CHEVROLET ORLANDO 2014 1.G Infotainment Manual
Manufacturer: CHEVROLET, Model Year: 2014, Model line: ORLANDO, Model: CHEVROLET ORLANDO 2014 1.GPages: 98, PDF Size: 0.99 MB
Page 51 of 98
Black plate (51,1)Chevrolet Orlando Infotainment System (GMNA-Localizing-Canada-
6081467) - 2014 - CRC - 6/13/13
Infotainment System 51
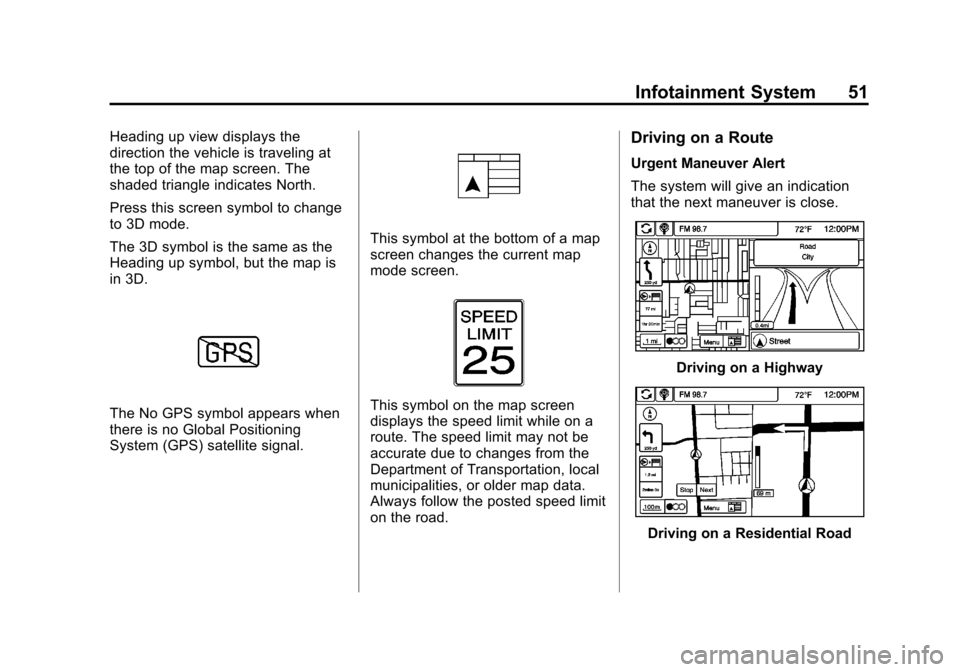
Heading up view displays the
direction the vehicle is traveling at
the top of the map screen. The
shaded triangle indicates North.
Press this screen symbol to change
to 3D mode.
The 3D symbol is the same as the
Heading up symbol, but the map is
in 3D.
The No GPS symbol appears when
there is no Global Positioning
System (GPS) satellite signal.
This symbol at the bottom of a map
screen changes the current map
mode screen.
This symbol on the map screen
displays the speed limit while on a
route. The speed limit may not be
accurate due to changes from the
Department of Transportation, local
municipalities, or older map data.
Always follow the posted speed limit
on the road.
Driving on a Route
Urgent Maneuver Alert
The system will give an indication
that the next maneuver is close.
Driving on a Highway
Driving on a Residential Road
Page 52 of 98
Black plate (52,1)Chevrolet Orlando Infotainment System (GMNA-Localizing-Canada-
6081467) - 2014 - CRC - 6/13/13
52 Infotainment System
Destination
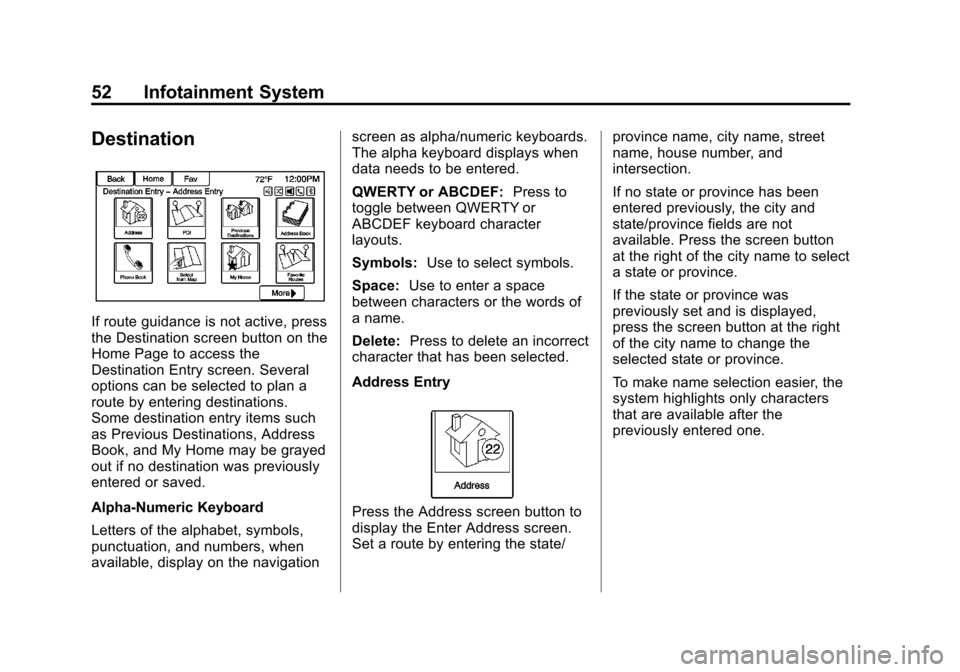
If route guidance is not active, press
the Destination screen button on the
Home Page to access the
Destination Entry screen. Several
options can be selected to plan a
route by entering destinations.
Some destination entry items such
as Previous Destinations, Address
Book, and My Home may be grayed
out if no destination was previously
entered or saved.
Alpha-Numeric Keyboard
Letters of the alphabet, symbols,
punctuation, and numbers, when
available, display on the navigationscreen as alpha/numeric keyboards.
The alpha keyboard displays when
data needs to be entered.
QWERTY or ABCDEF:
Press to
toggle between QWERTY or
ABCDEF keyboard character
layouts.
Symbols: Use to select symbols.
Space: Use to enter a space
between characters or the words of
a name.
Delete: Press to delete an incorrect
character that has been selected.
Address Entry
Press the Address screen button to
display the Enter Address screen.
Set a route by entering the state/ province name, city name, street
name, house number, and
intersection.
If no state or province has been
entered previously, the city and
state/province fields are not
available. Press the screen button
at the right of the city name to select
a state or province.
If the state or province was
previously set and is displayed,
press the screen button at the right
of the city name to change the
selected state or province.
To make name selection easier, the
system highlights only characters
that are available after the
previously entered one.
Page 53 of 98
Black plate (53,1)Chevrolet Orlando Infotainment System (GMNA-Localizing-Canada-
6081467) - 2014 - CRC - 6/13/13
Infotainment System 53
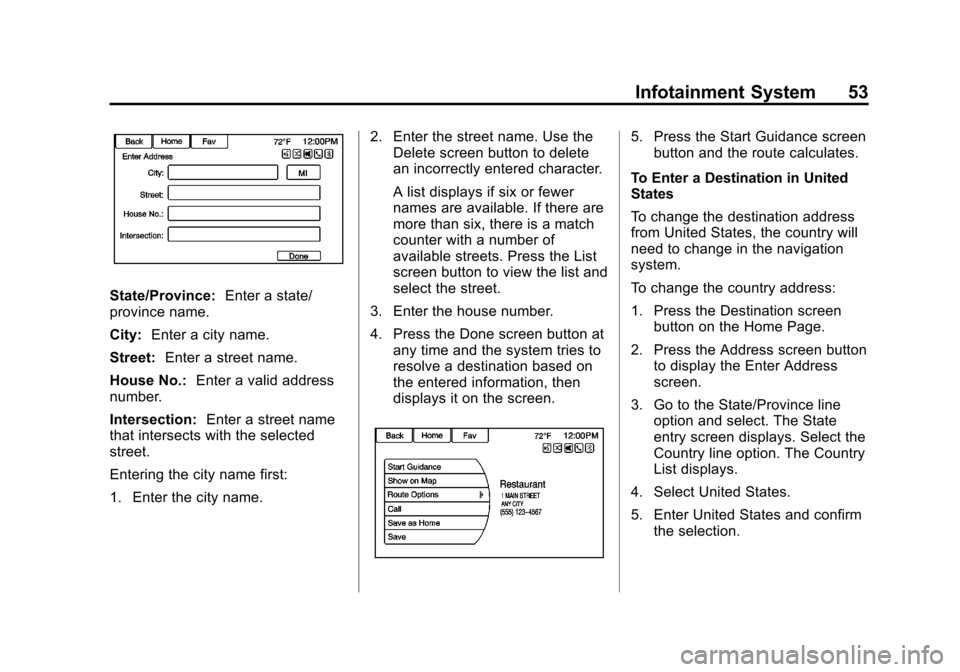
State/Province:Enter a state/
province name.
City: Enter a city name.
Street: Enter a street name.
House No.: Enter a valid address
number.
Intersection: Enter a street name
that intersects with the selected
street.
Entering the city name first:
1. Enter the city name. 2. Enter the street name. Use the
Delete screen button to delete
an incorrectly entered character.
A list displays if six or fewer
names are available. If there are
more than six, there is a match
counter with a number of
available streets. Press the List
screen button to view the list and
select the street.
3. Enter the house number.
4. Press the Done screen button at any time and the system tries to
resolve a destination based on
the entered information, then
displays it on the screen.
5. Press the Start Guidance screenbutton and the route calculates.
To Enter a Destination in United
States
To change the destination address
from United States, the country will
need to change in the navigation
system.
To change the country address:
1. Press the Destination screen button on the Home Page.
2. Press the Address screen button to display the Enter Address
screen.
3. Go to the State/Province line option and select. The State
entry screen displays. Select the
Country line option. The Country
List displays.
4. Select United States.
5. Enter United States and confirm the selection.
Page 54 of 98
Black plate (54,1)Chevrolet Orlando Infotainment System (GMNA-Localizing-Canada-
6081467) - 2014 - CRC - 6/13/13
54 Infotainment System
Entering a Destination in Other
Countries
To change the destination address
from Canada to another country, the
country will need to change in the
navigation system.
To change the country address:
1. Press the Destination screenbutton on the Home Page.
2. Press the Address screen button to display the Address Entry
screen.
3. Go to the State/Province line option and select. The State/
Province entry screen displays.
Select the Country line option.
The available Country List
displays.
4. Select the desired country. For example, select Canada as a
default country.
5. Enter State/Province. For example, enter Ontario and
confirm the selection. The destination in other countries
can also be changed using voice
recognition. See
Voice Recognition
on page 72.
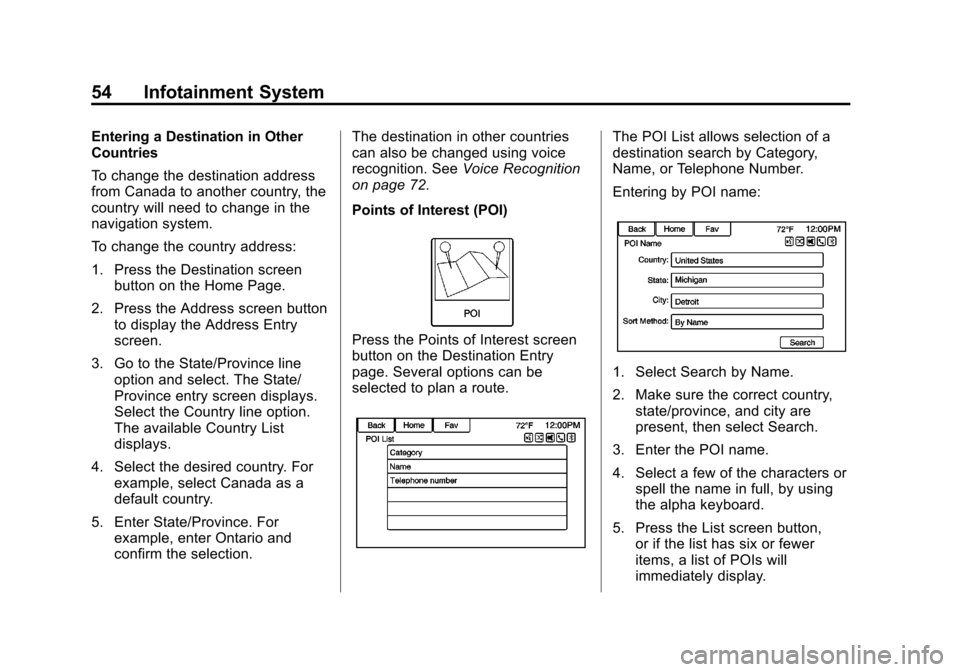
Points of Interest (POI)
Press the Points of Interest screen
button on the Destination Entry
page. Several options can be
selected to plan a route.
The POI List allows selection of a
destination search by Category,
Name, or Telephone Number.
Entering by POI name:
1. Select Search by Name.
2. Make sure the correct country, state/province, and city are
present, then select Search.
3. Enter the POI name.
4. Select a few of the characters or spell the name in full, by using
the alpha keyboard.
5. Press the List screen button, or if the list has six or fewer
items, a list of POIs will
immediately display.
Page 55 of 98
Black plate (55,1)Chevrolet Orlando Infotainment System (GMNA-Localizing-Canada-
6081467) - 2014 - CRC - 6/13/13
Infotainment System 55
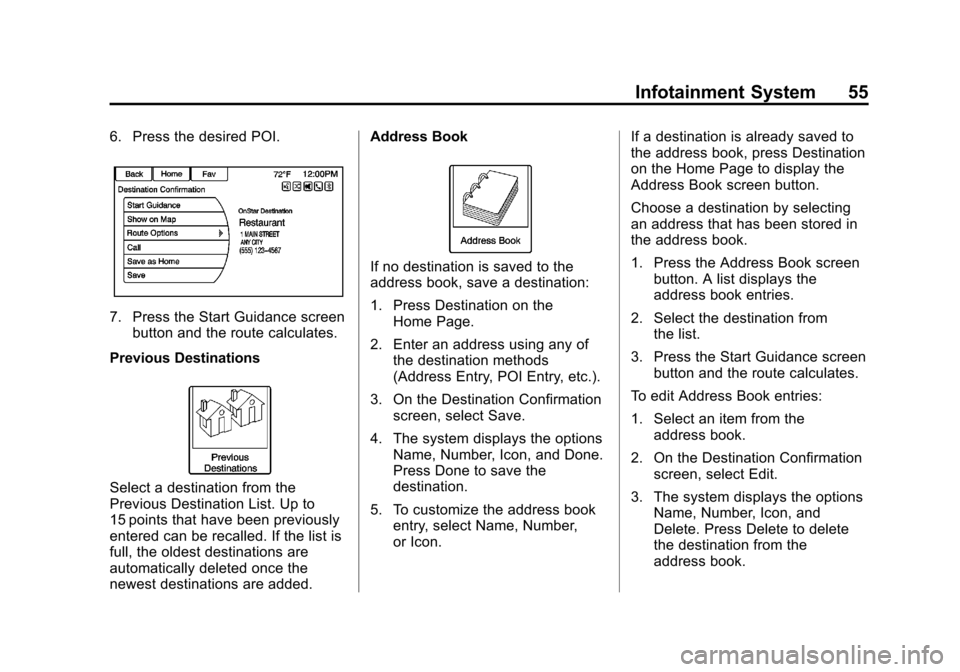
6. Press the desired POI.
7. Press the Start Guidance screenbutton and the route calculates.
Previous Destinations
Select a destination from the
Previous Destination List. Up to
15 points that have been previously
entered can be recalled. If the list is
full, the oldest destinations are
automatically deleted once the
newest destinations are added. Address Book
If no destination is saved to the
address book, save a destination:
1. Press Destination on the
Home Page.
2. Enter an address using any of the destination methods
(Address Entry, POI Entry, etc.).
3. On the Destination Confirmation screen, select Save.
4. The system displays the options Name, Number, Icon, and Done.
Press Done to save the
destination.
5. To customize the address book entry, select Name, Number,
or Icon. If a destination is already saved to
the address book, press Destination
on the Home Page to display the
Address Book screen button.
Choose a destination by selecting
an address that has been stored in
the address book.
1. Press the Address Book screen
button. A list displays the
address book entries.
2. Select the destination from the list.
3. Press the Start Guidance screen button and the route calculates.
To edit Address Book entries:
1. Select an item from the address book.
2. On the Destination Confirmation screen, select Edit.
3. The system displays the options Name, Number, Icon, and
Delete. Press Delete to delete
the destination from the
address book.
Page 56 of 98

Black plate (56,1)Chevrolet Orlando Infotainment System (GMNA-Localizing-Canada-
6081467) - 2014 - CRC - 6/13/13
56 Infotainment System
4. To customize the address bookentry, select Name, Number,
or Icon.
Latitude/Longitude Coordinates
Choose a destination based on
latitudinal and longitudinal
coordinates.
To enter the location as coordinates,
latitude and longitude:
1. Press Destination on the Home Page. Press the Latitude and
Longitude screen button to
display the screen above.
2. Select Latitude or Longitude to change. Enter the coordinates in
degrees, minutes, and seconds.
Then press Done to save
and exit.
3. Press the Search screen button if the information is correct.
4. Press the Start Guidance screen button. The route calculates. Favorite Routes
Adding a Favorite Route:
1. Press the Home Page
Destination button to display the
Favorite Routes screen button.
2. Press the Favorite Routes screen button to display Add
Favorite Route.
3. Select Add Favorite Route and enter a favorite route name.
4. Press OK and the display returns to the favorite routes list.
5. Select the favorite route and add a waypoint using any of the
destination methods, such as
address entry, POI entry, etc.
Page 57 of 98
Black plate (57,1)Chevrolet Orlando Infotainment System (GMNA-Localizing-Canada-
6081467) - 2014 - CRC - 6/13/13
Infotainment System 57
Selecting a Favorite Route:
1. Press the Home PageDestination button to display the
Favorite Routes screen button.
2. Press the Favorite Routes screen button to display a list of
available favorite routes.
3. Scroll and select a favorite route.
4. Press the Start Guidance screen button. The route calculates.
Deleting a favorite route:
1. Press the Home Page Destination button to display the
Favorite Routes screen button.
Press this button to display the
list of available favorite routes.
2. Scroll and select the route to be deleted.
3. Press Edit.
4. Press Delete Favorite Route. Changing the route name:
1. Press the Home Page
Destination button to display the
Favorite Routes screen button.
Press this button to display the
list of available favorite routes.
2. Press the Edit screen button.
3. Select Edit Name.
4. Using the keypad, enter the name.
5. Press the Done screen button. The new name will be in the
Favorite Routes Menu.
My Home
If no home destination is entered,
save a destination by pressing the
Home Page Destination button.
Enter a destination using any of the
destination entry methods (Address Entry, POI Entry, etc.). Select Save
as Home from the Destination
Confirmation screen.
If a destination is already saved as
home, press the Home Page
Destination button to display the My
Home screen button. Press this
button to start route guidance.
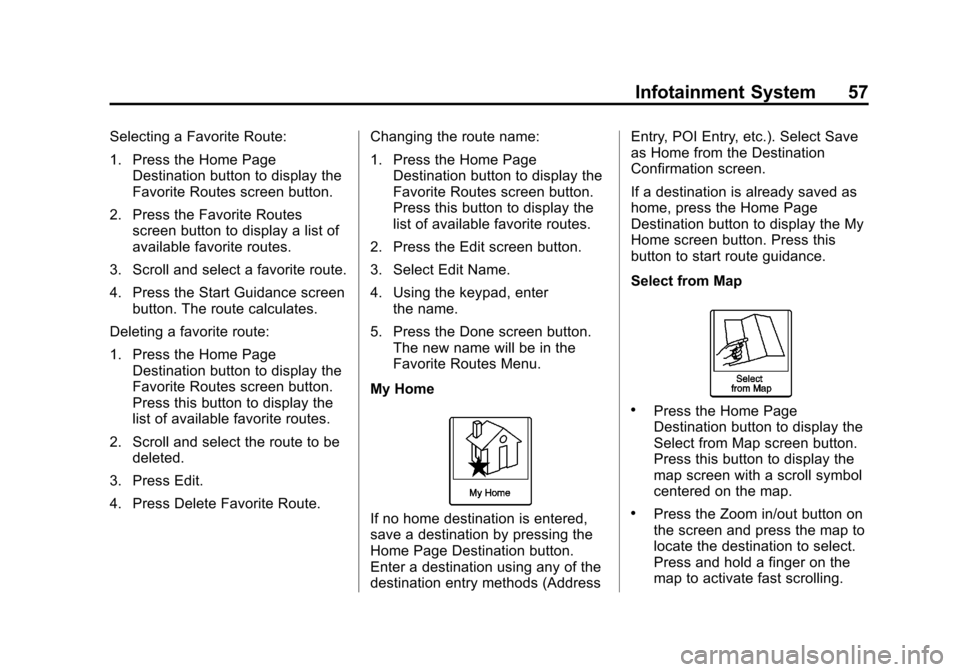
Select from Map
.Press the Home Page
Destination button to display the
Select from Map screen button.
Press this button to display the
map screen with a scroll symbol
centered on the map.
.Press the Zoom in/out button on
the screen and press the map to
locate the destination to select.
Press and hold a finger on the
map to activate fast scrolling.
Page 58 of 98
Black plate (58,1)Chevrolet Orlando Infotainment System (GMNA-Localizing-Canada-
6081467) - 2014 - CRC - 6/13/13
58 Infotainment System
.Press the Go button on the
bottom of the screen to display
the Destination Confirmation
screen.
.Press the Start Guidance screen
button. The route calculates.
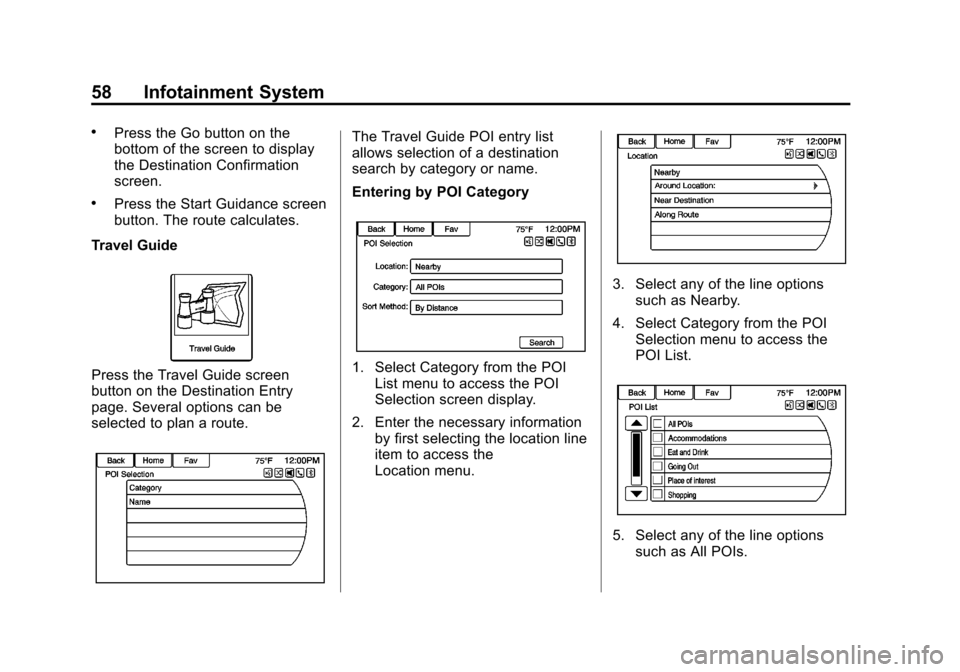
Travel Guide
Press the Travel Guide screen
button on the Destination Entry
page. Several options can be
selected to plan a route.
The Travel Guide POI entry list
allows selection of a destination
search by category or name.
Entering by POI Category
1. Select Category from the POI List menu to access the POI
Selection screen display.
2. Enter the necessary information by first selecting the location line
item to access the
Location menu.
3. Select any of the line optionssuch as Nearby.
4. Select Category from the POI Selection menu to access the
POI List.
5. Select any of the line optionssuch as All POIs.
Page 59 of 98
Black plate (59,1)Chevrolet Orlando Infotainment System (GMNA-Localizing-Canada-
6081467) - 2014 - CRC - 6/13/13
Infotainment System 59
6. Select Sort Method from the POISelection menu to access the
Search Order menu. Select one
of the two options available.
These options are By Distance
or By Name.
7. Select Search.
8. Select the desired POI.
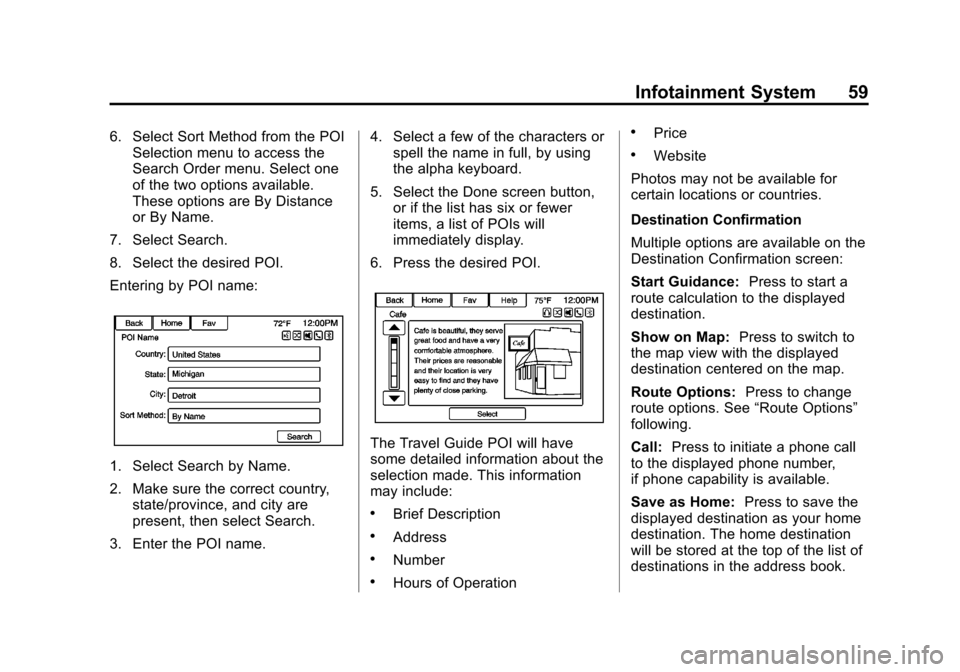
Entering by POI name:
1. Select Search by Name.
2. Make sure the correct country, state/province, and city are
present, then select Search.
3. Enter the POI name. 4. Select a few of the characters or
spell the name in full, by using
the alpha keyboard.
5. Select the Done screen button, or if the list has six or fewer
items, a list of POIs will
immediately display.
6. Press the desired POI.
The Travel Guide POI will have
some detailed information about the
selection made. This information
may include:
.Brief Description
.Address
.Number
.Hours of Operation
.Price
.Website
Photos may not be available for
certain locations or countries.
Destination Confirmation
Multiple options are available on the
Destination Confirmation screen:
Start Guidance: Press to start a
route calculation to the displayed
destination.
Show on Map: Press to switch to
the map view with the displayed
destination centered on the map.
Route Options: Press to change
route options. See “Route Options”
following.
Call: Press to initiate a phone call
to the displayed phone number,
if phone capability is available.
Save as Home: Press to save the
displayed destination as your home
destination. The home destination
will be stored at the top of the list of
destinations in the address book.
Page 60 of 98

Black plate (60,1)Chevrolet Orlando Infotainment System (GMNA-Localizing-Canada-
6081467) - 2014 - CRC - 6/13/13
60 Infotainment System
Save/Edit:Press to save the
displayed destination into the
address book. If the displayed
destination is already stored in the
address book, Edit will show as the
menu item.
Route Options
Press to display various route
options.
Alternative Routes: If enabled, the
system will provide an additional
screen after Start Guidance has
been selected. Select Fastest,
Shortest, or Eco calculated routes
before selecting GO.
Fastest: This calculates for the
quickest route. Shortest:
This calculates for the
shortest route.
Eco: This calculates for the most
fuel efficient route based on speed
and distance.
Under the Route Options menu,
there are route preferences that by
default are all enabled.
A checkmark placed next to each
preference indicates this. All of
these preferences are used when
calculating the route. If any of these
preferences are unselected, the
route will be calculated without
including these preferences.
Use Highways: Deselect to avoid
major roads.
Use Toll Roads: Deselect to avoid
toll roads.
Use Ferries: Deselect to avoid
ferries.
Use Tunnels: Deselect to avoid
tunnels.
Use Time Restricted: Deselect to
avoid time restricted roads. Use Car Train:
Deselect to avoid
car trains.
Menu with Route Guidance
Active
Several functions can be performed
after a destination has been
entered. Press the Home Page
Destination screen button to access
the Route Menu screen.
Cancel Guidance
Press Cancel Guidance to cancel
the current route.