lock CHEVROLET ORLANDO 2017 Service Manual
[x] Cancel search | Manufacturer: CHEVROLET, Model Year: 2017, Model line: ORLANDO, Model: CHEVROLET ORLANDO 2017Pages: 372, PDF Size: 6.71 MB
Page 91 of 372
Black plate (45,1)Chevrolet Orlando Owner Manual - 2013 - CRC - 6/5/12
Seats and Restraints 3-45
that the top tether be anchored, or if
the instructions that come with the
child restraint say that the top strap
must be anchored.
In Canada, the law requires that
forward-facing child restraints have
a top tether, and that the tether be
attached.
If the child restraint does not have
the LATCH system, you will be
using the safety belt to secure the
child restraint in this position. Be
sure to follow the instructions that
came with the child restraint. Secure
the child in the child restraint when
and as the instructions say.
If more than one child restraint
needs to be installed in the rear
seat, be sure to readWhere to Put
the Restraint on page 3‑38.
1. Put the child restraint on
the seat.
For outboard second and third
row seating positions, remove
the safety belt from the guide. Do not secure the child restraint
with the safety belt routed
through the guide.
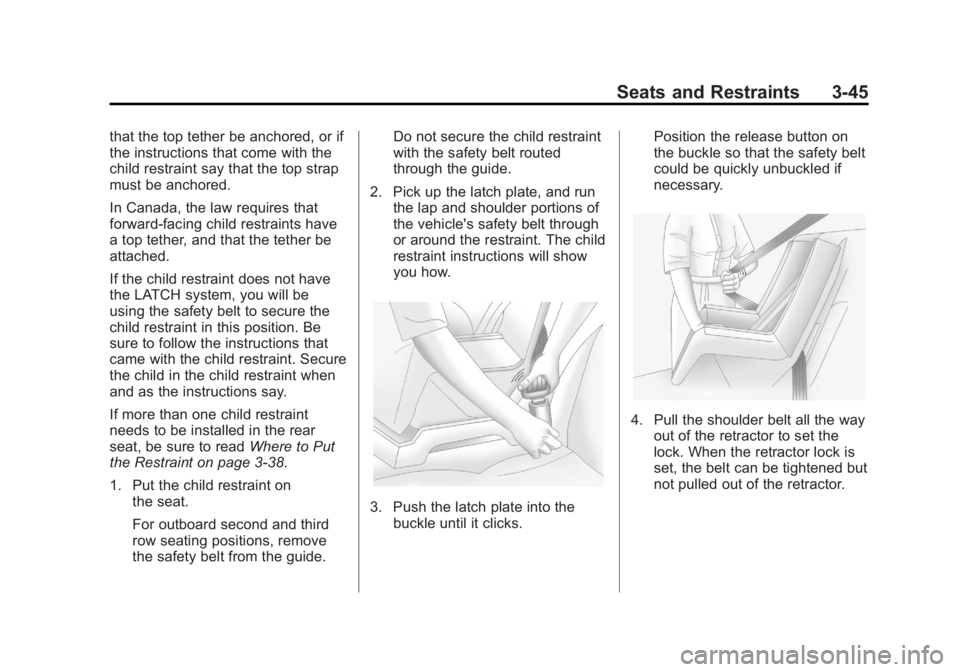
2. Pick up the latch plate, and run the lap and shoulder portions of
the vehicle's safety belt through
or around the restraint. The child
restraint instructions will show
you how.
3. Push the latch plate into thebuckle until it clicks. Position the release button on
the buckle so that the safety belt
could be quickly unbuckled if
necessary.
4. Pull the shoulder belt all the way
out of the retractor to set the
lock. When the retractor lock is
set, the belt can be tightened but
not pulled out of the retractor.
Page 92 of 372
Black plate (46,1)Chevrolet Orlando Owner Manual - 2013 - CRC - 6/5/12
3-46 Seats and Restraints
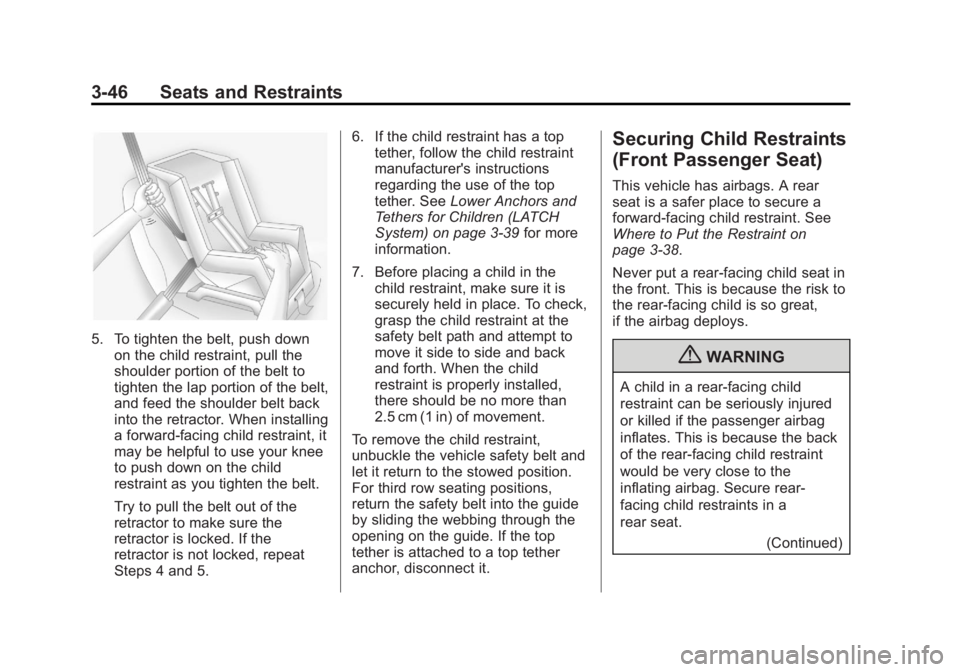
5. To tighten the belt, push downon the child restraint, pull the
shoulder portion of the belt to
tighten the lap portion of the belt,
and feed the shoulder belt back
into the retractor. When installing
a forward-facing child restraint, it
may be helpful to use your knee
to push down on the child
restraint as you tighten the belt.
Try to pull the belt out of the
retractor to make sure the
retractor is locked. If the
retractor is not locked, repeat
Steps 4 and 5. 6. If the child restraint has a top
tether, follow the child restraint
manufacturer's instructions
regarding the use of the top
tether. See Lower Anchors and
Tethers for Children (LATCH
System) on page 3‑39 for more
information.
7. Before placing a child in the child restraint, make sure it is
securely held in place. To check,
grasp the child restraint at the
safety belt path and attempt to
move it side to side and back
and forth. When the child
restraint is properly installed,
there should be no more than
2.5 cm (1 in) of movement.
To remove the child restraint,
unbuckle the vehicle safety belt and
let it return to the stowed position.
For third row seating positions,
return the safety belt into the guide
by sliding the webbing through the
opening on the guide. If the top
tether is attached to a top tether
anchor, disconnect it.
Securing Child Restraints
(Front Passenger Seat)
This vehicle has airbags. A rear
seat is a safer place to secure a
forward-facing child restraint. See
Where to Put the Restraint on
page 3‑38.
Never put a rear-facing child seat in
the front. This is because the risk to
the rear-facing child is so great,
if the airbag deploys.
{WARNING
A child in a rear-facing child
restraint can be seriously injured
or killed if the passenger airbag
inflates. This is because the back
of the rear-facing child restraint
would be very close to the
inflating airbag. Secure rear‐
facing child restraints in a
rear seat. (Continued)
Page 94 of 372
Black plate (48,1)Chevrolet Orlando Owner Manual - 2013 - CRC - 6/5/12
3-48 Seats and Restraints
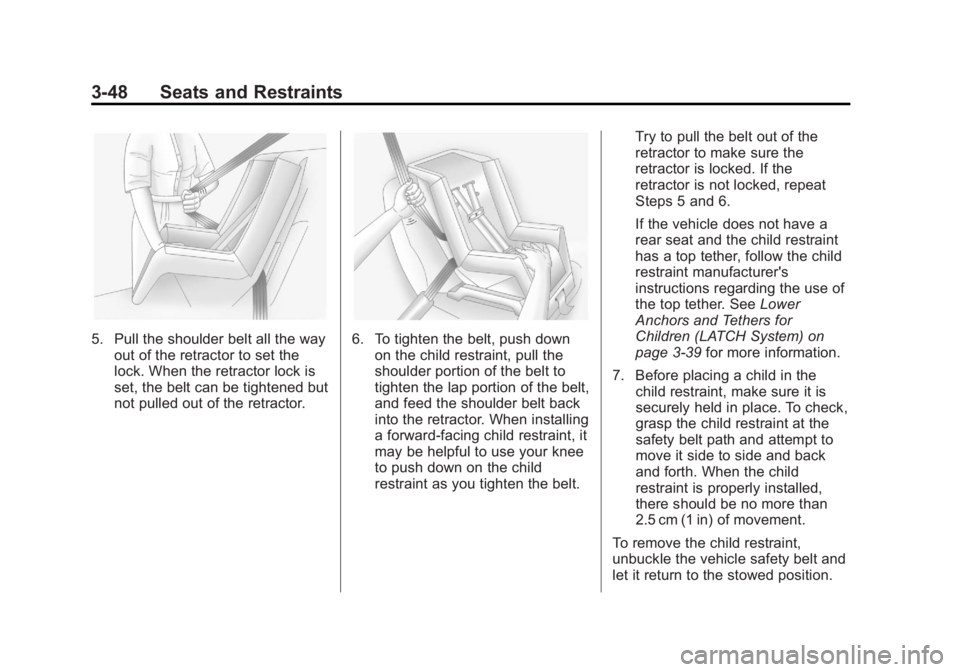
5. Pull the shoulder belt all the wayout of the retractor to set the
lock. When the retractor lock is
set, the belt can be tightened but
not pulled out of the retractor.6. To tighten the belt, push downon the child restraint, pull the
shoulder portion of the belt to
tighten the lap portion of the belt,
and feed the shoulder belt back
into the retractor. When installing
a forward-facing child restraint, it
may be helpful to use your knee
to push down on the child
restraint as you tighten the belt. Try to pull the belt out of the
retractor to make sure the
retractor is locked. If the
retractor is not locked, repeat
Steps 5 and 6.
If the vehicle does not have a
rear seat and the child restraint
has a top tether, follow the child
restraint manufacturer's
instructions regarding the use of
the top tether. See
Lower
Anchors and Tethers for
Children (LATCH System) on
page 3‑39 for more information.
7. Before placing a child in the child restraint, make sure it is
securely held in place. To check,
grasp the child restraint at the
safety belt path and attempt to
move it side to side and back
and forth. When the child
restraint is properly installed,
there should be no more than
2.5 cm (1 in) of movement.
To remove the child restraint,
unbuckle the vehicle safety belt and
let it return to the stowed position.
Page 100 of 372
Black plate (6,1)Chevrolet Orlando Owner Manual - 2013 - CRC - 6/5/12
4-6 Storage
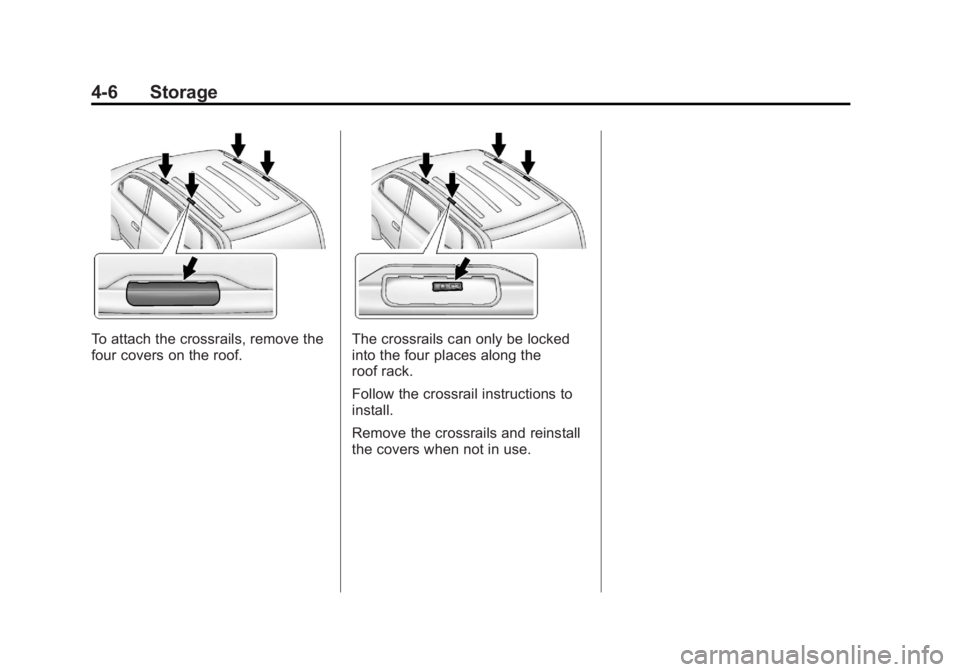
To attach the crossrails, remove the
four covers on the roof.The crossrails can only be locked
into the four places along the
roof rack.
Follow the crossrail instructions to
install.
Remove the crossrails and reinstall
the covers when not in use.
Page 101 of 372
Black plate (1,1)Chevrolet Orlando Owner Manual - 2013 - CRC - 6/5/12
Instruments and Controls 5-1
Instruments and
Controls
Controls
Steering Wheel Adjustment . . . 5-2
Steering Wheel Controls . . . . . . 5-3
Horn . . . . . . . . . . . . . . . . . . . . . . . . . . 5-3
Windshield Wiper/Washer . . . . . 5-3
Rear Window Wiper/Washer . . . . . . . . . . . . . . . . . . . . . . 5-4
Compass . . . . . . . . . . . . . . . . . . . . . 5-5
Clock . . . . . . . . . . . . . . . . . . . . . . . . . 5-5
Power Outlets . . . . . . . . . . . . . . . . . 5-6
Cigarette Lighter . . . . . . . . . . . . . . 5-6
Ashtrays . . . . . . . . . . . . . . . . . . . . . . 5-7
Warning Lights, Gauges, and
Indicators
Warning Lights, Gauges, and Indicators . . . . . . . . . . . . . . . . . . . . 5-7
Instrument Cluster . . . . . . . . . . . . 5-8
Speedometer . . . . . . . . . . . . . . . . . 5-9
Odometer . . . . . . . . . . . . . . . . . . . . . 5-9
Tachometer . . . . . . . . . . . . . . . . . . . 5-9
Fuel Gauge . . . . . . . . . . . . . . . . . . . 5-9
Engine Coolant Temperature
Gauge . . . . . . . . . . . . . . . . . . . . . . 5-10 Safety Belt Reminders . . . . . . . 5-10
Airbag Readiness Light . . . . . . 5-11
Charging System Light . . . . . . . 5-11
Malfunction
Indicator Lamp . . . . . . . . . . . . . 5-12
Service Vehicle Soon Light . . . . . . . . . . . . . . . . . . . . . . . 5-14
Brake System Warning Light . . . . . . . . . . . . . . . . . . . . . . . 5-14
Antilock Brake System (ABS) Warning Light . . . . . . . . . . . . . . 5-15
Up-Shift Light . . . . . . . . . . . . . . . . 5-16
Power Steering Warning Light . . . . . . . . . . . . . . . . . . . . . . . 5-16
Traction Off Light . . . . . . . . . . . . 5-16
StabiliTrak
®OFF Light . . . . . . . 5-17
Traction Control System (TCS)/StabiliTrak
®Light . . . . 5-17
Tire Pressure Light . . . . . . . . . . 5-17
Engine Oil Pressure Light . . . . 5-18
Low Fuel Warning Light . . . . . . 5-18
Security Light . . . . . . . . . . . . . . . . 5-19
Reduced Engine Power Light . . . . . . . . . . . . . . . . . . . . . . . 5-19
High-Beam On Light . . . . . . . . . 5-19
Daytime Running Lamps (DRL) Indicator Light . . . . . . . 5-20
Front Fog Lamp Light . . . . . . . . 5-20 Lamps On Reminder . . . . . . . . . 5-20
Cruise Control Light . . . . . . . . . 5-20
Door Ajar Light . . . . . . . . . . . . . . 5-21
Information Displays
Driver Information
Center (DIC) . . . . . . . . . . . . . . . 5-21
Vehicle Messages
Vehicle Messages . . . . . . . . . . . 5-24
Battery Voltage and ChargingMessages . . . . . . . . . . . . . . . . . . 5-25
Brake System Messages . . . . 5-25
Compass Messages . . . . . . . . . 5-25
Cruise Control Messages . . . . 5-25
Door Ajar Messages . . . . . . . . . 5-25
Engine Cooling System Messages . . . . . . . . . . . . . . . . . . 5-26
Engine Oil Messages . . . . . . . . 5-26
Engine Power Messages . . . . 5-27
Fuel System Messages . . . . . . 5-27
Key and Lock Messages . . . . . 5-27
Lamp Messages . . . . . . . . . . . . . 5-27
Object Detection System Messages . . . . . . . . . . . . . . . . . . 5-28
Ride Control System Messages . . . . . . . . . . . . . . . . . . 5-28
Airbag System Messages . . . . 5-28
Security Messages . . . . . . . . . . 5-28
Page 102 of 372
Black plate (2,1)Chevrolet Orlando Owner Manual - 2013 - CRC - 6/5/12
5-2 Instruments and Controls
Service Vehicle Messages . . . 5-28
Starting the VehicleMessages . . . . . . . . . . . . . . . . . . 5-29
Tire Messages . . . . . . . . . . . . . . . 5-29
Transmission Messages . . . . . 5-29
Vehicle Reminder Messages . . . . . . . . . . . . . . . . . . 5-30
Vehicle Personalization
Vehicle Personalization . . . . . . 5-30
Controls
Steering Wheel
Adjustment
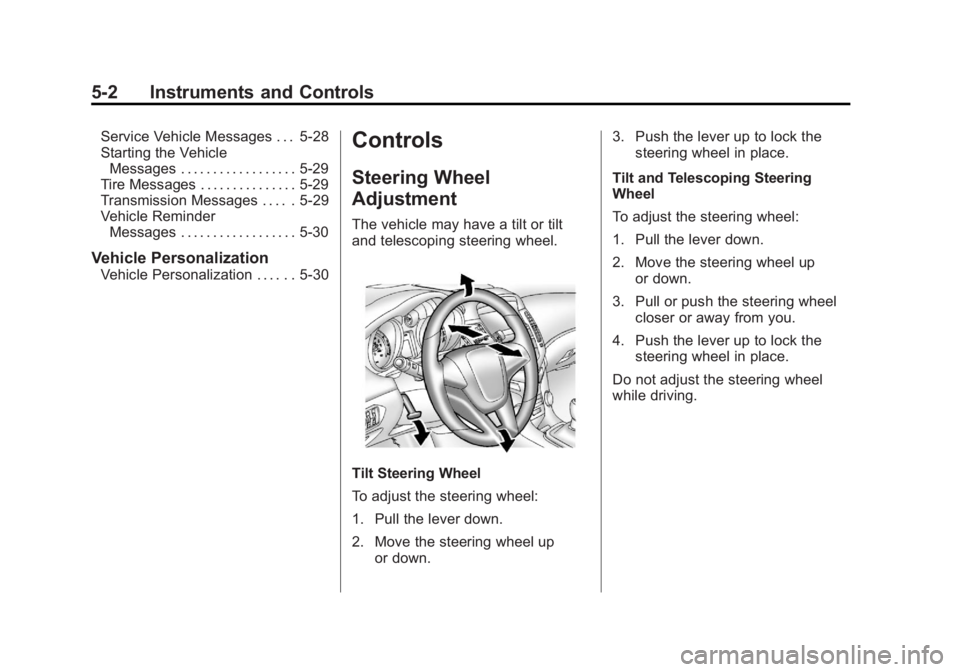
The vehicle may have a tilt or tilt
and telescoping steering wheel.
Tilt Steering Wheel
To adjust the steering wheel:
1. Pull the lever down.
2. Move the steering wheel up
or down. 3. Push the lever up to lock the
steering wheel in place.
Tilt and Telescoping Steering
Wheel
To adjust the steering wheel:
1. Pull the lever down.
2. Move the steering wheel up or down.
3. Pull or push the steering wheel closer or away from you.
4. Push the lever up to lock the steering wheel in place.
Do not adjust the steering wheel
while driving.
Page 104 of 372
Black plate (4,1)Chevrolet Orlando Owner Manual - 2013 - CRC - 6/5/12
5-4 Instruments and Controls
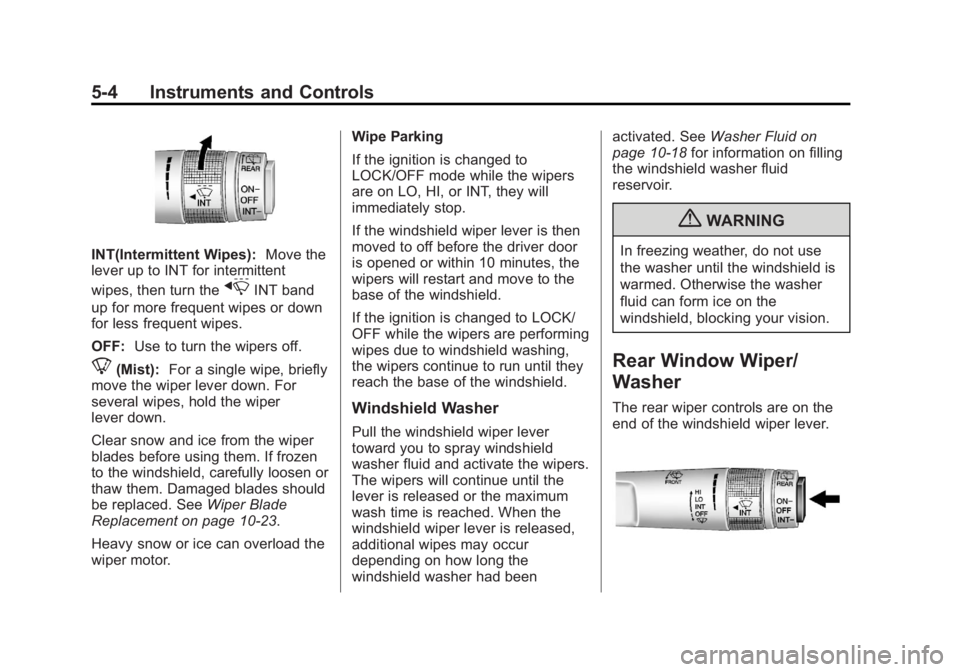
INT(Intermittent Wipes):Move the
lever up to INT for intermittent
wipes, then turn the
xINT band
up for more frequent wipes or down
for less frequent wipes.
OFF: Use to turn the wipers off.
8(Mist): For a single wipe, briefly
move the wiper lever down. For
several wipes, hold the wiper
lever down.
Clear snow and ice from the wiper
blades before using them. If frozen
to the windshield, carefully loosen or
thaw them. Damaged blades should
be replaced. See Wiper Blade
Replacement on page 10‑23.
Heavy snow or ice can overload the
wiper motor. Wipe Parking
If the ignition is changed to
LOCK/OFF mode while the wipers
are on LO, HI, or INT, they will
immediately stop.
If the windshield wiper lever is then
moved to off before the driver door
is opened or within 10 minutes, the
wipers will restart and move to the
base of the windshield.
If the ignition is changed to LOCK/
OFF while the wipers are performing
wipes due to windshield washing,
the wipers continue to run until they
reach the base of the windshield.
Windshield Washer
Pull the windshield wiper lever
toward you to spray windshield
washer fluid and activate the wipers.
The wipers will continue until the
lever is released or the maximum
wash time is reached. When the
windshield wiper lever is released,
additional wipes may occur
depending on how long the
windshield washer had beenactivated. See
Washer Fluid on
page 10‑18 for information on filling
the windshield washer fluid
reservoir.
{WARNING
In freezing weather, do not use
the washer until the windshield is
warmed. Otherwise the washer
fluid can form ice on the
windshield, blocking your vision.
Rear Window Wiper/
Washer
The rear wiper controls are on the
end of the windshield wiper lever.
Page 105 of 372
Black plate (5,1)Chevrolet Orlando Owner Manual - 2013 - CRC - 6/5/12
Instruments and Controls 5-5
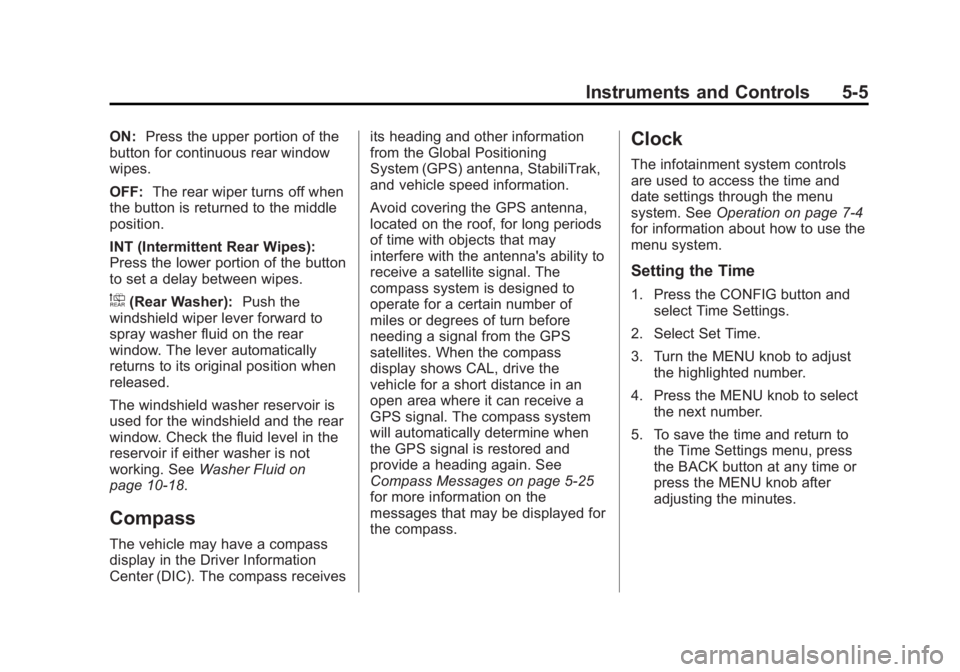
ON:Press the upper portion of the
button for continuous rear window
wipes.
OFF: The rear wiper turns off when
the button is returned to the middle
position.
INT (Intermittent Rear Wipes):
Press the lower portion of the button
to set a delay between wipes.
a(Rear Washer): Push the
windshield wiper lever forward to
spray washer fluid on the rear
window. The lever automatically
returns to its original position when
released.
The windshield washer reservoir is
used for the windshield and the rear
window. Check the fluid level in the
reservoir if either washer is not
working. See Washer Fluid on
page 10‑18.
Compass
The vehicle may have a compass
display in the Driver Information
Center (DIC). The compass receives its heading and other information
from the Global Positioning
System (GPS) antenna, StabiliTrak,
and vehicle speed information.
Avoid covering the GPS antenna,
located on the roof, for long periods
of time with objects that may
interfere with the antenna's ability to
receive a satellite signal. The
compass system is designed to
operate for a certain number of
miles or degrees of turn before
needing a signal from the GPS
satellites. When the compass
display shows CAL, drive the
vehicle for a short distance in an
open area where it can receive a
GPS signal. The compass system
will automatically determine when
the GPS signal is restored and
provide a heading again. See
Compass Messages on page 5‑25
for more information on the
messages that may be displayed for
the compass.
Clock
The infotainment system controls
are used to access the time and
date settings through the menu
system. See
Operation on page 7‑4
for information about how to use the
menu system.
Setting the Time
1. Press the CONFIG button and select Time Settings.
2. Select Set Time.
3. Turn the MENU knob to adjust the highlighted number.
4. Press the MENU knob to select the next number.
5. To save the time and return to the Time Settings menu, press
the BACK button at any time or
press the MENU knob after
adjusting the minutes.
Page 115 of 372
Black plate (15,1)Chevrolet Orlando Owner Manual - 2013 - CRC - 6/5/12
Instruments and Controls 5-15
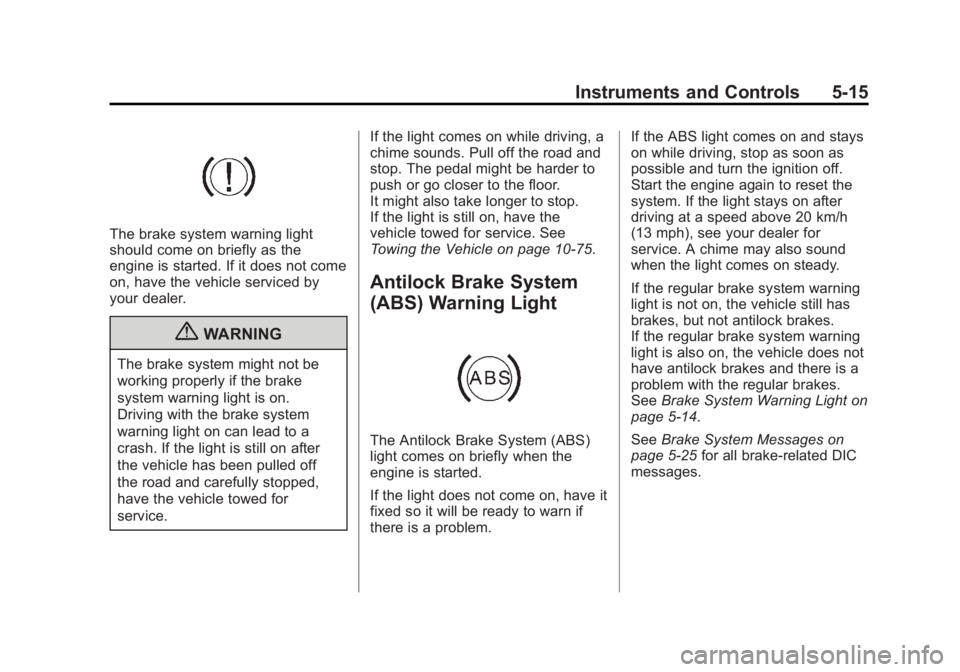
The brake system warning light
should come on briefly as the
engine is started. If it does not come
on, have the vehicle serviced by
your dealer.
{WARNING
The brake system might not be
working properly if the brake
system warning light is on.
Driving with the brake system
warning light on can lead to a
crash. If the light is still on after
the vehicle has been pulled off
the road and carefully stopped,
have the vehicle towed for
service.If the light comes on while driving, a
chime sounds. Pull off the road and
stop. The pedal might be harder to
push or go closer to the floor.
It might also take longer to stop.
If the light is still on, have the
vehicle towed for service. See
Towing the Vehicle on page 10‑75.
Antilock Brake System
(ABS) Warning Light
The Antilock Brake System (ABS)
light comes on briefly when the
engine is started.
If the light does not come on, have it
fixed so it will be ready to warn if
there is a problem. If the ABS light comes on and stays
on while driving, stop as soon as
possible and turn the ignition off.
Start the engine again to reset the
system. If the light stays on after
driving at a speed above 20 km/h
(13 mph), see your dealer for
service. A chime may also sound
when the light comes on steady.
If the regular brake system warning
light is not on, the vehicle still has
brakes, but not antilock brakes.
If the regular brake system warning
light is also on, the vehicle does not
have antilock brakes and there is a
problem with the regular brakes.
See
Brake System Warning Light on
page 5‑14.
See Brake System Messages on
page 5‑25 for all brake‐related DIC
messages.
Page 127 of 372
Black plate (27,1)Chevrolet Orlando Owner Manual - 2013 - CRC - 6/5/12
Instruments and Controls 5-27
Engine Power Messages
ENGINE POWER IS REDUCED
This message displays when the
vehicle's engine power is reduced.
Reduced engine power can affect
the vehicle's ability to accelerate.
If this message is on, but there is no
reduction in performance, proceed
to your destination. The
performance may be reduced the
next time the vehicle is driven. The
vehicle may be driven at a reduced
speed while this message is on, but
maximum acceleration and speed
may be reduced. Anytime this
message stays on, the vehicle
should be taken to your dealer for
service as soon as possible.
Fuel System Messages
FUEL LEVEL LOW
This message displays when the
vehicle is low on fuel. Refuel as
soon as possible.
TIGHTEN GAS CAP
This message displays when the
fuel cap is not on tight. Tighten the
fuel cap.
Key and Lock Messages
REPLACE BATTERY IN
REMOTE KEY
This message displays when the
battery in the Remote Keyless Entry
(RKE) transmitter needs to be
replaced.
Lamp Messages
AUTOMATIC LIGHT
CONTROL ON
This message is displayed when the
automatic light control has been
turned on. SeeAutomatic Headlamp
System on page 6‑3.
AUTOMATIC LIGHT
CONTROL OFF
This message is displayed when the
automatic light control has been
turned off. See Automatic Headlamp
System on page 6‑3.
XXX TURN INDICATOR
FAILURE
When one of the turn signals is out,
this message displays to show
which bulb needs to be replaced.
See Bulb Replacement on
page 10‑25 andReplacement Bulbs
on page 10‑30 for more information
on turn signal bulb replacement.
TURN SIGNAL ON
This message is displayed if the
turn signal has been left on. Turn off
the turn signal.