CHEVROLET S10 1993 2.G Owners Manual
Manufacturer: CHEVROLET, Model Year: 1993, Model line: S10, Model: CHEVROLET S10 1993 2.GPages: 356, PDF Size: 20.85 MB
Page 281 of 356
Downloaded from www.Manualslib.com manuals search engine 2. Turn the socket counterclockwise and pull it out.
3. Turn the bulb counterclockwise and pull it out of the socket.
4. Put the new bulb in the socket and turn it clockwise until it is tight.
5. Put the socket back into the assembly and turn the socket clockwise
until it locks in place.
Rear Lights
a
KO635
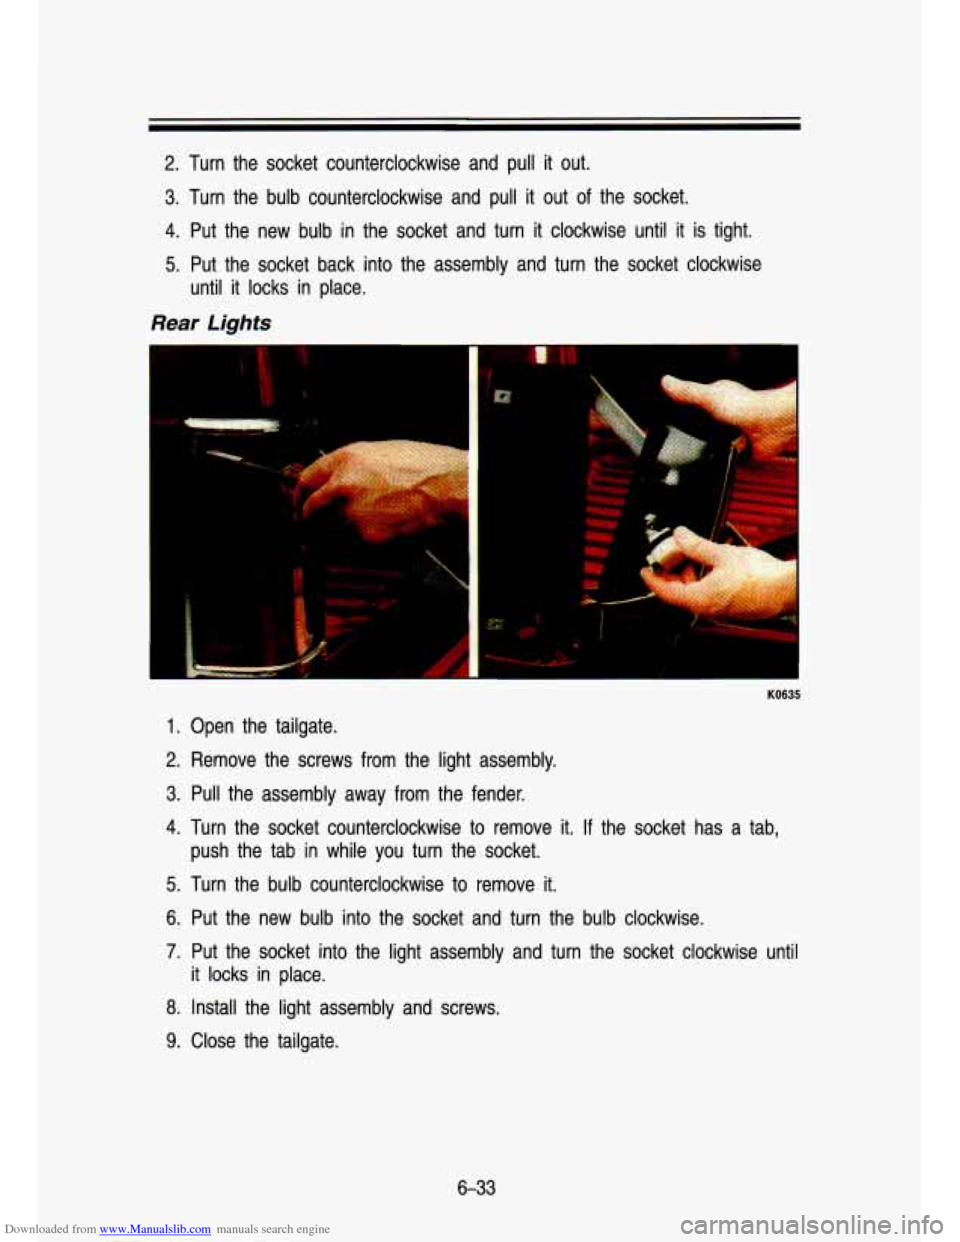
1. Open the tailgate.
2. Remove the screws from the light assembly.
3. Pull the assembly away from the fender.
4. Turn the socket counterclockwise to remove it. .If the socket has a tab,
push the tab in while you turn the socket.
5. Turn the bulb counterclockwise to remove it.
6. Put the new bulb into the socket and turn the bulb clockwise.
7. Put the socket into the light assembly and turn the socket cl\
ockwise until
8. Install the light assembly and screws.
9. Close the tailgate.
it
locks in
place.
6-33
Page 282 of 356
Downloaded from www.Manualslib.com manuals search engine Service & Appearance Care
Other Maintenance Items
Hydraulic Clutch Grease Fitting
If you have the 4.3L (VIN code Z) engine with a manual transmission, a
grease fitting is on the clutch housing for lubricating the cl\
utch fork ball stud.
Refer to the Maintenance Schedule for information on how to lu\
bricate the
clutch housing, and what type of lubricant to use. Be sure no\
t to over-fill
because you could
damage your clutch.
Front Suspension and Steering Linkage
Refer to the Maintenance Schedule to determine how often to lubricate the
fittings and what type of lubricant to use.
Front Wheel Bearings (Two-Wheel Drive)
If your vehicle is two-wheel drive, it has wheel bearings that mu\
st be cleaned
and repacked.
Refer
to the Maintenance Schedule to determine how often this must be
done.
Single Belt Accessory Drive
Your new vehicle uses a serpentine belt that is lighter, and more durable than
systems with several belts.
The belt runs over or around the pulleys
on the engine. A tensioner is used
to keep the belt tight at all times. The tensioner also makes replacing the
belt easier.
If you need to replace the belt, be sure to get the correct
replacement belt. Your dealership or parts supplier can help yo\
u with this.
The Accessory Drive Belt Routing label on your vehicle will sh\
ow you how to
route the belt your vehicle uses.
6-34
Page 283 of 356
Downloaded from www.Manualslib.com manuals search engine Windshield Wiper Blade Inserts
i
.. i. KO637 .. .,' :-, ;iyy ?-is;+;.-, &!!f$i& . l'jf:. j<-:q;* j';gi3f47!:;I' b,(..;',$< t&..YT:i;; ;.l:z~ .''! ..' :.. y.?;i'!g.tyz , . ..
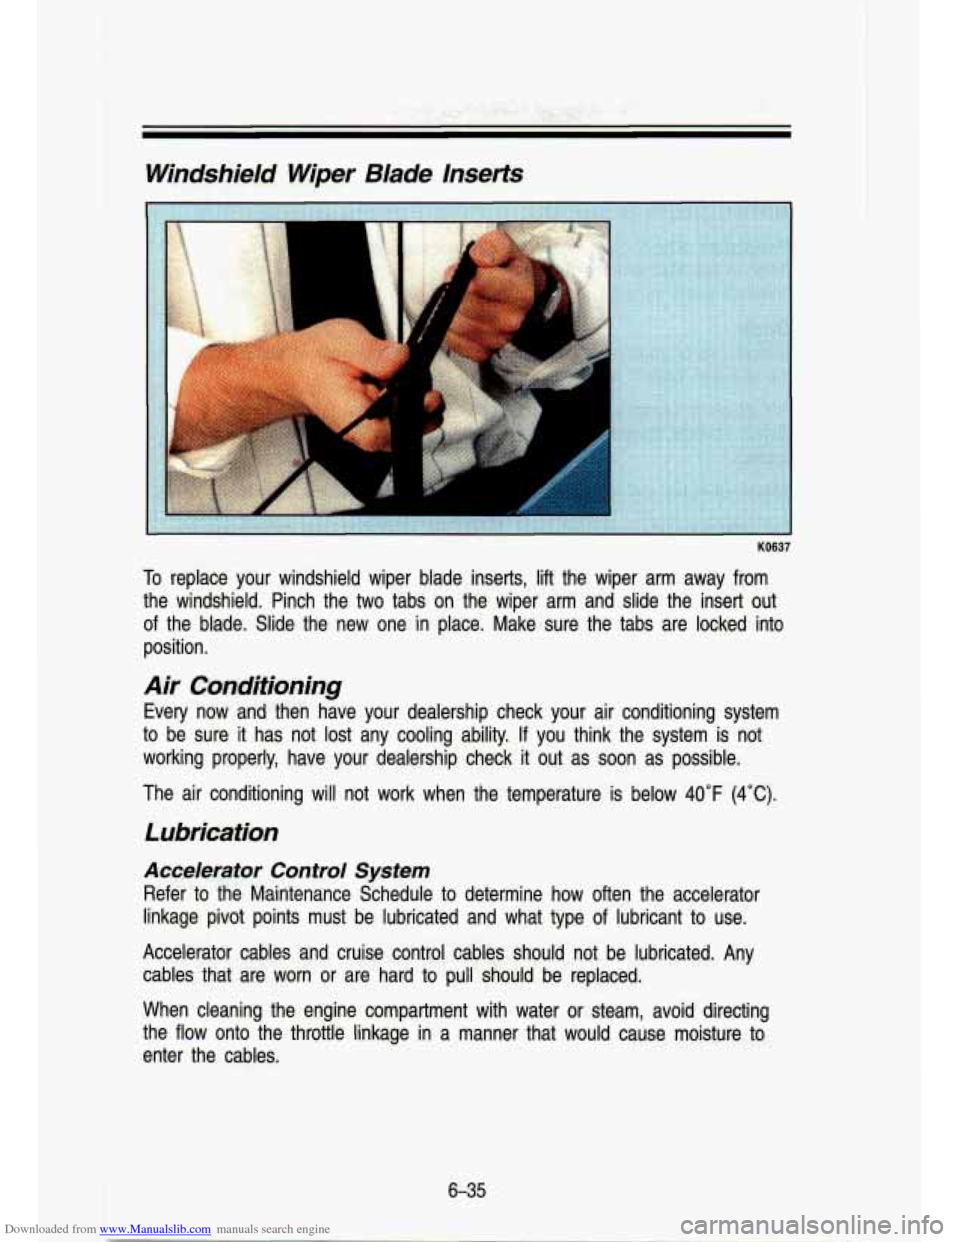
o rep ace your wlndshleld wiper blade inserts, lift the wiper ar\
m away from
the windshield. Pinch the
two tabs on the wiper arm and slide the insert out
of the bl'ade. Slide the new one in place. Make sure the tabs are locked into
position.
Air Conditioning
Every now and then have your dealership check your alr conditi\
oning system
to be sure it has not lost any cooling ability. If you think the system is not
working prope'rly, have your dealership check
it out as soon as possible.
The air conditioning will not work when the temperature is below
40°F (4°C).
Lubrication
Accelerator Control System
Refer to the Maintenance Schedule to determine how often the accelerator
linkage pivot points must be lubricated and what type
of lubricant to use.
Accelerator cables and cruise control cables should not be lubr\
icated. Any
cables that are worn or are hard
to pull should be replaced.
When cleaning the engine compartment with water or steam, avoid\
directing
the flow onto the throffle linkage in a manner that would cause moisture
to
enter the cables.
Page 284 of 356
Downloaded from www.Manualslib.com manuals search engine The sBat adjusters and seat track should be lubricated with chassis grea\
se.
Door weather strips and rubber hood bumpers should be wiped cl\
ean with a
wet cloth and lightly coated with
a rubber lubricant.
Never use too much
of any lubricant and be-sure to wipe up any extra
lubricant when you are finished.
Window regulators and controls are inside the
doors. They are lubricated with
a long lasting grease.
If lubricali'on is. re.quired your dealer shauld perform this
service.
Refer to the Maintenance Schedule to determine how often to lu\
bricate these
items and what type of lubricant
to use.
Tailgate Handle
The tailgate handle pivot points on your vehicle should be lubricate-d to keep
the handle working smoothly.
6-36
d
Page 285 of 356
Downloaded from www.Manualslib.com manuals search engine Refer to the Maintenance Schedule to determine how often to lubricate them
and what type
of lubricant to use.
Exhaust System
To help prevent damage to your exhaust system, do not continue to drive
your vehicle if you notice:
Engine misfiring
* Loss of performance
Other unusual operating conditions
Have your engine and exhaust system serviced regularly.
Three- Way Catalytic Converter
Your vehicle’s three-way catalytic converter is designed to reduce \
the
pollutants in your vehicle’s exhaust. Use only unleaded fuel \
in your vehicle.
If
you use leaded fuel, you could damage your three-way catalytic \
converter, and other engine components.
The Malfunction Indicator (SERVICE ENGINE SOON) lamp on your instrument panel lets you know when your emission system needs \
service.
The light will come on briefly when you start your engine to let you know
that the system is working.
If it does not come on when you start your
engine, or
if it comes on and stays on while you’re driving, your system \
may
need service. Your vehicle should still be driveable, but you should have your
system serviced right away.
6-37
Page 286 of 356
Downloaded from www.Manualslib.com manuals search engine Service & Appearance Care
Loading Your Vehicle
K3651
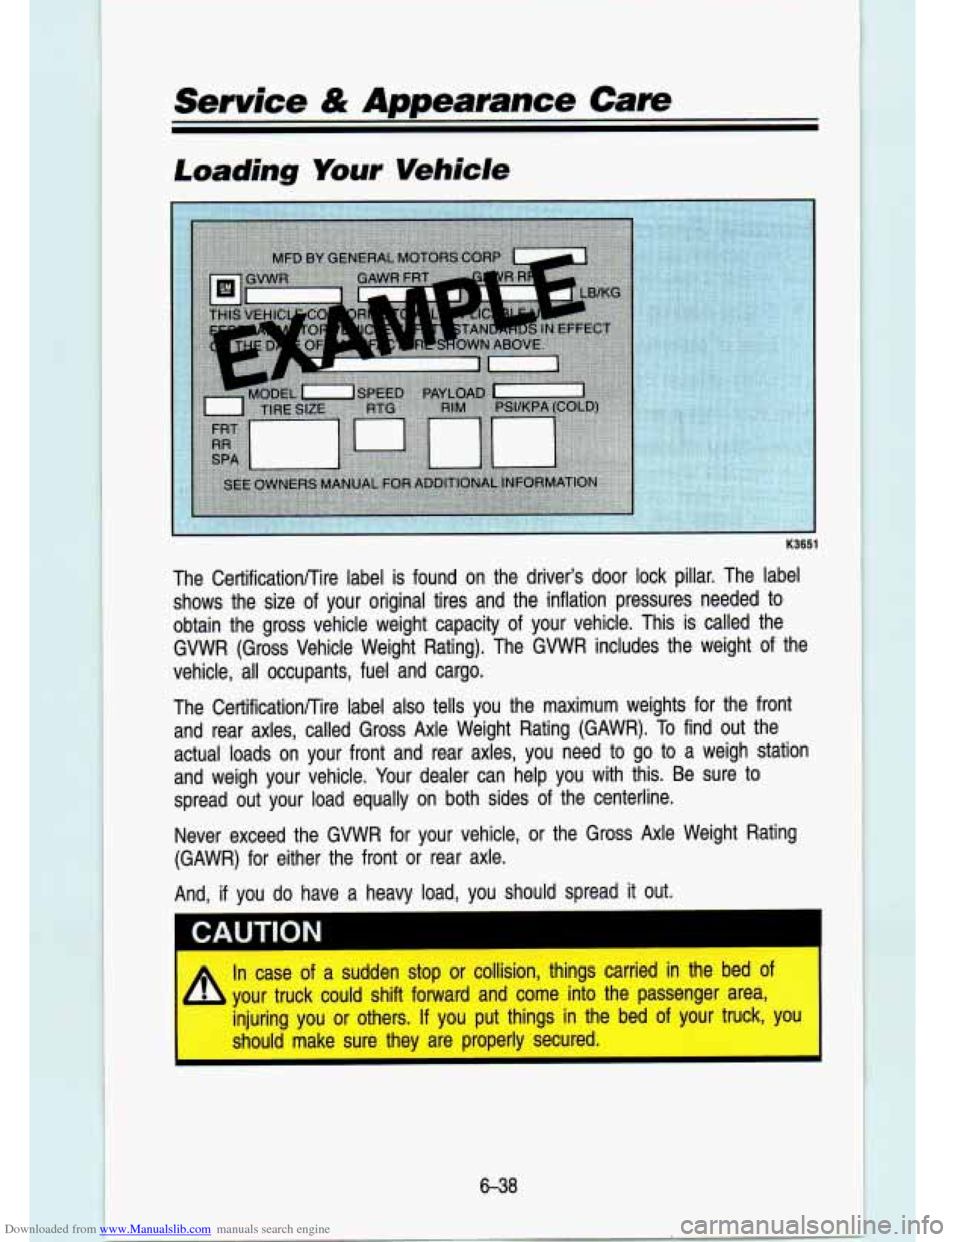
The CertificationRire label is found on the drive~r's door lock pillar. The label
shows t'he size of your original t'ires and the inflation pressu8res ne-eded to
obtain the gross vehicle weight capac-ity of your vehicle. This
is called the
GVWR (Gross Vehicle Weight Rating). The- GVWR includes the weight of the
vehlicle, all occupants, fuel and cargo.
The Certifi'cationKtre label also tells you the maximum weights for the front
and rear axles, called Gross
Axle Weight Rating (GAWR). To find out the
actual
loads on your front and rear axles, you need to go to a weigh station
and weigh your vehicle. Your dealer can help you with this. Be sure to
spread out your load equally
on both sides of the centerline.
Never exceed the GVWR for your vehicle, or the Gross Axle Wei\
ght Rating
(GAWR) for either the front or rear axle.
And,
if you do have a heavy load, you should spread it out.
I CAUTION
In case of a sudden stop or collision, things carried in the bed\
of
I [I! your truck could shift forward and come into the passenger are\
a
injuring you or others.
If you put things in the bed of your truck,
should make sure they are properly secured.
1
6-38
Page 287 of 356
Downloaded from www.Manualslib.com manuals search engine I I
CAUTION
Do not load your vehidle any heavier than tRle GVWR or tlhe
maximum
front and rear GAWRs. If you do, parts on your vehicle
can break, or it can change the way yolur vehicle hand;les. These
could cause
you to lose eonltrol. Also, overloading can shorten the
life
of your vehicle.
Using heavier suspension components
to get added durability might not
change your weight ratings. Ask your dealer
to help you load your vehicle the
right way.
I m
I NOriCE
-
II you put things inside your vehicle-like suitcases, tools, packages, or
anything else-they
will go as fast as the vehicle goes. If you have to stop
or turn quickly, or if there is a crash, they’ll keep going.
1 CAUTION
A Things you gut inside your vehicle can strike and injure peopl\
e in a
1 sudden stop or turn, or ita a ‘crash.
* Put things in the cargo area of your vehicle. Try to spread the
weight evenly.
Never stack heavier things, like suitcases, inside the vehicle so
that some of them are above the tops of the seats.
0 When you carry something inside the vehicle, secure it
whenever you can;
Don’t leave a seat folded down unless you need to.
Payload
The Payload Capacity is shown on the Certificationnire label. This is the
maximum load capacity that your vehicle can carry. Be sure to include the
weight of the people inside as part of your load.
If you added any
accessories or equipment after your vehicle
left the factory, remember to
subtract the weight of these things from the payload. Your dealer can help
you with this.
6-39
Page 288 of 356
Downloaded from www.Manualslib.com manuals search engine .-
.. .. -. .- -. -. .
Service & Appearance Care
Trailering Package
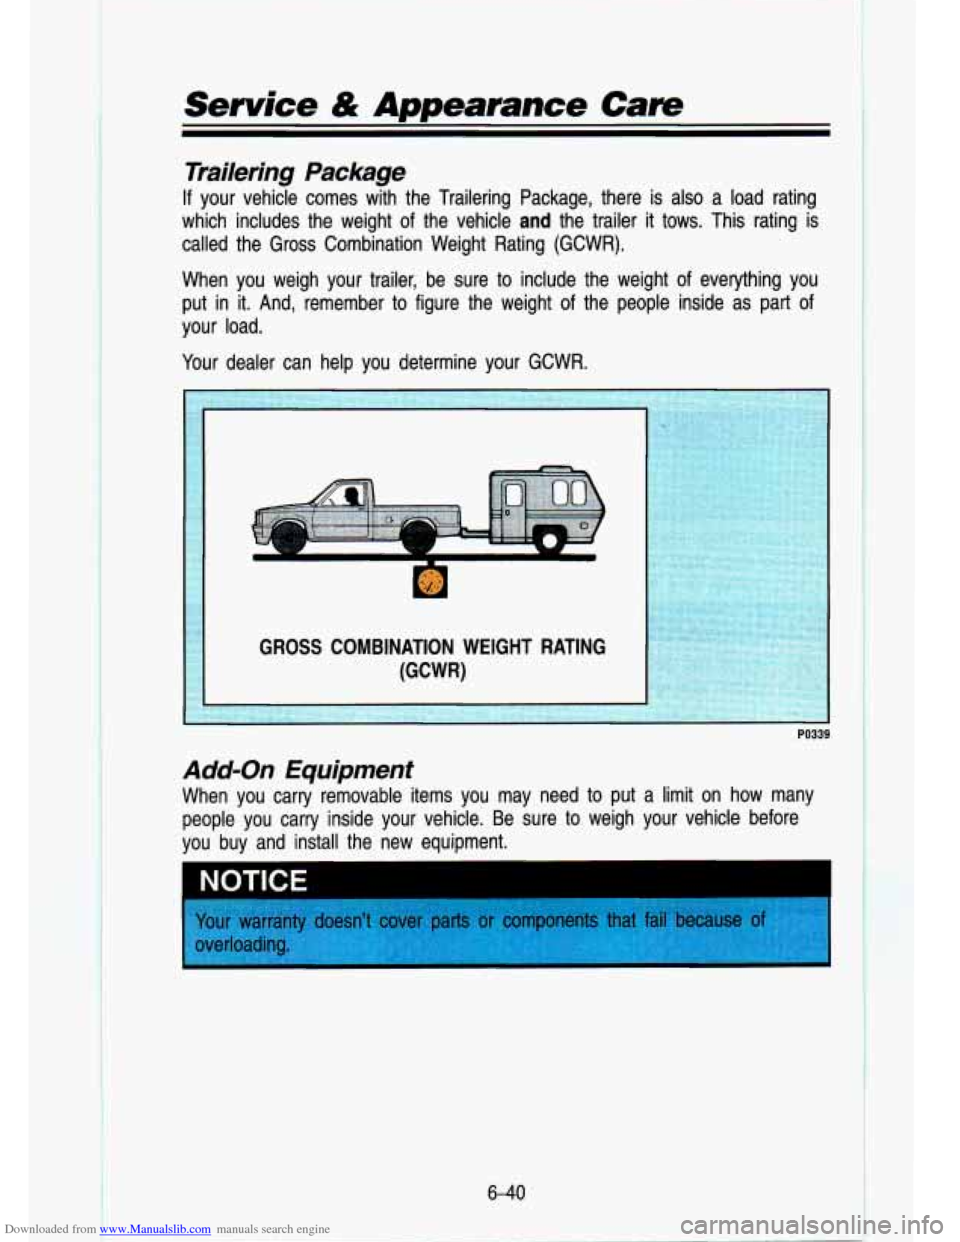
If your vehicle comes with the Trailering Package, there is also a load rating
which includes the weight of the vehicle
and the trailer it tows. This rating is
called the Gross Combination Weight Rating (GCWR).
When you weigh your trailer, be sure to include the weight of everything you
put in it. And, remember to figure the weight
of the people inside as part of
your load.
Your dealer can help you ?-‘ermine your GCWR.
Page 289 of 356
Downloaded from www.Manualslib.com manuals search engine Truck-Camper Loading Information
PO338
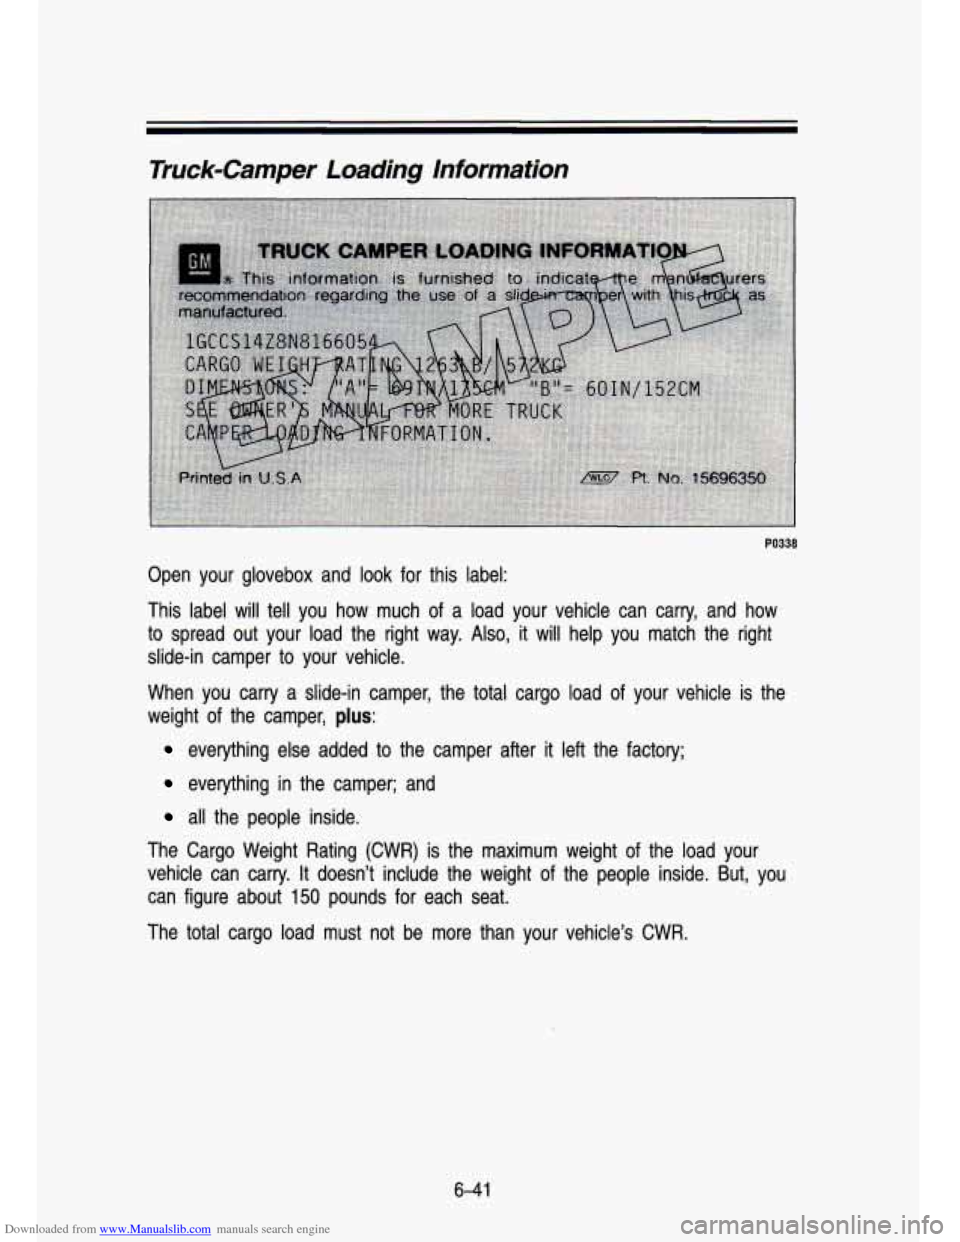
Open your glovebox and look for this label:
This label will tell you how much of a load your vehicle can carry, and how
to spread out your load the right way.
Also, it will help you match the right
slide-in camper to your vehicle.
When you carry a slide-in camper, the total cargo load of you\
r vehicle is the
weight of the camper,
plus:
everything else added to the camper after it left the factory;\
everything in the camper; and
all the people inside.
The Cargo Weight Rating (CWR) is the maximum weight
of the load your
vehicle can carry. It doesn’t include the weight of the people inside. But, you
can figure about
150 pounds for each seat.
The total cargo load must not be more than your vehicle’s
CWR.
6-41
Page 290 of 356
Downloaded from www.Manualslib.com manuals search engine I
Service & Appearance Care
TRUCK LOADING INFORMATION EXAMPLE OF PROPER TRUICK
AND CAMPER MATCH
1. Recommended location for cargo 7. Camper center of gravity.
center
of gravity for cargo weight 2. Recommended center of gravity
rating (Pickup Truck).
K-L.<:- location zone.
Note: Use rear edge of load floor : .‘$Ti: * .Refer to Truck Camper Loading
for measurement purposes.
- - Information label in glove box for
“A” and “B” dimensions.
.Y %!, -
PO254
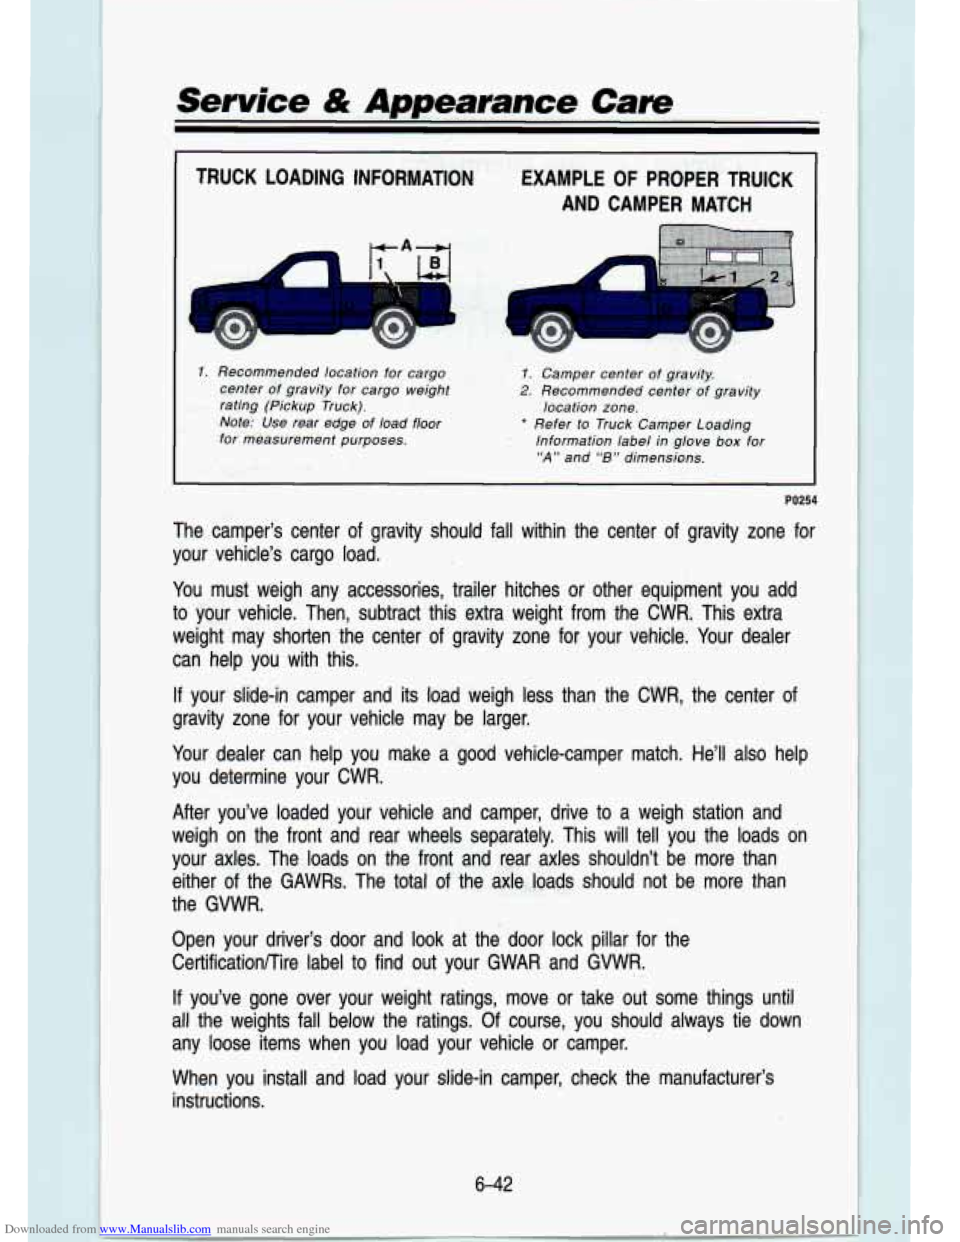
The camper’s center of gravity should fall within the center of gravity zone for
your vehicle’s cargo load.
You must weigh any accessories, trailer hitches or other equipment you add
to your vehicle. Then, subtract this extra weight from the CWR,
This extra
weight may shotten the center of gravity zone for your vehicle. Your dealer
can help you with this.
If your slide-in camper and its load weigh less than the CWR, the center of
gravity zone for your vehicle may be larger.
Your dealer can help you make
a good vehicle-camper match. He’ll also help
you determine your CWR.
After you’ve loaded your vehicle and camper, drive to a weigh station and
weigh on the front and rear wheels separately. This will tell you the loads on
your
axles. The loads on the front and rear axles shouldn’t be more th\
an
either
of the GAWRs. The total of the axie..loads should not be more than
the GVWR.
Open your driver’s door and look at the door lock pillar f\
or the CertificationKire label to find out your GWAR and GWVR.
If you’ve gone over your weight ratings, move or take out some\
things until
all the weights fall below the ratings. Of course, you should always tie down
any loose items when you load your vehicle or camper.
When you install and load your slide-in camper, check the manufacturer’s
instructions.
6-42