lock CHEVROLET S10 1993 2.G Manual PDF
[x] Cancel search | Manufacturer: CHEVROLET, Model Year: 1993, Model line: S10, Model: CHEVROLET S10 1993 2.GPages: 356, PDF Size: 20.85 MB
Page 261 of 356
Downloaded from www.Manualslib.com manuals search engine Energy Conserving II
Oils with these words on the container will help you save fuel.
This doughnut-shaped logo (symbol) is used
on most oil containers to help
you select the correct oil.
You should look for this on the oil container, and use
only those oils that
display the logo.
GM Goodwrench@ oil (in Canada, GM Engine Oil) meets all the requirements
for your vehicle.
Engine Oil Additives:
Don’t add anything to your oil. Your GM dealer is ready to advise if you think
something should be added.
When to Change Engine c)k
See if any one of these is true for you:
Most trips are less than 4 miles (6 km).
It’s below freezing outside and most trips are less than 10 miles
(16 km).
The engine is at low speed most of the time (as in door-to-door delivery,
You tow a trailer often.
or in stop-and-go traffic).
Most trips are through dusty places.
The vehicle is frequently operated off-road.
If any one of these is true for your vehicle, you need to chang\
e your oil and
filter every 3,000 miles (5000 km) or 3 months-whichever comes first.
If none of them are true, change the oil every 7,500 miles (12 500 km) or
12 months-whichever comes first. Change the filter at the first oil change
and at every other oil change after that.
If your vehicle has 4-wheel drive, you ,will have a remote oil filter located
under the hood.
It is mounted to the front left inner fender, behind the
headlights.
Engine Block Heater:
An engine block heater can be a big help if you have to park outside in very
cold weather,
-0°F (-18°C) or colder. If your vehicle has this option, see
“Engine Block Heater” in the Index.
6-1 3
Page 262 of 356
Downloaded from www.Manualslib.com manuals search engine Service & Appearance Cam
What to Do with Used Oil:
I A Used engine oil contains things that have caused skin cancer in
- laboratory animals. Don’t let used oil stay on your skin for very long.
Clean your skin and nails with soap and water,
or a good hand
cleaner. Wash or properly throw away clothing
or rags containing
I used engine oil. I
Used oil can be a real threat to the environment. If you change your own oil,
be sure to drain all free-flowing oil from the filter before disposal. Don’t ever \
dispose of oil by putting
it in the trash, pouring it on the ground, into sewers,
or into streams or bodies of water. Instead, recycle it by taking it to a place
that collects used oil.
If you have a problem disposing of your used oil, ask
your dealer, a service station
or a local recycling center for help.
Air Cleaner
I
I
KO61 8
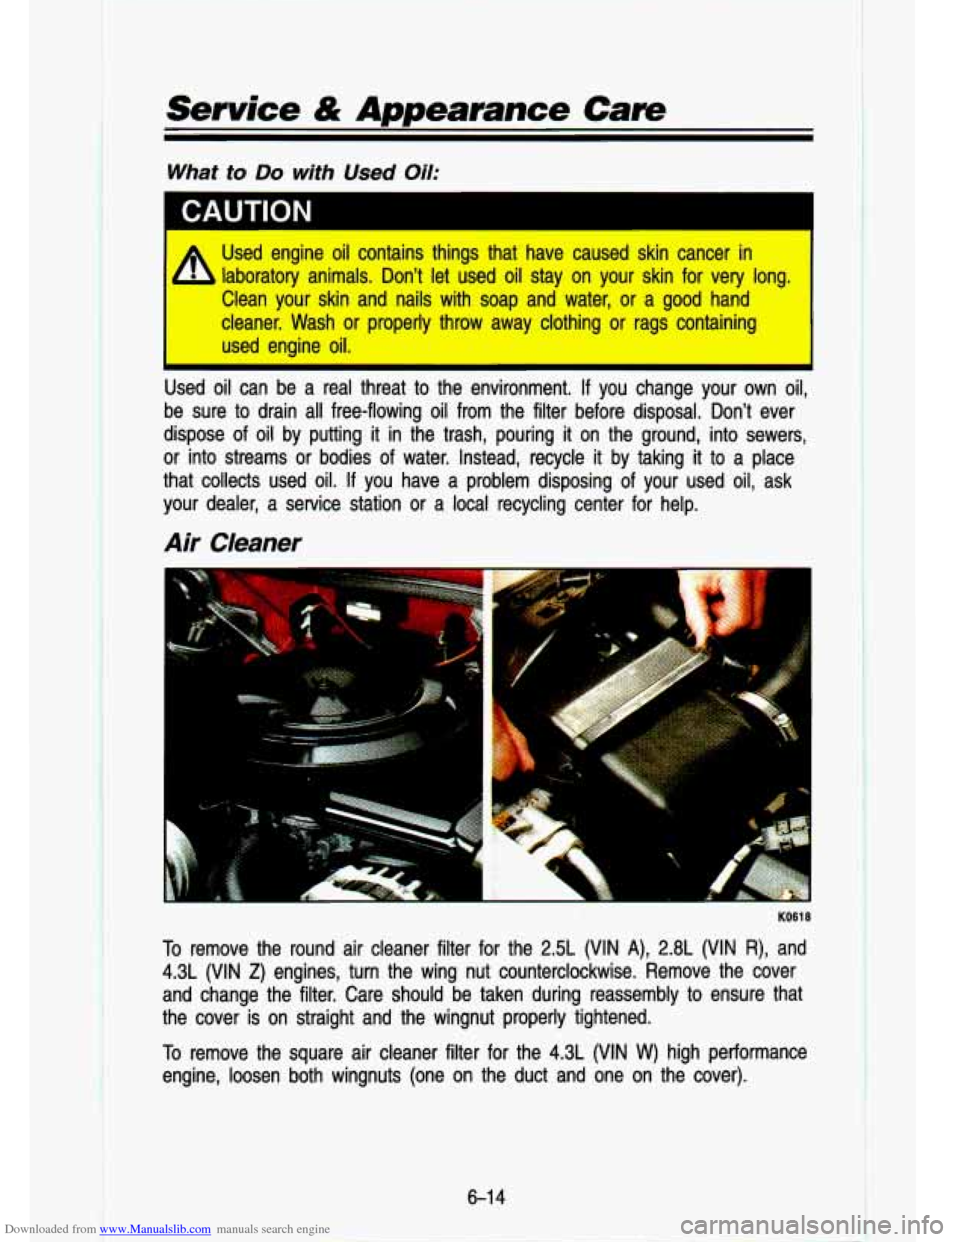
To remove the round air cleaner filter for the 2.5L (VIN A), 2.8L (VIN R), and
4.3L (VIN
Z) engines, turn the wing nut counterclockwise. Remove the cover
and change the filter. Care should be taken during reassembly to ensure that
the cover is on straight and the wingnut properly tightened.
To remove the square air cleaner filter for the 4.3L (VIN W) high performance
engine, loosen both wingnuts (one on the duct and one on the\
cover).
6-1 4
I I
Page 266 of 356
Downloaded from www.Manualslib.com manuals search engine Service & Appearance Care
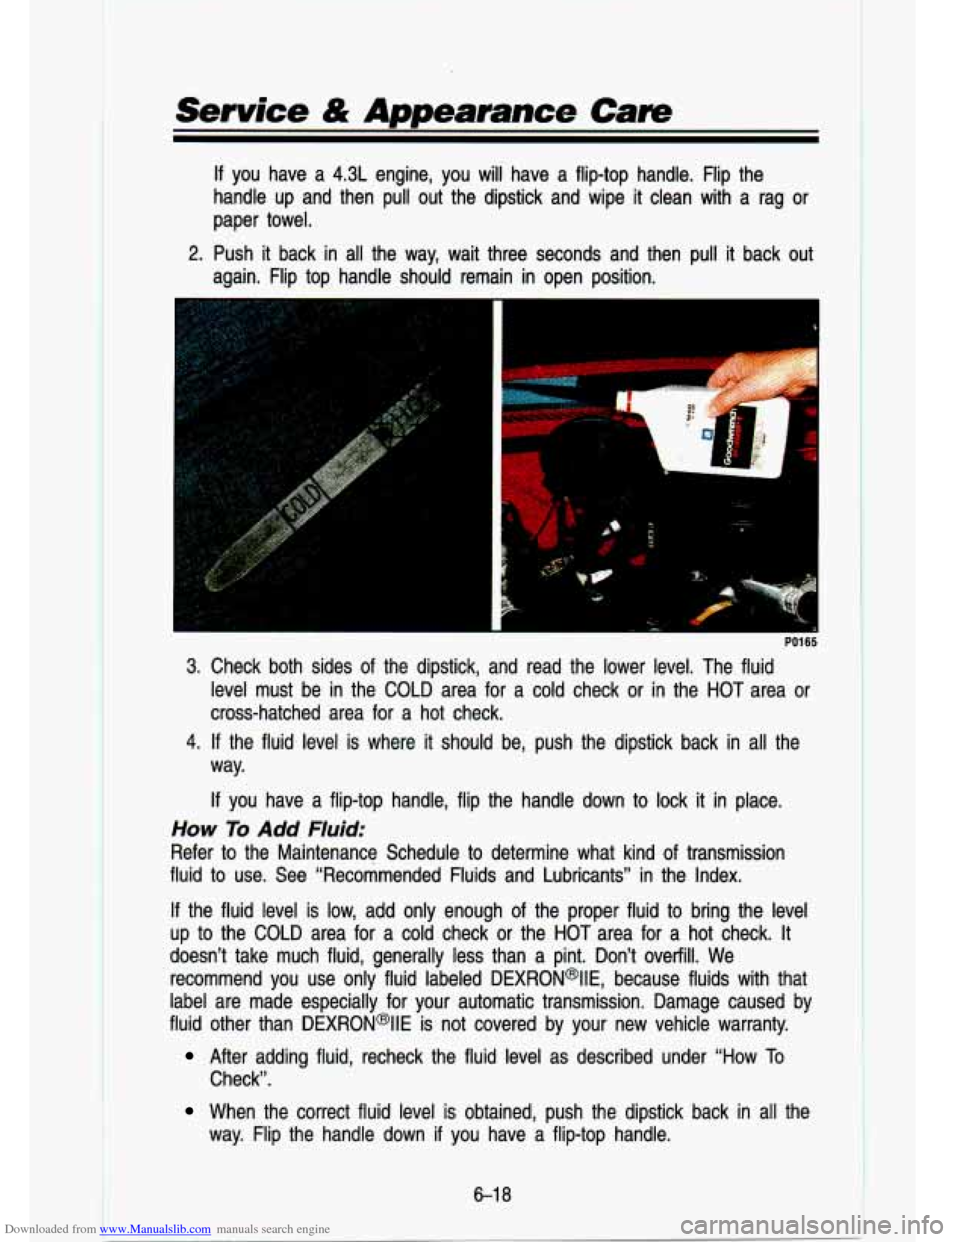
If you have a 4.3L engine, you will have a flip-top handle. Flip\
the
handle up and then pull out the dipstick and wipe it clean with a rag or
paper towel.
2. Push it back in all the way, wait three seconds and then pull it back out
again. Flip top handle should remain in open position.
c
PO1 65
3. Check both sides of the dipstick, and read the lower level. The fluid
level must be in the COLD area for a cold check or in the HOT area or
cross-hatched area for a hot check.
4.
If the fluid. level is where it should be, push the dipstick bac\
k in all the
way.
If you have a flip-top handle, flip the handle down to lock it in place.
How To Add Fluid:
Refer to the Maintenance Schedule to determine what kind of transmission
fluid to use. See “Recommended Fluids and Lubricants” in \
the Index.
If the fluid level is low, add only enough of the proper fluid to bring the level
up to the COLD area for a cold check or the HOT area for a hot c\
heck. It
doesn’t take much fluid, generally less than a pint. Don’\
t overfill. We
recommend you use only fluid labeled DEXRON@lIE, because fluids \
with that
label are made especially for your automatic transmission. Damag\
e caused by
fluid other than DEXRON@IIE is not covered by your new vehicle\
warranty.
After adding fluid, recheck the fluid level as described under \
“How To
Check”.
When the correct fluid level is obtained, push the dipstick ba\
ck in all the
way. Flip the handle down
if you have a flip-top handle.
6-1 8
1
Page 281 of 356
Downloaded from www.Manualslib.com manuals search engine 2. Turn the socket counterclockwise and pull it out.
3. Turn the bulb counterclockwise and pull it out of the socket.
4. Put the new bulb in the socket and turn it clockwise until it is tight.
5. Put the socket back into the assembly and turn the socket clockwise
until it locks in place.
Rear Lights
a
KO635
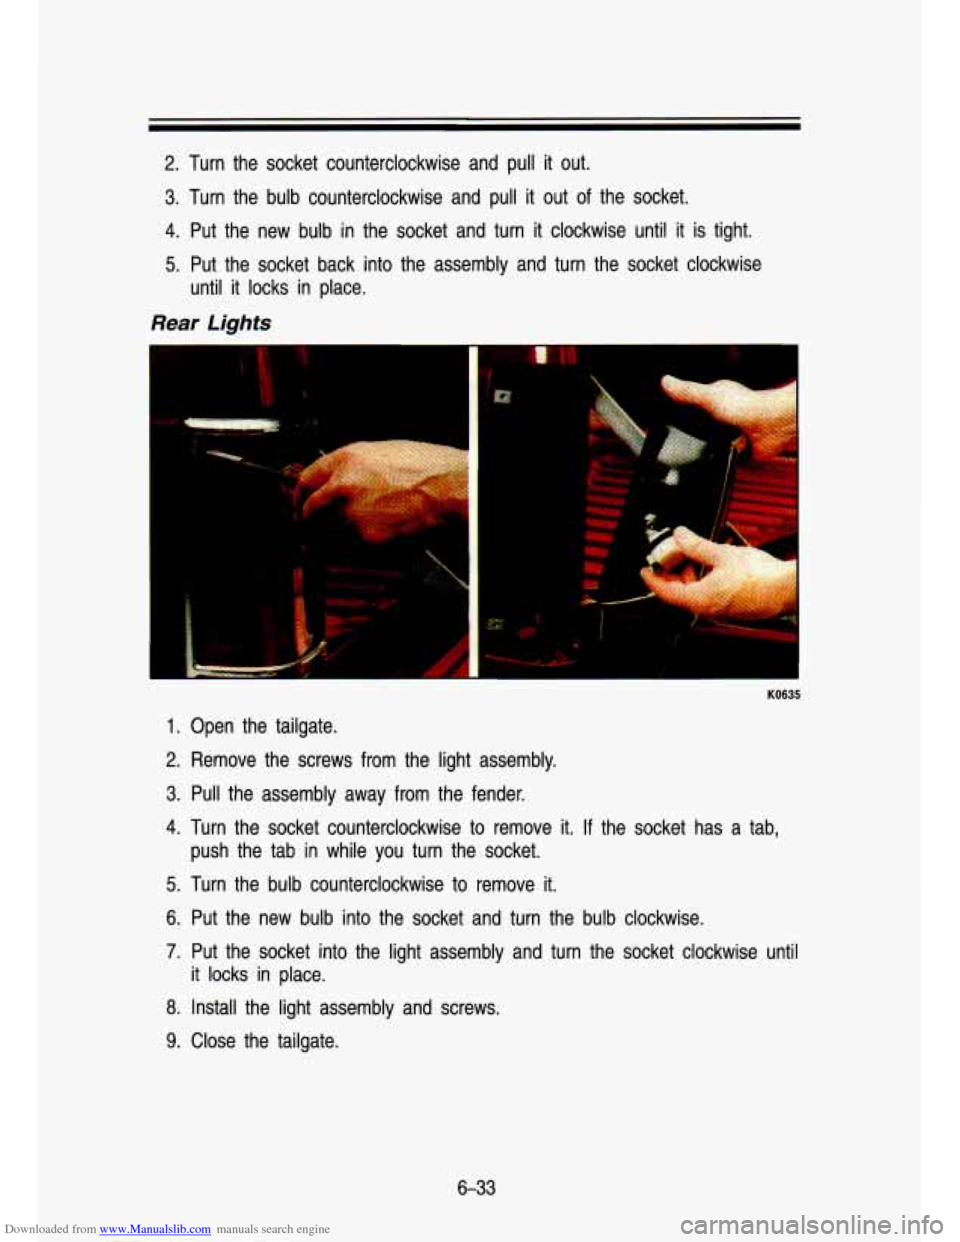
1. Open the tailgate.
2. Remove the screws from the light assembly.
3. Pull the assembly away from the fender.
4. Turn the socket counterclockwise to remove it. .If the socket has a tab,
push the tab in while you turn the socket.
5. Turn the bulb counterclockwise to remove it.
6. Put the new bulb into the socket and turn the bulb clockwise.
7. Put the socket into the light assembly and turn the socket cl\
ockwise until
8. Install the light assembly and screws.
9. Close the tailgate.
it
locks in
place.
6-33
Page 283 of 356
Downloaded from www.Manualslib.com manuals search engine Windshield Wiper Blade Inserts
i
.. i. KO637 .. .,' :-, ;iyy ?-is;+;.-, &!!f$i& . l'jf:. j<-:q;* j';gi3f47!:;I' b,(..;',$< t&..YT:i;; ;.l:z~ .''! ..' :.. y.?;i'!g.tyz , . ..
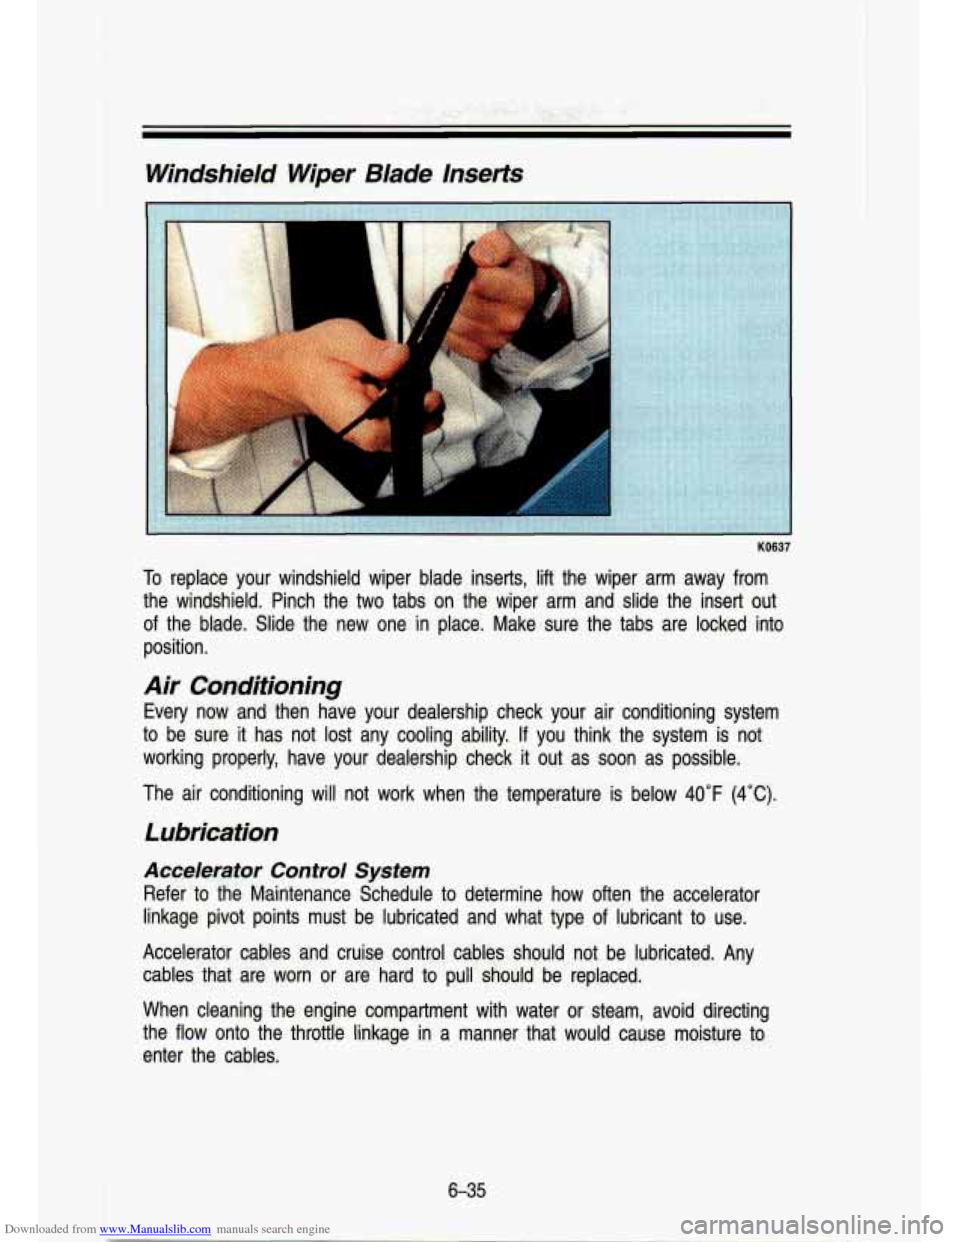
o rep ace your wlndshleld wiper blade inserts, lift the wiper ar\
m away from
the windshield. Pinch the
two tabs on the wiper arm and slide the insert out
of the bl'ade. Slide the new one in place. Make sure the tabs are locked into
position.
Air Conditioning
Every now and then have your dealership check your alr conditi\
oning system
to be sure it has not lost any cooling ability. If you think the system is not
working prope'rly, have your dealership check
it out as soon as possible.
The air conditioning will not work when the temperature is below
40°F (4°C).
Lubrication
Accelerator Control System
Refer to the Maintenance Schedule to determine how often the accelerator
linkage pivot points must be lubricated and what type
of lubricant to use.
Accelerator cables and cruise control cables should not be lubr\
icated. Any
cables that are worn or are hard
to pull should be replaced.
When cleaning the engine compartment with water or steam, avoid\
directing
the flow onto the throffle linkage in a manner that would cause moisture
to
enter the cables.
Page 286 of 356
Downloaded from www.Manualslib.com manuals search engine Service & Appearance Care
Loading Your Vehicle
K3651
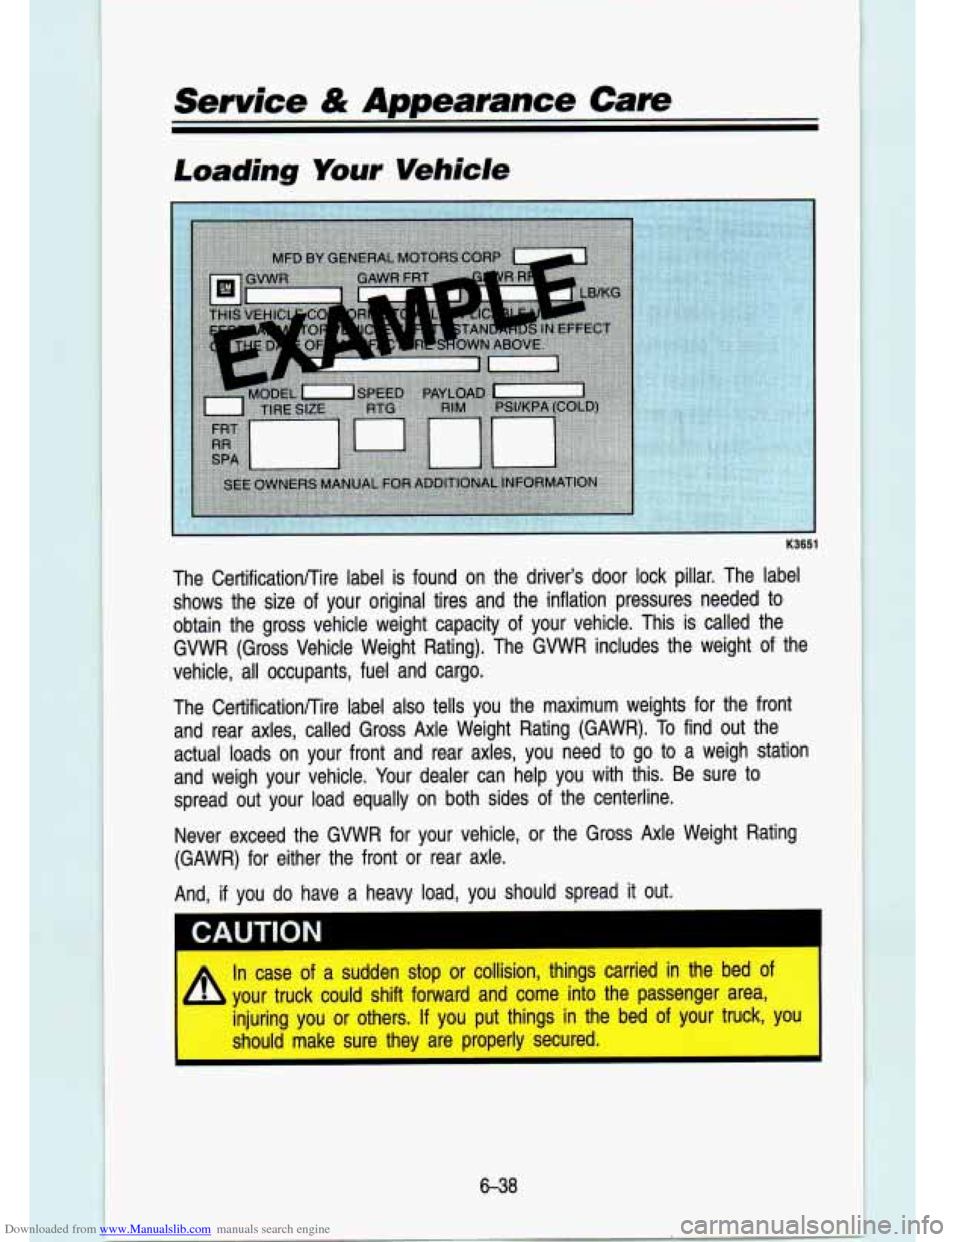
The CertificationRire label is found on the drive~r's door lock pillar. The label
shows t'he size of your original t'ires and the inflation pressu8res ne-eded to
obtain the gross vehicle weight capac-ity of your vehicle. This
is called the
GVWR (Gross Vehicle Weight Rating). The- GVWR includes the weight of the
vehlicle, all occupants, fuel and cargo.
The Certifi'cationKtre label also tells you the maximum weights for the front
and rear axles, called Gross
Axle Weight Rating (GAWR). To find out the
actual
loads on your front and rear axles, you need to go to a weigh station
and weigh your vehicle. Your dealer can help you with this. Be sure to
spread out your load equally
on both sides of the centerline.
Never exceed the GVWR for your vehicle, or the Gross Axle Wei\
ght Rating
(GAWR) for either the front or rear axle.
And,
if you do have a heavy load, you should spread it out.
I CAUTION
In case of a sudden stop or collision, things carried in the bed\
of
I [I! your truck could shift forward and come into the passenger are\
a
injuring you or others.
If you put things in the bed of your truck,
should make sure they are properly secured.
1
6-38
Page 290 of 356
Downloaded from www.Manualslib.com manuals search engine I
Service & Appearance Care
TRUCK LOADING INFORMATION EXAMPLE OF PROPER TRUICK
AND CAMPER MATCH
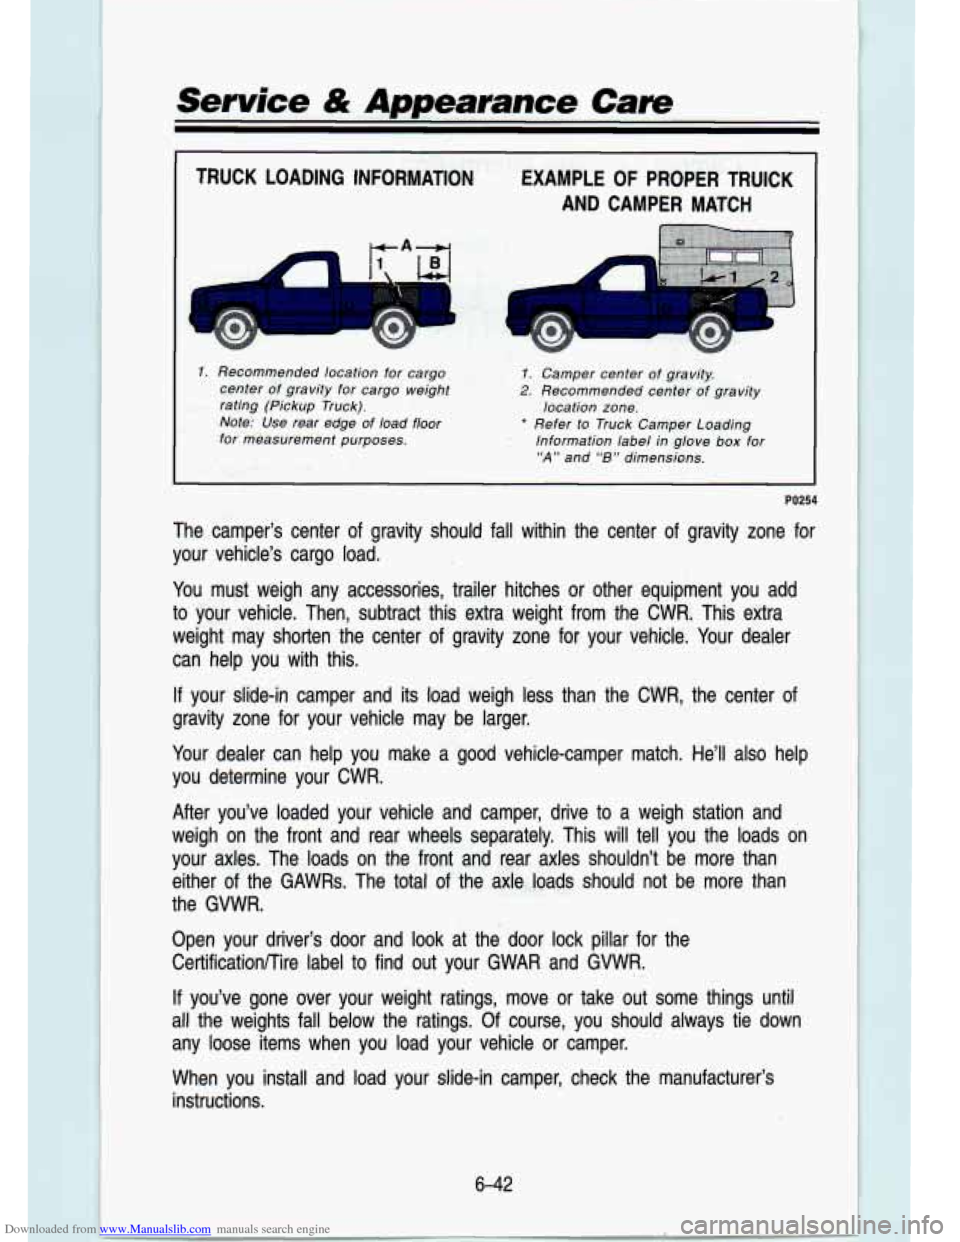
1. Recommended location for cargo 7. Camper center of gravity.
center
of gravity for cargo weight 2. Recommended center of gravity
rating (Pickup Truck).
K-L.<:- location zone.
Note: Use rear edge of load floor : .‘$Ti: * .Refer to Truck Camper Loading
for measurement purposes.
- - Information label in glove box for
“A” and “B” dimensions.
.Y %!, -
PO254
The camper’s center of gravity should fall within the center of gravity zone for
your vehicle’s cargo load.
You must weigh any accessories, trailer hitches or other equipment you add
to your vehicle. Then, subtract this extra weight from the CWR,
This extra
weight may shotten the center of gravity zone for your vehicle. Your dealer
can help you with this.
If your slide-in camper and its load weigh less than the CWR, the center of
gravity zone for your vehicle may be larger.
Your dealer can help you make
a good vehicle-camper match. He’ll also help
you determine your CWR.
After you’ve loaded your vehicle and camper, drive to a weigh station and
weigh on the front and rear wheels separately. This will tell you the loads on
your
axles. The loads on the front and rear axles shouldn’t be more th\
an
either
of the GAWRs. The total of the axie..loads should not be more than
the GVWR.
Open your driver’s door and look at the door lock pillar f\
or the CertificationKire label to find out your GWAR and GWVR.
If you’ve gone over your weight ratings, move or take out some\
things until
all the weights fall below the ratings. Of course, you should always tie down
any loose items when you load your vehicle or camper.
When you install and load your slide-in camper, check the manufacturer’s
instructions.
6-42
Page 292 of 356
Downloaded from www.Manualslib.com manuals search engine Service & Appearance Care
Inflation-Tire Pressure
The Certification/Tire label, which is on the driver’s door \
lock pillar, shows the
correct inflation pressures for your tires, when they’re cold\
. “Cold’’ means your
vehicle has been sitting for at least three hours or driven n\
o more than a mile.
I NOTICE I
When to Check: Check your tires once a month or more. Don’t forget \
your
compact spare tire (if
so equipped). It should be at 60 psi (420 kPa).
How to Check: Use a good quality pocket-type gage to check tire pressure.
Simply looking at the tires will not tell you the pressure, e\
specially
if you
have radial tires-which may
l’ook properly inflated even if they’re
underinflated.
If your tires have valve caps, be sure
to put them back on. They help
prevent leaks by keeping out dirt and moisture.
Ere lnspection and Rotation
To make your tires last longer, have them inspected and rotated a\
t the
mileages recommended in the Maintenance Schedule. See Scheduled
Maintenance Services in the Index.
6-44
Page 308 of 356
Downloaded from www.Manualslib.com manuals search engine I
Service & Appearance Cave
Headlights
The headlight wiring is protected by a circuit breaker in the \
light switch. An electrical overload will cause the lights to go on and
off, or in some cases to
remain
off. If this happens, have your headlight wiring checked right away.
Windshield Wipers
The windshield wiper motor is protected by a circuit breaker a\
nd a fuse. If
the motor overheats due to heavy snow, etc., the wiper will s\
top until the
motor cools. If the overload is caused by some electrical problem and not
snow, etc., be sure to get it fixed.
Power Windows and Other Power Options
Circuit breakers in the fuse panel protect the power windows a\
nd other power
accessories. When the current load is
too heavy, the circuit breaker opens
and closes, protecting the circuit until the problem is fixed \
or goes away.
Trailer Wiring Harness
The optional seven-wire trailer wiring I ;s is protected by an in-line fuse
in the battery feed wire. This fuse is near rhe junction bloc\
k. See “Trailer
Wiring Harness” in the “Features
& Controls’’ section.
Fuse Block
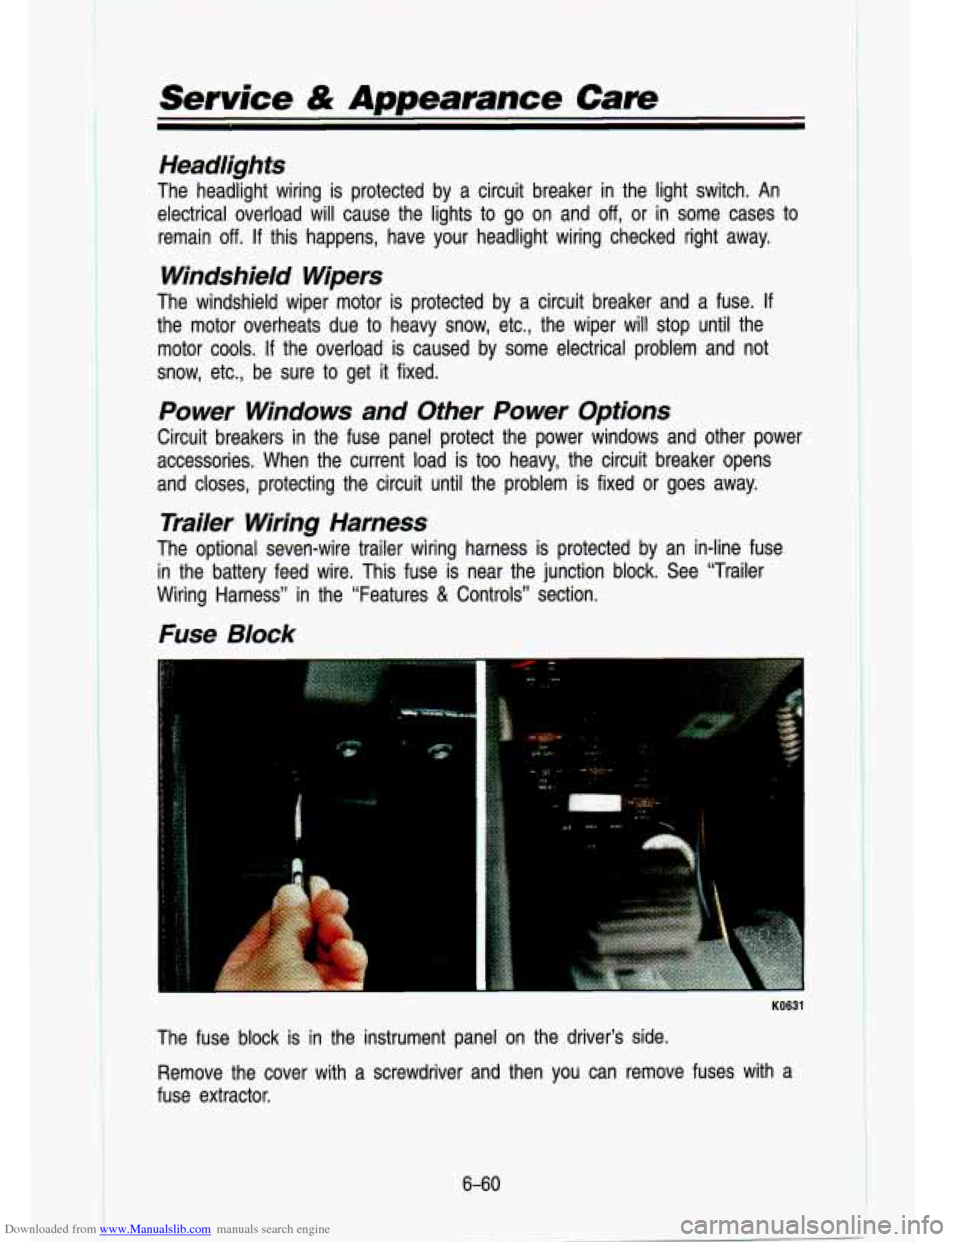
KO631
The fuse block is in the instrument panel on the driver’s side.
- .: .-: 1
.- .
Remove the cover with a screwdriver and then you can remove f\
uses with a
fuse extractor.
6-60
Page 315 of 356
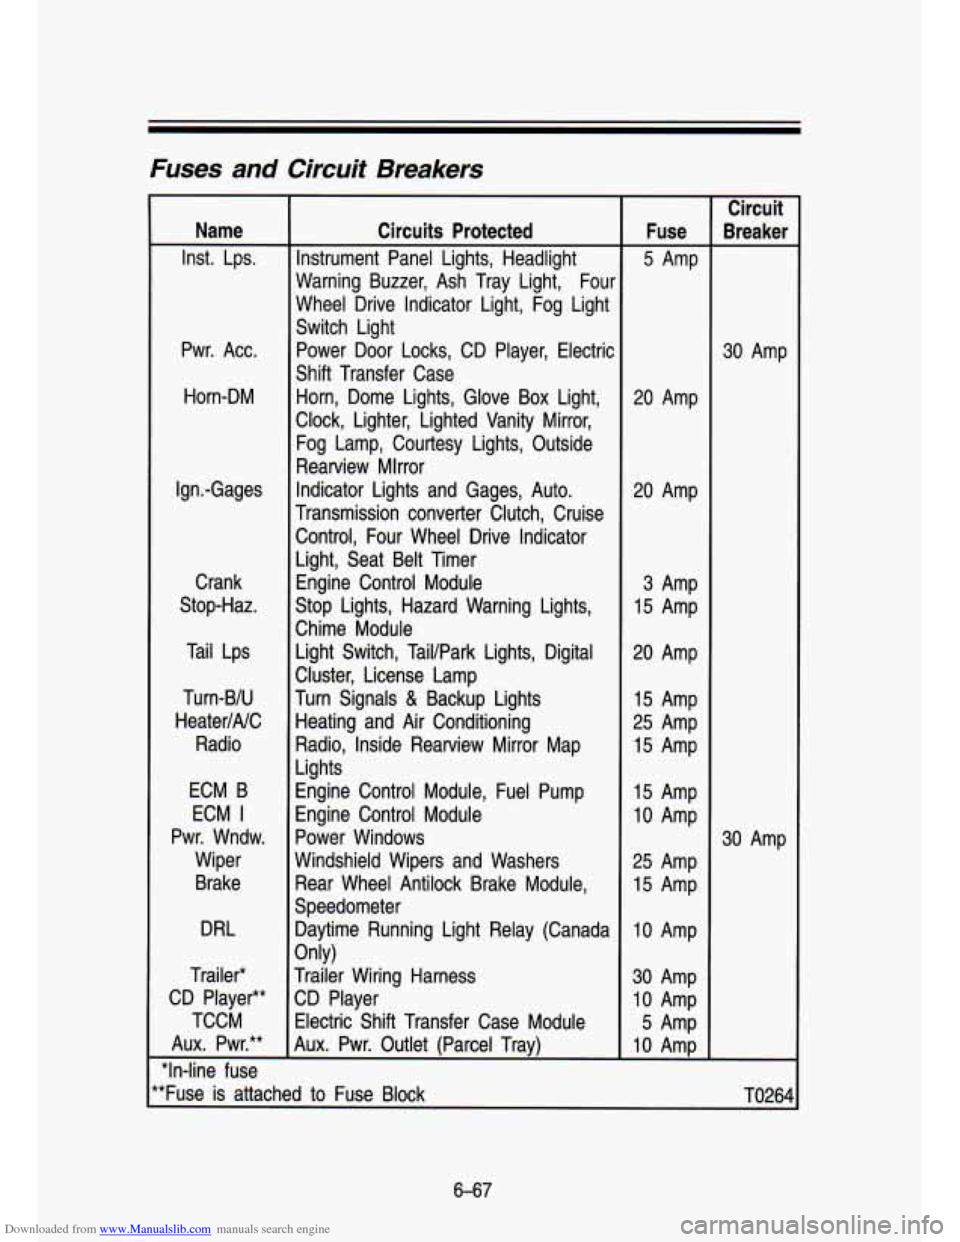
Downloaded from www.Manualslib.com manuals search engine Fuses and Circuit Breakers
Name
Inst. Lps.
Pwr. Acc. Horn-DM
Ign.-Gages Crank
Stop-Haz.
Tail Lps
Turn-BIU
HeaterINC Radio
ECM B
ECM
I
Pwr. Wndw. Wiper
Brake
DRL
Trailer*
CD Player**
TCCM
Aux. Pwr.**
"In-line fuse Circuits Protected
Instrument Panel Lights, Headlight
Warning Buzzer, Ash Tray Light, Four
Wheel Drive Indicator Light, Fog Light
Switch Light Power Door Locks, CD Player, Electric
Shift Transfer Case Horn, Dome Lights, Glove Box Light,
Clock, Lighter, Lighted Vanity Mirror,
Fog Lamp, Courtesy Lights, Outside
Rearview Mlrror
Indicator Lights and Gages, Auto.
Transmission converter Clutch, Cruise Control, Four Wheel Drive Indicator
Light, Seat Belt Timer Engine Control Module
Stop Lights, Hazard Warning Lights,
Chime Module Light Switch, Tail/Park Lights, Digital
Cluster, License Lamp
Turn Signals
& Backup Lights
Heating and Air Conditioning
Radio, Inside Rearview Mirror Map
Lights
Engine Control Module, Fuel Pump
Engine Control Module
Power Windows
Windshield Wipers and Washers Rear Wheel Antilock Brake Module,
Speedometer Daytime Running Light Relay (Canada
Trailer Wiring Harness
CD Player
Electric Shift Transfer Case Module
Aux. Pwr. Outlet (Parcel Trav)
Only) Fuse
5 Amp
20 Amp
20 Amp
3 Amp
15 Amp
20 Amp 15 Amp
25 Amp
15 Amp
15 Amp
10 Amp
25 Amp
15 Amp
10 Amp
30 Amp
10 Amp
5 Amp
10 AmD Circuit
kea ker
30 Amp
30 Amp
'*Fuse is attached to Fuse Block
TO264
6-67