CHEVROLET S10 1997 2.G Owners Manual
S10 1997 2.G
CHEVROLET
CHEVROLET
https://www.carmanualsonline.info/img/24/8269/w960_8269-0.png
CHEVROLET S10 1997 2.G Owners Manual
Trending: automatic transmission, service, snow chains, stop start, radio controls, power steering, engine
Page 221 of 402
Downloaded from www.Manualslib.com manuals search engine Removing the Spare.’Tire and Tools
The jacking equipment you’I1 need. is .stored inside the
plastic jack covef.which is behind the-fr-ont seats, -either
on the center of the wall (extmded cab) ‘or ‘on the
p-assenger’s side .of the wxll (regular cab).
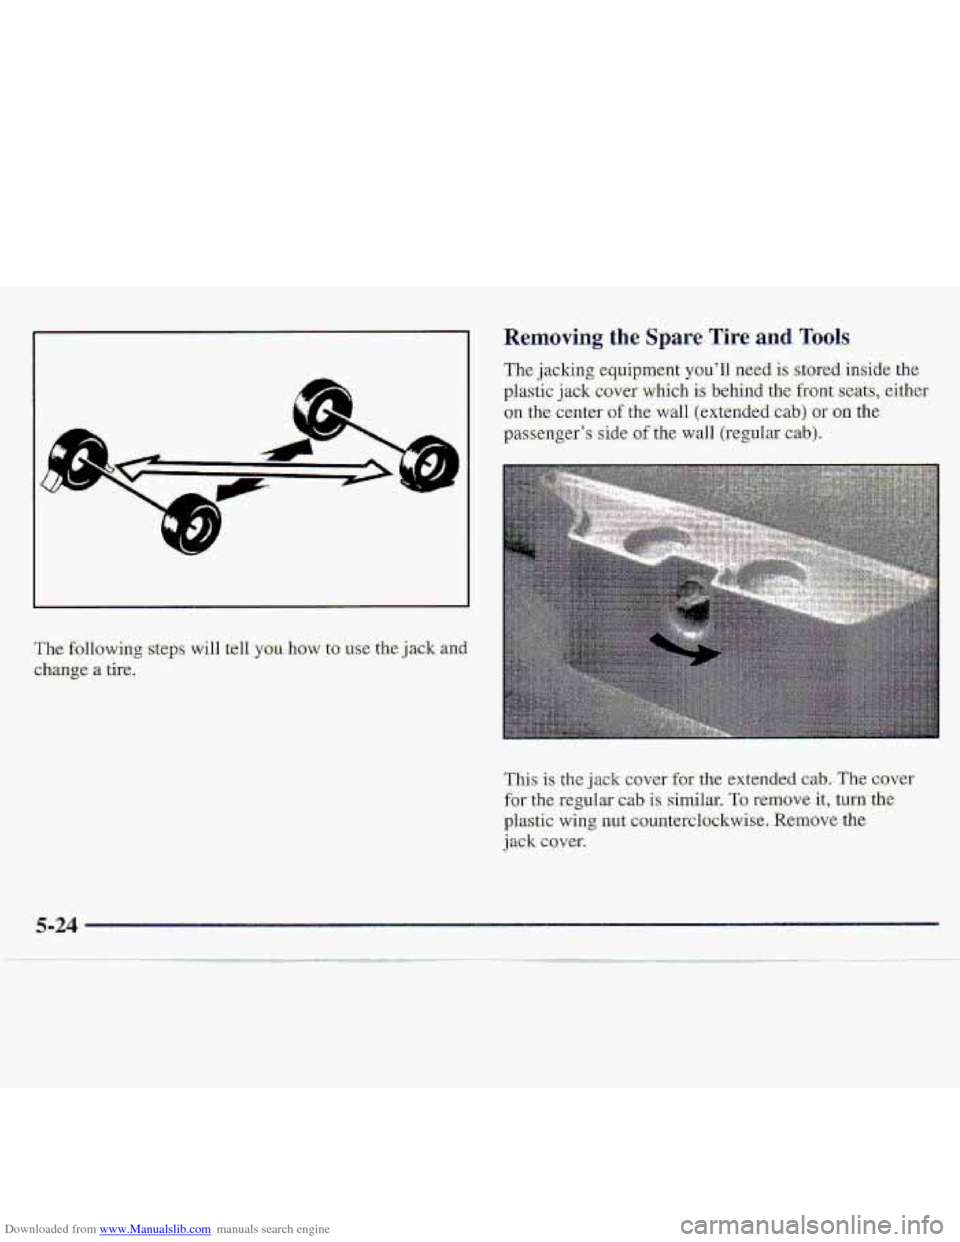
The following steps will tell youhow to use the jack and
change a tire.
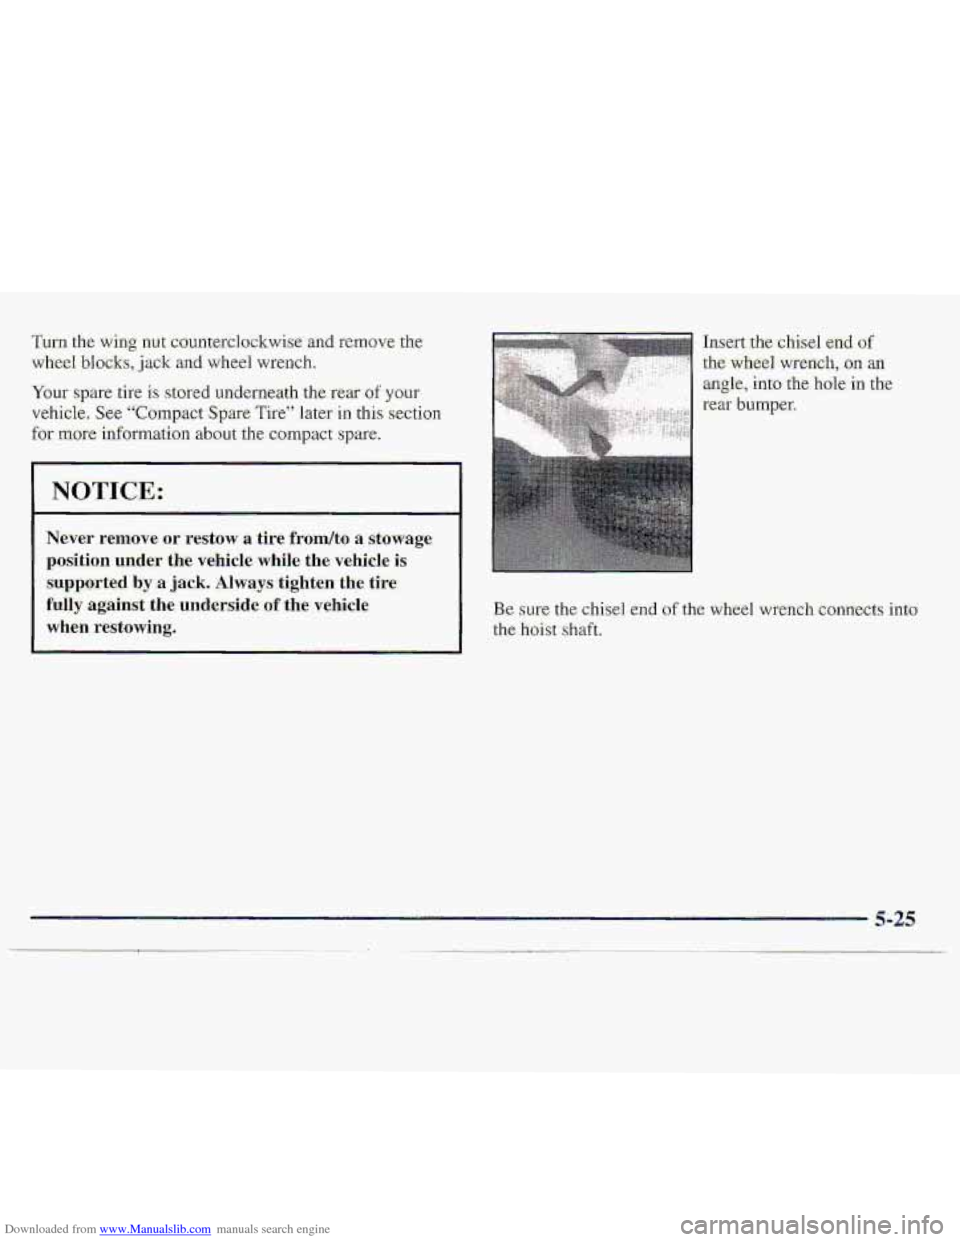
This is the jack cover for the extended cab. The cover
.for the re,gular cab is similar. To remove it, turn the
phstic wing nu% counterclmkwis.e. Rem-ove the.
J ac R cover.
Page 222 of 402
Downloaded from www.Manualslib.com manuals search engine Turn .the wi~%g imt. cwnterclockwise :and rem-ove the
wheel blocks., jack and wheel wrench.
Your spare tire is stored underneath the rear of your
vehicle; See “Compact S-pare Tire” later in this section
for more mformation- about the compact spare.
NOTICQ
Never remove or restow a tire frodto a stowage.
psition under the vehicle while the .vehicle is
suppiorted by .a jack+ Always tighten th.e tire
fully against the: underside- of the vehicle
when restowiqg.
$-E
. _.. - .
Page 223 of 402
Downloaded from www.Manualslib.com manuals search engine Turn the wheel wrench c0unterclo'ckwiA-e t$ lower the
.spare tire. Keep turning the wheel wrench irntil the spare
tire can be pulled out from under .the vehicle.
When the tire has been completely lowered, tilt the
retainer at the end of the cable.,and pill it through the-
wheel Gpening:. Puli the tire out from underthe vehicle. I
To help avoid v.ehicle .damage, do not drive th-e
vehicle before $he- cable is restored.
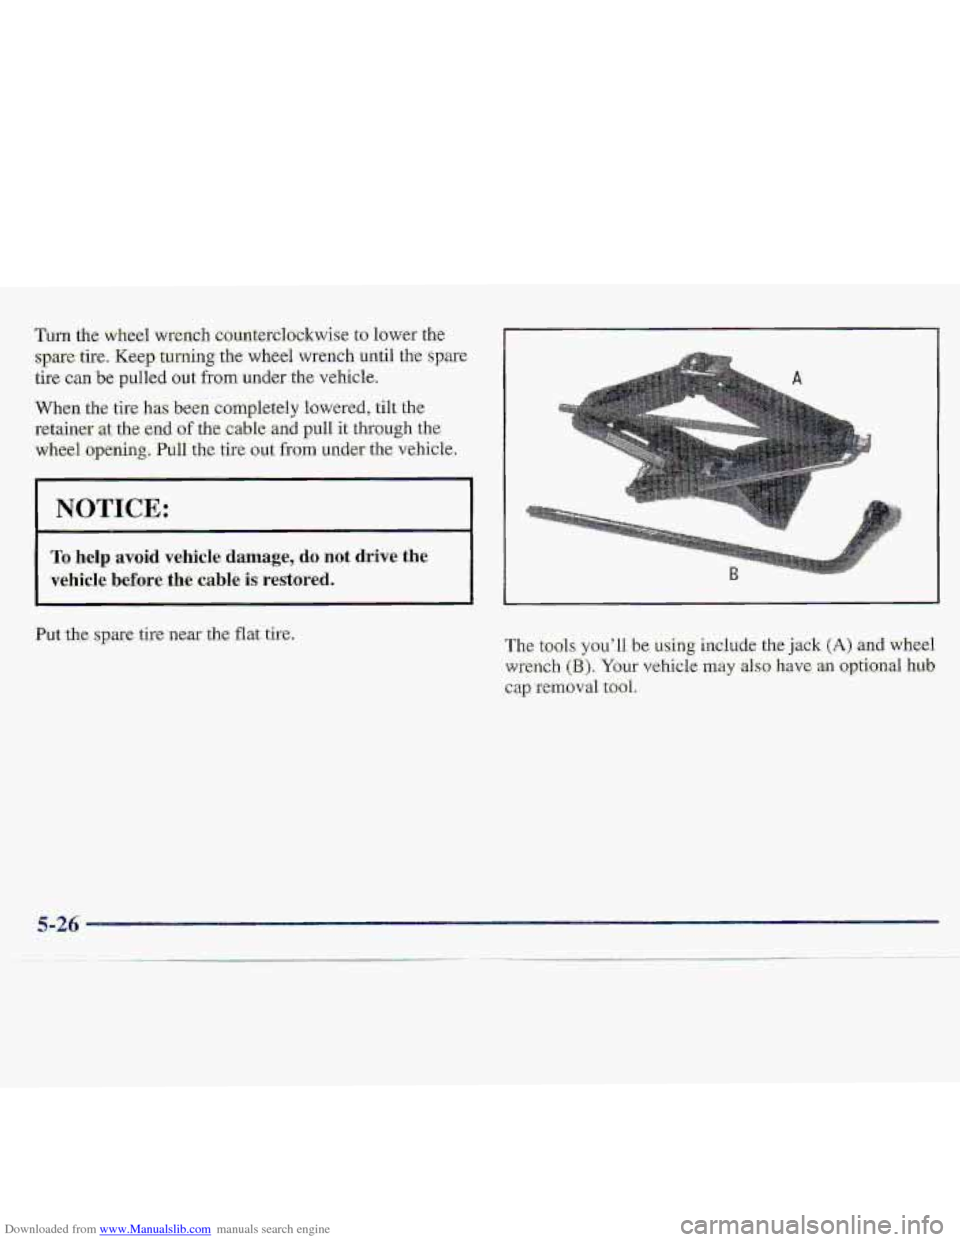
Pwf.the spare .tire nearae- flat tire. The tools you'll be, wing include. the jack (A) and wheel
wrench (€3). Your vehicle may also liava an optional hub,
cap I:emov.d to-ol.
5-26
Page 224 of 402
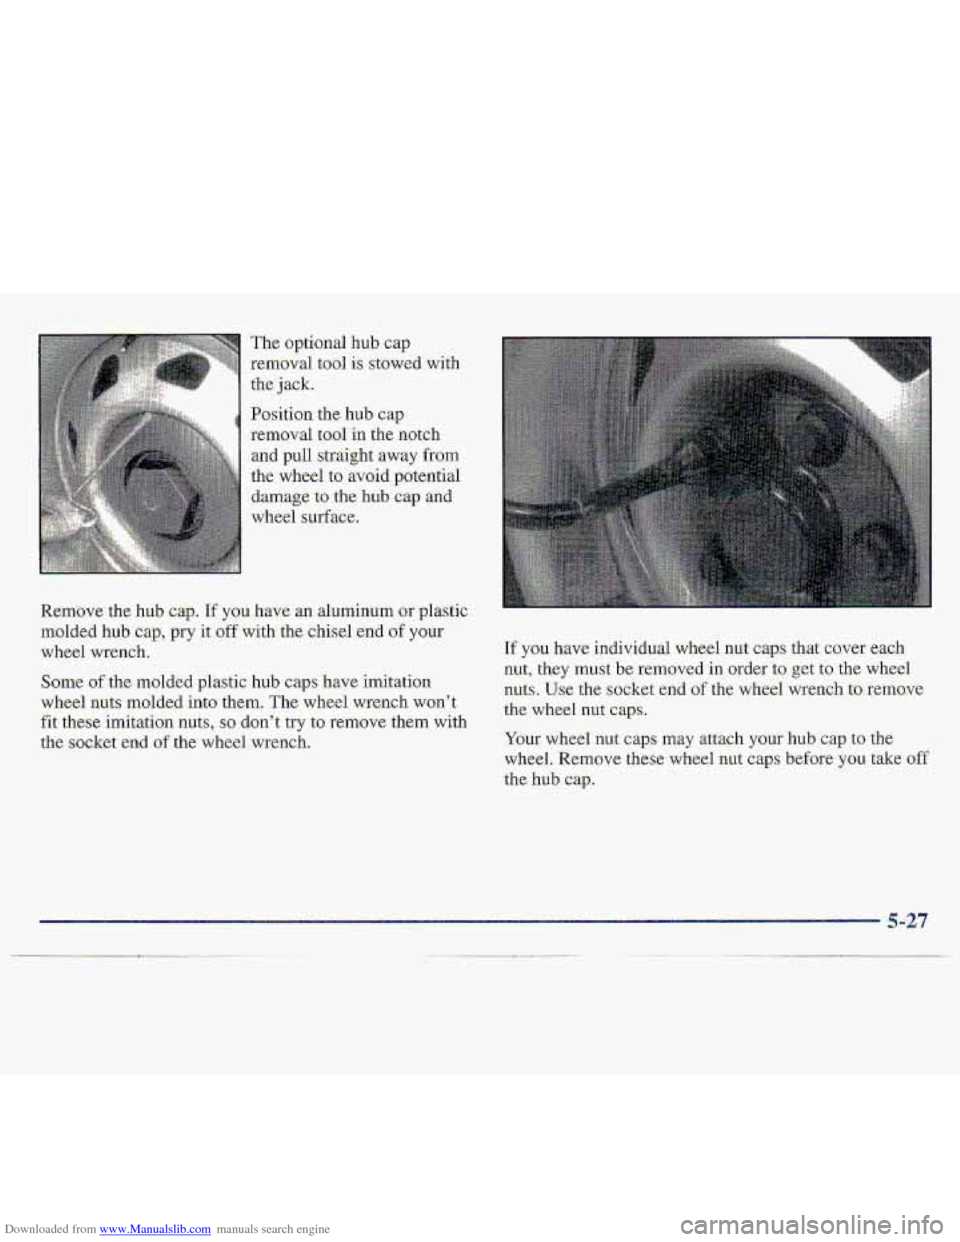
Downloaded from www.Manualslib.com manuals search engine The optional hub cap
removal tool is stowed with
the jack.
Position
the hub cap
removal tool i-n the notch
and pull straight ,away from
the wheel tQ avoid,p.otential
damag,e TO the hubcap and
wheel surface.
Remove.
the hub cap. I€ you hve an aluminum or plastic
molded hGb :cap:, pry it
off with the chisel .end of your
wheel wrench. If you have individual wheel nut caps that cover each
nut, they must
be- removed in order to get to the wheel Some of the molded plastic hub caps. hme imitation
nuts. Use the socket end of the wheel wrench to-rerno.ve wheel nuts -molded into them. The wheel wrench won’t the. wheel nLlt
fit
these imitation nuts, SQ don’t try to remove them with
the socket end of the’ wheel. wrench. Your wheel nut. caps may attach your hub cap to the
wheel, Remove these
whe.el nut caps before you rake off
the hub cap,
Page 225 of 402
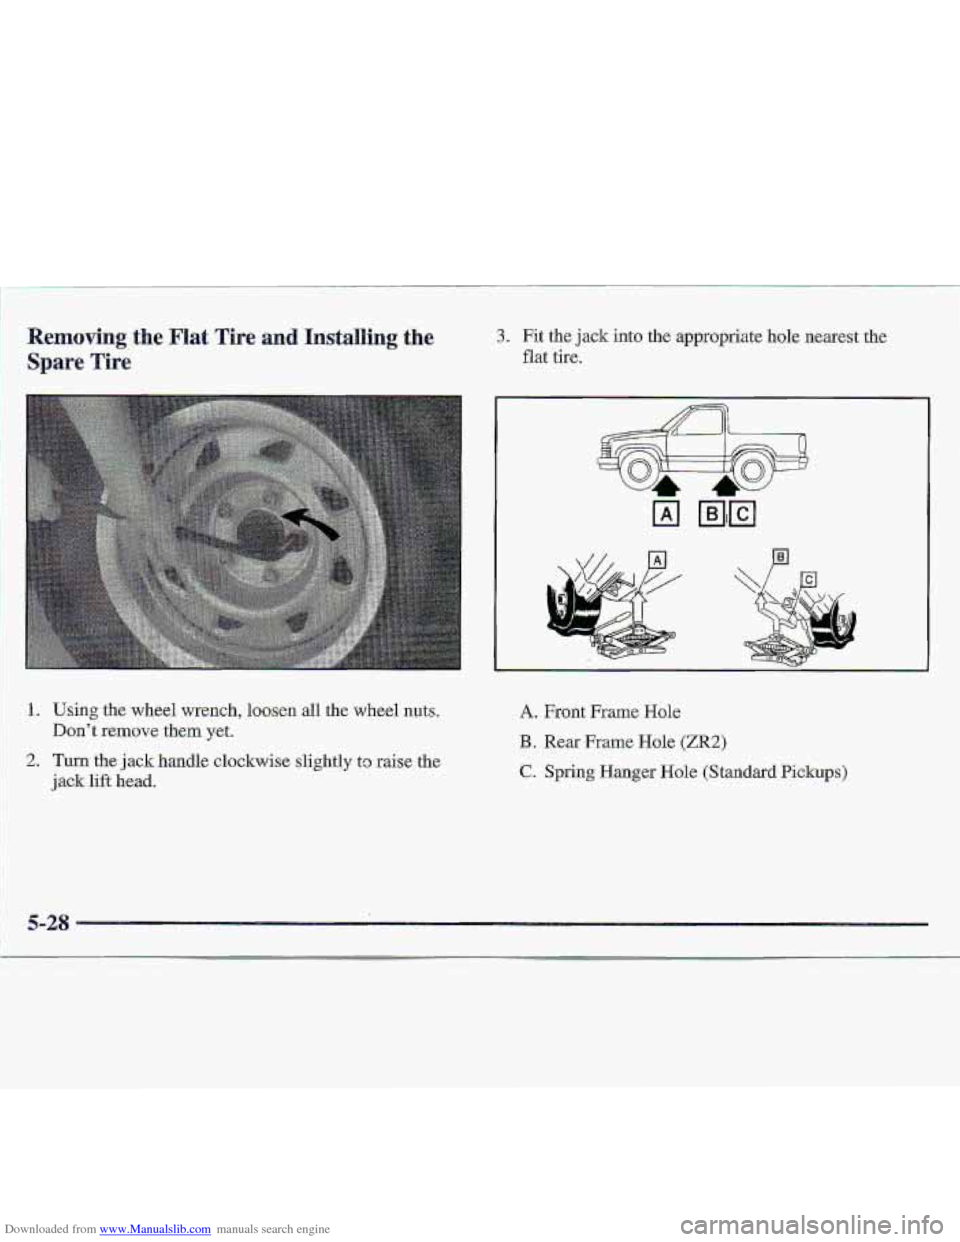
Downloaded from www.Manualslib.com manuals search engine 1. Using the wheel wrench, lomen all the wheel nuts.
Don't remove them yet.
2. Turn the jack handle clockwise slightly to raise the
jack lift head.
3. Fit the jack into the appropriate ho1.e nearest the
flat
tire.
A. Front Frame Hole.
B. Rear Frame Hole (ZR2)
C. Spring Hanger Hole (Standard Pickups)
5-28
Page 226 of 402
Downloaded from www.Manualslib.com manuals search engine Getting under a vehicle when it is jacked up is
dangerous. If the vehicle slips off the jack, you
could be badly injured or killed. Never get under
a vehicle when
it is supported only by a jack.
I
1 NOTICE:
Raising your vehicle with the jack improperly
positioned
can damage the vehicle and even make
the vehicle
fall. To help avoid personal injury
and vehicle
damage, be sure to fit the jack
18t head into the proper location before raising
your vehicle.
4. Raise the vehicle by turning the jack handle
clockwise. Raise the vehicle far enough off the
ground so there is enough room for the spare tire
to fit.
5. Remove all the wheel nuts and take off the flat-tire;
Page 227 of 402
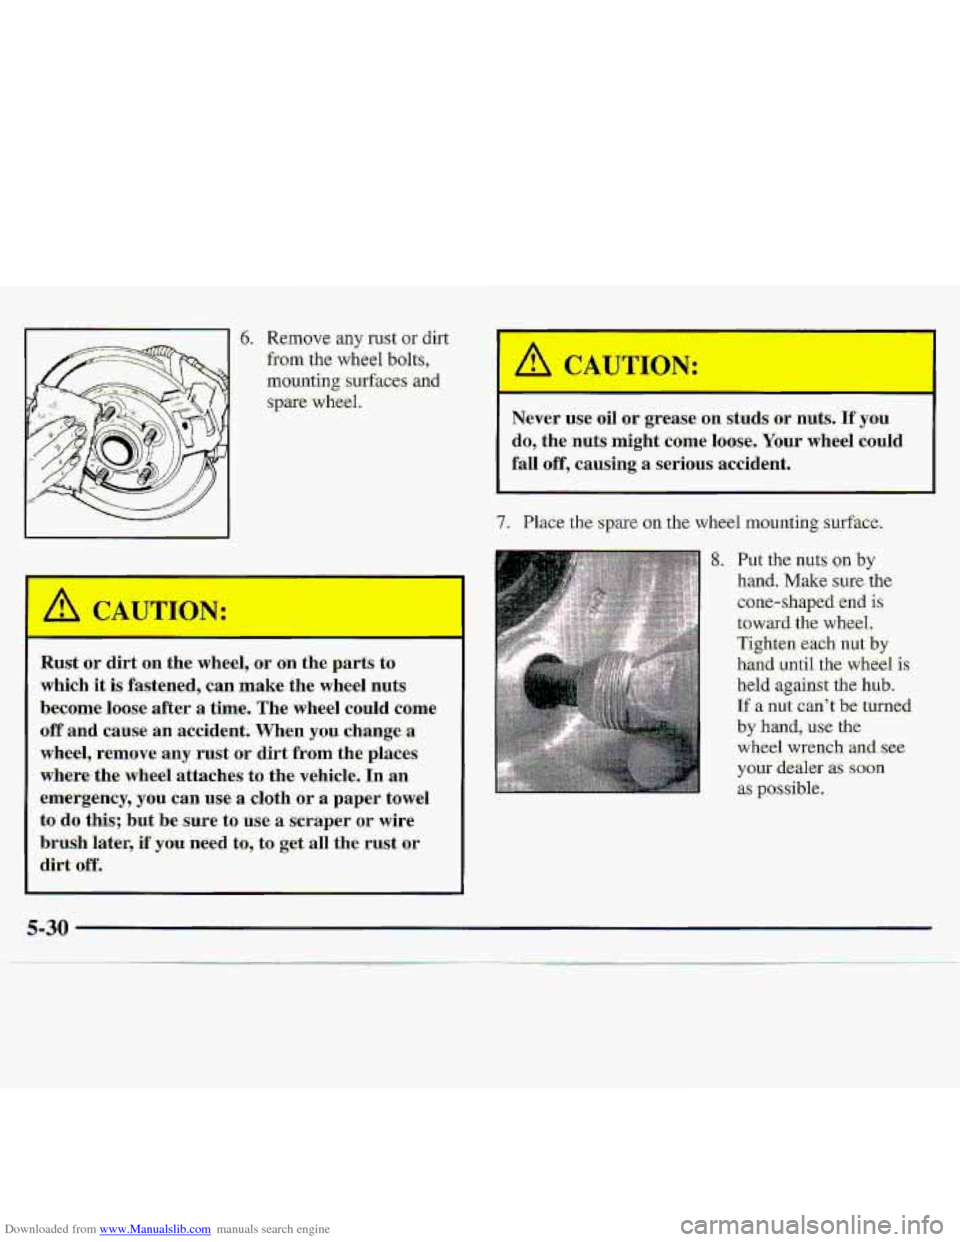
Downloaded from www.Manualslib.com manuals search engine b. Remove any rust or dirt
from the wheel bolts,
mounting surfaces and
spare wheel.
Rust or dirt on the wheel, or on the parts to
which
it is fastened, can make the wheel nuts
become loose after
a the. Th-e wheel could come
off.and cause an accident. When you change a
wheel,-remove-.any rust or dirt from the places
where the wheel attach.es
to the vehicle. In an
emergency,
you can use a cloth or a paper towel
todo this; but be sure to use a scraper or wire
brush rater, if .you need to, to get all the rust or
dirt off.
Never use oil or grease on studs or nuts.. If you
do, the nuts might come loose. Your wheel could
fall off, causing a serious accident.
7. Place the spare on the wheel mounting- surface.
8. Put the nuts on by
hand. Make sure. the
c.one-shapd end is
toward the wheel.
Tighten each nut by
hand untiI the- wheeI is
held against the hub.
If a nut can’t bel turned
by hand,. us.e the
wheel wrench.
and see
your deal.er as soon
as possible.
5-30
Page 228 of 402
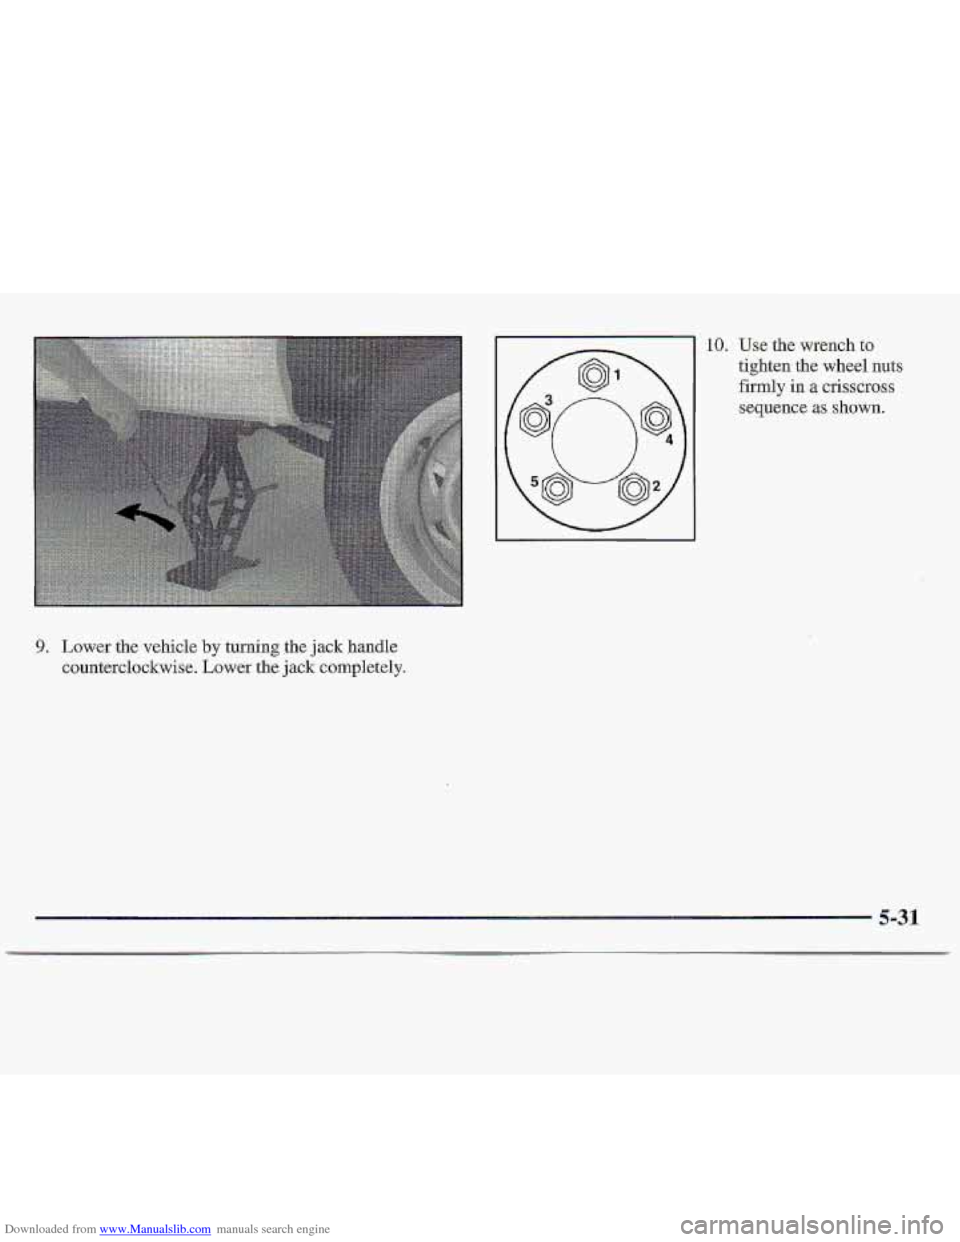
Downloaded from www.Manualslib.com manuals search engine 9. Lower the vehicle by turning the jack handle
counterclockwise. Lower the
jack completely.
10. Use the wrench.to
tighten the wheel nuts
firmly in a crisscross
sequence as
shown.
5-31
Page 229 of 402
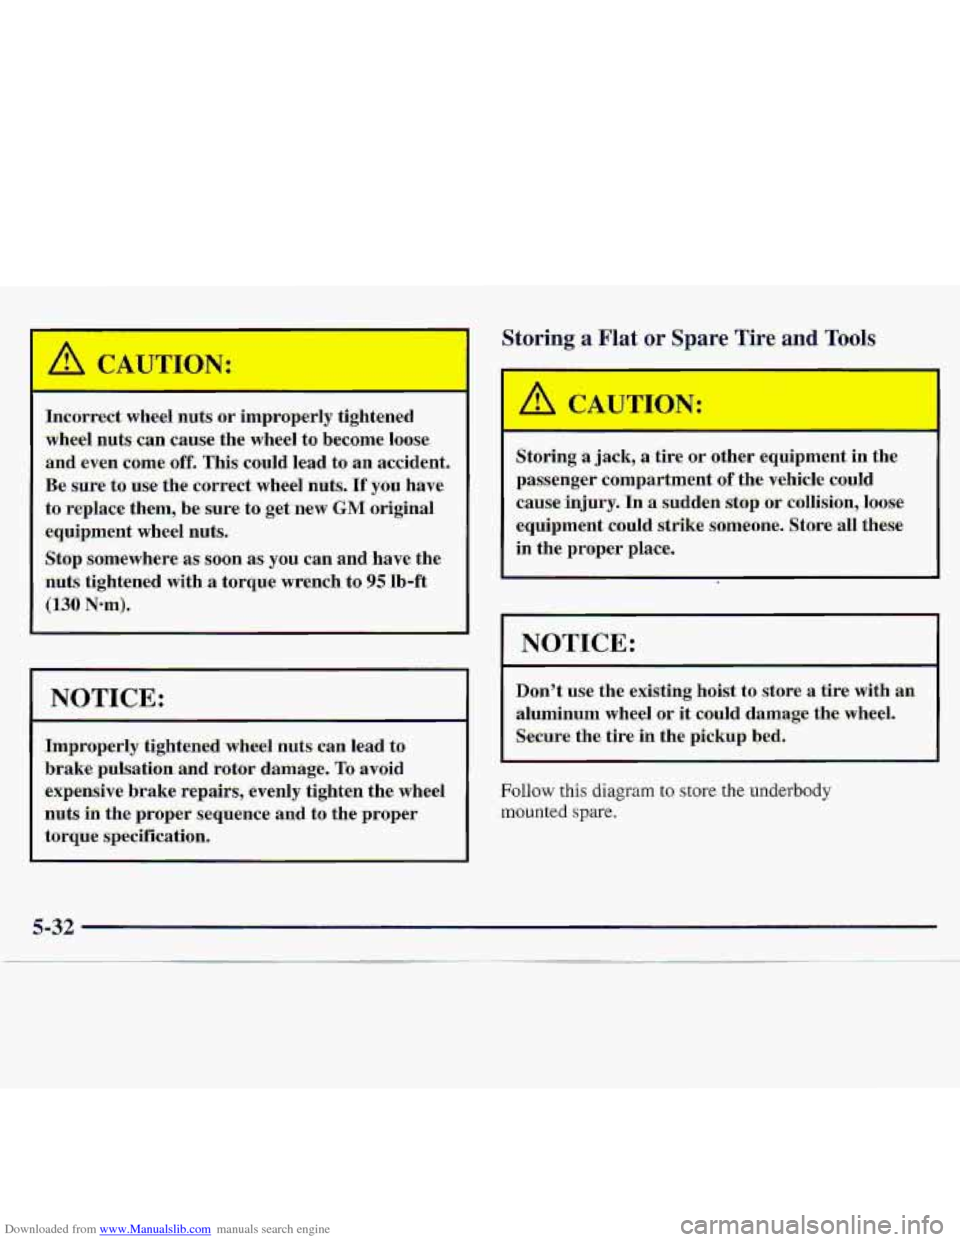
Downloaded from www.Manualslib.com manuals search engine I
Incorrect wheel nuts or imprdperly tightened
wheel nuts can cause th,e-wheel to become loose
and-even comeaff. This. could lead to 'an accident.
Fk swe'to use the corre-ct whee1 nuts. If pu have
to .iiep-lsrC.e them, be sure. to get 'new GM origin.al
equipment
wheel nuts.
Stop somewhere as soon as you can and have the
nuts tightened with a torque wpsnch to 95 lb-ft
(I30 Nmj.
I NOTICE:
Improperly .. tiightened wheel nuts: can lead to
brake - pulsatian-and r.otor damage. To avoid
expe-nsive brake
repairs; evenly tighten the wheel
nuts in the proper sequence and to the proper
tGrque spe~~citign.
Storing .a F1i ' or Spare .Tire and To&
A CAUTION:
Storing a jack, a tire or other equipment In the
passenger .compartment of the vehicle could
cause injury. In .r.,sudden stop -or collision, loose
equipment, could strike smneome. Stote all these
in the proper place.
Don't use the existing hoist to store a tire with an
,aluminum wheel or it could &amage the wheel.
Secure. the tire in the pichp bed.
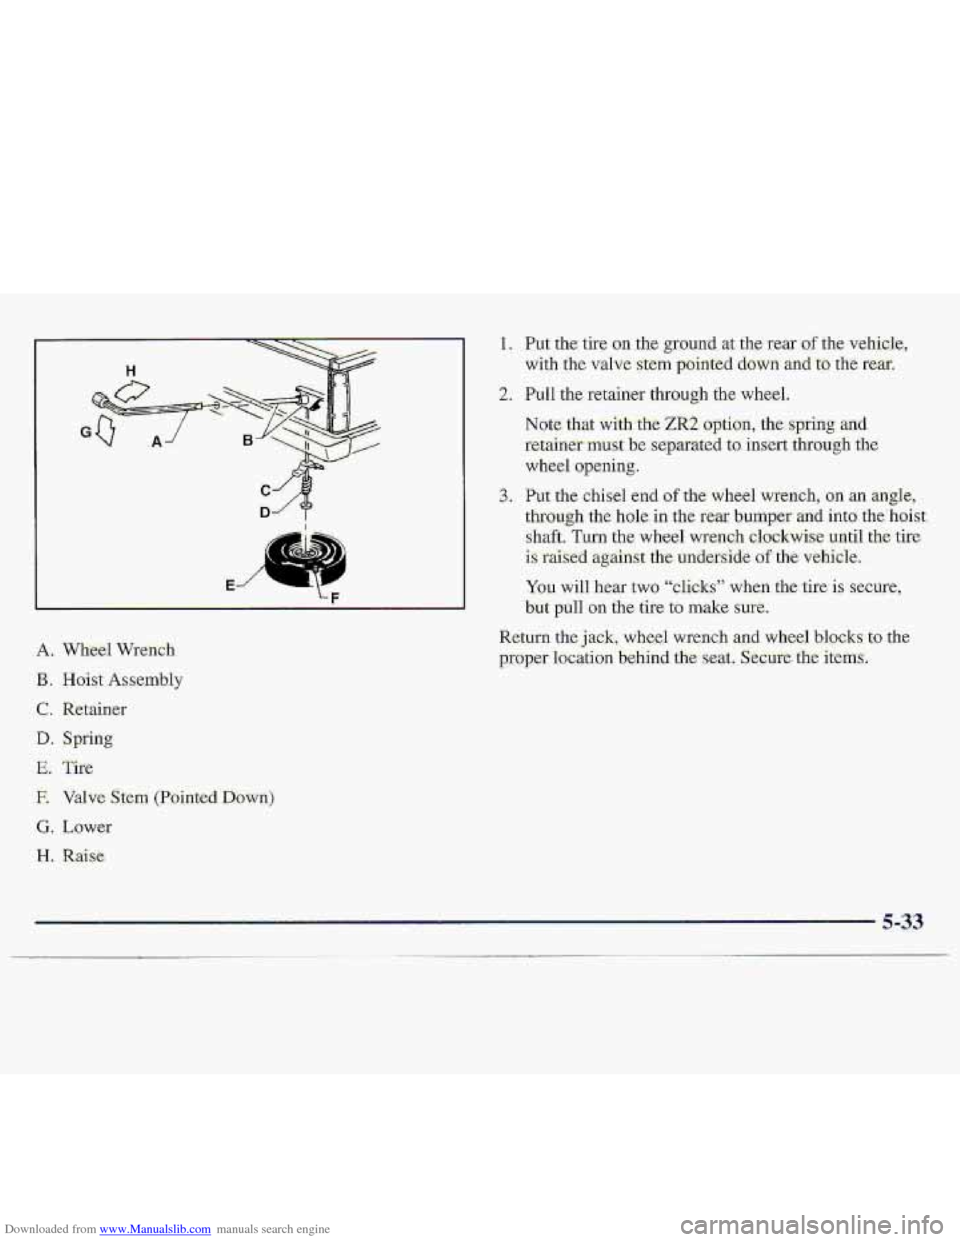
Follow this diagram to store the underbody
-mounted spare.
Page 230 of 402
Downloaded from www.Manualslib.com manuals search engine .A.. Wheel Wmch
B. Hoi;$ Assembly
C, Retainer
D. Spring
E. Tice
E Valve stem (PoiritedD.own)
G. Lower
€3. R.aise
Trending: heater, tow bar, charging, brake light, odometer, coolant temperature, wiring
