radio controls CHEVROLET S10 1997 2.G Owners Manual
[x] Cancel search | Manufacturer: CHEVROLET, Model Year: 1997, Model line: S10, Model: CHEVROLET S10 1997 2.GPages: 402, PDF Size: 21.04 MB
Page 72 of 402

Downloaded from www.Manualslib.com manuals search engine TO shift into or mt. of 4LQ:
1. The-vehicle myst be movingless than 3 mph
(4.8 h) with the tfansrnissi-on in NEUTRAL (N)
fa an automatic transmisSion. Fm a n~anual.
transmission, the clutch pedal must
.be engaged. The
p-referred method for shi€tin.g into 4LO is to have
your vehicle moving
1 to 2 mph (1.5 to 3.2 Wh).
2. Press the trans€er case s:hi€t buttan .and shift in one
continuous motion.
Don't pausejn
N SET PARIK;BRAKE as y-ou shift into
or out of 4L0, or your gears could clash.
Remember that driving in 4HI ur 4LO may reduce fuel
ec-onomy.
Also, driving in fo.ur-whee1 drive:on dry
pavement could cause your tires to wear faster and
make your transfer case harder to shift and-reduce
powertrain longevity.
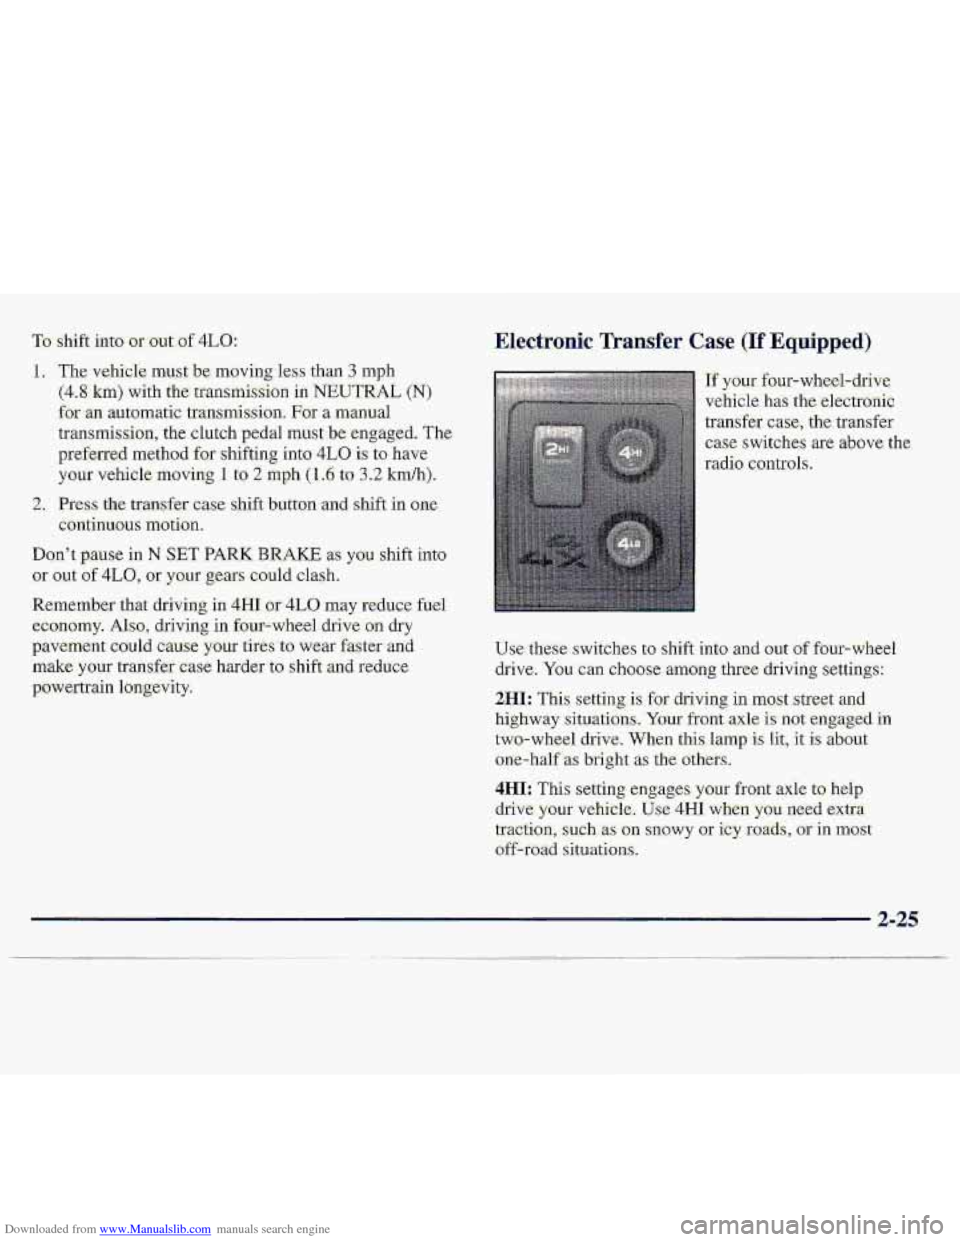
Electronic Transfer. Case (KEquipped)
I~y~~~-four-wheel-drive
vehicle
has the electrofiic
transfer
case, the transfer
case switches are above the,
radio controls.
Use these switches to shift into and out of four-wheel
drive.
You can choosea-rmng three driving settings:
2M[: This setting- is for driving in most .street and
highway situatibns ... Your front axle is not engaged in
two-wheel drive. When this. lamp is lit, it is about
orre-half as bright as the Others.
4HI: This setting engages your front axle ta- help
drive,
your vehitk. Use 4Hi when YOU. need extra
traction, such as
on snowy or icy rcmds, or in mast
off-road situations-.
Page 114 of 402

Downloaded from www.Manualslib.com manuals search engine Section 3 Comfort Controls and Audio Systems
In this section, you’ll find out how to operate the comfort control and audio systems offered with your vehicle; Be
sure to read about the particular systems supplied with your vehicle.
3-2
3 -2
3-3
3-4
3 -4
3 -4
3-5
3 -6
3 -6
3-6
3-6
Comfort Controls
Standard Climate Control System
Optional Climate Control Syste-m
Air Conditioning (Option)
Heating
Ventilation System
Defogging and Defro.sting
Audio Systems Setting the Clock
Setting the Clock for AM-FM Stereo with
Compact Disc- Player and Automatic
Tone Control
AM-FM Stereo
3-8
3-10
3- 13
3-17
3-19
3-19
3-20
3-21
3-21
AM-FM Stereo with Cassette Tape Player
(If Equipped)
AM-FM Stereo with Cassette Tape PlayeT
and
Equalizer (If Equipped)
AM-FM Stereo with Compact Disc Player and
Automatic Tone Control
(if Equipped)
Theft-Deterrent Feature
Understanding Radio Reception
Tips About Your Audio System
Care of Your Cassette Tape Player
Care of Your Compact Discs
Fixed Mast Antenna
3-1
Page 119 of 402

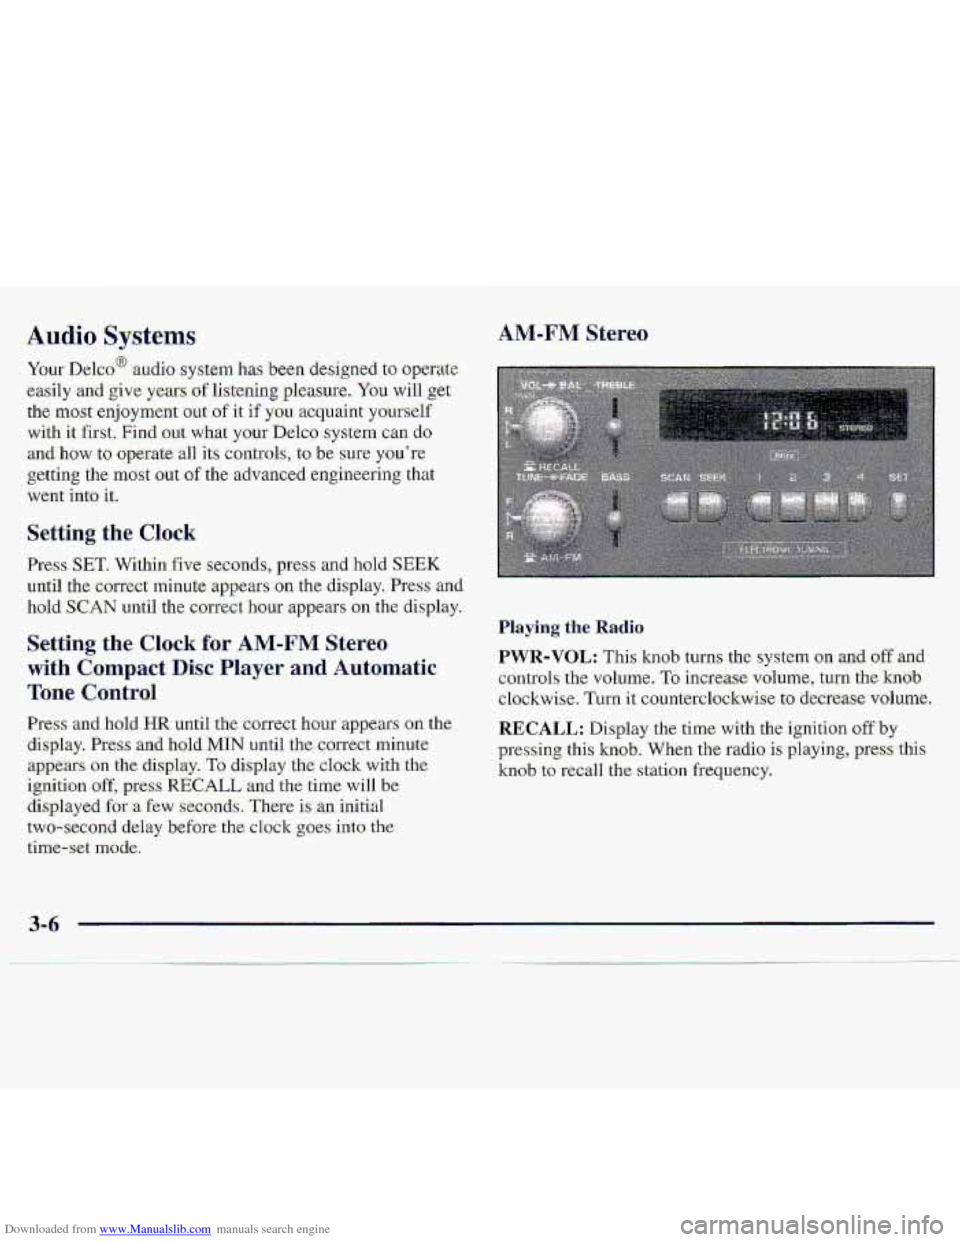
Downloaded from www.Manualslib.com manuals search engine Your Delco@ audio system has -been designed to operate
easily afid give years df 1iste.hg pleasure. You will.,get
the
mast enjoyment out of it if yuu acquaint yourxelf
with It first. Find out what your Delco system can do
and how to operate-all its coatr.ols, to be swe you're
getting the most 0-ut of the advanced erigineerhg that
went into it.
Setting the Clock
Press SET. Within five seconds, press and hold SEEK
uri-ti1 the correct minute appears on the. display. Press and
hoId SCAN -until the ccmect hour appears on the di,splay.
Press and, hold HR until the correct hour appears .on the
display. Press and hold.MIN until the correct minute
appears on the display. To display the clock with the
ignition off, pres-s RECALL and .the time will be
displayed for -a €ew seconds, There is an initial
two-sec-ond
delay before-the clo.ck goes into the
time-set mode.
Playing the .Radio.
PWR-VOL: This knob turns :the system on .and. off -and
controls the
volume. To increase. volulme, turn the hob
clockwise. Turn it counterclockwise to decrease volume.
RECALL: Display the time. with the ignition off by
plxessing this knob. 'When the radio is .playing, press this
knob to red1 the station frequency.
3-6
Page 121 of 402

Downloaded from www.Manualslib.com manuals search engine AM-FM Stereo with Cassette Tape Player
(If Equipped)
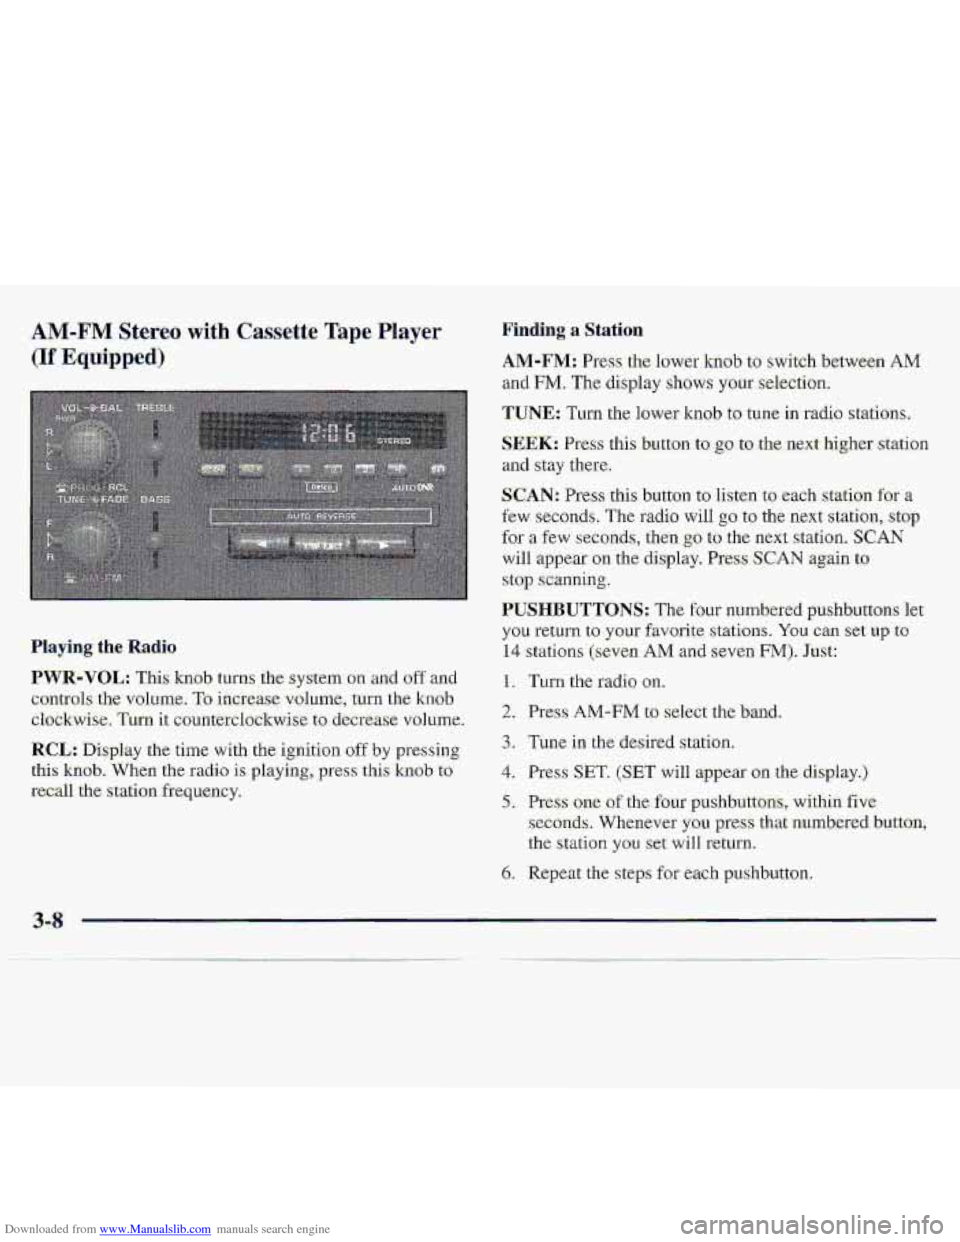
Finding a Station
.AM-FM: Press the lower knob to switch betwe-en AM
and FM. The display shows your selection.
TUNE: Turn the lower knob to tune in radio stations,
SEEK: Press this button to go to the next higher station
and stay there.
SCAN: Press this button to listen to each station for a
few seconds, The radio will go to the next station, stop
for a few seconds, then go to the ne.xt station. SCAN
will appear on the display. Press SCAN again to
stop scanning.
PUSHBUTTONS: The four numbered p-ushbuttons let
you return to your favorite. stations. You can set up to
14 stations (seven AM and seven FM). Just:
1. Turn the radio on.
2. Press AM-FM to select the band.
3. Tune in the desired slation,
4. Press SET. (SET will appear on the display.)
5. Press one of the four pushbuttons, within five
seconds. Whenever you press that numbered button,
the
stalion you set will return.
6. Repeat the steps for each pushbu.tton.
Playing the Radio
PWR-VOL: This knob turns the system on and off and
controls- the- volume,
To increase volume, turn the knob.
clockwise. Turn it countetclsckwise to. decrease vol~me-.
RCL: Display the time with the ignition off by pressing
thi-s knob. When the radio is playing,.press this knob to
recall the station freq,uency.
3-8