CHEVROLET SILVERADO 1500 2021 Service Manual
Manufacturer: CHEVROLET, Model Year: 2021, Model line: SILVERADO 1500, Model: CHEVROLET SILVERADO 1500 2021Pages: 463, PDF Size: 9.65 MB
Page 41 of 463
Chevrolet Silverado 1500 Owner Manual (GMNA-Localizing-U.S./Canada/
Mexico/Paraguay-14632303) - 2021 - CRC - 11/9/20
38 Keys, Doors, and Windows
Reverse Tilt Mirrors
If equipped with reverse tilt mirrors and
memory seats, the passenger and/or driver
mirror tilts to a preselected position when
the vehicle is in R (Reverse). This allows the
curb to be seen when parallel parking.
The mirror(s) may move from their tilted
position when:
.The vehicle is shifted out of R (Reverse),
or remains in R (Reverse) for about
30 seconds.
.The vehicle is turned off.
.The vehicle is driven in R (Reverse) above
a set speed.
To turn this feature on or off, see Vehicle
Personalization 0131.
Interior Mirrors
Interior Rearview Mirrors
Adjust the rearview mirror for a clear view
of the area behind your vehicle.
Do not spray glass cleaner directly on the
mirror. Use a soft towel dampened with
water.
Manual Rearview Mirror
If equipped, push the tab forward for
daytime use and pull it rearward for
nighttime use to avoid glare from the
headlamps from behind.
Automatic Dimming Rearview
Mirror
If equipped, the mirror will automatically
reduce the glare of the headlamps from
behind. The dimming feature comes on each
time the vehicle is started.
Rear Camera Mirror
If equipped, this automatic dimming mirror
provides a wide angle camera view of the
area behind the vehicle.
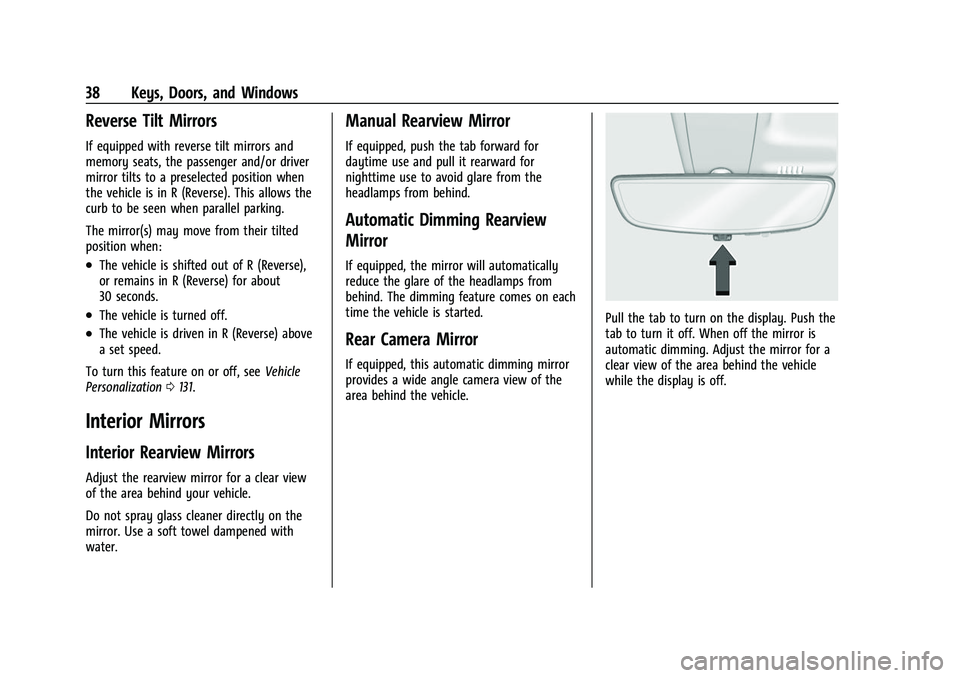
Pull the tab to turn on the display. Push the
tab to turn it off. When off the mirror is
automatic dimming. Adjust the mirror for a
clear view of the area behind the vehicle
while the display is off.
Page 42 of 463
Chevrolet Silverado 1500 Owner Manual (GMNA-Localizing-U.S./Canada/
Mexico/Paraguay-14632303) - 2021 - CRC - 11/9/20
Keys, Doors, and Windows 39
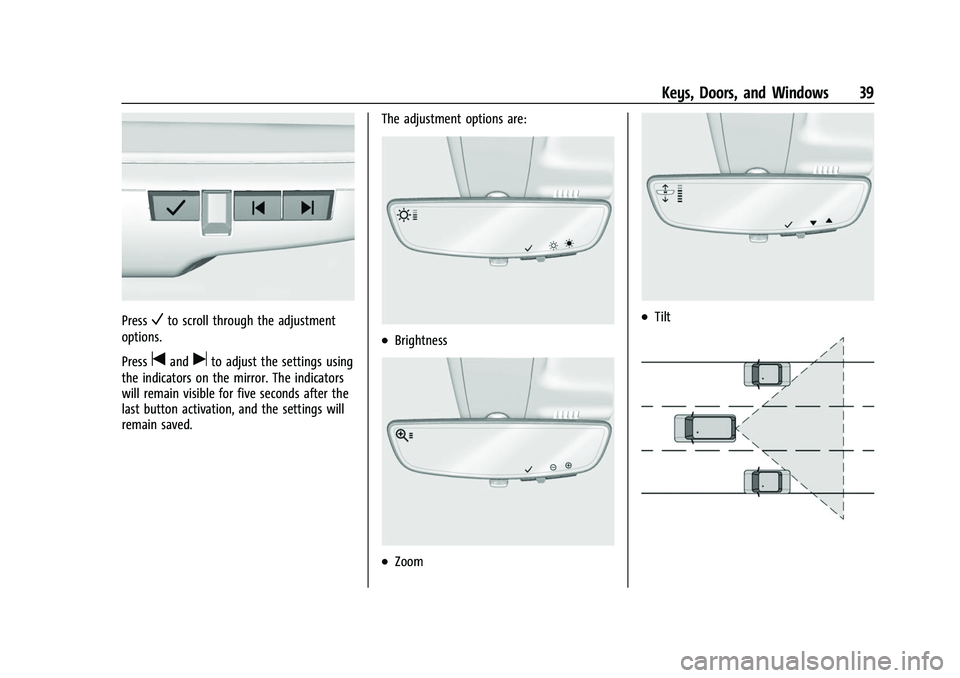
PressVto scroll through the adjustment
options.
Press
tanduto adjust the settings using
the indicators on the mirror. The indicators
will remain visible for five seconds after the
last button activation, and the settings will
remain saved. The adjustment options are:
.Brightness
.Zoom
.Tilt
Page 43 of 463
Chevrolet Silverado 1500 Owner Manual (GMNA-Localizing-U.S./Canada/
Mexico/Paraguay-14632303) - 2021 - CRC - 11/9/20
40 Keys, Doors, and Windows
{Warning
The Rear Camera Mirror (RCM) has a
limited view. Portions of the road,
vehicles, and other objects may not be
seen. Do not drive or park the vehicle
using only this camera. Objects may
appear closer than they are. Check the
outside mirrors or glance over your
shoulder when making lane changes or
merging. Failure to use proper care may
result in injury, death, or vehicle damage.
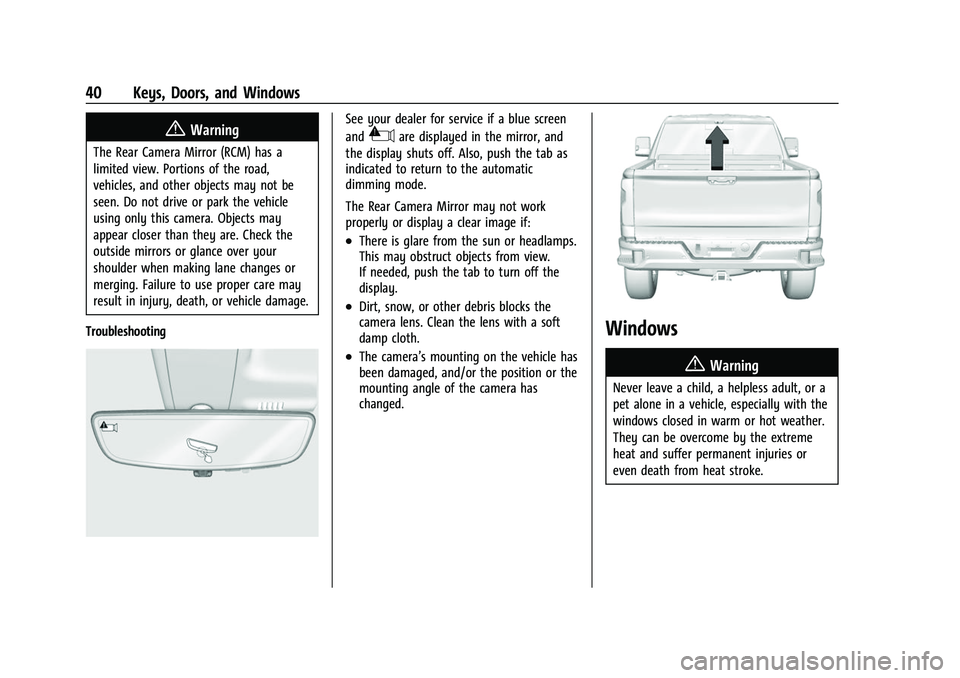
Troubleshooting
See your dealer for service if a blue screen
and
3are displayed in the mirror, and
the display shuts off. Also, push the tab as
indicated to return to the automatic
dimming mode.
The Rear Camera Mirror may not work
properly or display a clear image if:
.There is glare from the sun or headlamps.
This may obstruct objects from view.
If needed, push the tab to turn off the
display.
.Dirt, snow, or other debris blocks the
camera lens. Clean the lens with a soft
damp cloth.
.The camera’s mounting on the vehicle has
been damaged, and/or the position or the
mounting angle of the camera has
changed.
Windows
{
Warning
Never leave a child, a helpless adult, or a
pet alone in a vehicle, especially with the
windows closed in warm or hot weather.
They can be overcome by the extreme
heat and suffer permanent injuries or
even death from heat stroke.
Page 44 of 463
Chevrolet Silverado 1500 Owner Manual (GMNA-Localizing-U.S./Canada/
Mexico/Paraguay-14632303) - 2021 - CRC - 11/9/20
Keys, Doors, and Windows 41
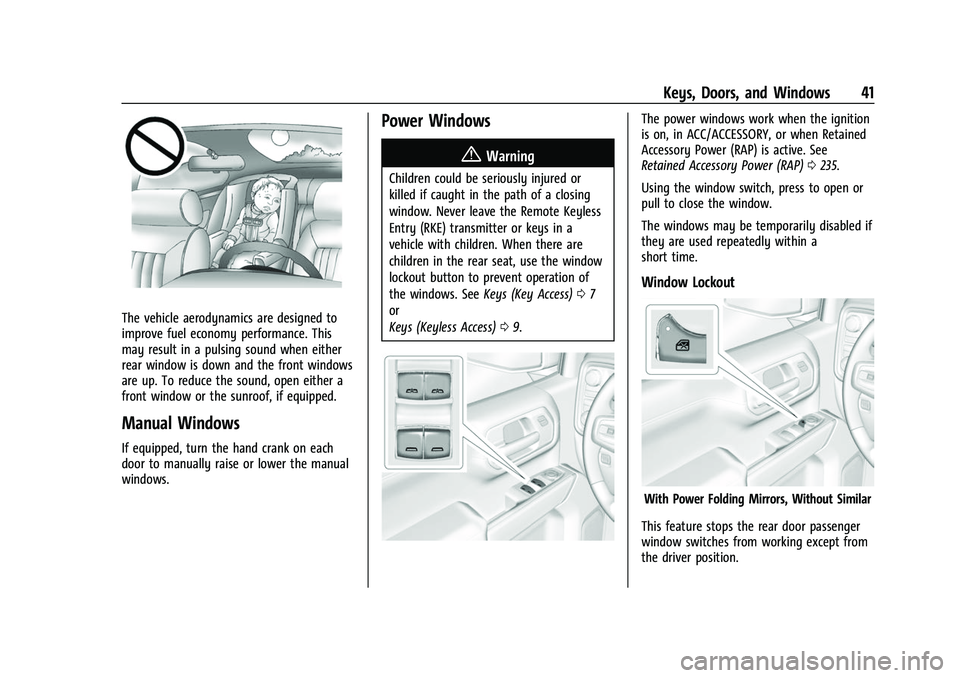
The vehicle aerodynamics are designed to
improve fuel economy performance. This
may result in a pulsing sound when either
rear window is down and the front windows
are up. To reduce the sound, open either a
front window or the sunroof, if equipped.
Manual Windows
If equipped, turn the hand crank on each
door to manually raise or lower the manual
windows.
Power Windows
{Warning
Children could be seriously injured or
killed if caught in the path of a closing
window. Never leave the Remote Keyless
Entry (RKE) transmitter or keys in a
vehicle with children. When there are
children in the rear seat, use the window
lockout button to prevent operation of
the windows. SeeKeys (Key Access)07
or
Keys (Keyless Access) 09.
The power windows work when the ignition
is on, in ACC/ACCESSORY, or when Retained
Accessory Power (RAP) is active. See
Retained Accessory Power (RAP) 0235.
Using the window switch, press to open or
pull to close the window.
The windows may be temporarily disabled if
they are used repeatedly within a
short time.
Window Lockout
With Power Folding Mirrors, Without Similar
This feature stops the rear door passenger
window switches from working except from
the driver position.
Page 45 of 463
Chevrolet Silverado 1500 Owner Manual (GMNA-Localizing-U.S./Canada/
Mexico/Paraguay-14632303) - 2021 - CRC - 11/9/20
42 Keys, Doors, and Windows
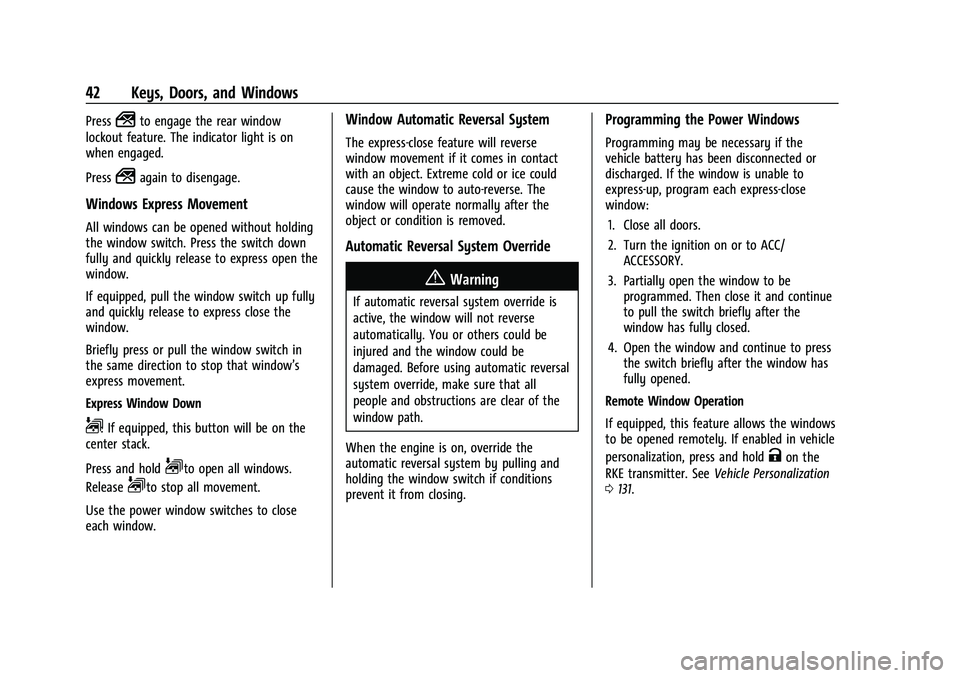
Press2to engage the rear window
lockout feature. The indicator light is on
when engaged.
Press
2again to disengage.
Windows Express Movement
All windows can be opened without holding
the window switch. Press the switch down
fully and quickly release to express open the
window.
If equipped, pull the window switch up fully
and quickly release to express close the
window.
Briefly press or pull the window switch in
the same direction to stop that window’s
express movement.
Express Window Down
L: If equipped, this button will be on the
center stack.
Press and hold
Lto open all windows.
Release
Lto stop all movement.
Use the power window switches to close
each window.
Window Automatic Reversal System
The express-close feature will reverse
window movement if it comes in contact
with an object. Extreme cold or ice could
cause the window to auto-reverse. The
window will operate normally after the
object or condition is removed.
Automatic Reversal System Override
{Warning
If automatic reversal system override is
active, the window will not reverse
automatically. You or others could be
injured and the window could be
damaged. Before using automatic reversal
system override, make sure that all
people and obstructions are clear of the
window path.
When the engine is on, override the
automatic reversal system by pulling and
holding the window switch if conditions
prevent it from closing.
Programming the Power Windows
Programming may be necessary if the
vehicle battery has been disconnected or
discharged. If the window is unable to
express-up, program each express-close
window: 1. Close all doors.
2. Turn the ignition on or to ACC/ ACCESSORY.
3. Partially open the window to be programmed. Then close it and continue
to pull the switch briefly after the
window has fully closed.
4. Open the window and continue to press the switch briefly after the window has
fully opened.
Remote Window Operation
If equipped, this feature allows the windows
to be opened remotely. If enabled in vehicle
personalization, press and hold
Kon the
RKE transmitter. See Vehicle Personalization
0 131.
Page 46 of 463
Chevrolet Silverado 1500 Owner Manual (GMNA-Localizing-U.S./Canada/
Mexico/Paraguay-14632303) - 2021 - CRC - 11/9/20
Keys, Doors, and Windows 43
Rear Windows
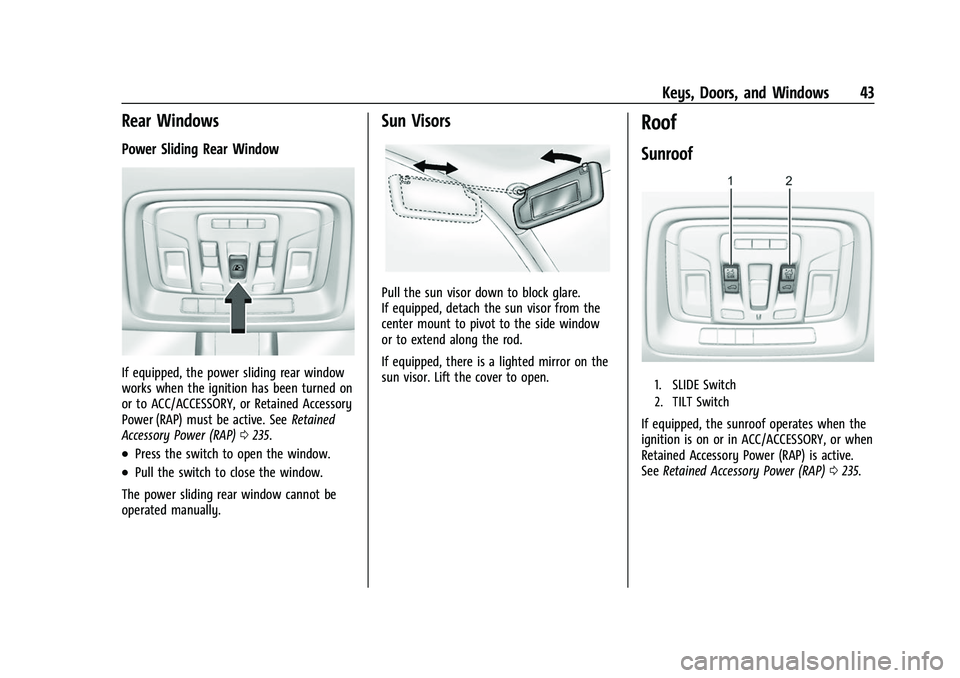
Power Sliding Rear Window
If equipped, the power sliding rear window
works when the ignition has been turned on
or to ACC/ACCESSORY, or Retained Accessory
Power (RAP) must be active. SeeRetained
Accessory Power (RAP) 0235.
.Press the switch to open the window.
.Pull the switch to close the window.
The power sliding rear window cannot be
operated manually.
Sun Visors
Pull the sun visor down to block glare.
If equipped, detach the sun visor from the
center mount to pivot to the side window
or to extend along the rod.
If equipped, there is a lighted mirror on the
sun visor. Lift the cover to open.
Roof
Sunroof
1. SLIDE Switch
2. TILT Switch
If equipped, the sunroof operates when the
ignition is on or in ACC/ACCESSORY, or when
Retained Accessory Power (RAP) is active.
See Retained Accessory Power (RAP) 0235.
Page 47 of 463
Chevrolet Silverado 1500 Owner Manual (GMNA-Localizing-U.S./Canada/
Mexico/Paraguay-14632303) - 2021 - CRC - 11/9/20
44 Keys, Doors, and Windows
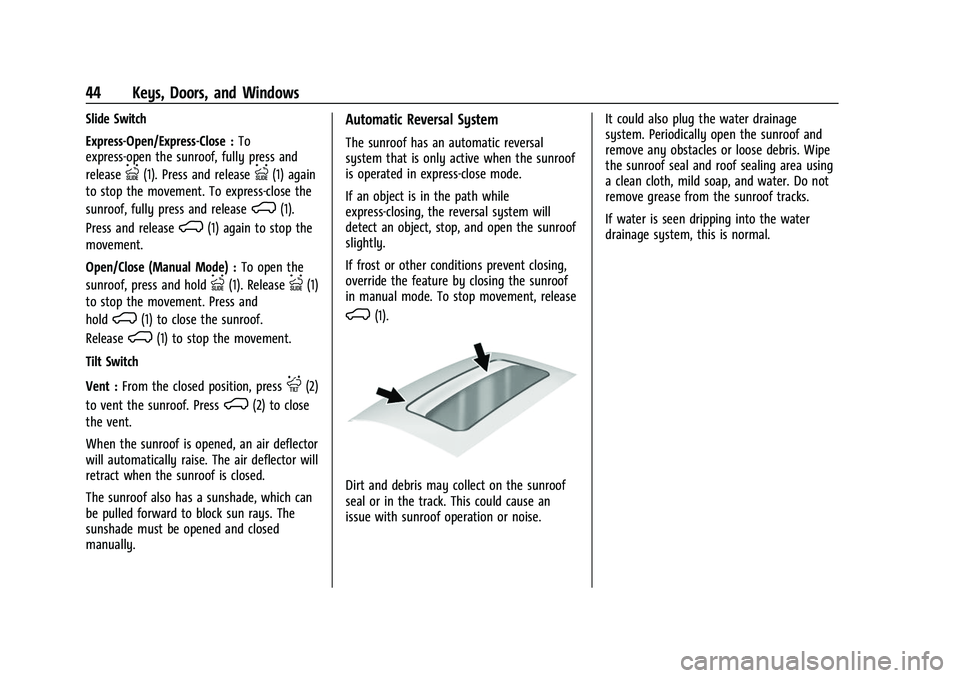
Slide Switch
Express-Open/Express-Close :To
express-open the sunroof, fully press and
release
I(1). Press and releaseI(1) again
to stop the movement. To express-close the
sunroof, fully press and release
K(1).
Press and release
K(1) again to stop the
movement.
Open/Close (Manual Mode) : To open the
sunroof, press and hold
I(1). ReleaseI(1)
to stop the movement. Press and
hold
K(1) to close the sunroof.
Release
K(1) to stop the movement.
Tilt Switch
Vent : From the closed position, press
J(2)
to vent the sunroof. Press
K(2) to close
the vent.
When the sunroof is opened, an air deflector
will automatically raise. The air deflector will
retract when the sunroof is closed.
The sunroof also has a sunshade, which can
be pulled forward to block sun rays. The
sunshade must be opened and closed
manually.
Automatic Reversal System
The sunroof has an automatic reversal
system that is only active when the sunroof
is operated in express-close mode.
If an object is in the path while
express-closing, the reversal system will
detect an object, stop, and open the sunroof
slightly.
If frost or other conditions prevent closing,
override the feature by closing the sunroof
in manual mode. To stop movement, release
K(1).
Dirt and debris may collect on the sunroof
seal or in the track. This could cause an
issue with sunroof operation or noise. It could also plug the water drainage
system. Periodically open the sunroof and
remove any obstacles or loose debris. Wipe
the sunroof seal and roof sealing area using
a clean cloth, mild soap, and water. Do not
remove grease from the sunroof tracks.
If water is seen dripping into the water
drainage system, this is normal.
Page 48 of 463
Chevrolet Silverado 1500 Owner Manual (GMNA-Localizing-U.S./Canada/
Mexico/Paraguay-14632303) - 2021 - CRC - 11/9/20
Seats and Restraints 45
Seats and Restraints
Head Restraints
Head Restraints . . . . . . . . . . . . . . . . . . . . . . . . 45
Front Seats
Seat Adjustment . . . . . . . . . . . . . . . . . . . . . . . 46
Center Seat . . . . . . . . . . . . . . . . . . . . . . . . . . . . . 47
Power Seat Adjustment . . . . . . . . . . . . . . . . 47
Lumbar Adjustment . . . . . . . . . . . . . . . . . . . . 48
Reclining Seatbacks . . . . . . . . . . . . . . . . . . . . . 48
Memory Seats . . . . . . . . . . . . . . . . . . . . . . . . . 49
Heated and Ventilated Front Seats . . . . . 52
Rear Seats
Rear Seats . . . . . . . . . . . . . . . . . . . . . . . . . . . . . . 53
Heated Rear Seats . . . . . . . . . . . . . . . . . . . . . . 54
Seat Belts
Seat Belts . . . . . . . . . . . . . . . . . . . . . . . . . . . . . . 54
How to Wear Seat Belts Properly . . . . . . . 55
Lap-Shoulder Belt . . . . . . . . . . . . . . . . . . . . . . . 57
Seat Belt Use During Pregnancy . . . . . . . . 59
Seat Belt Extender . . . . . . . . . . . . . . . . . . . . . . 59
Safety System Check . . . . . . . . . . . . . . . . . . . 60
Seat Belt Care . . . . . . . . . . . . . . . . . . . . . . . . . . 60
Replacing Seat Belt System Parts after aCrash . . . . . . . . . . . . . . . . . . . . . . . . . . . . . . . . . 60
Airbag System
Airbag System . . . . . . . . . . . . . . . . . . . . . . . . . . 61 Where Are the Airbags? . . . . . . . . . . . . . . . . 62
When Should an Airbag Inflate? . . . . . . . . 63
What Makes an Airbag Inflate? . . . . . . . . 64
How Does an Airbag Restrain? . . . . . . . . . 64
What Will You See after an Airbag
Inflates? . . . . . . . . . . . . . . . . . . . . . . . . . . . . . . 65
Passenger Sensing System . . . . . . . . . . . . . 66
Servicing the Airbag-Equipped Vehicle . . . . . . . . . . . . . . . . . . . . . . . . . . . . . . . 69
Adding Equipment to the Airbag-Equipped Vehicle . . . . . . . . . . . . . . 69
Airbag System Check . . . . . . . . . . . . . . . . . . . 70
Replacing Airbag System Parts after a Crash . . . . . . . . . . . . . . . . . . . . . . . . . . . . . . . . . . 71
Child Restraints
Older Children . . . . . . . . . . . . . . . . . . . . . . . . . . 71
Infants and Young Children . . . . . . . . . . . . . 72
Child Restraint Systems . . . . . . . . . . . . . . . . 74
Where to Put the Restraint . . . . . . . . . . . . . 76
Lower Anchors and Tethers for Children(LATCH System) . . . . . . . . . . . . . . . . . . . . . . . 77
Replacing LATCH System Parts After a Crash . . . . . . . . . . . . . . . . . . . . . . . . . . . . . . . . . 88
Securing Child Restraints (With the Seat Belt in the Rear Seat) . . . . . . . . . . . . . . . . 88
Securing Child Restraints (With the Seat Belt in the Center Front Seat) . . . . . . . . 92
Securing Child Restraints (With the Seat Belt in the Front Passenger Seat) . . . . . 92
Head Restraints
{
Warning
With head restraints that are not
installed and adjusted properly, there is a
greater chance that occupants will suffer
a neck/spinal injury in a crash. Do not
drive until the head restraints for all
occupants are installed and adjusted
properly.
Front Seats
The vehicle's front seats have adjustable
head restraints in the outboard seating
positions.
Page 49 of 463
Chevrolet Silverado 1500 Owner Manual (GMNA-Localizing-U.S./Canada/
Mexico/Paraguay-14632303) - 2021 - CRC - 11/9/20
46 Seats and Restraints
Adjust the head restraint so that the top of
the restraint is at the same height as the
top of the occupant's head. This position
reduces the chance of a neck injury in a
crash.
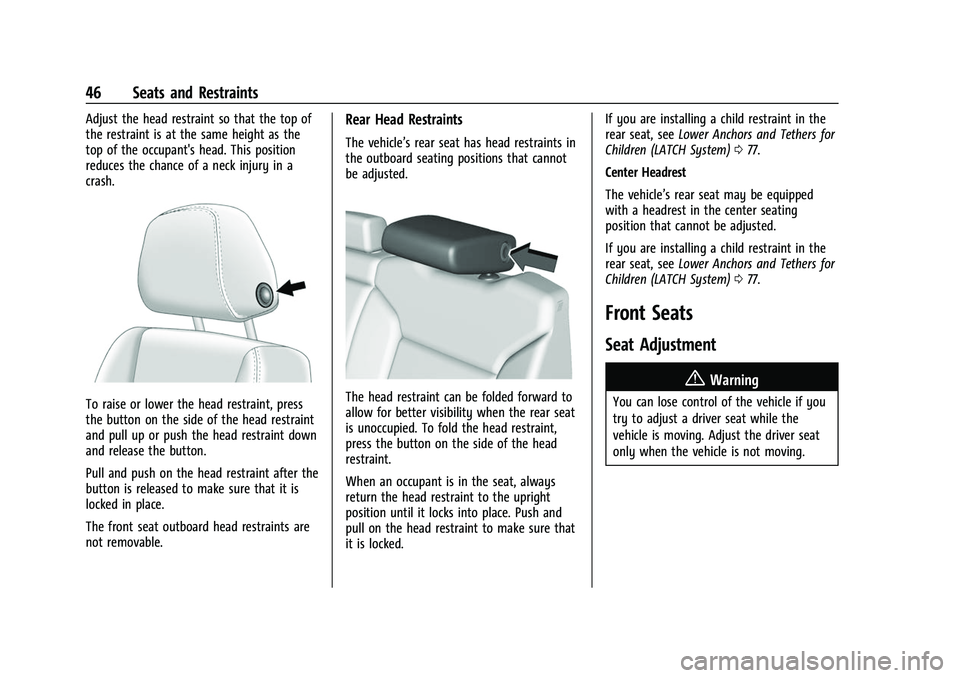
To raise or lower the head restraint, press
the button on the side of the head restraint
and pull up or push the head restraint down
and release the button.
Pull and push on the head restraint after the
button is released to make sure that it is
locked in place.
The front seat outboard head restraints are
not removable.
Rear Head Restraints
The vehicle’s rear seat has head restraints in
the outboard seating positions that cannot
be adjusted.
The head restraint can be folded forward to
allow for better visibility when the rear seat
is unoccupied. To fold the head restraint,
press the button on the side of the head
restraint.
When an occupant is in the seat, always
return the head restraint to the upright
position until it locks into place. Push and
pull on the head restraint to make sure that
it is locked.If you are installing a child restraint in the
rear seat, see
Lower Anchors and Tethers for
Children (LATCH System) 077.
Center Headrest
The vehicle’s rear seat may be equipped
with a headrest in the center seating
position that cannot be adjusted.
If you are installing a child restraint in the
rear seat, see Lower Anchors and Tethers for
Children (LATCH System) 077.
Front Seats
Seat Adjustment
{Warning
You can lose control of the vehicle if you
try to adjust a driver seat while the
vehicle is moving. Adjust the driver seat
only when the vehicle is not moving.
Page 50 of 463
Chevrolet Silverado 1500 Owner Manual (GMNA-Localizing-U.S./Canada/
Mexico/Paraguay-14632303) - 2021 - CRC - 11/9/20
Seats and Restraints 47
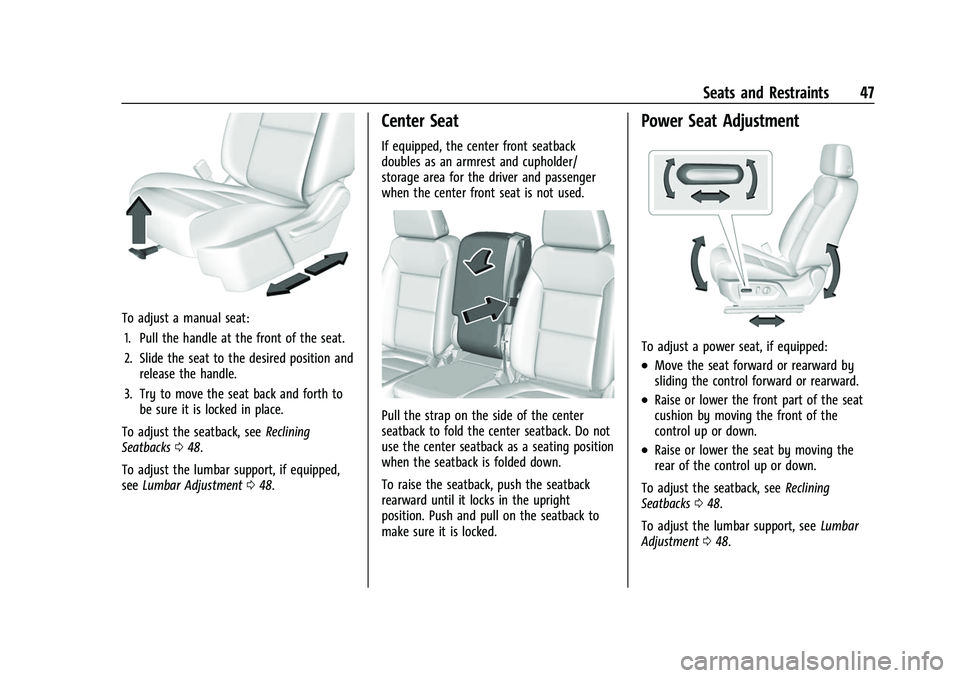
To adjust a manual seat:1. Pull the handle at the front of the seat.
2. Slide the seat to the desired position and release the handle.
3. Try to move the seat back and forth to be sure it is locked in place.
To adjust the seatback, see Reclining
Seatbacks 048.
To adjust the lumbar support, if equipped,
see Lumbar Adjustment 048.
Center Seat
If equipped, the center front seatback
doubles as an armrest and cupholder/
storage area for the driver and passenger
when the center front seat is not used.
Pull the strap on the side of the center
seatback to fold the center seatback. Do not
use the center seatback as a seating position
when the seatback is folded down.
To raise the seatback, push the seatback
rearward until it locks in the upright
position. Push and pull on the seatback to
make sure it is locked.
Power Seat Adjustment
To adjust a power seat, if equipped:
.Move the seat forward or rearward by
sliding the control forward or rearward.
.Raise or lower the front part of the seat
cushion by moving the front of the
control up or down.
.Raise or lower the seat by moving the
rear of the control up or down.
To adjust the seatback, see Reclining
Seatbacks 048.
To adjust the lumbar support, see Lumbar
Adjustment 048.