park assist CHEVROLET SILVERADO 1500 2022 Owner's Manual
[x] Cancel search | Manufacturer: CHEVROLET, Model Year: 2022, Model line: SILVERADO 1500, Model: CHEVROLET SILVERADO 1500 2022Pages: 461, PDF Size: 11.09 MB
Page 232 of 461
Chevrolet Silverado 1500 Owner Manual (GMNA-Localizing-U.S./Canada/
Mexico/Paraguay-14632303) - 2021 - CRC - 11/9/20
Driving and Operating 231
Vehicles equipped with Keyless Access have
pushbutton starting.
The Remote Keyless Entry (RKE) transmitter
must be in the vehicle for the system to
operate. If the pushbutton start is not
working, the vehicle may be near a strong
radio antenna signal causing interference to
the Keyless Access system. SeeRemote
Keyless Entry (RKE) System Operation (Key
Access) 010 or
Remote Keyless Entry (RKE) System
Operation (Keyless Access) 013.
To shift out of P (Park), the ignition must be
on or in Service Mode, and the brake pedal
must be applied.
{Warning
Turning off the vehicle while moving may
cause loss of power assist in the brake
and steering systems and disable the
airbags. While driving, only shut the
vehicle off in an emergency.
Stopping the Engine/LOCK/OFF (No Indicator
Lights) : When the vehicle is stopped, press
ENGINE START/STOP once to turn the
engine off. If the vehicle is in P (Park), the ignition will
turn off, and Retained Accessory Power (RAP)
will remain active. See
Retained Accessory
Power (RAP) 0235.
If the vehicle is not in P (Park), the ignition
will return to ACC/ACCESSORY and display
the message SHIFT TO PARK in the Driver
Information Center (DIC). When the vehicle is
shifted into P (Park), the ignition system will
turn off.
The vehicle may have an electric steering
column lock. The lock is activated when the
ignition is turned off and driver door is
opened. A sound may be heard as the lock
actuates or releases. The steering column
lock may not release with the wheels turned
off center. If this happens, the vehicle may
not start. Move the steering wheel from left
to right while attempting to start the
vehicle. If this does not work, the vehicle
needs service.
Unless an emergency exists, do not turn the
engine off when the vehicle is moving. This
will cause a loss of power assist in the brake
and steering systems and disable the
airbags. If the vehicle must be shut off in an
emergency:
1. If the vehicle cannot be pulled over, and must be shut off while driving, press and
hold ENGINE START/STOP button for
longer than two seconds, or press twice
in five seconds.
2. Brake using a firm and steady pressure. Do not pump the brakes repeatedly. This
may deplete power assist, requiring
increased brake pedal force.
3. Shift the vehicle to N (Neutral). This can be done while the vehicle is moving.
After shifting to N (Neutral), firmly apply
the brakes and steer the vehicle to a
safe location.
4. Come to a complete stop, shift to P (Park), and make sure engine is off.
The shift lever must be in P (Park) to
turn the ignition off.
5. Set the parking brake. See Electric
Parking Brake 0246.
Page 233 of 461
Chevrolet Silverado 1500 Owner Manual (GMNA-Localizing-U.S./Canada/
Mexico/Paraguay-14632303) - 2021 - CRC - 11/9/20
232 Driving and Operating
{Warning
Turning off the vehicle while moving may
cause loss of power assist in the brake
and steering systems and disable the
airbags. While driving, only shut the
vehicle off in an emergency.
ACC/ACCESSORY (Amber Indicator Light) :
This mode allows some electrical accessories
to be used when the engine is off.
With the ignition off, pressing the ENGINE
START/STOP button one time without the
brake pedal applied will place the ignition
system in ACC/ACCESSORY.
The ignition will switch from ACC/
ACCESSORY to off after five minutes to
prevent battery rundown.
ON/RUN/START (Green Indicator Light) : This
mode is for driving and starting. With the
ignition off, and the brake pedal applied,
pressing ENGINE START/STOP button once
will turn the ignition on. Once engine
cranking begins, release the button. Engine
cranking will continue until the engine
starts. See Starting the Engine 0232. Service Mode
This power mode is available for service and
diagnostics, and to verify the proper
operation of the malfunction indicator lamp
as may be required for emission inspection
purposes. With the vehicle off, and the
brake pedal not applied, pressing and
holding the ENGINE START/STOP button for
more than five seconds will place the vehicle
in Service Mode. The instruments and audio
systems will operate as they do when the
ignition is on, but the vehicle will not be
able to be driven. The engine will not start
in Service Mode. Press the ENGINE START/
STOP button again to turn the ignition off.
Starting the Engine
If the vehicle has a diesel engine, see the
Duramax diesel supplement.
Caution
If you add electrical parts or accessories,
you could change the way the engine
operates. Any resulting damage would
not be covered by the vehicle warranty.
See
Add-On Electrical Equipment 0317. Move the shift lever to P (Park) or
N (Neutral). To restart the engine when the
vehicle is already moving, use
N (Neutral) only.
Caution
Do not try to shift to P (Park) if the
vehicle is moving. If you do, you could
damage the transmission. Shift to P (Park)
only when the vehicle is stopped.
Starting Procedure
1. For Key Access vehicles, turn the ignition
key to Start. When the engine starts, let
go of the key. For Keyless Access
vehicles, the RKE transmitter must be in
the vehicle. Press ENGINE START/STOP
with the brake pedal applied. When the
engine begins cranking, let go of the
button.
The driver may observe a minor, and
temporary, brake pedal kickback when
starting the vehicle. This is normal.
The idle speed will go down as the
engine gets warm. Do not race the
engine immediately after starting it.
Operate the engine and transmission
gently to allow the oil to warm up and
lubricate all moving parts.
Page 248 of 461
Chevrolet Silverado 1500 Owner Manual (GMNA-Localizing-U.S./Canada/
Mexico/Paraguay-14632303) - 2021 - CRC - 11/9/20
Driving and Operating 247
have the vehicle serviced. Do not drive the
vehicle if the red parking brake status light
is flashing. See your dealer.
If the amber service parking brake warning
light is on, press the EPB switch. Continue to
hold the switch until the red parking brake
status light remains on. If the amber service
parking brake warning light is on, see your
dealer.
If the EPB is applied while the vehicle is
moving, the vehicle will decelerate as long
as the switch is pressed. If the switch is
pressed until the vehicle comes to a stop,
the EPB will remain applied.
The vehicle may automatically apply the EPB
in some situations when the vehicle is not
moving. This is normal, and is done to
periodically check the correct operation of
the EPB system, or at the request of other
safety functions that utilize the EPB.
If the EPB fails to apply, block the rear
wheels to prevent vehicle movement.
EPB Release
To release the EPB:1. Turn the ignition on or to ACC/ ACCESSORY.
2. Apply and hold the brake pedal. 3. Press the EPB switch momentarily.
The EPB is released when the red parking
brake status light is off.
If the amber service parking brake warning
light is on, release the EPB by pressing and
holding the EPB switch. Continue to hold the
switch until the red parking brake status
light is off. If either light stays on after
release is attempted, see your dealer.
Caution
Driving with the parking brake on can
overheat the brake system and cause
premature wear or damage to brake
system parts. Make sure that the parking
brake is fully released and the brake
warning light is off before driving.
If you are towing a trailer and parking on a
hill, see Driving Characteristics and Towing
Tips 0288.
Automatic EPB Release
The EPB will automatically release if the
vehicle is running, placed into gear, and an
attempt is made to drive away. Avoid rapid
acceleration when the EPB is applied, to
preserve parking brake lining life.
Brake Assist
Brake Assist detects rapid brake pedal
applications due to emergency braking
situations and provides additional braking to
activate the Antilock Brake System (ABS) if
the brake pedal is not pushed hard enough
to activate ABS normally. Minor noise, brake
pedal pulsation, and/or pedal movement
during this time may occur. Continue to
apply the brake pedal as the driving
situation dictates. Brake Assist disengages
when the brake pedal is released.
Hill Start Assist (HSA)
{Warning
Do not rely on the HSA feature. HSA does
not replace the need to pay attention
and drive safely. You may not hear or
feel alerts or warnings provided by this
system. Failure to use proper care when
driving may result in injury, death,
or vehicle damage. See Defensive Driving
0 213.
When the vehicle is stopped on a grade, Hill
Start Assist (HSA) prevents the vehicle from
rolling in an unintended direction during the
transition from brake pedal release to
Page 249 of 461
Chevrolet Silverado 1500 Owner Manual (GMNA-Localizing-U.S./Canada/
Mexico/Paraguay-14632303) - 2021 - CRC - 11/9/20
248 Driving and Operating
accelerator pedal apply. The brakes release
when the accelerator pedal is applied. If the
accelerator pedal is not applied within a few
minutes, the Electric Parking Brake will
apply. The brakes may also release under
other conditions. Do not rely on HSA to hold
the vehicle.
HSA is available when the vehicle is facing
uphill in a forward gear, or when facing
downhill in R (Reverse). The vehicle must
come to a complete stop on a grade for HSA
to activate.
Ride Control Systems
Traction Control/Electronic
Stability Control
System Operation
The vehicle has a Traction Control System
(TCS) and StabiliTrak/Electronic Stability
Control (ESC) system. These systems help
limit wheel spin and assist the driver in
maintaining control, especially on slippery
road conditions.TCS activates if it senses any of the drive
wheels are spinning or beginning to lose
traction. When this happens, TCS applies the
brakes to the spinning wheels and reduces
engine power to limit wheel spin.
StabiliTrak/ESC activates when the vehicle
senses a difference between the intended
path and the direction the vehicle is actually
traveling. StabiliTrak/ESC selectively applies
braking pressure to any one of the vehicle
wheel brakes to assist the driver in keeping
the vehicle on the intended path. Trailer
Sway Control (TSC) is also on automatically
when the vehicle is started. See
Trailer Sway
Control (TSC) 0305.
If cruise control is being used and traction
control or StabiliTrak/ESC begins to limit
wheel spin, cruise control will disengage.
Cruise control may be turned back on when
road conditions allow.
Both systems come on automatically when
the vehicle is started and begins to move.
The systems may be heard or felt while
they are operating or while performing
diagnostic checks. This is normal and does
not mean there is a problem with the
vehicle. It is recommended to leave both systems on
for normal driving conditions, but it may be
necessary to turn TCS off if the vehicle gets
stuck in sand, mud, ice, or snow. See
If the
Vehicle Is Stuck 0221 and “Turning the
Systems Off and On” later in this section.
When the transfer case (if equipped) is in
Four-Wheel Drive Low, the stability system
is automatically disabled,
gcomes on, and
the appropriate message will appear on the
Driver Information Center (DIC). Both
traction control and StabiliTrak/ESC are
automatically disabled in this condition.
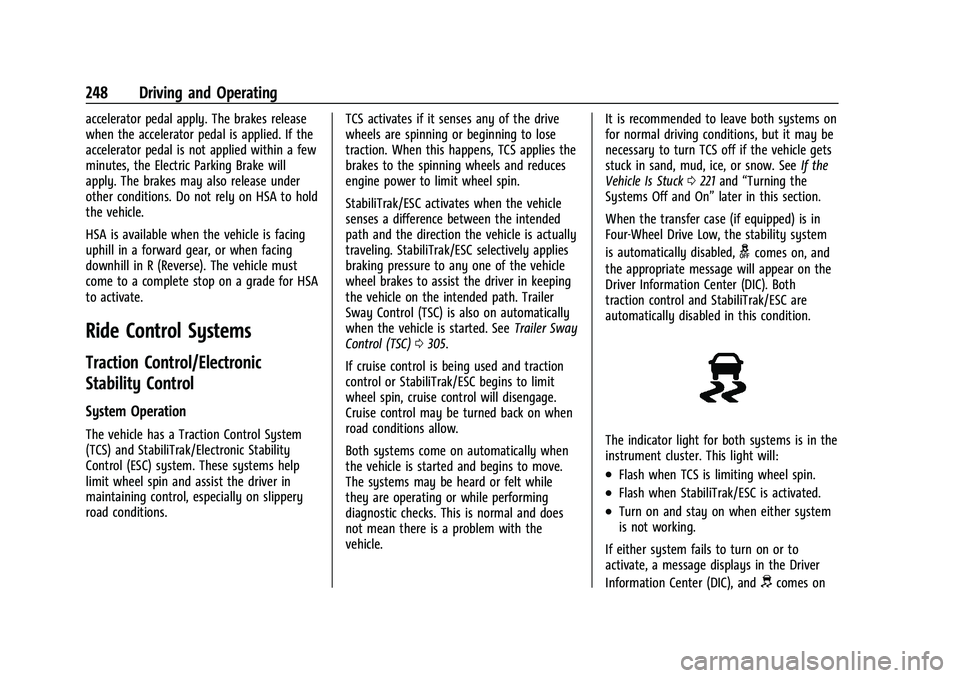
The indicator light for both systems is in the
instrument cluster. This light will:
.Flash when TCS is limiting wheel spin.
.Flash when StabiliTrak/ESC is activated.
.Turn on and stay on when either system
is not working.
If either system fails to turn on or to
activate, a message displays in the Driver
Information Center (DIC), and
dcomes on
Page 265 of 461
Chevrolet Silverado 1500 Owner Manual (GMNA-Localizing-U.S./Canada/
Mexico/Paraguay-14632303) - 2021 - CRC - 11/9/20
264 Driving and Operating
Lighting Conditions Affecting ACC
The ACC front camera can be affected by
poor lighting conditions, and ACC may have
limited performance when:
.There are changes in brightness, such as
entering and exiting tunnels, bridges, and
overpasses.
.Low sun angles cause the camera to not
detect objects, or it is more difficult to
detect objects in the same traffic lane.
.Lighting is poor in the evening or early
morning
.There are multiple changes in brightness
or shadows along the vehicle roadway.
.In a tunnel without the headlamps on,
or in a tunnel when there is a vehicle in
front that does not have its taillamps on.
.Subjected to strong light from opposing
lane traffic in the front of the vehicle,
such as high-beam headlamps from
oncoming traffic.
Accessory Installations and Vehicle
Modifications
Do not install or place any object around
the front camera windshield area that would
obstruct the front camera view. Do not install objects on top of the vehicle
that overhang and obstruct the front
camera, such as a canoe, kayak, or other
items that can be transported on the
vehicle roof.
Do not modify the hood, headlamps, or fog
lamps, as this may limit the camera’s ability
to detect an object.
Cleaning the Sensing System
The camera sensor on the windshield behind
the rearview mirror can become blocked by
snow, ice, dirt, mud, or debris. This area
needs to be cleaned for ACC to operate
properly.
The vehicle headlamps may need to be
cleaned due to dirt, snow, or ice. Objects
that are not illuminated correctly may be
difficult to detect.
If ACC will not operate, regular cruise control
may be available. See
“Switching Between
ACC and Regular Cruise Control” previously
in this section. Always consider driving
conditions before using either cruise control
system.
For cleaning instructions, see “Washing the
Vehicle” underExterior Care 0398.
Driver Assistance Systems
This vehicle may have features that work
together to help avoid crashes or reduce
crash damage while driving, backing, and
parking. Read this entire section before
using these systems.
{Warning
Do not rely on the Driver Assistance
Systems. These systems do not replace
the need for paying attention and driving
safely. You may not hear or feel alerts or
warnings provided by these systems.
Failure to use proper care when driving
may result in injury, death, or vehicle
damage. See Defensive Driving 0213.
Under many conditions, these systems
will not:
.Detect children, pedestrians, bicyclists,
or animals.
.Detect vehicles or objects outside the
area monitored by the system.
.Work at all driving speeds.
.Warn you or provide you with enough
time to avoid a crash. (Continued)
Page 267 of 461
Chevrolet Silverado 1500 Owner Manual (GMNA-Localizing-U.S./Canada/
Mexico/Paraguay-14632303) - 2021 - CRC - 11/9/20
266 Driving and Operating
Radio Frequency
This vehicle may be equipped with driver
assistance systems that operate using radio
frequency. SeeRadio Frequency Statement
0 436.
Assistance Systems for Parking or
Backing
If equipped, the Rear Vision Camera (RVC),
Surround Vision, Rear Park Assist (RPA),
Front Park Assist (FPA), and Rear Cross
Traffic Alert (RCTA) may help the driver park
or avoid objects. Always check around the
vehicle when parking or backing.
The RVC, RPA, and Surround Vision will not
work properly if the tailgate is down. If the
tailgate is down, do not use these systems.
Rear Vision Camera (RVC)
When the vehicle is shifted into R (Reverse),
the RVC displays an image of the area
behind the vehicle in the infotainment
display. The previous screen displays when
the vehicle is shifted out of R (Reverse) after
a short delay. To return to the previous
screen sooner, press any button on the
infotainment system, shift into P (Park), or, while in D (Drive), reach a vehicle speed of
approximately 12 km/h (8 mph). The rear
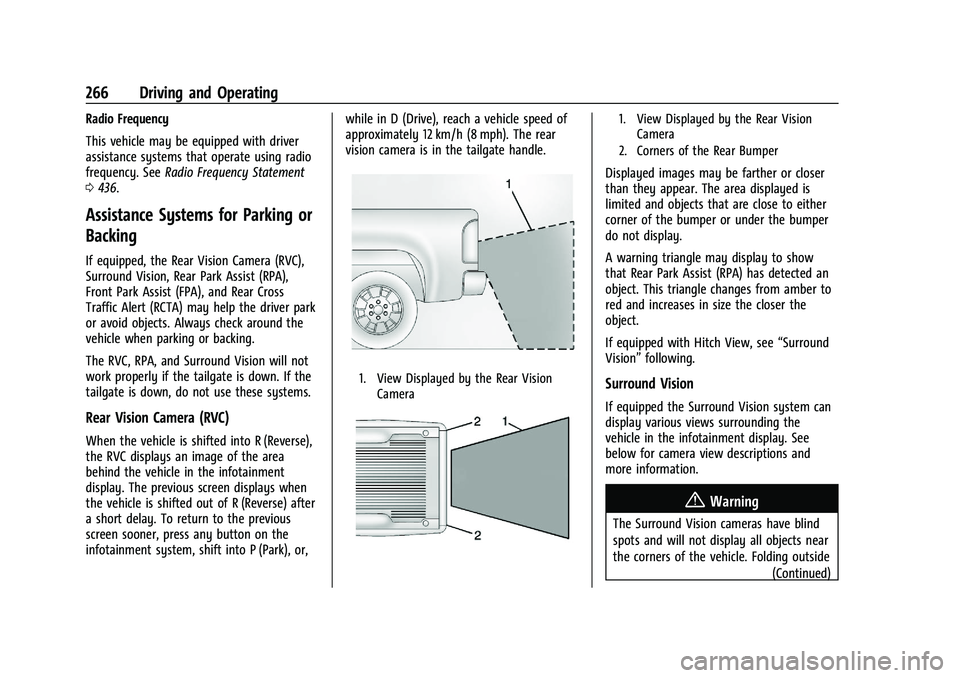
vision camera is in the tailgate handle.
1. View Displayed by the Rear Vision
Camera
1. View Displayed by the Rear VisionCamera
2. Corners of the Rear Bumper
Displayed images may be farther or closer
than they appear. The area displayed is
limited and objects that are close to either
corner of the bumper or under the bumper
do not display.
A warning triangle may display to show
that Rear Park Assist (RPA) has detected an
object. This triangle changes from amber to
red and increases in size the closer the
object.
If equipped with Hitch View, see “Surround
Vision” following.
Surround Vision
If equipped the Surround Vision system can
display various views surrounding the
vehicle in the infotainment display. See
below for camera view descriptions and
more information.
{Warning
The Surround Vision cameras have blind
spots and will not display all objects near
the corners of the vehicle. Folding outside
(Continued)
Page 269 of 461
Chevrolet Silverado 1500 Owner Manual (GMNA-Localizing-U.S./Canada/
Mexico/Paraguay-14632303) - 2021 - CRC - 11/9/20
268 Driving and Operating
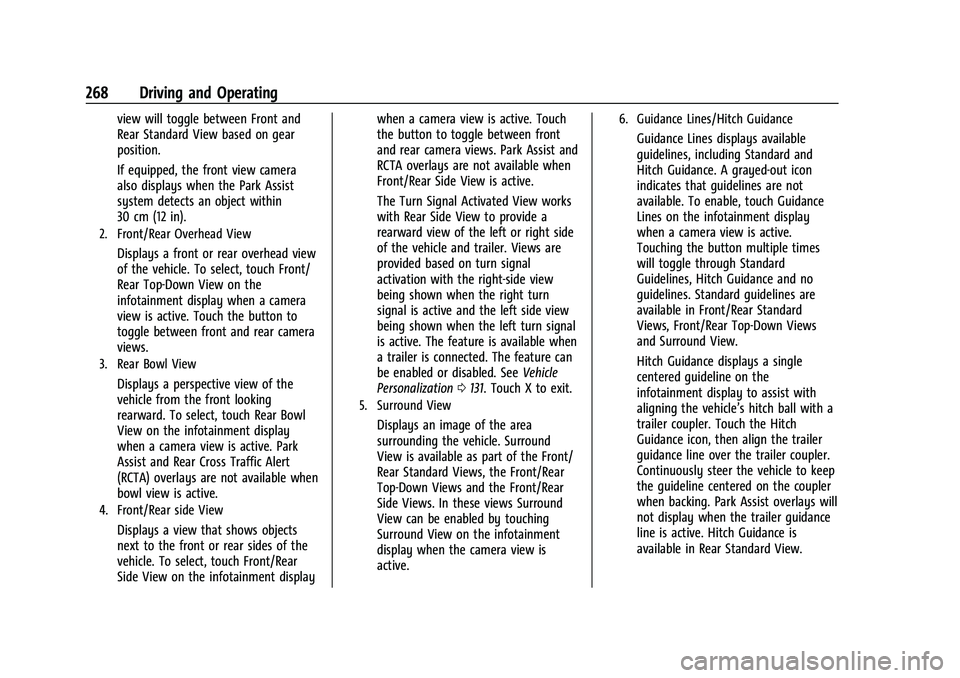
view will toggle between Front and
Rear Standard View based on gear
position.
If equipped, the front view camera
also displays when the Park Assist
system detects an object within
30 cm (12 in).
2. Front/Rear Overhead View
Displays a front or rear overhead view
of the vehicle. To select, touch Front/
Rear Top-Down View on the
infotainment display when a camera
view is active. Touch the button to
toggle between front and rear camera
views.
3. Rear Bowl View
Displays a perspective view of the
vehicle from the front looking
rearward. To select, touch Rear Bowl
View on the infotainment display
when a camera view is active. Park
Assist and Rear Cross Traffic Alert
(RCTA) overlays are not available when
bowl view is active.
4. Front/Rear side View
Displays a view that shows objects
next to the front or rear sides of the
vehicle. To select, touch Front/Rear
Side View on the infotainment displaywhen a camera view is active. Touch
the button to toggle between front
and rear camera views. Park Assist and
RCTA overlays are not available when
Front/Rear Side View is active.
The Turn Signal Activated View works
with Rear Side View to provide a
rearward view of the left or right side
of the vehicle and trailer. Views are
provided based on turn signal
activation with the right-side view
being shown when the right turn
signal is active and the left side view
being shown when the left turn signal
is active. The feature is available when
a trailer is connected. The feature can
be enabled or disabled. See
Vehicle
Personalization 0131. Touch X to exit.
5. Surround View
Displays an image of the area
surrounding the vehicle. Surround
View is available as part of the Front/
Rear Standard Views, the Front/Rear
Top-Down Views and the Front/Rear
Side Views. In these views Surround
View can be enabled by touching
Surround View on the infotainment
display when the camera view is
active.
6. Guidance Lines/Hitch Guidance
Guidance Lines displays available
guidelines, including Standard and
Hitch Guidance. A grayed-out icon
indicates that guidelines are not
available. To enable, touch Guidance
Lines on the infotainment display
when a camera view is active.
Touching the button multiple times
will toggle through Standard
Guidelines, Hitch Guidance and no
guidelines. Standard guidelines are
available in Front/Rear Standard
Views, Front/Rear Top-Down Views
and Surround View.
Hitch Guidance displays a single
centered guideline on the
infotainment display to assist with
aligning the vehicle’s hitch ball with a
trailer coupler. Touch the Hitch
Guidance icon, then align the trailer
guidance line over the trailer coupler.
Continuously steer the vehicle to keep
the guideline centered on the coupler
when backing. Park Assist overlays will
not display when the trailer guidance
line is active. Hitch Guidance is
available in Rear Standard View.
Page 270 of 461
Chevrolet Silverado 1500 Owner Manual (GMNA-Localizing-U.S./Canada/
Mexico/Paraguay-14632303) - 2021 - CRC - 11/9/20
Driving and Operating 269
{Warning
Use Hitch Guidance only to help back the
vehicle to a trailer hitch or, when
traveling above 12 km/h (8 mph), to
briefly check the status of your trailer. Do
not use for any other purpose, such as
making lane change decisions. Before
making a lane change, always check the
mirrors and glance over your shoulder.
Improper use could result in serious
injury to you or others.
7. Interior Trailer View
Provides a view of the interior of the
trailer. The feature is available when a
trailer is connected. The feature
requires user installation of an
accessory trailer camera on the
interior of the trailer per the accessory
trailer camera installation instructions
(see your dealer for accessory trailer
camera(s) and information). To select,
touch Interior Trailer View on the
infotainment display when a camera
view is active. To access this view
when in a forward gear above
12 km/h (8 mph), touch CAMERA on
the infotainment display and touchthe Interior Trailer View icon. The view
will close after 8 seconds and can be
closed early by touching X.
8. Hitch View
Assists with connecting to a trailer by
providing a zoomed-in view of the
hitch to help align the vehicle’s hitch
ball with the trailer coupler, or to
monitor the trailer connection. To
select, touch Hitch View on the
infotainment display when a camera
view is active. To access this view
when in a forward gear above
12 km/h (8 mph), touch CAMERA on
the infotainment display and touch
the Cargo Bed View icon. The view
will close after 8 seconds and can be
closed early by touching X. Shifting
into P (Park) while in this view will
automatically engage the Electric
Parking Brake (EPB).
9. Bed View
Provides a view of the truck bed and
the area behind the vehicle to assist
in cargo or hitch monitoring or
hitching to a fifth wheel or gooseneck
trailer. To select, touch Bed View on
the infotainment display when a
camera view is active. To access this
view when in a forward gear above12 km/h (8 mph), touch CAMERA on
the infotainment display and touch
the Bed View icon. The view will close
after 8 seconds and can be closed
early by touching X.
10. Transparent Trailer View
Provides a view that allows the driver
to virtually
“see through” the trailer.
The feature is available when a
compatible trailer is connected and a
profile is configured and selected via
the Trailering App. See Trailering App
0 306. The feature requires user
installation of an accessory trailer
camera on the rear exterior surface of
the trailer per the accessory trailer
camera installation instructions (see
your dealer for accessory trailer
camera(s) and information). To select,
touch Transparent Trailer View on the
infotainment display when a camera
view is active. To access this view
when in a forward gear above
12 km/h (8 mph), touch CAMERA on
the infotainment display and touch
the Transparent Trailer View icon.
Touch X to exit.
When the system is calibrated and the
trailer position is known, one of three
views will be shown; Transparent
Page 274 of 461
Chevrolet Silverado 1500 Owner Manual (GMNA-Localizing-U.S./Canada/
Mexico/Paraguay-14632303) - 2021 - CRC - 11/9/20
Driving and Operating 273
.The accessory trailer cameras are
swapped at the hitch connector. Ensure
that the accessory camera(s) are
connected to the correct input.
.The accessory trailer camera(s) are
connected to the correct camera input.
.The accessory trailer camera(s) are not
installed according to the installation
instructions.
A feature may be unavailable or not
activating as expected if:
.The customization is disabled. Check the
customization settings where applicable.
.The accessory trailer cameras are
swapped at the hitch connector. Ensure
that the accessory camera(s) are
connected to the correct camera input.
A view may switch automatically if:
.The vehicle is shifted to another gear.
Park Assist
With Front and Rear Park Assist, as the
vehicle moves at speeds of less than 8 km/h
(5 mph) the sensors on the bumpers may
detect objects up to 1.2 m (4 ft) in front and
2.5 m (8 ft) behind the vehicle within a zone
25 cm (10 in) high off the ground and below
bumper level. These detection distances may be shorter during warmer or humid weather.
Blocked sensors will not detect objects and
can also cause false detections. Keep the
sensors clean of mud, dirt, snow, ice, and
slush; and clean sensors after a car wash in
freezing temperatures.
{Warning
The Park Assist system does not detect
children, pedestrians, bicyclists, animals,
or objects located below the bumper or
that are too close or too far from the
vehicle. It is not available at speeds
greater than 8 km/h (5 mph). To prevent
injury, death, or vehicle damage, even
with Park Assist, always check the area
around the vehicle and check all mirrors
before moving forward or backing.
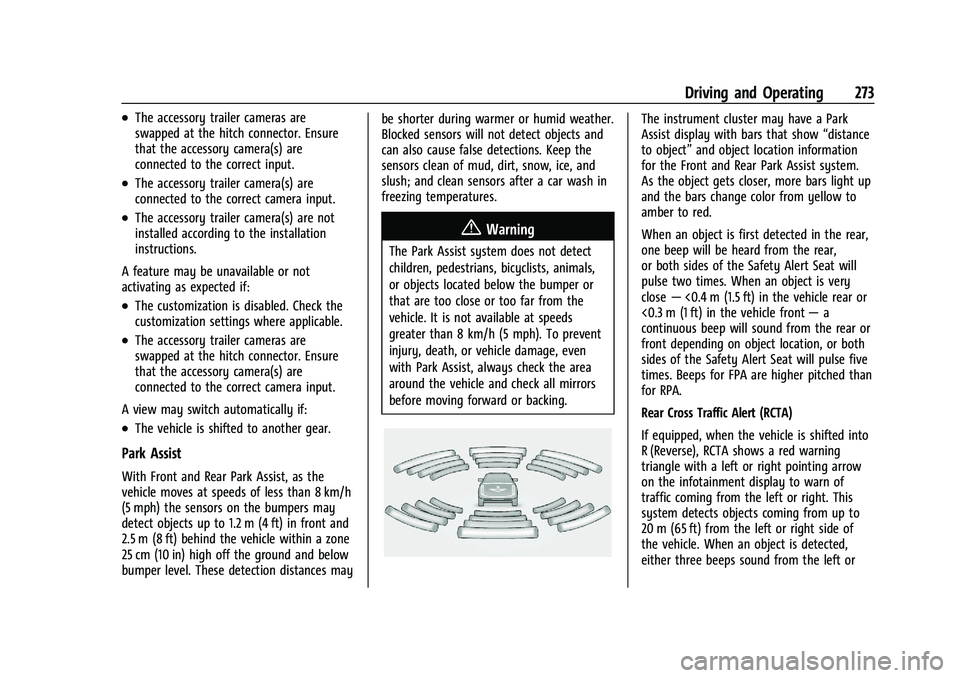
The instrument cluster may have a Park
Assist display with bars that show
“distance
to object” and object location information
for the Front and Rear Park Assist system.
As the object gets closer, more bars light up
and the bars change color from yellow to
amber to red.
When an object is first detected in the rear,
one beep will be heard from the rear,
or both sides of the Safety Alert Seat will
pulse two times. When an object is very
close —<0.4 m (1.5 ft) in the vehicle rear or
<0.3 m (1 ft) in the vehicle front —a
continuous beep will sound from the rear or
front depending on object location, or both
sides of the Safety Alert Seat will pulse five
times. Beeps for FPA are higher pitched than
for RPA.
Rear Cross Traffic Alert (RCTA)
If equipped, when the vehicle is shifted into
R (Reverse), RCTA shows a red warning
triangle with a left or right pointing arrow
on the infotainment display to warn of
traffic coming from the left or right. This
system detects objects coming from up to
20 m (65 ft) from the left or right side of
the vehicle. When an object is detected,
either three beeps sound from the left or
Page 275 of 461
Chevrolet Silverado 1500 Owner Manual (GMNA-Localizing-U.S./Canada/
Mexico/Paraguay-14632303) - 2021 - CRC - 11/9/20
274 Driving and Operating
right or three Safety Alert Seat pulses occur
on the left or right side, depending on the
direction of the detected vehicle.
Use caution while backing up when towing
a trailer, as the RCTA detection zones that
extend out from the back of the vehicle do
not move further back when a trailer is
towed.
RCTA is disabled when the trailer connection
status is displayed.
RCTA can be turned off. See“Collision/
Detection Systems” underVehicle
Personalization 0131.
Turning the Features On or Off
PressXon the center stack to turn on or
off the Front and Rear Park Assist. The
indicator light next to the button comes on
when the features are on and turns off
when the features have been disabled. Front and Rear Park Assist can be turned
Off, On, or On with Towbar. See
“Park
Assist” underVehicle Personalization 0131.
If Park Assist is turned off through vehicle
personalization, the Park Assist button will
be disabled. To turn Park Assist on again,
select On in vehicle personalization. The On
with Towbar setting allows Park Assist to
work properly with a trailer hitch. Some
larger trailer hitches may not be compatible.
Turn off Park Assist when towing a trailer.
To turn the RPA symbols on or off, see
“Rear Camera Park Assist Symbols” under
Vehicle Personalization 0131.
Assistance Systems for Driving
If equipped, when driving the vehicle in a
forward gear, Forward Collision Alert (FCA),
Lane Departure Warning (LDW), Lane Keep
Assist (LKA), Side Blind Zone Alert (SBZA),
Lane Change Alert (LCA), Automatic
Emergency Braking (AEB), and/or the Front
Pedestrian Braking (FPB) System can help to
avoid a crash or reduce crash damage.
Forward Collision Alert (FCA)
System
If equipped, the FCA system may help to
avoid or reduce the harm caused by
front-end crashes. When approaching a
vehicle ahead too quickly, FCA provides a
red flashing alert on the windshield and
rapidly beeps or pulses the driver seat. FCA
also lights an amber visual alert if following
another vehicle much too closely.
FCA detects vehicles within a distance of
approximately 60 m (197 ft) and operates at
speeds above 8 km/h (5 mph).
{Warning
FCA is a warning system and does not
apply the brakes. When approaching a
slower-moving or stopped vehicle ahead
too rapidly, or when following a vehicle
too closely, FCA may not provide a
warning with enough time to help avoid
a crash. It also may not provide any
warning at all. FCA does not warn of
pedestrians, animals, signs, guardrails,
bridges, construction barrels, or other
(Continued)