tire CHEVROLET SILVERADO 2007 1.G Owner's Manual
[x] Cancel search | Manufacturer: CHEVROLET, Model Year: 2007, Model line: SILVERADO, Model: CHEVROLET SILVERADO 2007 1.GPages: 684, PDF Size: 3.4 MB
Page 290 of 684
TIGHTEN GAS CAP
This message may display along with the check
engine light on the instrument panel cluster if
the vehicle’s fuel cap is not tightened properly. See
Malfunction Indicator Lamp on page 262.
Reinstall the fuel cap fully. SeeFilling the Tank on
page 494. The diagnostic system can determine
if the fuel cap has been left off or improperly
installed. A loose or missing fuel cap allows fuel to
evaporate into the atmosphere. A few driving
trips with the cap properly installed should turn this
light and message off.
TIRE LEARNING ACTIVE
If your vehicle has a Tire Pressure Monitor (TPM)
system, this message displays when the system
is re-learning the tire positions on your vehicle.
SeeDIC Operation and Displays (With DIC
Buttons) on page 270orDIC Operation and
Displays (Without DIC Buttons) on page 277for
more information. The tire positions must be
re-learned after rotating the tires or after replacing
a tire or sensor. SeeTire Inspection and
Rotation on page 568,Tire Pressure Monitor
System on page 563, andInation - Tire Pressure
on page 561for more information.
TRACTION CONTROL OFF
If your vehicle has StabiliTrak®, this message
displays when the Traction Control System (TCS)
is turned off. Adjust your driving accordingly.
SeeStabiliTrak
®System on page 384for more
information.
TRAILER CONNECTED
On vehicles with the Integrated Trailer Brake
Control (ITBC) system, this message displays
briey when a trailer with electric brakes is
rst connected to the vehicle.
This message clears itself after several seconds.
This message also clears if you acknowledge
it. After this message clears, the TRAILER
GAIN/OUTPUT display appears in the DIC.
See “TRAILER GAIN/OUTPUT” underDIC
Operation and Displays (With DIC Buttons) on
page 270orDIC Operation and Displays (Without
DIC Buttons) on page 277and “Integrated
Trailer Brake Control System” underTowing a
Trailer on page 447for more information.
290
Page 311 of 684
Do not add any label to a CD, it could get caught
in the CD player. If a CD is recorded on a
personal computer and a description label is
needed, try labeling the top of the recorded CD
with a marking pen.
If an error displays, see “CD Messages” later in
this section.
ZEJECT:Press the CD eject button to eject
the CD. If the CD is not removed, after several
seconds, the CD automatically pulls back into
the player.
f(Tune):Turn this knob to select tracks on the
CD currently playing.
©SEEK¨:Press the left SEEK arrow to go to
the start of the current track, if more than ten
seconds have played. Press the right SEEK arrow
to go to the next track. If either SEEK arrow is held
or pressed multiple times, the player continues
moving backward or forward through the CD.
sREV (Reverse):Press and hold this button
to reverse playback quickly within a track. Sound is
heard at a reduced volume. Release this
pushbutton to resume playing the track. The
elapsed time of the track displays.
\FWD (Fast Forward):Press and hold this
pushbutton to advance playback quickly within a
track. Sound is heard at a reduced volume.
Release this pushbutton to resume playing the
track. The elapsed time of the track displays.
RDM (Random):With the random setting, the CD
tracks can be listened to in random, rather than
sequential order. To use random, do the following:
1. Press this button to play tracks from the
CD you are listening to in random order.
The random icon displays.
2. Press this button again to turn off random
play. The random icon disappears from the
display.
RPT (Repeat):With the repeat setting, one track
or an entire CD can be repeated. To repeat
the track you are listening to, press and release
the RPT button. An arrow symbol displays.
Press RPT again to turn off repeat play.
4(Information):Press this button to switch the
display between the track number, elapsed time of
the track, and the time. When the ignition is off,
press this button to display the time.
311
Page 335 of 684

Playing a DVD
DVD/CD AUX (Auxiliary):Press this button to
cycle through DVD, CD, or Auxiliary when listening
to the radio. The DVD/CD text label and a
message showing track or chapter number
displays when a disc is in either slot. Press this
button again and the system automatically
searches for an auxiliary input device, such as a
portable audio player. If a portable audio player is
not connected, “No Aux Input Device” displays.
If a disc is in both the DVD slot and the CD slot the
DVD/CD AUX button cycles between the two
sources and not indicate “No Aux Input Device”. If
a front auxiliary device is connected, the
DVD/CD AUX button cycles through all available
options, such as: DVD slot, CD slot, Front
Auxiliary, and Rear Auxiliary (if available). See
“Using the Auxiliary Input Jack(s)” later in
this section, or “Audio/Video (A/V) Jacks” under,
Rear Seat Entertainment System on page 357
for more information.
O(Power):Press this knob to turn the radio on or
off. Turn this knob clockwise or counterclockwise to
increase or decrease the volume. Press and hold
the knob for more than two seconds to turn off the
entire radio and Rear Seat Entertainment (RSE)
system and to start the parental control feature.
Parental control prevents the rear seat occupant
from operating the Rear Seat Audio (RSA) system
or remote control.
A lock symbol appears next to the clock display.
The parental control feature remains on until this
button is pressed and held for more than
two seconds again, or until the driver turns the
ignition off and exits the vehicle.
f(Tune):Turn this knob to change tracks on a
CD or DVD, to manually tune a radio station, or to
change clock or date settings, while in the clock
or date setting mode. See the information
given earlier in this section specic to the radio,
CD, and the DVD. Also, see “Setting the Time” in
the index, for setting the clock and date.
335
Page 380 of 684
Control of a Vehicle
You have three systems that make your vehicle go
where you want it to go. They are the brakes, the
steering, and the accelerator. All three systems
have to do their work at the places where the tires
meet the road.
Sometimes, as when you are driving on snow
or ice, it is easy to ask more of those control
systems than the tires and road can provide.
That means you can lose control of your vehicle.
SeeStabiliTrak
®System on page 384.
Adding non-GM accessories can affect your
vehicle’s performance. SeeAccessories and
Modications on page 488.
Braking
SeeBrake System Warning Light on page 258.
Braking action involves perception time and
reaction time.
First, you have to decide to push on the brake
pedal. That is perception time. Then you have to
bring up your foot and do it. That is reaction time.
Average reaction time is about three-fourths of a
second. But that is only an average. It might
be less with one driver and as long as two or
three seconds or more with another. Age, physical
condition, alertness, coordination, and eyesight
all play a part. So do alcohol, drugs, and
frustration. But even in three-fourths of a second,
a vehicle moving at 60 mph (100 km/h) travels
66 feet (20 m). That could be a lot of distance in an
emergency, so keeping enough space between
your vehicle and others is important.
And, of course, actual stopping distances vary
greatly with the surface of the road, whether it is
pavement or gravel; the condition of the road,
whether it is wet, dry, or icy; tire tread; the
condition of the brakes; the weight of the vehicle;
and the amount of brake force applied.
380
Page 382 of 684
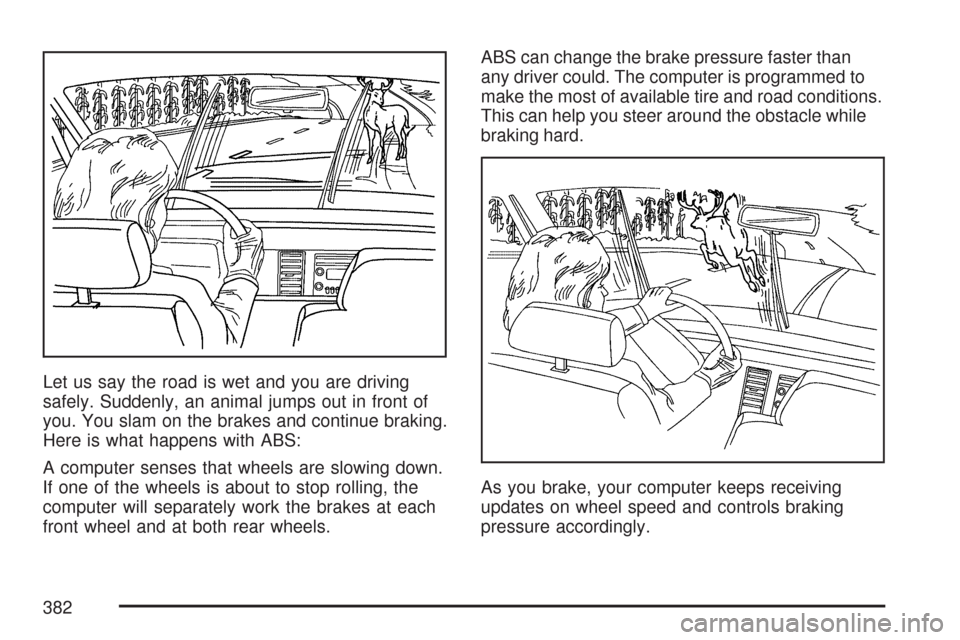
Let us say the road is wet and you are driving
safely. Suddenly, an animal jumps out in front of
you. You slam on the brakes and continue braking.
Here is what happens with ABS:
A computer senses that wheels are slowing down.
If one of the wheels is about to stop rolling, the
computer will separately work the brakes at each
front wheel and at both rear wheels.ABS can change the brake pressure faster than
any driver could. The computer is programmed to
make the most of available tire and road conditions.
This can help you steer around the obstacle while
braking hard.
As you brake, your computer keeps receiving
updates on wheel speed and controls braking
pressure accordingly.
382
Page 387 of 684
Steering
Power Steering
If you lose power steering assist because the
engine stops or the system is not functioning,
you can steer but it will take much more effort.
Steering Tips
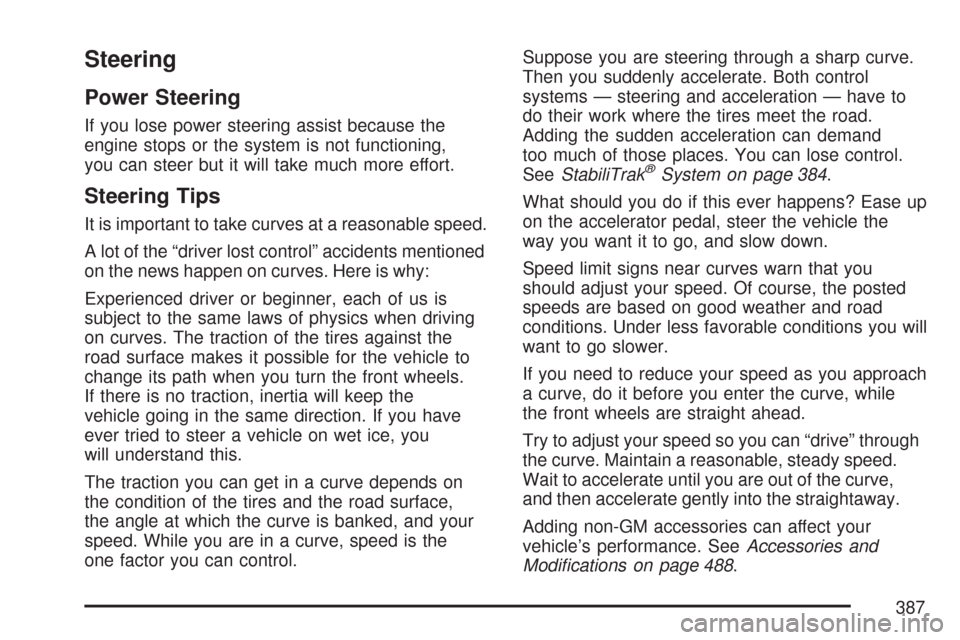
It is important to take curves at a reasonable speed.
A lot of the “driver lost control” accidents mentioned
on the news happen on curves. Here is why:
Experienced driver or beginner, each of us is
subject to the same laws of physics when driving
on curves. The traction of the tires against the
road surface makes it possible for the vehicle to
change its path when you turn the front wheels.
If there is no traction, inertia will keep the
vehicle going in the same direction. If you have
ever tried to steer a vehicle on wet ice, you
will understand this.
The traction you can get in a curve depends on
the condition of the tires and the road surface,
the angle at which the curve is banked, and your
speed. While you are in a curve, speed is the
one factor you can control.Suppose you are steering through a sharp curve.
Then you suddenly accelerate. Both control
systems — steering and acceleration — have to
do their work where the tires meet the road.
Adding the sudden acceleration can demand
too much of those places. You can lose control.
SeeStabiliTrak
®System on page 384.
What should you do if this ever happens? Ease up
on the accelerator pedal, steer the vehicle the
way you want it to go, and slow down.
Speed limit signs near curves warn that you
should adjust your speed. Of course, the posted
speeds are based on good weather and road
conditions. Under less favorable conditions you will
want to go slower.
If you need to reduce your speed as you approach
a curve, do it before you enter the curve, while
the front wheels are straight ahead.
Try to adjust your speed so you can “drive” through
the curve. Maintain a reasonable, steady speed.
Wait to accelerate until you are out of the curve,
and then accelerate gently into the straightaway.
Adding non-GM accessories can affect your
vehicle’s performance. SeeAccessories and
Modications on page 488.
387
Page 389 of 684
Off-Road Recovery
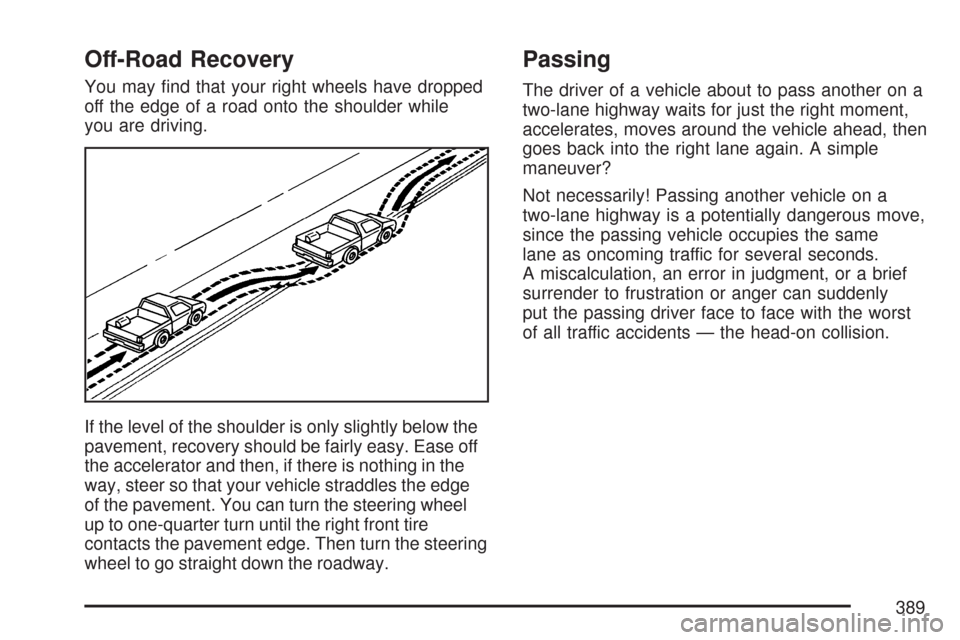
You may nd that your right wheels have dropped
off the edge of a road onto the shoulder while
you are driving.
If the level of the shoulder is only slightly below the
pavement, recovery should be fairly easy. Ease off
the accelerator and then, if there is nothing in the
way, steer so that your vehicle straddles the edge
of the pavement. You can turn the steering wheel
up to one-quarter turn until the right front tire
contacts the pavement edge. Then turn the steering
wheel to go straight down the roadway.
Passing
The driver of a vehicle about to pass another on a
two-lane highway waits for just the right moment,
accelerates, moves around the vehicle ahead, then
goes back into the right lane again. A simple
maneuver?
Not necessarily! Passing another vehicle on a
two-lane highway is a potentially dangerous move,
since the passing vehicle occupies the same
lane as oncoming traffic for several seconds.
A miscalculation, an error in judgment, or a brief
surrender to frustration or anger can suddenly
put the passing driver face to face with the worst
of all traffic accidents — the head-on collision.
389
Page 391 of 684
Check your vehicle’s mirrors, glance over your
shoulder, and start your left lane change
signal before moving out of the right lane to
pass. When you are far enough ahead of
the passed vehicle to see its front in
your vehicle’s inside mirror, activate the right
lane change signal and move back into
the right lane. Remember that, if your vehicle’s
passenger side outside mirror is convex, the
vehicle you just passed may seem to be
farther away from you than it really is.
Try not to pass more than one vehicle at a
time on two-lane roads. Reconsider before
passing the next vehicle.
Do not overtake a slowly moving vehicle too
rapidly. Even though the brake lamps are
not ashing, it may be slowing down or starting
to turn.
If you are being passed, make it easy for the
following driver to get ahead of you. Perhaps
you can ease a little to the right.
Loss of Control
Let us review what driving experts say about what
happens when the three control systems — brakes,
steering, and acceleration — do not have enough
friction where the tires meet the road to do what the
driver has asked.
In any emergency, do not give up. Keep trying to
steer and constantly seek an escape route or area
of less danger.
Skidding
In a skid, a driver can lose control of the vehicle.
Defensive drivers avoid most skids by taking
reasonable care suited to existing conditions, and
by not overdriving those conditions. But skids
are always possible.
The three types of skids correspond to your
vehicle’s three control systems. In the braking skid,
your wheels are not rolling. In the steering or
cornering skid, too much speed or steering in a
curve causes tires to slip and lose cornering force.
And in the acceleration skid, too much throttle
causes the driving wheels to spin.
391
Page 392 of 684
A cornering skid is best handled by easing your
foot off the accelerator pedal.
Remember: StabiliTrak
®helps avoid only the
acceleration skid. SeeStabiliTrak®System
on page 384. If the StabiliTrak®System is off,
then an acceleration skid is also best handled by
easing your foot off the accelerator pedal.
If your vehicle starts to slide, ease your foot off the
accelerator pedal and quickly steer the way you
want the vehicle to go. If you start steering quickly
enough, your vehicle may straighten out. Always be
ready for a second skid if it occurs.
Of course, traction is reduced when water, snow,
ice, gravel, or other material is on the road.
For safety, you will want to slow down and adjust
your driving to these conditions. It is important
to slow down on slippery surfaces because
stopping distance will be longer and vehicle control
more limited.
While driving on a surface with reduced traction,
try your best to avoid sudden steering,
acceleration, or braking, including reducing
vehicle speed by shifting to a lower gear.Any sudden changes could cause the tires to
slide. You may not realize the surface is slippery
until your vehicle is skidding. Learn to recognize
warning clues — such as enough water, ice,
or packed snow on the road to make a mirrored
surface — and slow down when you have
any doubt.
Remember: Any Anti-Lock Brake System (ABS)
helps avoid only the braking skid.
Off-Road Driving
This off-road guide is for vehicles that have
four-wheel drive. Also, seeBraking on page 380.
If your vehicle is an SS Model or does not have
four-wheel drive, you should not drive off-road
unless you are on a level, solid surface. If your
vehicle has 20-inch tire/wheel assemblies, do not
use your vehicle for off-road driving. SeeTires
on page 552.
The airbag system is designed to work properly
under a wide range of conditions, including off-road
usage. Observe safe driving speeds, especially
on rough terrain. As always, wear your safety belt.
392
Page 394 of 684
Before You Go Off-Roading
There are some things to do before you go out.
For example, be sure to have all necessary
maintenance and service work done. Check to
make sure all underbody shields, if the vehicle has
them, are properly attached. Be sure you read
all the information about your four-wheel-drive
vehicle in this manual. Is there enough fuel? Is the
spare tire fully inated? Are the uid levels up
where they should be? What are the local laws
that apply to off-roading where you will be driving?
If you do not know, you should check with law
enforcement people in the area. Will you be
on someone’s private land? If so, be sure to get
the necessary permission.
Loading Your Vehicle for Off-Road
Driving
{CAUTION:
Cargo on the load oor piled higher
than the seatbacks can be thrown
forward during a sudden stop. You or
your passengers could be injured.
Keep cargo below the top of the
seatbacks.
Unsecured cargo on the load oor can
be tossed about when driving over
rough terrain. You or your passengers
can be struck by ying objects.
Secure the cargo properly.
Heavy loads on the roof raise the
vehicle’s center of gravity, making it
more likely to roll over. You can be
seriously or fatally injured if the
vehicle rolls over. Put heavy loads
inside the cargo area, not on the roof.
Keep cargo in the cargo area as far
forward and low as possible.
394