remove CHEVROLET SILVERADO 2500 2023 User Guide
[x] Cancel search | Manufacturer: CHEVROLET, Model Year: 2023, Model line: SILVERADO 2500, Model: CHEVROLET SILVERADO 2500 2023Pages: 441, PDF Size: 14.4 MB
Page 23 of 441
Chevrolet Silverado 2500 HD/3500 HD Owner Manual (GMNA-Localizing-U.
S./Canada/Mexico-15546003) - 2022 - CRC - 5/12/21
22 Keys, Doors, and Windows
Free-Turning Locks
The door key lock cylinder turns freely when
either the wrong key is used, or the correct
key is not fully inserted. The free-turning
door lock feature prevents the lock from
being forced open. To reset the lock, turn it
to the vertical position with the correct key
fully inserted. Remove the key and insert it
again. If this does not reset the lock, turn
the key halfway around in the cylinder and
repeat the reset procedure.
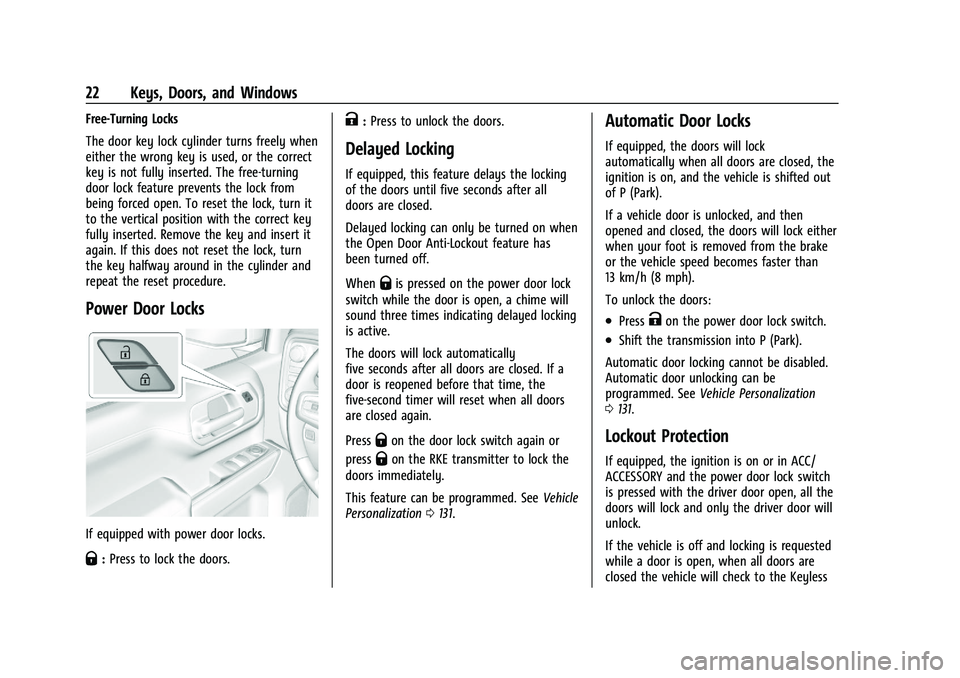
Power Door Locks
If equipped with power door locks.
Q:Press to lock the doors.
K:Press to unlock the doors.
Delayed Locking
If equipped, this feature delays the locking
of the doors until five seconds after all
doors are closed.
Delayed locking can only be turned on when
the Open Door Anti-Lockout feature has
been turned off.
When
Qis pressed on the power door lock
switch while the door is open, a chime will
sound three times indicating delayed locking
is active.
The doors will lock automatically
five seconds after all doors are closed. If a
door is reopened before that time, the
five-second timer will reset when all doors
are closed again.
Press
Qon the door lock switch again or
press
Qon the RKE transmitter to lock the
doors immediately.
This feature can be programmed. See Vehicle
Personalization 0131.
Automatic Door Locks
If equipped, the doors will lock
automatically when all doors are closed, the
ignition is on, and the vehicle is shifted out
of P (Park).
If a vehicle door is unlocked, and then
opened and closed, the doors will lock either
when your foot is removed from the brake
or the vehicle speed becomes faster than
13 km/h (8 mph).
To unlock the doors:
.PressKon the power door lock switch.
.Shift the transmission into P (Park).
Automatic door locking cannot be disabled.
Automatic door unlocking can be
programmed. See Vehicle Personalization
0 131.
Lockout Protection
If equipped, the ignition is on or in ACC/
ACCESSORY and the power door lock switch
is pressed with the driver door open, all the
doors will lock and only the driver door will
unlock.
If the vehicle is off and locking is requested
while a door is open, when all doors are
closed the vehicle will check to the Keyless
Page 32 of 441
Chevrolet Silverado 2500 HD/3500 HD Owner Manual (GMNA-Localizing-U.
S./Canada/Mexico-15546003) - 2022 - CRC - 5/12/21
Keys, Doors, and Windows 31
Power Assist Steps
{Warning
To avoid personal injury or property
damage, before entering or exiting the
vehicle, be sure the power assist step is
fully extended. Do not step on the power
assist step while it is moving. Never place
hands or other body parts between the
extended power assist step and the
vehicle.
If equipped, the power assist steps will
deploy when the door is opened and
automatically retract three seconds after the
door is closed. The power assist steps will
retract immediately if the vehicle starts
moving. Check the step position before
exiting the vehicle.
Disable the power assist steps before jacking
or placing any object under the vehicle.
Keep hands, children, pets, objects, and
clothing clear of the power assist steps
when in motion. The steps will reverse
direction if they encounter an obstruction
when opening or closing. Remove the
obstruction, then open and close the door
on the same side to complete the motion of the assist steps. If the obstruction is not
cleared, the assist steps remain extended
while driving.
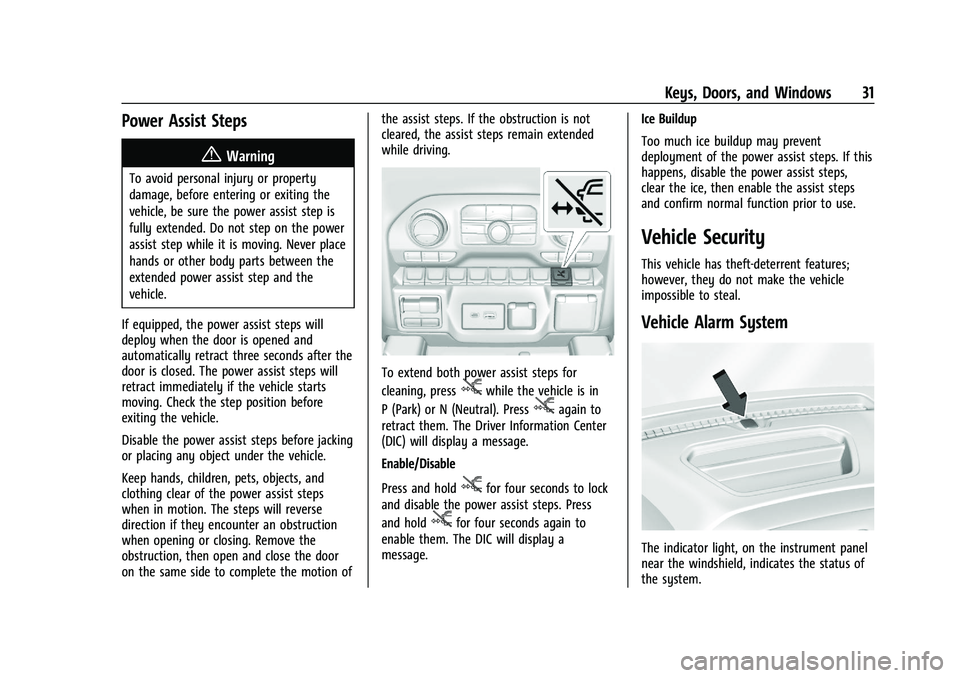
To extend both power assist steps for
cleaning, press
jwhile the vehicle is in
P (Park) or N (Neutral). Press
jagain to
retract them. The Driver Information Center
(DIC) will display a message.
Enable/Disable
Press and hold
jfor four seconds to lock
and disable the power assist steps. Press
and hold
jfor four seconds again to
enable them. The DIC will display a
message. Ice Buildup
Too much ice buildup may prevent
deployment of the power assist steps. If this
happens, disable the power assist steps,
clear the ice, then enable the assist steps
and confirm normal function prior to use.
Vehicle Security
This vehicle has theft-deterrent features;
however, they do not make the vehicle
impossible to steal.
Vehicle Alarm System
The indicator light, on the instrument panel
near the windshield, indicates the status of
the system.
Page 44 of 441
Chevrolet Silverado 2500 HD/3500 HD Owner Manual (GMNA-Localizing-U.
S./Canada/Mexico-15546003) - 2022 - CRC - 5/12/21
Keys, Doors, and Windows 43
Press2to engage the rear window
lockout feature. The indicator light is on
when engaged.
Press
2again to disengage.
Windows Express Movement
All windows can be opened without holding
the window switch. Press the switch down
fully and quickly release to express open the
window.
If equipped, pull the window switch up fully
and quickly release to express close the
window.
Briefly press or pull the window switch in
the same direction to stop that window’s
express movement.
Express Window Down
L: If equipped, this button will be on the
center stack.
Press and hold
Lto open all windows.
Release
Lto stop all movement.
Use the power window switches to close
each window.
Window Automatic Reversal System
The express-close feature will reverse
window movement if it comes in contact
with an object. Extreme cold or ice could
cause the window to auto-reverse. The
window will operate normally after the
object or condition is removed.
Automatic Reversal System Override
{Warning
If automatic reversal system override is
active, the window will not reverse
automatically. You or others could be
injured and the window could be
damaged. Before using automatic reversal
system override, make sure that all
people and obstructions are clear of the
window path.
When the engine is on, override the
automatic reversal system by pulling and
holding the window switch if conditions
prevent it from closing.
Programming the Power Windows
Programming may be necessary if the
vehicle battery has been disconnected or
discharged. If the window is unable to
express-up, program each express-close
window: 1. Close all doors.
2. Turn the ignition on or to ACC/ ACCESSORY.
3. Partially open the window to be programmed. Then close it and continue
to pull the switch briefly after the
window has fully closed.
4. Open the window and continue to press the switch briefly after the window has
fully opened.
Remote Window Operation
If equipped, this feature allows the windows
to be opened remotely. If enabled in vehicle
personalization, press and hold
Kon the
RKE transmitter. See Vehicle Personalization
0 131.
Page 46 of 441
Chevrolet Silverado 2500 HD/3500 HD Owner Manual (GMNA-Localizing-U.
S./Canada/Mexico-15546003) - 2022 - CRC - 5/12/21
Keys, Doors, and Windows 45
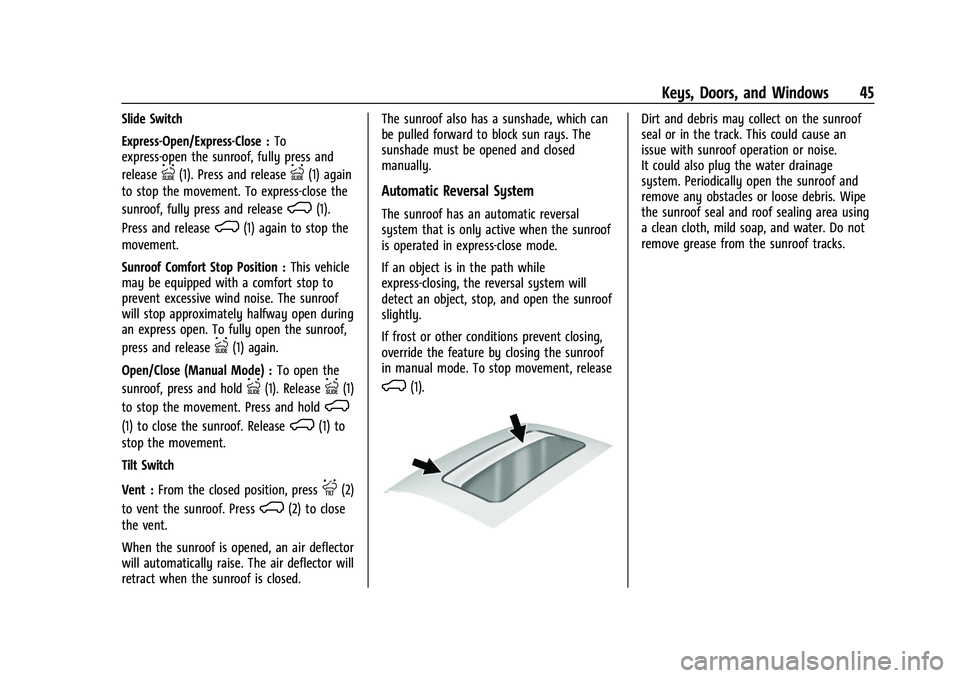
Slide Switch
Express-Open/Express-Close :To
express-open the sunroof, fully press and
release
I(1). Press and releaseI(1) again
to stop the movement. To express-close the
sunroof, fully press and release
K(1).
Press and release
K(1) again to stop the
movement.
Sunroof Comfort Stop Position : This vehicle
may be equipped with a comfort stop to
prevent excessive wind noise. The sunroof
will stop approximately halfway open during
an express open. To fully open the sunroof,
press and release
I(1) again.
Open/Close (Manual Mode) : To open the
sunroof, press and hold
I(1). ReleaseI(1)
to stop the movement. Press and hold
K
(1) to close the sunroof. ReleaseK(1) to
stop the movement.
Tilt Switch
Vent : From the closed position, press
J(2)
to vent the sunroof. Press
K(2) to close
the vent.
When the sunroof is opened, an air deflector
will automatically raise. The air deflector will
retract when the sunroof is closed. The sunroof also has a sunshade, which can
be pulled forward to block sun rays. The
sunshade must be opened and closed
manually.
Automatic Reversal System
The sunroof has an automatic reversal
system that is only active when the sunroof
is operated in express-close mode.
If an object is in the path while
express-closing, the reversal system will
detect an object, stop, and open the sunroof
slightly.
If frost or other conditions prevent closing,
override the feature by closing the sunroof
in manual mode. To stop movement, release
K(1).
Dirt and debris may collect on the sunroof
seal or in the track. This could cause an
issue with sunroof operation or noise.
It could also plug the water drainage
system. Periodically open the sunroof and
remove any obstacles or loose debris. Wipe
the sunroof seal and roof sealing area using
a clean cloth, mild soap, and water. Do not
remove grease from the sunroof tracks.
Page 52 of 441
Chevrolet Silverado 2500 HD/3500 HD Owner Manual (GMNA-Localizing-U.
S./Canada/Mexico-15546003) - 2022 - CRC - 5/5/21
Seats and Restraints 51
Personalization Settings”later in this section.
The memory recalls may be cancelled at any
time during the recall. See “Cancel Memory
Seating Recalls” later in this section.
Identifying Driver Number
The vehicle identifies the current driver by
their RKE transmitter number 1–8. The
current RKE transmitter number may be
identified by Driver Information Center (DIC)
welcome message, “You are driver x for
memory recalls.” This message is displayed
the first few times the vehicle is turned on
when a different RKE transmitter is used. For
Seat Entry Memory to work properly, save
positions to the 1 or 2 memory button
matching the driver number of this welcome
message. To aid in identifying transmitter
IDs, it is recommended to only carry one
RKE transmitter when entering the vehicle.
Perform the following if the welcome
message is not displayed:
1. Move all keys and RKE transmitters away from the vehicle.
2. Start the vehicle with another RKE transmitter. A DIC welcome message
should display indicating the driver
number of the other RKE transmitter. Turn the vehicle off and remove the
other key or RKE transmitter from the
vehicle.
3. Start the vehicle with the initial key or RKE transmitter. The DIC welcome
message should display the driver
number of the initial RKE transmitter.
Saving Seating Positions
Read these instructions completely before
saving memory positions.
To save preferred driving positions to
1 and 2: 1. Turn the vehicle on or to ACC/ ACCESSORY. A DIC welcome message
may indicate the driver number of the
current RKE transmitter. See “Identifying
Driver Number” previously in this
section.
2. Adjust all available memory features to the desired driving position.
3. Press and release SET; a beep will sound.
4. Immediately upon releasing SET, press and hold memory button 1 or 2 matching
the current Driver’s RKE transmitter
number until two beeps sound. If too
much time passes between releasing SET
and pressing 1 or 2, the two beeps will not sound indicating memory position
were not saved. Repeat Steps 3 and 4 to
try again.
5. Repeat Steps 1–4 for the other RKE transmitter 1 or 2 using the other 1 or
2 memory button.
It is recommended to save the preferred
driving positions to both 1 and 2 if you are
the only driver.
To save the common exit seating position to
Bthat is used by all drivers for Manually
Recalling Seating Positions and Auto Seat
Exit Memory Recall features, repeat Steps 1–
4 using
B, the exit button.
Manually Recalling Seating Positions
Press and hold 1, 2, or
Bbutton until the
recall is complete, to recall the positions
previously saved to that button.
Manual Memory recall movement for 1, 2 or
Bbuttons may be initiated and will
complete to the saved memory position if
the vehicle is in or out of P (Park).
Page 54 of 441
Chevrolet Silverado 2500 HD/3500 HD Owner Manual (GMNA-Localizing-U.
S./Canada/Mexico-15546003) - 2022 - CRC - 5/5/21
Seats and Restraints 53
Cancel Memory Seating Recalls
.During any memory recall:
Press a power seat control
Press SET memory button
.During Manual memory recall:
Release 1, 2, or
Bmemory button
.During Auto Seat Entry Memory Recall:
Turn vehicle off
Press SET, 1, 2, or
Bmemory buttons
.During Auto Seat Exit Memory Recall:
Press SET, 1, 2, or
Bmemory buttons
Obstructions
If something has blocked the seat while
recalling a memory position, the recall may
stop. Remove the obstruction and try the
recall again. If the memory position still
does not recall, see your dealer.
Heated and Ventilated Front
Seats
{Warning
If temperature change or pain to the skin
cannot be felt, the seat heater may cause
burns. To reduce the risk of burns, use
care when using the seat heater,
especially for long periods of time. Do
not place anything on the seat that
insulates against heat, such as a blanket,
cushion, cover, or similar item. This may
cause the seat heater to overheat. An
overheated seat heater may cause a burn
or may damage the seat.
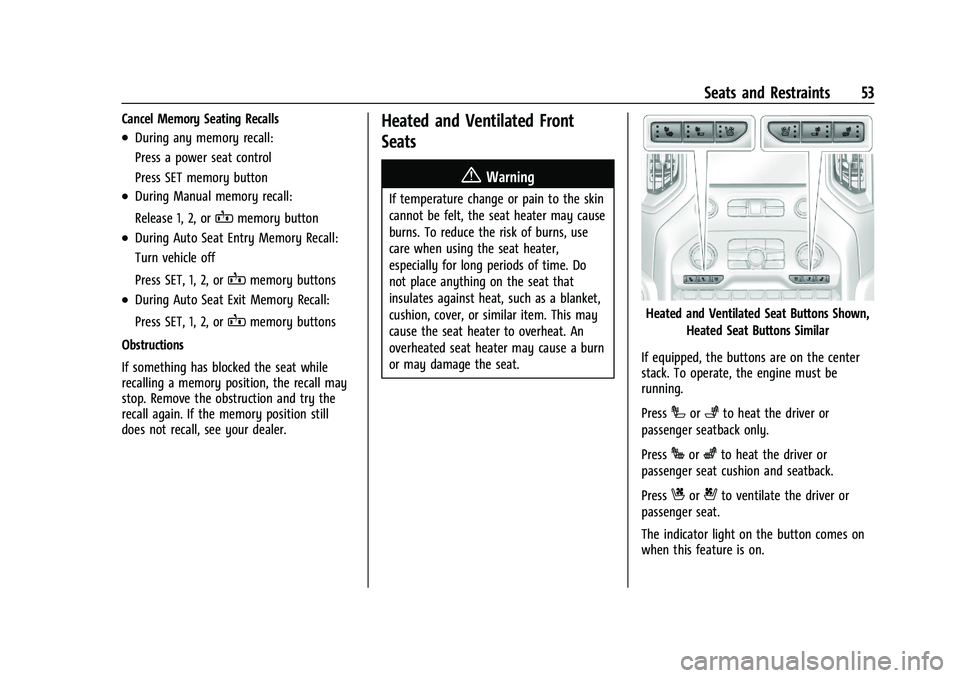
Heated and Ventilated Seat Buttons Shown, Heated Seat Buttons Similar
If equipped, the buttons are on the center
stack. To operate, the engine must be
running.
Press
Ior+to heat the driver or
passenger seatback only.
Press
Jorzto heat the driver or
passenger seat cushion and seatback.
Press
Cor{to ventilate the driver or
passenger seat.
The indicator light on the button comes on
when this feature is on.
Page 70 of 441
Chevrolet Silverado 2500 HD/3500 HD Owner Manual (GMNA-Localizing-U.
S./Canada/Mexico-15546003) - 2022 - CRC - 5/5/21
Seats and Restraints 69
.There is a critical problem with the airbag
system or the passenger sensing system.
When the passenger sensing system has
turned off the front outboard passenger
frontal airbag, the OFF indicator will light
and stay lit as a reminder that the airbag is
off. See Passenger Airbag Status Indicator
0 115.
The passenger sensing system is designed to
turn on the front outboard passenger frontal
airbag anytime the system senses that a
person of adult size is sitting properly in the
front outboard passenger seat.
When the passenger sensing system has
allowed the airbag to be enabled, the ON
indicator will light and stay lit as a reminder
that the airbag is active.
For some children, including children in child
restraints, and for very small adults, the
passenger sensing system may or may not
turn off the front outboard passenger
frontal airbag, depending upon the person's
seating posture and body build. Everyone in
the vehicle who has outgrown child
restraints should wear a seat belt
properly —whether or not there is an
airbag for that person.{Warning
If the airbag readiness light ever comes
on and stays on, it means that
something may be wrong with the airbag
system. To help avoid injury to yourself
or others, have the vehicle serviced right
away. See Airbag Readiness Light 0114
for more information, including important
safety information.
If the On Indicator Is Lit for a Child
Restraint
The passenger sensing system is designed to
turn off the front outboard passenger
frontal airbag if the system determines that
an infant is present in a child restraint. If a
child restraint has been installed and the ON
indicator is lit:
1. Turn the vehicle off.
2. Remove the child restraint from the vehicle.
3. Remove any additional items from the seat such as blankets, cushions, seat
covers, seat heaters, or seat massagers. 4. Reinstall the child restraint following the
directions provided by the child restraint
manufacturer and refer to Securing Child
Restraints (With the Seat Belt in the
Center Front Seat) 095 or
Securing Child Restraints (With the Seat
Belt in the Rear Seat) 089 or
Securing Child Restraints (With the Seat
Belt in the Front Passenger Seat) 093.
Make sure the seat belt retractor is
locked by pulling the shoulder belt all
the way out of the retractor when
installing the child restraint, even if the
child restraint is equipped with a seat
belt lock off. When the retractor lock is
set, the belt can be tightened but not
pulled out of the retractor.
5. If, after reinstalling the child restraint and restarting the vehicle, the ON
indicator is still lit, turn the vehicle off.
Then slightly recline the vehicle seatback
and adjust the seat cushion,
if adjustable, to make sure that the
vehicle seatback is not pushing the child
restraint into the seat cushion.
Also make sure the child restraint is not
trapped under the vehicle head restraint.
If this happens, adjust the head restraint.
See Head Restraints 046.
Page 71 of 441
Chevrolet Silverado 2500 HD/3500 HD Owner Manual (GMNA-Localizing-U.
S./Canada/Mexico-15546003) - 2022 - CRC - 5/5/21
70 Seats and Restraints
6. Restart the vehicle.
The passenger sensing system may or may
not turn off the airbag for a child in a child
restraint depending upon the child’s size.
It is better to secure child restraints in the
rear seat. Consider using another vehicle to
transport the child when a rear seat is not
available. Never put a rear-facing child
restraint in the front seat, even if the ON
indicator is not lit.
If the Off Indicator Is Lit for an
Adult-Sized Occupant
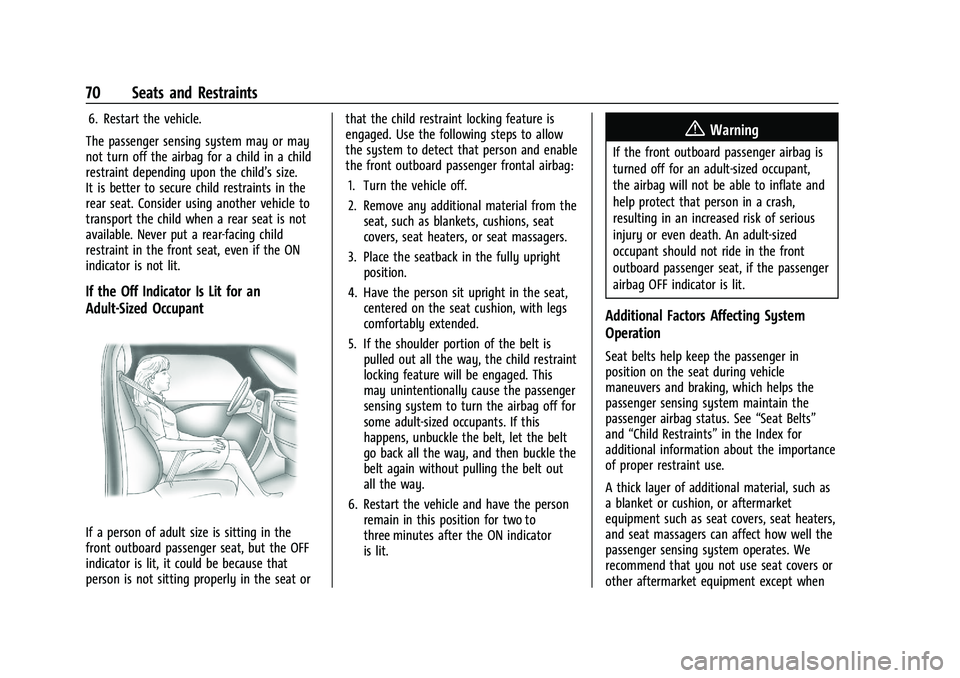
If a person of adult size is sitting in the
front outboard passenger seat, but the OFF
indicator is lit, it could be because that
person is not sitting properly in the seat or that the child restraint locking feature is
engaged. Use the following steps to allow
the system to detect that person and enable
the front outboard passenger frontal airbag:
1. Turn the vehicle off.
2. Remove any additional material from the seat, such as blankets, cushions, seat
covers, seat heaters, or seat massagers.
3. Place the seatback in the fully upright position.
4. Have the person sit upright in the seat, centered on the seat cushion, with legs
comfortably extended.
5. If the shoulder portion of the belt is pulled out all the way, the child restraint
locking feature will be engaged. This
may unintentionally cause the passenger
sensing system to turn the airbag off for
some adult-sized occupants. If this
happens, unbuckle the belt, let the belt
go back all the way, and then buckle the
belt again without pulling the belt out
all the way.
6. Restart the vehicle and have the person remain in this position for two to
three minutes after the ON indicator
is lit.
{Warning
If the front outboard passenger airbag is
turned off for an adult-sized occupant,
the airbag will not be able to inflate and
help protect that person in a crash,
resulting in an increased risk of serious
injury or even death. An adult-sized
occupant should not ride in the front
outboard passenger seat, if the passenger
airbag OFF indicator is lit.
Additional Factors Affecting System
Operation
Seat belts help keep the passenger in
position on the seat during vehicle
maneuvers and braking, which helps the
passenger sensing system maintain the
passenger airbag status. See “Seat Belts”
and “Child Restraints” in the Index for
additional information about the importance
of proper restraint use.
A thick layer of additional material, such as
a blanket or cushion, or aftermarket
equipment such as seat covers, seat heaters,
and seat massagers can affect how well the
passenger sensing system operates. We
recommend that you not use seat covers or
other aftermarket equipment except when
Page 72 of 441
Chevrolet Silverado 2500 HD/3500 HD Owner Manual (GMNA-Localizing-U.
S./Canada/Mexico-15546003) - 2022 - CRC - 5/5/21
Seats and Restraints 71
approved by GM for your specific vehicle.
SeeAdding Equipment to the
Airbag-Equipped Vehicle 071 for more
information about modifications that can
affect how the system operates.
The ON indicator may be lit if an object,
such as a briefcase, handbag, grocery bag,
laptop, or other electronic device, is put on
an unoccupied seat. If this is not desired,
remove the object from the seat.
{Warning
Stowing articles under the passenger seat
or between the passenger seat cushion
and seatback may interfere with the
proper operation of the passenger
sensing system.
Servicing the Airbag-Equipped
Vehicle
Airbags affect how the vehicle should be
serviced. There are parts of the airbag
system in several places around the vehicle.
Your dealer and the service manual have
information about servicing the vehicle and
the airbag system. To purchase a service
manual, see Publication Ordering
Information 0416.
{Warning
For up to 10 seconds after the vehicle is
turned off and the battery is
disconnected, an airbag can still inflate
during improper service. You can be
injured if you are close to an airbag
when it inflates. Avoid yellow connectors.
They are probably part of the airbag
system. Be sure to follow proper service
procedures, and make sure the person
performing work for you is qualified to
do so.
Adding Equipment to the
Airbag-Equipped Vehicle
Adding accessories that change the vehicle's
frame, bumper system, height, front end,
or side sheet metal, may keep the airbag
system from working properly.
The operation of the airbag system can also
be affected by changing, including
improperly repairing or replacing, any parts
of the following:
.Airbag system, including airbag modules,
front or side impact sensors, sensing and
diagnostic module, or airbag wiring
.Front seats, including stitching, seams,
or zippers
.Seat belts
.Steering wheel, instrument panel,
overhead console, ceiling trim, or pillar
garnish trim
.Inner door seals, including speakers
Your dealer and the service manual have
information about the location of the airbag
modules and sensors, sensing and diagnostic
module, and airbag wiring along with the
proper replacement procedures.
In addition, the vehicle has a passenger
sensing system for the front outboard
passenger position, which includes sensors
that are part of the passenger seat. The
passenger sensing system may not operate
properly if the original seat trim is replaced
with non-GM covers, upholstery, or trim; or
with GM covers, upholstery, or trim
designed for a different vehicle. Any object,
such as an aftermarket seat heater or a
comfort-enhancing pad or device, installed
under or on top of the seat fabric, could
also interfere with the operation of the
passenger sensing system. This could either
prevent proper deployment of the passenger
airbag(s) or prevent the passenger sensing
Page 87 of 441
Chevrolet Silverado 2500 HD/3500 HD Owner Manual (GMNA-Localizing-U.
S./Canada/Mexico-15546003) - 2022 - CRC - 5/5/21
86 Seats and Restraints
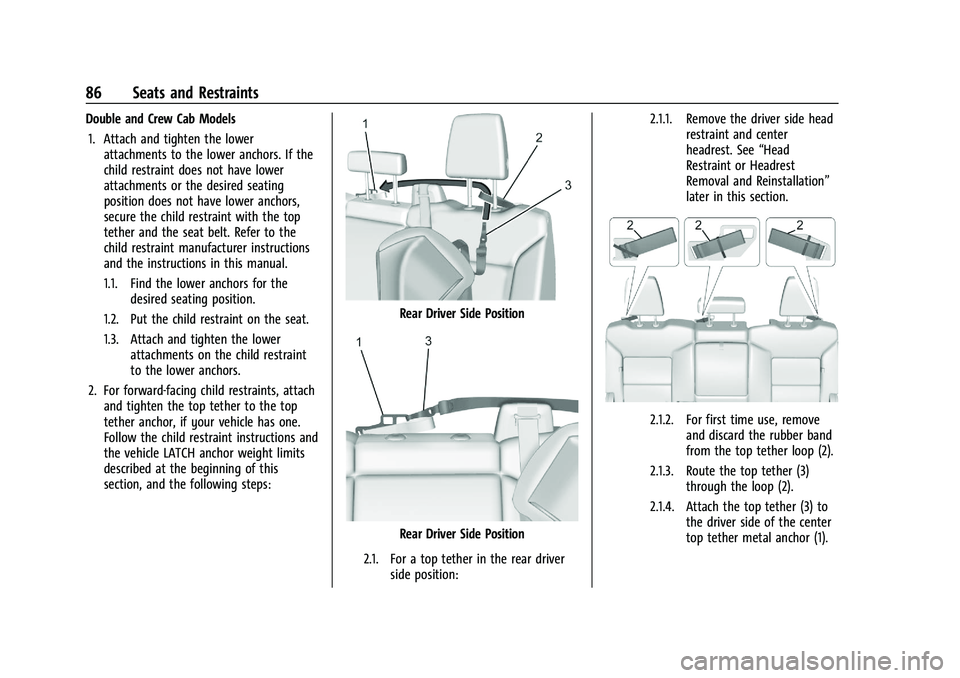
Double and Crew Cab Models1. Attach and tighten the lower attachments to the lower anchors. If the
child restraint does not have lower
attachments or the desired seating
position does not have lower anchors,
secure the child restraint with the top
tether and the seat belt. Refer to the
child restraint manufacturer instructions
and the instructions in this manual.
1.1. Find the lower anchors for the desired seating position.
1.2. Put the child restraint on the seat.
1.3. Attach and tighten the lower attachments on the child restraint
to the lower anchors.
2. For forward-facing child restraints, attach and tighten the top tether to the top
tether anchor, if your vehicle has one.
Follow the child restraint instructions and
the vehicle LATCH anchor weight limits
described at the beginning of this
section, and the following steps:
Rear Driver Side Position
Rear Driver Side Position
2.1. For a top tether in the rear driver side position: 2.1.1. Remove the driver side head
restraint and center
headrest. See “Head
Restraint or Headrest
Removal and Reinstallation”
later in this section.
2.1.2. For first time use, remove and discard the rubber band
from the top tether loop (2).
2.1.3. Route the top tether (3) through the loop (2).
2.1.4. Attach the top tether (3) to the driver side of the center
top tether metal anchor (1).