sensor CHEVROLET SILVERADO EV 2024 Owner's Guide
[x] Cancel search | Manufacturer: CHEVROLET, Model Year: 2024, Model line: SILVERADO EV, Model: CHEVROLET SILVERADO EV 2024Pages: 429, PDF Size: 8.98 MB
Page 271 of 429
Chevrolet Silverado EV Owner Manual (GMNA-Localizing-U.S./Canada-
16702912) - 2024 - CRC - 1/17/23
270 Driving and Operating
zone. If the turn signal is activated in the
same direction as a detected vehicle, this
display will flash as an extra warning not to
change lanes.
LCA can be disabled through vehicle
personalization.To view available settings
from the infotainment screen, touch
Settings > Vehicle > Collision/Detection
Systems. If LCA is disabled by the driver, the
LCA mirror displays will not light up.
When the System Does Not Seem to
Work Properly
The LCA system requires some driving for
the system to calibrate to maximum
performance. This calibration may occur
more quickly if the vehicle is driven on a
straight highway road with traffic and
roadside objects (e.g., guardrails, barriers).
LCA displays may not come on when
passing a vehicle quickly or for a stopped
vehicle. LCA may alert to objects attached to
the vehicle, such as a bicycle, or object
extending out to either side of the vehicle.
Attached objects may also interfere with the
detection of vehicles. This is normal system
operation; the vehicle does not need service.LCA may not always alert the driver to
vehicles in the next lane over, especially in
wet conditions or when driving on sharp
curves. The system does not need to be
serviced. The system may light up due to
guardrails, signs, trees, shrubs, and other
non-moving objects. This is normal system
operation; the vehicle does not need service.
LCA may not operate when the LCA sensors
in the left or right corners of the rear
bumper are covered with mud, dirt, snow,
ice, or slush, or in heavy rainstorms. For
cleaning instructions, see "Washing the
Vehicle" under
Exterior Care0379. If the DIC
still displays the system unavailable
message after cleaning both sides of the
vehicle toward the rear corners of the
vehicle, see your dealer.
If the LCA displays do not light up when
moving vehicles are in the side blind zone or
rapidly approaching this zone and the
system is clean, the system may need
service. Take the vehicle to your dealer.
Driving with a Trailer
If equipped with Lane Change Alert (LCA),
the LCA detection zones that extend back
from the side of the vehicle do not move
further back when a trailer is towed. Use caution while changing lanes when
towing a trailer.
Bicycle Detection
If equipped, the system may detect a
bicyclist approaching from the side or rear
of the vehicle.
If this occurs, a chime will sound in the
direction of the detection, and the Safety
Alert Seat will pulse if enabled through
vehicle settings. To view available settings
from the infotainment screen, touch
Settings > Vehicle > Collision/Detection
Systems.
Bicyclist Detection is available when the
vehicle is in D (Drive), P (Park), and for a
short time after the vehicle is turned off.
If the vehicle detects a bicyclist when it is
off, a DIC message may display and alert to
the direction of the detection. In some
cases, an Unavailable message may display.
This is normal and does not mean that the
system is broken.
Detection Zones
When the vehicle is in P (Park) or is turned
off, a bicyclist can be detected 11 m (36 ft)
behind the vehicle or 10 m (33 ft) to the
side of the vehicle.
Page 276 of 429
Chevrolet Silverado EV Owner Manual (GMNA-Localizing-U.S./Canada-
16702912) - 2024 - CRC - 1/17/23
Driving and Operating 275
The LKA system is not intended to keep the
vehicle centered in the lane. LKA will not
assist or alert if the turn signal is active,
or if it detects that you are accelerating,
braking, or actively steering. LKA can be
overridden by turning the steering wheel.
If the system detects you are steering
intentionally across a lane marker, the LDW
alert may not be given. Do not expect the
LDW alert to occur when you are
intentionally crossing the lane marker.
{Warning
The LKA system does not continuously
steer the vehicle. It may not keep the
vehicle in the lane or give a Lane
Departure Warning (LDW) alert, even if a
lane marking is detected.
The LKA and LDW systems may not:
.Provide an alert or enough steering
assist to avoid a lane departure or
crash.
.Detect lane markings under poor
weather or visibility conditions. This
can occur if the windshield or
headlamps are blocked by dirt, snow,(Continued)
Warning (Continued)
or ice; if they are not in proper
condition; or if the sun shines directly
into the camera.
.Detect road edges.
.Detect lanes on winding or hilly roads.
If LKA only detects lane markings on one
side of the road, it will only assist or
provide an LDW alert when approaching
the lane on the side where it has
detected a lane marking. Even with LKA
and LDW, you must steer the vehicle.
Always keep your attention on the road
and maintain proper vehicle position
within the lane, or vehicle damage,
injury, or death could occur. Always keep
the windshield, headlamps, and camera
sensors clean and in good repair. Do not
use LKA in bad weather conditions or on
roads with unclear lane markings, such as
construction zones.
{Warning
Using LKA on slippery roads could cause
loss of control of the vehicle and a crash.
Turn the system off.
{Warning
LKA will not alert the driver if a towed
trailer crosses into an adjacent lane of
travel. Serious injury or property damage
may occur if the trailer moves into
another lane. Always monitor the trailer
position while towing to make sure it is
within the same lane as the tow vehicle.
How the System Works
LKA uses a camera sensor installed on the
windshield ahead of the rearview mirror to
detect lane markings. It may provide brief
steering assist if it detects an unintended
lane departure. It may further provide an
audible alert or the driver seat may pulse
indicating that a lane marking has been
crossed. The system does not provide an
LDW when intentionally steering across a
lane marker.
Page 313 of 429
Chevrolet Silverado EV Owner Manual (GMNA-Localizing-U.S./Canada-
16702912) - 2024 - CRC - 1/17/23
312 Driving and Operating
See“Integrated Trailer Brake Control
System” section under Towing Equipment
0 301.
Trailering App
If equipped, the Trailering App is on the
Home Page of the infotainment home
screen.
If equipped, this feature allows profiles for
connected trailers to be created to view
status, to store and track trailer usage
information, and to set up towing assist
features.
The Trailering App welcome page appears
when the Trailering App is opened for the
first time from the infotainment home
screen.
When a trailer is electrically connected and
a trailer profile has not been created, there
is an option to create a profile, use a guest
profile, or select Accessory/No trailer.
When a trailer is electrically connected after
a Trailer Profile has been created, the trailer
detection pop-up appears with a list of all of
the custom Trailer Profiles made on the
vehicle. To load an existing Trailer Profile,
select one of the Trailer Profiles listed,
or load the Guest Trailer Profile by selecting GUEST TRAILER. Touching Accessory/No
trailer selects Accessory/No trailer as the
active Trailer Profile and dismisses the
pop-up.
Create a Trailer Profile
1. Touch Add Trailer on the trailer detection pop-up or touch + Add Trailer in the
Trailering App.
2. Follow the on-screen instructions to set up a profile.
3. After a profile is created, set up for additional trailer features may become
available, such as Tow/Haul mode
reminder, Trailer Tire Pressure
Monitoring System, maintenance
reminders, or camera views and guides.
Import a Trailer Profile 1. Touch Import on the trailer detection pop-up or touch Import in the
Trailering App.
2. Follow the on-screen instructions to import a profile.
3. After a profile is imported, it can be selected from the trailer list. The Tow/
Haul mode reminder, Brake Gain Setting
and Trailer Tire Pressure sensor learning,
if equipped, do not import.
Trailer Feature Setup
Tow/Haul Mode Reminder
To turn the Tow/Haul Mode Reminder
setting on, touch Yes. To turn it off,
touch No.
Trailer Tire Monitoring
If the TTPMS is detected, touch the Trailer
Tire Monitoring icon to set up trailer tire
monitoring.
1. Select trailer tire speed rating.
2. Enter trailer tire manufacturing date number.
3. Follow the on-screen instructions to complete the trailer tire sensor learn
process.
The trailer tire pressure sensors can transmit
up to 7 m (23 feet) from the hitch receiver of
the vehicle.
A trailer must be electrically connected to
the vehicle before starting the
sensor-to-vehicle learn process.
After selecting Start from the Learn Sensors
screen, use the Tool Method or the Manual
Method (described below) to learn each
TTPMS sensor, during which the current tire
number will be highlighted. The vehicle has
Page 314 of 429
Chevrolet Silverado EV Owner Manual (GMNA-Localizing-U.S./Canada-
16702912) - 2024 - CRC - 1/17/23
Driving and Operating 313
a maximum of two minutes to detect and
label each TTPMS sensor. After each sensor
is learned, a check mark appears next to the
tire, the vehicle horn sounds, the vehicle
brake lamps flash, and all working trailer
lamps flash.
The recommended tire pressure must be
entered for the trailer tires. An alert appears
when a trailer tire's pressure is high or low.
Tool Method: A TTPMS activation tool can
be purchased separately to learn the trailer
TTPMS sensor locations.
Manual Method: Without the TTPMS
activation tool, the air pressure can be
increased or decreased in each tire for
10 seconds. Do not exceed the maximum
inflation pressure found on the tire
sidewalls. Make sure to readjust tire
pressure to the recommended level when
the process is complete.
Sensor Learning Steps
To complete the sensor-to-vehicle learn
process:1. Touch Start on the Learn Sensors screen. The horn chirps twice and the Learning
Active screen appears on the
infotainment display. 2. Start with the driver side front
trailer tire.
3. Activate the tool near the valve stem or adjust the air pressure of this tire until
the horn chirps and all working vehicle
and trailer lights flash.
The process stops without saving the
sensor locations if this step takes more
than two minutes.
4. Move to the next tire and repeat Step 3 for each sensor. The horn chirps twice
when all sensors are completed.
5. Return to the vehicle to complete the setup.
Maintenance Reminders
To set up maintenance reminders, touch the
Trailer Maintenance icon. Follow the
on-screen prompts. The maximum number
of reminders is 50.
Camera Views and Guides
To set up the trailer camera and guideline
features, if equipped, touch the Camera
Views and Guides icon.
1. Select the number of axles on the trailer.
2. Select the wheel location on the trailer (inboard or outboard). 3. Enter the trailer dimensions as prompted.
Follow the on-screen instructions to
complete setup for available features.
Certain trailer features require a compatible
trailer profile be configured and selected.
A compatible trailer is a box-type trailer
(cargo, camper, etc.) with a conventional
hitch.
Transparent Trailer Setup
If equipped, the rear trailer camera must be
mounted on the trailer and electrically
connected to the vehicle before transparent
trailer feature can be used. See Assistance
Systems for Parking or Backing 0246.
Follow the on-screen instructions to enter
the trailer dimensions.
Trailer dimensions must be in range and
transparent trailer must be calibrated
before use.
.Trailer Length: Measure from center of
coupler to furthest rear point on the
trailer.
.Trailer Total Width: Measure from the left
most edge of trailer, including the wheels,
to the right most edge.
Page 317 of 429
Chevrolet Silverado EV Owner Manual (GMNA-Localizing-U.S./Canada-
16702912) - 2024 - CRC - 1/17/23
316 Driving and Operating
Light Test
Touch Start Light Test to cycle the trailer
lights on and off to determine if they are
working. The test follows this sequence:1. The running lights turn on first and remain on throughout the sequence.
2. The brake lights turn on for about two seconds.
3. The left turn signal light flashes three times.
4. The right turn signal light flashes three times.
5. The reverse lights turn on for about two seconds.
6. Steps 2–5 repeat for approximately one minute and 45 seconds, or until the
test deactivates.
Touch Stop to manually stop the test. The
test automatically ends after one minute
and 45 seconds.
The Light Test also deactivates when any of
the following occur:
.The vehicle is turned off.
.The vehicle is shifted out of P (Park).
.The brake pedal is pressed.
.The turn signal is activated.
.The hazard warning flashers are activated.
Tires
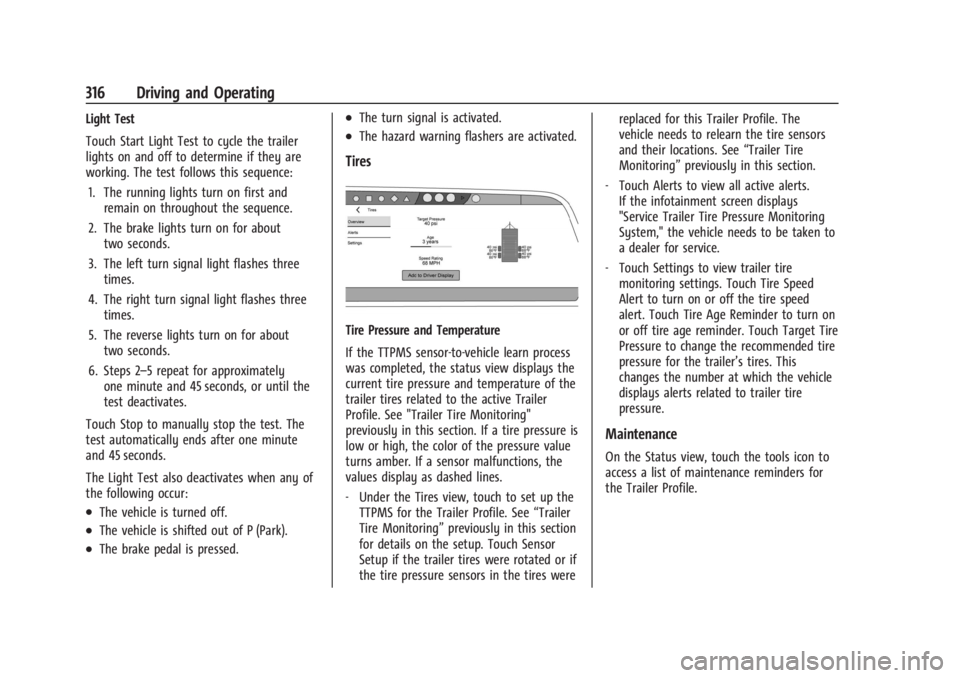
Tire Pressure and Temperature
If the TTPMS sensor-to-vehicle learn process
was completed, the status view displays the
current tire pressure and temperature of the
trailer tires related to the active Trailer
Profile. See "Trailer Tire Monitoring"
previously in this section. If a tire pressure is
low or high, the color of the pressure value
turns amber. If a sensor malfunctions, the
values display as dashed lines.
‐ Under the Tires view, touch to set up the
TTPMS for the Trailer Profile. See “Trailer
Tire Monitoring” previously in this section
for details on the setup. Touch Sensor
Setup if the trailer tires were rotated or if
the tire pressure sensors in the tires were replaced for this Trailer Profile. The
vehicle needs to relearn the tire sensors
and their locations. See
“Trailer Tire
Monitoring” previously in this section.
‐ Touch Alerts to view all active alerts.
If the infotainment screen displays
"Service Trailer Tire Pressure Monitoring
System," the vehicle needs to be taken to
a dealer for service.
‐ Touch Settings to view trailer tire
monitoring settings. Touch Tire Speed
Alert to turn on or off the tire speed
alert. Touch Tire Age Reminder to turn on
or off tire age reminder. Touch Target Tire
Pressure to change the recommended tire
pressure for the trailer’s tires. This
changes the number at which the vehicle
displays alerts related to trailer tire
pressure.
Maintenance
On the Status view, touch the tools icon to
access a list of maintenance reminders for
the Trailer Profile.
Page 335 of 429
Chevrolet Silverado EV Owner Manual (GMNA-Localizing-U.S./Canada-
16702912) - 2024 - CRC - 1/13/23
334 Vehicle Care
Windshield Replacement
Driver Assistance Systems
If the windshield needs to be replaced and
the vehicle is equipped with a front camera
sensor for the Driver Assistance Systems, a
GM replacement windshield is
recommended. The replacement windshield
must be installed according to GM
specifications for proper alignment. If it is
not, these systems may not work properly,
they may display messages, or they may
not work at all. See your dealer for proper
windshield replacement.
Gas Strut(s)
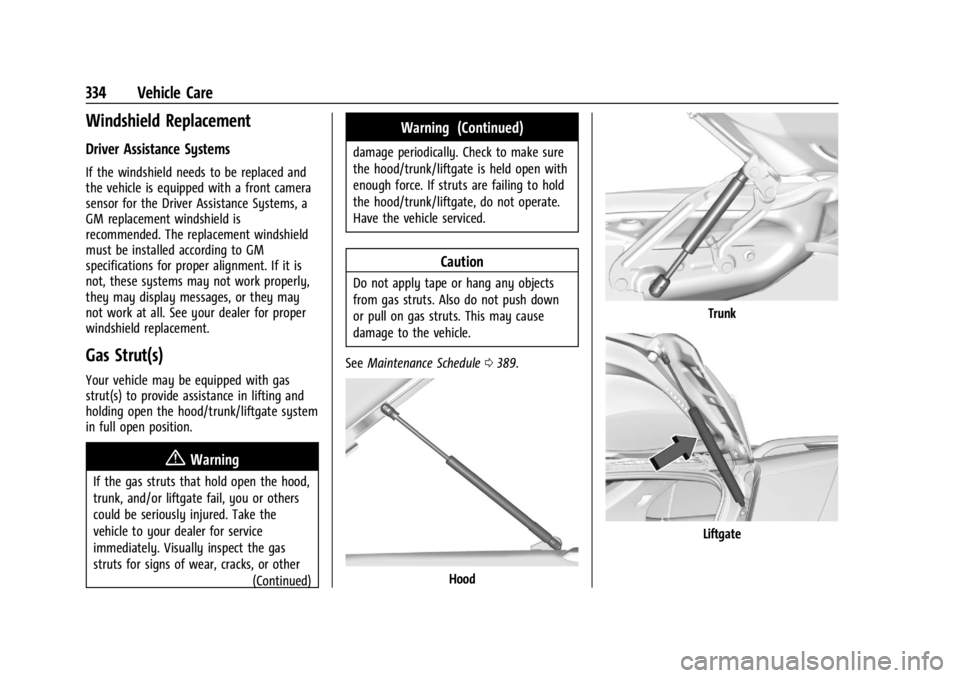
Your vehicle may be equipped with gas
strut(s) to provide assistance in lifting and
holding open the hood/trunk/liftgate system
in full open position.
{Warning
If the gas struts that hold open the hood,
trunk, and/or liftgate fail, you or others
could be seriously injured. Take the
vehicle to your dealer for service
immediately. Visually inspect the gas
struts for signs of wear, cracks, or other(Continued)
Warning (Continued)
damage periodically. Check to make sure
the hood/trunk/liftgate is held open with
enough force. If struts are failing to hold
the hood/trunk/liftgate, do not operate.
Have the vehicle serviced.
Caution
Do not apply tape or hang any objects
from gas struts. Also do not push down
or pull on gas struts. This may cause
damage to the vehicle.
See Maintenance Schedule 0389.
Hood
Trunk
Liftgate
Page 351 of 429
Chevrolet Silverado EV Owner Manual (GMNA-Localizing-U.S./Canada-
16702912) - 2024 - CRC - 1/13/23
350 Vehicle Care
Warning (Continued)
.Needless damage from road
hazards
The Tire and Loading Information label
on the vehicle indicates the original
equipment tires and the correct cold
tire inflation pressures. The
recommended pressure is the minimum
air pressure needed to support the
vehicle's maximum load carrying
capacity.
For additional information regarding
how much weight the vehicle can carry,
and an example of the Tire and Loading
Information label, see Vehicle Load
Limits 0193. How the vehicle is loaded
affects vehicle handling and ride
comfort. Never load the vehicle with
more weight than it was designed to
carry.
When to Check
Check the pressure of the tires once a
month or more. Do not forget the spare, if the vehicle
has one. See
Full-Size Spare Tire 0374
for additional information.
How to Check
Use a good quality pocket-type gauge
to check tire pressure. Proper tire
inflation cannot be determined by
looking at the tire. Check the tire
inflation pressure when the tires are
cold, meaning the vehicle has not been
driven for at least three hours or no
more than 1.6 km (1 mi).
Remove the valve cap from the tire
valve stem. Press the tire gauge firmly
onto the valve to get a pressure
measurement. If the cold tire inflation
pressure matches the recommended
pressure on the Tire and Loading
Information label, no further adjustment
is necessary. If the inflation pressure is
low, add air until the recommended
pressure is reached. If the inflation
pressure is high, press on the metal
stem in the center of the tire valve to
release air. Re-check the tire pressure with the tire
gauge.
Put the valve caps back on the valve
stems to keep out dirt and moisture.
Use only valve caps designed for the
vehicle by GM. TPMS sensors could be
damaged and would not be covered by
the vehicle warranty.
Tire Pressure for High-Speed
Operation
{Warning
Driving at high speeds, 160 km/h
(100 mph) or higher, puts additional
strain on tires. Sustained high-speed
driving causes excessive heat buildup and
can cause sudden tire failure. This could
cause a crash, and you or others could be
killed. Some high-speed rated tires require
inflation pressure adjustment for
high-speed operation. When speed limits
and road conditions allow the vehicle to
be driven at high speeds, make sure the
tires are rated for high-speed operation,
(Continued)
Page 352 of 429
Chevrolet Silverado EV Owner Manual (GMNA-Localizing-U.S./Canada-
16702912) - 2024 - CRC - 1/13/23
Vehicle Care 351
Warning (Continued)
are in excellent condition, and are set to
the correct cold tire inflation pressure for
the vehicle load.
Tire Pressure Monitor System
The Tire Pressure Monitor System (TPMS)
uses radio and sensor technology to check
tire pressure levels. The TPMS sensors
monitor the air pressure in your tires and
transmit tire pressure readings to a receiver
located in the vehicle.
Each tire, including the spare (if provided),
should be checked monthly when cold and
inflated to the inflation pressure
recommended by the vehicle manufacturer
on the vehicle placard or tire inflation
pressure label. (If your vehicle has tires of a
different size than the size indicated on the
vehicle placard or tire inflation pressure
label, you should determine the proper tire
inflation pressure for those tires.)
As an added safety feature, your vehicle has
been equipped with a tire pressure
monitoring system (TPMS) that illuminates a
low tire pressure telltale when one or more
of your tires is significantly under-inflated.Accordingly, when the low tire pressure
telltale illuminates, you should stop and
check your tires as soon as possible, and
inflate them to the proper pressure. Driving
on a significantly under-inflated tire causes
the tire to overheat and can lead to tire
failure. Under-inflation also reduces energy
efficiency and tire tread life, and may affect
the vehicle's handling and stopping ability.
Please note that the TPMS is not a
substitute for proper tire maintenance, and
it is the driver's responsibility to maintain
correct tire pressure, even if under-inflation
has not reached the level to trigger
illumination of the TPMS low tire pressure
telltale.
Your vehicle has also been equipped with a
TPMS malfunction indicator to indicate when
the system is not operating properly. The
TPMS malfunction indicator is combined
with the low tire pressure telltale. When the
system detects a malfunction, the telltale
will flash for approximately one minute and
then remain continuously illuminated. This
sequence will continue upon subsequent
vehicle start-ups as long as the malfunction
exists.
When the malfunction indicator is
illuminated, the system may not be able to
detect or signal low tire pressure as
intended. TPMS malfunctions may occur for
a variety of reasons, including the
installation of replacement or alternate tires
or wheels on the vehicle that prevent the
TPMS from functioning properly. Always
check the TPMS malfunction telltale after
replacing one or more tires or wheels on
your vehicle to ensure that the replacement
or alternate tires and wheels allow the
TPMS to continue to function properly.
See
Tire Pressure Monitor Operation 0351.
See Radio Frequency Statement 0404.
Tire Pressure Monitor Operation
This vehicle may have a Tire Pressure
Monitor System (TPMS). The TPMS is
designed to warn the driver when a low tire
pressure condition exists. TPMS sensors are
mounted onto each tire and wheel
assembly, excluding the spare tire and
wheel assembly. The TPMS sensors monitor
the air pressure in the tires and transmit the
tire pressure readings to a receiver located
in the vehicle.
Page 353 of 429
Chevrolet Silverado EV Owner Manual (GMNA-Localizing-U.S./Canada-
16702912) - 2024 - CRC - 1/13/23
352 Vehicle Care
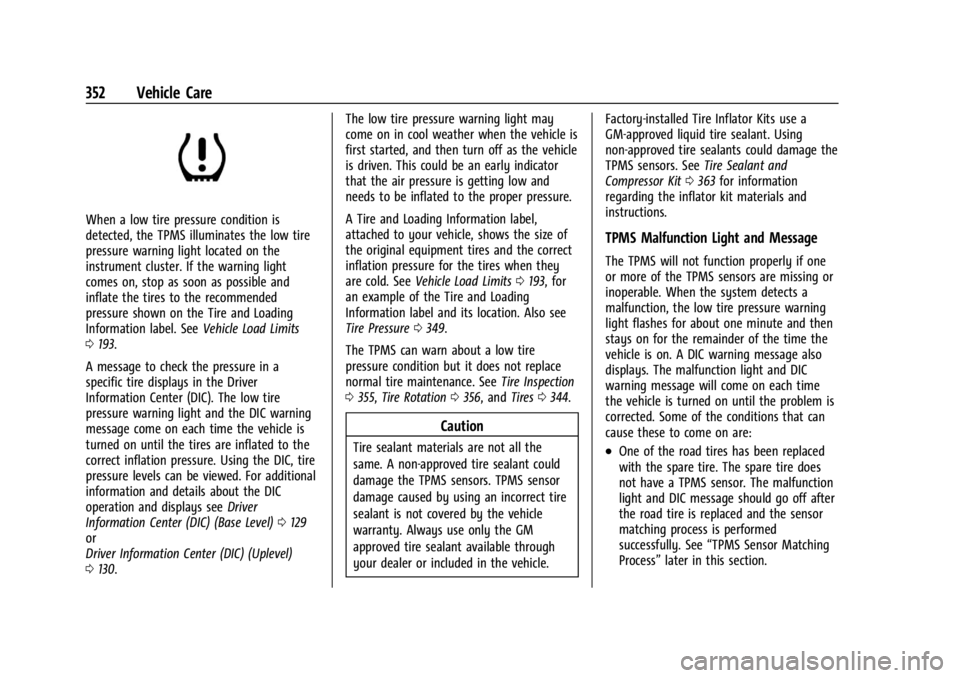
When a low tire pressure condition is
detected, the TPMS illuminates the low tire
pressure warning light located on the
instrument cluster. If the warning light
comes on, stop as soon as possible and
inflate the tires to the recommended
pressure shown on the Tire and Loading
Information label. SeeVehicle Load Limits
0 193.
A message to check the pressure in a
specific tire displays in the Driver
Information Center (DIC). The low tire
pressure warning light and the DIC warning
message come on each time the vehicle is
turned on until the tires are inflated to the
correct inflation pressure. Using the DIC, tire
pressure levels can be viewed. For additional
information and details about the DIC
operation and displays see Driver
Information Center (DIC) (Base Level) 0129
or
Driver Information Center (DIC) (Uplevel)
0 130. The low tire pressure warning light may
come on in cool weather when the vehicle is
first started, and then turn off as the vehicle
is driven. This could be an early indicator
that the air pressure is getting low and
needs to be inflated to the proper pressure.
A Tire and Loading Information label,
attached to your vehicle, shows the size of
the original equipment tires and the correct
inflation pressure for the tires when they
are cold. See
Vehicle Load Limits 0193, for
an example of the Tire and Loading
Information label and its location. Also see
Tire Pressure 0349.
The TPMS can warn about a low tire
pressure condition but it does not replace
normal tire maintenance. See Tire Inspection
0 355, Tire Rotation 0356, and Tires0344.
Caution
Tire sealant materials are not all the
same. A non-approved tire sealant could
damage the TPMS sensors. TPMS sensor
damage caused by using an incorrect tire
sealant is not covered by the vehicle
warranty. Always use only the GM
approved tire sealant available through
your dealer or included in the vehicle. Factory-installed Tire Inflator Kits use a
GM-approved liquid tire sealant. Using
non-approved tire sealants could damage the
TPMS sensors. See
Tire Sealant and
Compressor Kit 0363 for information
regarding the inflator kit materials and
instructions.
TPMS Malfunction Light and Message
The TPMS will not function properly if one
or more of the TPMS sensors are missing or
inoperable. When the system detects a
malfunction, the low tire pressure warning
light flashes for about one minute and then
stays on for the remainder of the time the
vehicle is on. A DIC warning message also
displays. The malfunction light and DIC
warning message will come on each time
the vehicle is turned on until the problem is
corrected. Some of the conditions that can
cause these to come on are:
.One of the road tires has been replaced
with the spare tire. The spare tire does
not have a TPMS sensor. The malfunction
light and DIC message should go off after
the road tire is replaced and the sensor
matching process is performed
successfully. See “TPMS Sensor Matching
Process” later in this section.
Page 354 of 429
Chevrolet Silverado EV Owner Manual (GMNA-Localizing-U.S./Canada-
16702912) - 2024 - CRC - 1/13/23
Vehicle Care 353
.The TPMS sensor matching process was
not done or not completed successfully
after rotating the tires. The malfunction
light and the DIC message should go off
after successfully completing the sensor
matching process. See "TPMS Sensor
Matching Process" later in this section.
.One or more TPMS sensors are missing or
damaged. The malfunction light and the
DIC message should go off when the
TPMS sensors are installed and the sensor
matching process is performed
successfully. See your dealer for service.
.Replacement tires or wheels do not match
the original equipment tires or wheels.
Tires and wheels other than those
recommended could prevent the TPMS
from functioning properly. SeeBuying
New Tires 0358.
.Operating electronic devices or being near
facilities using radio wave frequencies
similar to the TPMS could cause the TPMS
sensors to malfunction.
If the TPMS is not functioning properly it
cannot detect or signal a low tire pressure
condition. See your dealer for service if the
TPMS malfunction light and DIC message
come on and stay on.
Tire Fill Alert (If Equipped)
This feature provides visual and audible
alerts outside the vehicle to help when
inflating an underinflated tire to the
recommended cold tire pressure.
When the low tire pressure warning light
comes on: 1. Park the vehicle in a safe, level place.
2. Set the parking brake firmly.
3. Place the vehicle in P (Park).
4. Add air to the tire that is underinflated. The turn signal lamp will flash.
When the recommended pressure is
reached, the horn sounds once and the
turn signal lamp will stop flashing and
briefly turn solid.
Repeat these steps for all underinflated tires
that have illuminated the low tire pressure
warning light.
{Warning
Overinflating a tire could cause the tire
to rupture and you or others could be
injured. Do not exceed the maximum (Continued)
Warning (Continued)
pressure listed on the tire sidewall. See
Tire Sidewall Labeling0346 and
Vehicle Load Limits 0193.
If the tire is overinflated by more than
35 kPa (5 psi), the horn will sound multiple
times and the turn signal lamp will continue
to flash for several seconds after filling
stops. To release and correct the pressure,
while the turn signal lamp is still flashing,
briefly press the center of the valve stem.
When the recommended pressure is reached,
the horn sounds once.
If the turn signal lamp does not flash within
15 seconds after starting to inflate the tire,
the tire fill alert has not been activated or is
not working.
If the hazard warning flashers are on, the
tire fill alert visual feedback will not work
properly.
The TPMS will not activate the tire fill alert
properly under the following conditions:
.There is interference from an external
device or transmitter.
.The air pressure from the inflation device
is not sufficient to inflate the tire.