parking brake CHEVROLET SONIC 2016 2.G User Guide
[x] Cancel search | Manufacturer: CHEVROLET, Model Year: 2016, Model line: SONIC, Model: CHEVROLET SONIC 2016 2.GPages: 353, PDF Size: 7.74 MB
Page 203 of 353
Chevrolet Sonic Owner Manual (GMNA-Localizing-U.S/Canada-9085902) -
2016 - CRC - 5/27/15
202 Driving and Operating
Brakes
Antilock Brake
System (ABS)
This vehicle has ABS, an advanced
electronic braking system that helps
prevent a braking skid.
When the vehicle begins to drive
away, ABS checks itself.
A momentary motor or clicking noise
might be heard while this test is
going on, and it might even be
noticed that the brake pedal moves
a little. This is normal.
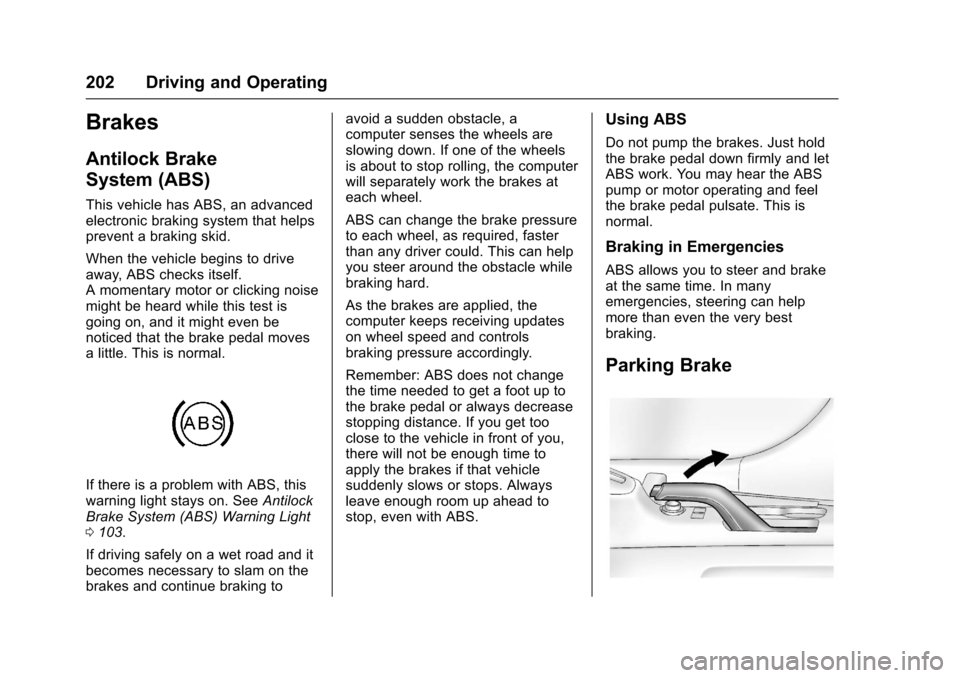
If there is a problem with ABS, this
warning light stays on. SeeAntilock
Brake System (ABS) Warning Light
0 103.
If driving safely on a wet road and it
becomes necessary to slam on the
brakes and continue braking to avoid a sudden obstacle, a
computer senses the wheels are
slowing down. If one of the wheels
is about to stop rolling, the computer
will separately work the brakes at
each wheel.
ABS can change the brake pressure
to each wheel, as required, faster
than any driver could. This can help
you steer around the obstacle while
braking hard.
As the brakes are applied, the
computer keeps receiving updates
on wheel speed and controls
braking pressure accordingly.
Remember: ABS does not change
the time needed to get a foot up to
the brake pedal or always decrease
stopping distance. If you get too
close to the vehicle in front of you,
there will not be enough time to
apply the brakes if that vehicle
suddenly slows or stops. Always
leave enough room up ahead to
stop, even with ABS.
Using ABS
Do not pump the brakes. Just hold
the brake pedal down firmly and let
ABS work. You may hear the ABS
pump or motor operating and feel
the brake pedal pulsate. This is
normal.
Braking in Emergencies
ABS allows you to steer and brake
at the same time. In many
emergencies, steering can help
more than even the very best
braking.
Parking Brake
Page 204 of 353
Chevrolet Sonic Owner Manual (GMNA-Localizing-U.S/Canada-9085902) -
2016 - CRC - 5/27/15
Driving and Operating 203
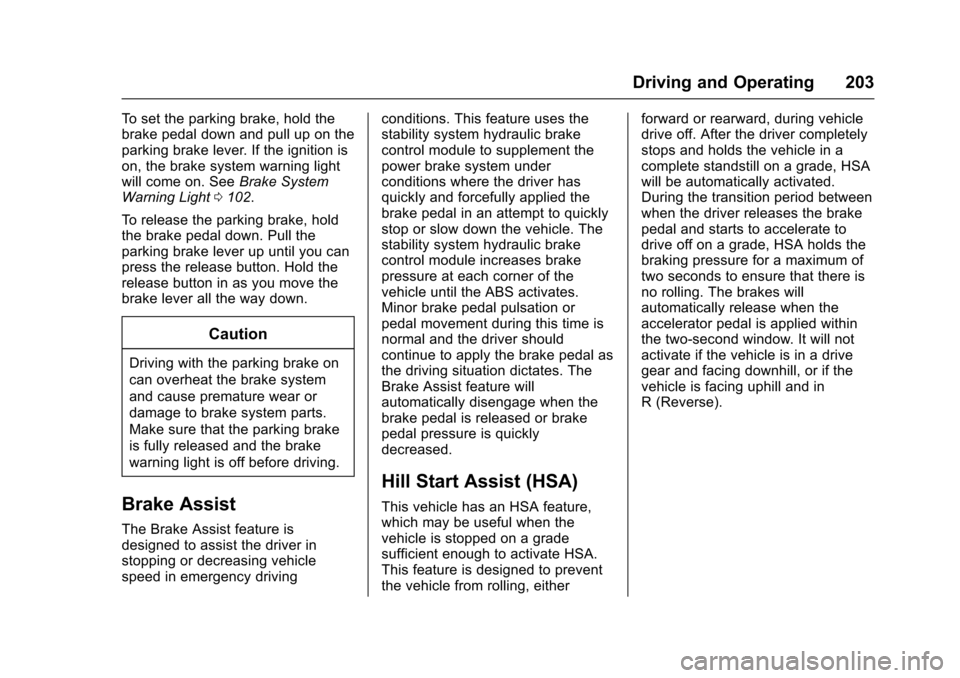
To set the parking brake, hold the
brake pedal down and pull up on the
parking brake lever. If the ignition is
on, the brake system warning light
will come on. SeeBrake System
Warning Light 0102.
To release the parking brake, hold
the brake pedal down. Pull the
parking brake lever up until you can
press the release button. Hold the
release button in as you move the
brake lever all the way down.
Caution
Driving with the parking brake on
can overheat the brake system
and cause premature wear or
damage to brake system parts.
Make sure that the parking brake
is fully released and the brake
warning light is off before driving.
Brake Assist
The Brake Assist feature is
designed to assist the driver in
stopping or decreasing vehicle
speed in emergency driving conditions. This feature uses the
stability system hydraulic brake
control module to supplement the
power brake system under
conditions where the driver has
quickly and forcefully applied the
brake pedal in an attempt to quickly
stop or slow down the vehicle. The
stability system hydraulic brake
control module increases brake
pressure at each corner of the
vehicle until the ABS activates.
Minor brake pedal pulsation or
pedal movement during this time is
normal and the driver should
continue to apply the brake pedal as
the driving situation dictates. The
Brake Assist feature will
automatically disengage when the
brake pedal is released or brake
pedal pressure is quickly
decreased.
Hill Start Assist (HSA)
This vehicle has an HSA feature,
which may be useful when the
vehicle is stopped on a grade
sufficient enough to activate HSA.
This feature is designed to prevent
the vehicle from rolling, eitherforward or rearward, during vehicle
drive off. After the driver completely
stops and holds the vehicle in a
complete standstill on a grade, HSA
will be automatically activated.
During the transition period between
when the driver releases the brake
pedal and starts to accelerate to
drive off on a grade, HSA holds the
braking pressure for a maximum of
two seconds to ensure that there is
no rolling. The brakes will
automatically release when the
accelerator pedal is applied within
the two-second window. It will not
activate if the vehicle is in a drive
gear and facing downhill, or if the
vehicle is facing uphill and in
R (Reverse).
Page 209 of 353
Chevrolet Sonic Owner Manual (GMNA-Localizing-U.S/Canada-9085902) -
2016 - CRC - 5/27/15
208 Driving and Operating
accelerator pedal to maintain the
vehicle speed. When going
downhill, you might have to brake or
shift to a lower gear to keep your
speed down. If the brake pedal is
applied, cruise control will
disengage.
Ending Cruise Control
There are four ways to end cruise
control:
.To disengage cruise control,
step lightly on the brake pedal or
clutch for manual transmission.
. Press
non the steering wheel.
. Shift the transmission to
N (Neutral).
. To turn off cruise control, press
oon the steering wheel.
Erasing Speed Memory
The cruise control set speed is
erased from memory if the
obutton
is pressed or if the ignition is
turned off.
Driver Assistance
Systems
Rear Vision
Camera (RVC)
This vehicle may have the RVC
system. Read this entire section
before using it.
The RVC system can assist the
driver when backing up by
displaying a view of the area behind
the vehicle.
{Warning
The camera(s) do not display
children, pedestrians, bicyclists,
crossing traffic, animals, or any
other object outside of the
cameras’ field of view, below the
bumper, or under the vehicle.
Shown distances may be different
from actual distances. Do not
drive or park the vehicle using
only these camera(s). Always
check behind and around the
(Continued)
Warning (Continued)
vehicle before driving. Failure to
use proper care may result in
injury, death, or vehicle damage.
An image appears on the
infotainment screen when the
vehicle is shifted into R (Reverse).
The infotainment screen goes to the
previous screen after approximately
4 seconds once the vehicle is
shifted out of R (Reverse).
To return to the previous screen
sooner, do one of the following:
. Shift into P (Park).
. Reach a vehicle speed of
8 km/h (5 mph).
Guidelines
The RVC system has a guideline
overlay that can help the driver align
the vehicle when backing into a
parking spot.
To turn the guidelines on or off: 1. Shift into P (Park).
Page 220 of 353
Chevrolet Sonic Owner Manual (GMNA-Localizing-U.S/Canada-9085902) -
2016 - CRC - 5/27/15
Vehicle Care 219
Vehicle Care
General Information
General Information . . . . . . . . . . 220
California Proposition65 Warning . . . . . . . . . . . . . . . . . 220
California Perchlorate Materials Requirements . . . . . 220
Accessories and Modifications . . . . . . . . . . . . . . . . 220
Vehicle Checks
Doing Your OwnService Work . . . . . . . . . . . . . . . 221
Hood . . . . . . . . . . . . . . . . . . . . . . . . . 222
Engine Compartment Overview . . . . . . . . . . . . . . . . . . . . 223
Engine Oil . . . . . . . . . . . . . . . . . . . . 226
Engine Oil Life System . . . . . . . 228
Automatic Transmission Fluid . . . . . . . . . . . . . . . . . . . . . . . . 229
Manual Transmission Fluid . . . 230
Hydraulic Clutch . . . . . . . . . . . . . . 230
Engine Air Cleaner/Filter . . . . . . 230
Cooling System . . . . . . . . . . . . . . 232
Engine Coolant . . . . . . . . . . . . . . . 233
Engine Overheating . . . . . . . . . . 236
Washer Fluid . . . . . . . . . . . . . . . . . 237
Brakes . . . . . . . . . . . . . . . . . . . . . . . 238
Brake Fluid . . . . . . . . . . . . . . . . . . . 239 Battery - North America . . . . . . 240
Starter Switch Check . . . . . . . . . 240
Automatic Transmission Shift
Lock Control Function
Check . . . . . . . . . . . . . . . . . . . . . . . 241
Ignition Transmission Lock Check . . . . . . . . . . . . . . . . . . . . . . . 241
Park Brake and P (Park) Mechanism Check . . . . . . . . . . 241
Wiper Blade Replacement . . . . 242
Headlamp Aiming
Headlamp Aiming . . . . . . . . . . . . 243
Bulb Replacement
Bulb Replacement . . . . . . . . . . . . 243
Halogen Bulbs . . . . . . . . . . . . . . . . 243
Headlamps, Front Turn Signal and Parking Lamps . . . . . . . . . 244
Fog Lamps (LS, LT, and LTZ) . . . . . . . . . . . . . . . . . . . . 245
Fog Lamps (RS) . . . . . . . . . . . . . . 245
Taillamps, Turn Signal, Stoplamps, and Back-Up
Lamps . . . . . . . . . . . . . . . . . . . . . . 245
License Plate Lamp . . . . . . . . . . 246
Replacement Bulbs . . . . . . . . . . . 247
Electrical System
Electrical System Overload . . . 248
Fuses and Circuit Breakers . . . 248 Engine Compartment Fuse
Block . . . . . . . . . . . . . . . . . . . . . . . . 249
Instrument Panel Fuse Block . . . . . . . . . . . . . . . . . . . . . . . . 252
Wheels and Tires
Tires . . . . . . . . . . . . . . . . . . . . . . . . . . 254
All-Season Tires . . . . . . . . . . . . . . 255
Winter Tires . . . . . . . . . . . . . . . . . . 255
Summer Tires . . . . . . . . . . . . . . . . 256
Tire Sidewall Labeling . . . . . . . . 256
Tire Designations . . . . . . . . . . . . . 258
Tire Terminology andDefinitions . . . . . . . . . . . . . . . . . . 259
Tire Pressure . . . . . . . . . . . . . . . . . 261
Tire Pressure Monitor System . . . . . . . . . . . . . . . . . . . . . . 262
Tire Pressure Monitor Operation . . . . . . . . . . . . . . . . . . . 263
Tire Inspection . . . . . . . . . . . . . . . . 266
Tire Rotation . . . . . . . . . . . . . . . . . 266
When It Is Time for New Tires . . . . . . . . . . . . . . . . . . . . . . . . 267
Buying New Tires . . . . . . . . . . . . . 268
Different Size Tires and Wheels . . . . . . . . . . . . . . . . . . . . . . 270
Uniform Tire Quality Grading . . . . . . . . . . . . . . . . . . . . . 270
Wheel Alignment and Tire Balance . . . . . . . . . . . . . . . . . . . . . 272
Wheel Replacement . . . . . . . . . . 272
Page 241 of 353
Chevrolet Sonic Owner Manual (GMNA-Localizing-U.S/Canada-9085902) -
2016 - CRC - 5/27/15
240 Vehicle Care
Battery - North America
The original equipment battery is
maintenance free. Do not remove
the cap and do not add fluid.
Refer to the replacement number
shown on the original battery label
when a new battery is needed. See
Engine Compartment Overview
0223 for battery location.
{Warning
WARNING: Battery posts,
terminals, and related
accessories contain lead and lead
compounds, chemicals known to
the State of California to cause
cancer and birth defects or other
reproductive harm. Batteries also
contain other chemicals known to
the State of California to cause
cancer. WASH HANDS AFTER
HANDLING. SeeCalifornia
Proposition 65 Warning 0220.
Vehicle Storage
{Warning
Batteries have acid that can burn
you and gas that can explode.
You can be badly hurt if you are
not careful. See Jump Starting -
North America 0287 for tips on
working around a battery without
getting hurt.
Infrequent Usage: Remove the
black, negative (−) cable from the
battery to keep the battery from
running down.
Extended Storage: Remove the
black, negative (−) cable from the
battery or use a battery trickle
charger.
Starter Switch Check
{Warning
When you are doing this
inspection, the vehicle could
move suddenly. If the vehicle
moves, you or others could be
injured.
1. Before starting this check, be sure there is enough room
around the vehicle.
2. Apply both the parking brake and the regular brake.
Do not use the accelerator
pedal, and be ready to turn off
the engine immediately if it
starts.
3. For automatic transmission vehicles, try to start the engine
in each gear. The vehicle
should start only in P (Park) or
N (Neutral). If the vehicle starts
in any other position, contact
your dealer for service.
Page 242 of 353
Chevrolet Sonic Owner Manual (GMNA-Localizing-U.S/Canada-9085902) -
2016 - CRC - 5/27/15
Vehicle Care 241
For manual transmission
vehicles, put the shift lever in
Neutral, push the clutch pedal
down halfway, and try to start
the engine. The vehicle should
start only when the clutch
pedal is pushed down all the
way to the floor. If the vehicle
starts when the clutch pedal is
not pushed all the way down,
contact your dealer for service.
Automatic Transmission
Shift Lock Control
Function Check
{Warning
When you are doing this
inspection, the vehicle could
move suddenly. If the vehicle
moves, you or others could be
injured.
1. Before starting this check, be sure there is enough room
around the vehicle. It should be
parked on a level surface. 2. Apply the parking brake. Be
ready to apply the regular
brake immediately if the vehicle
begins to move.
3. With the engine off, turn the ignition on, but do not start the
engine. Without applying the
regular brake, try to move the
shift lever out of P (Park) with
normal effort. If the shift lever
moves out of P (Park), contact
your dealer for service.
Ignition Transmission
Lock Check
While parked, and with the parking
brake set, try to turn the ignition to
LOCK/OFF in each shift lever
position.
.For automatic transmission
vehicles, the ignition should turn
to LOCK/OFF only when the
shift lever is in P (Park).
. For manual transmission
vehicles, the ignition should turn
to LOCK/OFF only when the
shift lever is in neutral. On all vehicles, the ignition key
should come out only in LOCK/OFF.
Contact your dealer if service is
required.
Park Brake and P (Park)
Mechanism Check
{Warning
When you are doing this check,
the vehicle could begin to move.
You or others could be injured
and property could be damaged.
Make sure there is room in front
of the vehicle in case it begins to
roll. Be ready to apply the regular
brake at once should the vehicle
begin to move.
Park on a fairly steep hill, with the
vehicle facing downhill. Keeping
your foot on the regular brake, set
the parking brake.
. To check the parking brake's
holding ability: With the engine
running and the transmission in
N (Neutral), slowly remove foot
Page 243 of 353
Chevrolet Sonic Owner Manual (GMNA-Localizing-U.S/Canada-9085902) -
2016 - CRC - 5/27/15
242 Vehicle Care
pressure from the regular brake
pedal. Do this until the vehicle is
held by the parking brake only.
. To check the P (Park)
mechanism's holding ability:
With the engine running, shift to
P (Park). Then release the
parking brake followed by the
regular brake.
Contact your dealer if service is
required.
Wiper Blade Replacement
Front Wiper Blade
Replacement
Windshield wiper blades should be
inspected for wear or cracking. See
the Maintenance Schedule 0302 for
more information.
Replacement blades come in
different types and are removed in
different ways. For proper
windshield wiper blade length and
type, see Maintenance
Replacement Parts 0312.
Caution
Allowing the wiper arm to touch
the windshield when no wiper
blade is installed could damage
the windshield. Any damage that
occurs would not be covered by
the vehicle warranty. Do not allow
the wiper arm to touch the
windshield.
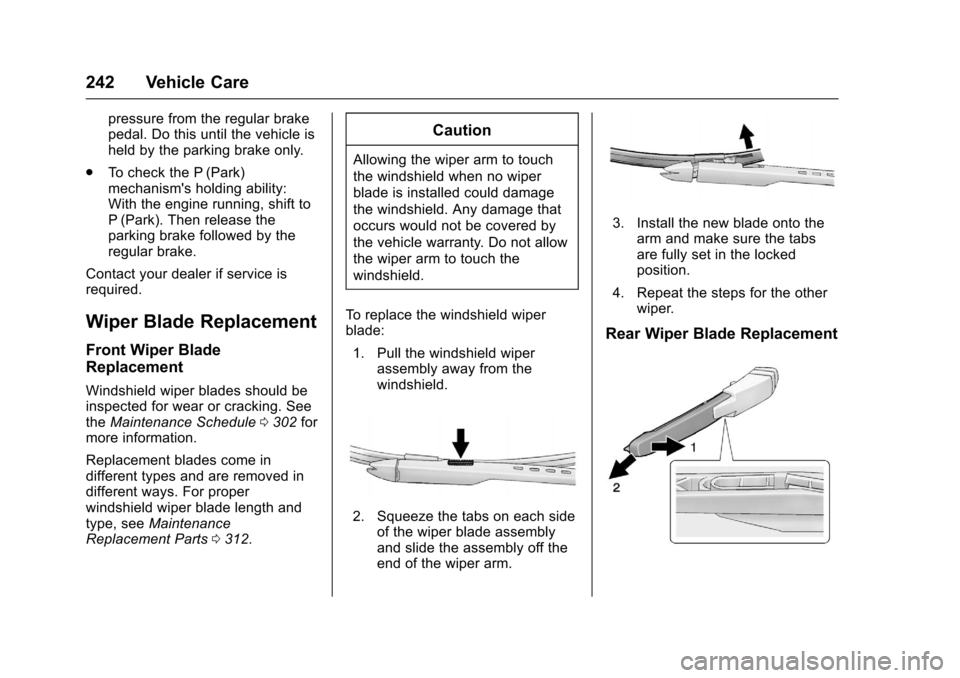
To replace the windshield wiper
blade: 1. Pull the windshield wiper assembly away from the
windshield.
2. Squeeze the tabs on each sideof the wiper blade assembly
and slide the assembly off the
end of the wiper arm.
3. Install the new blade onto the
arm and make sure the tabs
are fully set in the locked
position.
4. Repeat the steps for the other wiper.
Rear Wiper Blade Replacement
Page 266 of 353
Chevrolet Sonic Owner Manual (GMNA-Localizing-U.S/Canada-9085902) -
2016 - CRC - 5/27/15
Vehicle Care 265
.One of the road tires has been
replaced with the spare tire. The
spare tire does not have a
TPMS sensor. The malfunction
light should go off after the road
tire is replaced and the sensor
matching process is performed
successfully. See "TPMS Sensor
Matching Process" later in this
section.
. The TPMS sensor matching
process was not done or not
completed successfully after
rotating the tires. The
malfunction light should go off
after successfully completing the
sensor matching process. See
"TPMS Sensor Matching
Process" later in this section.
. One or more TPMS sensors are
missing or damaged. The
malfunction light should go off
when the TPMS sensors are
installed and the sensor
matching process is performed
successfully. See your dealer for
service. .
Replacement tires or wheels do
not match the original equipment
tires or wheels. Tires and wheels
other than those recommended
could prevent the TPMS from
functioning properly. See Buying
New Tires 0268.
. Operating electronic devices or
being near facilities using radio
wave frequencies similar to the
TPMS could cause the TPMS
sensors to malfunction.
If the TPMS is not functioning
properly, it cannot detect or signal a
low tire condition. See your dealer
for service if the TPMS malfunction
light comes on and stays on.
TPMS Sensor Matching
Process
Each TPMS sensor has a unique
identification code. The identification
code needs to be matched to a new
tire/wheel position after rotating the
tires or replacing one or more of the
TPMS sensors. The TPMS sensor
matching process should also be
performed after replacing a spare
tire with a road tire containing the
TPMS sensor. The malfunction light should go off at the next ignition
cycle. The sensors are matched to
the tire/wheel positions, using a
TPMS relearn tool, in the following
order: driver side front tire,
passenger side front tire, passenger
side rear tire, and driver side rear.
See your dealer for service or to
purchase a relearn tool. A TPMS
relearn tool can also be purchased.
See Tire Pressure Monitor Sensor
Activation Tool at
www.gmtoolsandequipment.com or
call 1-800-GM TOOLS
(1-800-468-6657).
There are two minutes to match the
first tire/wheel position, and
five minutes overall to match all four
tire/wheel positions. If it takes
longer, the matching process stops
and must be restarted.
The TPMS sensor matching
process is:
1. Set the parking brake.
2. Turn the ignition to ON/RUN with the engine off.
Page 269 of 353
Chevrolet Sonic Owner Manual (GMNA-Localizing-U.S/Canada-9085902) -
2016 - CRC - 5/27/15
268 Vehicle Care
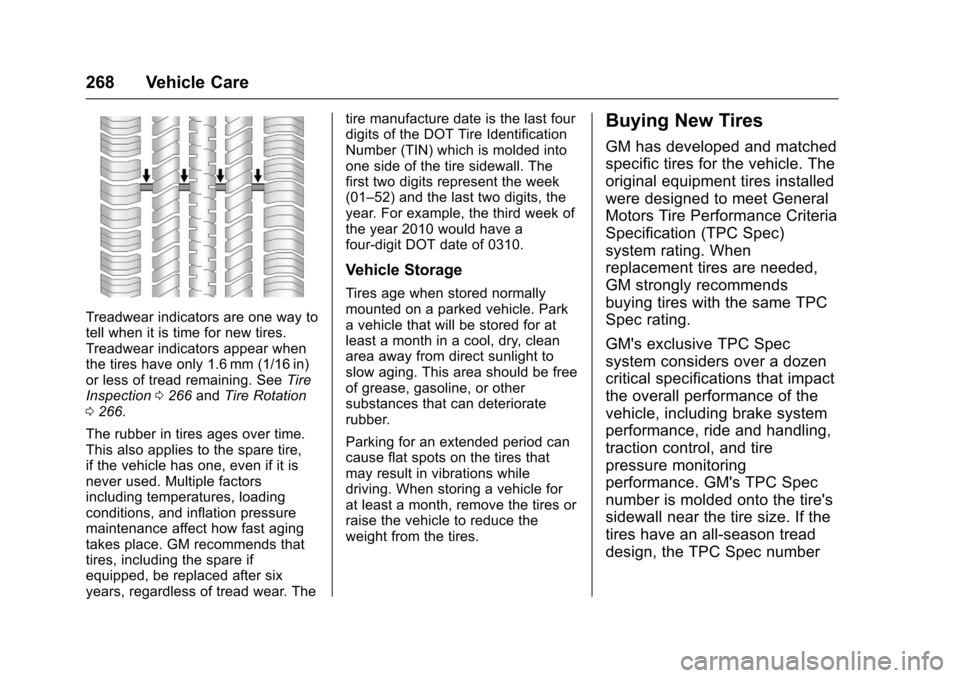
Treadwear indicators are one way to
tell when it is time for new tires.
Treadwear indicators appear when
the tires have only 1.6 mm (1/16 in)
or less of tread remaining. SeeTire
Inspection 0266 andTire Rotation
0 266.
The rubber in tires ages over time.
This also applies to the spare tire,
if the vehicle has one, even if it is
never used. Multiple factors
including temperatures, loading
conditions, and inflation pressure
maintenance affect how fast aging
takes place. GM recommends that
tires, including the spare if
equipped, be replaced after six
years, regardless of tread wear. The tire manufacture date is the last four
digits of the DOT Tire Identification
Number (TIN) which is molded into
one side of the tire sidewall. The
first two digits represent the week
(01–52) and the last two digits, the
year. For example, the third week of
the year 2010 would have a
four-digit DOT date of 0310.
Vehicle Storage
Tires age when stored normally
mounted on a parked vehicle. Park
a vehicle that will be stored for at
least a month in a cool, dry, clean
area away from direct sunlight to
slow aging. This area should be free
of grease, gasoline, or other
substances that can deteriorate
rubber.
Parking for an extended period can
cause flat spots on the tires that
may result in vibrations while
driving. When storing a vehicle for
at least a month, remove the tires or
raise the vehicle to reduce the
weight from the tires.
Buying New Tires
GM has developed and matched
specific tires for the vehicle. The
original equipment tires installed
were designed to meet General
Motors Tire Performance Criteria
Specification (TPC Spec)
system rating. When
replacement tires are needed,
GM strongly recommends
buying tires with the same TPC
Spec rating.
GM's exclusive TPC Spec
system considers over a dozen
critical specifications that impact
the overall performance of the
vehicle, including brake system
performance, ride and handling,
traction control, and tire
pressure monitoring
performance. GM's TPC Spec
number is molded onto the tire's
sidewall near the tire size. If the
tires have an all-season tread
design, the TPC Spec number
Page 275 of 353
Chevrolet Sonic Owner Manual (GMNA-Localizing-U.S/Canada-9085902) -
2016 - CRC - 5/27/15
274 Vehicle Care
Warning (Continued)
be badly injured or killed if the
vehicle slips off the jack. If a jack
is provided with the vehicle, only
use it for changing a flat tire.
If a tire goes flat, avoid further tire
and wheel damage by driving slowly
to a level place, well off the road,
if possible. Turn on the hazard
warning flashers. See Hazard
Warning Flashers 0122.
{Warning
Changing a tire can be
dangerous. The vehicle can slip
off the jack and roll over or fall
causing injury or death. Find a
level place to change the tire. To
help prevent the vehicle from
moving:
1. Set the parking brake firmly. (Continued)
Warning (Continued)
2. Put an automatictransmission in P (Park) or a
manual transmission in
1 (First) or R (Reverse).
3. Turn off the engine and do not restart while the vehicle
is raised.
4. Do not allow passengers to remain in the vehicle.
5. Place wheel blocks, if equipped, on both sides of
the tire at the opposite
corner of the tire being
changed.
This vehicle may come with a jack
and spare tire or a tire sealant and
compressor kit. To use the jacking
equipment to change a spare tire
safely, follow the instructions below.
Then see Tire Changing 0281. To
use the tire sealant and compressor
kit, see Tire Sealant and
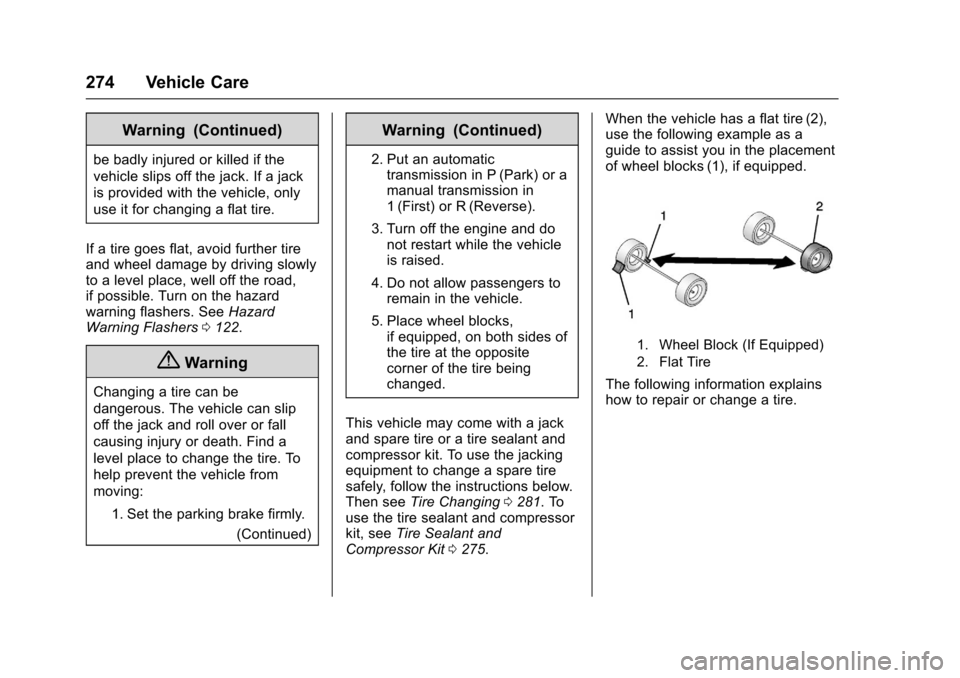
Compressor Kit 0275. When the vehicle has a flat tire (2),
use the following example as a
guide to assist you in the placement
of wheel blocks (1), if equipped.
1. Wheel Block (If Equipped)
2. Flat Tire
The following information explains
how to repair or change a tire.