jack CHEVROLET SPARK 2017 4.G Owners Manual
[x] Cancel search | Manufacturer: CHEVROLET, Model Year: 2017, Model line: SPARK, Model: CHEVROLET SPARK 2017 4.GPages: 331, PDF Size: 5.56 MB
Page 150 of 331
Chevrolet Spark Owner Manual (GMNA-Localizing-U.S./Canada-9956101) -
2017 - crc - 4/25/16
Infotainment System 149
Auxiliary Devices
Using the Auxiliary Input Jack
Settings menus and functions may
vary depending on vehicle options.
If equipped, the auxiliary input jack
can be used to connect external
audio devices such as an iPod
®,
iPhone®, MP3 player, CD player,
and other supported devices for use
as another source for audio
listening. This input jack is not an
audio output; do not plug
headphones into the front auxiliary
input jack.
If equipped, the auxiliary input jack
is located on the center stack below
the climate controls. The
infotainment system can play music
connected by the auxiliary device.
Play will begin when the system has
finished reading the information on
the device. Playing Music
To play music from the device, if the
device is already connected:
1. Press
{.
2. Touch AUDIO.
3. Touch Source.
4. Touch AUX.
5. Touch
0.
To adjust the tone settings, See
“Tone Settings” under“Radio
Controls” inOperation 0138.
Phone
Bluetooth (Overview)
If equipped with Bluetooth®
capability, the system can interact
with many Bluetooth phones, PDAs,
or other devices to:
.
Place and receive hands-free
calls.
. Transmit hands-free data.
. Play audio streaming files.
The device must be paired first. See
“Pairing” later in this section.
To minimize driver distraction,
before driving, and with the vehicle
parked:
. Become familiar with the
features of the cell phone.
Organize the phone book and
contact lists clearly and delete
duplicate or rarely used entries.
If possible, program speed dial
or other shortcuts.
. Review the controls and
operation of the infotainment
system.
Page 199 of 331
Chevrolet Spark Owner Manual (GMNA-Localizing-U.S./Canada-9956101) -
2017 - crc - 4/25/16
198 Driving and Operating
Turning the System On and Off
The RPA system can be turned on
and off using the infotainment
system controls. SeeVehicle
Personalization 0123.
When the System Does Not
Seem to Work Properly
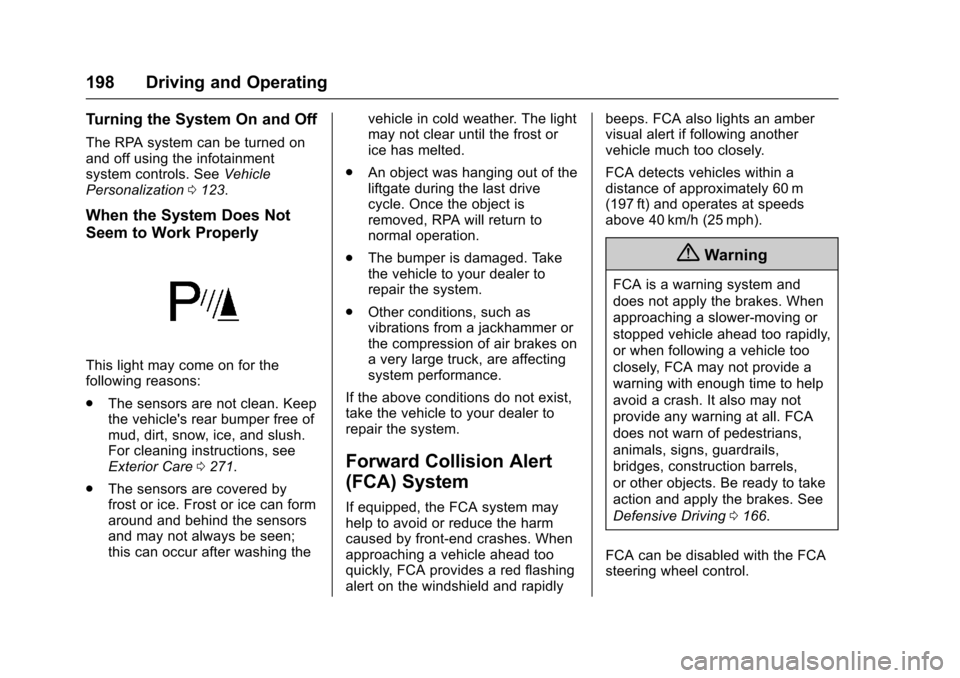
This light may come on for the
following reasons:
.
The sensors are not clean. Keep
the vehicle's rear bumper free of
mud, dirt, snow, ice, and slush.
For cleaning instructions, see
Exterior Care 0271.
. The sensors are covered by
frost or ice. Frost or ice can form
around and behind the sensors
and may not always be seen;
this can occur after washing the vehicle in cold weather. The light
may not clear until the frost or
ice has melted.
. An object was hanging out of the
liftgate during the last drive
cycle. Once the object is
removed, RPA will return to
normal operation.
. The bumper is damaged. Take
the vehicle to your dealer to
repair the system.
. Other conditions, such as
vibrations from a jackhammer or
the compression of air brakes on
a very large truck, are affecting
system performance.
If the above conditions do not exist,
take the vehicle to your dealer to
repair the system.
Forward Collision Alert
(FCA) System
If equipped, the FCA system may
help to avoid or reduce the harm
caused by front-end crashes. When
approaching a vehicle ahead too
quickly, FCA provides a red flashing
alert on the windshield and rapidly beeps. FCA also lights an amber
visual alert if following another
vehicle much too closely.
FCA detects vehicles within a
distance of approximately 60 m
(197 ft) and operates at speeds
above 40 km/h (25 mph).
{Warning
FCA is a warning system and
does not apply the brakes. When
approaching a slower-moving or
stopped vehicle ahead too rapidly,
or when following a vehicle too
closely, FCA may not provide a
warning with enough time to help
avoid a crash. It also may not
provide any warning at all. FCA
does not warn of pedestrians,
animals, signs, guardrails,
bridges, construction barrels,
or other objects. Be ready to take
action and apply the brakes. See
Defensive Driving
0166.
FCA can be disabled with the FCA
steering wheel control.
Page 260 of 331
Chevrolet Spark Owner Manual (GMNA-Localizing-U.S./Canada-9956101) -
2017 - crc - 4/25/16
Vehicle Care 259
Warning (Continued)
Use another type of traction
device only if its manufacturer
recommends it for the vehicle's
tire size combination and road
conditions. Follow that
manufacturer's instructions. To
avoid vehicle damage, drive slow
and readjust or remove the
traction device if it contacts the
vehicle. Do not spin the wheels.
If traction devices are used, install
them on the front tires.
If a Tire Goes Flat
It is unusual for a tire to blow out
while driving, especially if the tires
are maintained properly. SeeTires
0 240. If air goes out of a tire, it is
much more likely to leak out slowly.
But if there ever is a blowout, here
are a few tips about what to expect
and what to do:
If a front tire fails, the flat tire
creates a drag that pulls the vehicle
toward that side. Take your foot off
the accelerator pedal and grip the steering wheel firmly. Steer to
maintain lane position, and then
gently brake to a stop, well off the
road, if possible.
A rear blowout, particularly on a
curve, acts much like a skid and
may require the same correction as
used in a skid. Stop pressing the
accelerator pedal and steer to
straighten the vehicle. It may be
very bumpy and noisy. Gently brake
to a stop, well off the road,
if possible.
{Warning
Driving on a flat tire will cause
permanent damage to the tire.
Re-inflating a tire after it has been
driven on while severely
underinflated or flat may cause a
blowout and a serious crash.
Never attempt to re-inflate a tire
that has been driven on while
severely underinflated or flat.
Have your dealer or an authorized
tire service center repair or
replace the flat tire as soon as
possible.
{Warning
Lifting a vehicle and getting under
it to do maintenance or repairs is
dangerous without the
appropriate safety equipment and
training. If a jack is provided with
the vehicle, it is designed only for
changing a flat tire. If it is used for
anything else, you or others could
be badly injured or killed if the
vehicle slips off the jack. If a jack
is provided with the vehicle, only
use it for changing a flat tire.
If a tire goes flat, avoid further tire
and wheel damage by driving slowly
to a level place, well off the road,
if possible. Turn on the hazard
warning flashers. See Hazard
Warning Flashers 0131.
{Warning
Changing a tire can be
dangerous. The vehicle can slip
off the jack and roll over or fall
(Continued)
Page 261 of 331

Chevrolet Spark Owner Manual (GMNA-Localizing-U.S./Canada-9956101) -
2017 - crc - 4/25/16
260 Vehicle Care
Warning (Continued)
causing injury or death. Find a
level place to change the tire. To
help prevent the vehicle from
moving:1. Set the parking brake firmly.
2. Put an automatictransmission in P (Park) or a
manual transmission in
1 (First) or R (Reverse).
3. Turn off the engine and do not restart while the vehicle
is raised.
4. Do not allow passengers to remain in the vehicle.
5. Place wheel blocks, if equipped, on both sides of
the tire at the opposite
corner of the tire being
changed.
When the vehicle has a flat tire (2),
use the following example as a
guide to assist in the placement of
the wheel blocks (1), if equipped.
1. Wheel Block (If Equipped)
2. Flat Tire
The following information explains
how to repair or change a tire.
Tire Changing
Removing the Spare Tire and
Tools
The spare tire and tools are located
in the storage compartment in the
rear of the vehicle.
To access the spare tire and tools: 1. Open the liftgate. See Liftgate 036.
2. Lift the trim cover.
3. Remove the jack, tools, and spare tire.
4. Place them near the tire being changed.
Removing the Flat Tire and
Installing the Spare Tire
1. Do a safety check beforeproceeding. See If a Tire Goes
Flat 0259.
Page 262 of 331

Chevrolet Spark Owner Manual (GMNA-Localizing-U.S./Canada-9956101) -
2017 - crc - 4/25/16
Vehicle Care 261
2. If there is a wheel cover,remove the wheel nut caps to
access the wheel nuts.
3. Turn the wheel wrench
counterclockwise to loosen the
wheel nuts. Do not remove
them yet.
4. Place the jack at the positionmarked with a half circle.
5. Attach the jack handleextension to the jack by sliding
the hook through the end of
the jack.
6. Turn the wheel wrench clockwise until the lift head is
firmly contacting the proper
lifting point nearest the flat tire.
{Warning
Getting under a vehicle when it is
lifted on a jack is dangerous.
If the vehicle slips off the jack,
you could be badly injured or
killed. Never get under a vehicle
when it is supported only by
a jack.
{Warning
Raising the vehicle with the jack
improperly positioned can
damage the vehicle and even
make the vehicle fall. To help
avoid personal injury and vehicle
(Continued)
Page 263 of 331
Chevrolet Spark Owner Manual (GMNA-Localizing-U.S./Canada-9956101) -
2017 - crc - 4/25/16
262 Vehicle Care
Warning (Continued)
damage, be sure to fit the jack lift
head into the proper location
before raising the vehicle.
{Warning
Lifting a vehicle and getting under
it to do maintenance or repairs is
dangerous without the
appropriate safety equipment and
training. If a jack is provided with
the vehicle, it is designed only for
changing a flat tire. If it is used for
anything else, you or others could
be badly injured or killed if the
vehicle slips off the jack. If a jack
is provided with the vehicle, only
use it for changing a flat tire.
7. Turn the wheel wrench clockwise to raise the vehicle
far enough off the ground so
there is enough room for the
spare tire to fit underneath the
wheel well. 8. Turn the wheel nuts
counterclockwise to
remove them.
9. Remove the flat tire.
{Warning
Rust or dirt on a wheel, or on the
parts to which it is fastened, can
make wheel nuts become loose
after time. The wheel could come
off and cause an accident. When
changing a wheel, remove any
rust or dirt from places where the
wheel attaches to the vehicle. In
an emergency, a cloth or a paper
towel can be used; however, use
a scraper or wire brush later to
remove all rust or dirt.
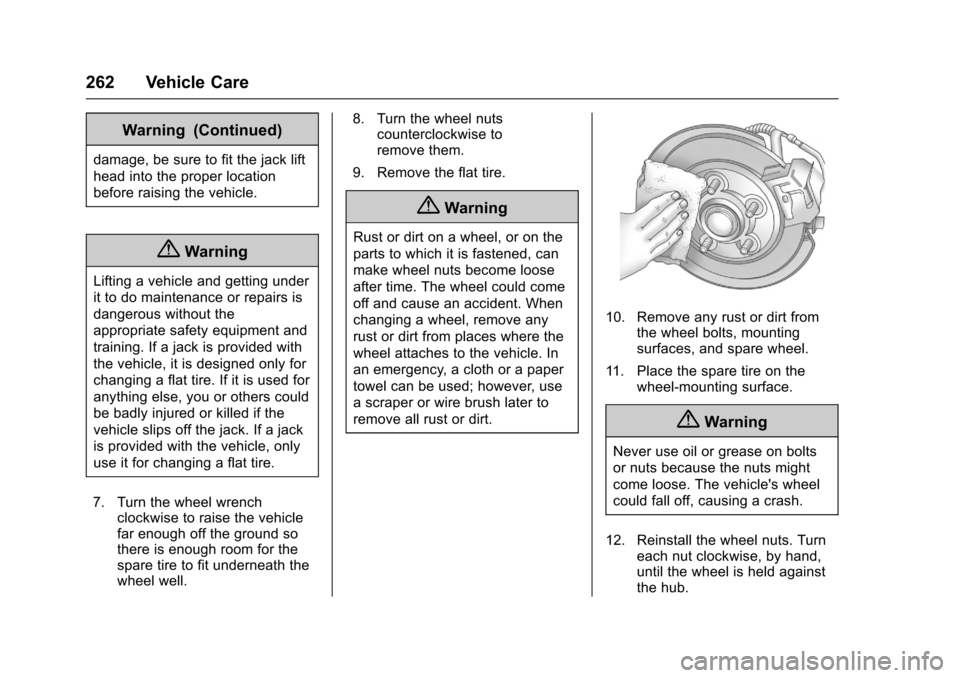
10. Remove any rust or dirt from the wheel bolts, mounting
surfaces, and spare wheel.
11. Place the spare tire on the wheel-mounting surface.
{Warning
Never use oil or grease on bolts
or nuts because the nuts might
come loose. The vehicle's wheel
could fall off, causing a crash.
12. Reinstall the wheel nuts. Turn each nut clockwise, by hand,
until the wheel is held against
the hub.
Page 264 of 331
Chevrolet Spark Owner Manual (GMNA-Localizing-U.S./Canada-9956101) -
2017 - crc - 4/25/16
Vehicle Care 263
13. Lower the vehicle by turningthe wheel wrench
counterclockwise. Lower the
jack completely.
{Warning
Wheel nuts that are improperly or
incorrectly tightened can cause
the wheels to become loose or
come off. The wheel nuts should
be tightened with a torque wrench
to the proper torque specification
after replacing. Follow the torque
specification supplied by the
aftermarket manufacturer when
using accessory locking wheel
nuts. See Capacities and
Specifications 0294 for original
equipment wheel nut torque
specifications.
Caution
Improperly tightened wheel nuts
can lead to brake pulsation and
rotor damage. To avoid expensive
brake repairs, evenly tighten the
wheel nuts in the proper
sequence and to the proper
torque specification. See
Capacities and Specifications
0 294 for the wheel nut torque
specification.
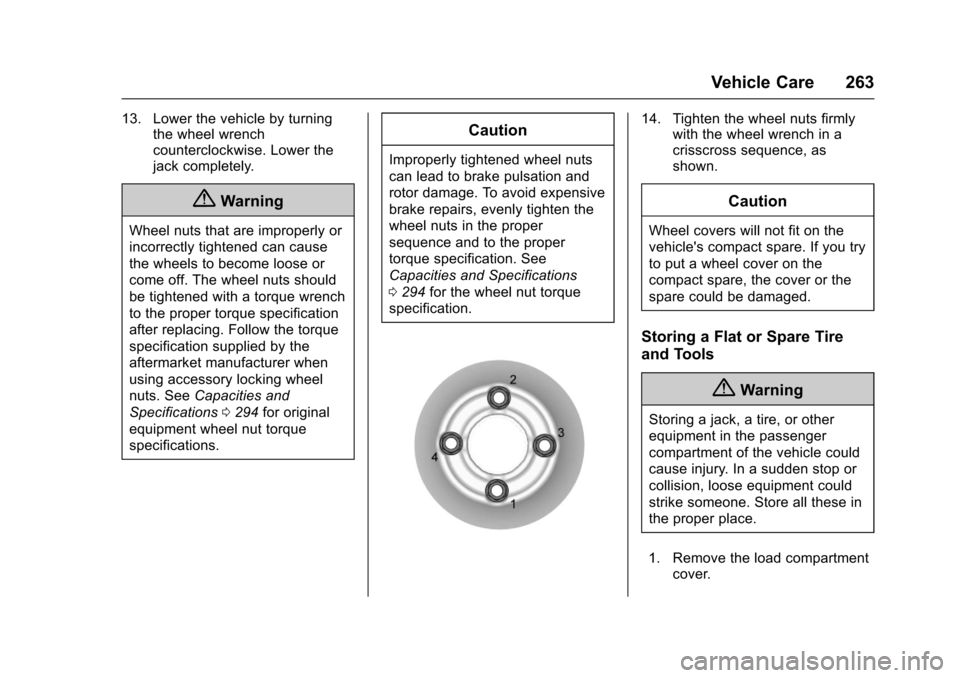
14. Tighten the wheel nuts firmly with the wheel wrench in a
crisscross sequence, as
shown.
Caution
Wheel covers will not fit on the
vehicle's compact spare. If you try
to put a wheel cover on the
compact spare, the cover or the
spare could be damaged.
Storing a Flat or Spare Tire
and Tools
{Warning
Storing a jack, a tire, or other
equipment in the passenger
compartment of the vehicle could
cause injury. In a sudden stop or
collision, loose equipment could
strike someone. Store all these in
the proper place.
1. Remove the load compartment cover.