CHEVROLET SS 2017 1.G Owners Manual
Manufacturer: CHEVROLET, Model Year: 2017, Model line: SS, Model: CHEVROLET SS 2017 1.GPages: 400, PDF Size: 7.31 MB
Page 291 of 400
Chevrolet SS Sedan Owner Manual (GMNA-Localizing-U.S.-10122752) -2017 - crc - 8/31/16
290 Vehicle Care
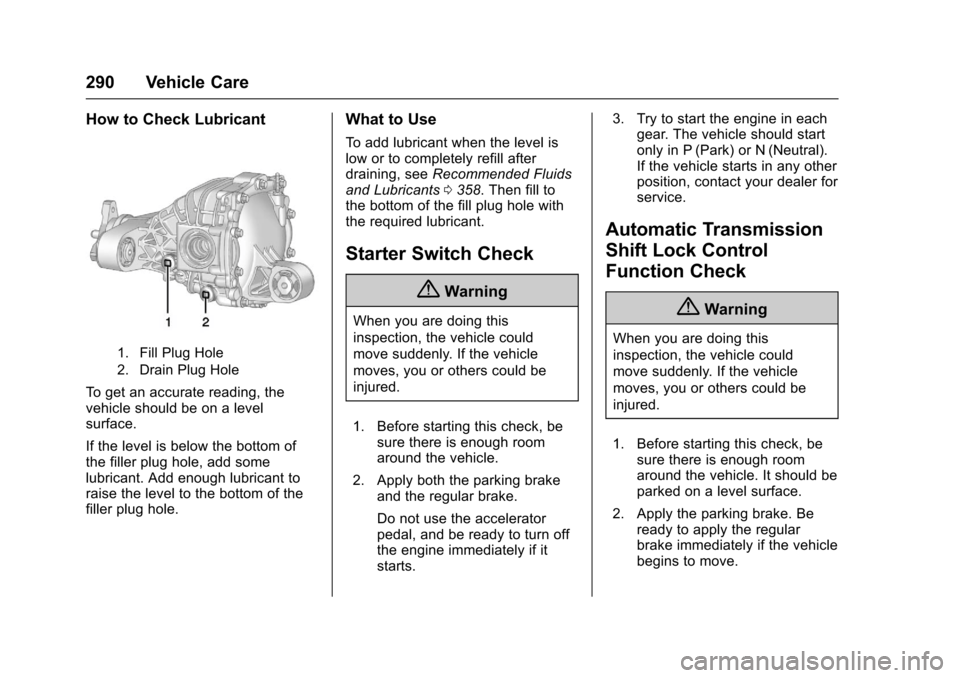
How to Check Lubricant
1. Fill Plug Hole
2. Drain Plug Hole
To g e t a n a c c u r a t e r e a d i n g , t h evehicle should be on a levelsurface.
If the level is below the bottom ofthe filler plug hole, add somelubricant. Add enough lubricant toraise the level to the bottom of thefiller plug hole.
What to Use
To a d d l u b r i c a n t w h e n t h e l e v e l i slow or to completely refill afterdraining, seeRecommended Fluidsand Lubricants0358.Thenfilltothe bottom of the fill plug hole withthe required lubricant.
Starter Switch Check
{Warning
When you are doing this
inspection, the vehicle could
move suddenly. If the vehicle
moves, you or others could be
injured.
1. Before starting this check, besure there is enough roomaround the vehicle.
2. Apply both the parking brakeand the regular brake.
Do not use the acceleratorpedal, and be ready to turn offthe engine immediately if itstarts.
3. Try to start the engine in eachgear. The vehicle should startonly in P (Park) or N (Neutral).If the vehicle starts in any otherposition, contact your dealer forservice.
Automatic Transmission
Shift Lock Control
Function Check
{Warning
When you are doing this
inspection, the vehicle could
move suddenly. If the vehicle
moves, you or others could be
injured.
1. Before starting this check, besure there is enough roomaround the vehicle. It should beparked on a level surface.
2. Apply the parking brake. Beready to apply the regularbrake immediately if the vehiclebegins to move.
Page 292 of 400
Chevrolet SS Sedan Owner Manual (GMNA-Localizing-U.S.-10122752) -2017 - crc - 8/31/16
Vehicle Care 291
3. With the engine off, turn theignition on, but do not start theengine. Without applying theregular brake, try to move theshift lever out of P (Park) withnormal effort. If the shift levermoves out of P (Park), contactyour dealer for service.
Park Brake and P (Park)
Mechanism Check
{Warning
When you are doing this check,
the vehicle could begin to move.
Yo u o r o t h e r s c o u l d b e i n j u r e d
and property could be damaged.
Make sure there is room in front
of the vehicle in case it begins to
roll. Be ready to apply the regular
brake at once should the vehicle
begin to move.
Park on a fairly steep hill, with thevehicle facing downhill. Keepingyour foot on the regular brake, setthe parking brake.
.To c h e c k t h e p a r k i n g b r a k e ' sholding ability: With the enginerunning and the transmission inN(Neutral), slowly remove footpressure from the regular brakepedal. Do this until the vehicle isheld by the parking brake only.
.To c h e c k t h e P ( P a r k )mechanism's holding ability:With the engine running, shift toP(Park). Then release theparking brake followed by theregular brake.
Contact your dealer if service isrequired.
Wiper Blade Replacement
Front Wiper Blade
Windshield wiper blades should beinspected for wear or cracking. SeeMaintenance Schedule0349.
Replacement blades come indifferent types and are removed indifferent ways. For the proper typeand size, seeMaintenanceReplacement Parts0359.
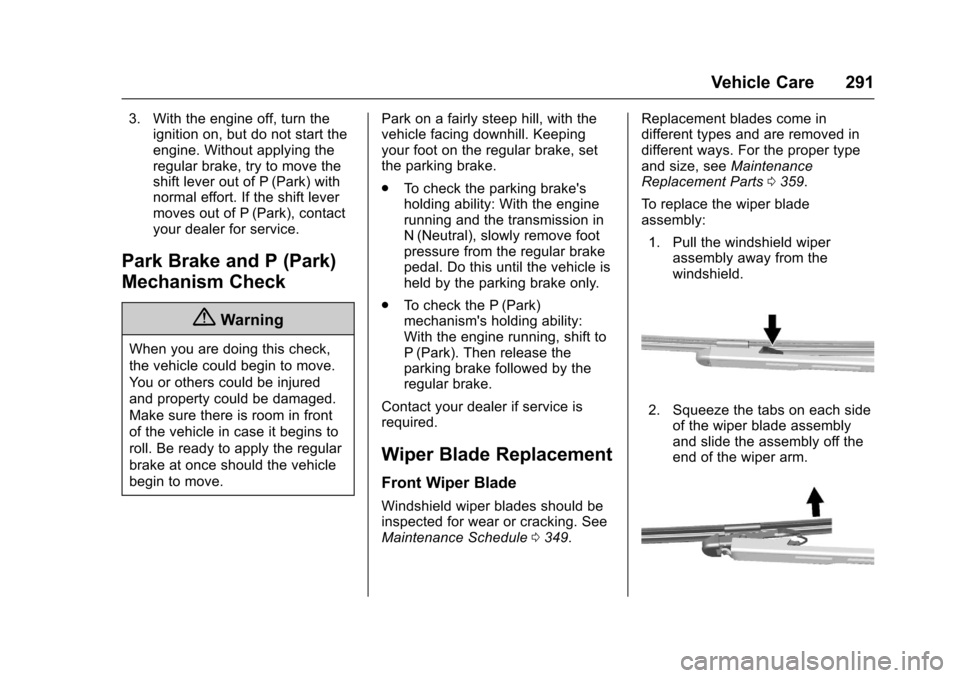
To r e p l a c e t h e w i p e r b l a d eassembly:
1. Pull the windshield wiperassembly away from thewindshield.
2. Squeeze the tabs on each sideof the wiper blade assemblyand slide the assembly off theend of the wiper arm.
Page 293 of 400
Chevrolet SS Sedan Owner Manual (GMNA-Localizing-U.S.-10122752) -2017 - crc - 8/31/16
292 Vehicle Care
3. Install the new blade onto thearm connector and make surethe tabs are fully set in thelocked position.
Allowing the wiper blade arm totouch the windshield when nowiper blade is installed coulddamage the windshield. Anydamage that occurs would notbe covered by your warranty.Do not allow the wiper bladearm to touch the windshield.
4. Repeat the steps for the otherblade.
Windshield Replacement
HUD System
The windshield is part of the HUDsystem. If the windshield must bereplaced, get one that is designedfor HUD or the HUD image maylook out of focus.
Driver Assistance Systems
When a windshield replacement isneeded and the vehicle is equippedwith a front-looking camera sensorfor the Driver Assistance Systems,the windshield must be installedaccording to GM specifications forthese systems to work properly. If itis not, there may be unexpectedbehavior and/or messages fromthese systems. SeeObjectDetection System Messages011 6.
Headlamp Aiming
Headlamp aim has been preset andshould need no further adjustment.
If the vehicle is damaged in a crash,the headlamp aim may be affected.If adjustment to the headlamps isnecessary, see your dealer.
Page 294 of 400
Chevrolet SS Sedan Owner Manual (GMNA-Localizing-U.S.-10122752) -2017 - crc - 8/31/16
Vehicle Care 293
Bulb Replacement
For the proper type of replacementbulbs, seeReplacement Bulbs0294.
For any bulb changing procedurenot listed in this section, see yourdealer.
Atoolisincludedwiththevehicletoassist with bulb replacement by yourdealer.
High Intensity Discharge
(HID) Lighting
{Warning
The High Intensity Discharge
(HID) lighting system operates at
averyhighvoltage.Ifyoutryto
service any of the system
components, you could be
seriously injured. Have your
dealer or a qualified technician
service them.
After an HID headlamp bulb hasbeen replaced, the beam might be aslightly different shade than it wasoriginally. This is normal.
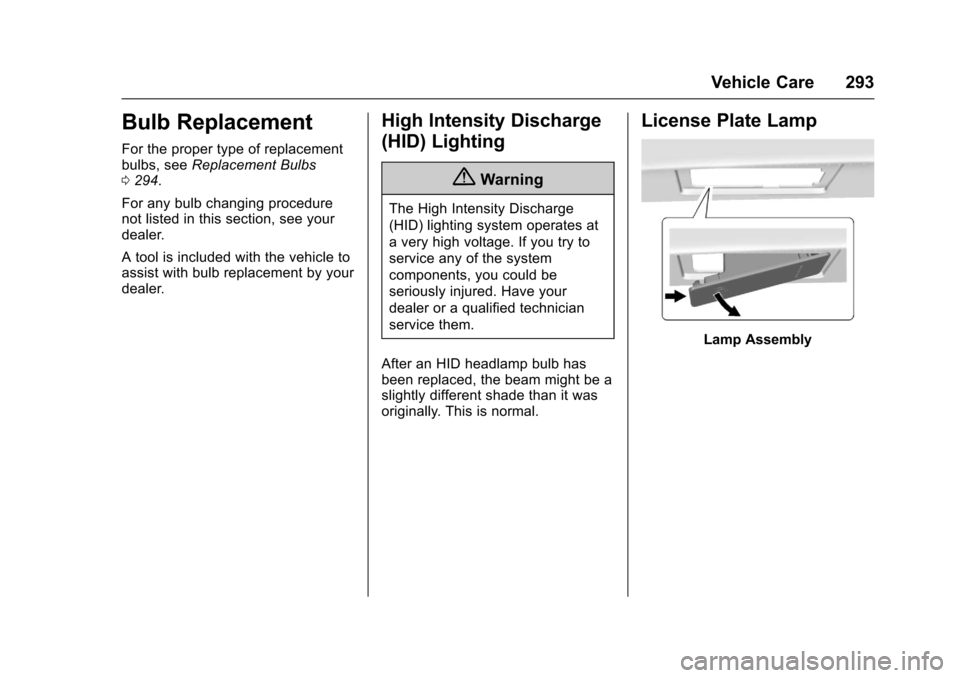
License Plate Lamp
Lamp Assembly
Page 295 of 400
Chevrolet SS Sedan Owner Manual (GMNA-Localizing-U.S.-10122752) -2017 - crc - 8/31/16
294 Vehicle Care
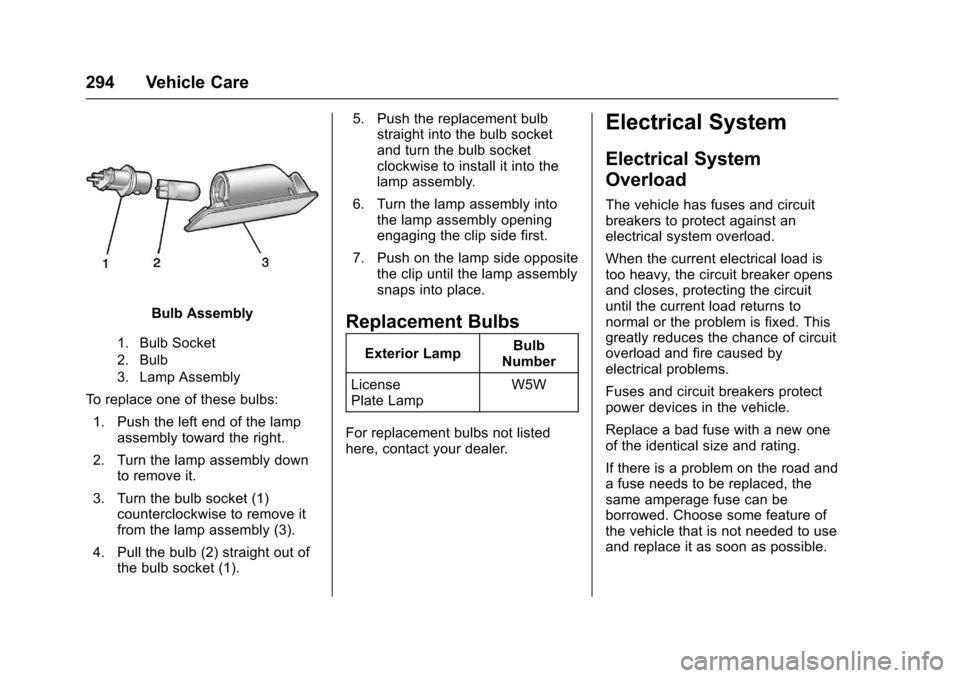
Bulb Assembly
1. Bulb Socket
2. Bulb
3. Lamp Assembly
To r e p l a c e o n e o f t h e s e b u l b s :
1. Push the left end of the lampassembly toward the right.
2. Turn the lamp assembly downto remove it.
3. Turn the bulb socket (1)counterclockwise to remove itfrom the lamp assembly (3).
4. Pull the bulb (2) straight out ofthe bulb socket (1).
5. Push the replacement bulbstraight into the bulb socketand turn the bulb socketclockwise to install it into thelamp assembly.
6. Turn the lamp assembly intothe lamp assembly openingengaging the clip side first.
7. Push on the lamp side oppositethe clip until the lamp assemblysnaps into place.
Replacement Bulbs
Exterior LampBulbNumber
LicensePlate LampW5W
For replacement bulbs not listedhere, contact your dealer.
Electrical System
Electrical System
Overload
The vehicle has fuses and circuitbreakers to protect against anelectrical system overload.
When the current electrical load istoo heavy, the circuit breaker opensand closes, protecting the circuituntil the current load returns tonormal or the problem is fixed. Thisgreatly reduces the chance of circuitoverload and fire caused byelectrical problems.
Fuses and circuit breakers protectpower devices in the vehicle.
Replace a bad fuse with a new oneof the identical size and rating.
If there is a problem on the road andafuseneedstobereplaced,thesame amperage fuse can beborrowed. Choose some feature ofthe vehicle that is not needed to useand replace it as soon as possible.
Page 296 of 400
Chevrolet SS Sedan Owner Manual (GMNA-Localizing-U.S.-10122752) -2017 - crc - 8/31/16
Vehicle Care 295
Headlamp Wiring
An electrical overload may causethe lamps to go on and off, or insome cases to remain off. Have theheadlamp wiring checked right awayif the lamps go on and off orremain off.
Windshield Wipers
If the wiper motor overheats due toheavy snow or ice, the windshieldwipers will stop until the motor coolsand will then restart.
Although the circuit is protectedfrom electrical overload, overloaddue to heavy snow or ice maycause wiper linkage damage.Always clear ice and heavy snowfrom the windshield before using thewindshield wipers.
If the overload is caused by anelectrical problem and not snow orice, be sure to get it fixed.
Fuses
The wiring circuits in the vehicle areprotected from short circuits byfuses. This greatly reduces thechance of fires caused by electricalproblems.
Look at the silver-colored bandinside the fuse. If the band is brokenor melted, replace the fuse. Be sureyou replace a bad fuse with a newone of the identical size and rating.
Fuses of the same amperage canbe temporarily borrowed fromanother fuse location, if a fuse goesout. Replace the fuse as soon asyou can.
Spare fuses of various ratings areprovided in the EngineCompartment Fuse Block and RearCompartment Fuse Block.
Engine Compartment
Fuse Block
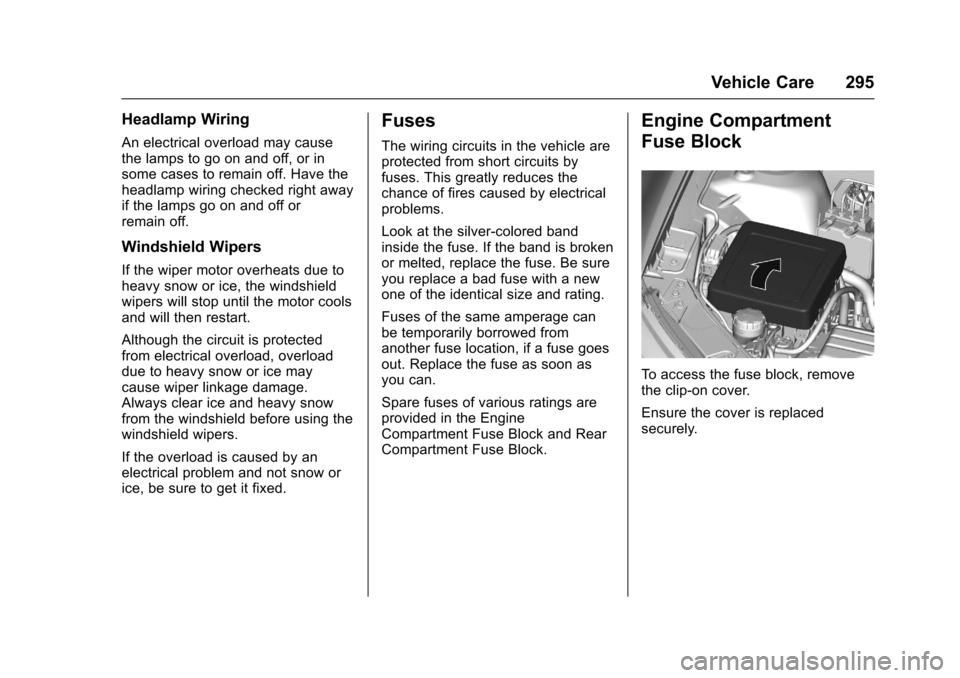
To a c c e s s t h e f u s e b l o c k , r e m o v ethe clip-on cover.
Ensure the cover is replacedsecurely.
Page 297 of 400
Chevrolet SS Sedan Owner Manual (GMNA-Localizing-U.S.-10122752) -2017 - crc - 8/31/16
296 Vehicle Care
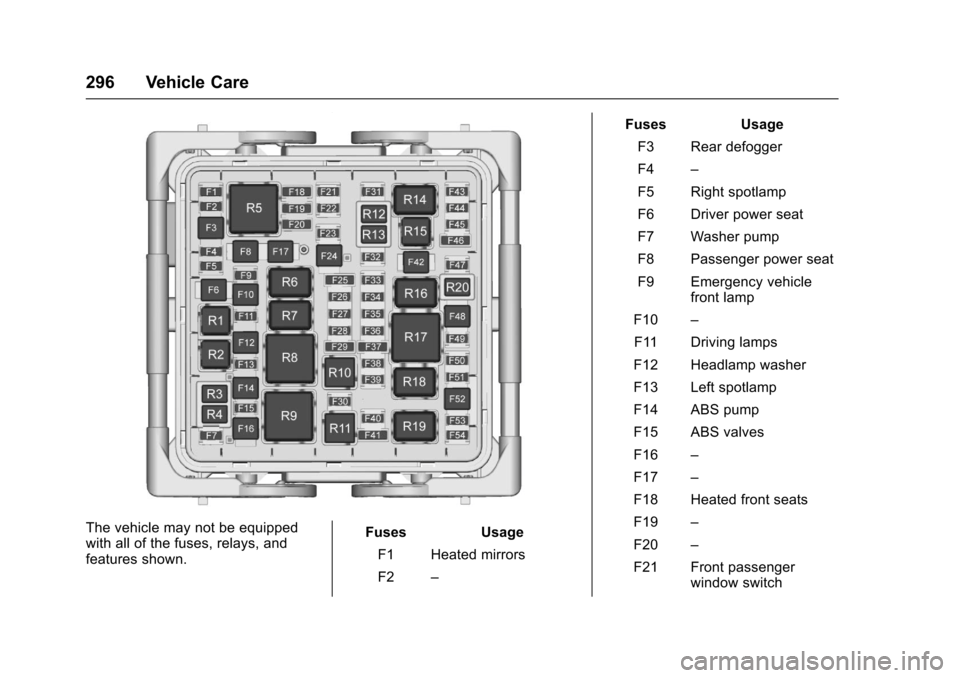
The vehicle may not be equippedwith all of the fuses, relays, andfeatures shown.
Fuses Usage
F1 Heated mirrors
F2–
Fuses Usage
F3 Rear defogger
F4–
F5 Right spotlamp
F6 Driver power seat
F7 Washer pump
F8 Passenger power seat
F9 Emergency vehiclefront lamp
F10–
F11 Driving lamps
F12 Headlamp washer
F13 Left spotlamp
F14 ABS pump
F15 ABS valves
F16–
F17–
F18 Heated front seats
F19–
F20–
F21 Front passengerwindow switch
Page 298 of 400
Chevrolet SS Sedan Owner Manual (GMNA-Localizing-U.S.-10122752) -2017 - crc - 8/31/16
Vehicle Care 297
FusesUsage
F22 Rear wiper
F23 Sunroof
F24 Front wipers
F25 Automatic occupantsensing/Instrumentcluster/Ignition
F26 Left rear bus electricalcenter/Ignition
F27–
F28 Ignition/Injectors even–V8
F29 Engine control module–V8/Ignition odd–V6/Emissions
F30–
F31–
F32–
F33 Ignition/Instrumentpanel body
F34 Fuel system controlmodule/Ignition
F35–
FusesUsage
F36 Electric steeringcolumn lock
F37 Emission 2/Ignitioneven–V6
F38 Engine control module–V6/Injectors/Ignitionodd–V8
F39 Intercooler pump
F40–
F41 Transmission controlmodule/Electric powersteering
F42 Starter motor
F43–
F44 Left HID headlamp
F45 Right HID headlamp
F46 High-beamheadlamps
F47 Horn
F48 Engine cooling fan
F49 Automatic headlampleveling
FusesUsage
F50 Transmission controlmodule ignition
F51 Engine control moduleignition
F52 Brake vacuum pump
F53 A/C clutch
F54 Vaporizer controlmodule
RelaysUsage
R1 Driving lamps
R2 Headlamp washer
R3 Rear washer pump
R4 Front washer pump
R5 Rear defogger
R6 Front wiper control
R7 Wiper speed
R8 Engine control module
R9–
R10 Intercooler pump
R11–
Page 299 of 400
Chevrolet SS Sedan Owner Manual (GMNA-Localizing-U.S.-10122752) -2017 - crc - 8/31/16
298 Vehicle Care
RelaysUsage
R12 Rear wiper control
R13 Fog lamps
R14 Low-beam headlamps
R15 High-beamheadlamps
R16 Starter
R17 Run/Crank
R18 Brake vacuum pump
R19 A/C control
R20 Horn
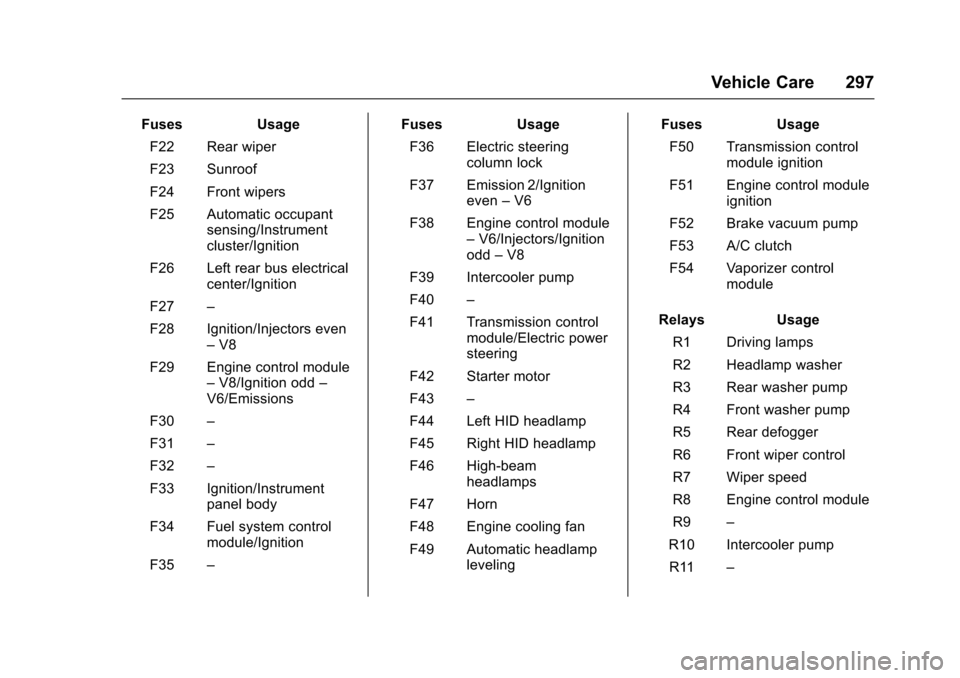
Relays R3, R4, R12, R13, and R20are PCB mounted relays.
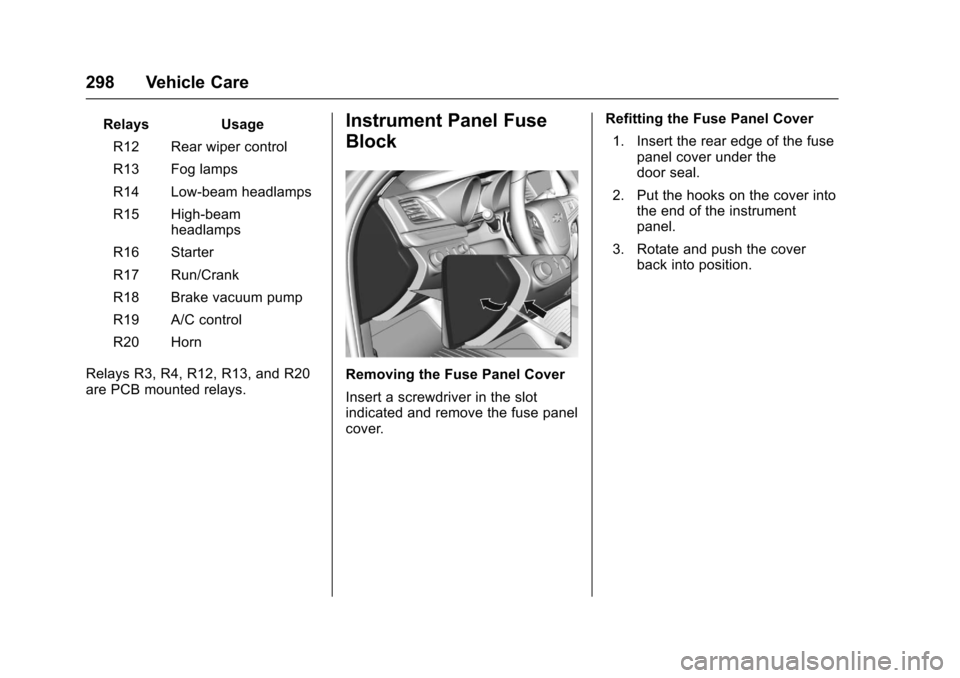
Instrument Panel Fuse
Block
Removing the Fuse Panel Cover
Insert a screwdriver in the slotindicated and remove the fuse panelcover.
Refitting the Fuse Panel Cover
1. Insert the rear edge of the fusepanel cover under thedoor seal.
2. Put the hooks on the cover intothe end of the instrumentpanel.
3. Rotate and push the coverback into position.
Page 300 of 400
Chevrolet SS Sedan Owner Manual (GMNA-Localizing-U.S.-10122752) -2017 - crc - 8/31/16
Vehicle Care 299
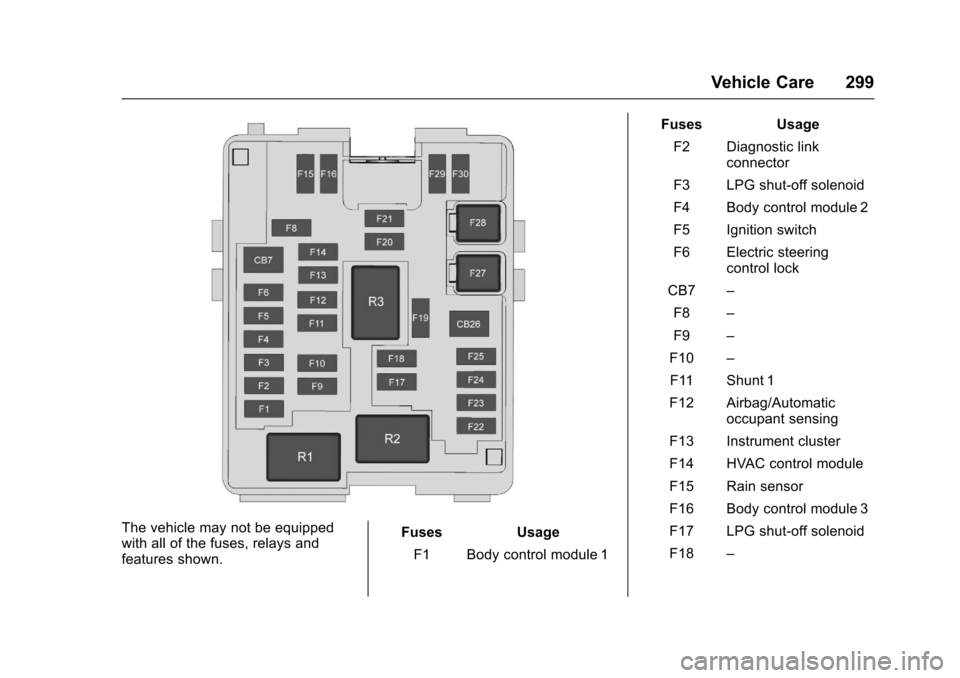
The vehicle may not be equippedwith all of the fuses, relays andfeatures shown.
Fuses Usage
F1 Body control module 1
Fuses Usage
F2 Diagnostic linkconnector
F3 LPG shut-off solenoid
F4 Body control module 2
F5 Ignition switch
F6 Electric steeringcontrol lock
CB7–
F8–
F9–
F10–
F11 Shunt 1
F12 Airbag/Automaticoccupant sensing
F13 Instrument cluster
F14 HVAC control module
F15 Rain sensor
F16 Body control module 3
F17 LPG shut-off solenoid
F18–