warning CHEVROLET SUBURBAN 2010 10.G Owners Manual
[x] Cancel search | Manufacturer: CHEVROLET, Model Year: 2010, Model line: SUBURBAN, Model: CHEVROLET SUBURBAN 2010 10.GPages: 608, PDF Size: 6.53 MB
Page 9 of 608

A.Outlet Adjustment on page 4‑26.
B. Turn Signal/Multifunction Lever on page 4‑4.
C. Instrument Panel Cluster on page 4‑30.
D. Hazard Warning Flashers
on page 4‑3.
E. Shift Lever. See Automatic Transmission Operation
on page 3‑32.
F. Tow/Haul Mode
on page 3‑38(If Equipped).
G. Driver Information Center (DIC) Buttons. See Driver Information Center (DIC) on page 4‑47.
H. Audio System(s) on page 4‑80.
I. Exterior Lamps on page 4‑11.
J. Dome Lamp Override
on page 4‑15.Instrument
Panel Brightnesson page 4‑14. Fog Lampson
page 4‑13(If Equipped).
K. Hood Release on page 6‑14.
L. Integrated Trailer Brake Controller (If Equipped). Towing a Trailer on page 5‑47.
M. Automatic Transfer Case Control. (If Equipped). See Four-Wheel Drive (Two Speed Automatic
Transfer Case)
on page 3‑39or Four-Wheel Drive
(Single Speed Automatic Transfer Case)on
page 3‑44. N.
Cruise Control on page 4‑8.
O. Tilt Wheel on page 4‑3.
P. Horn on page 4‑3.
Q. Audio Steering Wheel Controls on page 4‑136.
R. Climate Control System
on page 4‑18orDual
Automatic Climate Control Systemon page 4‑20(If Equipped).
S. Accessory Power Outlet(s)
on page 4‑16.
Cigarette Lighter (If Equipped). See Ashtray(s) and
Cigarette Lighter
on page 4‑17.
T. StabiliTrak®Systemon page 5‑6(If Equipped).
Pedal Adjust Button (If Equipped). See Adjustable
Throttle and Brake Pedal
on page 3‑30. Ultrasonic
Rear Parking Assist (URPA)on page 3‑56(If Equipped). Heated Windshield Washer Fluid
Button (If Equipped). See Windshield Washeron
page 4‑6. Power Assist Stepson page 3‑17(If Equipped).
U. Glove Box on page 3‑73.
1-3
Page 11 of 608
When the vehicle starts, the parking lamps will turn on
and remain on as long as the engine is running. The
doors will be locked and the climate control system may
come on.
The engine will continue to run for 10 minutes. Repeat
the steps for a 10-minute time extension. Remote start
can be extended only once.
Canceling a Remote Start
To cancel a remote start:
.Aim the RKE transmitter at the vehicle and press
and hold
/until the parking lamps turn off.
.Turn on the hazard warning flashers.
.Turn the ignition on and then back off.
See Remote Vehicle Start on page 3‑7.
Door Locks
There are several ways to lock and unlock the vehicle.
From outside, use the Remote Keyless Entry (RKE)
transmitter or the key in the driver door. From inside,
use the power door locks or the manual door locks.
To lock or unlock the door with the manual locks, push
down or pull up on the manual lock knob.
Power Door Locks
If available, these switches are located on the front
doors.
K:Press to unlock the doors.
Q:Remove the key from the ignition and press to lock
the doors.
For more information, see:
.Programmable Automatic Door Lockson
page 3‑11.
.Rear Door Security Locks on page 3‑11.
1-5
Page 33 of 608
Performance and Maintenance
StabiliTrak®
The vehicle may have a traction control system that
limits wheel spin and the StabiliTrak system that assists
with directional control of the vehicle in difficult driving
conditions. Both systems turn on automatically every
time the vehicle is started.
.To turn off traction control, press and release5on
the instrument panel.
Filluminates and the
appropriate DIC message displays. See DIC
Warnings and Messages on page 4‑61.
.To turn off both traction control and Electronic
Stability Control, press and hold
5until
Filluminates and the appropriate DIC message
displays. See DIC Warnings and Messageson
page 4‑61.
.Press and release the button again to turn on both
systems.
For more information, see StabiliTrak
®Systemon
page 5‑6.
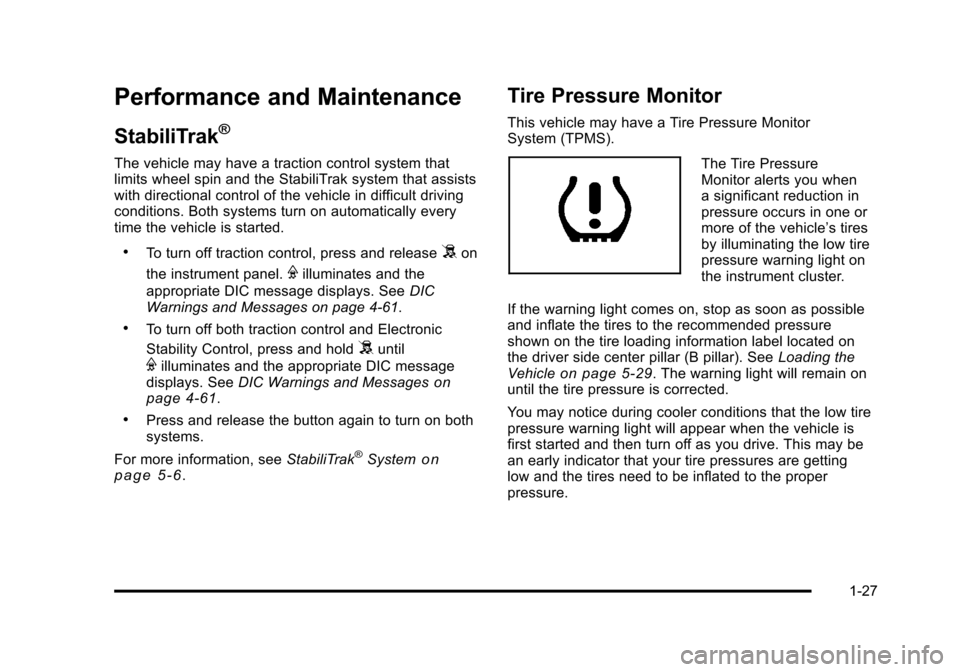
Tire Pressure Monitor
This vehicle may have a Tire Pressure Monitor
System (TPMS).
The Tire Pressure
Monitor alerts you when
a significant reduction in
pressure occurs in one or
more of the vehicle’s tires
by illuminating the low tire
pressure warning light on
the instrument cluster.
If the warning light comes on, stop as soon as possible
and inflate the tires to the recommended pressure
shown on the tire loading information label located on
the driver side center pillar (B pillar). See Loading the
Vehicle
on page 5‑29. The warning light will remain on
until the tire pressure is corrected.
You may notice during cooler conditions that the low tire
pressure warning light will appear when the vehicle is
first started and then turn off as you drive. This may be
an early indicator that your tire pressures are getting
low and the tires need to be inflated to the proper
pressure.
1-27
Page 41 of 608
Head Restraints
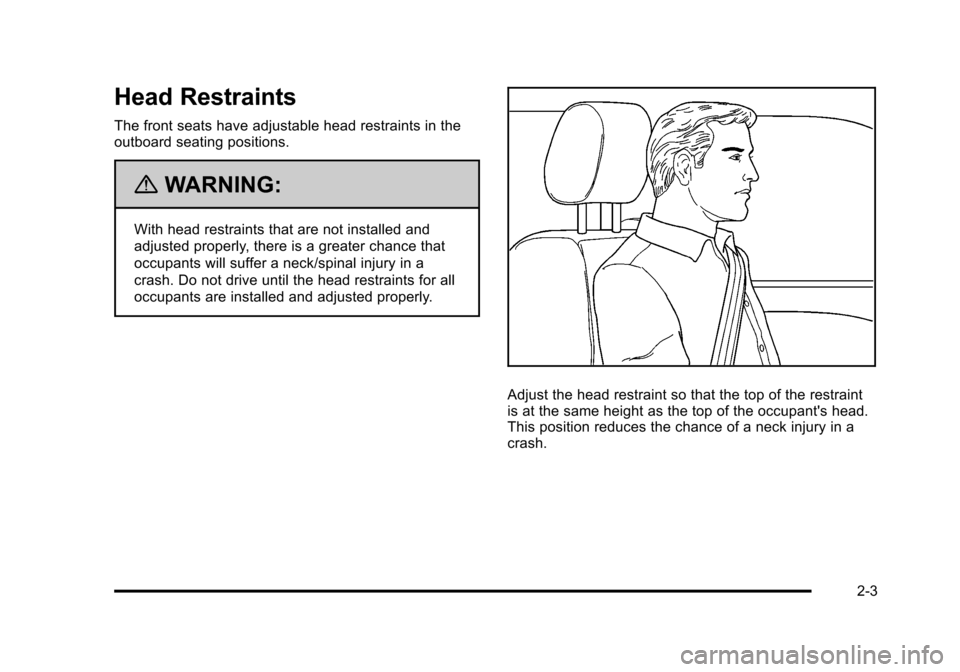
The front seats have adjustable head restraints in the
outboard seating positions.
{WARNING:
With head restraints that are not installed and
adjusted properly, there is a greater chance that
occupants will suffer a neck/spinal injury in a
crash. Do not drive until the head restraints for all
occupants are installed and adjusted properly.
Adjust the head restraint so that the top of the restraint
is at the same height as the top of the occupant's head.
This position reduces the chance of a neck injury in a
crash.
2-3
Page 42 of 608
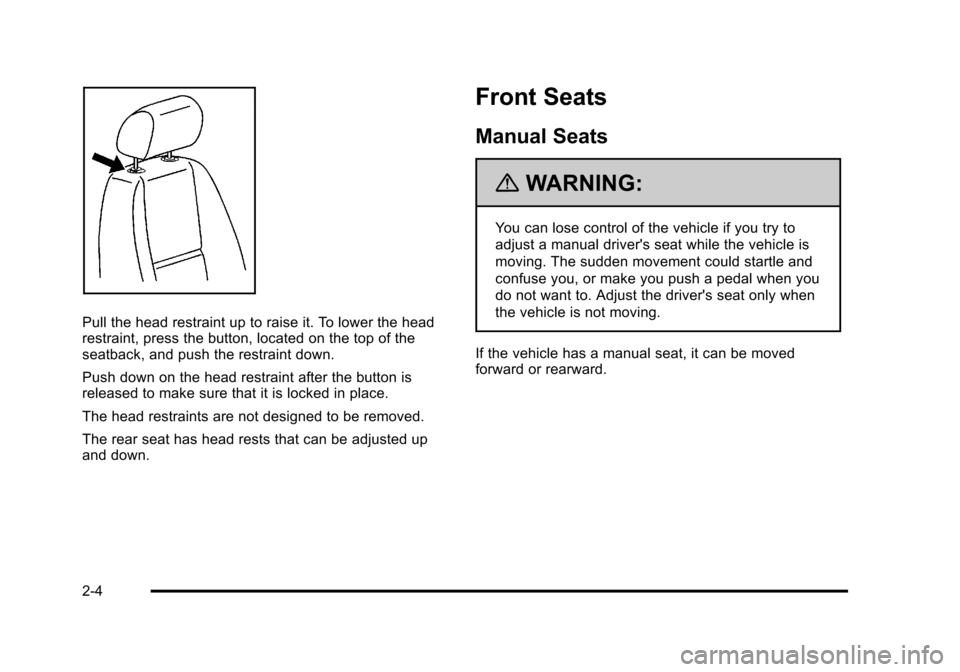
Pull the head restraint up to raise it. To lower the head
restraint, press the button, located on the top of the
seatback, and push the restraint down.
Push down on the head restraint after the button is
released to make sure that it is locked in place.
The head restraints are not designed to be removed.
The rear seat has head rests that can be adjusted up
and down.
Front Seats
Manual Seats
{WARNING:
You can lose control of the vehicle if you try to
adjust a manual driver's seat while the vehicle is
moving. The sudden movement could startle and
confuse you, or make you push a pedal when you
do not want to. Adjust the driver's seat only when
the vehicle is not moving.
If the vehicle has a manual seat, it can be moved
forward or rearward.
2-4
Page 46 of 608
Heated Seats
{WARNING:
If you cannot feel temperature change or pain to
the skin, the seat heater may cause burns even
at low temperatures. To reduce the risk of burns,
people with such a condition should use care
when using the seat heater, especially for long
periods of time. Do not place anything on the seat
that insulates against heat, such as a blanket,
cushion, cover or similar item. This may cause
the seat heater to overheat. An overheated seat
heater may cause a burn or may damage
the seat.On vehicles with heated front seats, the controls are
located on the driver and passenger doors.
I
(Heated Seatback): Press to turn on the heated
seatback.
J (Heated Seat and Seatback): Press to turn on the
heated seat and seatback.
The light on the button will come on to indicate that the
feature is working. Press the button to cycle through the
temperature settings of high, medium, and low and to
turn the heat to the seat off. Indicator lights will show
the level of heat selected: three for high, two for
medium, and one for low.
The heated seats will be canceled 10 seconds after the
ignition is turned off. To use the heated seat feature
after restarting the vehicle, press the heated seat or
seatback button again.
2-8
Page 50 of 608
Reclining Seatbacks
{WARNING:
You can lose control of the vehicle if you try to
adjust a manual driver's seat while the vehicle is
moving. The sudden movement could startle and
confuse you, or make you push a pedal when you
do not want to. Adjust the driver's seat only when
the vehicle is not moving.
{WARNING:
If either seatback is not locked, it could move
forward in a sudden stop or crash. That could
cause injury to the person sitting there. Always
push and pull on the seatbacks to be sure they
are locked.
2-12
Page 51 of 608
{WARNING:
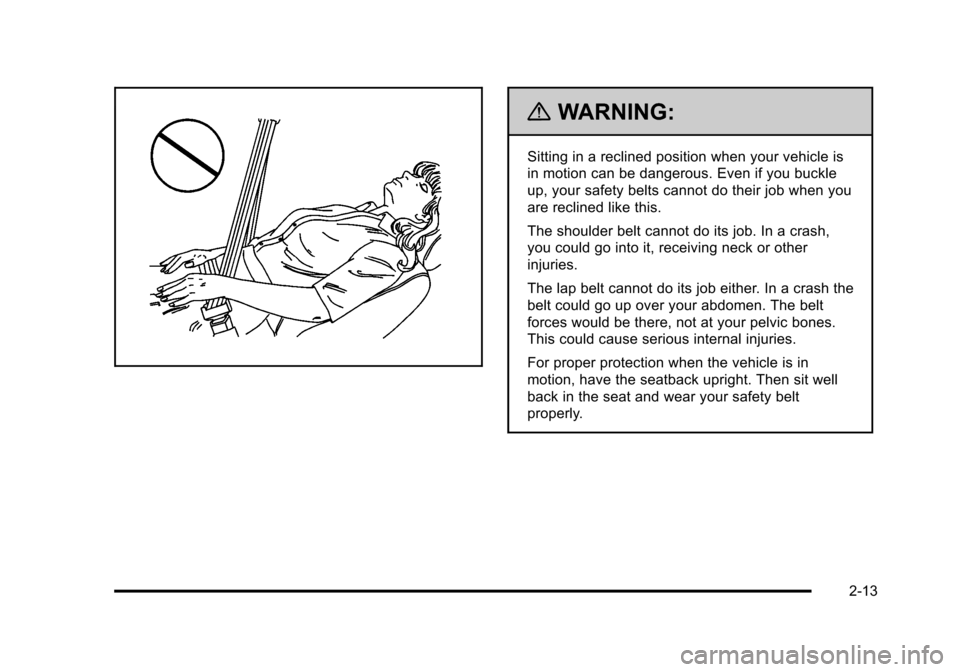
Sitting in a reclined position when your vehicle is
in motion can be dangerous. Even if you buckle
up, your safety belts cannot do their job when you
are reclined like this.
The shoulder belt cannot do its job. In a crash,
you could go into it, receiving neck or other
injuries.
The lap belt cannot do its job either. In a crash the
belt could go up over your abdomen. The belt
forces would be there, not at your pelvic bones.
This could cause serious internal injuries.
For proper protection when the vehicle is in
motion, have the seatback upright. Then sit well
back in the seat and wear your safety belt
properly.
2-13
Page 56 of 608
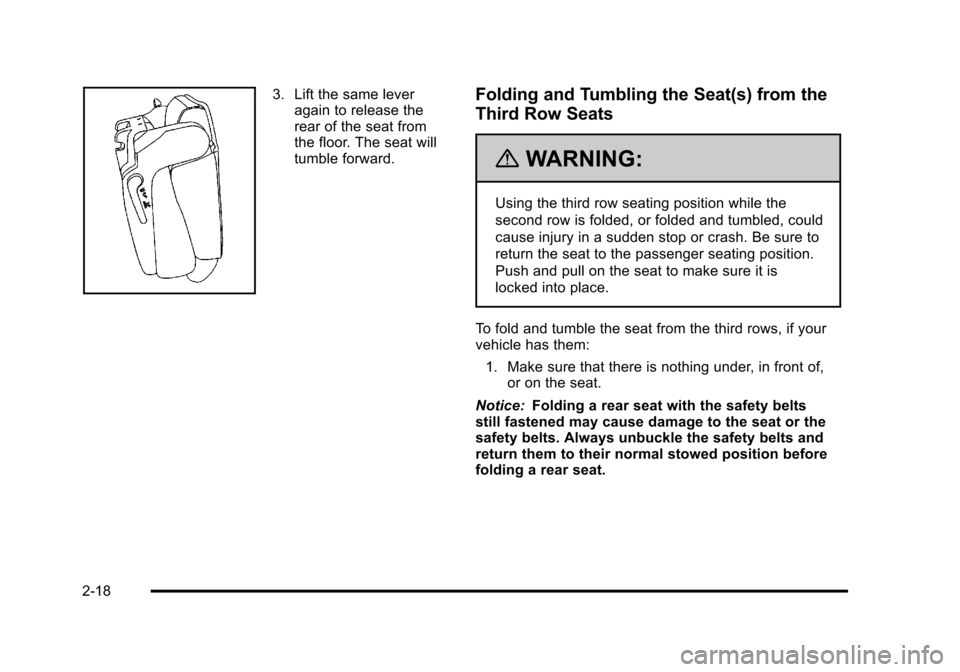
3. Lift the same leveragain to release the
rear of the seat from
the floor. The seat will
tumble forward.Folding and Tumbling the Seat(s) from the
Third Row Seats
{WARNING:
Using the third row seating position while the
second row is folded, or folded and tumbled, could
cause injury in a sudden stop or crash. Be sure to
return the seat to the passenger seating position.
Push and pull on the seat to make sure it is
locked into place.
To fold and tumble the seat from the third rows, if your
vehicle has them: 1. Make sure that there is nothing under, in front of, or on the seat.
Notice: Folding a rear seat with the safety belts
still fastened may cause damage to the seat or the
safety belts. Always unbuckle the safety belts and
return them to their normal stowed position before
folding a rear seat.
2-18
Page 57 of 608
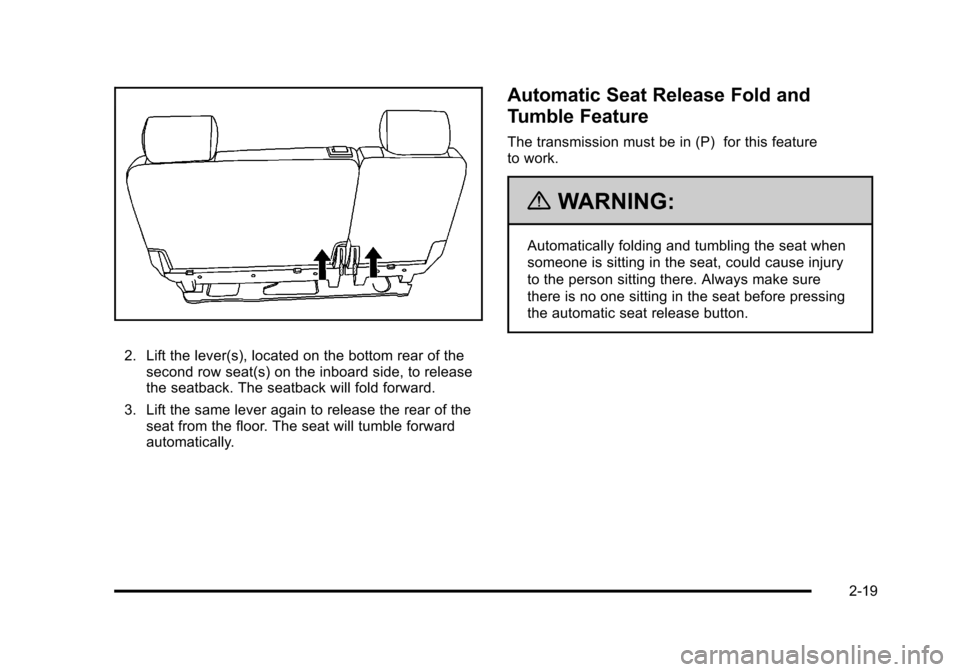
2. Lift the lever(s), located on the bottom rear of thesecond row seat(s) on the inboard side, to release
the seatback. The seatback will fold forward.
3. Lift the same lever again to release the rear of the seat from the floor. The seat will tumble forward
automatically.
Automatic Seat Release Fold and
Tumble Feature
The transmission must be in (P) for this feature
to work.
{WARNING:
Automatically folding and tumbling the seat when
someone is sitting in the seat, could cause injury
to the person sitting there. Always make sure
there is no one sitting in the seat before pressing
the automatic seat release button.
2-19