length CHEVROLET SUBURBAN 2021 Owner's Manual
[x] Cancel search | Manufacturer: CHEVROLET, Model Year: 2021, Model line: SUBURBAN, Model: CHEVROLET SUBURBAN 2021Pages: 433, PDF Size: 7.36 MB
Page 71 of 433
Chevrolet Tahoe/Suburban Owner Manual (GMNA-Localizing-U.S./Canada/
Mexico-13690484) - 2021 - crc - 8/17/20
70 Seats and Restraints
Child Restraints
Older Children
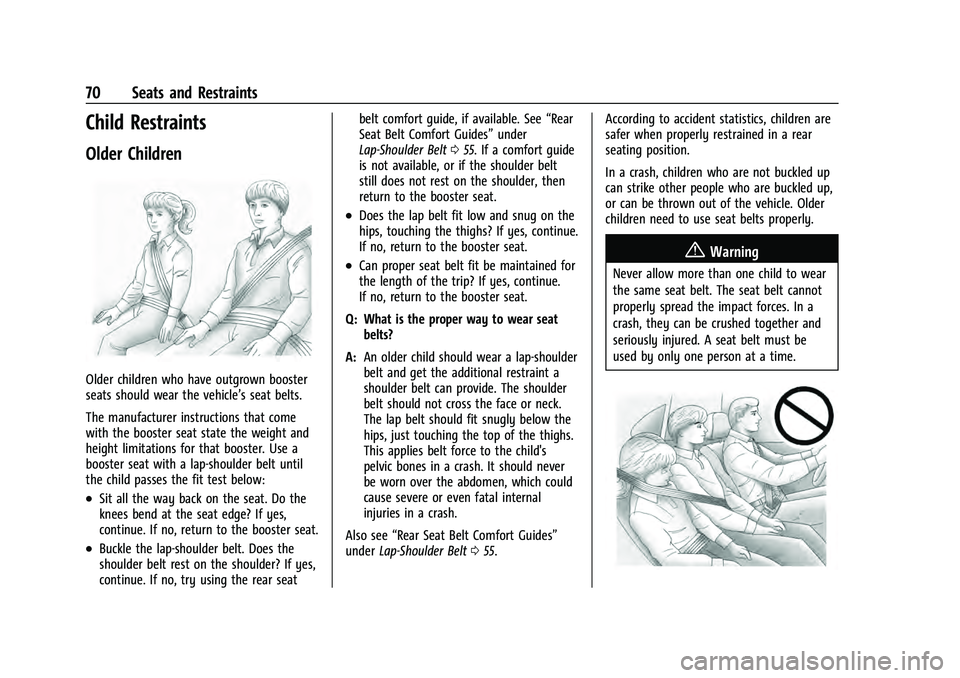
Older children who have outgrown booster
seats should wear the vehicle’s seat belts.
The manufacturer instructions that come
with the booster seat state the weight and
height limitations for that booster. Use a
booster seat with a lap-shoulder belt until
the child passes the fit test below:
.Sit all the way back on the seat. Do the
knees bend at the seat edge? If yes,
continue. If no, return to the booster seat.
.Buckle the lap-shoulder belt. Does the
shoulder belt rest on the shoulder? If yes,
continue. If no, try using the rear seatbelt comfort guide, if available. See
“Rear
Seat Belt Comfort Guides” under
Lap-Shoulder Belt 055. If a comfort guide
is not available, or if the shoulder belt
still does not rest on the shoulder, then
return to the booster seat.
.Does the lap belt fit low and snug on the
hips, touching the thighs? If yes, continue.
If no, return to the booster seat.
.Can proper seat belt fit be maintained for
the length of the trip? If yes, continue.
If no, return to the booster seat.
Q: What is the proper way to wear seat belts?
A: An older child should wear a lap-shoulder
belt and get the additional restraint a
shoulder belt can provide. The shoulder
belt should not cross the face or neck.
The lap belt should fit snugly below the
hips, just touching the top of the thighs.
This applies belt force to the child's
pelvic bones in a crash. It should never
be worn over the abdomen, which could
cause severe or even fatal internal
injuries in a crash.
Also see “Rear Seat Belt Comfort Guides”
under Lap-Shoulder Belt 055. According to accident statistics, children are
safer when properly restrained in a rear
seating position.
In a crash, children who are not buckled up
can strike other people who are buckled up,
or can be thrown out of the vehicle. Older
children need to use seat belts properly.{Warning
Never allow more than one child to wear
the same seat belt. The seat belt cannot
properly spread the impact forces. In a
crash, they can be crushed together and
seriously injured. A seat belt must be
used by only one person at a time.
Page 190 of 433
Chevrolet Tahoe/Suburban Owner Manual (GMNA-Localizing-U.S./Canada/
Mexico-13690484) - 2021 - crc - 8/17/20
Infotainment System 189
.Maximum Startup Volume: This feature
adjusts the maximum volume of the
infotainment system when you start your
vehicle. To set the maximum startup
volume, touch the controls on the
infotainment display to increase or
decrease.
.Audio Cues: This feature determines if
sounds play when the infotainment
system starts up and shuts down. This
feature can be turned off or on.
.Set Audio Cue Volume: This setting
controls the volume of Audio Cues played
on startup and shut down. Touch the
controls on the infotainment display to
increase or decrease.
.Audible Touch Feedback: This setting
determines if a sound plays when
touching the infotainment display or
radio controls. This feature can be turned
off or on.
Voice
Touch and the following may display:
.Confirm More/Less: This setting specifies
how often the voice recognition system
confirms commands. Touch Confirm More
to have the system check with you more
often before acting on your commands.
.Prompt Length: This setting specifies the
amount of detail the voice recognition
system provides when giving you
feedback. Touch Auto to have the system
automatically adjust to your speech
habits. Touch Informative, Short, or Auto.
.Audio Feedback Speed: Touch Slow,
Medium, or Fast to adjust how quickly
the voice recognition system speaks.
.Friendly Prompts: This setting adjusts the
formality of voice prompts. Touch Off for
shorter prompts. Touch On to hear
prompts with more personality. Touch
Auto to have the prompt match your
command style.
.Tutorial Mode: Touch Off or On to
provide tutorial feedback on the display.
.Allow Prompt Interruptions: This setting
controls whether voice commands can be
spoken before voice prompts finish. Turn
this on to speak commands without
hearing the full prompt. Speaking while
the prompt is still playing will
immediately stop playing the current
prompt and recognize your command.
Background noise may cause accidental
interruptions. Touch Off or On.
Favorites
Touch and the following may display:
.Manage Favorites: Touch to display a list
of Audio, Phone, and Navigation favorites.
Favorites can be moved, renamed,
or deleted.
To move, touch and hold the favorite, and
then drag up or down to rearrange the
position.
.Set Number of Audio Favorites: Touch to
select how many favorites pages can be
viewed from the audio application. The
Auto setting will automatically adjust this
number based on the number of favorites
you have saved. Touch Auto, 5, 10, 15, 20,
25, 30, 35, or 40.
Updates
If equipped, the vehicle can download and
install select software updates over a
wireless connection. The system will prompt
for certain updates to be downloaded and
installed. There is also an option to check
for updates manually.
To manually check for updates, touch
Settings on the Home Page and select the
System tab. Go to the Vehicle Software
section and touch Updates. Follow the
on-screen prompts. The steps to check for,
download, and install updates may vary by
vehicle.
Page 245 of 433
Chevrolet Tahoe/Suburban Owner Manual (GMNA-Localizing-U.S./Canada/
Mexico-13690484) - 2021 - crc - 8/17/20
244 Driving and Operating
For vehicles with four corner air suspension
StabiliTrak/ESC will automatically turn on if
the vehicle exceeds 32 km/h (20 mph).
The vehicle has a Trailer Sway Control (TSC)
feature and a Hill Start Assist (HSA) feature.
SeeTrailer Sway Control (TSC) 0295 or
Hill Start Assist (HSA) 0242.
Adding accessories can affect the vehicle
performance. See Accessories and
Modifications 0309.
Hill Descent Control (HDC)
If equipped, Hill Descent Control (HDC) sets
and maintains vehicle speed while driving
down steep grades in a forward or reverse
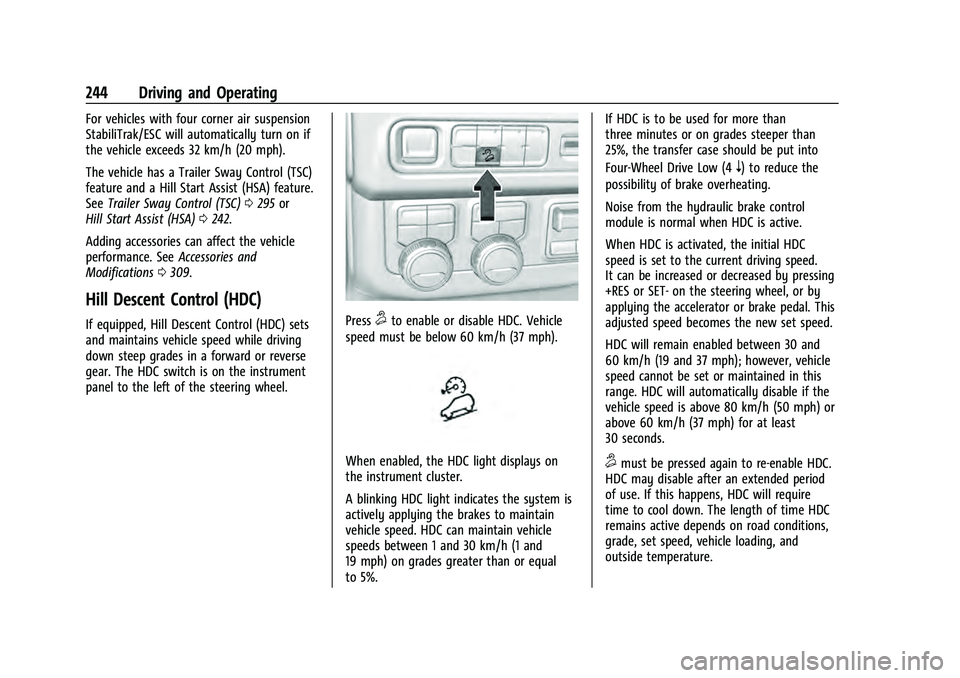
gear. The HDC switch is on the instrument
panel to the left of the steering wheel.Press5to enable or disable HDC. Vehicle
speed must be below 60 km/h (37 mph).
When enabled, the HDC light displays on
the instrument cluster.
A blinking HDC light indicates the system is
actively applying the brakes to maintain
vehicle speed. HDC can maintain vehicle
speeds between 1 and 30 km/h (1 and
19 mph) on grades greater than or equal
to 5%. If HDC is to be used for more than
three minutes or on grades steeper than
25%, the transfer case should be put into
Four-Wheel Drive Low (4
n) to reduce the
possibility of brake overheating.
Noise from the hydraulic brake control
module is normal when HDC is active.
When HDC is activated, the initial HDC
speed is set to the current driving speed.
It can be increased or decreased by pressing
+RES or SET- on the steering wheel, or by
applying the accelerator or brake pedal. This
adjusted speed becomes the new set speed.
HDC will remain enabled between 30 and
60 km/h (19 and 37 mph); however, vehicle
speed cannot be set or maintained in this
range. HDC will automatically disable if the
vehicle speed is above 80 km/h (50 mph) or
above 60 km/h (37 mph) for at least
30 seconds.
5must be pressed again to re-enable HDC.
HDC may disable after an extended period
of use. If this happens, HDC will require
time to cool down. The length of time HDC
remains active depends on road conditions,
grade, set speed, vehicle loading, and
outside temperature.
Page 274 of 433
Chevrolet Tahoe/Suburban Owner Manual (GMNA-Localizing-U.S./Canada/
Mexico-13690484) - 2021 - crc - 8/17/20
Driving and Operating 273
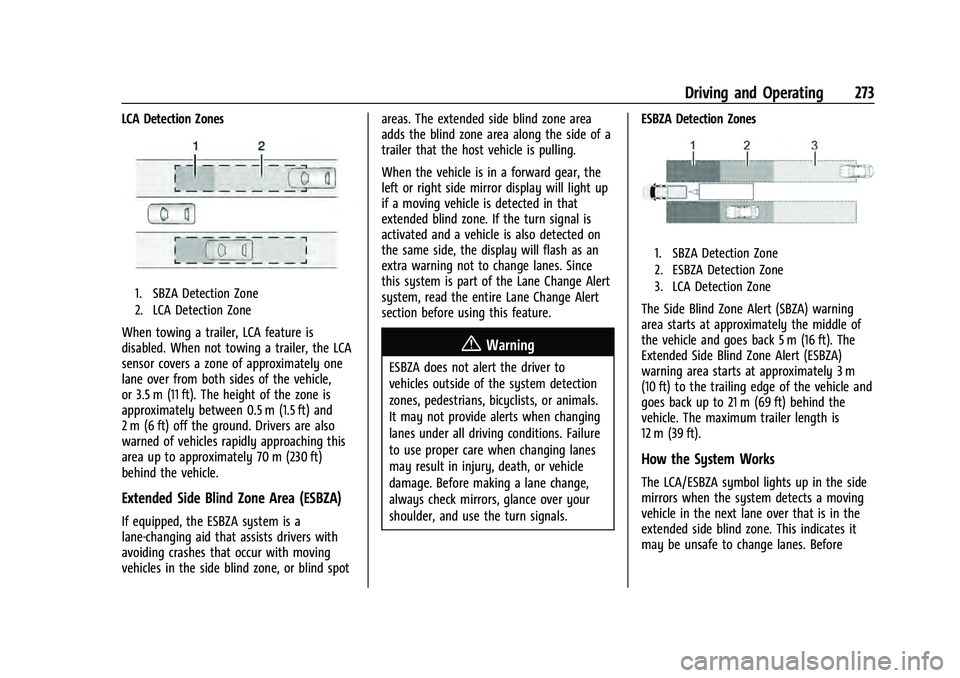
LCA Detection Zones
1. SBZA Detection Zone
2. LCA Detection Zone
When towing a trailer, LCA feature is
disabled. When not towing a trailer, the LCA
sensor covers a zone of approximately one
lane over from both sides of the vehicle,
or 3.5 m (11 ft). The height of the zone is
approximately between 0.5 m (1.5 ft) and
2 m (6 ft) off the ground. Drivers are also
warned of vehicles rapidly approaching this
area up to approximately 70 m (230 ft)
behind the vehicle.
Extended Side Blind Zone Area (ESBZA)
If equipped, the ESBZA system is a
lane-changing aid that assists drivers with
avoiding crashes that occur with moving
vehicles in the side blind zone, or blind spotareas. The extended side blind zone area
adds the blind zone area along the side of a
trailer that the host vehicle is pulling.
When the vehicle is in a forward gear, the
left or right side mirror display will light up
if a moving vehicle is detected in that
extended blind zone. If the turn signal is
activated and a vehicle is also detected on
the same side, the display will flash as an
extra warning not to change lanes. Since
this system is part of the Lane Change Alert
system, read the entire Lane Change Alert
section before using this feature.
{Warning
ESBZA does not alert the driver to
vehicles outside of the system detection
zones, pedestrians, bicyclists, or animals.
It may not provide alerts when changing
lanes under all driving conditions. Failure
to use proper care when changing lanes
may result in injury, death, or vehicle
damage. Before making a lane change,
always check mirrors, glance over your
shoulder, and use the turn signals.
ESBZA Detection Zones
1. SBZA Detection Zone
2. ESBZA Detection Zone
3. LCA Detection Zone
The Side Blind Zone Alert (SBZA) warning
area starts at approximately the middle of
the vehicle and goes back 5 m (16 ft). The
Extended Side Blind Zone Alert (ESBZA)
warning area starts at approximately 3 m
(10 ft) to the trailing edge of the vehicle and
goes back up to 21 m (69 ft) behind the
vehicle. The maximum trailer length is
12 m (39 ft).
How the System Works
The LCA/ESBZA symbol lights up in the side
mirrors when the system detects a moving
vehicle in the next lane over that is in the
extended side blind zone. This indicates it
may be unsafe to change lanes. Before
Page 300 of 433
Chevrolet Tahoe/Suburban Owner Manual (GMNA-Localizing-U.S./Canada/
Mexico-13690484) - 2021 - crc - 8/17/20
Driving and Operating 299
Each sensor has a minimum of two minutes
to learn, shown by a timer. After a sensor is
learned, a checkmark appears next to the
tire, the vehicle horn will sound, the
vehicle’s brake lamps will flash, and all
working trailer lamps will flash. It then
moves to the next sensor.
To cancel the process touch Stop.
The recommended tire pressure must be
entered for the trailer tires. This allows the
vehicle to alert when the tire pressure is
high or low.
TTPMS must learn the location of the
installed tire sensors to show correct air
pressure and temperature for each tire. To
set up, use one of the following options or
see a tire or trailer dealer for service. The
learning process must be repeated when the
trailer tires are rotated or replaced. See
“Editing a Trailer Profile”later in this section
for tire pressure sensor relearn information.
Tool Method: A TTPMS activation tool can
be purchased separately to learn the sensor
locations.
Manual Method: Without the tool, the air
pressure can be increased or decreased in
each tire for 10 seconds. Do not exceed the
maximum inflation pressure found on the tire sidewalls. Make sure to re-adjust tire
pressure to the recommended level when
the process is complete.
Sensor Learning Steps
To complete the sensor-to-vehicle learn
process:
1. Touch Start on the Learn Sensors screen. The horn chirps twice and the Learning
Active screen appears on the
infotainment display.
2. Start with the driver side front trailer tire.
3. Activate the tool near the valve stem or adjust the air pressure of this tire until
the horn chirps and all working vehicle
and trailer lights flash.
The process stops without saving the
sensor locations if this step takes more
than two minutes.
4. Move to the next tire and repeat Step 3 for each sensor. The horn chirps twice
when all sensors are completed.
5. Return to the vehicle to complete the setup.Maintenance Reminders
To set up maintenance reminders, touch the
Trailer Maintenance icon. Select Yes to set
up the maintenance reminders for the
Trailer Profile. Follow the on-screen prompts.
The maximum number of reminders is 50.
Select No to return to the previous screen.
Trailer Side Blind Zone Alert Setup
Trailer dimensions must be in range to
enable this feature.
.Trailer Length: 300 cm (118.1 in) –1200 cm
(472.4 in). Measure from center of coupler
to furthest rear point on the trailer.
If trailer dimensions are out of range, this
feature will be unavailable.
Status View
The Status view shows:
.Vehicle
.Connections
.Tires
.Maintenance
Upon entry, the most recent items will be
shown. Select MORE to view all options.