check engine CHEVROLET TRACKER 1998 1.G Workshop Manual
[x] Cancel search | Manufacturer: CHEVROLET, Model Year: 1998, Model line: TRACKER, Model: CHEVROLET TRACKER 1998 1.GPages: 386, PDF Size: 21.17 MB
Page 278 of 386

Downloaded from www.Manualslib.com manuals search engine Inflation -- Tire Pressure
The Tire-Loading Information label, which is on the
driver’s door lock pillar, shows the correct inflation
pressures for your tires when they’re cold. “Cold”
means your vehicle has been sitting for at least three
hours or driven no more than
1 mile ( 1.6 km).
NOTICE:
Don’t let anyone tell you that underinflation or
overinflation
is all right. It’s not. If your tires
don’t have enough
air (underinflation), you can
get the following:
Too much flexing
Too much heat
Tire overloading
Bad wear
Bad handling
0 Bad fuel economy.
NOTICE: (Continued) NOTICE: (Continued)
If your tires have too much air
(overinflation),
you can get the following:
Unusual wear
Bad handling
0 Rough ride
Needless damage from road hazards.
When to Check Check your tires once
a month or more. Also, check
the tire pressure
of the spare tire.
How to Check
Use
a good quality pocket-type gage to check tire
pressure.
You can’t tell if your tires are properly inflated
simply by looking at them. Radial tires may look
properly inflated even when they’re underinflated.
Be sure to put the valve caps back on the valve stems. They help prevent leaks by keeping out dirt
and moisture.
Page 279 of 386
Downloaded from www.Manualslib.com manuals search engine ~~
~~~ ~ ~ ~~ ~~ ~~ -. .~~~
Tire Inspection and Rotation
Tires should be rotated every 6,000 to 8,000 miles
(10 000 to 13 000 km). Any time you notice unusual
wear, rotate your tires as soon as possible and check
wheel alignment.
Also check for damaged tires or
wheels. See “When It’s Time for New Tires” and “Whe\
el
Replacement” later in this section for more information.
The purpose
of regular rotation is to achieve more
uniform wear for all tires on the vehicle. The first
rotation is the most important. See “Scheduled
Maintenance Services” in the Index for scheduled
rotation intervals.
I
1
J.
4
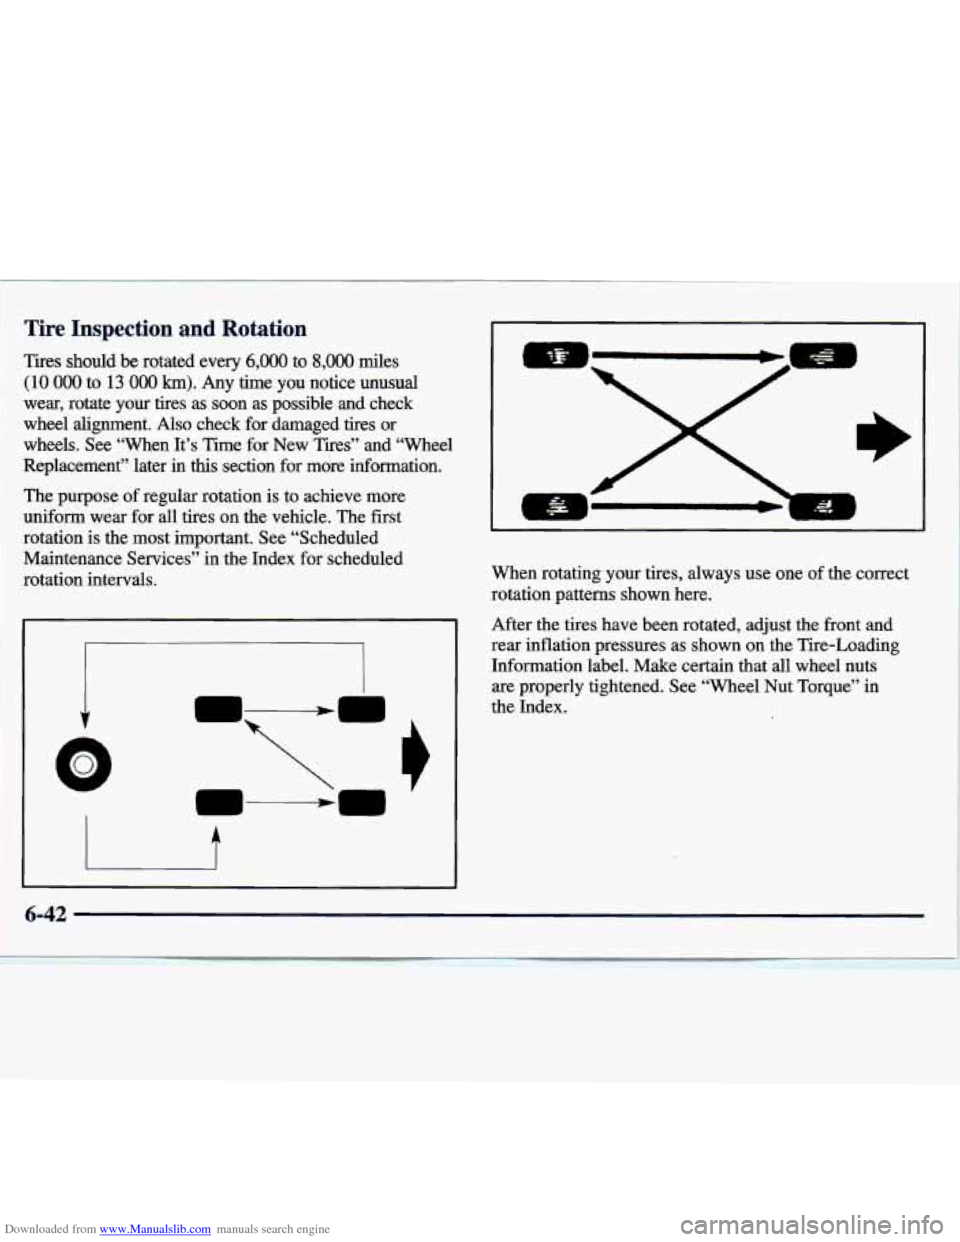
When rotating your tires, always use one of the correct
rotation patterns shown here.
After the tires have been rotated, adjust the front and
rear inflation pressures as shown on the Tire-Loading
Information label. Make certain that
all wheel nuts
are properly tightened. See “Wheel Nut Torque” in
the Index.
! 6-42
Page 280 of 386
Downloaded from www.Manualslib.com manuals search engine When It’s Time for New Tires
Kust or dirt on a wheel,
or on the parts to which
it is fastened, can make wheel nuts become loose
after a time. The wheel could come off and cause
an accident. When you change a wheel, remove
any rust
or dirt from places where the wheel
attaches to the vehicle. In an emergency, you can
use a cloth or a paper towel to do this; but be
sure to use a scraper or wire brush later, if you
need to, to get
all the rust or dirt off. (See
“Changing a Flat Tire” in the Index.)
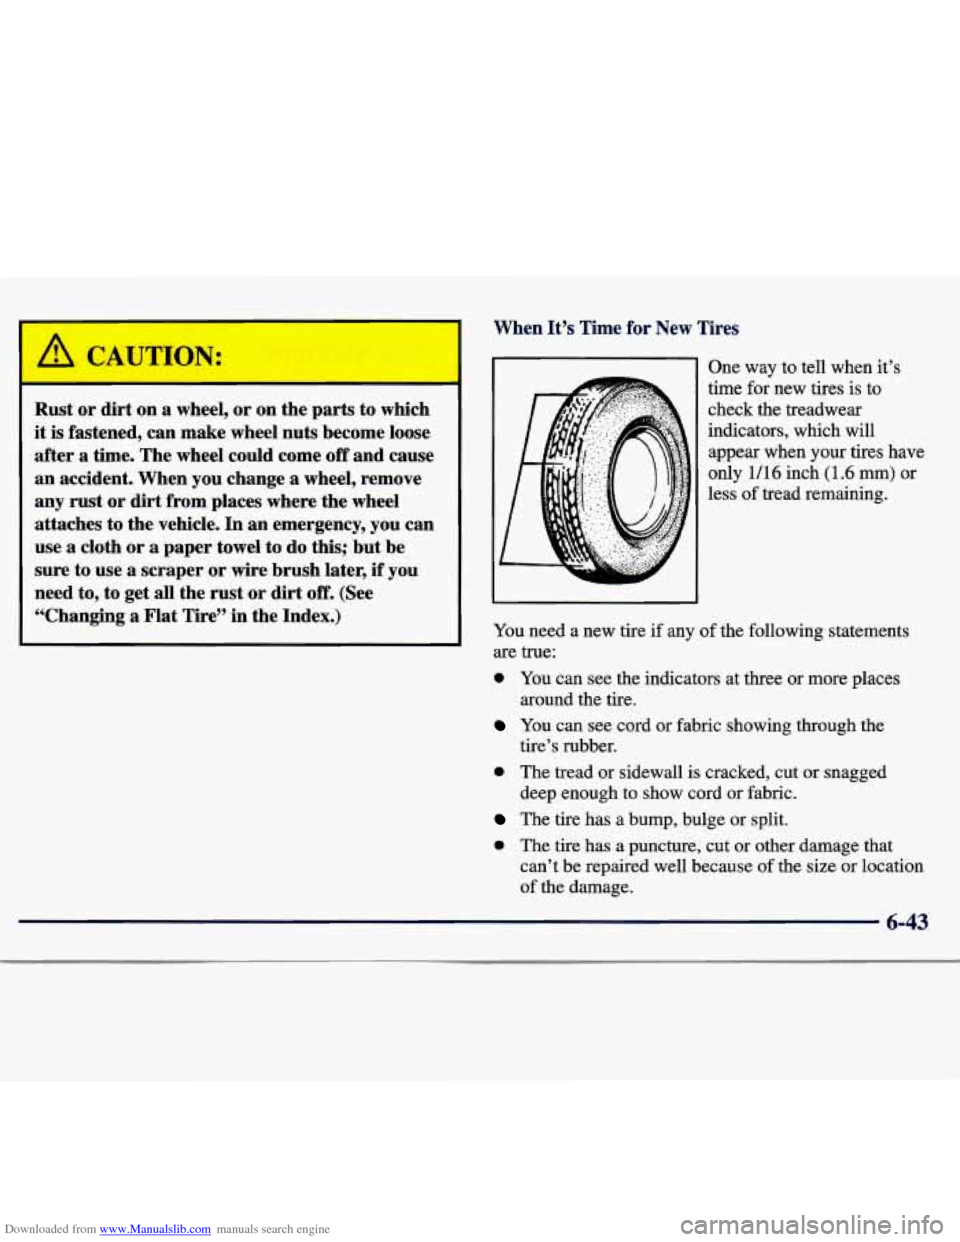
One way to tell when it’s
time for new tires is to
check the treadwear
indicators, which will appear when your tires have
only
1/16 inch (1.6 mm) or
less of tread remaining.
You need a new tire if any of the following statements
are true:
0 You can see the indicators at three or more places
around the tire.
You can see cord or fabric showing through the
tire’s rubber.
0 The tread or sidewall is cracked, cut or snagged
The tire has a bump, bulge or split.
0 The tire has a puncture, cut or other damage that
deep enough to show cord
or fabric.
can’t be repaired well because
of the size or location
of the damage.
Page 288 of 386
Downloaded from www.Manualslib.com manuals search engine Cleaning Interior Plastic Components
Use only a mild soap and water solution on a soft
cloth or sponge. Commercial cleaners may affect the surface finish.
Care of Safety Belts
Keep belts clean and dry.
I A CAUTION: 1
Do not bleach or dye safety belts. If you do, it
may severely weaken them.
In a crash, they
might not be able to provide adequate protection. Clean safety belts only with mild soap and
lukewarm water.
Cleaning Glass Surfaces
Glass should be cleaned often. GM Glass Cleaner (GM
Part No. 1050427) or a liquid household glass cleaner
will remove normal tobacco smoke and dust films on
interior glass. Don’t use abrasive cleaners on glass, because they may
cause scratches.
Avoid placing decals on the inside rear
window, since they may have to be scraped
off later. If
abrasive cleaners are used on the inside
of the rear
window, an electric defogger element may be damaged.
Any temporary license should not
be attached across the
defogger grid.
Cleaning the Outside of the Windshield,
Backglass and Wiper Blades
If the windshield is not clear after using the
windshield washer, or if the wiper blade chatters
when running, wax, sap
or other material may be on
the blade or windshield.
Clean the outside of the windshield with
GM
Windshield Cleaner, Bon Ami@ Powder (non-scratching
glass cleaning powder),
GM Part No. 105001 1. The
windshield is clean
if beads do not form when you rinse
it with water.
Grime from the windshield will stick to the wiper blades
and affect their performance. Clean the blade by wiping
vigorously with a cloth soaked in full-strength windshield
washer solvent. Then rinse the blade with water.
Check the wiper blades and clean them as necessary;
replace blades that look worn.
6-51
Page 294 of 386
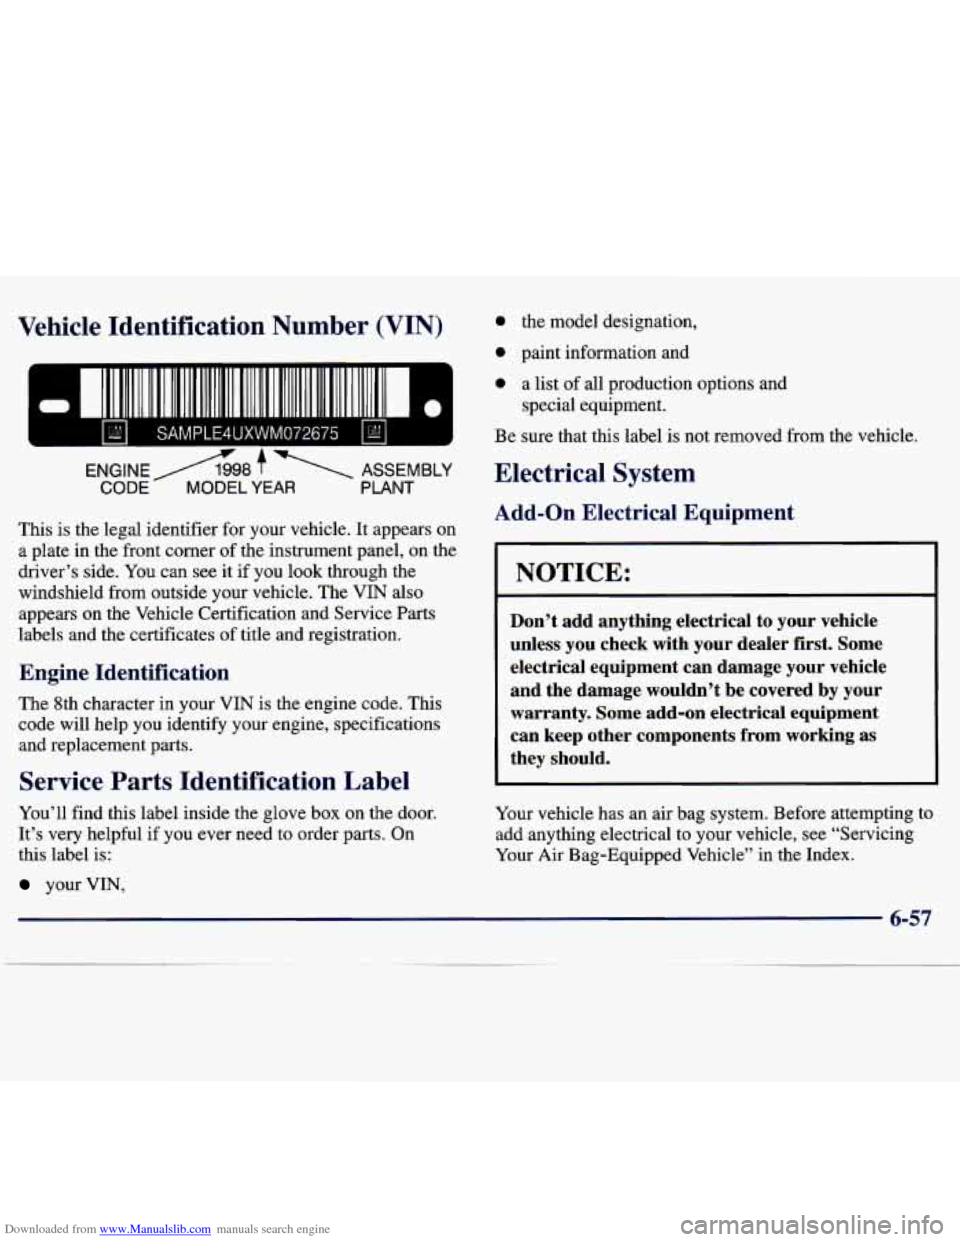
Downloaded from www.Manualslib.com manuals search engine Vehicle Identification Number (VIN)
ENGlNEA98 f ASSEMBLY
CODE MODEL YEAR PLANT
This is the legal identifier for your vehicle. It appears on
a plate in the front corner of the instrument panel, on the
driver’s side. You can see it if
you look through the
windshield from outside your vehicle. The VIN also
appears on the Vehicle Certification and Service Parts
labels and the certificates of title and registration.
Engine Identification
The 8th character in your VIN is the engine code. This
code will help you identify your engine, specifications
and replacement parts.
Service Parts Identification Label
You’ll find this label inside the glove box on the door.
It’s very helpful if you ever need to order parts. On
this label is:
your VIN,
0 the model designation,
0 paint information and
0 a list of all production options and
special equipment.
Be sure that this label
is not removed from the vehicle.
Electrical System
Add-on Electrical Equipment
I NOTICE:
-
Don’t add anything electrical to your vehicle
unless you check with your dealer first. Some
electrical equipment can damage
your vehicle
and the damage wouldn’t be covered by your warranty. Some add-on electrical equipment
can keep other components from working as
they should.
Your vehicle has an air bag system. Before attempting to
add anything electrical to your vehicle, see “Servicing
Your Air Bag-Equipped Vehicle” in
the Index.
6-57
Page 295 of 386
Downloaded from www.Manualslib.com manuals search engine Fuses and Circuit Breakers
The wiring circuits in your vehicle are protected from short circuits by fuses, circuit breakers and thermal links
in the wiring itself. This greatly reduces the chance of
fires caused by electrical problems.
Look at the silver-colored band inside the fuse. If the
band is broken or melted, replace the fuse. Be sure you
replace a bad fuse with a new one of the correct size.
If you ever have a problem on the road and don't have a
spare fuse,
you can borrow one. Just pick some feature
of your vehicle that you can get along without
-- like the
radio or cigarette lighter
-- and use its fuse, if it is the
size you need. Replace it as soon as you can.
Before replacing a fuse, turn every vehicle electrical
switch
off.
There are two fuse blocks in your vehicle: the
instrument panel fuse block and the engine
compartment fuse block.
Instrument Panel Fuse Block
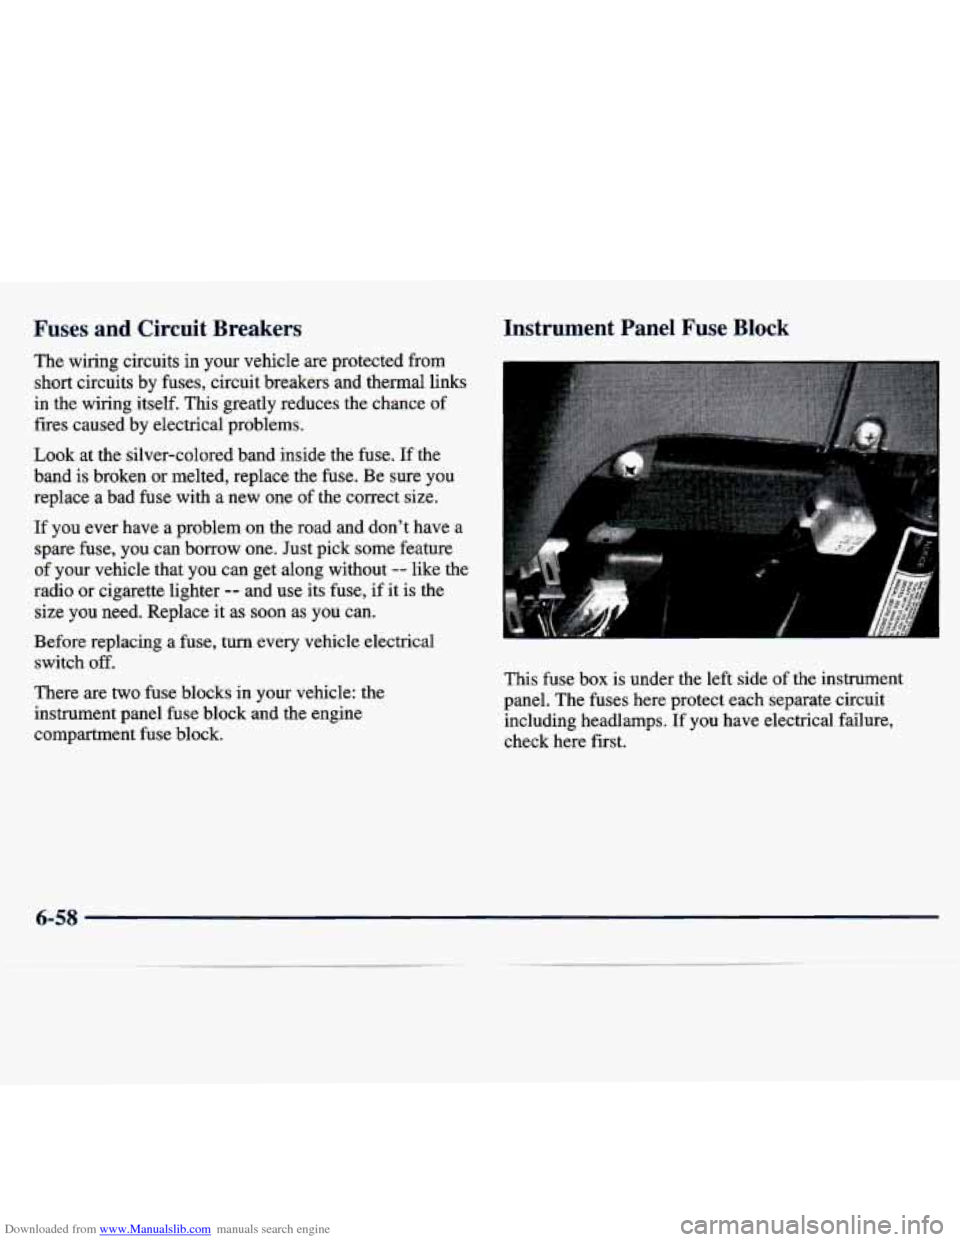
This fuse box is under the left side of the instrument
panel. The fuses here protect each separate circuit
including headlamps. If you have electrical failure,
check here first.
6-58
Page 299 of 386
Downloaded from www.Manualslib.com manuals search engine Capacities (Approximate)
The following approximate capacities are given in
English and metric conversions.
Air Conditioning
. . See the refrigerant information
label under the hood and
“Air Conditioning Refrigerants”
at the end of this section.
Automatic Transmission-Drain and Refill
3 Speed ................... 3.0 quarts (2.8 L)*
4 Speed .................... 2.6 quarts (2.5 L)
Automatic Transmission ....... 5.5 quarts (5.2 L)
Manual Transmission ......... 5.6 quarts (5.3 L)
Cooling System
Crankcase
With Filter Change
......... 4.5 quarts (4.2 L)**
Front Differential ............ 1.1 quarts ( 1 .O L)
Fuel Tank
Two-Door Convertible
....... 11 .O gallons (42 L)
Four-Door Hardtop .......... 14.5 gallons (55 L)
Manual Transmission Four-wheel Drive
........... 1.6 quarts (1.5 L)*
Two-Wheel Drive ........... 2.0 quarts (1.9 L)*
Rear Differential ............. 2.3 quarts (2.2 L)
Transfer Case ............... 1.8 quarts (1.7 L)
* Recheck fluid level after filling. See “Automatic
Transmission Fluid” or “Manual Transmission Fluid” in
the Index.
** When changing the oil filter, additional oil may be
needed. Recheck the oil level after filling. See “Engine
Oil” in the Index.
6-62
Page 304 of 386
Downloaded from www.Manualslib.com manuals search engine 0 Section 7 Maintenance Schedule
This section covers the maintenance required for your vehicle. Your vehicle needs these services to retain its safety,
dependability and emission control performance.
7-2
7-4
7-5
7-5
7-6
7-7 Introduction
Part A: Scheduled Maintenance Services
Short TripKity Definition
Short TripKity Intervals
Long Tripklighway Definition
Long Tripmighway Intervals
7-8 Short Trip/City Maintenance Schedule
7-3 1 Long Tripmighway Maintenance Schedule
7-47 Part B: Owner Checks and Services
7-5 1 Part C: Periodic Maintenance Inspections
7-53 Part D: Recommended Fluids and Lubricants
7-55 Part E: Maintenance Record
Page 306 of 386
Downloaded from www.Manualslib.com manuals search engine Performing maintenance work on a vehicle can
be dangerous. In trying to do some jobs, you can
be seriously injured.
Do your own maintenance
work onIy
if you have the required know-how
and the proper tools and equipment for
the job.
If you have any doubt, have a qualified
technician do the work.
If you are skilled enough to do some work on your
vehicle, you will probably want to get the service
information. See “Service and Owner Publications” in
the Index.
“Part B: Owner Checks and Services” tells you
what should be checked and when. It also explains
what
you can easily do to help keep your vehicle in
good condition.
“Part C: Periodic Maintenance Inspections”
explains important inspections that your dealer’s
service department or another qualified service center
should perform.
“Part D: Recommended Fluids and Lubricants”
lists some recommended products to help keep your
vehicle properly maintained. These products, or their
equivalents, should be used whether you do the work
yourself or have it done.
“Part E: Maintenance Record” provides a place for
you to record the maintenance performed
on your
vehicle. Whenever any maintenance is performed, be
sure to write it down in this part. This will help you
determine when your next maintenance should be done.
In addition, it is a good idea to keep your maintenance
receipts. They may be needed to qualify your vehicle
for warranty repairs.
Page 307 of 386
Downloaded from www.Manualslib.com manuals search engine Part A: Scheduled
Maintenance Services
Using Your Maintenance Schedule
We at General Motors want to help you keep your
vehicle in good working condition. But we don’t
know exactly how you’ll drive it.
You may drive very
short distances only a few times a week. Or you may
drive long distances all the time in very hot, dusty
weather. You may use your vehicle in making deliveries.
Or you may drive it to work, to do errands or in many
other ways.
Because of all the different ways people use their
vehicles, maintenance needs vary. You may even need
more frequent checks and replacements than you’ll find
in the schedules in this section.
So please read this
section and note how you drive.
If you have any
questions on how to keep your vehicle
in good
condition, see your dealer.
This part tells you the maintenance services you should
have done and when you should schedule them. If you
go to your dealer for your service needs, you’ll know that GM-trained and supported service people will
perform the work using genuine GM
parts.
The proper fluids and lubricants to use are listed in
Part D. Make sure whoever services your vehicle
uses these. All parts should be replaced and all
necessary repairs done before you or anyone else
drives the vehicle.
These schedules are for vehicles that:
carry passengers and cargo within recommended
limits. You will find these limits on your vehicle’s
Tire-Loading Information label. See “Loading Your
Vehicle” in the Index.
are driven on reasonable road surfaces within legal
driving limits.
0 use the recommended fuel. See “Fuel” in the Index.
Selecting the Right Schedule
First you’ll need to decide which of the two schedules
is right for your vehicle. Here’s how to decide which
schedule to follow:
7-4