sensor CHEVROLET TRAVERSE 2010 1.G User Guide
[x] Cancel search | Manufacturer: CHEVROLET, Model Year: 2010, Model line: TRAVERSE, Model: CHEVROLET TRAVERSE 2010 1.GPages: 448, PDF Size: 6.96 MB
Page 285 of 448
Driving and Operating 9-33
Using Cruise Control on Hills
How well the cruise control will work
on hills depends upon the vehicle
speed, load, and the steepness of
the hills. When going up steep hills,
you might have to step on the
accelerator pedal to maintain the
vehicle speed. When going
downhill, you might have to brake or
shift to a lower gear to keep the
vehicle speed down. When the
brakes are applied the cruise control
is disengaged.
Ending Cruise Control
There are three ways to end cruise
control:
.Step lightly on the brake pedal.
.Press the[button.
.Press theTbutton.
Erasing Speed Memory
The cruise control set speed
memory is erased when the cruise
control or the ignition is turned off.
Object Detection
Systems
Ultrasonic Parking Assist
For vehicles with the Ultrasonic
Rear Parking Assist (URPA) system,
it operates at speeds less than
8 km/h (5 mph), and assists the
driver with parking and avoiding
objects while in R (Reverse). The
sensors on the rear bumper are
used to detect the distance to an
object up to 2.5 m (8 ft) behind the
vehicle, and at least 25.4 cm (10 in)
off the ground.
{WARNING
The Ultrasonic Rear Parking
Assist (URPA) system does not
replace driver vision. It cannot
detect:
.Objects that are below the
bumper, underneath the
vehicle, or if they are too
close or far from the vehicle
.Children, pedestrians,
bicyclists, or pets.
If you do not use proper care
before and while backing; vehicle
damage, injury, or death could
occur. Even with URPA, always
check behind the vehicle before
backing up. While backing, be
sure to look for objects and check
the vehicle's mirrors.
Page 286 of 448
9-34 Driving and Operating
How the System Works
URPA comes on automatically when
the shift lever is moved into
R (Reverse). A single tone sounds
to indicate the system is working.
URPA operates only at speeds less
than 5 mph (8 km/h).
An obstacle is indicated by audible
beeps. The interval between the
beeps becomes shorter as the
vehicle gets closer to the obstacle.
When the distance is less than
30 cm (12 in) the beeps are
continuous.
To be detected, objects must be at
least 25.4 cm (10 in) off the ground
and below liftgate level. Objects
must also be within 2.5 m (8 ft) from
the rear bumper. This distance may
be less during warmer or humid
weather.
The system can be disabled through
the Driver Information Center (DIC).
See“Park Assist” underVehicle
Personalization (With DIC Buttons)
on page 5‑40for more information.
When the System Does Not
Seem to Work Properly
If the URPA system does not
activate due to a temporary
condition, the message PARK
ASSIST OFF displays on the DIC
when the shift lever is moved into
R (Reverse). This may occur under
the following conditions:
.The driver disables the system.
.The ultrasonic sensors are not
clean. Keep the vehicle's rear
bumper free of mud, dirt, snow,
ice and slush. For cleaning
instructions, see Exterior Care
on page 10‑86.
.A trailer was attached to the
vehicle, or a bicycle or an object
was hanging out of the liftgate
during the last drive cycle. Once
the attached object is removed,
URPA will return to normal
operation.
.A tow bar is attached to the
vehicle.
.The vehicle's bumper is
damaged. Take the vehicle to
your dealer to repair the system.
.Other conditions may affect
system performance, such as
vibrations from a jackhammer or
the compression of air brakes on
a very large truck.
If the system is still disabled, after
driving forward at least 25 km/h
(15 mph), take the vehicle to your
dealer.
Page 320 of 448
10-12 Vehicle Care
The transmission fluid will not reach
the end of the dipstick unless the
transmission is at operating
temperature. If you need to check
the transmission fluid level, please
take the vehicle to your dealer.
Engine Air Cleaner/Filter
When to Inspect the Engine Air
Cleaner/Filter
Inspect the air cleaner/filter at the
MaintenanceIIintervals and replace
it at the first oil change after each
80 000 km (50,000 mile) interval.
See Scheduled Maintenance
on
page 11‑2for more information.
If you are driving in dusty/dirty
conditions, inspect the filter at each
engine oil change. See
Engine Compartment Overview
on page 10‑6for the location of the
engine air cleaner/filter.
How to Inspect the Engine Air
Cleaner/Filter
To inspect the air cleaner/filter,
remove the filter from the vehicle
and lightly shake the filter (away
from vehicle) to release loose dust
and dirt. If the filter remains caked
with dirt, a new filter is required. To inspect or replace the engine air
cleaner/filter:
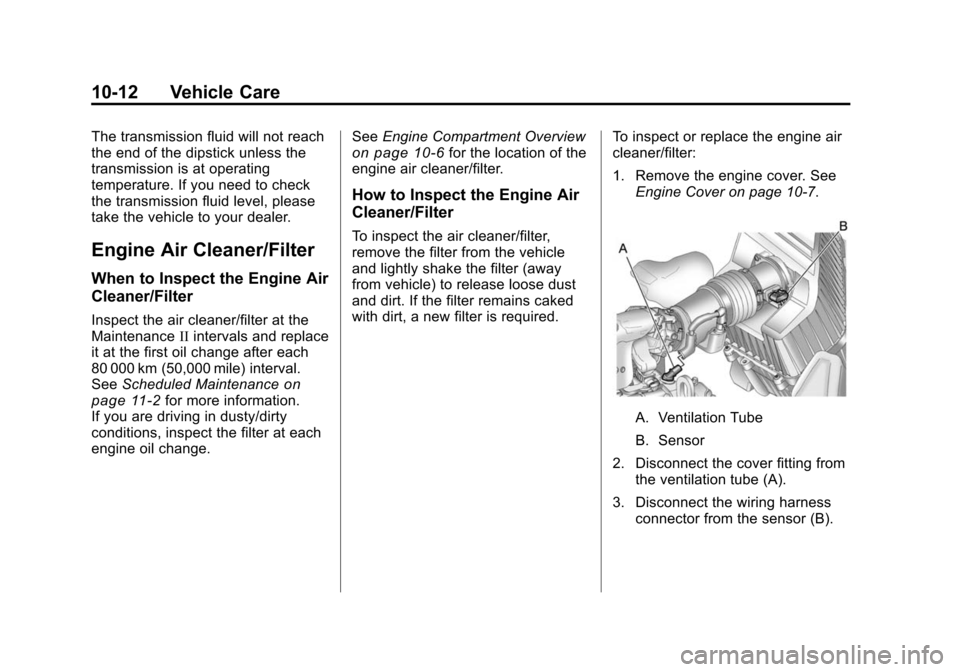
1. Remove the engine cover. See
Engine Cover on page 10‑7.
A. Ventilation Tube
B. Sensor
2. Disconnect the cover fitting from the ventilation tube (A).
3. Disconnect the wiring harness connector from the sensor (B).
Page 321 of 448
Vehicle Care 10-13
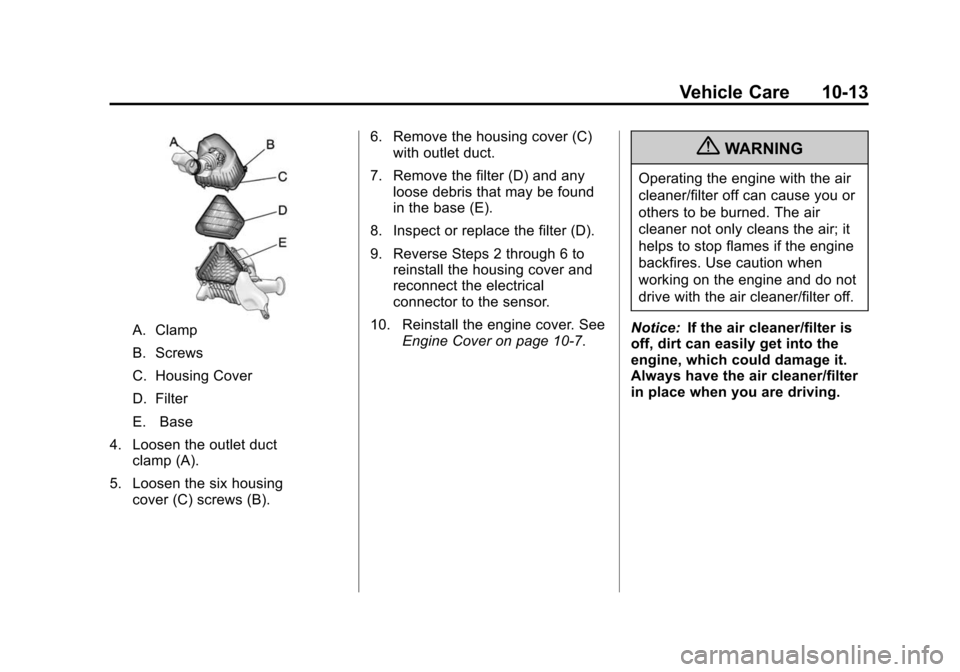
A. Clamp
B. Screws
C. Housing Cover
D. Filter
E. Base
4. Loosen the outlet duct clamp (A).
5. Loosen the six housing cover (C) screws (B). 6. Remove the housing cover (C)
with outlet duct.
7. Remove the filter (D) and any loose debris that may be found
in the base (E).
8. Inspect or replace the filter (D).
9. Reverse Steps 2 through 6 to reinstall the housing cover and
reconnect the electrical
connector to the sensor.
10. Reinstall the engine cover. See Engine Cover on page 10‑7.
{WARNING
Operating the engine with the air
cleaner/filter off can cause you or
others to be burned. The air
cleaner not only cleans the air; it
helps to stop flames if the engine
backfires. Use caution when
working on the engine and do not
drive with the air cleaner/filter off.
Notice: If the air cleaner/filter is
off, dirt can easily get into the
engine, which could damage it.
Always have the air cleaner/filter
in place when you are driving.
Page 340 of 448
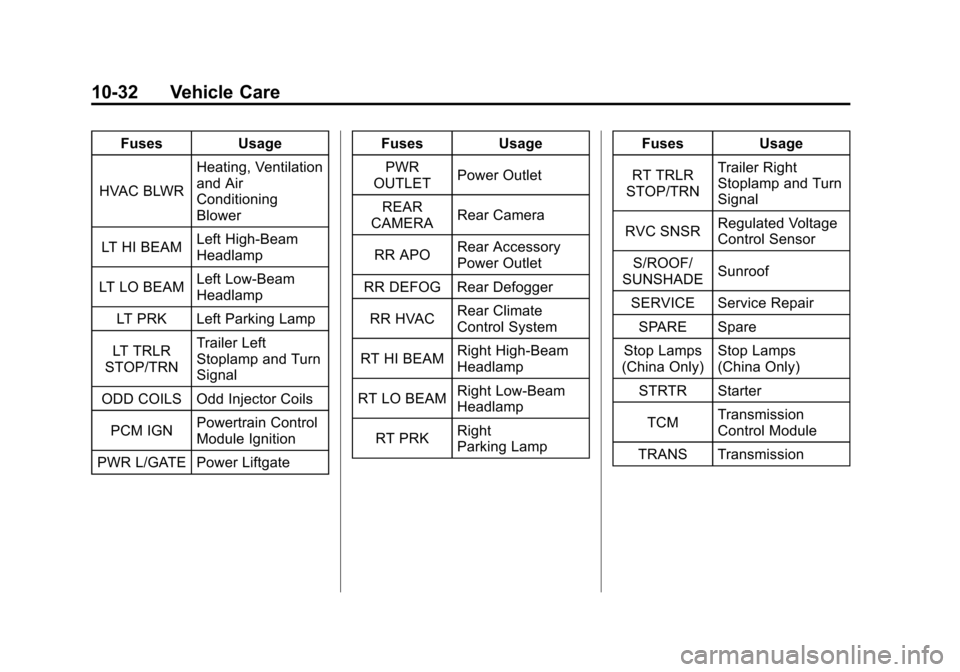
10-32 Vehicle Care
FusesUsage
HVAC BLWR Heating, Ventilation
and Air
Conditioning
Blower
LT HI BEAM Left High-Beam
Headlamp
LT LO BEAM Left Low‐Beam
Headlamp
LT PRK Left Parking Lamp
LT TRLR
STOP/TRN Trailer Left
Stoplamp and Turn
Signal
ODD COILS Odd Injector Coils
PCM IGN Powertrain Control
Module Ignition
PWR L/GATE Power Liftgate Fuses
Usage
PWR
OUTLET Power Outlet
REAR
CAMERA Rear Camera
RR APO Rear Accessory
Power Outlet
RR DEFOG Rear Defogger
RR HVAC Rear Climate
Control System
RT HI BEAM Right High‐Beam
Headlamp
RT LO BEAM Right Low‐Beam
Headlamp
RT PRK Right
Parking Lamp Fuses
Usage
RT TRLR
STOP/TRN Trailer Right
Stoplamp and Turn
Signal
RVC SNSR Regulated Voltage
Control Sensor
S/ROOF/
SUNSHADE Sunroof
SERVICE Service Repair SPARE Spare
Stop Lamps
(China Only) Stop Lamps
(China Only)
STRTR Starter
TCM Transmission
Control Module
TRANS Transmission
Page 351 of 448
Vehicle Care 10-43
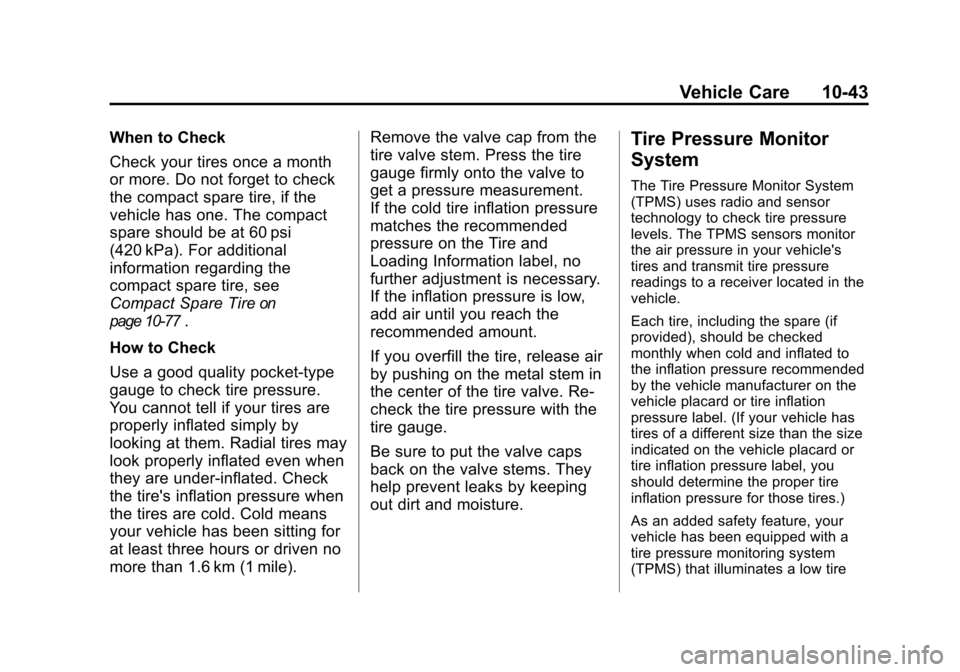
When to Check
Check your tires once a month
or more. Do not forget to check
the compact spare tire, if the
vehicle has one. The compact
spare should be at 60 psi
(420 kPa). For additional
information regarding the
compact spare tire, see
Compact Spare Tire
on
page 10‑77
.
How to Check
Use a good quality pocket-type
gauge to check tire pressure.
You cannot tell if your tires are
properly inflated simply by
looking at them. Radial tires may
look properly inflated even when
they are under‐inflated. Check
the tire's inflation pressure when
the tires are cold. Cold means
your vehicle has been sitting for
at least three hours or driven no
more than 1.6 km (1 mile). Remove the valve cap from the
tire valve stem. Press the tire
gauge firmly onto the valve to
get a pressure measurement.
If the cold tire inflation pressure
matches the recommended
pressure on the Tire and
Loading Information label, no
further adjustment is necessary.
If the inflation pressure is low,
add air until you reach the
recommended amount.
If you overfill the tire, release air
by pushing on the metal stem in
the center of the tire valve. Re‐
check the tire pressure with the
tire gauge.
Be sure to put the valve caps
back on the valve stems. They
help prevent leaks by keeping
out dirt and moisture.
Tire Pressure Monitor
System
The Tire Pressure Monitor System
(TPMS) uses radio and sensor
technology to check tire pressure
levels. The TPMS sensors monitor
the air pressure in your vehicle's
tires and transmit tire pressure
readings to a receiver located in the
vehicle.
Each tire, including the spare (if
provided), should be checked
monthly when cold and inflated to
the inflation pressure recommended
by the vehicle manufacturer on the
vehicle placard or tire inflation
pressure label. (If your vehicle has
tires of a different size than the size
indicated on the vehicle placard or
tire inflation pressure label, you
should determine the proper tire
inflation pressure for those tires.)
As an added safety feature, your
vehicle has been equipped with a
tire pressure monitoring system
(TPMS) that illuminates a low tire
Page 352 of 448
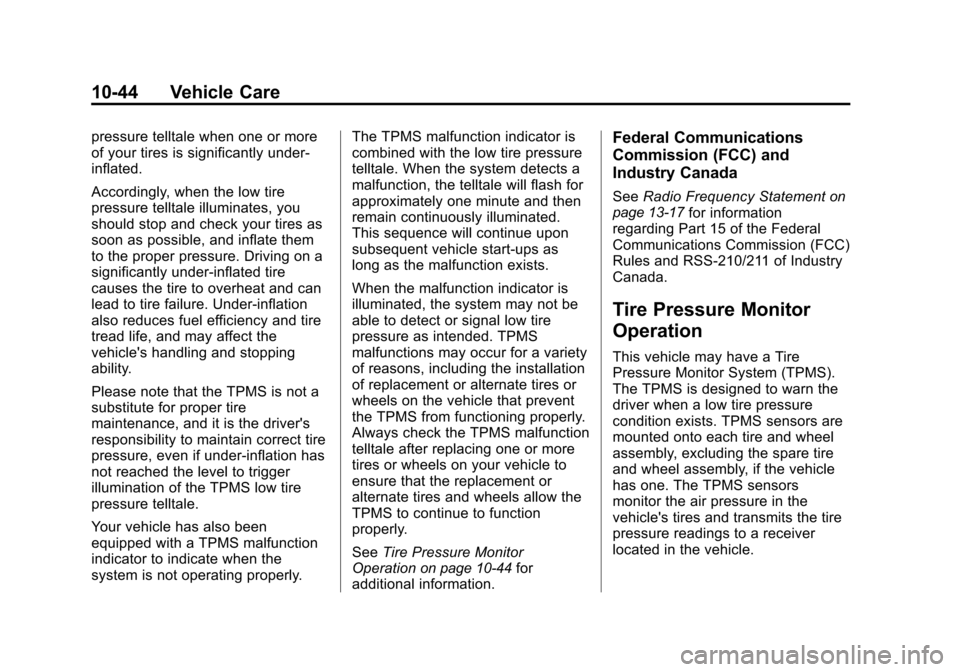
10-44 Vehicle Care
pressure telltale when one or more
of your tires is significantly under‐
inflated.
Accordingly, when the low tire
pressure telltale illuminates, you
should stop and check your tires as
soon as possible, and inflate them
to the proper pressure. Driving on a
significantly under‐inflated tire
causes the tire to overheat and can
lead to tire failure. Under‐inflation
also reduces fuel efficiency and tire
tread life, and may affect the
vehicle's handling and stopping
ability.
Please note that the TPMS is not a
substitute for proper tire
maintenance, and it is the driver's
responsibility to maintain correct tire
pressure, even if under‐inflation has
not reached the level to trigger
illumination of the TPMS low tire
pressure telltale.
Your vehicle has also been
equipped with a TPMS malfunction
indicator to indicate when the
system is not operating properly.The TPMS malfunction indicator is
combined with the low tire pressure
telltale. When the system detects a
malfunction, the telltale will flash for
approximately one minute and then
remain continuously illuminated.
This sequence will continue upon
subsequent vehicle start‐ups as
long as the malfunction exists.
When the malfunction indicator is
illuminated, the system may not be
able to detect or signal low tire
pressure as intended. TPMS
malfunctions may occur for a variety
of reasons, including the installation
of replacement or alternate tires or
wheels on the vehicle that prevent
the TPMS from functioning properly.
Always check the TPMS malfunction
telltale after replacing one or more
tires or wheels on your vehicle to
ensure that the replacement or
alternate tires and wheels allow the
TPMS to continue to function
properly.
See
Tire Pressure Monitor
Operation
on page 10‑44for
additional information.
Federal Communications
Commission (FCC) and
Industry Canada
See Radio Frequency Statementon
page 13‑17for information
regarding Part 15 of the Federal
Communications Commission (FCC)
Rules and RSS-210/211 of Industry
Canada.
Tire Pressure Monitor
Operation
This vehicle may have a Tire
Pressure Monitor System (TPMS).
The TPMS is designed to warn the
driver when a low tire pressure
condition exists. TPMS sensors are
mounted onto each tire and wheel
assembly, excluding the spare tire
and wheel assembly, if the vehicle
has one. The TPMS sensors
monitor the air pressure in the
vehicle's tires and transmits the tire
pressure readings to a receiver
located in the vehicle.
Page 353 of 448
Vehicle Care 10-45
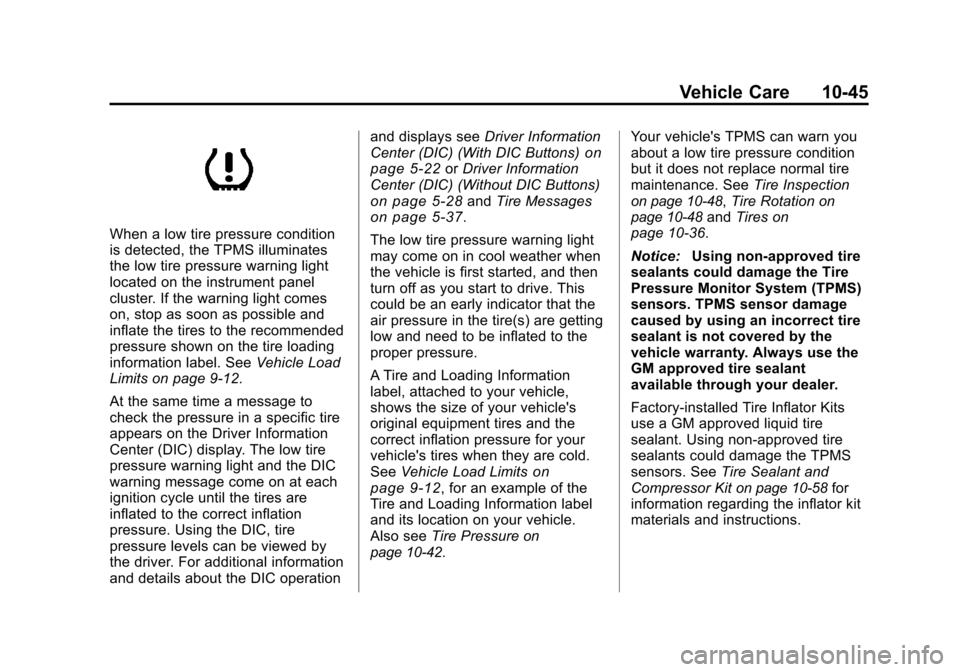
When a low tire pressure condition
is detected, the TPMS illuminates
the low tire pressure warning light
located on the instrument panel
cluster. If the warning light comes
on, stop as soon as possible and
inflate the tires to the recommended
pressure shown on the tire loading
information label. SeeVehicle Load
Limits on page 9‑12.
At the same time a message to
check the pressure in a specific tire
appears on the Driver Information
Center (DIC) display. The low tire
pressure warning light and the DIC
warning message come on at each
ignition cycle until the tires are
inflated to the correct inflation
pressure. Using the DIC, tire
pressure levels can be viewed by
the driver. For additional information
and details about the DIC operation and displays see
Driver Information
Center (DIC) (With DIC Buttons)
on
page 5‑22or Driver Information
Center (DIC) (Without DIC Buttons)
on page 5‑28and Tire Messageson page 5‑37.
The low tire pressure warning light
may come on in cool weather when
the vehicle is first started, and then
turn off as you start to drive. This
could be an early indicator that the
air pressure in the tire(s) are getting
low and need to be inflated to the
proper pressure.
A Tire and Loading Information
label, attached to your vehicle,
shows the size of your vehicle's
original equipment tires and the
correct inflation pressure for your
vehicle's tires when they are cold.
See Vehicle Load Limits
on
page 9‑12, for an example of the
Tire and Loading Information label
and its location on your vehicle.
Also see Tire Pressure
on
page 10‑42. Your vehicle's TPMS can warn you
about a low tire pressure condition
but it does not replace normal tire
maintenance. See
Tire Inspection
on page 10‑48,Tire Rotationon
page 10‑48and Tires on
page 10‑36.
Notice: Using non‐approved tire
sealants could damage the Tire
Pressure Monitor System (TPMS)
sensors. TPMS sensor damage
caused by using an incorrect tire
sealant is not covered by the
vehicle warranty. Always use the
GM approved tire sealant
available through your dealer.
Factory-installed Tire Inflator Kits
use a GM approved liquid tire
sealant. Using non-approved tire
sealants could damage the TPMS
sensors. See Tire Sealant and
Compressor Kit
on page 10‑58for
information regarding the inflator kit
materials and instructions.
Page 354 of 448
10-46 Vehicle Care
TPMS Malfunction Light and
Message
The TPMS will not function properly
if one or more of the TPMS sensors
are missing or inoperable. When the
system detects a malfunction, the
low tire warning light flashes for
about one minute and then stays on
for the remainder of the ignition
cycle. A DIC warning message is
also displayed. The low tire warning
light and DIC warning message
come on at each ignition cycle until
the problem is corrected. Some of
the conditions that can cause the
malfunction light and DIC message
to come on are:
.One of the road tires has been
replaced with the spare tire,
if your vehicle has one. The
spare tire does not have a
TPMS sensor. The TPMS
malfunction light and DIC
message should go off once you
re‐install the road tire containing
the TPMS sensor.
.The TPMS sensor matching
process was started but not
completed or not completed
successfully after rotating the
vehicle's tires. The DIC message
and TPMS malfunction light
should go off once the TPMS
sensor matching process is
performed successfully. See
“TPMS Sensor Matching
Process”later in this section.
.One or more TPMS sensors are
missing or damaged. The DIC
message and the TPMS
malfunction light should go off
when the TPMS sensors are
installed and the sensor
matching process is performed
successfully. See your dealer for
service.
.Replacement tires or wheels do
not match your vehicle's original
equipment tires or wheels. Tires
and wheels other than those
recommended for your vehicle
could prevent the TPMS from
functioning properly. See Buying
New Tires on page 10‑50.
.Operating electronic devices or
being near facilities using radio
wave frequencies similar to the
TPMS could cause the TPMS
sensors to malfunction.
If the TPMS is not functioning it
cannot detect or signal a low tire
condition. See your dealer for
service if the TPMS malfunction
light and DIC message comes on
and stays on.
TPMS Sensor Matching
Process
Each TPMS sensor has a unique
identification code. Any time you
rotate your vehicle's tires or replace
one or more of the TPMS sensors,
the identification codes will need to
be matched to the new tire/wheel
position. The sensors are matched
to the tire/wheel positions in the
following order: driver side front tire,
passenger side front tire, passenger
side rear tire, and driver side rear
tire using a TPMS diagnostic tool.
See your dealer for service.
Page 355 of 448
Vehicle Care 10-47
The TPMS sensors can also be
matched to each tire/wheel position
by increasing or decreasing the
tire's air pressure. If increasing the
tire's air pressure, do not exceed
the maximum inflation pressure
indicated on the tire's sidewall.
To decrease air-pressure out of a
tire you can use the pointed end of
the valve cap, a pencil-style air
pressure gauge, or a key.
You have two minutes to match the
first tire/wheel position, and
five minutes overall to match all four
tire/wheel positions. If it takes longer
than two minutes, to match the first
tire and wheel, or more than
five minutes to match all four tire
and wheel positions the matching
process stops and you need to
start over.
The TPMS sensor matching process
is outlined below:
1. Set the parking brake.
2. Turn the ignition switch to ON/RUN with the engine off. 3. Press the Remote Keyless Entry
(RKE) transmitter's LOCK and
UNLOCK buttons at the same
time for approximately
five seconds. The horn sounds
twice to signal the receiver is in
relearn mode and TIRE
LEARNING ACTIVE message
displays on the DIC screen.
4. Start with the driver side front tire.
5. Remove the valve cap from the valve cap stem. Activate the
TPMS sensor by increasing or
decreasing the tire's air pressure
for five seconds, or until a horn
chirp sounds. The horn chirp,
which may take up to
30 seconds to sound, confirms
that the sensor identification
code has been matched to this
tire and wheel position.
6. Proceed to the passenger side front tire, and repeat the
procedure in Step 5. 7. Proceed to the passenger side
rear tire, and repeat the
procedure in Step 5.
8. Proceed to the driver side rear tire, and repeat the procedure in
Step 5. The horn sounds two
times to indicate the sensor
identification code has been
matched to the driver side rear
tire, and the TPMS sensor
matching process is no longer
active. The TIRE LEARNING
ACTIVE message on the DIC
display screen goes off.
9. Turn the ignition switch to LOCK/OFF.
10. Set all four tires to the recommended air pressure
level as indicated on the Tire
and Loading Information label.
11. Put the valve caps back on the valve stems.