radio CHEVROLET TRAVERSE 2017 1.G User Guide
[x] Cancel search | Manufacturer: CHEVROLET, Model Year: 2017, Model line: TRAVERSE, Model: CHEVROLET TRAVERSE 2017 1.GPages: 394, PDF Size: 6.47 MB
Page 44 of 394
Chevrolet Traverse Owner Manual (GMNA-Localizing-U.S./Canada/Mexico-
9955676) - 2017 - crc - 3/29/16
Keys, Doors, and Windows 43
disarming the system. When the
alarm is activated, the turn signals
flash and the horn sounds for about
30 seconds. The alarm system will
then re-arm to monitor for the next
unauthorized event.
The vehicle can be started with the
correct ignition key if the alarm has
been set off.
To avoid setting off the alarm by
accident:
.Lock the vehicle with the door
key after the doors are closed.
. Unlock the door with the RKE
transmitter. Unlocking a door any
other way sets off the alarm if
the system has been armed.
Press
Kor place the key in the
ignition and turn it to START to turn
off the alarm.
Testing the Alarm
To test the alarm:
1. From inside the vehicle, lower the driver side window, and
open the driver door.
2. Press
Q. 3. Get out of the vehicle, close
the door, and wait for the
security light to go out.
4. Reach in through the window, unlock the door with the
manual door lock, and open
the door. This should set off the
alarm.
If the alarm does not sound when it
should, but the headlamps flash,
check to see if the horn works. The
horn fuse may be blown. To replace
the fuse, see Fuses and Circuit
Breakers 0291.
If the alarm does not sound or the
headlamps do not flash, see your
dealer for service.
Immobilizer
See Radio Frequency
Statement 0369.
Immobilizer Operation
This vehicle has PASS-Key®III+
(Personalized Automotive Security
System) theft-deterrent system.
PASS-Key III+ is a passive
theft-deterrent system. The system is automatically armed
when the key is removed from the
ignition.
The system is automatically
disarmed when the key is turned to
ON/RUN, ACC/ACCESSORY,
or START from the LOCK/OFF
position.
You do not have to manually arm or
disarm the system.
The security light comes on if there
is a problem with arming or
disarming the theft-deterrent
system.
When the PASS-Key III+ system
senses an incorrect key, the vehicle
does not start. Anyone using a
trial-and-error method to start the
vehicle will be discouraged because
of the high number of electrical key
codes.
If the engine does not start and the
security light on the instrument
panel comes on when trying to start
the vehicle, there may be a problem
with the theft-deterrent system. Turn
the ignition off and try again.
Page 109 of 394
Chevrolet Traverse Owner Manual (GMNA-Localizing-U.S./Canada/Mexico-
9955676) - 2017 - crc - 3/29/16
108 Instruments and Controls
Instruments and
Controls
Controls
Steering Wheel Adjustment . . . 109
Steering Wheel Controls(Radio without
Touchscreen) . . . . . . . . . . . . . . . 109
Steering Wheel Controls (Radio with Touchscreen) . . . 110
Heated Steering Wheel . . . . . . . 111
Horn . . . . . . . . . . . . . . . . . . . . . . . . . . 111
Windshield Wiper/Washer . . . . . 111
Rear Window Wiper/ Washer . . . . . . . . . . . . . . . . . . . . . . 112
Compass . . . . . . . . . . . . . . . . . . . . . 112
Clock (Radio without Touchscreen) . . . . . . . . . . . . . . . . 114
Clock (Radio with Touchscreen) . . . . . . . . . . . . . . . . 115
Power Outlets . . . . . . . . . . . . . . . . 115
Warning Lights, Gauges, and
Indicators
Warning Lights, Gauges, and Indicators . . . . . . . . . . . . . . . . . . . 117
Instrument Cluster . . . . . . . . . . . . 118
Speedometer . . . . . . . . . . . . . . . . . 119
Odometer . . . . . . . . . . . . . . . . . . . . . 119 Tachometer . . . . . . . . . . . . . . . . . . . 119
Fuel Gauge . . . . . . . . . . . . . . . . . . . 119
Engine Coolant Temperature
Gauge . . . . . . . . . . . . . . . . . . . . . . 120
Voltmeter Gauge . . . . . . . . . . . . . 121
Safety Belt Reminders . . . . . . . . 121
Airbag Readiness Light . . . . . . . 122
Passenger Airbag Status
Indicator . . . . . . . . . . . . . . . . . . . . 122
Charging System Light . . . . . . . 123
Malfunction Indicator Lamp (Check Engine Light) . . . . . . . . 124
Brake System Warning Light . . . . . . . . . . . . . . . . . . . . . . . . 126
Antilock Brake System (ABS) Warning Light . . . . . . . . . . . . . . . 126
Tow/Haul Mode Light . . . . . . . . . 127
Lane Departure Warning (LDW) Light . . . . . . . . . . . . . . . . . 127
Vehicle Ahead Indicator . . . . . . 127
StabiliTrak
®Indicator Light . . . 127
Engine Coolant Temperature Warning Light . . . . . . . . . . . . . . . 128
Tire Pressure Light . . . . . . . . . . . 128
Engine Oil Pressure Light . . . . 128
Security Light . . . . . . . . . . . . . . . . . 129
High-Beam On Light . . . . . . . . . . 129
Cruise Control Light . . . . . . . . . . 130
Information Displays
Driver Information Center (DIC) (With DIC Buttons) . . . . . . . . . . 130
Driver Information Center (DIC) (Without DIC Buttons) . . . . . . . 135
Vehicle Messages
Vehicle Messages . . . . . . . . . . . . 137
Battery Voltage and ChargingMessages . . . . . . . . . . . . . . . . . . . 138
Brake System Messages . . . . . 138
Cruise Control Messages . . . . . 138
Door Ajar Messages . . . . . . . . . . 138
Engine Cooling System Messages . . . . . . . . . . . . . . . . . . . 139
Engine Oil Messages . . . . . . . . . 140
Engine Power Messages . . . . . 140
Fuel System Messages . . . . . . . 141
Key and Lock Messages . . . . . 141
Lamp Messages . . . . . . . . . . . . . . 141
Object Detection System Messages . . . . . . . . . . . . . . . . . . . 141
Ride Control System Messages . . . . . . . . . . . . . . . . . . . 143
Airbag System Messages . . . . 143
Security Messages . . . . . . . . . . . 143
Service Vehicle Messages . . . . 144
Tire Messages . . . . . . . . . . . . . . . . 144
Transmission Messages . . . . . . 145
Vehicle Reminder Messages . . . . . . . . . . . . . . . . . . . 146
Page 110 of 394
Chevrolet Traverse Owner Manual (GMNA-Localizing-U.S./Canada/Mexico-
9955676) - 2017 - crc - 3/29/16
Instruments and Controls 109
Vehicle Speed Messages . . . . . 146
Washer Fluid Messages . . . . . . 146
Vehicle Personalization
Vehicle Personalization (WithDIC Buttons) . . . . . . . . . . . . . . . . 146
Universal Remote System
Universal Remote System . . . . 153
Universal Remote SystemProgramming . . . . . . . . . . . . . . . 153
Universal Remote System Operation . . . . . . . . . . . . . . . . . . . 156
Controls
Steering Wheel
Adjustment
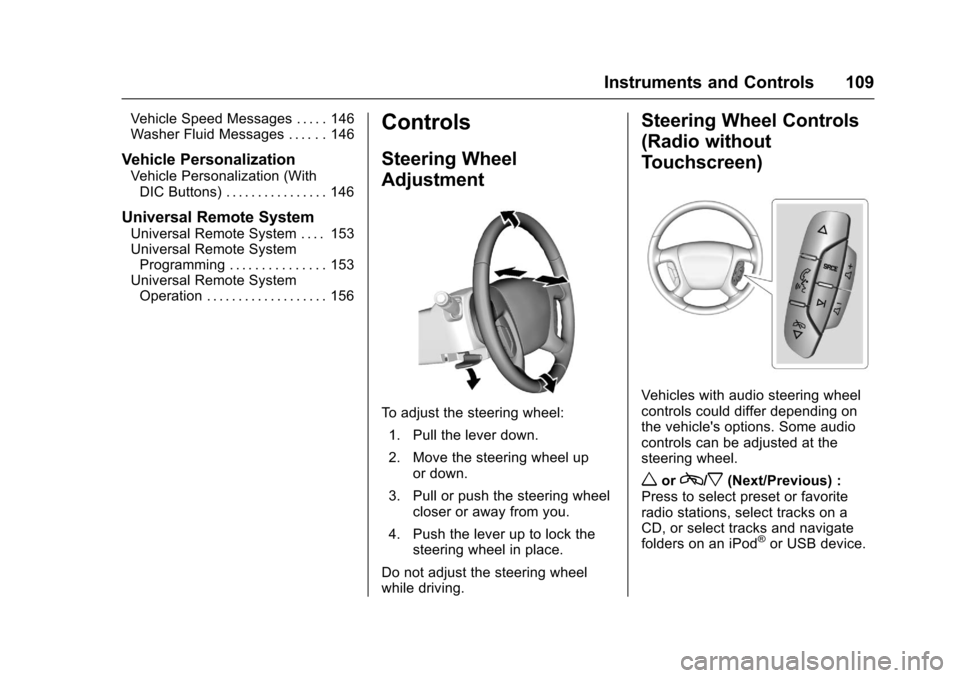
To adjust the steering wheel:
1. Pull the lever down.
2. Move the steering wheel up or down.
3. Pull or push the steering wheel closer or away from you.
4. Push the lever up to lock the steering wheel in place.
Do not adjust the steering wheel
while driving.
Steering Wheel Controls
(Radio without
Touchscreen)
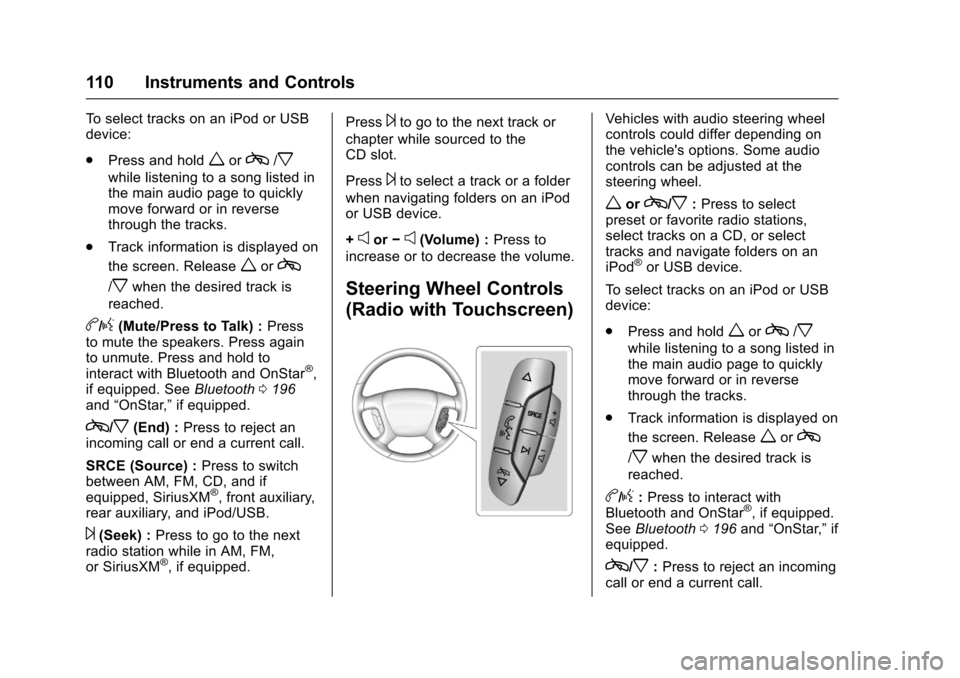
Vehicles with audio steering wheel
controls could differ depending on
the vehicle's options. Some audio
controls can be adjusted at the
steering wheel.
worc/x(Next/Previous) :
Press to select preset or favorite
radio stations, select tracks on a
CD, or select tracks and navigate
folders on an iPod
®or USB device.
Page 111 of 394
Chevrolet Traverse Owner Manual (GMNA-Localizing-U.S./Canada/Mexico-
9955676) - 2017 - crc - 3/29/16
110 Instruments and Controls
To select tracks on an iPod or USB
device:
.Press and hold
worc/x
while listening to a song listed in
the main audio page to quickly
move forward or in reverse
through the tracks.
. Track information is displayed on
the screen. Release
worc
/xwhen the desired track is
reached.
b/g(Mute/Press to Talk) : Press
to mute the speakers. Press again
to unmute. Press and hold to
interact with Bluetooth and OnStar
®,
if equipped. See Bluetooth0196
and “OnStar,” if equipped.
c/x(End) :Press to reject an
incoming call or end a current call.
SRCE (Source) : Press to switch
between AM, FM, CD, and if
equipped, SiriusXM
®, front auxiliary,
rear auxiliary, and iPod/USB.
¨(Seek) : Press to go to the next
radio station while in AM, FM,
or SiriusXM
®, if equipped. Press
¨to go to the next track or
chapter while sourced to the
CD slot.
Press
¨to select a track or a folder
when navigating folders on an iPod
or USB device.
+
eor −e(Volume) : Press to
increase or to decrease the volume.
Steering Wheel Controls
(Radio with Touchscreen)
Vehicles with audio steering wheel
controls could differ depending on
the vehicle's options. Some audio
controls can be adjusted at the
steering wheel.
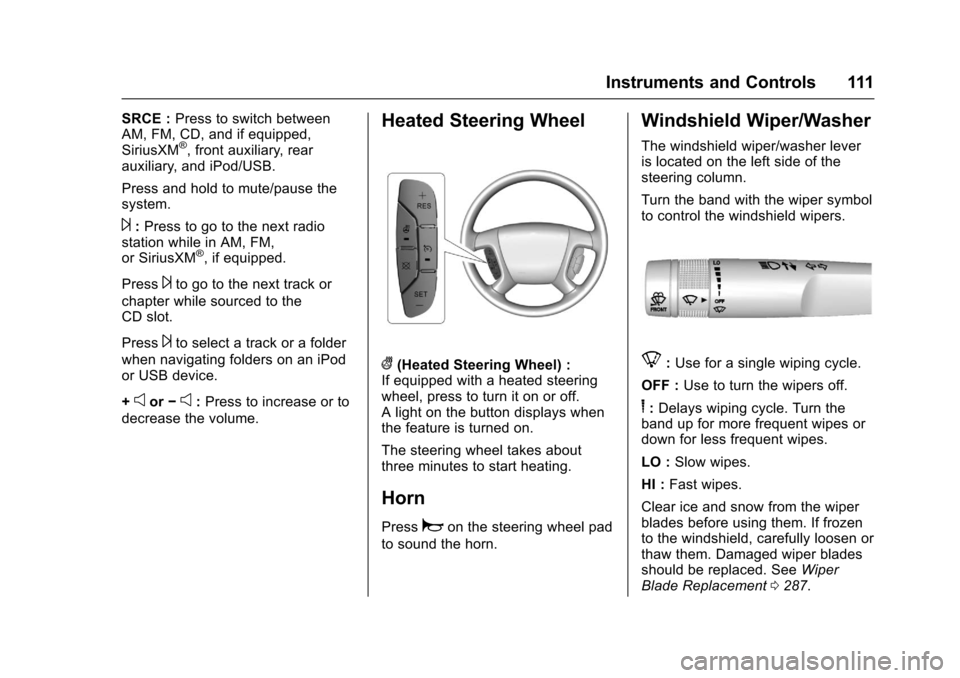
worc/x: Press to select
preset or favorite radio stations,
select tracks on a CD, or select
tracks and navigate folders on an
iPod
®or USB device.
To select tracks on an iPod or USB
device:
. Press and hold
worc/x
while listening to a song listed in
the main audio page to quickly
move forward or in reverse
through the tracks.
. Track information is displayed on
the screen. Release
worc
/xwhen the desired track is
reached.
b/g: Press to interact with
Bluetooth and OnStar®, if equipped.
See Bluetooth 0196 and“OnStar,” if
equipped.
c/x: Press to reject an incoming
call or end a current call.
Page 112 of 394
Chevrolet Traverse Owner Manual (GMNA-Localizing-U.S./Canada/Mexico-
9955676) - 2017 - crc - 3/29/16
Instruments and Controls 111
SRCE :Press to switch between
AM, FM, CD, and if equipped,
SiriusXM
®, front auxiliary, rear
auxiliary, and iPod/USB.
Press and hold to mute/pause the
system.
¨: Press to go to the next radio
station while in AM, FM,
or SiriusXM
®, if equipped.
Press
¨to go to the next track or
chapter while sourced to the
CD slot.
Press
¨to select a track or a folder
when navigating folders on an iPod
or USB device.
+
eor −e:Press to increase or to
decrease the volume.
Heated Steering Wheel
((Heated Steering Wheel) :
If equipped with a heated steering
wheel, press to turn it on or off.
A light on the button displays when
the feature is turned on.
The steering wheel takes about
three minutes to start heating.
Horn
Pressaon the steering wheel pad
to sound the horn.
Windshield Wiper/Washer
The windshield wiper/washer lever
is located on the left side of the
steering column.
Turn the band with the wiper symbol
to control the windshield wipers.
8: Use for a single wiping cycle.
OFF : Use to turn the wipers off.
6:Delays wiping cycle. Turn the
band up for more frequent wipes or
down for less frequent wipes.
LO : Slow wipes.
HI : Fast wipes.
Clear ice and snow from the wiper
blades before using them. If frozen
to the windshield, carefully loosen or
thaw them. Damaged wiper blades
should be replaced. See Wiper
Blade Replacement 0287.
Page 115 of 394
Chevrolet Traverse Owner Manual (GMNA-Localizing-U.S./Canada/Mexico-
9955676) - 2017 - crc - 3/29/16
114 Instruments and Controls
Do not operate any switches
such as window, sunroof,
climate controls, seats, etc.
during the calibration
procedure.
2. Press the vehicle information button until PRESS
VTO
CALIBRATE COMPASS
displays.
3. Press the set/reset button to start the compass calibration.
4. The DIC will display CALIBRATING: DRIVE IN
CIRCLES. Drive the vehicle in
tight circles at less than 8 km/h
(5 mph) to complete the
calibration. The DIC will display
CALIBRATION COMPLETE for
a few seconds when the
calibration is complete. The
DIC display will then return to
the previous menu.
Clock (Radio without
Touchscreen)
To adjust the time and date:
1. Turn the ignition key to ACC/ ACCESSORY or ON/RUN,
then press
Oto turn the
radio on.
2. Press
Hto display HR, MIN,
MM, DD, YYYY (hour, minute,
month, day, and year).
3. Press the pushbutton located under any one of the labels to
be changed.
4. To increase the time or date, do one of the following:
.Press the pushbutton below
the selected label.
. Press
¨SEEK.
. Press
\FWD.
. Turn
fclockwise.
5. To decrease the time or date, do one of the following:
.Press
©SEEK. .
Press
sREV.
. Turn
fcounterclockwise.
To change the time default setting
from 12 hour to 24 hour or to
change the date default setting from
month/day/year to day/month/year:
1. Press
Hand then the
pushbutton located under the
forward arrow that displays on
the radio screen until the time
12H (hour) and 24H (hour), and
the date MM/DD (month and
day) and DD/MM (day and
month) display.
2. Press the pushbutton located under the desired option.
3. Press
Hagain to apply the
selected default, or let the
screen time out.
Page 116 of 394
Chevrolet Traverse Owner Manual (GMNA-Localizing-U.S./Canada/Mexico-
9955676) - 2017 - crc - 3/29/16
Instruments and Controls 115
Clock (Radio with
Touchscreen)
Touch Settings on the Home Page
Menu, then touch the Set Time or
Set Date settings screen button to
display the different options for
setting the time and date.
Set Time:
.Touch the up or down arrows to
increase or decrease the Hours,
Minutes, AM, PM, or the 24 hour
setting on the clock.
. Touch and hold to quickly
increase or decrease the time
settings.
. Touch OK to save the
adjustments.
. Touch the Back or Cancel
screen button to cancel the
adjustments.
Set Date:
. Touch the up or down arrows to
increase or decrease the Month,
Day, and Year settings. .
Touch and hold to quickly
increase or decrease the date
settings.
. Touch OK to save the
adjustments.
. Touch the Back or Cancel
screen button to cancel the
adjustments.
Power Outlets
The vehicle has 12-volt outlets that
can be used to plug in electrical
equipment, such as a cell phone or
MP3 player.
The power outlets are located:
.On the center stack below the
climate controls.
. Inside the center console.
. At the rear of the center console.
. In the rear cargo area.
Lift the cover to access the outlet
and replace when not in use.
{Warning
Power is always supplied to the
outlets. Do not leave electrical
equipment plugged in when the
vehicle is not in use because the
vehicle could catch fire and cause
injury or death.
Caution
Leaving electrical equipment
plugged in for an extended period
of time while the vehicle is off will
drain the battery. Always unplug
electrical equipment when not in
use and do not plug in equipment
that exceeds the maximum
20 amp rating.
Certain accessory plugs may not be
compatible with the accessory
power outlet and could overload
vehicle and adapter fuses. If a
problem is experienced, see your
dealer.
Page 125 of 394
Chevrolet Traverse Owner Manual (GMNA-Localizing-U.S./Canada/Mexico-
9955676) - 2017 - crc - 3/29/16
124 Instruments and Controls
If the light stays on, or comes on
while driving, there may be a
problem with the electrical charging
system. Have it checked by your
dealer. Driving while this light is on
could drain the battery.
When this light comes on, the Driver
Information Center (DIC) also
displays the SERVICE BATTERY
CHARGING SYSTEM message.
SeeVehicle Messages 0137 for
more information.
If a short distance must be driven
with the light on, be sure to turn off
all accessories, such as the radio
and air conditioner.
Malfunction Indicator
Lamp (Check Engine
Light)
This light is part of the vehicle’s
emission control on-board
diagnostic system. If this light is on
while the engine is running, a
malfunction has been detected and
the vehicle may require service. The
light should come on to show that it
is working when the ignition is in ON/RUN and the engine is not
running. See
Ignition
Positions 0227.
Malfunctions are often indicated by
the system before any problem is
noticeable. Being aware of the light
and seeking service promptly when
it comes on may prevent damage.
Caution
If the vehicle is driven continually
with this light on, the emission
control system may not work as
well, the fuel economy may be
lower, and the vehicle may not
run smoothly. This could lead to
costly repairs that might not be
covered by the vehicle warranty.
Caution
Modifications to the engine,
transmission, exhaust, intake,
or fuel system, or the use of
replacement tires that do not
meet the original tire
specifications, can cause this light
to come on. This could lead to
costly repairs not covered by the
vehicle warranty. This could also
affect the vehicle’s ability to pass
an Emissions Inspection/
Maintenance test. See
Accessories and
Modifications 0266.
If the light is flashing : A
malfunction has been detected that
could damage the emission control
system and increase vehicle
emissions. Diagnosis and service
may be required.
To help prevent damage, reduce
vehicle speed and avoid hard
accelerations and uphill grades.
Page 154 of 394
Chevrolet Traverse Owner Manual (GMNA-Localizing-U.S./Canada/Mexico-
9955676) - 2017 - crc - 3/29/16
Instruments and Controls 153
for this feature. Then press the
customization button to scroll
through the following settings:
RESTORE ALL (default) :The
customization features will be set to
their factory default settings.
DO NOT RESTORE : The
customization features will not be
set to their factory default settings.
To select a setting, press the set/
reset button while the desired
setting is displayed on the DIC.
EXIT FEATURE SETTINGS
This feature allows you to exit the
feature settings menu.
Press the customization button until
FEATURE SETTINGS PRESS
V
TO EXIT appears in the DIC display.
Press the set/reset button once to
exit the menu.
If you do not exit, pressing the
customization button again will
return you to the beginning of the
feature settings menu.
Exiting the Feature
Settings Menu
The feature settings menu will be
exited when any of the following
occurs:
. The vehicle is shifted out of
P (Park).
. The vehicle is no longer in
ON/RUN.
. The trip/fuel or vehicle
information DIC buttons are
pressed.
. The end of the feature settings
menu is reached and exited.
. A 40-second time period has
elapsed with no selection made.
Universal Remote
System
See Radio Frequency
Statement 0369.
Universal Remote System
Programming
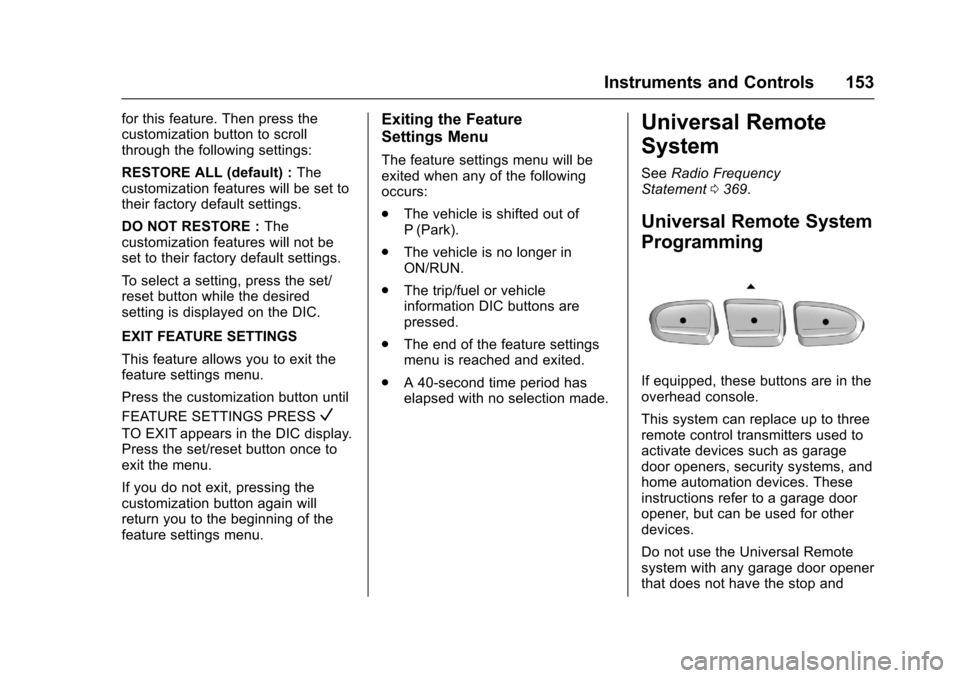
If equipped, these buttons are in the
overhead console.
This system can replace up to three
remote control transmitters used to
activate devices such as garage
door openers, security systems, and
home automation devices. These
instructions refer to a garage door
opener, but can be used for other
devices.
Do not use the Universal Remote
system with any garage door opener
that does not have the stop and
Page 155 of 394
Chevrolet Traverse Owner Manual (GMNA-Localizing-U.S./Canada/Mexico-
9955676) - 2017 - crc - 3/29/16
154 Instruments and Controls
reverse feature. This includes any
garage door opener model
manufactured before April 1, 1982.
Read these instructions completely
before programming the Universal
Remote system. It may help to have
another person assist with the
programming process.
Keep the original hand-held
transmitter for use in other vehicles
as well as for future programming.
Erase the programming when
vehicle ownership is terminated.
See“Erasing Universal Remote
System Buttons” later in this
section.
To program a garage door opener,
park outside directly in line with and
facing the garage door opener
receiver. Clear all people and
objects near the garage door.
Make sure the hand-held transmitter
has a new battery for quicker and
more accurate transmission of the
radio-frequency signal.Programming the Universal
Remote System
For questions or help programming
the Universal Remote system, call
1-800-355-3515 or see
www.homelink.com.
Programming involves
time-sensitive actions, and may time
out causing the procedure to be
repeated.
To program up to three devices:
1. Hold the end of the hand-held transmitter about 3 to 8 cm (1
to 3 in) away from the
Universal Remote system
buttons with the indicator light
in view. The hand-held
transmitter was supplied by the
manufacturer of the garage
door opener receiver.
2. At the same time, press and hold both the hand-held
transmitter button and one of
the three Universal Remote
system buttons to be used to
operate the garage door. Do
not release either button until the indicator light changes from
a slow to a rapid flash. Then
release both buttons.
Some garage door openers
may require substitution of
Step 2 with the procedure
under
“Radio Signals for
Canada and Some Gate
Operators” later in this section.
3. Press and hold the newly programmed Universal Remote
system button for five seconds
while watching the indicator
light and garage door
activation.
.If the indicator light stays on
continuously or the garage
door moves when the
button is pressed, then
programming is complete.
There is no need to
complete Steps 4–6.
. If the indicator light does
not come on or the garage
door does not move, a
second button press may
be required. For a second
time, press and hold the
newly programmed button