buttons CHEVROLET TRAVERSE 2017 1.G Owners Manual
[x] Cancel search | Manufacturer: CHEVROLET, Model Year: 2017, Model line: TRAVERSE, Model: CHEVROLET TRAVERSE 2017 1.GPages: 394, PDF Size: 6.47 MB
Page 6 of 394
Chevrolet Traverse Owner Manual (GMNA-Localizing-U.S./Canada/Mexico-
9955676) - 2017 - crc - 3/29/16
In Brief 5
In Brief
Instrument Panel
Instrument Panel . . . . . . . . . . . . . . . . 6
Initial Drive Information
Initial Drive Information . . . . . . . . . . 8
Remote Keyless Entry (RKE)System . . . . . . . . . . . . . . . . . . . . . . . . 8
Remote Vehicle Start . . . . . . . . . . . 8
Door Locks . . . . . . . . . . . . . . . . . . . . . 9
Liftgate . . . . . . . . . . . . . . . . . . . . . . . . . . 9
Windows . . . . . . . . . . . . . . . . . . . . . . . 10
Seat Adjustment . . . . . . . . . . . . . . . 10
Memory Features . . . . . . . . . . . . . . 11
Second Row Seats . . . . . . . . . . . . 12
Third Row Seats . . . . . . . . . . . . . . . 12
Heated and Cooled Front Seats . . . . . . . . . . . . . . . . . . . . . . . . . 13
Head Restraint Adjustment . . . . 13
Safety Belts . . . . . . . . . . . . . . . . . . . . 13
Passenger Sensing System . . . 14
Mirror Adjustment . . . . . . . . . . . . . . 14
Steering Wheel Adjustment . . . . 15
Interior Lighting . . . . . . . . . . . . . . . . 16
Exterior Lighting . . . . . . . . . . . . . . . 16
Windshield Wiper/Washer . . . . . . 17
Climate Controls . . . . . . . . . . . . . . . 18
Transmission . . . . . . . . . . . . . . . . . . 19
Vehicle Features
Infotainment System . . . . . . . . . . . 20
Radio(s) . . . . . . . . . . . . . . . . . . . . . . . 20
Satellite Radio . . . . . . . . . . . . . . . . . 23
Portable Audio Devices . . . . . . . . 23
Bluetooth
®. . . . . . . . . . . . . . . . . . . . . 24
Steering Wheel Controls (Radio without Touchscreen) . . . . . . . . . 24
Steering Wheel Controls (Radio with Touchscreen) . . . . . . . . . . . . 25
Cruise Control . . . . . . . . . . . . . . . . . 25
Driver Information Center (DIC) (With DIC Buttons) . . . . . . . . . . . 26
Forward Collision Alert (FCA) System . . . . . . . . . . . . . . . . . . . . . . . 26
Lane Departure Warning (LDW) . . . . . . . . . . . . . . . 26
Side Blind Zone Alert (SBZA) . . . . . . . . . . . . . . . . . . 26
Rear Vision Camera (RVC) . . . . 27
Rear Cross Traffic Alert (RCTA) System . . . . . . . . . . . . . . . . . . . . . . . 27
Parking Assist . . . . . . . . . . . . . . . . . 27
Power Outlets . . . . . . . . . . . . . . . . . 27
Universal Remote System . . . . . 27
Sunroof . . . . . . . . . . . . . . . . . . . . . . . . 27
Performance and Maintenance
Traction Control/Electronic Stability Control . . . . . . . . . . . . . . 28
Tire Pressure Monitor . . . . . . . . . . 29 Fuel . . . . . . . . . . . . . . . . . . . . . . . . . . . 29
E85 or FlexFuel . . . . . . . . . . . . . . . . 29
Engine Oil Life System . . . . . . . . 29
Driving for Better Fuel
Economy . . . . . . . . . . . . . . . . . . . . . 30
Roadside Assistance Program . . . . . . . . . . . . . . . . . . . . . . 30
Page 8 of 394

Chevrolet Traverse Owner Manual (GMNA-Localizing-U.S./Canada/Mexico-
9955676) - 2017 - crc - 3/29/16
In Brief 7
1.Air Vents 0214.
2. Turn Signal Lever. See Turn
and Lane-Change Signals
0 159 (Out of View).
Windshield Wiper/Washer
0 111 (Out of View).
3. Instrument Cluster 0118.
4. Instrument Panel
Storage 0103.
5. CD Player. See CD Player
(Radio without Touchscreen)
0 182 orCD Player (Radio with
Touchscreen) 0184.
6. Infotainment 0164.
7. Passenger Sensing
System 078.
8. Hazard Warning
Flashers 0159.
9. Heated and Cooled Front
Seats 058 (If Equipped).
10. Rear Window Wiper/
Washer 0112.
Traction Control System (TCS)
Disable Button. See Traction
Control/Electronic Stability
Control 0240. Forward Collision Alert (FCA)
System
0248 (If Equipped).
Lane Departure Warning
(LDW) 0252 (If Equipped).
Tow/Haul Button (If Equipped).
See Tow/Haul Mode 0237.
Power Liftgate Button (If
Equipped). See Liftgate039.
11. Power Outlets 0115.
12. USB Port. See Auxiliary
Devices 0193.
13. Shift Lever. See Automatic
Transmission 0235.
14. Climate Control Systems 0205
(If Equipped).
Dual Automatic Climate Control
System 0208 (If Equipped).
15. Driver Information Center (DIC) Buttons. See Driver Information
Center (DIC) (With DIC
Buttons) 0130 orDriver
Information Center (DIC)
(Without DIC Buttons) 0135.
16. Steering Wheel Controls
(Radio with Touchscreen)
0110 orSteering Wheel Controls (Radio without
Touchscreen)
0109 (If
Equipped).
17. Horn 0111.
18. Steering Wheel
Adjustment 0109.
19. Cruise Control 0242.
20. Dome Lamp Override. See Dome Lamps 0160.
Instrument Panel Illumination
Control 0160.
21. Data Link Connector (DLC) (Out of View). See Malfunction
Indicator Lamp (Check Engine
Light) 0124.
22. Parking Brake 0239.
23. Hood Release. See Hood 0268.
24. Exterior Lamp Controls 0157.
Fog Lamps 0159
(If Equipped).
Page 12 of 394
Chevrolet Traverse Owner Manual (GMNA-Localizing-U.S./Canada/Mexico-
9955676) - 2017 - crc - 3/29/16
In Brief 11
3. Try to move the seat back andforth to be sure it is locked in
place.
Move the lever (2) up or down to
raise or lower the seat.
Use the lever (3) to adjust the
seatback.
See Seat Adjustment 054 and
Reclining Seatbacks 056.
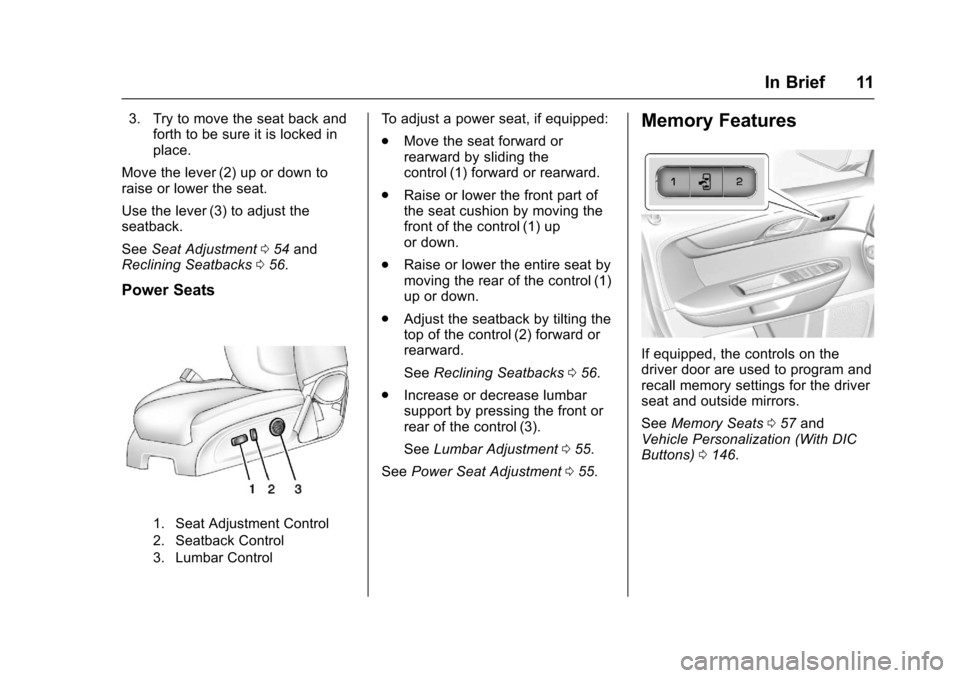
Power Seats
1. Seat Adjustment Control
2. Seatback Control
3. Lumbar Control
To adjust a power seat, if equipped:
.
Move the seat forward or
rearward by sliding the
control (1) forward or rearward.
. Raise or lower the front part of
the seat cushion by moving the
front of the control (1) up
or down.
. Raise or lower the entire seat by
moving the rear of the control (1)
up or down.
. Adjust the seatback by tilting the
top of the control (2) forward or
rearward.
See Reclining Seatbacks 056.
. Increase or decrease lumbar
support by pressing the front or
rear of the control (3).
See Lumbar Adjustment 055.
See Power Seat Adjustment 055.Memory Features
If equipped, the controls on the
driver door are used to program and
recall memory settings for the driver
seat and outside mirrors.
See Memory Seats 057 and
Vehicle Personalization (With DIC
Buttons) 0146.
Page 14 of 394
Chevrolet Traverse Owner Manual (GMNA-Localizing-U.S./Canada/Mexico-
9955676) - 2017 - crc - 3/29/16
In Brief 13
6. Push the seatback forward tolay flat.
See Third Row Seats 061.
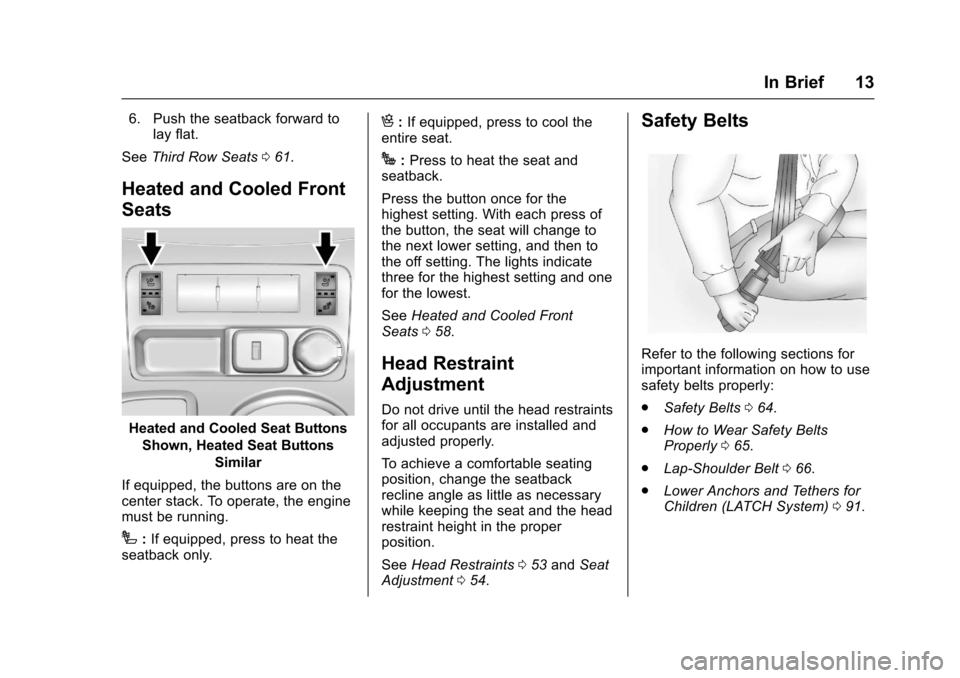
Heated and Cooled Front
Seats
Heated and Cooled Seat Buttons
Shown, Heated Seat Buttons Similar
If equipped, the buttons are on the
center stack. To operate, the engine
must be running.
I: If equipped, press to heat the
seatback only.
H: If equipped, press to cool the
entire seat.
J: Press to heat the seat and
seatback.
Press the button once for the
highest setting. With each press of
the button, the seat will change to
the next lower setting, and then to
the off setting. The lights indicate
three for the highest setting and one
for the lowest.
See Heated and Cooled Front
Seats 058.
Head Restraint
Adjustment
Do not drive until the head restraints
for all occupants are installed and
adjusted properly.
To achieve a comfortable seating
position, change the seatback
recline angle as little as necessary
while keeping the seat and the head
restraint height in the proper
position.
See Head Restraints 053 and Seat
Adjustment 054.
Safety Belts
Refer to the following sections for
important information on how to use
safety belts properly:
.
Safety Belts 064.
. How to Wear Safety Belts
Properly 065.
. Lap-Shoulder Belt 066.
. Lower Anchors and Tethers for
Children (LATCH System) 091.
Page 23 of 394
Chevrolet Traverse Owner Manual (GMNA-Localizing-U.S./Canada/Mexico-
9955676) - 2017 - crc - 3/29/16
22 In Brief
Radio with Touchscreen
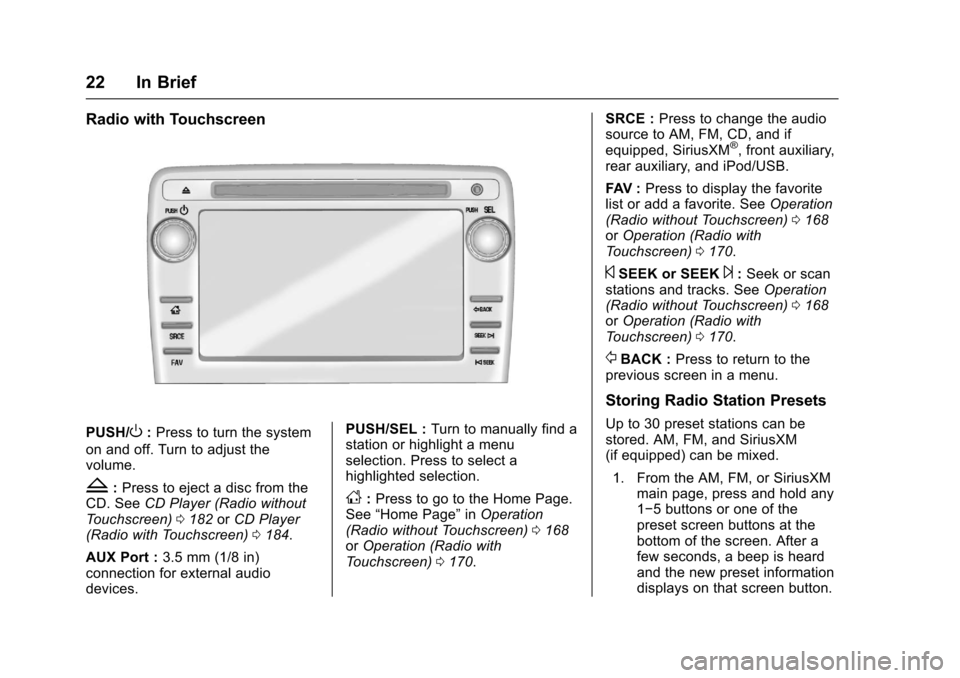
PUSH/O:Press to turn the system
on and off. Turn to adjust the
volume.
Z: Press to eject a disc from the
CD. See CD Player (Radio without
Touchscreen) 0182 orCD Player
(Radio with Touchscreen) 0184.
AUX Port : 3.5 mm (1/8 in)
connection for external audio
devices. PUSH/SEL :
Turn to manually find a
station or highlight a menu
selection. Press to select a
highlighted selection.D: Press to go to the Home Page.
See “Home Page” inOperation
(Radio without Touchscreen) 0168
or Operation (Radio with
Touchscreen) 0170. SRCE :
Press to change the audio
source to AM, FM, CD, and if
equipped, SiriusXM
®, front auxiliary,
rear auxiliary, and iPod/USB.
FAV : Press to display the favorite
list or add a favorite. See Operation
(Radio without Touchscreen) 0168
or Operation (Radio with
Touchscreen) 0170.
©SEEK or SEEK¨:Seek or scan
stations and tracks. See Operation
(Radio without Touchscreen) 0168
or Operation (Radio with
Touchscreen) 0170.
/BACK : Press to return to the
previous screen in a menu.
Storing Radio Station Presets
Up to 30 preset stations can be
stored. AM, FM, and SiriusXM
(if equipped) can be mixed.
1. From the AM, FM, or SiriusXM main page, press and hold any
1−5 buttons or one of the
preset screen buttons at the
bottom of the screen. After a
few seconds, a beep is heard
and the new preset information
displays on that screen button.
Page 27 of 394
Chevrolet Traverse Owner Manual (GMNA-Localizing-U.S./Canada/Mexico-
9955676) - 2017 - crc - 3/29/16
26 In Brief
Driver Information Center
(DIC) (With DIC Buttons)
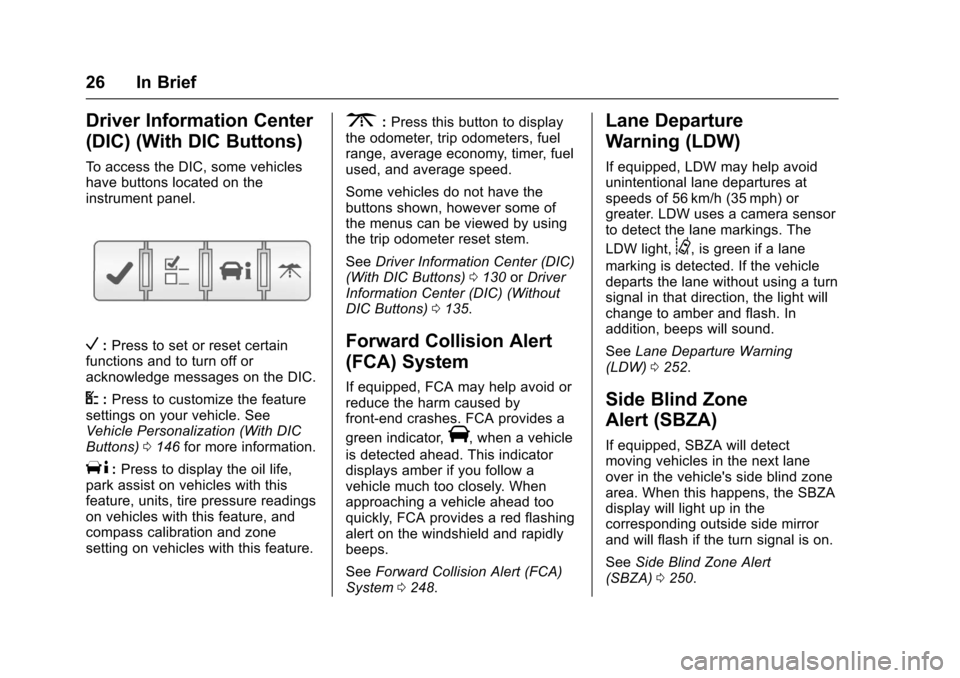
To access the DIC, some vehicles
have buttons located on the
instrument panel.
V:Press to set or reset certain
functions and to turn off or
acknowledge messages on the DIC.
U: Press to customize the feature
settings on your vehicle. See
Vehicle Personalization (With DIC
Buttons) 0146 for more information.
T:Press to display the oil life,
park assist on vehicles with this
feature, units, tire pressure readings
on vehicles with this feature, and
compass calibration and zone
setting on vehicles with this feature.
3: Press this button to display
the odometer, trip odometers, fuel
range, average economy, timer, fuel
used, and average speed.
Some vehicles do not have the
buttons shown, however some of
the menus can be viewed by using
the trip odometer reset stem.
See Driver Information Center (DIC)
(With DIC Buttons) 0130 orDriver
Information Center (DIC) (Without
DIC Buttons) 0135.
Forward Collision Alert
(FCA) System
If equipped, FCA may help avoid or
reduce the harm caused by
front-end crashes. FCA provides a
green indicator,
V, when a vehicle
is detected ahead. This indicator
displays amber if you follow a
vehicle much too closely. When
approaching a vehicle ahead too
quickly, FCA provides a red flashing
alert on the windshield and rapidly
beeps.
See Forward Collision Alert (FCA)
System 0248.
Lane Departure
Warning (LDW)
If equipped, LDW may help avoid
unintentional lane departures at
speeds of 56 km/h (35 mph) or
greater. LDW uses a camera sensor
to detect the lane markings. The
LDW light,
@, is green if a lane
marking is detected. If the vehicle
departs the lane without using a turn
signal in that direction, the light will
change to amber and flash. In
addition, beeps will sound.
See Lane Departure Warning
(LDW) 0252.
Side Blind Zone
Alert (SBZA)
If equipped, SBZA will detect
moving vehicles in the next lane
over in the vehicle's side blind zone
area. When this happens, the SBZA
display will light up in the
corresponding outside side mirror
and will flash if the turn signal is on.
See Side Blind Zone Alert
(SBZA) 0250.
Page 28 of 394
Chevrolet Traverse Owner Manual (GMNA-Localizing-U.S./Canada/Mexico-
9955676) - 2017 - crc - 3/29/16
In Brief 27
Rear Vision
Camera (RVC)
If equipped, RVC displays a view of
the area behind the vehicle, on the
infotainment system display, when
the vehicle is shifted into
R (Reverse).
SeeRear Vision Camera
(RVC) 0244.
Rear Cross Traffic Alert
(RCTA) System
If equipped, the RCTA system uses
a triangle with an arrow displayed
on the RVC screen to warn of traffic
behind your vehicle that may cross
your vehicle's path while in
R (Reverse). In addition, beeps will
sound.
See “Rear Cross Traffic Alert
(RCTA)” underRear Vision Camera
(RVC) 0244.
Parking Assist
If equipped, Rear Parking Assist
(RPA) uses sensors on the rear
bumper to assist with parking and avoiding objects while in
R (Reverse). It operates at speeds
less than 8 km/h (5 mph) and uses
audible beeps to provide distance
and system information.
Keep the sensors on the vehicle's
rear bumper clean to ensure proper
operation.
See
Parking Assist 0247.
Power Outlets
The vehicle has 12-volt accessory
power outlets, which can be used to
plug in electrical equipment, such as
a cell phone or MP3 player.
The power outlets are located:
.
On the center stack below the
climate controls.
. Inside the center console.
. At the rear of the center console.
. In the rear cargo area.
To use the outlets, remove the
cover.
See Power Outlets 0115.
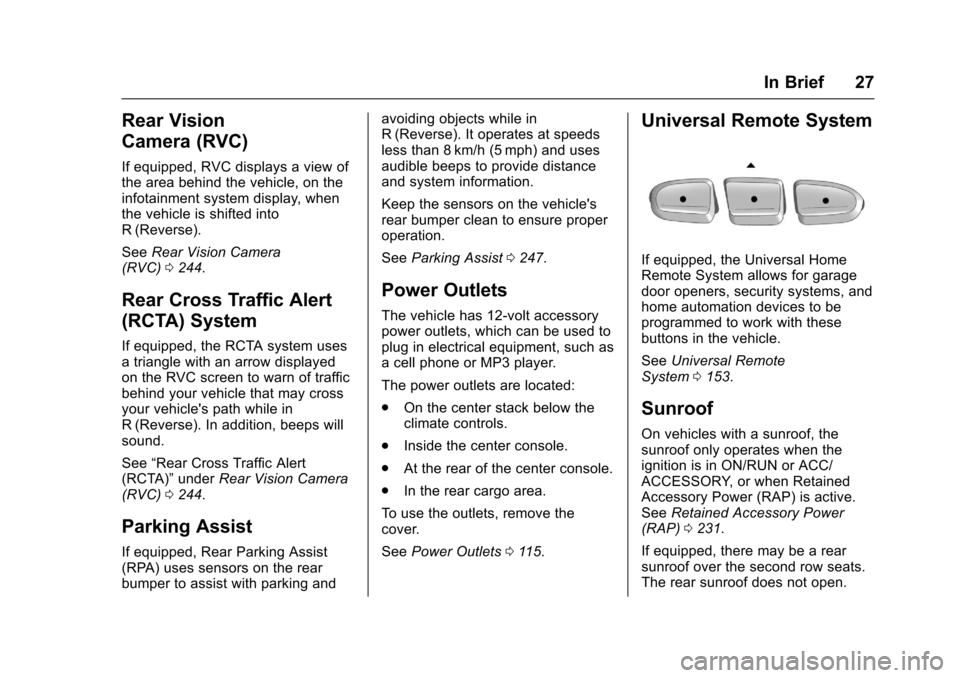
Universal Remote System
If equipped, the Universal Home
Remote System allows for garage
door openers, security systems, and
home automation devices to be
programmed to work with these
buttons in the vehicle.
See Universal Remote
System 0153.
Sunroof
On vehicles with a sunroof, the
sunroof only operates when the
ignition is in ON/RUN or ACC/
ACCESSORY, or when Retained
Accessory Power (RAP) is active.
See Retained Accessory Power
(RAP) 0231.
If equipped, there may be a rear
sunroof over the second row seats.
The rear sunroof does not open.
Page 31 of 394
Chevrolet Traverse Owner Manual (GMNA-Localizing-U.S./Canada/Mexico-
9955676) - 2017 - crc - 3/29/16
30 In Brief
Resetting the Oil Life System
If the vehicle does not have Driver
Information Center (DIC) buttons:1. Turn the ignition to ON/RUN, with the engine off. The vehicle
must be in P (Park) to access
this display. Press the trip
odometer reset stem until OIL
LIFE REMAINING displays.
2. Press and hold the trip odometer reset stem until OIL
LIFE REMAINING shows
“100%.” Three chimes sound
and the CHANGE ENGINE OIL
SOON message goes off.
3. Turn the key to LOCK/OFF.
If the vehicle has Driver Information
Center (DIC) buttons: 1. Turn the ignition to ON/RUN, with the engine off.
2. Press the vehicle information button until OIL LIFE
REMAINING displays. 3. Press and hold the set/reset
button until “100%”is
displayed. Three chimes sound
and the CHANGE ENGINE OIL
SOON message goes off.
4. Turn the key to LOCK/OFF.
See Engine Oil Life System 0273.
Driving for Better Fuel
Economy
Driving habits can affect fuel
mileage. Here are some driving tips
to get the best fuel economy
possible.
.
Avoid fast starts and accelerate
smoothly.
. Brake gradually and avoid
abrupt stops.
. Avoid idling the engine for long
periods of time.
. When road and weather
conditions are appropriate, use
cruise control.
. Always follow posted speed
limits or drive more slowly when
conditions require. .
Keep vehicle tires properly
inflated.
. Combine several trips into a
single trip.
. Replace the vehicle's tires with
the same TPC Spec number
molded into the tire's sidewall
near the size.
. Follow recommended scheduled
maintenance.Roadside Assistance
Program
U.S.: 1-800-243-8872
TTY Users (U.S. Only):
1-888-889-2438
Canada: 1-800-268-6800
New Chevrolet owners are
automatically enrolled in the
Roadside Assistance Program.
See Roadside Assistance
Program 0363.
Page 34 of 394
Chevrolet Traverse Owner Manual (GMNA-Localizing-U.S./Canada/Mexico-
9955676) - 2017 - crc - 3/29/16
Keys, Doors, and Windows 33
If locked out of the vehicle, call
Roadside Assistance. SeeRoadside
Assistance Program 0363.
If equipped with an active OnStar
subscription, an OnStar Advisor
may remotely unlock the vehicle.
See OnStar Overview 0373.
Remote Keyless Entry
(RKE) System
See Radio Frequency
Statement 0369.
If there is a decrease in the Remote
Keyless Entry (RKE) operating
range:
. Check the distance. The
transmitter may be too far from
the vehicle.
. Check the location. Other
vehicles or objects may be
blocking the signal.
. Check the transmitter's battery.
See “Battery Replacement” later
in this section. .
If the transmitter is still not
working correctly, see your
dealer or a qualified technician
for service.
Remote Keyless Entry
(RKE) System Operation
The RKE transmitter functions work
up to 60 m (195 ft) away from the
vehicle.
Other conditions can affect the
performance of the transmitter. See
Remote Keyless Entry (RKE)
System 033.
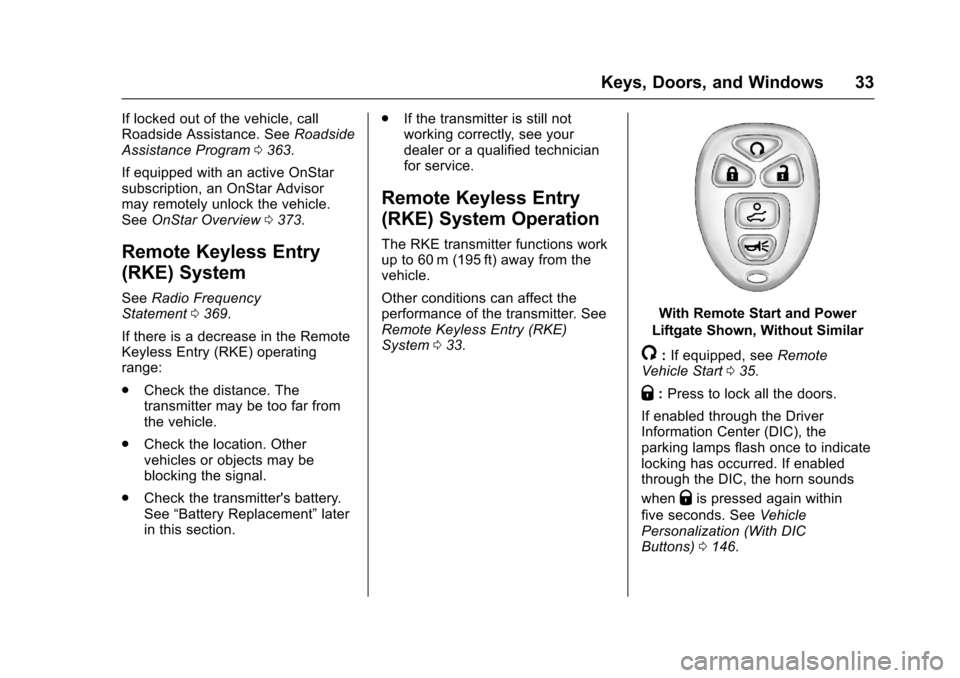
With Remote Start and Power
Liftgate Shown, Without Similar
/: If equipped, see Remote
Vehicle Start 035.
Q:Press to lock all the doors.
If enabled through the Driver
Information Center (DIC), the
parking lamps flash once to indicate
locking has occurred. If enabled
through the DIC, the horn sounds
when
Qis pressed again within
five seconds. See Vehicle
Personalization (With DIC
Buttons) 0146.
Page 35 of 394
Chevrolet Traverse Owner Manual (GMNA-Localizing-U.S./Canada/Mexico-
9955676) - 2017 - crc - 3/29/16
34 Keys, Doors, and Windows
PressingQmay arm the content
theft-deterrent system. See Vehicle
Alarm System 042.
K:Press once to unlock only the
driver door. If
Kis pressed again
within five seconds, all remaining
doors unlock. The interior lamps
come on and stay on for 20 seconds
or until the ignition is turned on.
If enabled through the DIC, the
parking lamps flash twice to indicate
unlocking has occurred. See Vehicle
Personalization (With DIC
Buttons) 0146.
Pressing
Kon the RKE transmitter
disarms the content theft-deterrent
system. See Vehicle Alarm
System 042.
8:Press and hold until the
liftgate begins to move to open or
close the liftgate. The taillamps flash
and a chime sounds to indicate
when the liftgate is opening or
closing.
L: Press and release to locate
the vehicle. The parking lamps flash
and the horn sounds three times. Press and hold
Lfor more than
two seconds to activate the panic
alarm. The parking lamps flash and
the horn sounds repeatedly for
30 seconds. The alarm turns off
when the ignition is moved to ON/
RUN or
Lis pressed again. The
ignition must be in LOCK/OFF for
the panic alarm to work.
Programming Transmitters to
the Vehicle
Only RKE transmitters programmed
to this vehicle will work. If a
transmitter is lost or stolen, a
replacement can be purchased and
programmed through your dealer.
When the replacement transmitter is
programmed to this vehicle, all
remaining transmitters must also be
reprogrammed. Any lost or stolen
transmitters will no longer work
once the new transmitter is
programmed. Each vehicle can
have up to eight transmitters
programmed to it. See your dealer
to program transmitters to this
vehicle.
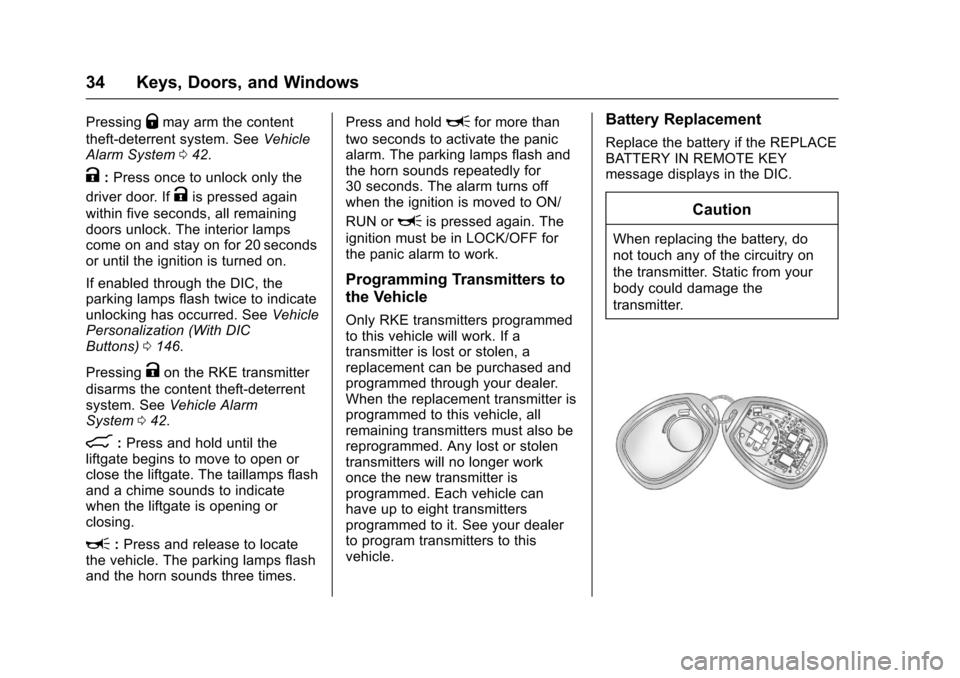
Battery Replacement
Replace the battery if the REPLACE
BATTERY IN REMOTE KEY
message displays in the DIC.
Caution
When replacing the battery, do
not touch any of the circuitry on
the transmitter. Static from your
body could damage the
transmitter.