Step CHEVROLET TRAVERSE 2018 Owner's Manual
[x] Cancel search | Manufacturer: CHEVROLET, Model Year: 2018, Model line: TRAVERSE, Model: CHEVROLET TRAVERSE 2018Pages: 419, PDF Size: 5.92 MB
Page 22 of 419
Chevrolet Traverse Owner Manual (GMNA-Localizing-U.S./Canada/Mexico-
10603118) - 2018 - CRC - 1/29/18
In Brief 21
Vehicle Features
Infotainment System
Base radio information is included in
this manual. See the infotainment
manual for information on other
available infotainment systems.
Read the following pages to
become familiar with these features.
{Warning
Taking your eyes off the road for
too long or too often while using
any infotainment feature can
cause a crash. You or others
could be injured or killed. Do not
give extended attention to
infotainment tasks while driving.
Limit your glances at the vehicle
displays and focus your attention
on driving. Use voice commands
whenever possible.
The infotainment system has built-in
features intended to help avoid
distraction by disabling some functions when driving. These
functions may gray out when they
are unavailable. Many infotainment
features are also available through
the instrument cluster and steering
wheel controls.
Before driving:
.
Become familiar with the
operation, center stack controls,
and infotainment display
controls.
. Set up the audio by presetting
favorite stations, setting the
tone, and adjusting the
speakers.
. Set up phone numbers in
advance so they can be called
easily by pressing a single
control or by using a single voice
command if equipped with
Bluetooth phone capability.
. Set up your Bluetooth, CarPlay,
or Android Auto device. Some
devices will require a series of
setup steps to be taken or a
default app to be chosen prior to
using the feature. Not completing these steps could
prevent the feature from
functioning properly.
See Defensive Driving 0209.
To play the infotainment system with
the ignition off, see Retained
Accessory Power (RAP) 0228.
Radio(s)
O
:Press to turn the system on or
mute the audio. Press and hold to
turn the system off. Turn to increase
or decrease the volume.
g: Press and release to go to the
previous station, channel, or song.
Press and hold to fast seek the
previous strongest station, channel,
or song.
d: Press and release to go to the
next station, channel, or song.
Press and hold to fast seek the next
strongest station, channel, or song.
Source : Touch to choose between
available sources.
{: Press to go to the Home Page.
Page 37 of 419
Chevrolet Traverse Owner Manual (GMNA-Localizing-U.S./Canada/Mexico-
10603118) - 2018 - CRC - 1/29/18
36 Keys, Doors, and Windows
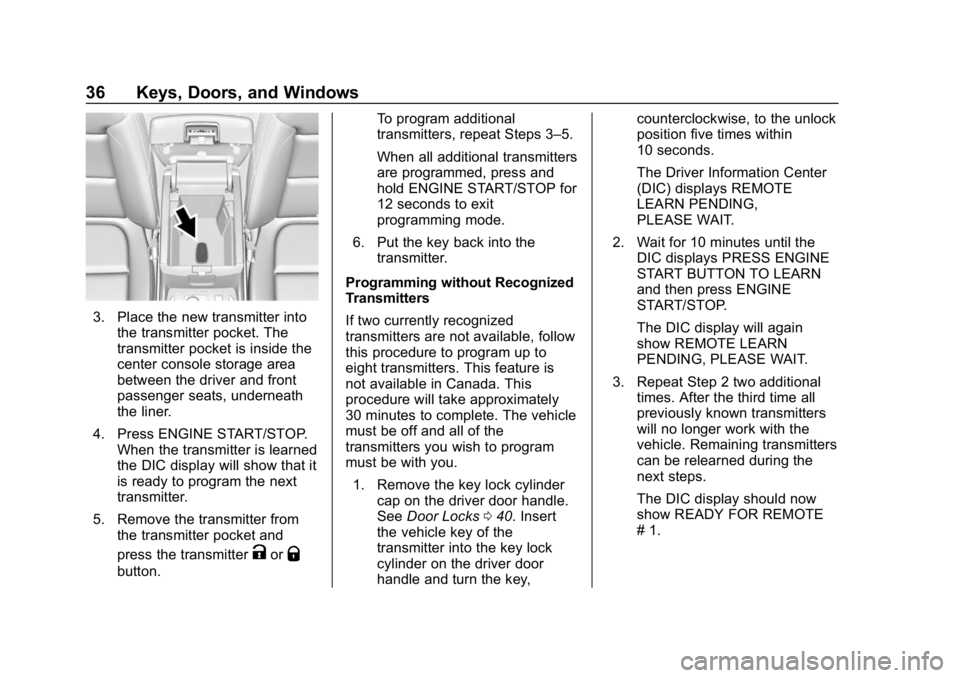
3. Place the new transmitter intothe transmitter pocket. The
transmitter pocket is inside the
center console storage area
between the driver and front
passenger seats, underneath
the liner.
4. Press ENGINE START/STOP. When the transmitter is learned
the DIC display will show that it
is ready to program the next
transmitter.
5. Remove the transmitter from the transmitter pocket and
press the transmitter
KorQ
button. To program additional
transmitters, repeat Steps 3–5.
When all additional transmitters
are programmed, press and
hold ENGINE START/STOP for
12 seconds to exit
programming mode.
6. Put the key back into the transmitter.
Programming without Recognized
Transmitters
If two currently recognized
transmitters are not available, follow
this procedure to program up to
eight transmitters. This feature is
not available in Canada. This
procedure will take approximately
30 minutes to complete. The vehicle
must be off and all of the
transmitters you wish to program
must be with you. 1. Remove the key lock cylinder cap on the driver door handle.
See Door Locks 040. Insert
the vehicle key of the
transmitter into the key lock
cylinder on the driver door
handle and turn the key, counterclockwise, to the unlock
position five times within
10 seconds.
The Driver Information Center
(DIC) displays REMOTE
LEARN PENDING,
PLEASE WAIT.
2. Wait for 10 minutes until the DIC displays PRESS ENGINE
START BUTTON TO LEARN
and then press ENGINE
START/STOP.
The DIC display will again
show REMOTE LEARN
PENDING, PLEASE WAIT.
3. Repeat Step 2 two additional times. After the third time all
previously known transmitters
will no longer work with the
vehicle. Remaining transmitters
can be relearned during the
next steps.
The DIC display should now
show READY FOR REMOTE
# 1.
Page 38 of 419
Chevrolet Traverse Owner Manual (GMNA-Localizing-U.S./Canada/Mexico-
10603118) - 2018 - CRC - 1/29/18
Keys, Doors, and Windows 37
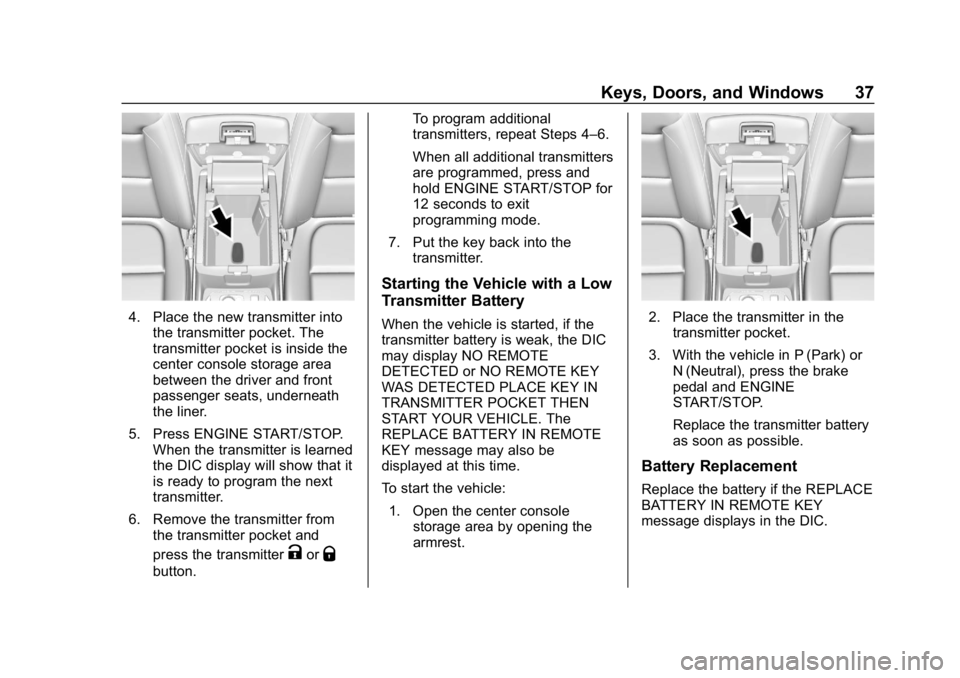
4. Place the new transmitter intothe transmitter pocket. The
transmitter pocket is inside the
center console storage area
between the driver and front
passenger seats, underneath
the liner.
5. Press ENGINE START/STOP. When the transmitter is learned
the DIC display will show that it
is ready to program the next
transmitter.
6. Remove the transmitter from the transmitter pocket and
press the transmitter
KorQ
button. To program additional
transmitters, repeat Steps 4–6.
When all additional transmitters
are programmed, press and
hold ENGINE START/STOP for
12 seconds to exit
programming mode.
7. Put the key back into the transmitter.
Starting the Vehicle with a Low
Transmitter Battery
When the vehicle is started, if the
transmitter battery is weak, the DIC
may display NO REMOTE
DETECTED or NO REMOTE KEY
WAS DETECTED PLACE KEY IN
TRANSMITTER POCKET THEN
START YOUR VEHICLE. The
REPLACE BATTERY IN REMOTE
KEY message may also be
displayed at this time.
To start the vehicle:
1. Open the center console storage area by opening the
armrest.2. Place the transmitter in thetransmitter pocket.
3. With the vehicle in P (Park) or N (Neutral), press the brake
pedal and ENGINE
START/STOP.
Replace the transmitter battery
as soon as possible.
Battery Replacement
Replace the battery if the REPLACE
BATTERY IN REMOTE KEY
message displays in the DIC.
Page 40 of 419
Chevrolet Traverse Owner Manual (GMNA-Localizing-U.S./Canada/Mexico-
10603118) - 2018 - CRC - 1/29/18
Keys, Doors, and Windows 39
start to have the vehicle in view.
Check local regulations for any
requirements.
Other conditions can affect the
performance of the transmitter. See
Remote Keyless Entry (RKE)
System032.
Starting the Engine Using Remote
Start
1. Press and release
Qon the
RKE transmitter.
2. Immediately press and hold
/
for at least four seconds or until
the turn signal lamps flash. The
turn signal lamps flashing
confirms the request to remote
start the vehicle has been
received.
During the remote start the
doors will be locked and the
parking lamps will remain on as
long as the engine is running.
The engine will shut off after
10 minutes unless a time
extension is done or the
vehicle is started. 3. With the RKE transmitter in the
vehicle, press the brake pedal
and start the vehicle to drive.
Extending Engine Run Time
The engine run time can also be
extended by another 10 minutes,
if during the first 10 minutes
Steps 1 and 2 are repeated while
the engine is still running. An
extension can be requested
30 seconds after starting. This
provides a total of 20 minutes.
The remote start can only be
extended once.
When the remote start is extended,
the second 10-minute period is
added on to the first 10 minutes for
a total of 20 minutes.
A maximum of two remote starts,
or a remote start with an extension,
are allowed between ignition cycles.
The ignition must be turned on and
then off before the remote start
procedure can be used again. Canceling a Remote Start
To cancel a remote start, do any of
the following:
.
Press and hold
/until the
parking lamps turn off.
. Turn on the hazard warning
flashers.
. Turn the vehicle on and then off.
Conditions in Which Remote Start
Will Not Work
The remote start will not operate if
any of the following occur:
. A transmitter is in the vehicle.
. The hood is not closed.
. The hazard warning flashers
are on.
. There is an emission control
system malfunction.
. The engine coolant temperature
is too high.
. The oil pressure is low.
. Two remote vehicle starts or a
start with an extension have
already been used.
Page 49 of 419
Chevrolet Traverse Owner Manual (GMNA-Localizing-U.S./Canada/Mexico-
10603118) - 2018 - CRC - 1/29/18
48 Keys, Doors, and Windows
On-Open and Close :The kicking
motion is activated to both open and
close the liftgate.
On-Open Only : The kicking motion
is activated to only open the liftgate.
Off : The feature is disabled.
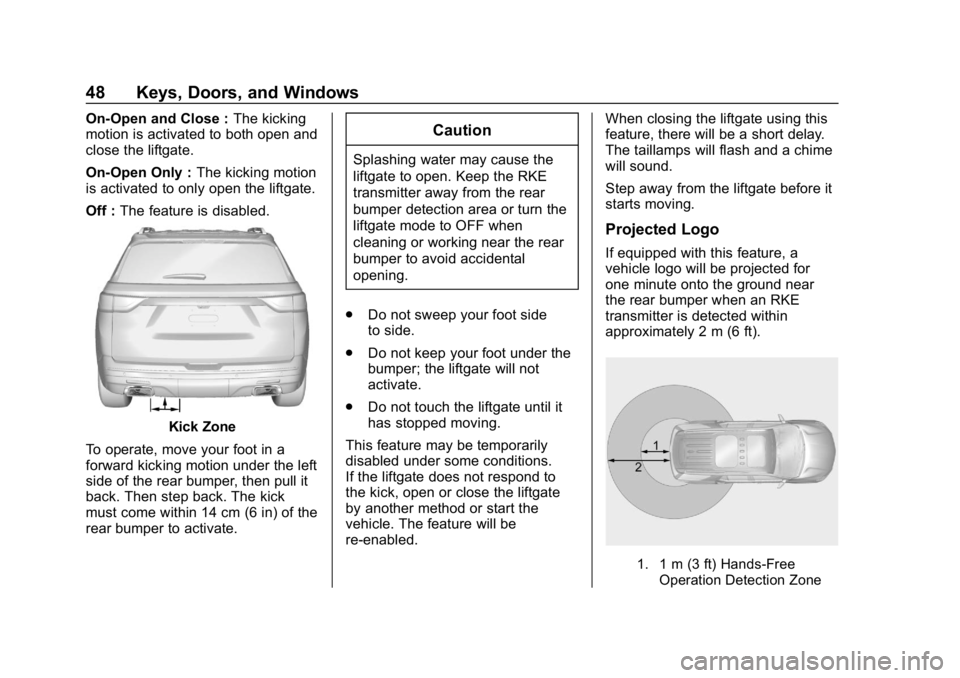
Kick Zone
To operate, move your foot in a
forward kicking motion under the left
side of the rear bumper, then pull it
back. Then step back. The kick
must come within 14 cm (6 in) of the
rear bumper to activate.
Caution
Splashing water may cause the
liftgate to open. Keep the RKE
transmitter away from the rear
bumper detection area or turn the
liftgate mode to OFF when
cleaning or working near the rear
bumper to avoid accidental
opening.
. Do not sweep your foot side
to side.
. Do not keep your foot under the
bumper; the liftgate will not
activate.
. Do not touch the liftgate until it
has stopped moving.
This feature may be temporarily
disabled under some conditions.
If the liftgate does not respond to
the kick, open or close the liftgate
by another method or start the
vehicle. The feature will be
re-enabled. When closing the liftgate using this
feature, there will be a short delay.
The taillamps will flash and a chime
will sound.
Step away from the liftgate before it
starts moving.
Projected Logo
If equipped with this feature, a
vehicle logo will be projected for
one minute onto the ground near
the rear bumper when an RKE
transmitter is detected within
approximately 2 m (6 ft).
1. 1 m (3 ft) Hands-Free
Operation Detection Zone
Page 69 of 419
Chevrolet Traverse Owner Manual (GMNA-Localizing-U.S./Canada/Mexico-
10603118) - 2018 - CRC - 1/29/18
68 Seats and Restraints
Settings menu, then Vehicle,
then Comfort and Convenience,
and then Auto Memory Recall.
Select On or Off. See“Auto
Memory Recall” later in this
section.
. To begin Easy Exit Recall
movement when the ignition is
turned off and the driver door is
opened, or when the ignition is
turned off with the driver door
already opened, select the
Settings menu, then Vehicle,
then Comfort and Convenience,
and then Easy Exit Options.
Select On or Off. See “Easy Exit
Recall” later in this section.
. See Vehicle Personalization
0 154 for additional setting
information.
Identifying Driver Number
To identify the driver number: 1. Start the vehicle with the other key or RKE transmitter. The
DIC should display the driver
number; 1 or 2. Turn the ignition off and remove the key
or RKE transmitter from the
vehicle.
2. Start the vehicle with the initial key or RKE transmitter. The
DIC should display the other
driver number not shown in
step 1.
Saving Memory Positions
Read these instructions completely
before saving memory positions.
To save preferred driving positions
1 and 2: 1. Turn the ignition on or to ACC/ ACCESSORY.
A DIC welcome message may
be displayed indicating number
1 or 2 for memory recalls.
2. Adjust all available memory features to the desired driving
position.
3. Press and release SET; a beep will sound. 4. Immediately press and hold the
1 or 2 memory button matching
the above DIC welcome
message until two beeps
sound.
If too much time passes
between releasing SET and
pressing 1, the memory
position will not be saved and
two beeps will not sound.
Repeat Steps 3 and 4.
1 or 2 corresponds to the driver
number. See “Identifying Driver
Number” in this section.
5. Repeat Steps 1–4 for a second driver using 1 or 2.
To save the position for
Band
easy exit features, repeat Steps 1–4
using
B. This stores the position
for getting out of the vehicle.
Save preferred memory feature
positions to both 1 and 2 if you are
the only driver.
Page 95 of 419
Chevrolet Traverse Owner Manual (GMNA-Localizing-U.S./Canada/Mexico-
10603118) - 2018 - CRC - 1/29/18
94 Seats and Restraints
If the Off Indicator Is Lit for an
Adult-Sized Occupant
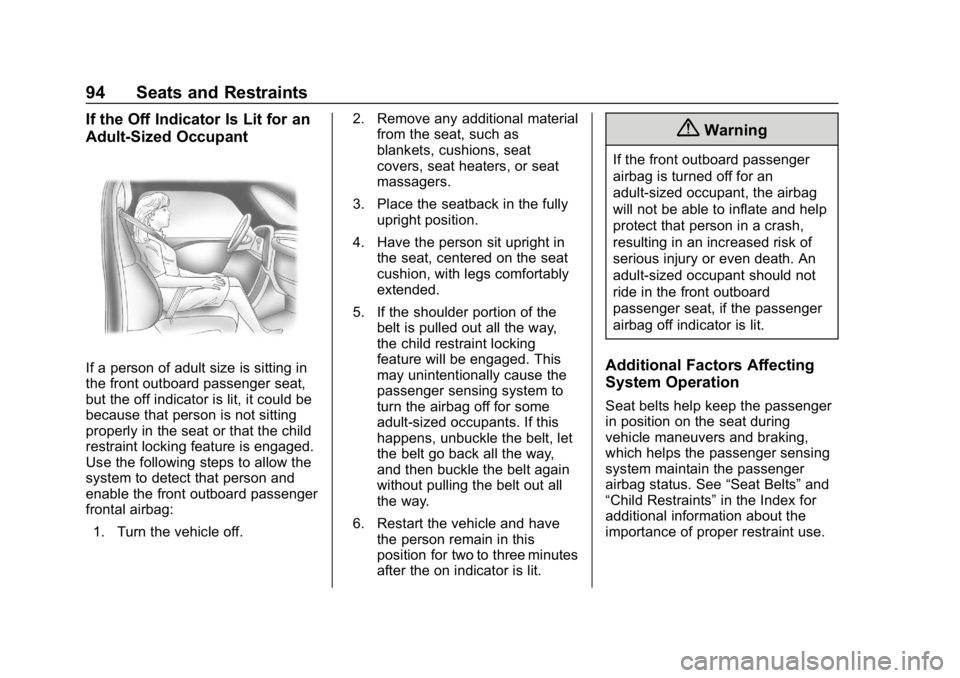
If a person of adult size is sitting in
the front outboard passenger seat,
but the off indicator is lit, it could be
because that person is not sitting
properly in the seat or that the child
restraint locking feature is engaged.
Use the following steps to allow the
system to detect that person and
enable the front outboard passenger
frontal airbag:1. Turn the vehicle off. 2. Remove any additional material
from the seat, such as
blankets, cushions, seat
covers, seat heaters, or seat
massagers.
3. Place the seatback in the fully upright position.
4. Have the person sit upright in the seat, centered on the seat
cushion, with legs comfortably
extended.
5. If the shoulder portion of the belt is pulled out all the way,
the child restraint locking
feature will be engaged. This
may unintentionally cause the
passenger sensing system to
turn the airbag off for some
adult-sized occupants. If this
happens, unbuckle the belt, let
the belt go back all the way,
and then buckle the belt again
without pulling the belt out all
the way.
6. Restart the vehicle and have the person remain in this
position for two to three minutes
after the on indicator is lit.
{Warning
If the front outboard passenger
airbag is turned off for an
adult-sized occupant, the airbag
will not be able to inflate and help
protect that person in a crash,
resulting in an increased risk of
serious injury or even death. An
adult-sized occupant should not
ride in the front outboard
passenger seat, if the passenger
airbag off indicator is lit.
Additional Factors Affecting
System Operation
Seat belts help keep the passenger
in position on the seat during
vehicle maneuvers and braking,
which helps the passenger sensing
system maintain the passenger
airbag status. See “Seat Belts”and
“Child Restraints” in the Index for
additional information about the
importance of proper restraint use.
Page 110 of 419
Chevrolet Traverse Owner Manual (GMNA-Localizing-U.S./Canada/Mexico-
10603118) - 2018 - CRC - 1/29/18
Seats and Restraints 109
use the vehicle's seat belts. Instead,
use the vehicle's anchors and child
restraint attachments to secure the
restraints. Some restraints also use
another vehicle anchor to secure a
top tether.1. Put the child restraint on the seat. If the head restraint
interferes with the proper
installation of the child
restraint, the head restraint
may be removed. See "Head
Restraint Removal and
Reinstallation" at the end of
this section.
2. Attach and tighten the lower attachments to the lower
anchors. If the child restraint
does not have lower
attachments or the desired
seating position does not have
lower anchors, secure the child
restraint with the top tether and
the seat belts. Refer to your
child restraint manufacturer
instructions and the
instructions in this manual. 2.1. Find the lower anchors
for the desired seating
position.
2.2. To access the lower anchors in the second
row, it may help to recline
the seatback.
Third row seatbacks must
be upright before placing
the child restraint on
the seat.
2.3. Put the child restraint on the seat.
2.4. Attach and tighten the lower attachments on the
child restraint to the lower
anchors.
If necessary, adjust the
angle of the second row
seatback to achieve a
tight installation. Make
sure the second row
bench seatbacks are
aligned at the same
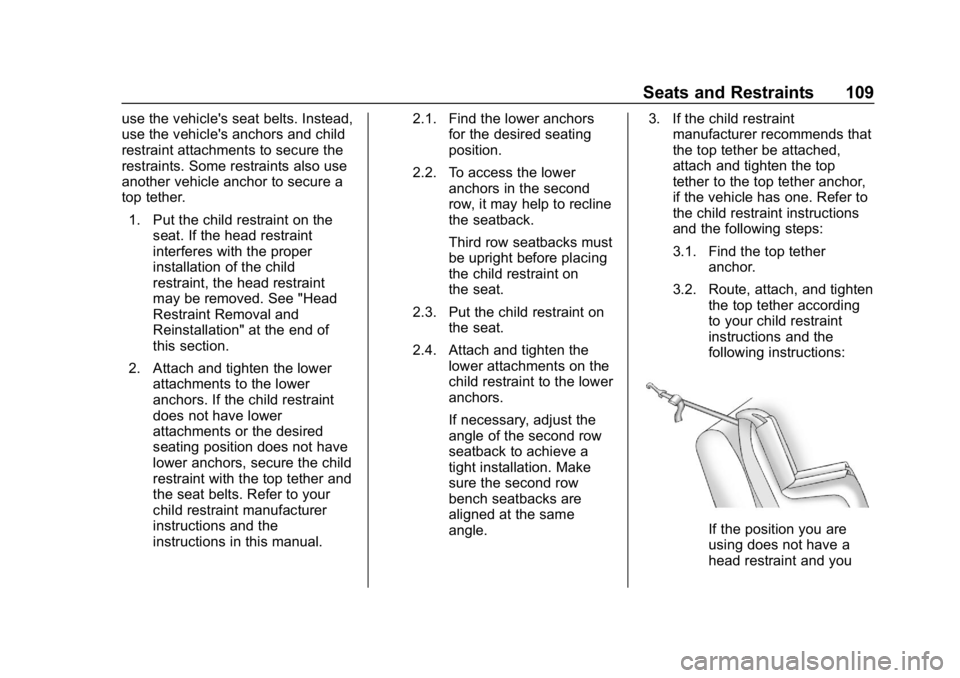
angle. 3. If the child restraint
manufacturer recommends that
the top tether be attached,
attach and tighten the top
tether to the top tether anchor,
if the vehicle has one. Refer to
the child restraint instructions
and the following steps:
3.1. Find the top tether
anchor.
3.2. Route, attach, and tighten the top tether according
to your child restraint
instructions and the
following instructions:
If the position you are
using does not have a
head restraint and you
Page 115 of 419
Chevrolet Traverse Owner Manual (GMNA-Localizing-U.S./Canada/Mexico-
10603118) - 2018 - CRC - 1/29/18
114 Seats and Restraints
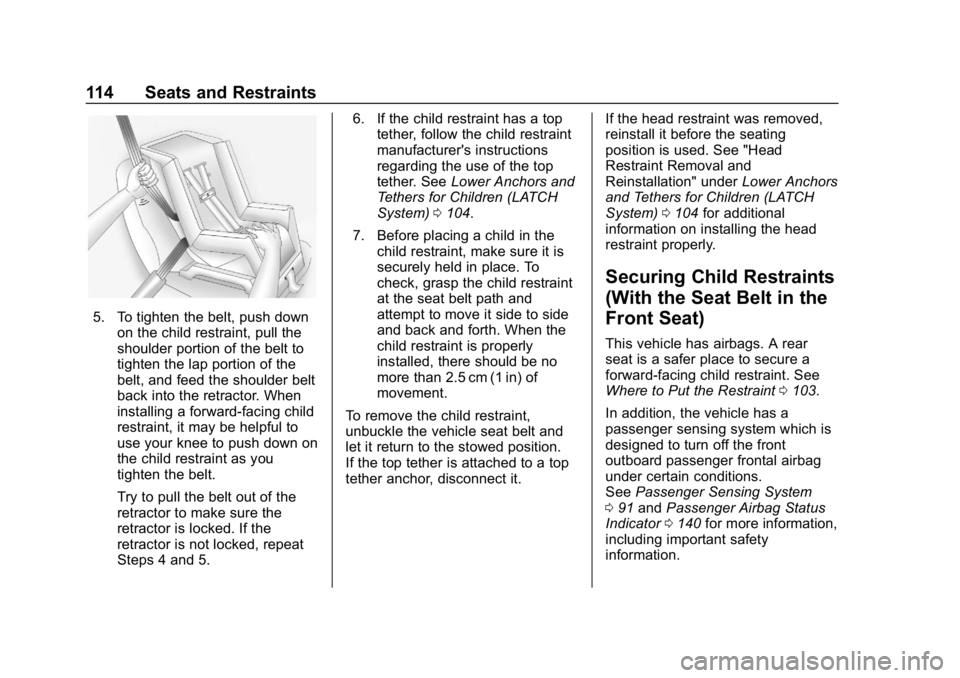
5. To tighten the belt, push downon the child restraint, pull the
shoulder portion of the belt to
tighten the lap portion of the
belt, and feed the shoulder belt
back into the retractor. When
installing a forward-facing child
restraint, it may be helpful to
use your knee to push down on
the child restraint as you
tighten the belt.
Try to pull the belt out of the
retractor to make sure the
retractor is locked. If the
retractor is not locked, repeat
Steps 4 and 5. 6. If the child restraint has a top
tether, follow the child restraint
manufacturer's instructions
regarding the use of the top
tether. See Lower Anchors and
Tethers for Children (LATCH
System) 0104.
7. Before placing a child in the child restraint, make sure it is
securely held in place. To
check, grasp the child restraint
at the seat belt path and
attempt to move it side to side
and back and forth. When the
child restraint is properly
installed, there should be no
more than 2.5 cm (1 in) of
movement.
To remove the child restraint,
unbuckle the vehicle seat belt and
let it return to the stowed position.
If the top tether is attached to a top
tether anchor, disconnect it. If the head restraint was removed,
reinstall it before the seating
position is used. See "Head
Restraint Removal and
Reinstallation" under
Lower Anchors
and Tethers for Children (LATCH
System) 0104 for additional
information on installing the head
restraint properly.
Securing Child Restraints
(With the Seat Belt in the
Front Seat)
This vehicle has airbags. A rear
seat is a safer place to secure a
forward-facing child restraint. See
Where to Put the Restraint 0103.
In addition, the vehicle has a
passenger sensing system which is
designed to turn off the front
outboard passenger frontal airbag
under certain conditions.
See Passenger Sensing System
0 91 and Passenger Airbag Status
Indicator 0140 for more information,
including important safety
information.
Page 118 of 419
Chevrolet Traverse Owner Manual (GMNA-Localizing-U.S./Canada/Mexico-
10603118) - 2018 - CRC - 1/29/18
Seats and Restraints 117
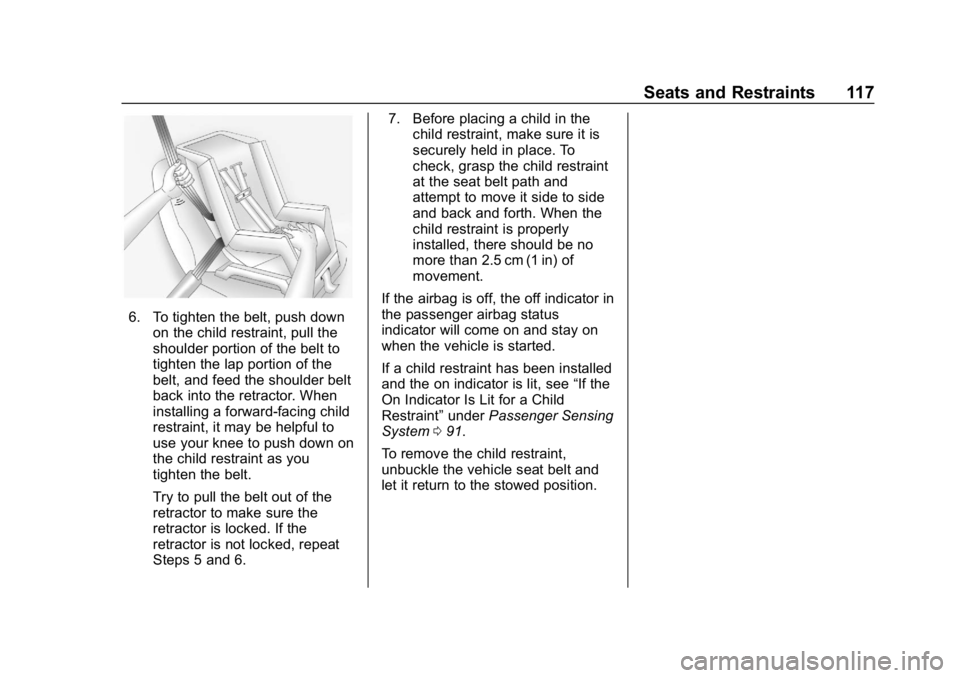
6. To tighten the belt, push downon the child restraint, pull the
shoulder portion of the belt to
tighten the lap portion of the
belt, and feed the shoulder belt
back into the retractor. When
installing a forward-facing child
restraint, it may be helpful to
use your knee to push down on
the child restraint as you
tighten the belt.
Try to pull the belt out of the
retractor to make sure the
retractor is locked. If the
retractor is not locked, repeat
Steps 5 and 6. 7. Before placing a child in the
child restraint, make sure it is
securely held in place. To
check, grasp the child restraint
at the seat belt path and
attempt to move it side to side
and back and forth. When the
child restraint is properly
installed, there should be no
more than 2.5 cm (1 in) of
movement.
If the airbag is off, the off indicator in
the passenger airbag status
indicator will come on and stay on
when the vehicle is started.
If a child restraint has been installed
and the on indicator is lit, see “If the
On Indicator Is Lit for a Child
Restraint” underPassenger Sensing
System 091.
To remove the child restraint,
unbuckle the vehicle seat belt and
let it return to the stowed position.