Manual mode CHEVROLET TRAX 2024 User Guide
[x] Cancel search | Manufacturer: CHEVROLET, Model Year: 2024, Model line: TRAX, Model: CHEVROLET TRAX 2024Pages: 328, PDF Size: 7.3 MB
Page 49 of 328
Chevrolet TRAX Owner Manual (GMNA-Localizing-U.S./Canada/Mexico-
17041293) - 2024 - CRC - 12/7/22
48 Seats and Restraints
Roof-rail airbags are designed to inflate in
moderate to severe side crashes depending
on the location of the impact. In addition,
these roof-rail airbags may inflate during a
rollover or in a severe frontal impact.
Roof-rail airbags are not designed to inflate
in rear impacts. Both roof-rail airbags may
inflate when either side of the vehicle is
struck or if the sensing system predicts that
the vehicle is about to roll over on its side,
or in a severe frontal impact.
In any particular crash, no one can say
whether an airbag should have inflated
simply because of the vehicle damage or
repair costs.
What Makes an Airbag Inflate?
In a deployment event, the sensing system
sends an electrical signal triggering a release
of gas from the inflator. Gas from the
inflator fills the airbag causing the bag to
break out of the cover. The inflator, the
airbag, and related hardware are all part of
the airbag module.
For airbag locations, seeWhere Are the
Airbags? 046.
How Does an Airbag Restrain?
In moderate to severe frontal collisions, even
belted occupants can contact the steering
wheel or the instrument panel. In moderate
to severe side collisions, even belted
occupants can contact the inside of the
vehicle.
Airbags supplement the protection provided
by seat belts by distributing the force of the
impact more evenly over the
occupant's body.
Rollover capable roof-rail airbags are
designed to help contain the head and chest
of occupants in the outboard seating
positions in the first and second rows. The
rollover capable roof-rail airbags are
designed to help reduce the risk of full or
partial ejection in rollover events, although
no system can prevent all such ejections.
But airbags would not help in many types
of collisions, primarily because the
occupant's motion is not toward those
airbags. See When Should an Airbag Inflate?
0 47.
Airbags should never be regarded as
anything more than a supplement to seat
belts.
What Will You See after an
Airbag Inflates?
After frontal and seat-mounted side impact
airbags inflate, they quickly deflate, so
quickly that some people may not even
realize the airbags inflated. Roof-rail airbags
may still be at least partially inflated for
some time after they inflate. Some
components of the airbag module may be
hot for several minutes. For location of the
airbags, see Where Are the Airbags? 046.
The parts of the airbag that come into
contact with you may be warm, but not too
hot to touch. There may be some smoke
and dust coming from the vents in the
deflated airbags. Airbag inflation does not
prevent people from leaving the vehicle.
{Warning
When an airbag inflates, there may be
dust in the air. This dust could cause
breathing problems for people with a
history of asthma or other breathing
trouble. To avoid this, everyone in the
vehicle should get out as soon as it is
safe to do so. If you have breathing
problems but cannot get out of the (Continued)
Page 50 of 328

Chevrolet TRAX Owner Manual (GMNA-Localizing-U.S./Canada/Mexico-
17041293) - 2024 - CRC - 12/7/22
Seats and Restraints 49
Warning (Continued)
vehicle after an airbag inflates, then get
fresh air by opening a window or a door.
If you experience breathing problems
following an airbag deployment, you
should seek medical attention.
The vehicle has a feature that may
automatically unlock the doors, turn on the
interior lamps and hazard warning flashers,
and shut off the fuel system after the
airbags inflate. The feature may also
activate, without airbag inflation, after an
event that exceeds a predetermined
threshold. After turning the vehicle off and
then on again, the fuel system will return to
normal operation; the doors can be locked,
the interior lamps can be turned off, and
the hazard warning flashers can be turned
off using the controls for those features.
If any of these systems are damaged in the
crash they may not operate as normal.
{Warning
A crash severe enough to inflate the
airbags may have also damaged
important functions in the vehicle, such (Continued)
Warning (Continued)
as the fuel system, brake and steering
systems, etc. Even if the vehicle appears
to be drivable after a moderate crash,
there may be concealed damage that
could make it difficult to safely operate
the vehicle.
Use caution if you should attempt to
restart the engine after a crash has
occurred.
In many crashes severe enough to inflate
the airbag, windshields are broken by
vehicle deformation. Additional windshield
breakage may also occur from the front
outboard passenger airbag.
.Airbags are designed to inflate only once.
After an airbag inflates, you will need
some new parts for the airbag system.
If you do not get them, the airbag
system will not be there to help protect
you in another crash. A new system will
include airbag modules and possibly other
parts. The service manual for the vehicle
covers the need to replace other parts.
.The vehicle has a crash sensing and
diagnostic module which records
information after a crash. See Vehicle
Data Recording and Privacy 0306 and
Event Data Recorders 0307.
.Let only qualified technicians work on the
airbag system. Improper service can mean
that an airbag system will not work
properly. See your dealer for service.
Passenger Sensing System
The vehicle has a passenger sensing system
for the front outboard passenger position.
The passenger airbag status indicator will
light on the overhead console when the
vehicle is started.
United States
Page 58 of 328

Chevrolet TRAX Owner Manual (GMNA-Localizing-U.S./Canada/Mexico-
17041293) - 2024 - CRC - 12/7/22
Seats and Restraints 57
{Warning
Children who are up against, or very
close to, any airbag when it inflates can
be seriously injured or killed. Never put a
rear-facing child restraint in the front
outboard seat. Secure a rear-facing child
restraint in a rear seat. It is also better to
secure a forward-facing child restraint in
a rear seat. If you must secure a
forward-facing child restraint in the front
outboard seat, always move the front
passenger seat as far back as it will go.
Child restraints are devices used to restrain,
seat, or position children in the vehicle and
are sometimes called child seats or car seats.There are three basic types of child
restraints:
.Forward-facing child restraints
.Rear-facing child restraints
.Belt-positioning booster seats
The proper child restraint for your child
depends on their size, weight, and age, and
also on whether the child restraint is
compatible with the vehicle in which it will
be used.
For each type of child restraint, there are
many different models available. When
purchasing a child restraint, be sure it is
designed to be used in a motor vehicle and
is designed by a genuine child restraint
manufacturer. If it is, the child restraint will
have a label saying that it meets federal
motor vehicle safety standards.
The instruction manual that is provided with
the child restraint states the weight and
height limitations for that particular child
restraint. In addition, there are many kinds
of child restraints available for children with
special needs.
{Warning
To reduce the risk of neck and head
injury in a crash, infants and toddlers
should be secured in a rear-facing child
restraint until age two, or until they
reach the maximum height and weight
limits of their child restraint.
{Warning
A young child's hip bones are still so
small that the vehicle seat belt may not
remain low on the hip bones, as it
should. Instead, it may settle up around
the child's abdomen. In a crash, the belt
would apply force on a body area that is
unprotected by any bony structure. This
alone could cause serious or fatal injuries.
To reduce the risk of serious or fatal
injuries during a crash, young children
should always be secured in an
appropriate child restraint.
Page 64 of 328
Chevrolet TRAX Owner Manual (GMNA-Localizing-U.S./Canada/Mexico-
17041293) - 2024 - CRC - 12/7/22
Seats and Restraints 63
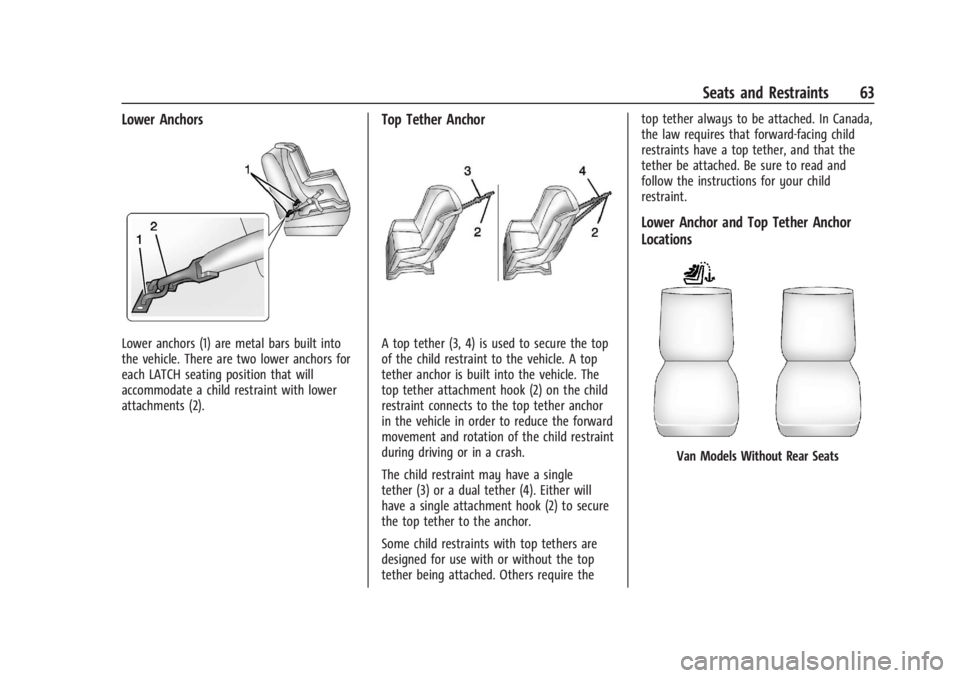
Lower Anchors
Lower anchors (1) are metal bars built into
the vehicle. There are two lower anchors for
each LATCH seating position that will
accommodate a child restraint with lower
attachments (2).
Top Tether Anchor
A top tether (3, 4) is used to secure the top
of the child restraint to the vehicle. A top
tether anchor is built into the vehicle. The
top tether attachment hook (2) on the child
restraint connects to the top tether anchor
in the vehicle in order to reduce the forward
movement and rotation of the child restraint
during driving or in a crash.
The child restraint may have a single
tether (3) or a dual tether (4). Either will
have a single attachment hook (2) to secure
the top tether to the anchor.
Some child restraints with top tethers are
designed for use with or without the top
tether being attached. Others require thetop tether always to be attached. In Canada,
the law requires that forward-facing child
restraints have a top tether, and that the
tether be attached. Be sure to read and
follow the instructions for your child
restraint.
Lower Anchor and Top Tether Anchor
Locations
Van Models Without Rear Seats
Page 65 of 328
Chevrolet TRAX Owner Manual (GMNA-Localizing-U.S./Canada/Mexico-
17041293) - 2024 - CRC - 12/7/22
64 Seats and Restraints
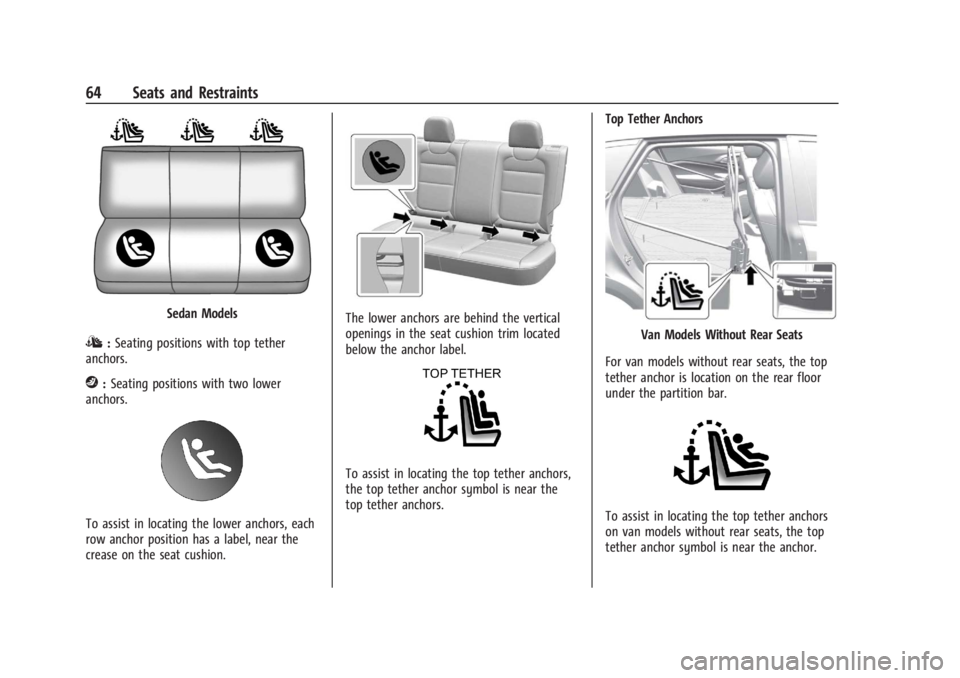
Sedan Models
I:Seating positions with top tether
anchors.
j: Seating positions with two lower
anchors.
To assist in locating the lower anchors, each
row anchor position has a label, near the
crease on the seat cushion.
The lower anchors are behind the vertical
openings in the seat cushion trim located
below the anchor label.
To assist in locating the top tether anchors,
the top tether anchor symbol is near the
top tether anchors. Top Tether Anchors
Van Models Without Rear Seats
For van models without rear seats, the top
tether anchor is location on the rear floor
under the partition bar.
To assist in locating the top tether anchors
on van models without rear seats, the top
tether anchor symbol is near the anchor.
Page 66 of 328
Chevrolet TRAX Owner Manual (GMNA-Localizing-U.S./Canada/Mexico-
17041293) - 2024 - CRC - 12/7/22
Seats and Restraints 65
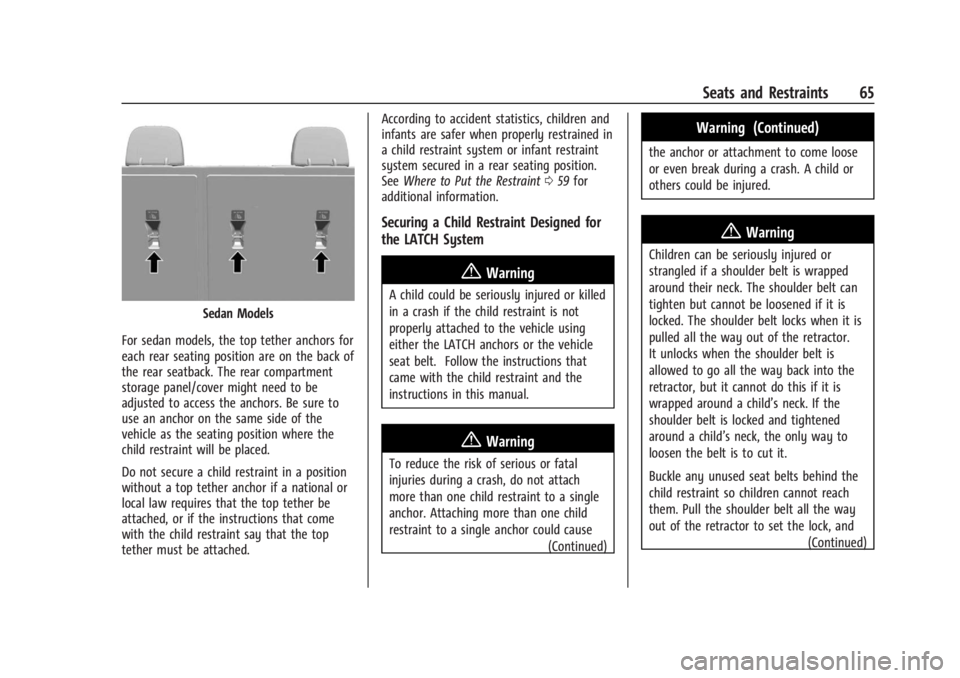
Sedan Models
For sedan models, the top tether anchors for
each rear seating position are on the back of
the rear seatback. The rear compartment
storage panel/cover might need to be
adjusted to access the anchors. Be sure to
use an anchor on the same side of the
vehicle as the seating position where the
child restraint will be placed.
Do not secure a child restraint in a position
without a top tether anchor if a national or
local law requires that the top tether be
attached, or if the instructions that come
with the child restraint say that the top
tether must be attached. According to accident statistics, children and
infants are safer when properly restrained in
a child restraint system or infant restraint
system secured in a rear seating position.
See
Where to Put the Restraint 059 for
additional information.
Securing a Child Restraint Designed for
the LATCH System
{Warning
A child could be seriously injured or killed
in a crash if the child restraint is not
properly attached to the vehicle using
either the LATCH anchors or the vehicle
seat belt. Follow the instructions that
came with the child restraint and the
instructions in this manual.
{Warning
To reduce the risk of serious or fatal
injuries during a crash, do not attach
more than one child restraint to a single
anchor. Attaching more than one child
restraint to a single anchor could cause
(Continued)
Warning (Continued)
the anchor or attachment to come loose
or even break during a crash. A child or
others could be injured.
{Warning
Children can be seriously injured or
strangled if a shoulder belt is wrapped
around their neck. The shoulder belt can
tighten but cannot be loosened if it is
locked. The shoulder belt locks when it is
pulled all the way out of the retractor.
It unlocks when the shoulder belt is
allowed to go all the way back into the
retractor, but it cannot do this if it is
wrapped around a child’s neck. If the
shoulder belt is locked and tightened
around a child’s neck, the only way to
loosen the belt is to cut it.
Buckle any unused seat belts behind the
child restraint so children cannot reach
them. Pull the shoulder belt all the way
out of the retractor to set the lock, and
(Continued)
Page 67 of 328
Chevrolet TRAX Owner Manual (GMNA-Localizing-U.S./Canada/Mexico-
17041293) - 2024 - CRC - 12/7/22
66 Seats and Restraints
Warning (Continued)
tighten the belt behind the child restraint
after the child restraint has been
installed.
Caution
Do not let the LATCH attachments rub
against the vehicle’s seat belts. This may
damage these parts. If necessary, move
buckled seat belts to avoid rubbing the
LATCH attachments. Do not fold the rear
seatback when the seat is occupied. Do
not fold the empty rear seat with a seat
belt buckled. This could damage the seat
belt or the seat. Unbuckle and return the
seat belt to its stowed position, before
folding the seat.
If you need to secure more than one child
restraint in the rear seat, see Where to Put
the Restraint 059. Van Models Without Rear Seats
1. For van models without rear seats, forward-facing child restraints should
only be installed in the right front
seating position with the seat belt and a
top tether. See Securing Child Restraints
(With the Seat Belt in the Rear Seat)
0 68 or
Securing Child Restraints (With the Seat
Belt in the Front Seat) 070.
If the child restraint manufacturer
recommends that the top tether be
attached, attach and tighten the top
tether to the top tether anchor, if your
vehicle has one. Refer to the child
restraint instructions and the following
steps:
1.1. Find the top tether anchor.
1.2. Route, attach, and tighten the top tether according to your child
restraint instructions and the
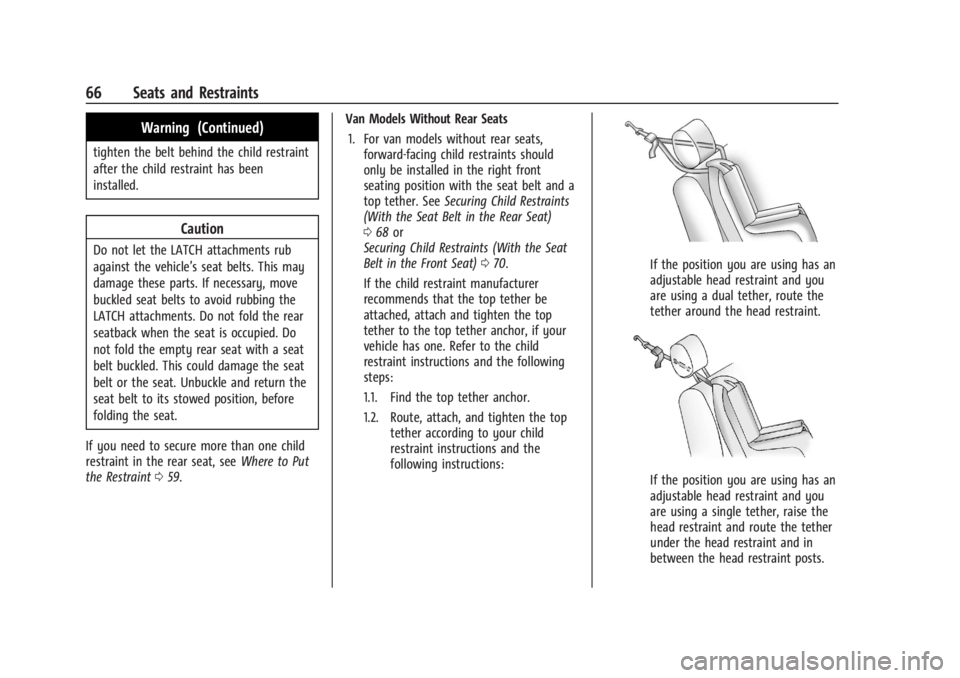
following instructions:If the position you are using has an
adjustable head restraint and you
are using a dual tether, route the
tether around the head restraint.
If the position you are using has an
adjustable head restraint and you
are using a single tether, raise the
head restraint and route the tether
under the head restraint and in
between the head restraint posts.
Page 68 of 328

Chevrolet TRAX Owner Manual (GMNA-Localizing-U.S./Canada/Mexico-
17041293) - 2024 - CRC - 12/7/22
Seats and Restraints 67
2. Secure the child restraint in the rightfront seating position with the seat belt.
See Securing Child Restraints (With the
Seat Belt in the Rear Seat) 068 or
Securing Child Restraints (With the Seat
Belt in the Front Seat) 070.
3. Before placing a child in the child restraint, make sure it is securely held in
place. To check, grasp the child restraint
at the belt path and attempt to move it
side to side and back and forth. There
should be no more than 2.5 cm (1 in) of
movement for proper installation.
Sedan Models 1. Attach and tighten the lower attachments to the lower anchors. If the
child restraint does not have lower
attachments or the desired seating
position does not have lower anchors,
secure the child restraint with the top
tether and the seat belt. Refer to the
child restraint manufacturer instructions
and the instructions in this manual.
1.1. Find the lower anchors for the desired seating position.
1.2. Put the child restraint on the seat. 1.3. Attach and tighten the lower
attachments on the child restraint
to the lower anchors.
2. If the child restraint manufacturer recommends that the top tether be
attached, attach and tighten the top
tether to the top tether anchor,
if equipped. Refer to the child restraint
instructions and the following steps:
2.1. Find the top tether anchor.
2.2. Route, attach and tighten the top
tether according to your child
restraint instructions and the
following instructions:
If the position you are using does
not have a head restraint and you
are using a single tether, route the
tether over the seatback.
If the position you are using does
not have a head restraint and you
are using a dual tether, route the
tether over the seatback.
If the position you are using has an
adjustable headrest or head
restraint and you are using a single
tether, raise the headrest or head
restraint and route the tether under
Page 89 of 328
Chevrolet TRAX Owner Manual (GMNA-Localizing-U.S./Canada/Mexico-
17041293) - 2024 - CRC - 12/2/22
88 Instruments and Controls
Infotainment :Displays one information
zone under the speedometer.
Gauge : Displays no information zones and
the gauges are located to the left and right
of the speedometer.
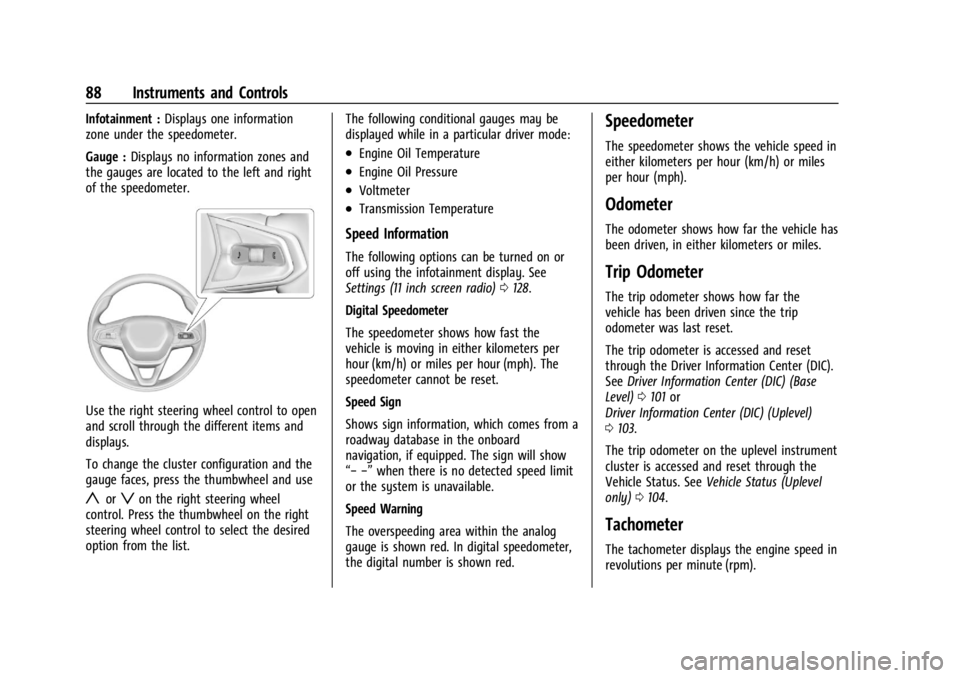
Use the right steering wheel control to open
and scroll through the different items and
displays.
To change the cluster configuration and the
gauge faces, press the thumbwheel and use
yorzon the right steering wheel
control. Press the thumbwheel on the right
steering wheel control to select the desired
option from the list. The following conditional gauges may be
displayed while in a particular driver mode:
.Engine Oil Temperature
.Engine Oil Pressure
.Voltmeter
.Transmission Temperature
Speed Information
The following options can be turned on or
off using the infotainment display. See
Settings (11 inch screen radio)
0128.
Digital Speedometer
The speedometer shows how fast the
vehicle is moving in either kilometers per
hour (km/h) or miles per hour (mph). The
speedometer cannot be reset.
Speed Sign
Shows sign information, which comes from a
roadway database in the onboard
navigation, if equipped. The sign will show
“− −” when there is no detected speed limit
or the system is unavailable.
Speed Warning
The overspeeding area within the analog
gauge is shown red. In digital speedometer,
the digital number is shown red.
Speedometer
The speedometer shows the vehicle speed in
either kilometers per hour (km/h) or miles
per hour (mph).
Odometer
The odometer shows how far the vehicle has
been driven, in either kilometers or miles.
Trip Odometer
The trip odometer shows how far the
vehicle has been driven since the trip
odometer was last reset.
The trip odometer is accessed and reset
through the Driver Information Center (DIC).
See Driver Information Center (DIC) (Base
Level) 0101 or
Driver Information Center (DIC) (Uplevel)
0 103.
The trip odometer on the uplevel instrument
cluster is accessed and reset through the
Vehicle Status. See Vehicle Status (Uplevel
only) 0104.
Tachometer
The tachometer displays the engine speed in
revolutions per minute (rpm).
Page 90 of 328
Chevrolet TRAX Owner Manual (GMNA-Localizing-U.S./Canada/Mexico-
17041293) - 2024 - CRC - 12/2/22
Instruments and Controls 89
For vehicles with the Stop/Start system,
when the ignition is on, the tachometer
indicates the vehicle status. When pointing
to AUTO STOP, the engine is off but the
vehicle is on and can move. The engine
could auto start at any time. When the
indicator points to OFF, the vehicle is off.
When the engine is on, the tachometer will
indicate the engine’s revolutions per minute
(rpm). The tachometer may vary by several
hundred rpm, during Auto Stop mode, when
the engine is shutting off and restarting.
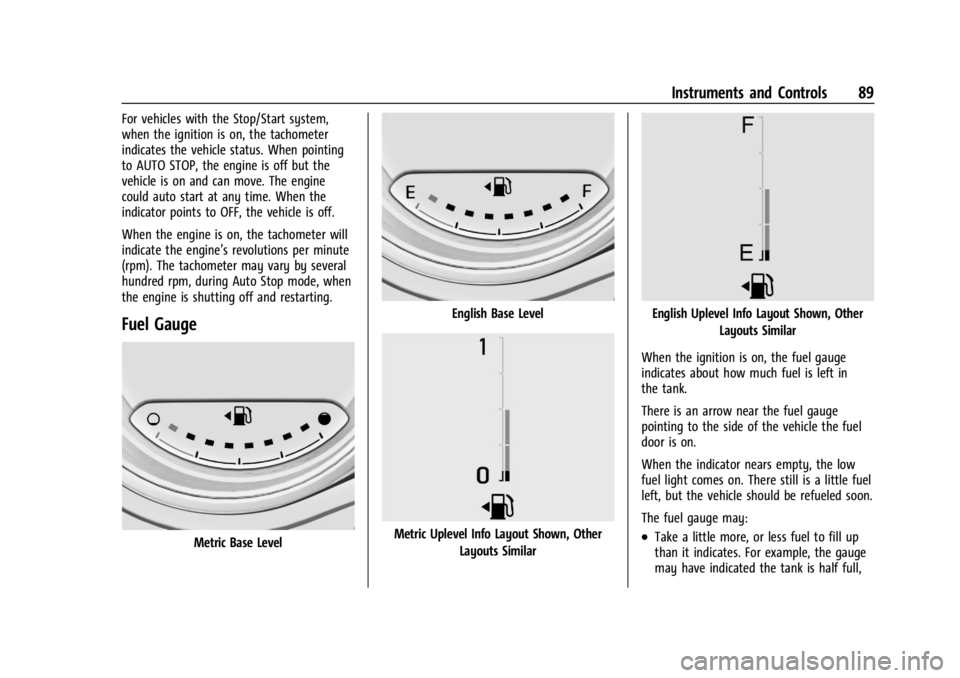
Fuel Gauge
Metric Base Level
English Base Level
Metric Uplevel Info Layout Shown, OtherLayouts Similar
English Uplevel Info Layout Shown, Other Layouts Similar
When the ignition is on, the fuel gauge
indicates about how much fuel is left in
the tank.
There is an arrow near the fuel gauge
pointing to the side of the vehicle the fuel
door is on.
When the indicator nears empty, the low
fuel light comes on. There still is a little fuel
left, but the vehicle should be refueled soon.
The fuel gauge may:
.Take a little more, or less fuel to fill up
than it indicates. For example, the gauge
may have indicated the tank is half full,