Manual mode CHEVROLET TRAX 2024 Workshop Manual
[x] Cancel search | Manufacturer: CHEVROLET, Model Year: 2024, Model line: TRAX, Model: CHEVROLET TRAX 2024Pages: 328, PDF Size: 7.3 MB
Page 208 of 328
Chevrolet TRAX Owner Manual (GMNA-Localizing-U.S./Canada/Mexico-
17041293) - 2024 - CRC - 12/6/22
Driving and Operating 207
Detecting the Pedestrian Ahead
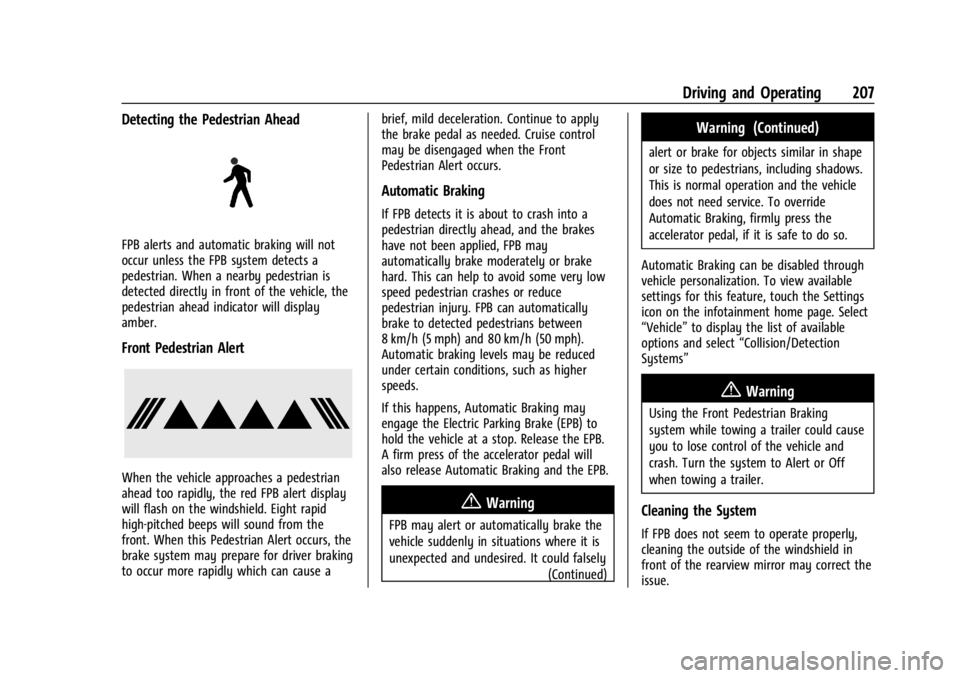
FPB alerts and automatic braking will not
occur unless the FPB system detects a
pedestrian. When a nearby pedestrian is
detected directly in front of the vehicle, the
pedestrian ahead indicator will display
amber.
Front Pedestrian Alert
When the vehicle approaches a pedestrian
ahead too rapidly, the red FPB alert display
will flash on the windshield. Eight rapid
high-pitched beeps will sound from the
front. When this Pedestrian Alert occurs, the
brake system may prepare for driver braking
to occur more rapidly which can cause abrief, mild deceleration. Continue to apply
the brake pedal as needed. Cruise control
may be disengaged when the Front
Pedestrian Alert occurs.
Automatic Braking
If FPB detects it is about to crash into a
pedestrian directly ahead, and the brakes
have not been applied, FPB may
automatically brake moderately or brake
hard. This can help to avoid some very low
speed pedestrian crashes or reduce
pedestrian injury. FPB can automatically
brake to detected pedestrians between
8 km/h (5 mph) and 80 km/h (50 mph).
Automatic braking levels may be reduced
under certain conditions, such as higher
speeds.
If this happens, Automatic Braking may
engage the Electric Parking Brake (EPB) to
hold the vehicle at a stop. Release the EPB.
A firm press of the accelerator pedal will
also release Automatic Braking and the EPB.
{Warning
FPB may alert or automatically brake the
vehicle suddenly in situations where it is
unexpected and undesired. It could falsely
(Continued)
Warning (Continued)
alert or brake for objects similar in shape
or size to pedestrians, including shadows.
This is normal operation and the vehicle
does not need service. To override
Automatic Braking, firmly press the
accelerator pedal, if it is safe to do so.
Automatic Braking can be disabled through
vehicle personalization. To view available
settings for this feature, touch the Settings
icon on the infotainment home page. Select
“Vehicle” to display the list of available
options and select “Collision/Detection
Systems”
{Warning
Using the Front Pedestrian Braking
system while towing a trailer could cause
you to lose control of the vehicle and
crash. Turn the system to Alert or Off
when towing a trailer.
Cleaning the System
If FPB does not seem to operate properly,
cleaning the outside of the windshield in
front of the rearview mirror may correct the
issue.
Page 243 of 328
Chevrolet TRAX Owner Manual (GMNA-Localizing-U.S./Canada/Mexico-
17041293) - 2024 - CRC - 12/6/22
242 Vehicle Care
The vehicle may not be equipped with all of
the fuses, relays, and features shown.Fuses Usage
F1 Body control module 1
F2 Body control module 2
F3 Body control module 3
F4 Body control module 4 F5 Body control module 5
F6 Body control module 6 F7 Body control module 7
F8 Body control module 8
F9 Discrete logic ignition switch
F10 Sensing diagnostic module battery
F11 Data link connector
F12 HVAC module/ICS
F13 Liftgate relay
F14 Central gate module F15 –
F16 –
F17 – Fuses Usage
F18 Park assist module/Side blind zone alert
F19 Body control module/ Regulated voltage control
F20 Clock spring F21 A/C/Accessory power outlet
F22 Auxiliary power outlet/DC front
F23 –
F24 –
F25 OnStar module
F26 –
F27 Instrument cluster
F28 –
F29 –
F30 –
F31 Instrument cluster module battery
F32 Silver box audio module/ Navigation
F33 – Fuses Usage
F34 Passive entry/Passive start
Midi Fuses Usage M01 –
S/B Fuses Usage S/B01 HVAC Aux heater –1
S/B02 HVAC Aux heater –2
S/B03 Front power windows
S/B04 Rear power windows S/B05 Logistic mode relay
S/B06 Driver power seat S/B07 –
S/B08 –
Circuit Breaker Usage CB1 –
Relays Usage RLY01 Accessory/Retained accessory power
Page 244 of 328
Chevrolet TRAX Owner Manual (GMNA-Localizing-U.S./Canada/Mexico-
17041293) - 2024 - CRC - 12/6/22
Vehicle Care 243
RelaysUsage
RLY02 Liftgate
RLY03 –
RLY04 Blower RLY05 Logistic mode
Wheels and Tires
Tires
Every new GM vehicle has high-quality
tires made by a leading tire
manufacturer. See the warranty manual
for information regarding the tire
warranty and where to get service. For
additional information refer to the tire
manufacturer.
{Warning
.Poorly maintained and improperly
used tires are dangerous.
.Overloading the tires can cause
overheating as a result of too
much flexing. There could be a
blowout and a serious crash. See
Vehicle Load Limits 0171.
.Underinflated tires pose the same
danger as overloaded tires. The
resulting crash could cause serious
injury. Check all tires frequently to
maintain the recommended
pressure. Tire pressure should be
checked when the tires are cold.
.Overinflated tires are more likely
to be cut, punctured, or broken by
a sudden impact —such as when
hitting a pothole. Keep tires at the
recommended pressure.
.Worn or old tires can cause a
crash. If the tread is badly worn,
replace them.
(Continued)
Warning (Continued)
.Replace any tires that have been
damaged by impacts with
potholes, curbs, etc.
.Improperly repaired tires can cause
a crash. Only your dealer or an
authorized tire service center
should repair, replace, dismount,
and mount the tires.
.Do not spin the tires in excess of
56 km/h (35 mph) on slippery
surfaces such as snow, mud, ice,
etc. Excessive spinning may cause
the tires to explode.
All-Season Tires
This vehicle may come with all-season tires.
These tires are designed to provide good
overall performance on most road surfaces
and weather conditions. Original equipment
tires designed to GM's specific tire
performance criteria have a TPC specification
code molded onto the sidewall.
Consider installing winter tires on the
vehicle if frequent driving on snow or
ice-covered roads is expected. All-season tires
Page 248 of 328
Chevrolet TRAX Owner Manual (GMNA-Localizing-U.S./Canada/Mexico-
17041293) - 2024 - CRC - 12/6/22
Vehicle Care 247
DOT Markings:A code molded into the
sidewall of a tire signifying that the tire
is in compliance with the U.S.
Department of Transportation (DOT)
Motor Vehicle Safety Standards. The
DOT code includes the Tire Identification
Number (TIN), an alphanumeric
designator which can also identify the
tire manufacturer, production plant,
brand, and date of production.
GVWR
:Gross Vehicle Weight Rating.
See Vehicle Load Limits 0171.
GAWR FRT
:Gross Axle Weight Rating
for the front axle. See Vehicle Load
Limits 0171.
GAWR RR
:Gross Axle Weight Rating
for the rear axle. See Vehicle Load
Limits 0171.
Intended Outboard Sidewall
:The side
of an asymmetrical tire, that must
always face outward when mounted on
a vehicle.
Kilopascal (kPa)
:The metric unit for air
pressure. Light Truck (LT-Metric) Tire
:A tire used
on light duty trucks and some
multipurpose passenger vehicles.
Load Index
:An assigned number
ranging from 1 to 279 that corresponds
to the load carrying capacity of a tire.
Maximum Inflation Pressure
:The
maximum air pressure to which a cold
tire can be inflated. The maximum air
pressure is molded onto the sidewall.
Maximum Load Rating
:The load rating
for a tire at the maximum permissible
inflation pressure for that tire.
Occupant Distribution
:Designated
seating positions.
Outward Facing Sidewall
:The side of
an asymmetrical tire that has a
particular side that faces outward when
mounted on a vehicle. The side of the
tire that contains a whitewall, bears
white lettering, or bears manufacturer,
brand, and/or model name molding
that is higher or deeper than the same
moldings on the other sidewall of
the tire. Passenger (P-Metric) Tire
:A tire used
on passenger cars and some light duty
trucks and multipurpose vehicles.
Recommended Inflation Pressure
:
Vehicle manufacturer's recommended
tire inflation pressure as shown on the
tire placard. See Tire Pressure0248 and
Vehicle Load Limits 0171.
Radial Ply Tire
:A pneumatic tire in
which the ply cords that extend to the
beads are laid at 90 degrees to the
centerline of the tread.
Rim
:A metal support for a tire and
upon which the tire beads are seated.
Sidewall
:The portion of a tire between
the tread and the bead.
Speed Rating
:An alphanumeric code
assigned to a tire indicating the
maximum speed at which a tire can
operate.
Traction
:The friction between the tire
and the road surface. The amount of
grip provided.
Tread
:The portion of a tire that comes
into contact with the road.
Page 254 of 328
Chevrolet TRAX Owner Manual (GMNA-Localizing-U.S./Canada/Mexico-
17041293) - 2024 - CRC - 12/6/22
Vehicle Care 253
also be performed after replacing a spare
tire with a road tire containing the TPMS
sensor. The malfunction light and the DIC
message should go off at the next ignition
cycle. The sensors are matched to the tire/
wheel positions, using a TPMS relearn tool,
in the following order: driver side front tire,
passenger side front tire, passenger side rear
tire, and driver side rear. See your dealer for
service or to purchase a relearn tool.
A TPMS relearn tool can also be purchased.
See Tire Pressure Monitor Sensor Activation
Tool at www.gmtoolsandequipment.com or
call 1-800-GM TOOLS (1-800-468-6657).
There are two minutes to match the first
tire/wheel position, and five minutes overall
to match all four tire/wheel positions. If it
takes longer, the matching process stops
and must be restarted.
The TPMS sensor matching process is:1. Set the parking brake.
2. Turn the ignition on without starting the vehicle.
3. Uplevel DIC only: Make sure the Tire Pressure info page option is turned on.
The info pages on the DIC can be turned
on and off through the Options menu. See
Driver Information Center (DIC) (Base
Level) 0101 or
Driver Information Center (DIC) (Uplevel)
0 103.
4. If the vehicle has an uplevel DIC, use the DIC controls on the right side of the
steering wheel to scroll to the Tire
Pressure screen under the DIC info page.
If the vehicle has a base level DIC, use
the trip odometer reset stem to scroll to
the Tire Pressure screen.
5. If the vehicle has an uplevel DIC, press and hold the thumbwheel in the center
of the DIC controls on the right side of
the steering wheel.
If the vehicle has a base level DIC, press
and hold the trip odometer reset stem
for about five seconds. A message asking
if the process should begin should
appear. Select yes and press the trip
odometer reset stem to confirm the
selection.
The horn sounds twice to signal the
receiver is in relearn mode and the TIRE
LEARNING ACTIVE message displays on
the DIC screen.
6. Start with the driver side front tire. 7. Place the relearn tool against the tire
sidewall, near the valve stem. Then press
the button to activate the TPMS sensor.
A horn chirp confirms that the sensor
identification code has been matched to
this tire and wheel position.
8. Proceed to the passenger side front tire, and repeat Step 7.
9. Proceed to the passenger side rear tire, and repeat Step 7.
10. Proceed to the driver side rear tire, and repeat Step 7. The horn sounds two
times to indicate the sensor
identification code has been matched to
the driver side rear tire, and the TPMS
sensor matching process is no longer
active. The TIRE LEARNING ACTIVE
message on the DIC display screen
goes off.
11. Turn the vehicle off.
12. Set all four tires to the recommended air pressure level as indicated on the Tire
and Loading Information label.
Page 267 of 328

Chevrolet TRAX Owner Manual (GMNA-Localizing-U.S./Canada/Mexico-
17041293) - 2024 - CRC - 12/6/22
266 Vehicle Care
7. Start the vehicle. The vehicle must berunning while using the air compressor.
8. Press the on/off button (5) to turn the tire sealant and compressor kit on.
The compressor will inflate the tire with
air only.
9. Inflate the tire to the recommended inflation pressure using the pressure
gauge (8). The recommended inflation
pressure can be found on the Tire and
Loading Information label. See Tire
Pressure 0248.
The pressure gauge (8) may read higher
than the actual tire pressure while the
compressor is on. Turn the compressor
off to get an accurate pressure reading.
The compressor may be turned on/off
until the correct pressure is reached.
Caution
If the recommended pressure cannot be
reached after approximately 25 minutes,
the vehicle should not be driven farther.
The tire is too severely damaged and the
tire sealant and compressor kit cannot
inflate the tire. Remove the power plug
from the accessory power outlet and
(Continued)
Caution (Continued)
unscrew the inflating hose from the tire
valve. See Roadside Assistance Program
0 300.
10. Press the on/off button (5) to turn the tire sealant and compressor kit off.
Be careful while handling the compressor
as it could be warm after usage.
11. Unplug the power plug (9) from the accessory power outlet in the vehicle.
12. Turn the air only hose (10) counterclockwise to remove it from the
tire valve stem.
13. Replace the tire valve stem cap.
14. Return the air only hose (10) and power plug (9) back to their original storage
location.
15. Return the equipment to its original storage location in the vehicle.
The tire sealant and compressor kit has
accessory adapters located in a
compartment on the bottom of its housing
that can be used to inflate air mattresses,
balls, etc.
Storing the Tire Sealant and
Compressor Kit
The van model is equipped with a tire
sealant and compressor kit, which is stored
under the load floor in the rear
storage area.
To access the tire sealant and
compressor kit: 1. Open a rear door.
2. Lift the load floor using the handle, or if equipped with sliding load floor, open
the lift gate, release the latch on the
load floor tray, and slide the load floor
toward the rear of the vehicle. See Cargo
Management System 076.
3. Remove the tire sealant and compressor kit from its storage location.
To store the tire sealant and compressor kit,
reverse the steps.
Page 295 of 328

Chevrolet TRAX Owner Manual (GMNA-Localizing-U.S./Canada/Mexico-
17041293) - 2024 - CRC - 12/2/22
294 Technical Data
Technical Data
Vehicle Identification
Vehicle Identification Number (VIN) . . . 294
Service Parts Identification . . . . . . . . . . . . 294
Vehicle Data
Capacities and Specifications . . . . . . . . . . 295
Engine Drive Belt Routing . . . . . . . . . . . . . 296
Vehicle Identification
Vehicle Identification
Number (VIN)
This legal identifier is in the front corner of
the instrument panel, on the driver side of
the vehicle. It can be seen through the
windshield from outside. The Vehicle
Identification Number (VIN) also appears on
the Vehicle Certification label and certificates
of title and registration.
Engine Identification
The eighth character in the VIN is the
engine code. This code identifies the
vehicle's engine, specifications, and
replacement parts. See“Engine
Specifications” underCapacities and
Specifications 0295 for the vehicle's
engine code.
Service Parts Identification
There may be a large barcode on the
certification label on the center pillar that
you can scan for the following information:
.Vehicle Identification Number (VIN)
.Model designation
.Paint information
.Production options
If there is not a large barcode on this label,
then you will find this same information on
the inside of the rear compartment area.
Page 301 of 328
Chevrolet TRAX Owner Manual (GMNA-Localizing-U.S./Canada/Mexico-
17041293) - 2024 - CRC - 12/2/22
300 Customer Information
adaptive equipment required for the vehicle,
such as hand controls or a wheelchair/
scooter lift for the vehicle.
To learn about the GM Mobility program,
see www.gmmobility.com or call the GM
Mobility Assistance Center at 1-800-323-9935.
Text Telephone (TTY) users, please dial the
national 711 relay service and contact
1-800-323-9935.
General Motors of Canada also has a
Mobility program. See www.gm.ca, or call
1-800-GM-DRIVE (800-463-7483) for details.
TTY users call 1-800-263-3830.
Roadside Assistance Program
For U.S.-purchased vehicles, call
1-800-243-8872. (Text Telephone (TTY):
1-888-889-2438.)
For Canadian-purchased vehicles, call
1-800-268-6800.
Service is available 24 hours a day, 365 days
a year.
Calling for Assistance
When calling Roadside Assistance, have the
following information ready:
.Your name, home address, and home
telephone number
.Telephone number of your location
.Location of the vehicle
.Model, year, color, and license plate
number of the vehicle
.Odometer reading and Vehicle
Identification Number (VIN)
.Description of the problem
Coverage
Services are provided for the duration of the
vehicle’s powertrain warranty.
In the U.S., anyone driving the vehicle is
covered. In Canada, a person driving the
vehicle without permission from the owner
is not covered.
Roadside Assistance is not a part of the New
Vehicle Limited Warranty. General Motors
North America and Chevrolet reserve the
right to make any changes or discontinue
the Roadside Assistance program at any
time without notification.
General Motors North America and Chevrolet
reserve the right to limit services or
payment to an owner or driver if they
decide the claims are made too often, or the
same type of claim is made many times.
Services Provided
.Emergency Fuel Delivery:Delivery of
enough fuel for the vehicle to get to the
nearest service station.
.Lock-Out Service: Service to unlock the
vehicle if you are locked out. A remote
unlock may be available if you have
OnStar. For security reasons, the driver
must present identification before this
service is given.
.Emergency Tow from a Public Road or
Highway: Tow to the nearest Chevrolet
dealer for warranty service, or if the
vehicle was in a crash and cannot be
driven. Assistance is not given when the
vehicle is stuck in the sand, mud,
or snow.
.Flat Tire Change: Service to change a flat
tire with the spare tire. The spare tire,
if equipped, must be in good condition
and properly inflated. It is the owner's
responsibility for the repair or
replacement of the tire if it is not covered
by the warranty.
.Battery Jump Start: Service to jump start
a dead battery.
.Trip Interruption Benefits and Assistance:
If your trip is interrupted due to a
warranty event, incidental expenses may
Page 304 of 328
Chevrolet TRAX Owner Manual (GMNA-Localizing-U.S./Canada/Mexico-
17041293) - 2024 - CRC - 12/2/22
Customer Information 303
appearance and safety performance;
however, the history of these parts is not
known. Such parts are not covered by the
GM New Vehicle Limited Warranty, and any
related failures are not covered by that
warranty.
Aftermarket collision parts are also available.
These are made by companies other than
GM and may not have been tested for the
vehicle. As a result, these parts may fit
poorly, exhibit premature durability/
corrosion problems, and may not perform
properly in subsequent collisions.
Aftermarket parts are not covered by the
GM New Vehicle Limited Warranty, and any
vehicle failure related to such parts is not
covered by that warranty.
Repair Facility
GM also recommends that you choose a
collision repair facility that meets your
needs before you ever need collision repairs.
Your dealer may have a collision repair
center with GM-trained technicians and
state-of-the-art equipment, or be able to
recommend a collision repair center that has
GM-trained technicians and comparable
equipment.
Insuring the Vehicle
Protect your investment in the GM vehicle
with comprehensive and collision insurance
coverage. There are significant differences in
the quality of coverage afforded by various
insurance policy terms. Many insurance
policies provide reduced protection to the
GM vehicle by limiting compensation for
damage repairs through the use of
aftermarket collision parts. Some insurance
companies will not specify aftermarket
collision parts. When purchasing insurance,
we recommend that you ensure that the
vehicle will be repaired with GM original
equipment collision parts. If such insurance
coverage is not available from your current
insurance carrier, consider switching to
another insurance carrier.
If the vehicle is leased, the leasing company
may require you to have insurance that
ensures repairs with Genuine GM Original
Equipment Manufacturer (OEM) parts or
Genuine Manufacturer replacement parts.
Read the lease carefully, as you may be
charged at the end of the lease for poor
quality repairs.
If a Crash Occurs
If there has been an injury, call emergency
services for help. Do not leave the scene of
a crash until all matters have been taken
care of. Move the vehicle only if its position
puts you in danger, or you are instructed to
move it by a police officer.
Give only the necessary information to
police and other parties involved in the
crash.
For emergency towing seeRoadside
Assistance Program 0300.
Gather the following information:
.Driver name, address, and telephone
number
.Driver license number
.Owner name, address, and telephone
number
.Vehicle license plate number
.Vehicle make, model, and model year
.Vehicle Identification Number (VIN)
.Insurance company and policy number
.General description of the damage to the
other vehicle
Page 305 of 328

Chevrolet TRAX Owner Manual (GMNA-Localizing-U.S./Canada/Mexico-
17041293) - 2024 - CRC - 12/2/22
304 Customer Information
Choose a reputable repair facility that uses
quality replacement parts. See“Collision
Parts” earlier in this section.
If the airbag has inflated, see What Will You
See after an Airbag Inflates? 048.
Managing the Vehicle Damage Repair
Process
In the event that the vehicle requires
damage repairs, GM recommends that you
take an active role in its repair. If you have
a pre-determined repair facility of choice,
take the vehicle there, or have it towed
there. Specify to the facility that any
required replacement collision parts be
original equipment parts, either new
Genuine GM parts or recycled original GM
parts. Remember, recycled parts will not be
covered by the GM vehicle warranty.
Insurance pays the bill for the repair, but
you must live with the repair. Depending on
your policy limits, your insurance company
may initially value the repair using
aftermarket parts. Discuss this with the
repair professional, and insist on Genuine
GM parts. Remember, if the vehicle is
leased, you may be obligated to have the vehicle repaired with Genuine GM parts,
even if your insurance coverage does not
pay the full cost.
If another party's insurance company is
paying for the repairs, you are not obligated
to accept a repair valuation based on that
insurance company's collision policy repair
limits, as you have no contractual limits
with that company. In such cases, you can
have control of the repair and parts choices
as long as the cost stays within reasonable
limits.
Publication Ordering Information
Service Manuals
Service manuals have the diagnosis and
repair information on the engine/propulsion,
transmission, axle, suspension, brakes,
electrical system, steering system, body, etc.
Customer Literature
Owner’s manuals are written specifically for
owners and are intended to provide basic
operational information about the vehicle.
The owner’s manual includes the
Maintenance Schedule for all models.
Customer literature publications available for
purchase include owner’s manuals, warranty
manuals, and portfolios. Portfolios include an
owner’s manual, warranty manual,
if applicable, and zip lock bag or pouch.
Current and Past Models
Service manuals and customer literature are
available for many GM vehicles.
To check availability and to order,
call 1-800-551-4123 Monday–Friday,
8:00 a.m.–6:00 p.m. Eastern Time
For credit card orders only (VISA,
MasterCard, or Discover), see Helm, Inc. at:
www.helminc.com.
To order by mail, write to:
Helm, Incorporated
Attention: Customer Service
47911 Halyard Drive
Plymouth, MI 48170
Make checks payable in U.S. funds.