remote control CHEVROLET UPLANDER 2008 1.G Owners Manual
[x] Cancel search | Manufacturer: CHEVROLET, Model Year: 2008, Model line: UPLANDER, Model: CHEVROLET UPLANDER 2008 1.GPages: 476, PDF Size: 5.77 MB
Page 1 of 476
Seats and Restraint Systems........................... 1-1
Front Seats
............................................... 1-2
Rear Seats
............................................... 1-6
Safety Belts
.............................................1-23
Child Restraints
.......................................1-42
Airbag System
.........................................1-77
Restraint System Check
............................1-91
Features and Controls..................................... 2-1
Keys
........................................................ 2-3
Doors and Locks
......................................2-10
Windows
.................................................2-24
Theft-Deterrent Systems
............................2-27
Starting and Operating Your Vehicle
...........2-31
Mirrors
....................................................2-43
Object Detection Systems
..........................2-44
OnStar
®System
......................................2-47
Universal Home Remote System
................2-51
Storage Areas
.........................................2-56
Instrument Panel............................................. 3-1
Instrument Panel Overview
.......................... 3-4
Climate Controls
......................................3-24
Warning Lights, Gages, and Indicators
........3-34
Driver Information Center (DIC)
..................3-50
Audio System(s)
.......................................3-84Driving Your Vehicle....................................... 4-1
Your Driving, the Road, and Your Vehicle
..... 4-2
Towing
...................................................4-27
Service and Appearance Care.......................... 5-1
Service
..................................................... 5-3
Fuel
......................................................... 5-5
Checking Things Under the Hood
...............5-10
Headlamp Aiming
.....................................5-41
Bulb Replacement
....................................5-42
Windshield Wiper Blade Replacement
.........5-47
Tires
......................................................5-48
Appearance Care
.....................................5-90
Vehicle Identi�cation
.................................5-98
Electrical System
......................................5-99
Capacities and Speci�cations
...................5-105
Maintenance Schedule..................................... 6-1
Maintenance Schedule
................................ 6-2
Customer Assistance Information.................... 7-1
Customer Assistance and Information
........... 7-2
Reporting Safety Defects
...........................7-14
Vehicle Data Recording and Privacy
...........7-16
Index................................................................ 1
2008 Chevrolet Uplander Owner ManualM
Page 97 of 476
Keys...............................................................2-3
Remote Keyless Entry (RKE) System................2-4
Remote Keyless Entry (RKE) System
Operation...................................................2-5
Remote Vehicle Start......................................2-8
Doors and Locks............................................2-10
Door Locks..................................................2-10
Power Door Locks........................................2-11
Delayed Locking...........................................2-12
Automatic Door Lock.....................................2-12
Programmable Automatic Door Unlock.............2-13
Lockout Protection........................................2-13
Dual Sliding Doors........................................2-13
Power Sliding Door (PSD)..............................2-16
Liftgate........................................................2-22
Windows........................................................2-24
Power Windows............................................2-25
Manual Rear Quarter Windows.......................2-26
Power Rear Quarter Windows........................2-26
Sun Visors...................................................2-27Theft-Deterrent Systems..................................2-27
Content Theft-Deterrent.................................2-27
PASS-Key
®III ..............................................2-29
PASS-Key®III Operation...............................2-29
Starting and Operating Your Vehicle................2-31
New Vehicle Break-In....................................2-31
Ignition Positions..........................................2-31
Retained Accessory Power (RAP)...................2-32
Starting the Engine.......................................2-32
Engine Coolant Heater..................................2-34
Automatic Transmission Operation...................2-35
Parking Brake..............................................2-38
Shifting Into PARK (P)...................................2-38
Shifting Out of PARK (P)...............................2-40
Parking Over Things That Burn.......................2-40
Engine Exhaust............................................2-41
Running the Engine While Parked...................2-42
Section 2 Features and Controls
2-1
Page 98 of 476
Mirrors...........................................................2-43
Manual Rearview Mirror.................................2-43
Outside Power Mirrors...................................2-43
Outside Convex Mirror...................................2-44
Outside Heated Mirrors..................................2-44
Object Detection Systems...............................2-44
Ultrasonic Rear Parking Assist (URPA)..............2-44
OnStar
®System.............................................2-47
Universal Home Remote System......................2-51
Universal Home Remote System.....................2-51
Universal Home Remote System Operation
(With One Triangular LED).........................2-51Storage Areas................................................2-56
Glove Box...................................................2-56
Cupholder(s)................................................2-56
Overhead Console (Without Rail)....................2-56
Overhead Console (With Rail)........................2-57
Floor Console Storage Area...........................2-59
Folding Tray................................................2-59
Second Row Center Console..........................2-59
Luggage Carrier...........................................2-60
Convenience Net
(With Rear Convenience Center).................2-61
Convenience Net
(Without Rear Convenience Center).............2-61
Convenience Center......................................2-62
Section 2 Features and Controls
2-2
Page 105 of 476
After your vehicle’s engine has been started two times
using the remote start button, the vehicle’s ignition
switch must be turned to ON/RUN and then back to
LOCK/OFF using the key before the remote start
procedure can be used again.
After entering the vehicle during a remote start, insert
and turn the key to ON/RUN to drive the vehicle.
To manually shut off the engine after a remote start,
do any of the following:
Aim the RKE transmitter at the vehicle and press the
remote start button until the parking lamps turn off.
Turn on the hazard warning �ashers.
Insert the vehicle’s key into the ignition switch and
turn the switch to ON/RUN and then back to
LOCK/OFF.
The remote vehicle start feature will not operate if:
The remote start system is disabled. See “REMOTE
START” underDIC Vehicle Personalization
(Uplevel Only) on page 3-76.
The vehicle’s key is in the ignition.
The vehicle’s hood, liftgate or doors are not closed.
The hazard warning �ashers are on.
There is an emission control system malfunction.
The engine coolant temperature is too high.
The oil pressure is low.
Two remote vehicle starts have already been
provided. The maximum number of remote starts or
remote start attempts between ignition cycles
with the key is two.
Remote Start Ready
If your vehicle does not have the remote vehicle start
feature, it may have the remote start ready feature.
This feature allows your dealer/retailer to add the
manufacturer’s remote vehicle start feature.
If the RKE transmitter has a plus (+) symbol on the
back cover, your vehicle has the remote start ready
feature. You can lock or unlock your vehicle from
approximately 197 feet (60 m) away.
See your dealer/retailer if you would like to add the
manufacturer’s remote vehicle start feature to your
vehicle.
2-9
Page 117 of 476
{CAUTION:
If your vehicle is facing downward on a steep
grade (15 percent or more), the door may not
stay open and could slam shut, possibly
injuring someone. To make sure the door does
not slam shut, turn on the power sliding door
feature. Then if the door closes, it will close
under the control of the power door system.
Power Sliding Door Second Row
Passenger Override (Deactivation)
To help avoid accidental operation of the sliding door(s)
by using the passenger PSD activation switch, press
the override (deactivation) part of the overhead console
switch. The door can still be manually opened from
the inside or outside with the override (deactivation) on.
To open a power sliding door(s) manually when the
overhead console switch is in override (deactivation)
position, pull the inside or outside door handle and slide
the door all the way back.To close the door(s) manually when the override
switch(es) is in the override (deactivation) position, pull
the inside or outside door handle and slide the door
all the way forward to the latched position.
To stop the door(s) immediately while the door(s) is
opening or closing, press the PSD override
(deactivation) part of the switch.
Pressing the PSD button(s) on the remote keyless entry
will open and close the door unless the door has
been manually locked using the mechanical slider.
Resetting the Power Sliding Door
The power sliding door may operate incorrectly or not at
all because of the following conditions:
A low voltage or dead battery
A disconnected battery
If the instrument panel PSD/fuse 21, LHPSD/fuse
24 or RHPSD/fuse 25 are removed or blown.
SeeFuses and Circuit Breakers on page 5-100for more
information.
2-21
Page 146 of 476
How OnStar Service Works
In order to provide you with OnStar services, your
vehicle’s OnStar system has the capability of recording
and transmitting vehicle information. This information
is automatically sent to an OnStar Call Center at
the time of an OnStar button press, Emergency button
press or if your airbags or AACN system deploys.
The vehicle information usually includes your GPS
location and, in the event of a crash, additional
information regarding the accident that your vehicle has
been involved in (e.g. the direction from which your
vehicle was hit). When you use the Virtual Advisor
feature of OnStar Hands-Free Calling, your vehicle also
sends OnStar your GPS location so that we can
provide you with location-based services.
OnStar service cannot work unless your vehicle is in a
place where OnStar has an agreement with a wireless
service provider for service in that area. OnStar service
also cannot work unless you are in a place where the
wireless service provider OnStar has hired for that area
has coverage, network capacity and reception when the
service is needed, and technology that is compatible with
the OnStar service. Not all services are available
everywhere, particularly in remote or enclosed areas, or
at all times.OnStar service that involves location information about
your vehicle cannot work unless GPS satellite signals are
unobstructed and available in that place as well.
Your vehicle must have a working electrical system
(including adequate battery power) for the OnStar
equipment to operate. There are other problems OnStar
cannot control that may prevent OnStar from providing
OnStar service to you at any particular time or place.
Some examples are damage to important parts of your
vehicle in an accident, hills, tall buildings, tunnels,
weather or wireless phone network congestion.
Your Responsibility
You may need to increase the volume of your radio to
hear the OnStar advisor. If the light next to the OnStar
buttons is red, this means that your system is not
functioning properly and should be checked by your
dealer/retailer. If the light appears clear (no light is
appearing), your OnStar subscription has expired. You
can always press the OnStar button to con�rm that your
OnStar equipment is active.
2-50
Page 147 of 476
Universal Home Remote
System
Universal Home Remote System
The Universal Home Remote System provides a way to
replace up to three hand-held Radio-Frequency (RF)
transmitters used to activate devices such as garage door
openers, security systems, and home lighting.
This device complies with Part 15 of the FCC Rules.
Operation is subject to the following two conditions:
1. This device may not cause harmful interference.
2. This device must accept any interference received,
including interference that may cause undesired
operation.
This device complies with RSS-210 of Industry Canada.
Operation is subject to the following two conditions:
1. This device may not cause interference.
2. This device must accept any interference received,
including interference that may cause undesired
operation of the device.
Changes or modi�cations to this system by other than an
authorized service facility could void authorization to use
this equipment.
Universal Home Remote
System Operation (With One
Triangular LED)
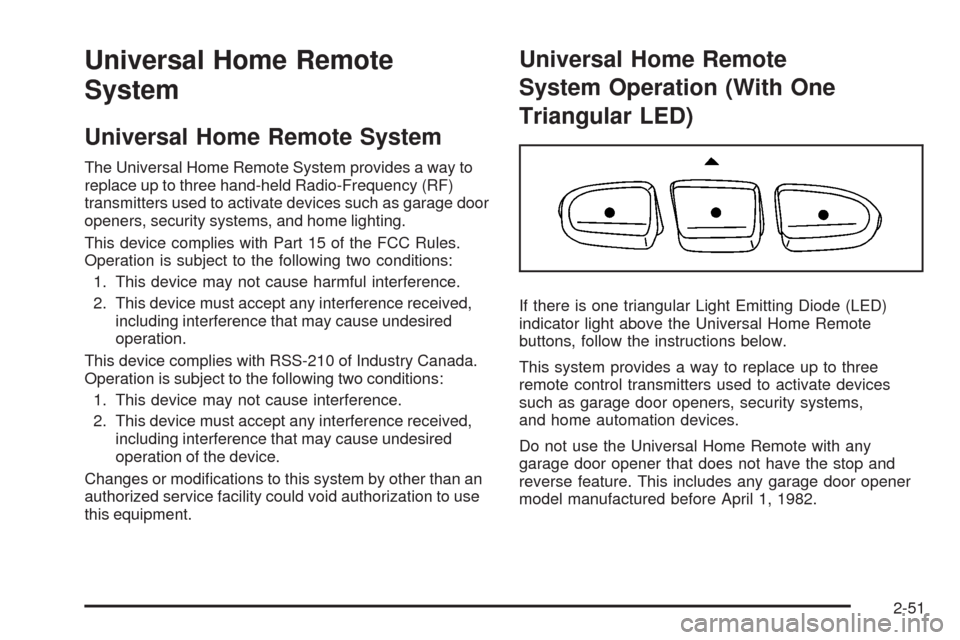
If there is one triangular Light Emitting Diode (LED)
indicator light above the Universal Home Remote
buttons, follow the instructions below.
This system provides a way to replace up to three
remote control transmitters used to activate devices
such as garage door openers, security systems,
and home automation devices.
Do not use the Universal Home Remote with any
garage door opener that does not have the stop and
reverse feature. This includes any garage door opener
model manufactured before April 1, 1982.
2-51
Page 149 of 476
Do not hold down the buttons for longer than
30 seconds and do not repeat this step to program
the remaining two Universal Home Remote
buttons.
2. Hold the end of your hand-held transmitter about
1 to 3 inches (3 to 8 cm) away from the Universal
Home Remote buttons while keeping the indicator
light in view. The hand-held transmitter was supplied
by the manufacturer of your garage door opener
receiver (motor head unit).
3. At the same time, press and hold both the Universal
Home Remote button that you would like to use to
control the garage door and the hand-held
transmitter button. Do not release the Universal
Home Remote button or the hand-held transmitter
button until Step 4 has been completed.
Some entry gates and garage door openers may
require you to substitute Step 3 with the procedure
noted in “Gate Operator and Canadian
Programming” later in this section.4. The indicator light on the Universal Home Remote
will �ash slowly at �rst and then rapidly after
Universal Home Remote successfully receives the
frequency signal from the hand-held transmitter.
Release both buttons.
5. Press and hold the newly-trained Universal Home
Remote button and observe the indicator light.
If the indicator light stays on continuously,
the programming is complete and your garage door
should move when the Universal Home Remote
button is pressed and released. You do not need to
continue the programming Steps 6 through 8 and
can stop here.
If the Universal Home Remote indicator light blinks
rapidly for two seconds and then turns to a
constant light, continue with the programming Steps
6 through 8.
It may be helpful to have another person available
to assist with the remaining steps.
2-53
Page 150 of 476
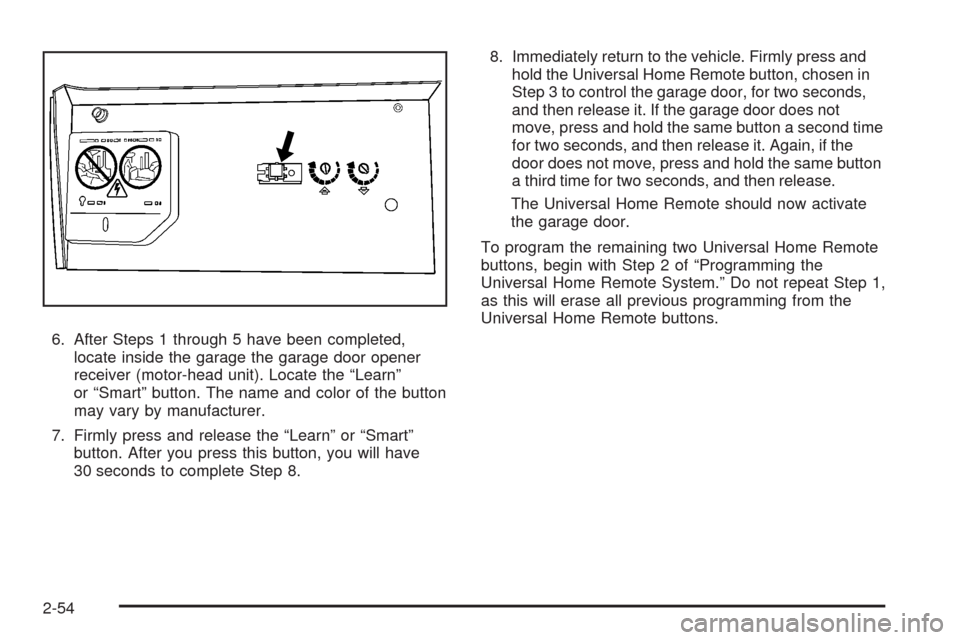
6. After Steps 1 through 5 have been completed,
locate inside the garage the garage door opener
receiver (motor-head unit). Locate the “Learn”
or “Smart” button. The name and color of the button
may vary by manufacturer.
7. Firmly press and release the “Learn” or “Smart”
button. After you press this button, you will have
30 seconds to complete Step 8.8. Immediately return to the vehicle. Firmly press and
hold the Universal Home Remote button, chosen in
Step 3 to control the garage door, for two seconds,
and then release it. If the garage door does not
move, press and hold the same button a second time
for two seconds, and then release it. Again, if the
door does not move, press and hold the same button
a third time for two seconds, and then release.
The Universal Home Remote should now activate
the garage door.
To program the remaining two Universal Home Remote
buttons, begin with Step 2 of “Programming the
Universal Home Remote System.” Do not repeat Step 1,
as this will erase all previous programming from the
Universal Home Remote buttons.
2-54
Page 178 of 476
Dome Lamp
The dome lamp is located in the headliner and has
two buttons to manually turn it on or off. The dome lamp
will come on each time you open a door, unless you
turn on the interior lamps override feature. SeeInterior
Lamps Control on page 3-17.
Entry Lighting
With entry lighting, the interior of your vehicle is
illuminated so that you can see inside before you enter
your vehicle. The lamps will come on for 20 seconds
if you unlock your door using your key or the remote
keyless entry transmitter and the ignition is in LOCK.
After 20 seconds have passed, the interior lamps
will slowly fade out. The lamps will turn off before
the 20 seconds if you do one of the following:
Lock all the doors using the key.
Press lock on the power door lock switch.
Press lock on the remote keyless entry transmitter.
When any door is opened, entry lighting is cancelled.
The interior lamps will stay on while any door or
the liftgate is open, and slowly fade out when all
doors and the liftgate are closed.The interior lamps may stay on for up to 25 seconds
after all doors have been closed if they have not been
locked. SeeDelayed Lighting on page 3-18.
To turn the entry lighting feature off or on, seeDIC
Vehicle Personalization (Uplevel Only) on page 3-76.
Delayed Lighting
The delayed lighting feature will continue to illuminate
the interior for 20 seconds after all doors have been
closed, so that you can �nd your ignition and buckle
your safety belt at night. Delayed lighting will not occur
while the ignition is in RUN or ACCESSORY. After
20 seconds have passed, the interior lamps will slowly
fade out. The lamps will fade out before the 20 seconds
have passed if you do one of the following:
Turn the ignition to RUN or ACCESSORY.
Lock all doors using the remote keyless entry
transmitter.
Lock all doors using the power door lock switch or
the key.
To turn the delayed lighting feature off or on, seeDIC
Vehicle Personalization (Uplevel Only) on page 3-76.
3-18