center console CHEVROLET UPLANDER 2009 1.G Owners Manual
[x] Cancel search | Manufacturer: CHEVROLET, Model Year: 2009, Model line: UPLANDER, Model: CHEVROLET UPLANDER 2009 1.GPages: 464, PDF Size: 2.59 MB
Page 10 of 464
Head Restraints
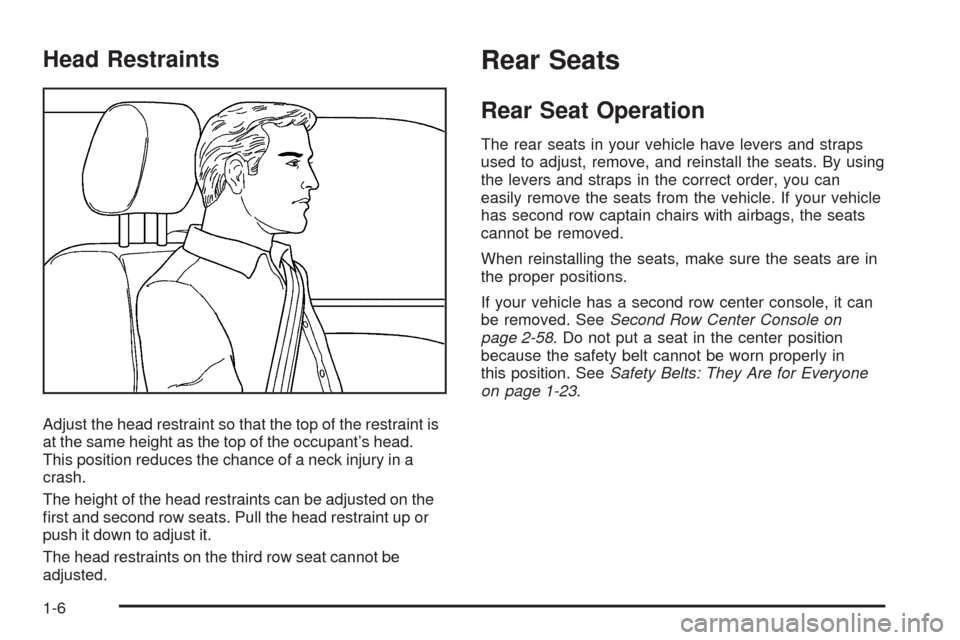
Adjust the head restraint so that the top of the restraint is
at the same height as the top of the occupant’s head.
This position reduces the chance of a neck injury in a
crash.
The height of the head restraints can be adjusted on the
�rst and second row seats. Pull the head restraint up or
push it down to adjust it.
The head restraints on the third row seat cannot be
adjusted.
Rear Seats
Rear Seat Operation
The rear seats in your vehicle have levers and straps
used to adjust, remove, and reinstall the seats. By using
the levers and straps in the correct order, you can
easily remove the seats from the vehicle. If your vehicle
has second row captain chairs with airbags, the seats
cannot be removed.
When reinstalling the seats, make sure the seats are in
the proper positions.
If your vehicle has a second row center console, it can
be removed. SeeSecond Row Center Console on
page 2-58. Do not put a seat in the center position
because the safety belt cannot be worn properly in
this position. SeeSafety Belts: They Are for Everyone
on page 1-23.
1-6
Page 100 of 464
Mirrors...........................................................2-43
Manual Rearview Mirror.................................2-43
Outside Power Mirrors...................................2-43
Outside Convex Mirror...................................2-43
Outside Heated Mirrors..................................2-44
Object Detection Systems...............................2-44
Ultrasonic Rear Parking Assist (URPA)............2-44
OnStar
®System.............................................2-47
Universal Home Remote System......................2-50
Universal Home Remote System Operation
(With One Triangular LED)...........................2-51Storage Areas................................................2-55
Glove Box...................................................2-55
Cupholders..................................................2-55
Overhead Console (Without Rail)....................2-55
Overhead Console (With Rail)........................2-56
Floor Console Storage Area...........................2-58
Folding Tray................................................2-58
Second Row Center Console..........................2-58
Luggage Carrier...........................................2-59
Convenience Net (With Rear
Convenience Center).................................2-60
Convenience Net (Without Rear
Convenience Center).................................2-60
Convenience Center......................................2-61
Section 2 Features and Controls
2-2
Page 117 of 464
To manually open the power sliding door(s) while
the switch(es) are in the activation position, pull
and release the inside or outside door handle
to release the door latch. The door will fully open.
To manually close the power sliding door(s) while
the switches are in the activation position, pull the
inside or outside door handle or the edge of
the door. Move the door about 4 inches (10 cm)
toward the closed position and release it. The door
will close completely and latch.
If a power sliding door is locked, it cannot be unlocked
and opened using the overhead console PSD
switch(es) or the passenger PSD activation switch(es).
The power sliding door must either be manually
unlocked or unlocked using the power door unlock
switch located on the driver’s or front passenger’s
armrest, and then opened using the overhead or
passenger PSD activation switch(es).
The remote keyless entry transmitter can also be used
to open the power sliding door(s). If the vehicle is
locked, press the power sliding door button(s) and all
doors will unlock and the sliding door(s) will open.
SeeRemote Keyless Entry (RKE) System Operation on
page 2-5.If the power sliding door has been manually locked, you
must unlock the PSD before it can be opened.
Notice:If you leave the power sliding door on
when you go through an automatic car wash, the
door may accidentally open. Be sure the power
sliding door is turned off when going through a
car wash.
If the power sliding door(s) is open or in the process of
closing when you shift out of PARK (P), a chime will
sound. This is a warning that the sliding door(s) is not
completely closed. Also, the Driver Information
Center (DIC) will indicate if the door is open. SeeDIC
Warnings and Messages on page 3-51. Stop the vehicle
and close the door.
{CAUTION:
If you shift the transaxle out of PARK (P) and
accelerate before the power sliding door latches
closed, the door may reverse to the open position.
A child or others could fall out of the vehicle and
be injured. Always make sure the power sliding
door is closed and latched before you drive away.
2-19
Page 124 of 464
Manual Rear Quarter Windows
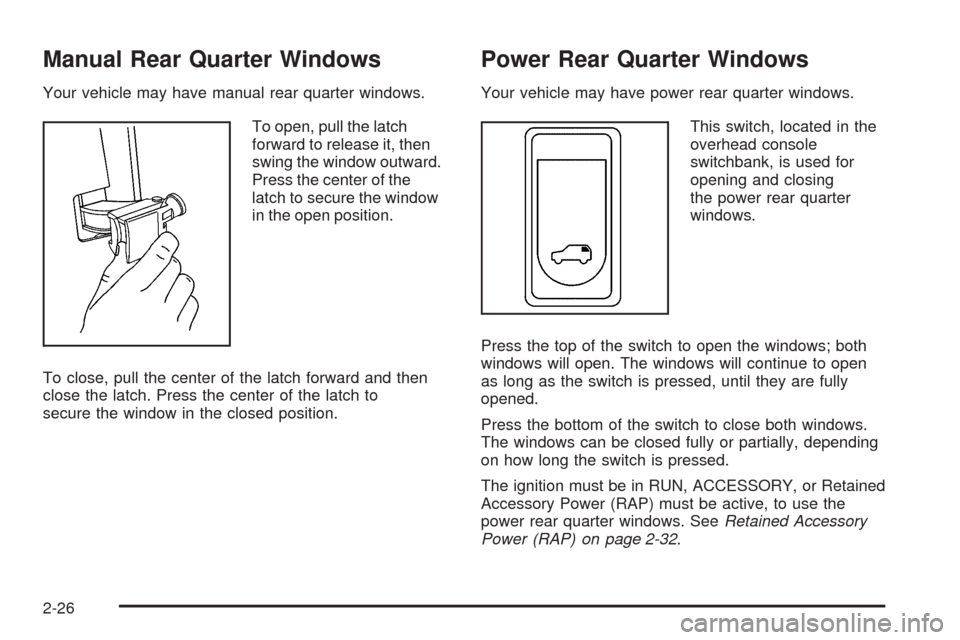
Your vehicle may have manual rear quarter windows.
To open, pull the latch
forward to release it, then
swing the window outward.
Press the center of the
latch to secure the window
in the open position.
To close, pull the center of the latch forward and then
close the latch. Press the center of the latch to
secure the window in the closed position.
Power Rear Quarter Windows
Your vehicle may have power rear quarter windows.
This switch, located in the
overhead console
switchbank, is used for
opening and closing
the power rear quarter
windows.
Press the top of the switch to open the windows; both
windows will open. The windows will continue to open
as long as the switch is pressed, until they are fully
opened.
Press the bottom of the switch to close both windows.
The windows can be closed fully or partially, depending
on how long the switch is pressed.
The ignition must be in RUN, ACCESSORY, or Retained
Accessory Power (RAP) must be active, to use the
power rear quarter windows. SeeRetained Accessory
Power (RAP) on page 2-32.
2-26
Page 153 of 464
Reprogramming a Single Universal
Home Remote Button
To reprogram any of the three Universal Home Remote
buttons, repeat the programming instructions earlier
in this section, beginning with Step 2.
For help or information on the Universal Home Remote
System, call the customer assistance phone number
underCustomer Assistance Offices on page 7-6.
Storage Areas
Your vehicle’s large carrying capacity can store many
items. If the vehicle has an extended wheelbase, it can
carry even larger items. The �oor pins that are used
to attach the seats, can be used to secure larger loads.
Glove Box
Lift the glovebox handle up to open it. Use the key to
lock and unlock the glovebox.
Cupholders
There are cupholders located below the center
instrument panel switchbank. The cupholders have a
rubber liner that can be removed, so that larger cups can
�t into the cupholders. You can also remove the liner
to clean it.
To use the cupholders, pull the tray out. Push the tray
back when not in use.
Your vehicle may be equipped with cupholders in the
second row.
Overhead Console (Without Rail)
If your vehicle has an overhead console without the rail
system, it has two reading lights, a courtesy light,
and a switchbank. SeeOverhead Console Switchbank
on page 3-19for more information.
2-55
Page 156 of 464
Floor Console Storage Area
Your vehicle may have a storage compartment located
on the front console below the front cupholders. Pull
up and then forward on the handle to open the storage
compartment.
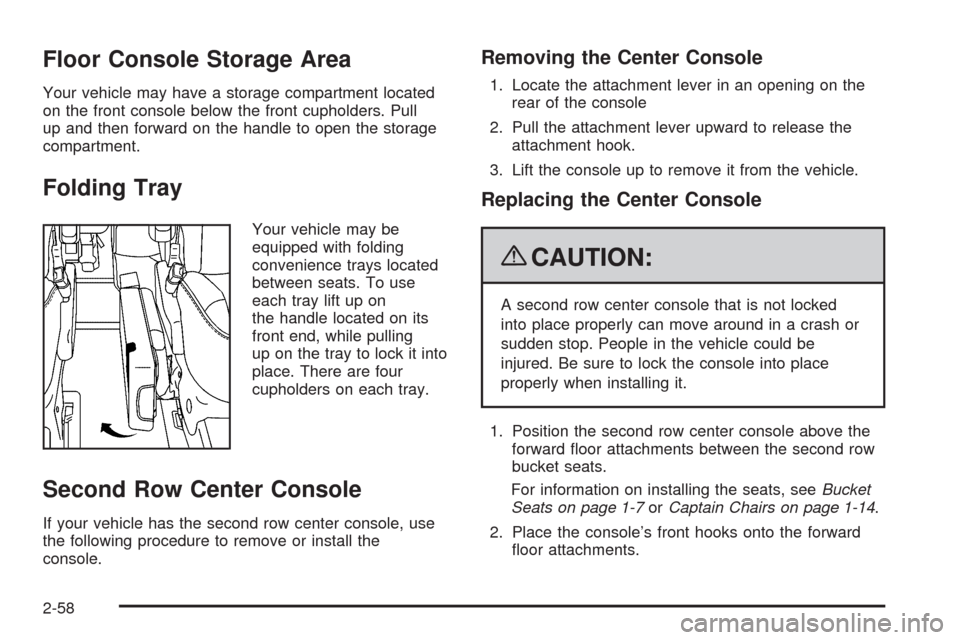
Folding Tray
Your vehicle may be
equipped with folding
convenience trays located
between seats. To use
each tray lift up on
the handle located on its
front end, while pulling
up on the tray to lock it into
place. There are four
cupholders on each tray.
Second Row Center Console
If your vehicle has the second row center console, use
the following procedure to remove or install the
console.
Removing the Center Console
1. Locate the attachment lever in an opening on the
rear of the console
2. Pull the attachment lever upward to release the
attachment hook.
3. Lift the console up to remove it from the vehicle.
Replacing the Center Console
{CAUTION:
A second row center console that is not locked
into place properly can move around in a crash or
sudden stop. People in the vehicle could be
injured. Be sure to lock the console into place
properly when installing it.
1. Position the second row center console above the
forward �oor attachments between the second row
bucket seats.
For information on installing the seats, seeBucket
Seats on page 1-7orCaptain Chairs on page 1-14.
2. Place the console’s front hooks onto the forward
�oor attachments.
2-58
Page 189 of 464
Press eitherqgorrlto increase or decrease
fan speed. The on screen display disappears after
a few seconds.
Press
9btwice to enable temperature adjustment.
After pressing
9b, the current temperature settings
are highlighted and appear in the on screen display. The
arrows indicate that to increase or decrease
temperature, press either the
qgorrlbutton.
The on screen display disappears after a few seconds.
Press
9ba third time to turn off the on screen
display.
QR:Press to toggle between the fan and
temperature settings.
Rear Air Outlets
The outlet behind the driver side rear seat is for the cold
air return. Be sure to keep it free from obstructions.
Also, keep the area around the base of the center
instrument panel console, between and under the front
seats, free of objects that could also obstruct air�ow
to the rear seating area.
SeeClimate Control System on page 3-22orDual
Climate Control System on page 3-25for more
information on the main climate control system.
SeeOutlet Adjustment on page 3-27for information on
ventilation.
Passenger Compartment Air Filter
Both outside and recirculated air are routed through a
passenger compartment �lter. Pollen, dust particles and
other contaminants are removed by the �lter. Air
reductions indicate that the �lter needs to be replaced.
SeeScheduled Maintenance on page 6-4for
replacement intervals.
The access panel for the passenger compartment air
�lter is located in the back of the glove box. To replace
the �lter:
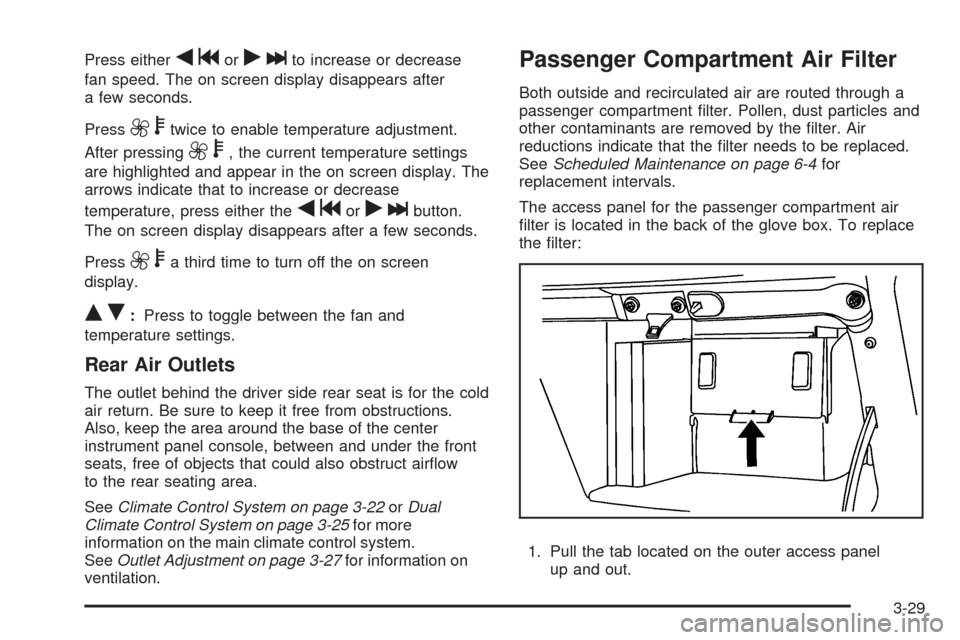
1. Pull the tab located on the outer access panel
up and out.
3-29
Page 459 of 464
N
Navigation System, Privacy..............................7-18
New Vehicle Break-In......................................2-31
O
Odometer......................................................3-32
Odometer, Trip...............................................3-32
Off-Road Recovery..........................................4-11
Oil
Engine.......................................................5-15
Pressure Light.............................................3-41
Oil, Engine Oil Life System..............................5-18
Older Children, Restraints................................1-43
Online Owner Center........................................ 7-5
OnStar, Privacy..............................................7-18
OnStar
®System, see OnStar®Manual...............2-47
Operation, Universal Home Remote System........2-51
Other Warning Devices...................................... 3-6
Outlet Adjustment............................................3-27
Outlets
Accessory Power.........................................3-20
Outside
Convex Mirror.............................................2-43
Heated Mirrors............................................2-44
Power Mirrors.............................................2-43
Overhead Console..................................2-55, 2-56
Overhead Console Switchbank..........................3-19Overheated Engine Protection Operating Mode....5-30
Owner Checks and Services.............................. 6-8
Owners, Canadian............................................... ii
P
Paint, Damage...............................................5-96
Park
Shifting Into................................................2-38
Shifting Out of............................................2-40
Park Aid........................................................2-44
Park Brake....................................................2-38
Parking
Assist........................................................2-44
Over Things That Burn.................................2-40
Passenger Airbag Status Indicator.....................3-34
Passenger Compartment Air Filter.....................3-29
Passenger Sensing System..............................1-85
Passing.........................................................4-11
PASS-KEY
®III+ Electronic Immobilizer...............2-29
PASS-Key®III Electronic Immobilizer Operation . . . 2-29
Perchlorate Materials Requirements, California...... 5-4
Power
Door Locks.................................................2-11
Electrical System.........................................5-98
Outlet 115 Volt Alternating Current.................3-21
Rear Quarter Windows.................................2-26
Retained Accessory (RAP)............................2-32
Seat............................................................ 1-3
9
Page 461 of 464
S
Safety Belts
Care of Safety Belts and Built-in Child
Restraint Harness.....................................5-92
How to Wear Safety Belts Properly................1-28
Lap-Shoulder Belt........................................1-37
Reminder Light............................................3-32
Safety Belt Extender....................................1-42
Safety Belt Use During Pregnancy.................1-42
Safety Belts Are for Everyone.......................1-23
Safety Warnings and Symbols.............................. iii
Scheduled Maintenance..................................... 6-4
Seats
Bucket Seats, Rear....................................... 1-7
Captain Chairs............................................1-14
Head Restraints............................................ 1-6
Heated Seats............................................... 1-3
Power Seats................................................. 1-3
Rear Seat Operation...................................... 1-6
Reclining Seatbacks...................................... 1-4
Third Row Seat...........................................1-18
Second Row Center Console............................2-58
Secondary Latch System.................................5-84
Securing a Child Restraint
Rear Seat Position......................................1-60
Right Front Seat Position..............................1-62
Security Light.................................................3-41Service........................................................... 5-3
Accessories and Modi�cations......................... 5-3
Adding Equipment to the Outside of the
Vehicle..................................................... 5-5
California Perchlorate Materials Requirements.... 5-4
California Proposition 65 Warning.................... 5-4
Doing Your Own Work................................... 5-4
Engine Soon Light.......................................3-38
Publications Ordering Information...................7-15
Service, Scheduling Appointments.....................7-10
Servicing Your Airbag-Equipped Vehicle..............1-90
Setting the Clock............................................3-77
Sheet Metal Damage.......................................5-96
Shifting Into Park............................................2-38
Shifting Out of Park........................................2-40
Signals, Turn and Lane-Change.......................... 3-7
Sliding Door, Power........................................2-16
Sliding Doors, Dual.........................................2-13
Spare Tire
Compact....................................................5-88
Installing....................................................5-77
Removing...................................................5-75
Storing.......................................................5-86
Speci�cations, Capacities...............................5-104
Speedometer..................................................3-32
Stabilitrak
®System........................................... 4-7
Start Vehicle, Remote....................................... 2-7
Starting the Engine.........................................2-32
Steering.......................................................... 4-9
11
Page 462 of 464
Steering Wheel Controls, Audio.......................3-111
Steering Wheel, Tilt Wheel................................. 3-6
Storage Areas................................................2-55
Convenience Center.....................................2-61
Convenience Net.........................................2-60
Cupholders.................................................2-55
Floor Console Storage Area..........................2-58
Folding Tray...............................................2-58
Glove Box..................................................2-55
Luggage Carrier..........................................2-59
Overhead Console...............................2-55, 2-56
Second Row Center Console........................2-58
Stuck in Sand, Mud, Ice, or Snow.....................4-18
Sun Visors.....................................................2-27
Switchbanks
Overhead Console.......................................3-19
T
Tachometer....................................................3-32
Taillamps
Turn Signal, Stoplamps and Back-up Lamps....5-44
TCS Warning Light..........................................3-37
Theft-Deterrent, Radio....................................3-110
Theft-Deterrent Systems...................................2-27
Content Theft-Deterrent................................2-27
PASS-Key
®III+ Electronic Immobilizer............2-29
PASS-Key®III Electronic Immobilizer
Operation................................................2-29Third Row Seat..............................................1-18
Tilt Wheel........................................................ 3-6
Time, Setting..................................................3-77
Tire
Pressure Light.............................................3-38
Tires.............................................................5-47
Aluminum Wheels, Cleaning..........................5-95
Buying New Tires........................................5-64
Chains.......................................................5-70
Changing a Flat Tire....................................5-74
Cleaning....................................................5-95
Compact Spare Tire.....................................5-88
Different Size..............................................5-66
High-Speed Operation..................................5-56
If a Tire Goes Flat.......................................5-73
In�ation - Tire Pressure................................5-54
In�ator,- Accessory.......................................5-71
Inspection and Rotation................................5-62
Installing the Spare Tire................................5-77
Pressure Monitor Operation...........................5-58
Pressure Monitor System..............................5-57
Removing the Flat Tire.................................5-77
Removing the Spare Tire and Tools...............5-75
Secondary Latch System..............................5-84
Storing a Flat or Spare Tire and Tools............5-86
Tire Sidewall Labeling..................................5-48
Tire Terminology and De�nitions....................5-51
Uniform Tire Quality Grading.........................5-67
Wheel Alignment and Tire Balance.................5-69
12