CHEVROLET VOLT 2018 Get To Know Guide
Manufacturer: CHEVROLET, Model Year: 2018, Model line: VOLT, Model: CHEVROLET VOLT 2018Pages: 16, PDF Size: 2.79 MB
Page 11 of 16
11
INFOTAINMENT SYSTEM
F Optional equipment
BLUETOOTH SYSTEM
Before using a Bluetooth-enabled device in the vehicle, it must be paire\
d with the in-vehicle Bluetooth system. Not all devices will support all functions. Th\
e pairing process is disabled when the vehicle is moving.
To pair a Bluetooth phone using voice recognition, press the Push to Talk button on the steering wheel; after the beep, say “Pair Phone,” or use th\
e infotainment screen to select Settings > Bluetooth > Pair Device. Follow the pairing \
instructions.
To activate Voice Pass-Thru for access to voice recognition commands (i\
.e. Siri® Eyes Free or Voice Command) on a paired, compatible cell phone, press a\
nd hold the
Push to Talk button on the steering wheel until a tone sounds.
APPLE CARPLAY™ AND ANDROID AUTO™
Apple CarPlay or Android Auto capability may be available through a comp\
atible
smartphone. If available, a Projection icon will appear on the home page of the infotainment display.
1. No app is required for Apple CarPlay. Download the Android Auto app to y\
our phone from the Google Play Store.
2. Connect your compatible phone by plugging the phone USB cable into a USB\
data port. Use your device’s factory-provided USB cable. Aftermarket cables may \
not work.
3. The Projection icon will change to Apple CarPlay or Android Auto, depending on the phone. Apple CarPlay or Android Auto may launch automatically upo\
n USB
connection. If not, touch the Apple CarPlay or Android Auto icon on the \
home page.
ONSTAR WITH 4G LTE AND WI-FI®
With OnStar 4G LTE and Wi-Fi, up to 7 devices (smartphones, tablets and\
laptops) can be connected to high-speed internet through the vehicle’s built-in Wi-Fi\
hotspot.
To retrieve the SSID and password for the hotspot, press the white OnSta\
r Voice Command button on the overhead console, wait for the prompt, and then sa\
y “Wi-Fi settings.” The information will be displayed on the screen.
For assistance, press the blue OnStar button or call 1-888-4-ONSTAR (1-888-466-7827).
WIRELESS CHARGING FOR MOBILE DEVICESF
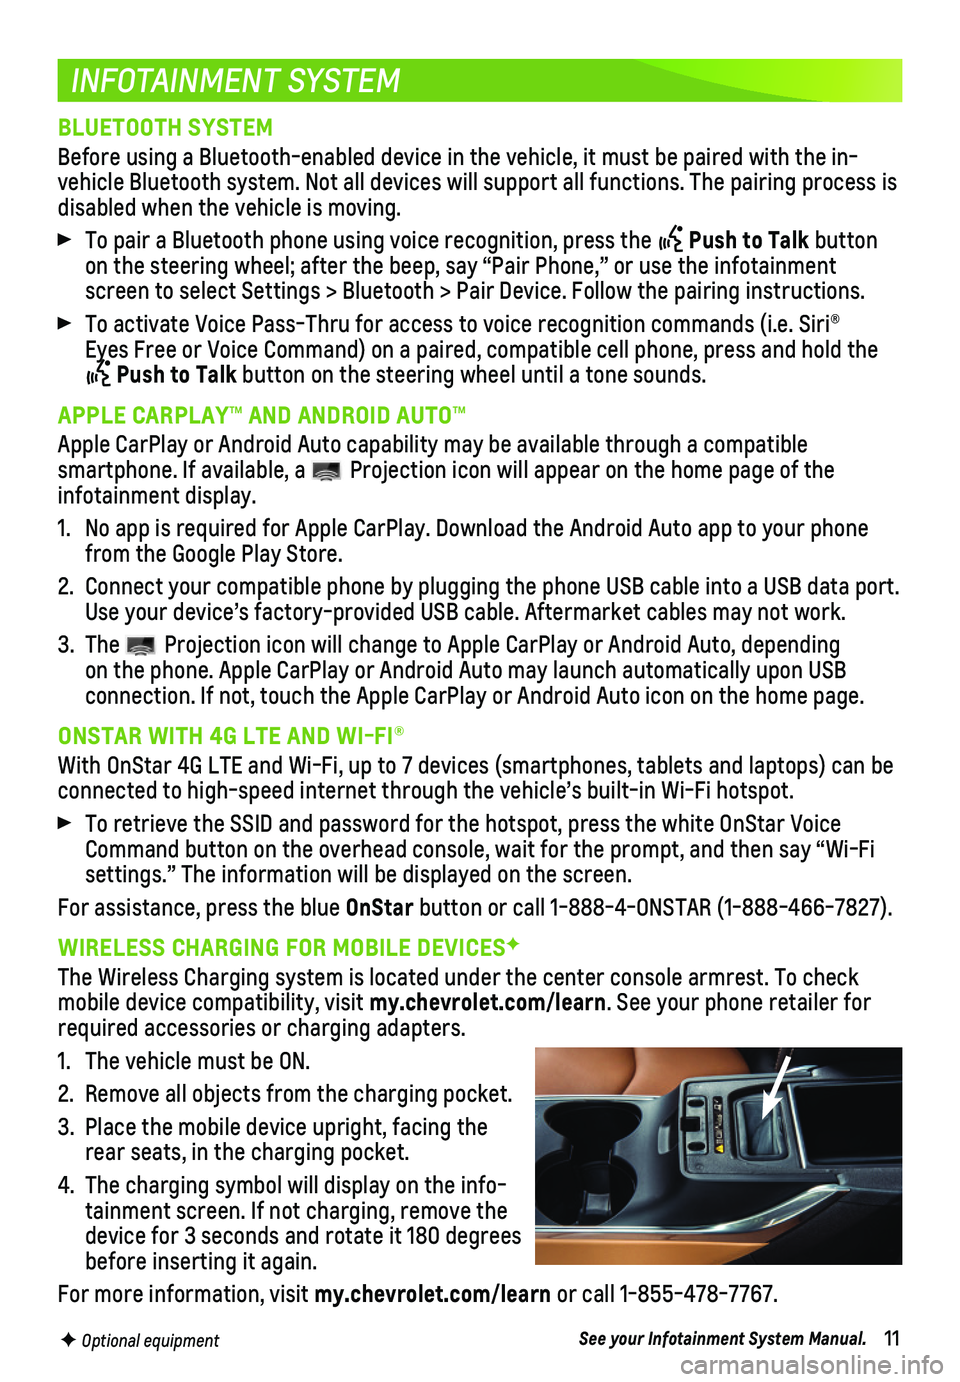
The Wireless Charging system is located under the center console armrest\
. To check mobile device compatibility, visit my.chevrolet.com/learn. See your phone retailer for required accessories or charging adapters.
1. The vehicle must be ON.
2. Remove all objects from the charging pocket.
3. Place the mobile device upright, facing the rear seats, in the charging pocket.
4. The charging symbol will display on the info-tainment screen. If not charging, remove the device for 3 seconds and rotate it 180 degrees before inserting it again.
For more information, visit my.chevrolet.com/learn or call 1-855-478-7767.
See your Infotainment System Manual.
Page 12 of 16
12
CHARGING
BATTERY
The Volt is powered by a lithium-ion high voltage battery pack, which ho\
lds its charge efficiently and has no memory effect (so it doesn’t have to be run\
down completely before recharging). Keep the vehicle plugged in, even when fully charge\
d, to keep the battery temperature ready for the next drive.
CHARGING TIME
Using a 120 volt standard outlet will take approximately 13 hours to cha\
rge the Volt at the 12 amp settings, or 19 hours at the 8 amp default setting. Using a 2\
40 volt charging station will take approximately 4.5 hours to charge. Charge times will v\
ary with outside temperature.
PROGRAMMABLE CHARGING
The Volt can be programmed for three charging modes: Immediately upon pl\
ug-in; Delayed based on departure time; and Delayed (Electric Rate and Departu\
re Time).
Touch the Energy icon on the touch screen and then touch the Charging icon to view the current Charge Mode and Charge Limit.
Touch the Charge Limit text to select a different charge limit.
Touch the Charge Mode text to select a different charge mode.
CHARGING STATUS
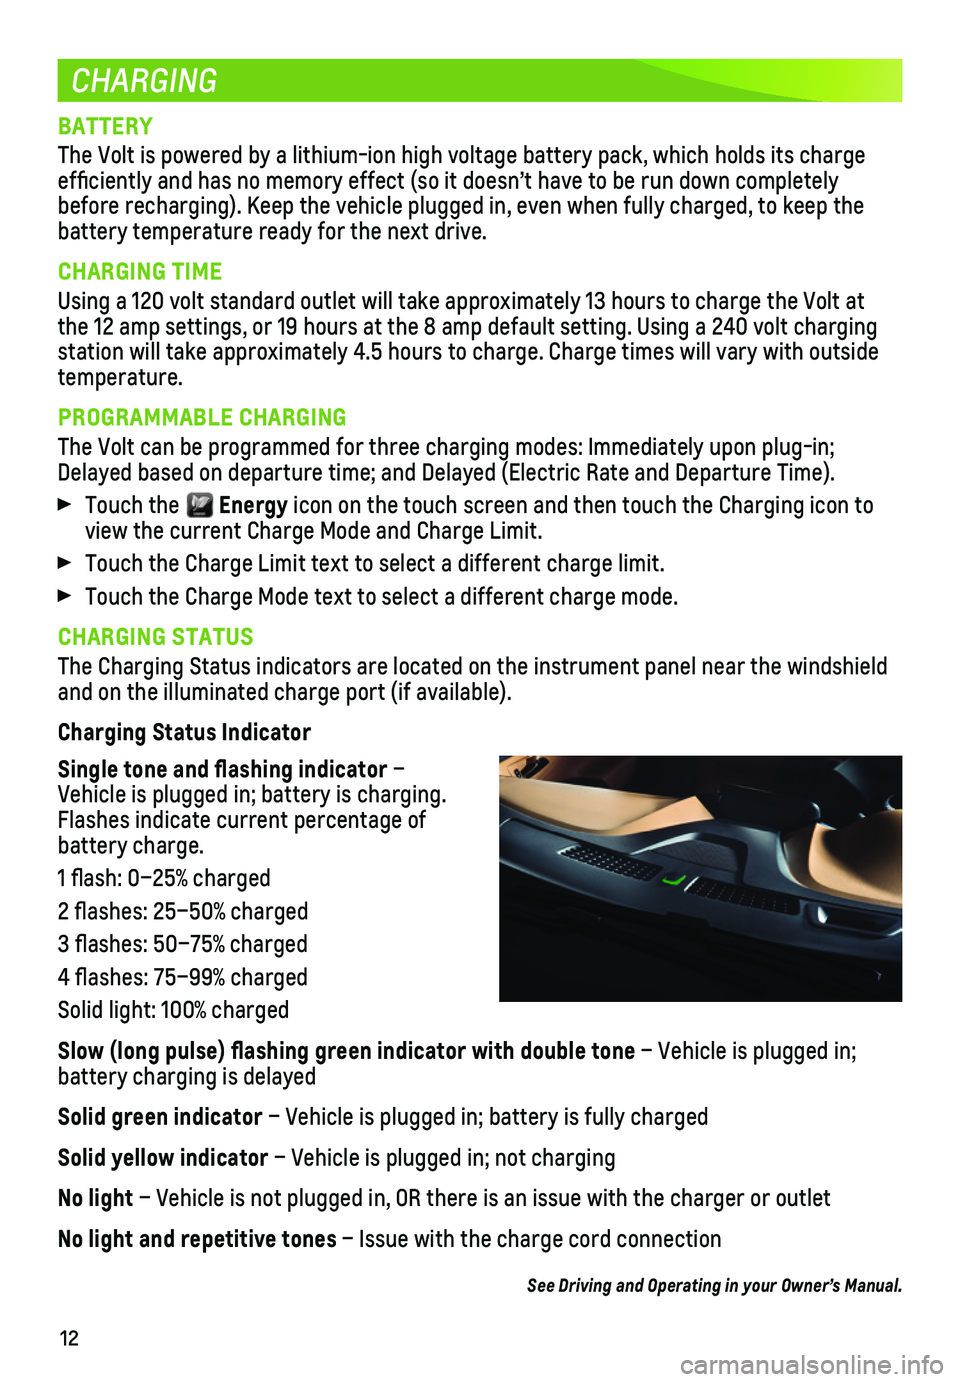
The Charging Status indicators are located on the instrument panel near \
the windshield and on the illuminated charge port (if available).
Charging Status Indicator
Single tone and flashing indicator – Vehicle is plugged in; battery is charging. Flashes indicate current percentage of battery charge.
1 flash: 0–25% charged
2 flashes: 25–50% charged
3 flashes: 50–75% charged
4 flashes: 75–99% charged
Solid light: 100% charged
Slow (long pulse) flashing green indicator with double tone – Vehicle is plugged in;
battery charging is delayed
Solid green indicator – Vehicle is plugged in; battery is fully charged
Solid yellow indicator – Vehicle is plugged in; not charging
No light – Vehicle is not plugged in, OR there is an issue with the charger or\
outlet
No light and repetitive tones – Issue with the charge cord connection
See Driving and Operating in your Owner’s Manual.
Page 13 of 16
13
CHARGING
START CHARGING
The provided 120 volt portable charge cord is located in the driver-side storage com-partment in the cargo area.
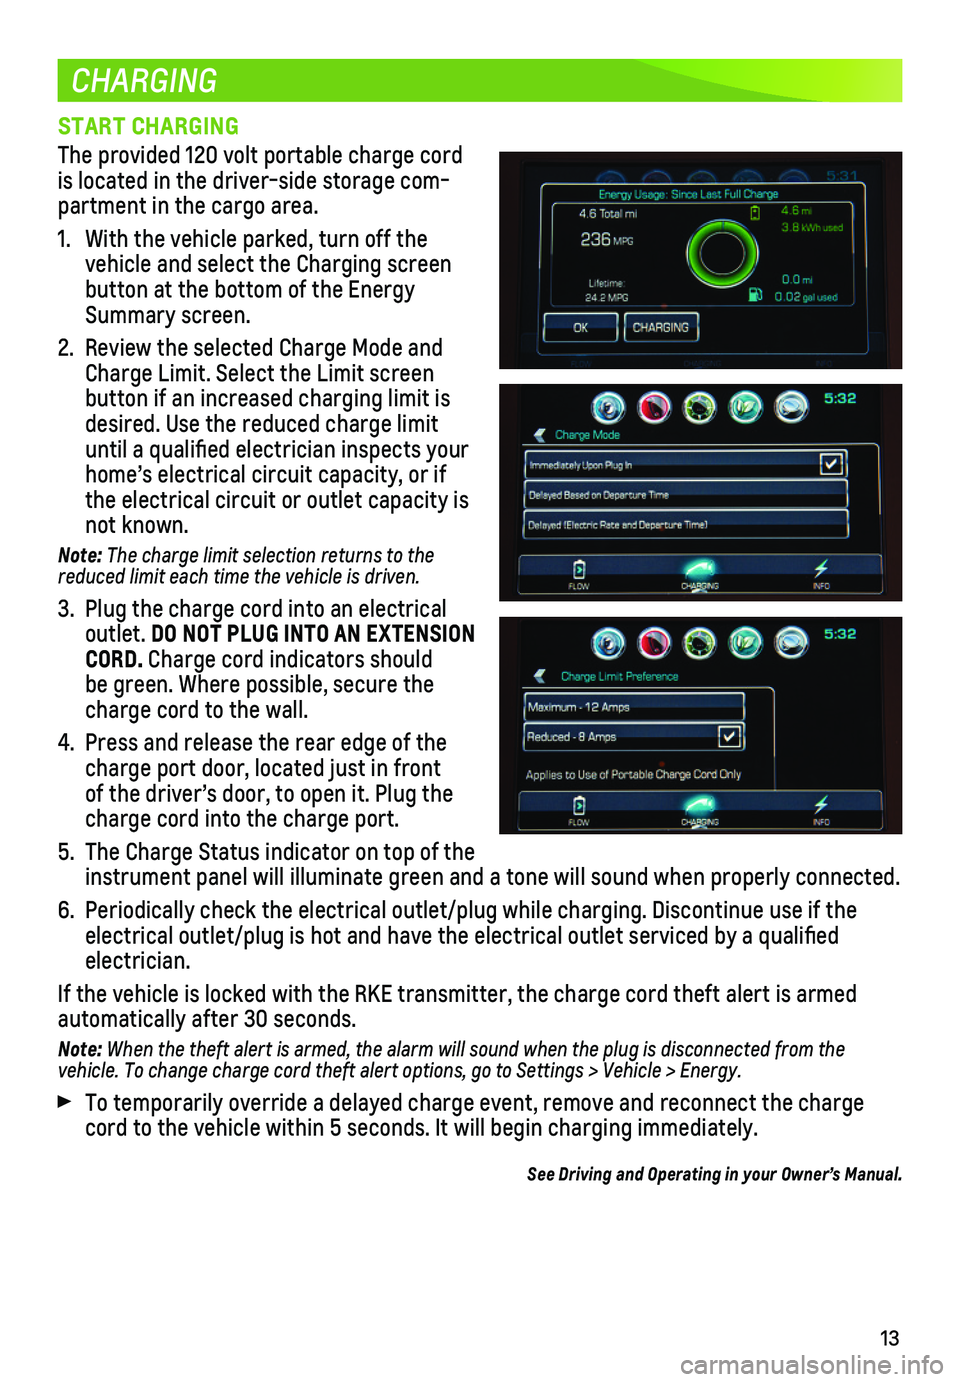
1. With the vehicle parked, turn off the vehicle and select the Charging screen button at the bottom of the Energy Summary screen.
2. Review the selected Charge Mode and Charge Limit. Select the Limit screen button if an increased charging limit is desired. Use the reduced charge limit until a qualified electrician inspects your home’s electrical circuit capacity, or if the electrical circuit or outlet capacity is not known.
Note: The charge limit selection returns to the reduced limit each time the vehicle is driven.
3. Plug the charge cord into an electrical outlet. DO NOT PLUG INTO AN EXTENSION CORD. Charge cord indicators should be green. Where possible, secure the charge cord to the wall.
4. Press and release the rear edge of the charge port door, located just in front of the driver’s door, to open it. Plug the charge cord into the charge port.
5. The Charge Status indicator on top of the instrument panel will illuminate green and a tone will sound when proper\
ly connected.
6. Periodically check the electrical outlet/plug while charging. Discontinu\
e use if the electrical outlet/plug is hot and have the electrical outlet serviced by\
a qualified electrician.
If the vehicle is locked with the RKE transmitter, the charge cord theft\
alert is armed
automatically after 30 seconds.
Note: When the theft alert is armed, the alarm will sound when the plug is disconnected from the vehicle. To change charge cord theft alert options, go to Settings > Vehicle > Energy.
To temporarily override a delayed charge event, remove and reconnect the\
charge cord to the vehicle within 5 seconds. It will begin charging immediately\
.
See Driving and Operating in your Owner’s Manual.
Page 14 of 16
14
CHARGING
END CHARGING
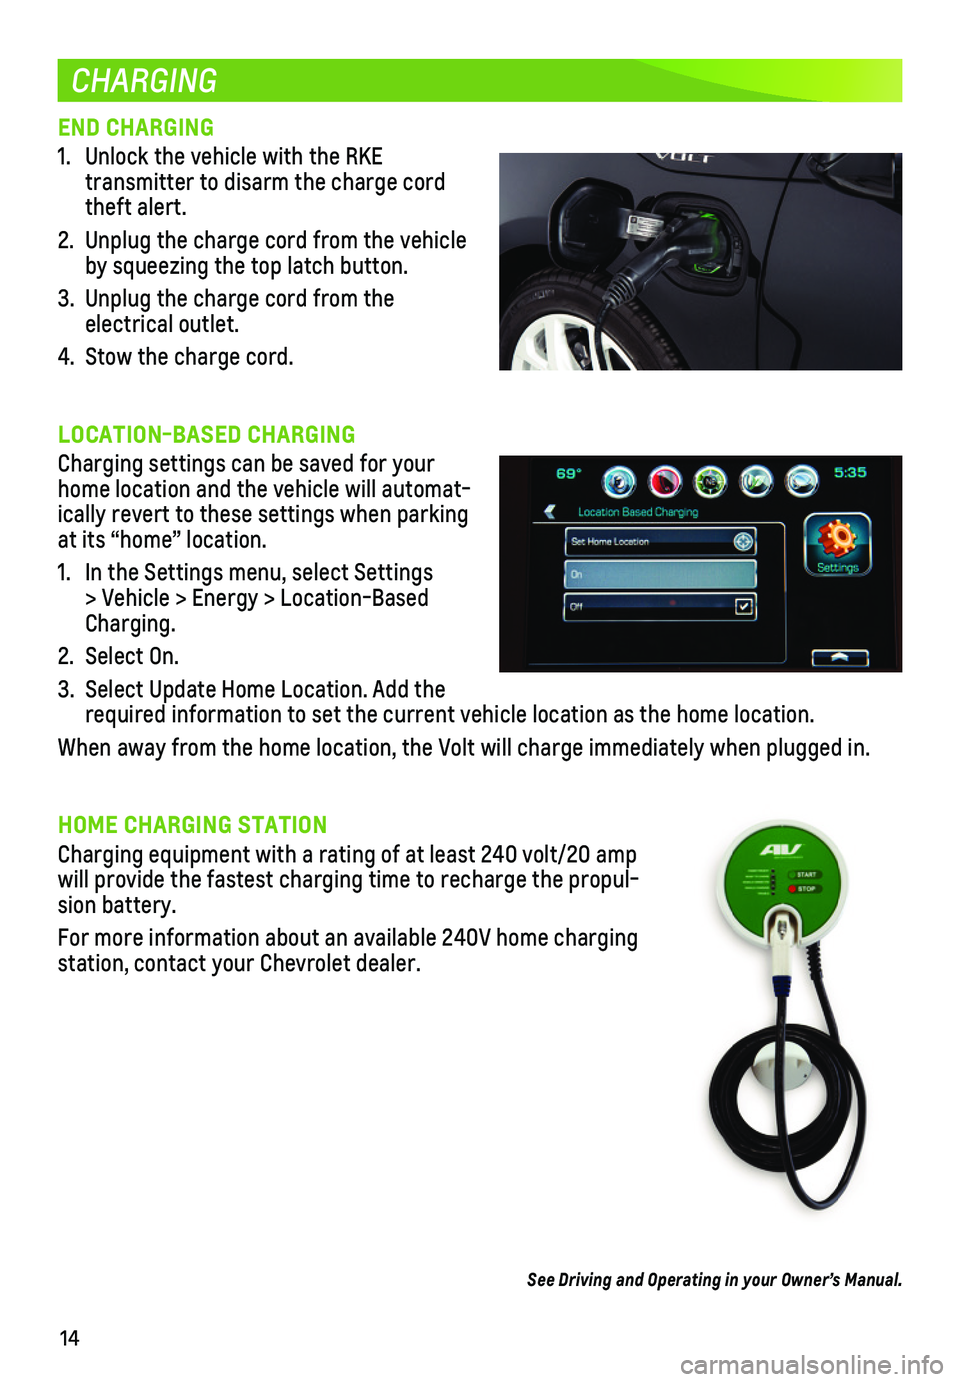
1. Unlock the vehicle with the RKE
transmitter to disarm the charge cord theft alert.
2. Unplug the charge cord from the vehicle by squeezing the top latch button.
3. Unplug the charge cord from the electrical outlet.
4. Stow the charge cord.
LOCATION-BASED CHARGING
Charging settings can be saved for your home location and the vehicle will automat-ically revert to these settings when parking at its “home” location.
1. In the Settings menu, select Settings > Vehicle > Energy > Location-Based Charging.
2. Select On.
3. Select Update Home Location. Add the required information to set the current vehicle location as the home loc\
ation.
When away from the home location, the Volt will charge immediately when \
plugged in.
HOME CHARGING STATION
Charging equipment with a rating of at least 240 volt/20 amp will provide the fastest charging time to recharge the propul-sion battery.
For more information about an available 240V home charging station, contact your Chevrolet dealer.
See Driving and Operating in your Owner’s Manual.
Page 15 of 16
15
FUELING
PARKING
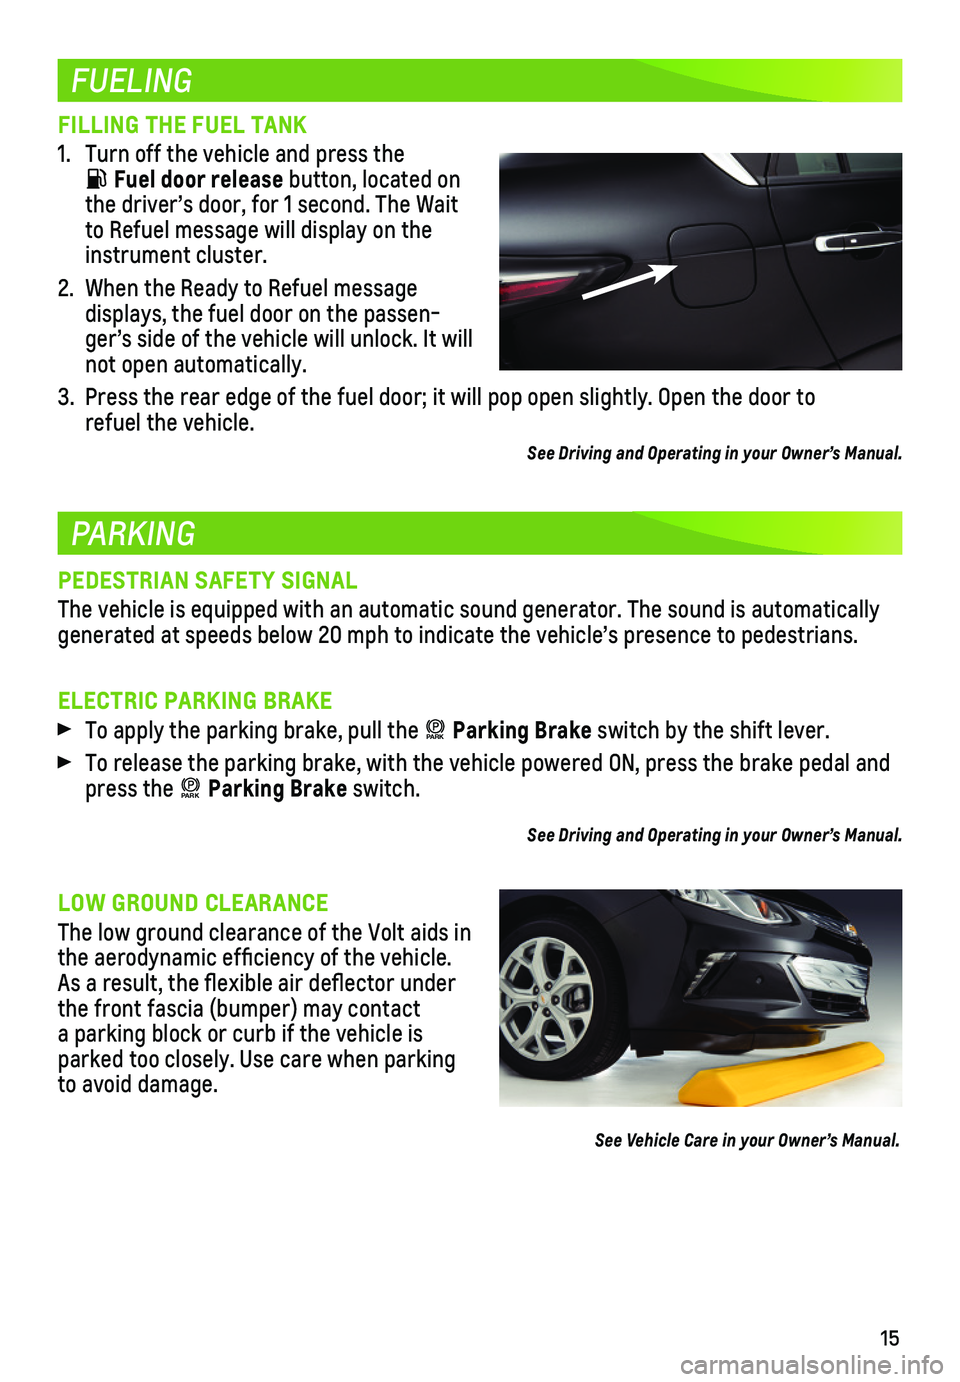
FILLING THE FUEL TANK
1. Turn off the vehicle and press the
Fuel door release button, located on the driver’s door, for 1 second. The Wait to Refuel message will display on the instrument cluster.
2. When the Ready to Refuel message
displays, the fuel door on the passen-ger’s side of the vehicle will unlock. It will not open automatically.
3. Press the rear edge of the fuel door; it will pop open slightly. Open th\
e door to refuel the vehicle.
See Driving and Operating in your Owner’s Manual.
PEDESTRIAN SAFETY SIGNAL
The vehicle is equipped with an automatic sound generator. The sound is \
automatically generated at speeds below 20 mph to indicate the vehicle’s presence t\
o pedestrians.
ELECTRIC PARKING BRAKE
To apply the parking brake, pull the PARK Parking Brake switch by the shift lever.
To release the parking brake, with the vehicle powered ON, press the bra\
ke pedal and press the PARK Parking Brake switch.
See Driving and Operating in your Owner’s Manual.
LOW GROUND CLEARANCE
The low ground clearance of the Volt aids in the aerodynamic efficiency of the vehicle. As a result, the flexible air deflector under the front fascia (bumper) may contact a parking block or curb if the vehicle is parked too closely. Use care when parking to avoid damage.
See Vehicle Care in your Owner’s Manual.
Page 16 of 16
16
ROADSIDE ASSISTANCE
MYCHEVROLET MOBILE APP
MYVOLT.COM OWNER SITE
1-888-811-1926 \
TTY Users: 1-888-889-2438
As the owner of a new Chevrolet, you are automatically enrolled in the C\
hevrolet Roadside Assistance program for 5 years/60,000 miles, whichever occurs fi\
rst, at no expense to you. Chevrolet’s Roadside Assistance toll-free number is s\
taffed by a team of trained advisors who are available 24 hours a day, 365 days a year, to contact a\
service provider for light services (fuel delivery, jump-starts, flat tire and lock-outs) or ma\
ke arrangements to tow your vehicle to the nearest Volt Authorized Chevrole\
t dealer.
Roadside Assistance and OnStar®
If you require roadside service and have a current OnStar service plan, \
press the OnStar
button and the vehicle will send your current GPS location to an OnStar \
Advisor who will speak to you, assess your problem, contact Roadside Assistance and relay\
your exact
location so you will get the help you need.
!23380519=A!
The myChevrolet mobile app connects owners to a variety of vehicle infor\
mation and
services, such as a searchable Owner’s Manual and Roadside Assistance\
.
The myChevrolet mobile app also enables uers to send Remote Keyless Entr\
y commands, check the current battery charge limit and charge mode, and receive char\
ging notifica-tions from your Volt.
Download the mobile app from your compatible mobile device’s app stor\
e.
MyVolt.com is a complimentary resource for Volt owners powered by OnStar. Owners can communicate with their vehicle online to check pertinent vehicle inf\
ormation and perform a number of remote commands. Also available are online service r\
eminders, vehicle maintenance tips, an online Owner’s Manual and more.
To create your OnStar username and password:
1. Visit myvolt.com.
2. Click the “Sign Up” link.
3. Enter your OnStar account number and ZIP code (available from your OnStar confirma-tion email, your dealership, or by calling 1-888-4-ONSTAR).
4. When prompted, select “Enable Remote Commands” to ensure all features within the mobile app are available.
Certain restrictions, precautions and safety procedures apply to your ve\
hicle. Please read your Owner’s Manual for complete instructions. All information contained in this guide is ba\
sed on the latest information available at the time of printing and is subject to change without notice. Copyright \
2017 General Motors. All rights reserved.
We recommend always using ACDelco or genuine GM service parts.
23380519 A