headlight CHRYSLER 200 2015 2.G User Guide
[x] Cancel search | Manufacturer: CHRYSLER, Model Year: 2015, Model line: 200, Model: CHRYSLER 200 2015 2.GPages: 698, PDF Size: 5.12 MB
Page 167 of 698
Multifunction Lever
The multifunction lever controls the operation of the turn
signals, headlight beam selection and passing lights. The
multifunction lever is located on the left side of the
steering column.
Turn Signals
Move the multifunction lever up or down and the arrows
on each side of the instrument cluster flash to show
proper operation of the front and rear turn signal lights.
NOTE:
•
If either light remains on and does not flash, or there is a
very fast flash rate, check for a defective outside light
bulb. If an indicator fails to light when the lever is moved,
it would suggest that the indicator bulb is defective.
•A “Turn Signal On” message will appear in the EVIC/DID
and a continuous chime will sound if the vehicle is driven
more than 1 mile (1.6 km) with either turn signal on.
• When the Daytime Running Lights are on and a turn
signal is activated, the Daytime Running Lamp will
turn off on the side of the vehicle in which the turn
signal is flashing. The Daytime Running Lamp will
turn back on when the turn signal is turned off.
Multifunction Lever
3
UNDERSTANDING THE FEATURES OF YOUR VEHICLE 165
Page 168 of 698
Lane Change Assist
Tap the lever up or down once, without moving beyond
the detent, and the turn signal (right or left) will flash
three times then automatically turn off.
High/Low Beam Switch
Push the multifunction lever away from you to switch
the headlights to high beam. Pull the multifunction lever
toward you to switch the headlights back to low beam.
Flash-To-Pass
You can signal another vehicle with your headlights by
lightly pulling the multifunction lever toward you. This
will turn on the high beams headlights until the lever is
released.
Front Map/Reading Lights
The front map/reading lights are mounted in the over-
head console.
Front Map/Reading Lights — With Center Buttons
There are two map/reading light buttons located in the
center of the overhead console that allow the lights to
operate independently.
Press the button once to turn the light on.
To turn the light off, press the button a second time.
166 UNDERSTANDING THE FEATURES OF YOUR VEHICLE
Page 170 of 698

Interior Lights
The interior lights come on when a door is opened.
To protect the battery, the interior lights will turn off
automatically 10 minutes after the ignition is moved to
the LOCK position. This will occur if the interior lights
were switched on manually or are on because a door is
open. This includes the glove box light, but not the trunk
light. To restore interior light operation, either place the
ignition in the ON/RUN position or cycle the light
switch.
Instrument Panel Dimmer Control
The instrument panel dimmer control is part of the
headlight switch and is located on the drivers side of the
instrument panel.With the parking lights or headlights on, rotating the
instrument panel dimmer control upward will increase
the brightness of the instrument panel lights.
Instrument Panel Dimmer
168 UNDERSTANDING THE FEATURES OF YOUR VEHICLE
Page 171 of 698
Ambient Light Control — If Equipped
Rotate the ambient dimmer control upward or down-
ward to increase or decrease the brightness of the ambi-
ent light located in the overhead console, door handle
lights, under I/P lights, door map pocket lights, and
cubby bin lights.
Dome Light Position
Rotate the instrument panel dimmer control completely
upward to the second detent to turn on the interior lights.
The interior lights will remain on when the instrument
panel dimmer control is in this position.
Interior Light Defeat (OFF)
Rotate the instrument panel dimmer control to the ex-
treme bottom OFF position. The interior lights will
remain off when the doors are open.
Parade Mode (Daytime Brightness Feature)
Rotate the instrument panel dimmer control upward to
the first detent. This feature brightens all text displays
such as the odometer, EVIC/DID, and radio when the
position lights or headlights are on.
Ambient Light/Door Handle Light Dimmer
3
UNDERSTANDING THE FEATURES OF YOUR VEHICLE 169
Page 322 of 698
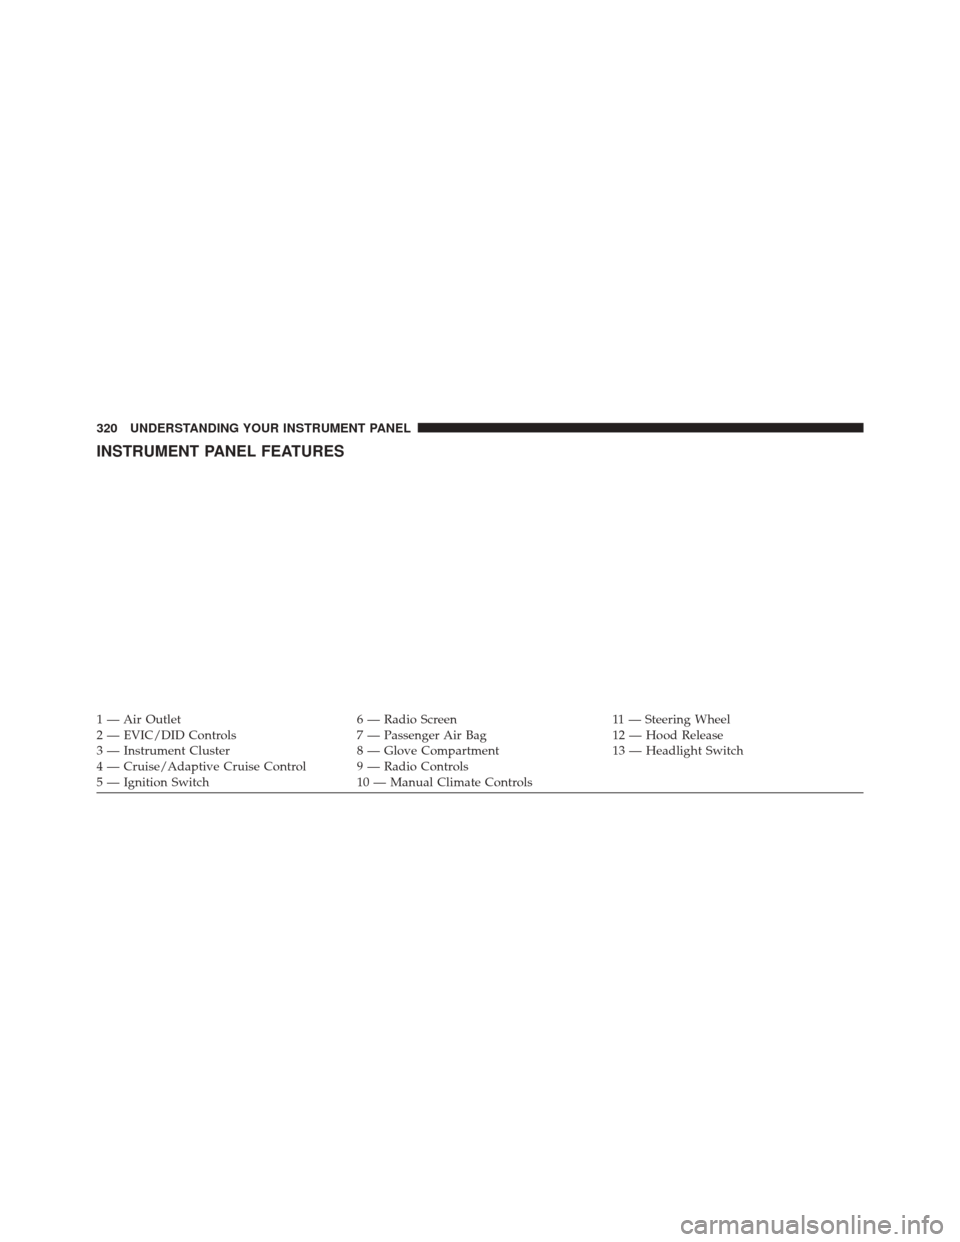
INSTRUMENT PANEL FEATURES
1 — Air Outlet6 — Radio Screen11 — Steering Wheel
2 — EVIC/DID Controls 7 — Passenger Air Bag12 — Hood Release
3 — Instrument Cluster 8 — Glove Compartment13 — Headlight Switch
4 — Cruise/Adaptive Cruise Control 9 — Radio Controls
5 — Ignition Switch 10 — Manual Climate Controls
320 UNDERSTANDING YOUR INSTRUMENT PANEL
Page 331 of 698
14. Fuel Filler Door LocationThe fuel pump symbol points to the side of the
vehicle where the fuel door is located.
15. Fuel Gauge
The pointer shows the level of fuel in the fuel tank when
the ignition switch is in the ON/RUN position.
16. Gear Selector Status (PRNDL/S) •P = Park
• R = Reverse
• N = Neutral
• D = Drive
• L = Low – If Equipped
• S = Sport – If Equipped
The shift status “P,R,N,D,L/,S” are displayed indicating
the shifter position. Refer to “Starting And Operating”. 17. Engine Temperature
When the engine temperature gets too high, the
temperature icon will change color from light blue
to red.
18. High Beam Indicator
Indicates that headlights are on high beam.
19. Malfunction Indicator Light (MIL) The Malfunction Indicator Light (MIL) is part of
an onboard diagnostic system called OBD II that
monitors engine and automatic transmission con-
trol systems. The light will illuminate when the key is in
the ON/RUN position before engine start. If the bulb
does not come on when turning the key from OFF to
ON/RUN, have the condition checked promptly.
Certain conditions, such as a loose or missing gas cap,
poor fuel quality, etc., may illuminate the light after
4
UNDERSTANDING YOUR INSTRUMENT PANEL 329
Page 333 of 698
22. Vehicle Security AlarmThis light will flash rapidly for approximately
15 seconds when the vehicle theft alarm is
arming. The light will flash at a slower speed
continuously after the alarm is set. The security
light will also come on for about three seconds when the
ignition is first turned on.
23. Tachometer
Indicates the engine speed in revolutions per minute
(RPM x 1000).
24. Park/Headlight ON Indicator — If Equipped
This indicator will illuminate when the park
lights or headlights are turned on.
25. EVIC White Telltales — If Equipped 26. Temperature Gauge
The temperature gauge shows engine coolant tempera-
ture. Any reading within the normal range indicates that
the engine cooling system is operating satisfactorily.
The gauge pointer will likely indicate a higher tempera-
ture when driving in hot weather, up mountain grades,
or when towing a trailer. It should not be allowed to
exceed the upper limits of the normal operating range.
CAUTION!
Driving with a hot engine cooling system could
damage your vehicle. If the temperature gauge reads
“H” pull over and stop the vehicle. Idle the vehicle
with the air conditioner turned off until the pointer
drops back into the normal range. If the pointer
remains on the “H” and you hear continuous chimes,
turn the engine off immediately and call an autho-
rized dealer for service.
4
UNDERSTANDING YOUR INSTRUMENT PANEL 331
Page 355 of 698
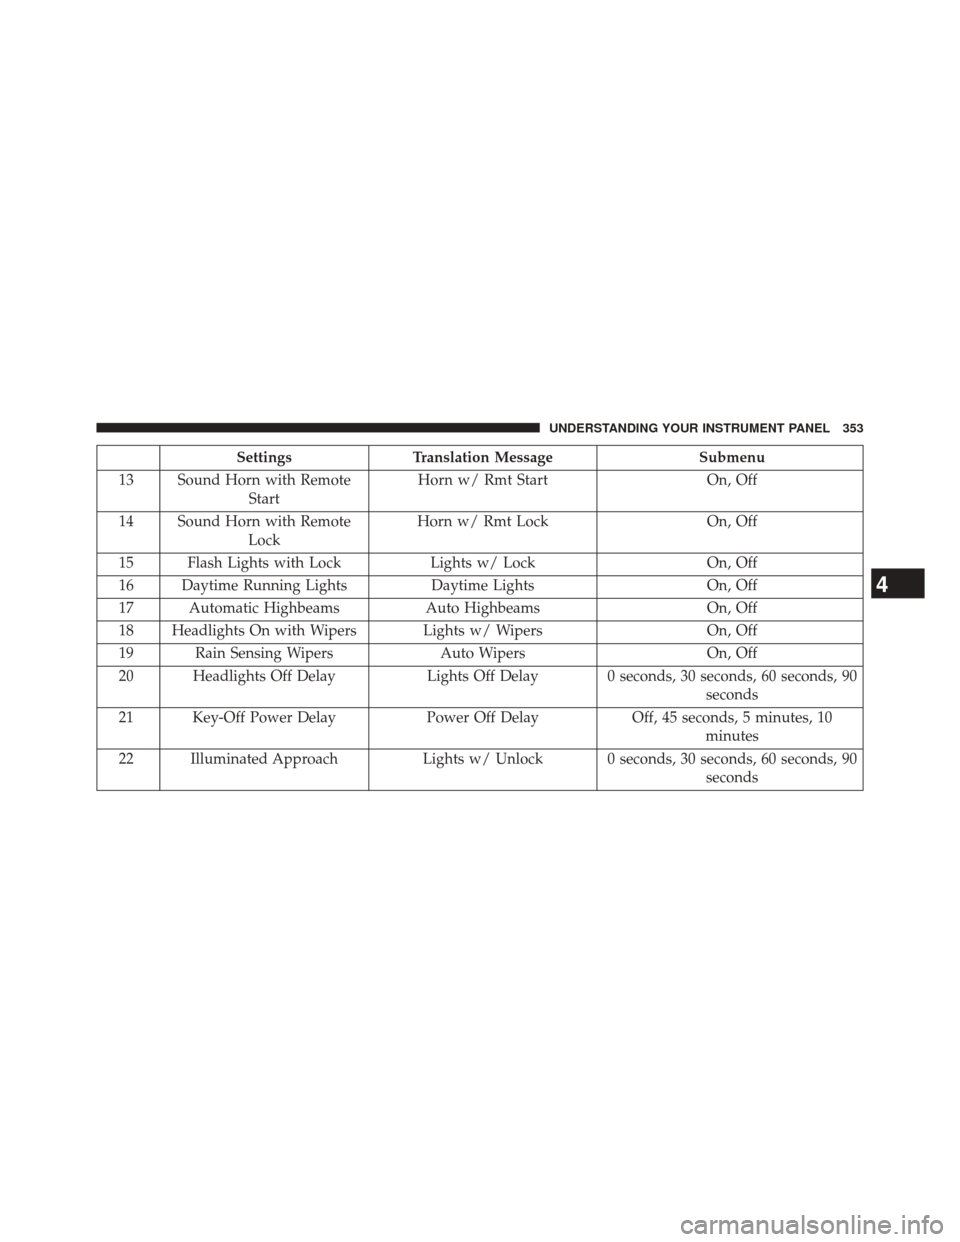
SettingsTranslation Message Submenu
13 Sound Horn with Remote Start Horn w/ Rmt Start
On, Off
14 Sound Horn with Remote Lock Horn w/ Rmt Lock
On, Off
15 Flash Lights with Lock Lights w/ LockOn, Off
16 Daytime Running Lights Daytime LightsOn, Off
17 Automatic Highbeams Auto HighbeamsOn, Off
18 Headlights On with Wipers Lights w/ Wipers On, Off
19 Rain Sensing Wipers Auto WipersOn, Off
20 Headlights Off Delay Lights Off Delay 0 seconds, 30 seconds, 60 seconds, 90
seconds
21 Key-Off Power Delay Power Off DelayOff, 45 seconds, 5 minutes, 10
minutes
22 Illuminated Approach Lights w/ Unlock 0 seconds, 30 seconds, 60 seconds, 90
seconds
4
UNDERSTANDING YOUR INSTRUMENT PANEL 353
Page 382 of 698
equipped), Engine Off Options, Audio, Phone/
Bluetooth®, SiriusXM Setup, Restore Settings, Clear Per-
sonal Data (if equipped).
NOTE:Only one category may be selected at a time.
To adjust the setting of a programmable feature, press the
desired setting option. Once in the desired setting option,
press and release the preferred setting until a check-mark
appears next to the setting, showing that the setting has
been selected. Once the setting is complete, either press
the back arrow button on the touchscreen or the Back
button on the faceplate to return to the previous menu or
press the “X” button on the touchscreen to close out of
the settings screen. Pressing the Up or Down Arrow
buttons on the right side of the screen will allow you to
toggle up or down through the list of available settings.Display
After pressing the “Display” button on the touchscreen
the following settings will be available:
• Display Mode
This feature allows you to select one of the auto display
settings. To change Mode status, press and release the
Auto or Manual button on the touchscreen. Then press
the back arrow button on the touchscreen or push the
back button on the faceplate.
• Display Brightness With Headlights On
This feature allows you to select the display brightness
when the headlights are on. Adjust the brightness with
the + and – setting buttons on the touchscreen. Then
press the back arrow button on the touchscreen, or push
the back button on the faceplate.
380 UNDERSTANDING YOUR INSTRUMENT PANEL
Page 383 of 698
•Display Brightness With the Headlights Off
This feature allows you to select the display brightness
when the headlights are off. Adjust the brightness with
the + and – setting buttons on the touchscreen. Then
press the back arrow button on the touchscreen, or push
the back button on the faceplate.
• Set Language
This feature allows you to select one of the languages for
all display nomenclature, including the trip functions
and the navigation system (if equipped). Press the “Set
Language” button on the touchscreen and then press the
desired language button on the touchscreen until a
check-mark appears next to the language, showing that
setting has been selected. Press the back arrow button on
the touchscreen to return to the previous menu, or push
the back button on the faceplate. •
Units
This feature allows you to select US or Metric units of
measure in the EVIC/DID, odometer, and navigation
system (if equipped). Press “US” or “Metric” until a
check-mark appears next to the setting, showing that
setting has been selected. Press the back arrow button on
the touchscreen to return to the previous menu, or push
the back button on the faceplate.
• Touchscreen Beep
This feature allows you to turn on or shut off the sound
heard when a touchscreen button is pressed. Press the
“Touchscreen Beep” button on the touchscreen until a
check-mark appears next to the setting, showing that
setting has been selected. Press the back arrow button on
the touchscreen to return to the previous menu, or push
the back button on the faceplate.
4
UNDERSTANDING YOUR INSTRUMENT PANEL 381