buttons CHRYSLER 300 LX 2005 Owners Manual
[x] Cancel search | Manufacturer: CHRYSLER, Model Year: 2005, Model line: 300 LX, Model: CHRYSLER 300 LX 2005Pages: 374, PDF Size: 7.09 MB
Page 20 of 374

To activate the system, open the rear door and move the
child lock control, located near the door's rear latch, to
the ON position.
When the child lock system is engaged the door can be
opened only by using the outside door handle even
though the inside door lock is in the unlocked position.
REMOTE KEYLESS ENTRY
This system allows you to lock or unlock the doors, open
the trunk, or activate the panic alarm from distances up
to about 23 feet (7 meters) using a hand held radio
transmitter. The transmitter need not be pointed at the
vehicle to activate the system.
NOTE:If the key is in the ignition switch, then all
buttons on that transmitter will be disabled. The buttons
on the remaining transmitters will work. If the vehicle is
shifted out of PARK, all the transmitter buttons are
disabled for all keys.
20 THINGS TO KNOW BEFORE STARTING YOUR VEHICLE
ProCarManuals.com
Page 21 of 374

To unlock the doors:
Press and release the UNLOCK button on the transmitter
once to unlock the driver's door, or twice to unlock all
doors. The turn signal lights will flash twice to acknowl-
edge the unlock signal. The illuminated entry system also
turns on.
The headlights will also activate and remain on for 90
seconds (programmable) when the doors are unlocked
using the remote keyless entry transmitter. The time for
this feature is programmable on vehicles equipped with
the Electronic Vehicle Information Center (EVIC). Refer
to ªTurn Headlamps on with Remote Key Unlockº under
ªPersonal Settingsº in the Electronic Vehicle Information
Center (EVIC) section of this manual for details.
NOTE:The system can also be programmed to unlock
all doors on the first press of the UNLOCK button. Refer
to ªRemote Unlock Driver's Door 1stº under ªPersonal
Settingsº in the Electronic Vehicle Information Center
(EVIC) section of this manual, or simply follow these
steps:
1. Press the UNLOCK button for 4 to 10 seconds.2. While the UNLOCK button is pressed, (after 4 sec-
onds) press the LOCK button. Release both buttons.
The ªRemote Unlock Driver's Door 1stº feature can be
reactivated by repeating this procedure.
To lock the doors:
Press and release the LOCK button on the transmitter to
lock all doors. The turn signal lights will flash once to
acknowledge the lock signal. The horn will chirp once to
acknowledge the signal. If desired, the ªSound Horn On
Lockº feature can be turned on and off by referring to
Personal Settings in the ªElectronic Vehicle Information
Center (EVIC)º section of this manual, or by following
these steps:
1. Press the LOCK button for 4 to 10 seconds.
2. While the LOCK button is pressed (after 4 seconds),
press the PANIC button. Release both buttons.
The ªSound Horn On Lockº feature can be reactivated by
repeating this procedure.
THINGS TO KNOW BEFORE STARTING YOUR VEHICLE 21
2
ProCarManuals.com
Page 22 of 374
To unlock the trunk:
Press the trunk button on the transmitter two times to
unlatch the trunk.
NOTE:The transmitter can be programmed to unlatch
the trunk by pressing the trunk button only one time by
performing the following procedure:
1. Press and hold the Unlock button on the transmit-
ter.
2. Continue to hold the Unlock button, wait at least 4
but no longer than 10 seconds, then press the trunk
button.
3. Release both buttons.
Using The Panic Alarm:
To turn the panic alarm feature ON or OFF, press and
hold the PANIC button on the transmitter for at least one
second and release. When the panic alarm is on, the
headlights and park lights will flash, the horn will pulse
on and off and the interior lights will turn on.The panic alarm will stay on for 3 minutes unless you
turn it off by pressing the PANIC button a second time or
if the vehicle speed is 15 mph (24 km/h) or greater.
NOTE:The interior lights will turn off when the
ignition is switched to the ACC or ON position after the
panic alarm is activated. However, the exterior lights and
horn will remain on.
NOTE:When you turn off the panic alarm by pressing
the PANIC button a second time, you may have to be
closer to the vehicle due to the radio frequency noises of
the system.
To Turn Off ªFlash Lights On Lock/Unlockº
NOTE:
The ªFlash Lights On Lock/Unlockº feature can
be turned on and off by referring to ªPersonal Settingsº
in the Electronic Vehicle Information Center (EVIC) sec-
tion of this manual, or by following these steps:
1. Press the LOCK button for 4 to 10 seconds.
2. While the LOCK button is pressed, (after 4 seconds)
press the UNLOCK button. Release both buttons.
22 THINGS TO KNOW BEFORE STARTING YOUR VEHICLE
ProCarManuals.com
Page 23 of 374

The ªFlash Lights On Lock/Unlockº feature can be
reactivated by repeating this procedure.
General Information
This device complies with part 15 of the FCC rules and
RSS 210 of Industry Canada. Operation is subject to the
following conditions:
²This device may not cause harmful interference.
²This device must accept any interference received,
including interference that may cause undesired op-
eration.
If your Remote Keyless Entry transmitter fails to operate
from a normal distance, check for these two conditions.
1. A weak battery in the transmitter. The expected life of
the battery is a minimum of three years.
2. Closeness to a radio transmitter such as a radio station
tower, airport transmitter, and some mobile or CB radios.
Transmitter Battery Service
The recommended replacement battery is one CR2032
battery.
NOTE:Do not touch the battery terminals that are on
the back housing or the printed circuit board.
1. With the transmitter buttons facing down, remove the
small screw, and separate the two halves of the transmit-
ter. Make sure not to damage the rubber gasket during
removal.
THINGS TO KNOW BEFORE STARTING YOUR VEHICLE 23
2
ProCarManuals.com
Page 24 of 374
2. Remove and replace the battery. Avoid touching the
new battery with your fingers. Skin oils may cause
battery deterioration. If you touch a battery, clean it with
rubbing alcohol.
3. To reassemble the transmitter case, join the two halves
of the case together. Install and tighten the screw until
snug. Make sure there is an even ªgapº between the two
halves. Test transmitter operation.
VEHICLE THEFT ALARM Ð IF EQUIPPED
This system monitors the vehicle doors and ignition
switch for unauthorized entry or operation. When the
alarm is activated, the system provides both audible and
visual signals. The horn will pulse, headlights/park
lights will flash, the Vehicle Theft Alarm/Immobilizer
light, located on the instrument panel below the Elec-
tronic Vehicle Information Center buttons will flash, and
the vehicle will not start. If the alarm is triggered and no
action is taken to disarm it, the system will turn off the
horn after three minutes and after 15 minutes of light
only operation the system will then rearm itself.To arm the system:Remove the key from the ignition
switch and either:
1. Press a power door lock switch while the driver's or
passenger's door is open.
2. Press the LOCK button on the keyless entry transmit-
ter.
After the last door is closed, or if all doors are closed, the
system will arm itself in about 16 seconds. During that
time, the Vehicle Theft Alarm/Immobilizer light will
flash. If it does not illuminate, the system is not arming.
If you open a door during this arming period, the system
will cancel the arming process. You must repeat one of
the previously described arming sequences to rearm the
system.
To disarm the system:Press the UNLOCK button on the
keyless entry transmitter. Also, using a valid sentry key
and moving the ignition switch to the ON/START posi-
tion will disarm the system. If something has triggered
the system in your absence, the horn will sound three
times when you disarm the system. Check the vehicle for
tampering.
24 THINGS TO KNOW BEFORE STARTING YOUR VEHICLE
ProCarManuals.com
Page 63 of 374
mWindshield Wipers And Washers..........106
NWindshield Washers...................106
NRain Sensing WipersÐIf Equipped.........107
NMist Feature.........................107
NHeadlamps On With Wipers
(Available With Auto Headlights Only)......107
NWindshield Wiper Operation.............108
NIntermittent Wiper System...............108
NAdding Washer Fluid..................108
mTilt/Telescoping Steering Column..........109
mPower Tilt/Telescoping Steering Column Ð
If Equipped
..........................109
mTraction Control System (Tcs) Ð If Equipped..110
mBrake Assist System (BAS)Ð If Equipped....112
mElectronic Stability Program (ESP)Ð
If Equipped
..........................113
NSynchronizing ESP....................115
mElectronic Speed Control.................115
NTo Activate..........................116
NTo Set At A Desired Speed...............116
NTo Deactivate........................116
NTo Resume Speed.....................116
NTo Vary The Speed Setting...............116
NTo Accelerate For Passing...............117
mOverhead Console Ð If Equipped..........118
NCourtesy/Reading Lights................118
NSunglasses Storage....................118
mGarage Door Opener Ð If Equipped........119
NProgramming Homelink................119
NCanadian Programming/Gate Programming . . 122
NUsing Homelink......................123
NErasing Homelink Buttons...............123
NReprogramming a Single Homelink Button . . . 123
UNDERSTANDING THE FEATURES OF YOUR VEHICLE 63
3
ProCarManuals.com
Page 69 of 374
The UConnectŸ phonebook enables you to store up to 32
names and four numbers per name. This system is driven
through your BluetoothŸ Hands-Free profile cellular
phone. UConnectŸ features BluetoothŸ technology - the
global standard that enables different electronic devices
to connect to each other without wires or a docking
station, so UConnect works no matter where you stow
your cellular phone (be it your purse, pocket, or brief-
case), as long as your phone is turned on and has been
paired to the vehicle's UConnectŸ system. The UCon-
nectŸ system allows up to seven cellular phones to be
linked to system. Only one linked (or paired) cellular
phone can be used with the system at a time. The system
is available in English, Spanish, or French languages (as
equipped).
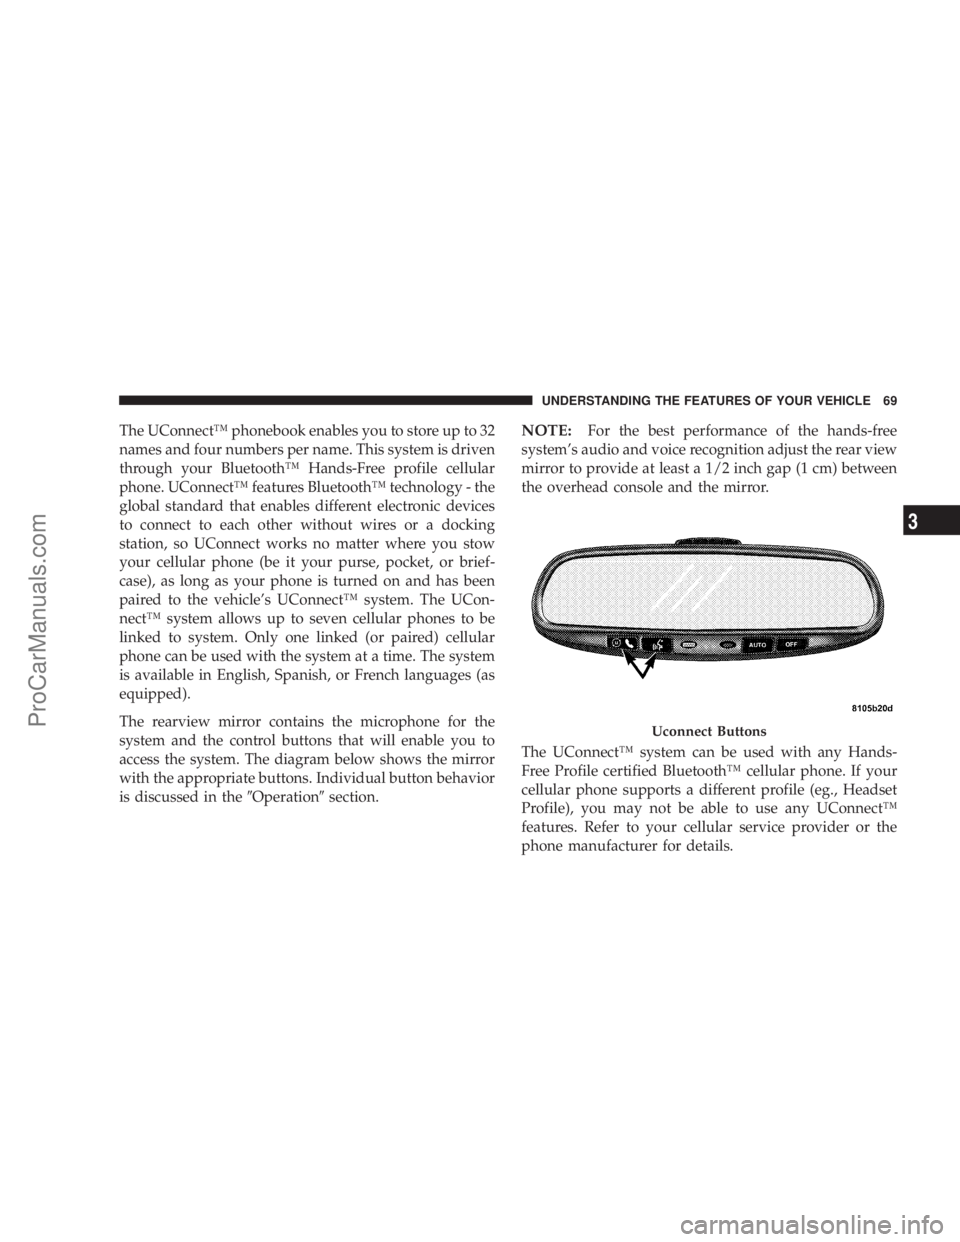
The rearview mirror contains the microphone for the
system and the control buttons that will enable you to
access the system. The diagram below shows the mirror
with the appropriate buttons. Individual button behavior
is discussed in the9Operation9section.NOTE:For the best performance of the hands-free
system's audio and voice recognition adjust the rear view
mirror to provide at least a 1/2 inch gap (1 cm) between
the overhead console and the mirror.
The UConnectŸ system can be used with any Hands-
Free Profile certified BluetoothŸ cellular phone. If your
cellular phone supports a different profile (eg., Headset
Profile), you may not be able to use any UConnectŸ
features. Refer to your cellular service provider or the
phone manufacturer for details.
Uconnect Buttons
UNDERSTANDING THE FEATURES OF YOUR VEHICLE 69
3
ProCarManuals.com
Page 84 of 374
Bluetooth Communication Link
Cellular phones have been found to occasionally loose
connection to the UConnectŸ system. When this hap-
pens, the connection can generally be re-established by
switching the phone off/on. Your cell phone is recom-
mended to remain in Bluetooth9on9mode.
Reset
In rare instances, it may be necessary to reset the UCon-
nectŸ system. The reset feature is exercised by pressingand holding the 'UConnectŸ ' and 'Voice Recognition'
buttons simultaneously for 15 seconds. Normally, you do
not need to exercise this feature.
Power-Up
After switching ignition key from LOCK to either ON or
ACC position, or after a reset, you must wait at least five
(5) seconds prior to using the system.
84 UNDERSTANDING THE FEATURES OF YOUR VEHICLE
ProCarManuals.com
Page 98 of 374
ADJUSTABLE PEDALS Ð IF EQUIPPED
This feature allows both the brake and accelerator pedals
to move toward or away from the driver to provide
improved position with the steering wheel. The adjust-
able pedal system is designed to allow a greater range of
driver comfort for steering wheel tilt and seat position.
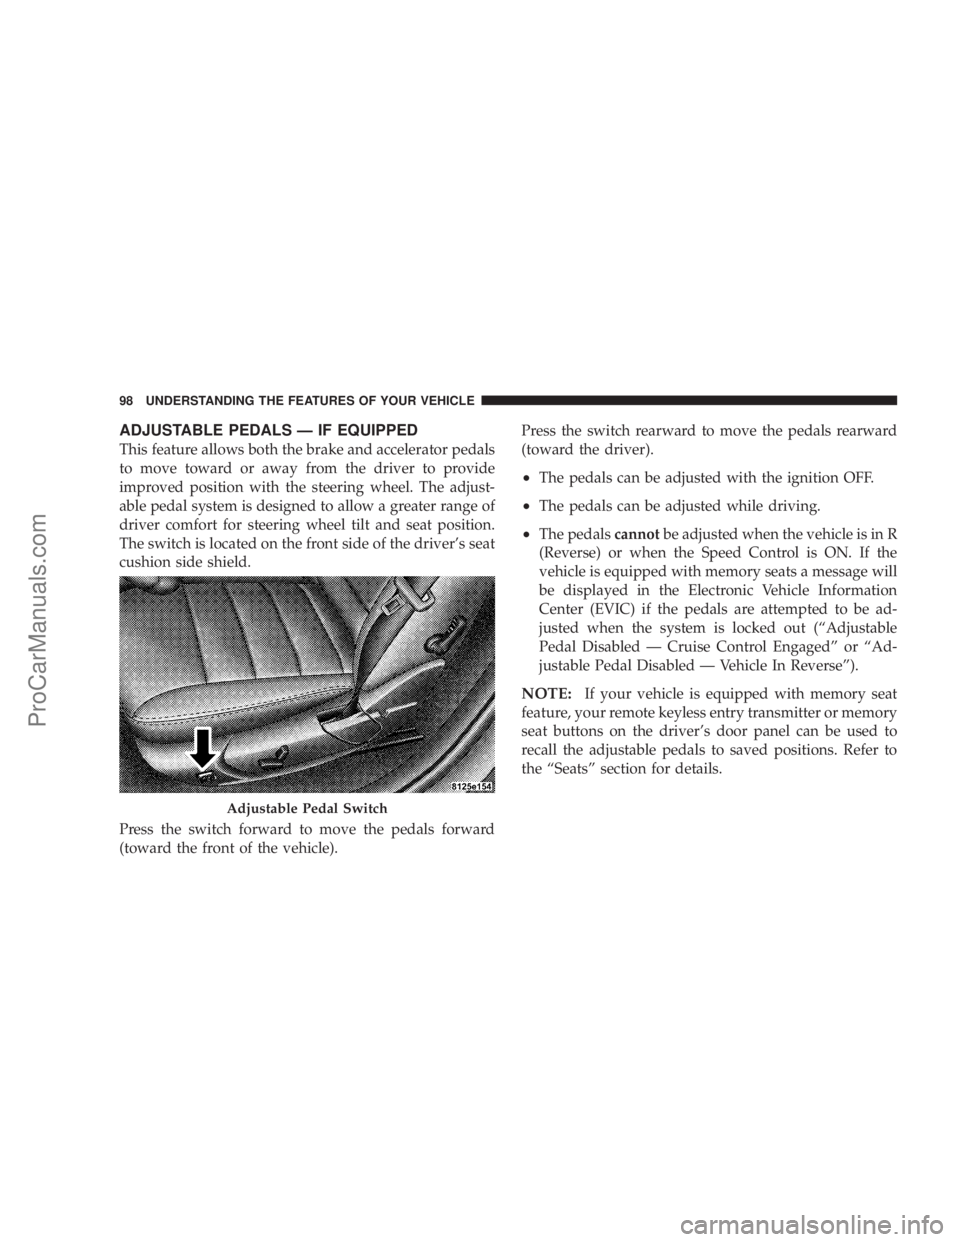
The switch is located on the front side of the driver's seat
cushion side shield.
Press the switch forward to move the pedals forward
(toward the front of the vehicle).Press the switch rearward to move the pedals rearward
(toward the driver).
²The pedals can be adjusted with the ignition OFF.
²The pedals can be adjusted while driving.
²The pedalscannotbe adjusted when the vehicle is in R
(Reverse) or when the Speed Control is ON. If the
vehicle is equipped with memory seats a message will
be displayed in the Electronic Vehicle Information
Center (EVIC) if the pedals are attempted to be ad-
justed when the system is locked out (ªAdjustable
Pedal Disabled Ð Cruise Control Engagedº or ªAd-
justable Pedal Disabled Ð Vehicle In Reverseº).
NOTE:If your vehicle is equipped with memory seat
feature, your remote keyless entry transmitter or memory
seat buttons on the driver's door panel can be used to
recall the adjustable pedals to saved positions. Refer to
the ªSeatsº section for details.
Adjustable Pedal Switch
98 UNDERSTANDING THE FEATURES OF YOUR VEHICLE
ProCarManuals.com
Page 110 of 374

NOTE:Note: If your vehicle is equipped with the
memory seat feature your remote keyless entry transmit-
ter or memory buttons on the driver's door panel can be
used to recall the steering column tilt and telescopic
positions. Refer to the ªSeatsºsection for details.WARNING!
Moving the steering column while the vehicle is
moving is dangerous. Without a stable steering col-
umn you could lose control of the vehicle and have
an accident. Adjust the column only while the ve-
hicle is stopped.
TRACTION CONTROL SYSTEM (TCS) Ð IF
EQUIPPED
WARNING!
TCS cannot prevent the natural laws of physics from
acting on the vehicle, nor can it increase the traction
afforded. The TCS cannot prevent accidents, includ-
ing those resulting from excessive speed in turns, or
hydroplaning. Only a safe, attentive, and skillful
driver can prevent accidents. The capabilities of a
TCS-equipped vehicle must never be exploited in a
reckless or dangerous manner which could jeopar-
dize the user's safety or the safety of others.
Power Tilt/Telescoping Steering
110 UNDERSTANDING THE FEATURES OF YOUR VEHICLE
ProCarManuals.com