CHRYSLER CROSSFIRE 2006 1.G Owners Manual
Manufacturer: CHRYSLER, Model Year: 2006, Model line: CROSSFIRE, Model: CHRYSLER CROSSFIRE 2006 1.GPages: 296, PDF Size: 1.6 MB
Page 241 of 296
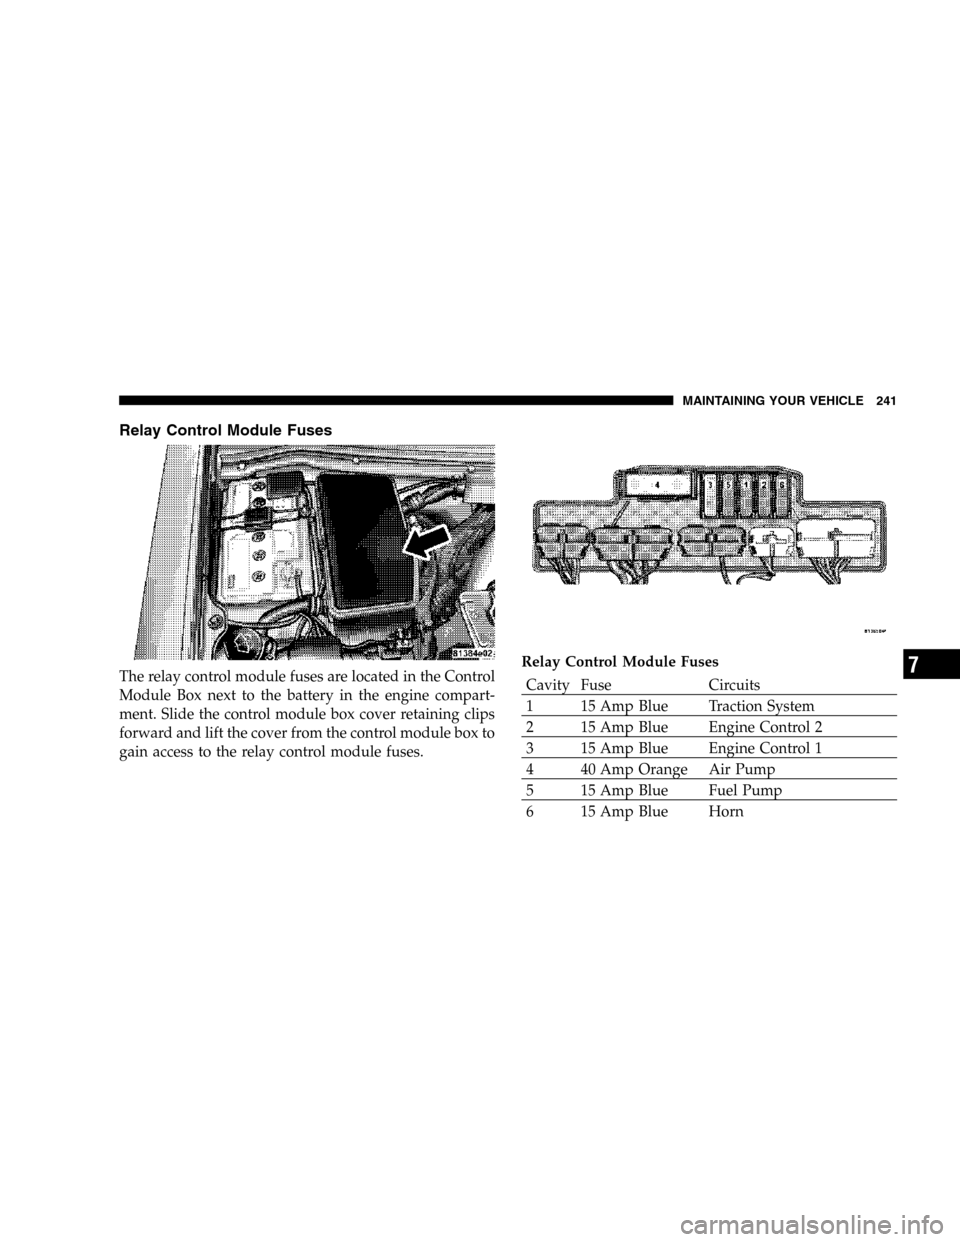
Relay Control Module Fuses
The relay control module fuses are located in the Control
Module Box next to the battery in the engine compart-
ment. Slide the control module box cover retaining clips
forward and lift the cover from the control module box to
gain access to the relay control module fuses.Relay Control Module FusesCavity Fuse Circuits
1 15 Amp Blue Traction System
2 15 Amp Blue Engine Control 2
3 15 Amp Blue Engine Control 1
4 40 Amp Orange Air Pump
5 15 Amp Blue Fuel Pump
6 15 Amp Blue Horn
MAINTAINING YOUR VEHICLE 241
7
Page 242 of 296
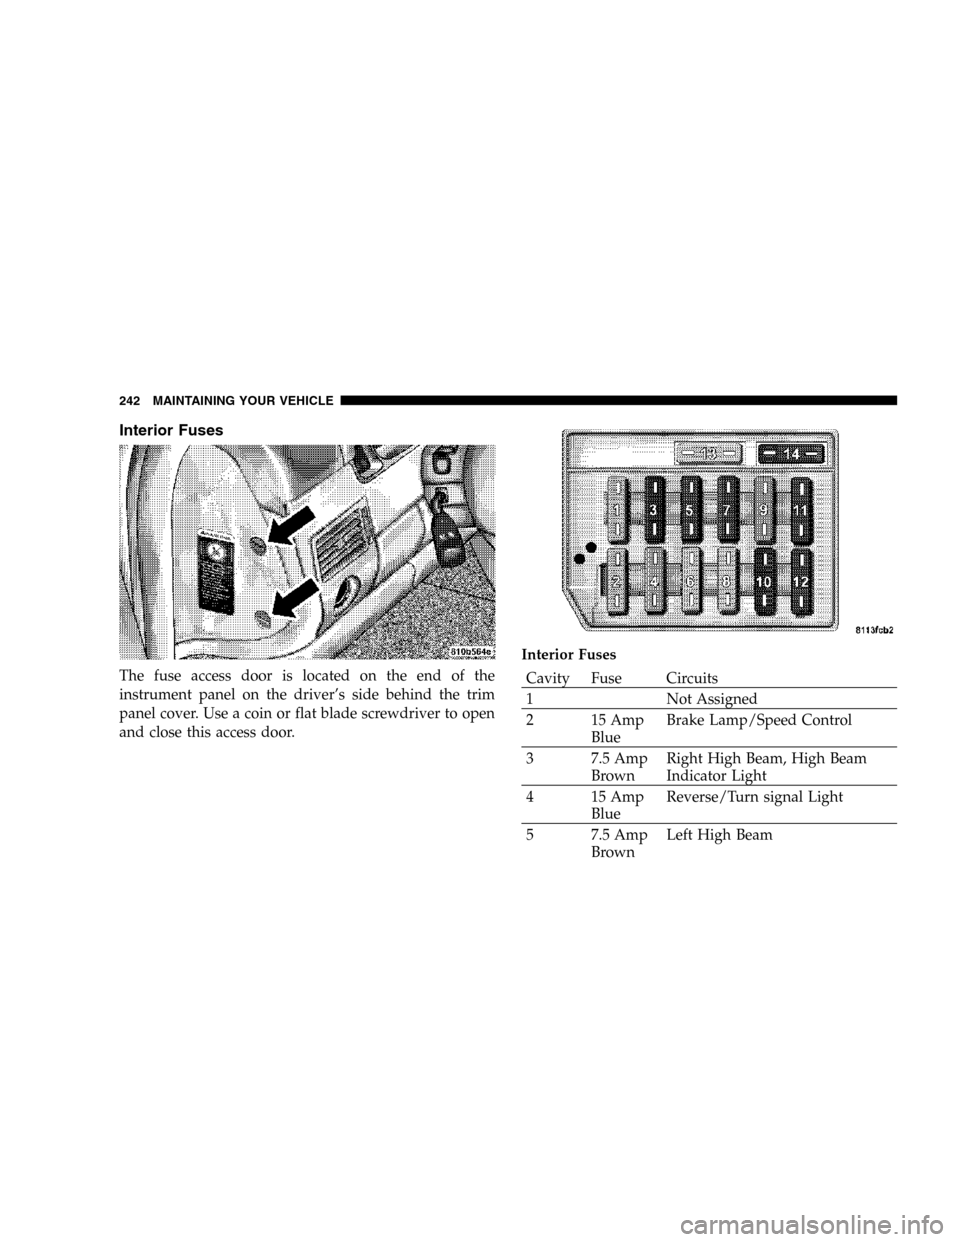
Interior Fuses
The fuse access door is located on the end of the
instrument panel on the driver’s side behind the trim
panel cover. Use a coin or flat blade screwdriver to open
and close this access door.Interior FusesCavity Fuse Circuits
1 Not Assigned
2 15 Amp
BlueBrake Lamp/Speed Control
3 7.5 Amp
BrownRight High Beam, High Beam
Indicator Light
4 15 Amp
BlueReverse/Turn signal Light
5 7.5 Amp
BrownLeft High Beam
242 MAINTAINING YOUR VEHICLE
Page 243 of 296
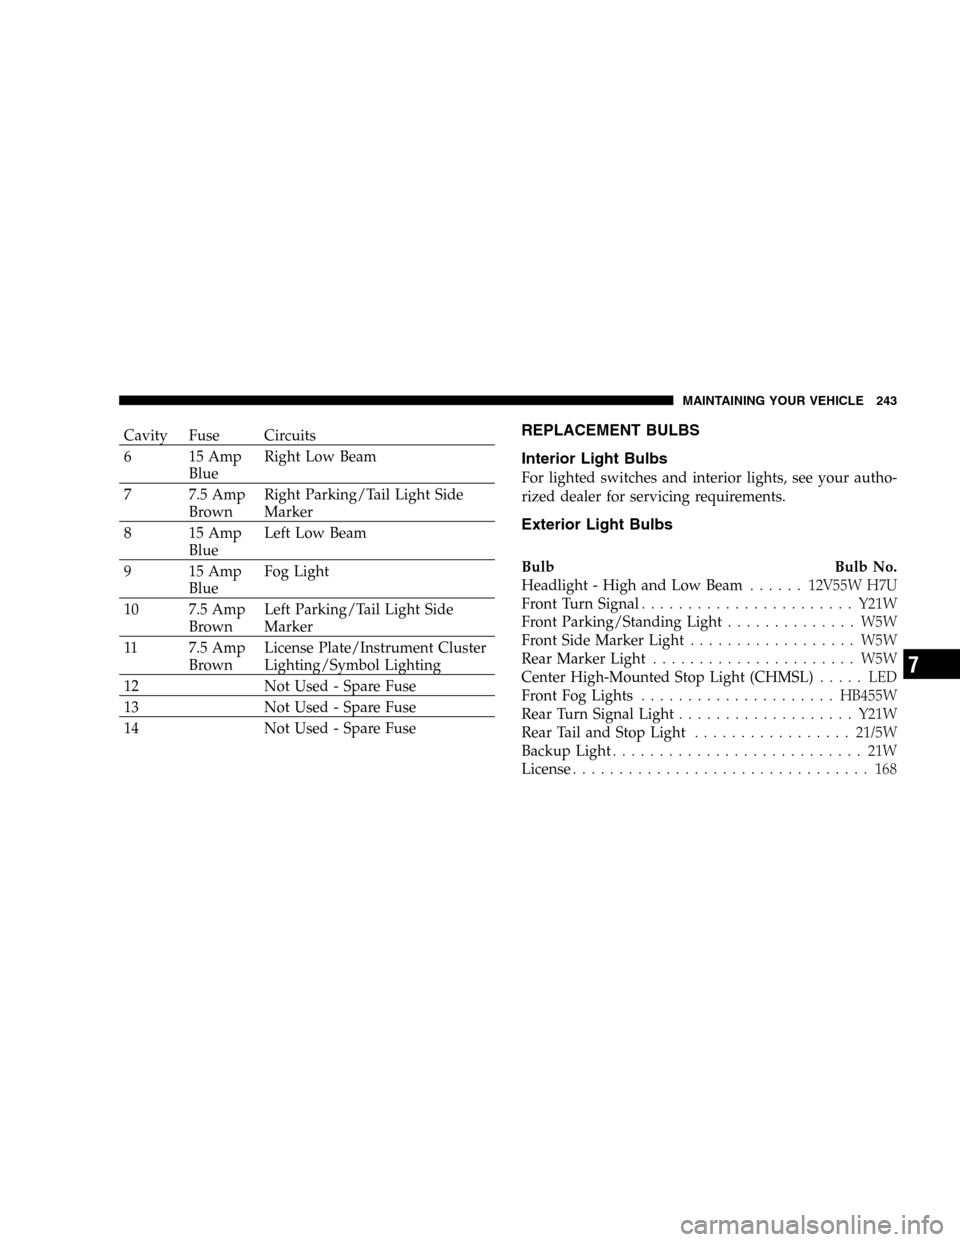
Cavity Fuse Circuits
6 15 Amp
BlueRight Low Beam
7 7.5 Amp
BrownRight Parking/Tail Light Side
Marker
8 15 Amp
BlueLeft Low Beam
9 15 Amp
BlueFog Light
10 7.5 Amp
BrownLeft Parking/Tail Light Side
Marker
11 7.5 Amp
BrownLicense Plate/Instrument Cluster
Lighting/Symbol Lighting
12 Not Used - Spare Fuse
13 Not Used - Spare Fuse
14 Not Used - Spare FuseREPLACEMENT BULBS
Interior Light Bulbs
For lighted switches and interior lights, see your autho-
rized dealer for servicing requirements.
Exterior Light Bulbs
Bulb Bulb No.
Headlight - High and Low Beam......12V55W H7U
Front Turn Signal.......................Y21W
Front Parking/Standing Light.............. W5W
Front Side Marker Light.................. W5W
Rear Marker Light...................... W5W
Center High-Mounted Stop Light (CHMSL)..... LED
Front Fog Lights.....................HB455W
Rear Turn Signal Light...................Y21W
Rear Tail and Stop Light.................21/5W
Backup Light........................... 21W
License................................ 168
MAINTAINING YOUR VEHICLE 243
7
Page 244 of 296
EXTERIOR LIGHT BULB SERVICE
Headlights
WARNING!
Halogen lamps contain pressurized gas. A bulb can
explode if you:
•Touch or move it when hot
•Drop the bulb
•Scratch the bulb
Wear eye and hand protection.
NOTE:To prevent a possible electrical short circuit,
switch off light prior to replacing a bulb.
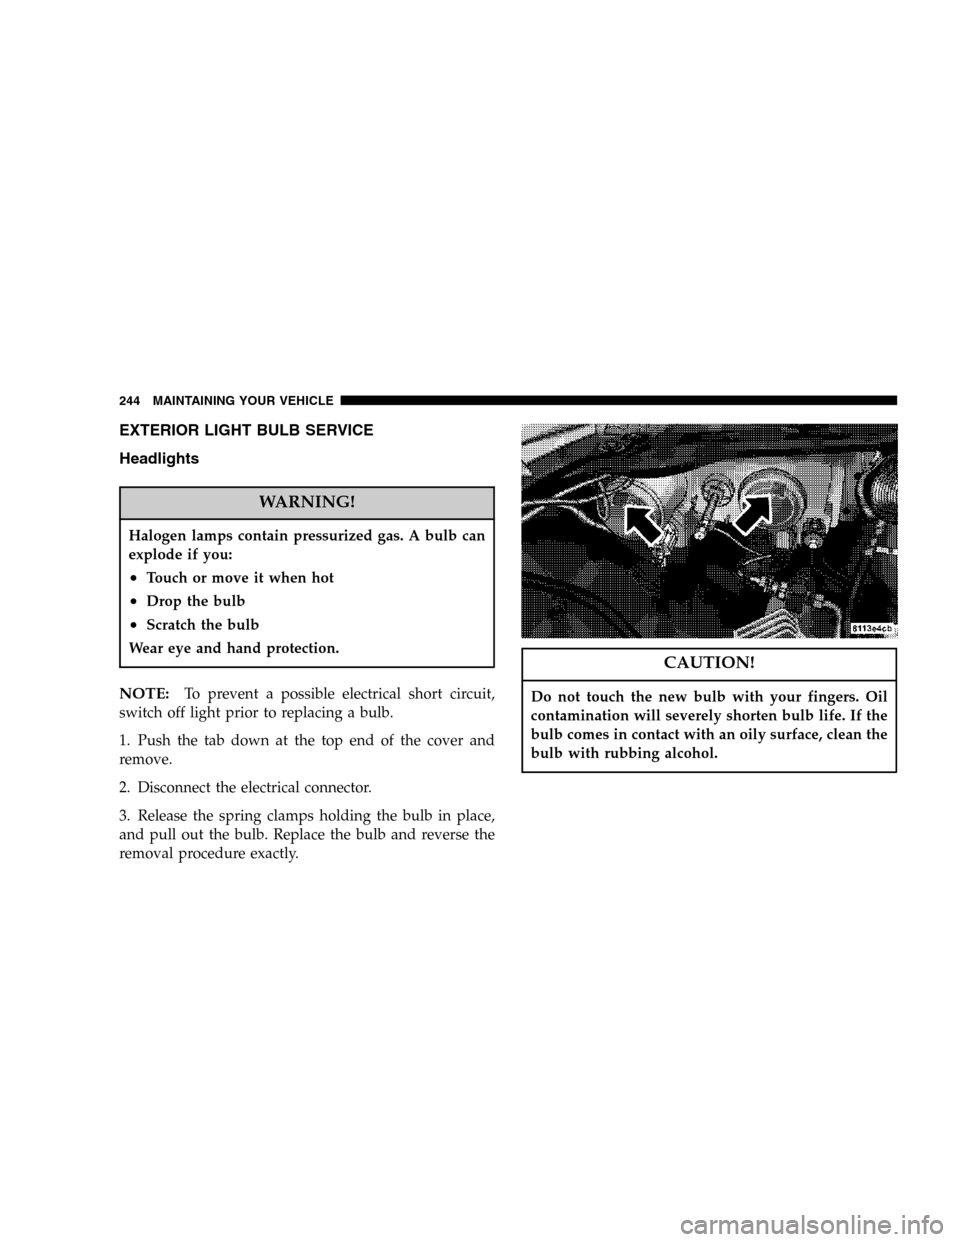
1. Push the tab down at the top end of the cover and
remove.
2. Disconnect the electrical connector.
3. Release the spring clamps holding the bulb in place,
and pull out the bulb. Replace the bulb and reverse the
removal procedure exactly.
CAUTION!
Do not touch the new bulb with your fingers. Oil
contamination will severely shorten bulb life. If the
bulb comes in contact with an oily surface, clean the
bulb with rubbing alcohol.
244 MAINTAINING YOUR VEHICLE
Page 245 of 296
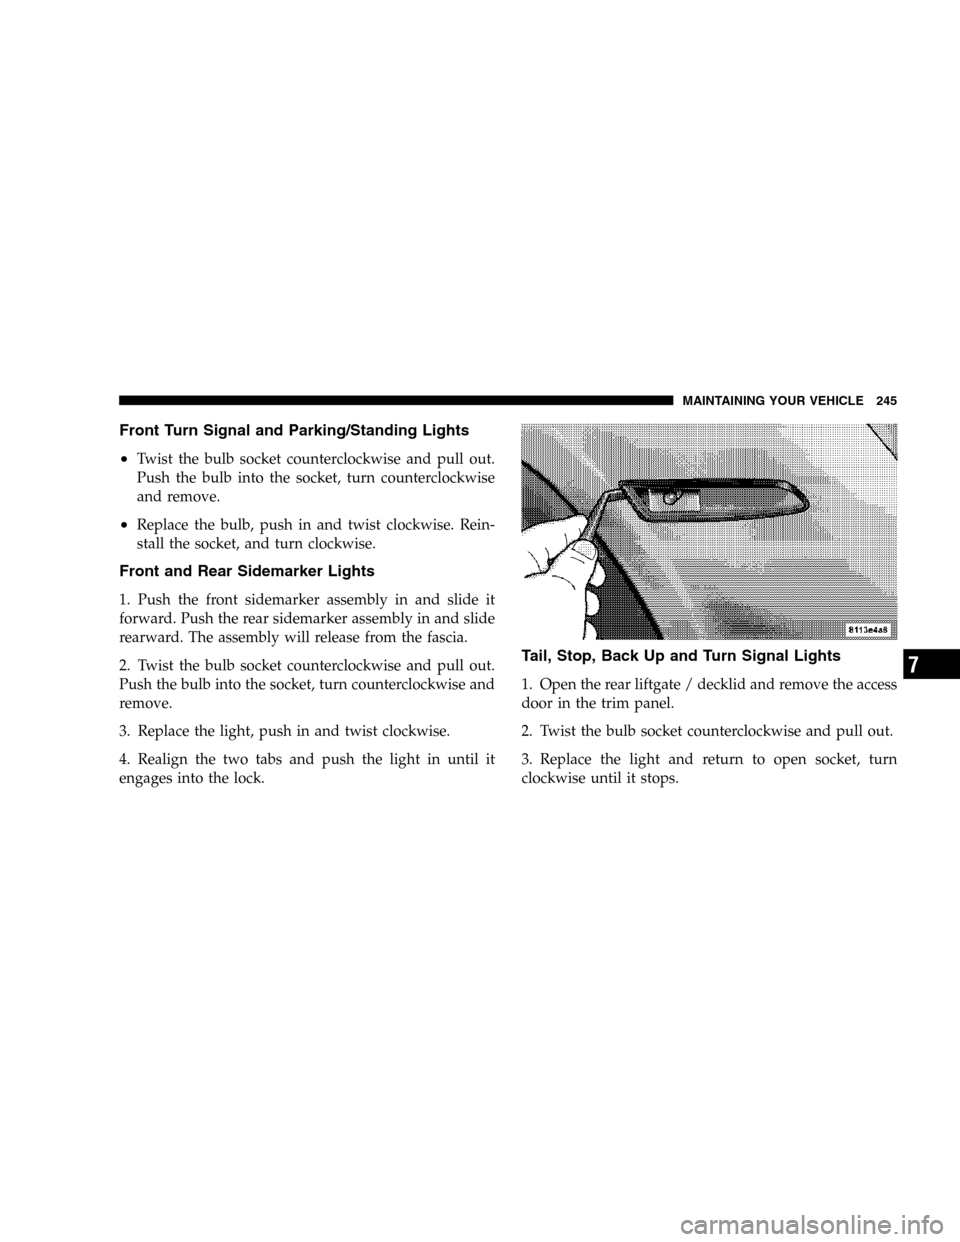
Front Turn Signal and Parking/Standing Lights
•
Twist the bulb socket counterclockwise and pull out.
Push the bulb into the socket, turn counterclockwise
and remove.
•Replace the bulb, push in and twist clockwise. Rein-
stall the socket, and turn clockwise.
Front and Rear Sidemarker Lights
1. Push the front sidemarker assembly in and slide it
forward. Push the rear sidemarker assembly in and slide
rearward. The assembly will release from the fascia.
2. Twist the bulb socket counterclockwise and pull out.
Push the bulb into the socket, turn counterclockwise and
remove.
3. Replace the light, push in and twist clockwise.
4. Realign the two tabs and push the light in until it
engages into the lock.
Tail, Stop, Back Up and Turn Signal Lights
1. Open the rear liftgate / decklid and remove the access
door in the trim panel.
2. Twist the bulb socket counterclockwise and pull out.
3. Replace the light and return to open socket, turn
clockwise until it stops.
MAINTAINING YOUR VEHICLE 245
7
Page 246 of 296

4. Replace the access door in the trim panel.
License Plate Light
1. Remove the two lens assembly mounting screws.
2. Pull the bulb out of the socket.
3. Replace the bulb and reattach the lens assembly.
4. Align and resecure the two lens assembly mounting
screws.
NOTE:Be sure not to over-torque the mounting screws
or permanent damage to the lens may occur.
NOTE:Always test the operation of all lights after
service operations have been performed to validate an
effective repair.
Headlight Aiming
The headlights on your new vehicle were aimed at the
factory. The factory setting was made at a no load setting.
A great increase in weight will change the aiming and it
may be necessary to readjust the headlights if carrying an
excessive amount of weight in the rear cargo area. To
readjust the headlights first mark the position of the
headlights on a wall prior to loading the vehicle. Load
246 MAINTAINING YOUR VEHICLE
Page 247 of 296
the vehicle and then readjust the headlights to the
original position. If any further adjustments are neces-
sary contact your manufacturer’s dealer. A detailed ser-
vice procedure is contained in the manufacturer’s Service
Manual. Information on purchasing a Service Manual can
be found at the back of this Owner’s Manual.
VEHICLE STORAGE
We recommend that you follow these guidelines before
storing your Crossfire for extended periods.
•Fill the gas tank. This will prevent water condensation
inside the tank. If you plan on storing your vehicle
more than two months, add an anti-oxidant fuel
stabilizer to the gas tank.
•Change the oil to remove any corrosive combustion-
related acids in the crankcase.
•Wash and wax the vehicle to protect the finish.
•Cover the vehicle whenever possible to prevent acci-
dental damage to the finish.
•Store the vehicle in a dry, well-ventilated location.
•If the vehicle will be subjected to freezing tempera-
tures, remove the battery and store it in a dry, well-
ventilated place. If the vehicle is not going to be driven
in the next three weeks, follow the battery recharge
procedure in the Service Manual, then disconnect the
battery at the negative terminal.
CAUTION!
Use care when disconnecting the remote positive
cable. It is connected to the battery and can short out
to any metal on the vehicle. Always tape or wrap the
exposed cable end to prevent electrical shorts.
Disconnecting the battery causes the engine control sys-
tem to lose memory of some “learned” functions. The
engine may run rough when first started after a battery
disconnect until the control module “relearns” these
functions.
MAINTAINING YOUR VEHICLE 247
7
Page 248 of 296

Check the battery every four to six weeks to ensure that
the voltage is above 12.40. Voltage will drop more rapidly
in hot temperatures. If battery voltage drops below 12.40,
follow the battery recharge procedure in the Service
Manual.
•Check that the radiator coolant level of protection is to
at least -20°F (-29°C).
•Block the wheels. Do not apply the parking brake.
•Make sure that all tires are inflated to the optimum
pressure.
•Cut blocks of plywood about the same size of the tires.
Cover each block with indoor/outdoor carpeting and
place them between the tires and concrete. This will
prevent tire flat spotting.
•For long term storage, remove the tires and put the
vehicle up on blocks. Stack the tires on plywood and
cover with a tarp to prevent flat spotting.
•Move the wiper blades away from the windshield.
NOTE:To help prevent the battery from discharging
during shorter periods of inactivity, perform the follow-
ing:
1. Make sure that the rear liftgate/decklid, hood, and
doors are completely closed.
2. Make sure that the remote transmitter is operating and
that the battery is good.
3. Make sure that the hood, rear liftgate and door
switches are in adjustment.
4. Use the remote transmitter to set the alarm.
248 MAINTAINING YOUR VEHICLE
Page 249 of 296
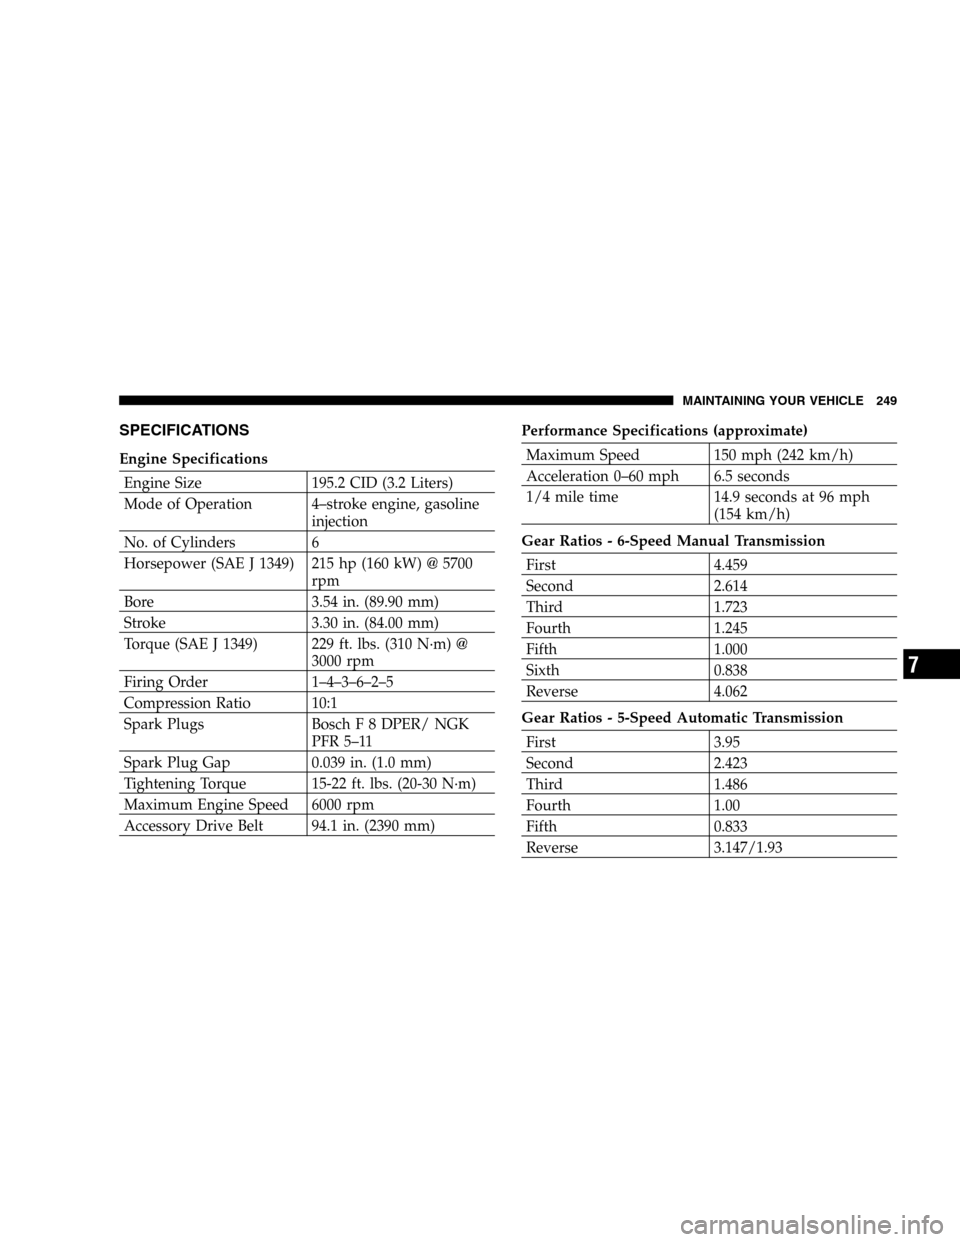
SPECIFICATIONS
Engine Specifications
Engine Size 195.2 CID (3.2 Liters)
Mode of Operation 4–stroke engine, gasoline
injection
No. of Cylinders 6
Horsepower (SAE J 1349) 215 hp (160 kW) @ 5700
rpm
Bore 3.54 in. (89.90 mm)
Stroke 3.30 in. (84.00 mm)
Torque (SAE J 1349) 229 ft. lbs. (310 N·m) @
3000 rpm
Firing Order 1–4–3–6–2–5
Compression Ratio 10:1
Spark Plugs Bosch F 8 DPER/ NGK
PFR 5–11
Spark Plug Gap 0.039 in. (1.0 mm)
Tightening Torque 15-22 ft. lbs. (20-30 N·m)
Maximum Engine Speed 6000 rpm
Accessory Drive Belt 94.1 in. (2390 mm)Performance Specifications (approximate)
Maximum Speed 150 mph (242 km/h)
Acceleration 0–60 mph 6.5 seconds
1/4 mile time 14.9 seconds at 96 mph
(154 km/h)
Gear Ratios - 6-Speed Manual Transmission
First 4.459
Second 2.614
Third 1.723
Fourth 1.245
Fifth 1.000
Sixth 0.838
Reverse 4.062
Gear Ratios - 5-Speed Automatic Transmission
First 3.95
Second 2.423
Third 1.486
Fourth 1.00
Fifth 0.833
Reverse 3.147/1.93
MAINTAINING YOUR VEHICLE 249
7
Page 250 of 296
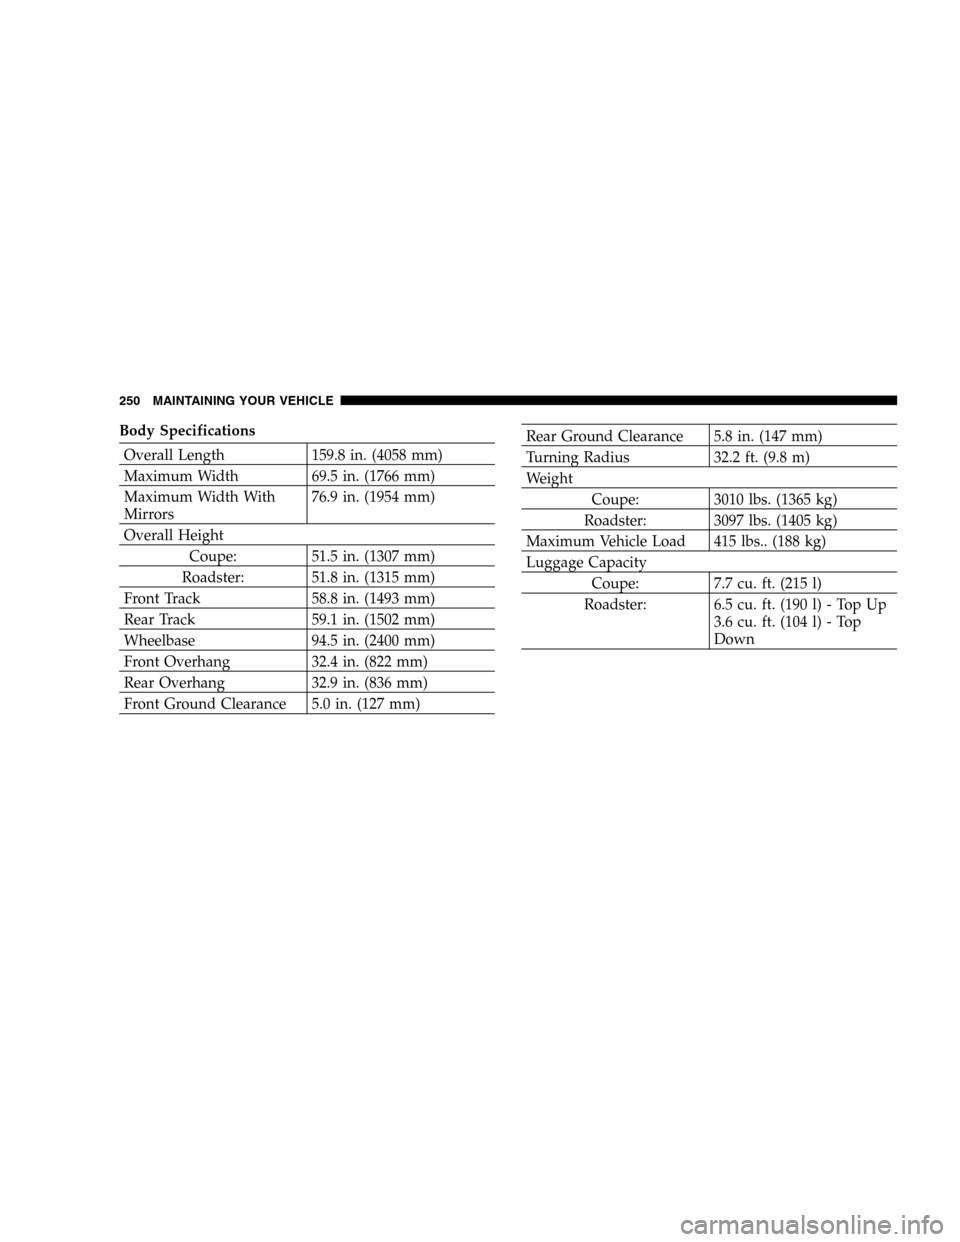
Body Specifications
Overall Length 159.8 in. (4058 mm)
Maximum Width 69.5 in. (1766 mm)
Maximum Width With
Mirrors76.9 in. (1954 mm)
Overall Height
Coupe: 51.5 in. (1307 mm)
Roadster: 51.8 in. (1315 mm)
Front Track 58.8 in. (1493 mm)
Rear Track 59.1 in. (1502 mm)
Wheelbase 94.5 in. (2400 mm)
Front Overhang 32.4 in. (822 mm)
Rear Overhang 32.9 in. (836 mm)
Front Ground Clearance 5.0 in. (127 mm)
Rear Ground Clearance 5.8 in. (147 mm)
Turning Radius 32.2 ft. (9.8 m)
Weight
Coupe: 3010 lbs. (1365 kg)
Roadster: 3097 lbs. (1405 kg)
Maximum Vehicle Load 415 lbs.. (188 kg)
Luggage Capacity
Coupe: 7.7 cu. ft. (215 l)
Roadster: 6.5 cu. ft. (190 l) - Top Up
3.6 cu. ft. (104 l) - Top
Down
250 MAINTAINING YOUR VEHICLE