CHRYSLER PACIFICA 2004 1.G Owners Manual
Manufacturer: CHRYSLER, Model Year: 2004, Model line: PACIFICA, Model: CHRYSLER PACIFICA 2004 1.GPages: 361, PDF Size: 5.21 MB
Page 91 of 361

5. Within 5 seconds, press and release the UNLOCK
button on the remote keyless entry transmitters. A chime
will sound signaling you that the transmitter link has
been successfully disabled. A message will also be dis-
played in the Electronic Vehicle Information Center
(EVIC), indicating the transmitter has been disabled.
To disable another transmitter from memory positions 1
or 2, repeat steps 1± 4 for each transmitter.
NOTE:This function can be selected using the ªCus-
tomer Programmable Featuresº in the Electronic Vehicle
Information Center (EVIC) section, Otherwise see your
authorized dealer.
Second Row Manual Seat Recliner
The recliner mechanism control is on the outboard side of
the seat. To recline, lean forward slightly, lift the lever,
then push back to the desired position and release the
lever. Lean forward and lift the lever to return theseatback to its normal position. Using body pressure, lean
forward and rearward on the seat to be sure the seatback
has latched.
NOTE:When using the recliner mechanism with the 3rd
row seat folded down, the second row seat may need to
be adjusted forward to achieve full recline.
UNDERSTANDING THE FEATURES OF YOUR VEHICLE 91
3
Page 92 of 361

WARNING!
Do not ride with the seatback reclined so that the
shoulder belt is no longer resting against your chest.
In a collision you could slide under the seat belt and
be seriously or fatally injured. Use the recliner only
when the vehicle is parked.
Second Row Manual Seat Adjuster
The adjusting bar is located under the front of the seat.
Pull the bar up and move the seat to the desired position.
Release the bar to lock the seat into position.
Using body pressure, move forward and rearward on the
seat to be sure the seat adjusters have latched.
92 UNDERSTANDING THE FEATURES OF YOUR VEHICLE
Page 93 of 361

WARNING!
Adjust the seat only while the vehicle is parked.
Adjusting a seat while the vehicle is moving is
dangerous. The seat belt might not be properly
adjusted and you could be injured.
Second Row Fold & Tumble Seats
The second row seats can be folded and tumbled forward
for easy access to the third seat or rear cargo area.
To fold and tumble the seat, follow these steps:
1. Remove any obstructions from the floor in front of the
seat.
2. Lower the head restraint to its full downward position
and rotate the arm rest to the upright position.
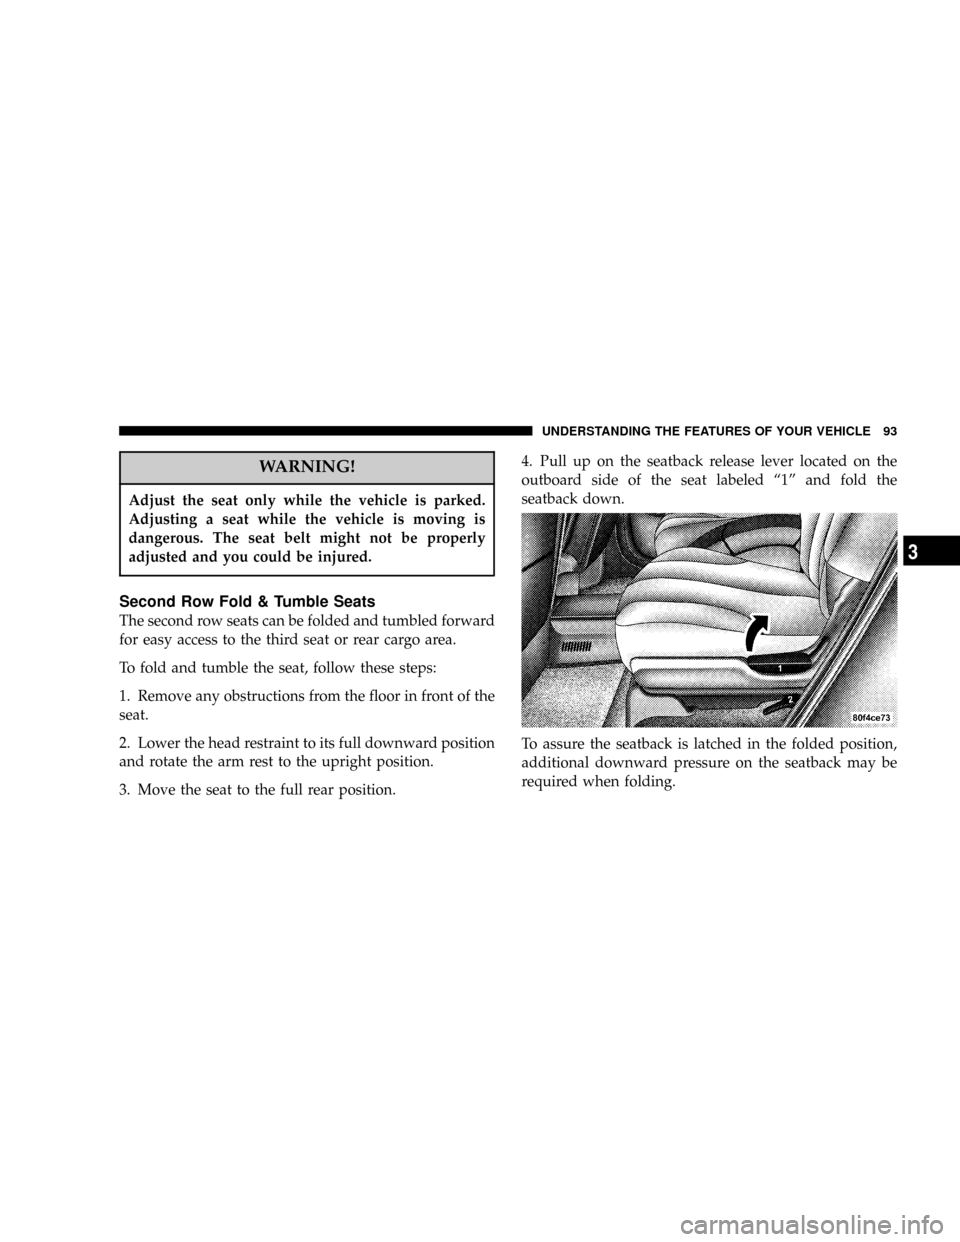
3. Move the seat to the full rear position.4. Pull up on the seatback release lever located on the
outboard side of the seat labeled ª1º and fold the
seatback down.
To assure the seatback is latched in the folded position,
additional downward pressure on the seatback may be
required when folding.
UNDERSTANDING THE FEATURES OF YOUR VEHICLE 93
3
Page 94 of 361

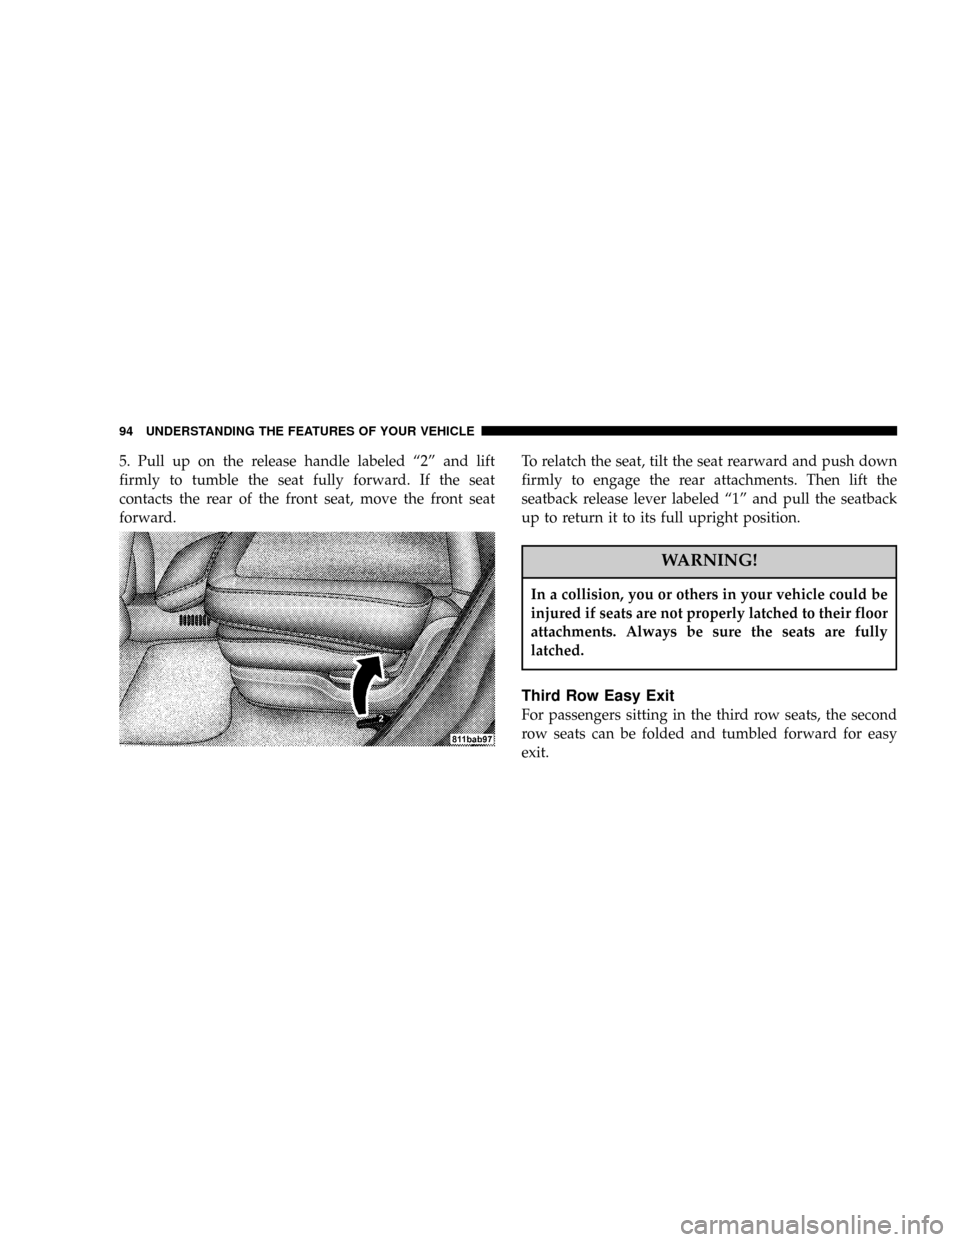
5. Pull up on the release handle labeled ª2º and lift
firmly to tumble the seat fully forward. If the seat
contacts the rear of the front seat, move the front seat
forward.To relatch the seat, tilt the seat rearward and push down
firmly to engage the rear attachments. Then lift the
seatback release lever labeled ª1º and pull the seatback
up to return it to its full upright position.
WARNING!
In a collision, you or others in your vehicle could be
injured if seats are not properly latched to their floor
attachments. Always be sure the seats are fully
latched.
Third Row Easy Exit
For passengers sitting in the third row seats, the second
row seats can be folded and tumbled forward for easy
exit.
94 UNDERSTANDING THE FEATURES OF YOUR VEHICLE
Page 95 of 361

To fold and tumble the seat forward, follow these steps:
1. Pull up on the seatback release handle ª1º located on
the back of the seat to fold the seatback down.
2. Pull the release strap ª2º located at the bottom of the
seat to lift and tumble the seat forward.To relatch the seat, tilt the seat rearward and push down
firmly to engage the rear attachments. Then lift the
seatback release lever labeled ª1º and pull the seatback
up to return it to its full upright position.
UNDERSTANDING THE FEATURES OF YOUR VEHICLE 95
3
Page 96 of 361

Third Row Seating Flexibility
The third row seats may be used with either or both
seatbacks folded forward for additional storage space.
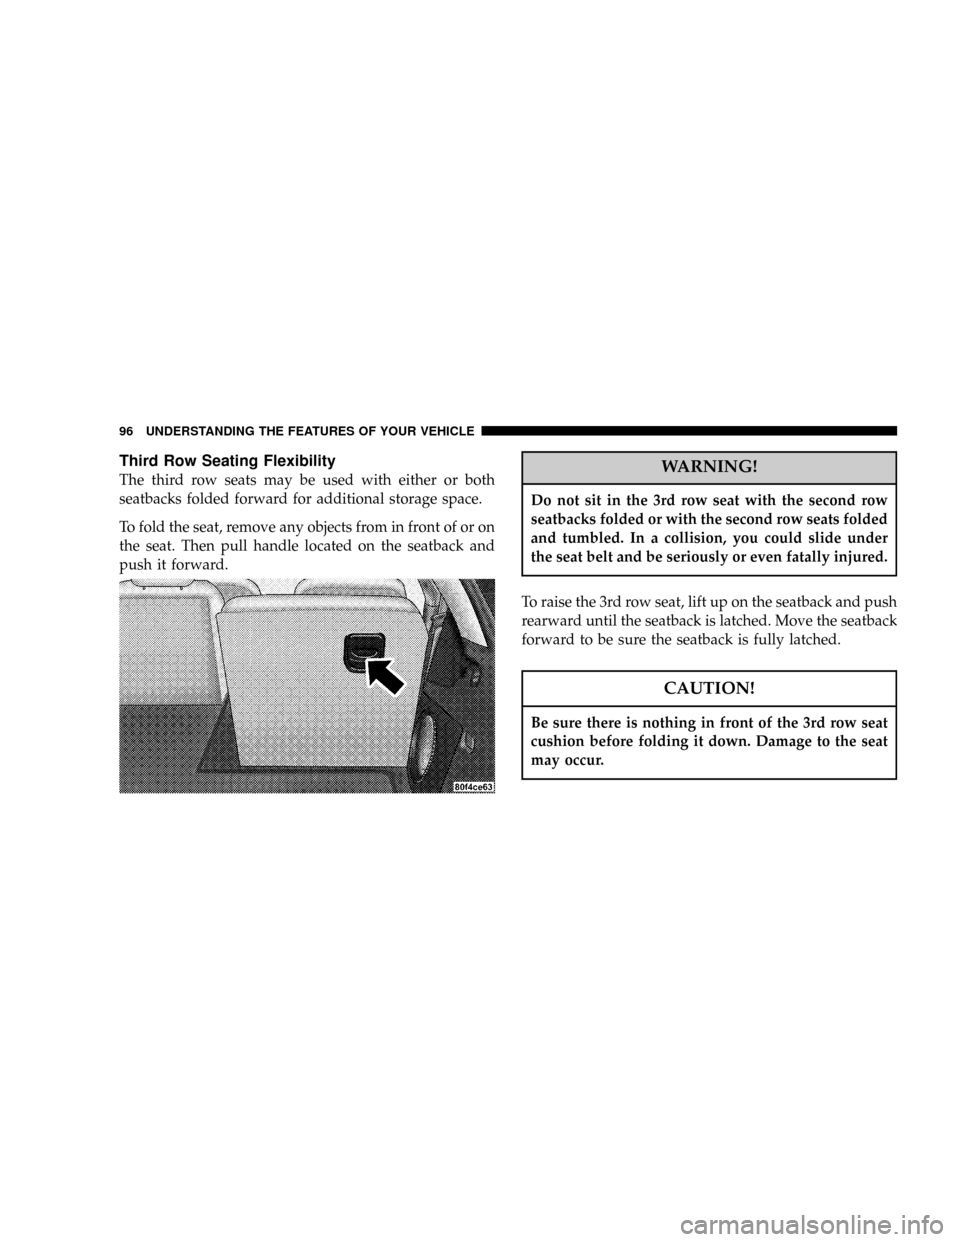
To fold the seat, remove any objects from in front of or on
the seat. Then pull handle located on the seatback and
push it forward.WARNING!
Do not sit in the 3rd row seat with the second row
seatbacks folded or with the second row seats folded
and tumbled. In a collision, you could slide under
the seat belt and be seriously or even fatally injured.
To raise the 3rd row seat, lift up on the seatback and push
rearward until the seatback is latched. Move the seatback
forward to be sure the seatback is fully latched.
CAUTION!
Be sure there is nothing in front of the 3rd row seat
cushion before folding it down. Damage to the seat
may occur.
96 UNDERSTANDING THE FEATURES OF YOUR VEHICLE
Page 97 of 361

WARNING!
²Not all head restraints in this vehicle are the same.
Head restraints from one seating position should not
be removed and installed in any other seating posi-
tion. In a collision, serious injury or death may result
if the proper head restraint is not installed on each
seat.
²The cargo area in the rear of the vehicle should not
be used as a play area by children. They could be
seriously injured in a collision. Children should be
seated and using the proper restraint system.
²It is extremely dangerous to ride in a cargo area,
inside or outside of a vehicle. In a collision, people
riding in these areas are more likely to be seriously
injured or killed.
²Do not allow people to ride in any area of your
vehicle that is not equipped with seats and seat belts.
²Be sure everyone in your vehicle is in a seat and
using a seat belt properly.
Load Floor
For additional cargo space, the second and third row
seatbacks may be folded forward and the load floor
extended to cover the center console.
To extend the load floor, follow these steps:
1. Move the second row seats to the full rear position.
2. Fold the second and third row seatbacks down.
UNDERSTANDING THE FEATURES OF YOUR VEHICLE 97
3
Page 98 of 361

3. Pull on the load floor strap and lift the panel from the
driver's second row seatback over the center console and
onto the passenger second row seat.
NOTE:Be sure to reattach the strap to secure the load
floor panel when not in use.Plastic Grocery Bag Retainer
Retainer hooks which will hold plastic grocery bag
handles are built into the seatbacks of all front seats. The
floor supports the partial weight of the bagged goods.
98 UNDERSTANDING THE FEATURES OF YOUR VEHICLE
Page 99 of 361

ADJUSTABLE PEDALS Ð IF EQUIPPED
This feature allows both the brake and accelerator pedals
to move toward or away from the driver to provide
improved position with the steering wheel. The adjust-
able pedal system is designed to allow a greater range of
driver comfort for steering wheel tilt and seat position.
The switch is located on the drivers door trim panel next
to the power seat switches.
Press the switch forward to move the pedals forward
(toward the front of the vehicle).
Press the switch rearward to move the pedals rearward
(toward the driver).
²The pedals can be adjusted with the ignition OFF.
²The pedals can be adjusted while driving.
UNDERSTANDING THE FEATURES OF YOUR VEHICLE 99
3
Page 100 of 361

²The pedalscannotbe adjusted when the vehicle is in R
(Reverse) or when the Speed Control is ON. A message
will be displayed in the Electronic Vehicle Information
Center (EVIC) if the pedals are attempted to be ad-
justed when the system is locked out (ªAdjustable
Pedal Disabled Ð Cruise Control Engagedº or ªAd-
justable Pedal Disabled Ð Vehicle In Reverseº).
NOTE:If your vehicle is equipped with memory seat
feature, your remote keyless entry transmitter or memory
seat buttons on the driver's door panel can be used to
recall the adjustable pedals to saved positions.CAUTION!
Do not place any article under the adjustable pedals
or impede its ability to move as it may cause damage
to the pedal controls. Pedal travel may become
limited if movement is stopped by an obstruction in
the adjustable pedal's path.
TO OPEN AND CLOSE THE HOOD
To open the hood, two latches must be released. First pull
the hood release lever located under the left side of the
instrument panel.
100 UNDERSTANDING THE FEATURES OF YOUR VEHICLE