mount CHRYSLER PACIFICA 2018 Service Manual
[x] Cancel search | Manufacturer: CHRYSLER, Model Year: 2018, Model line: PACIFICA, Model: CHRYSLER PACIFICA 2018Pages: 696, PDF Size: 8.48 MB
Page 523 of 696
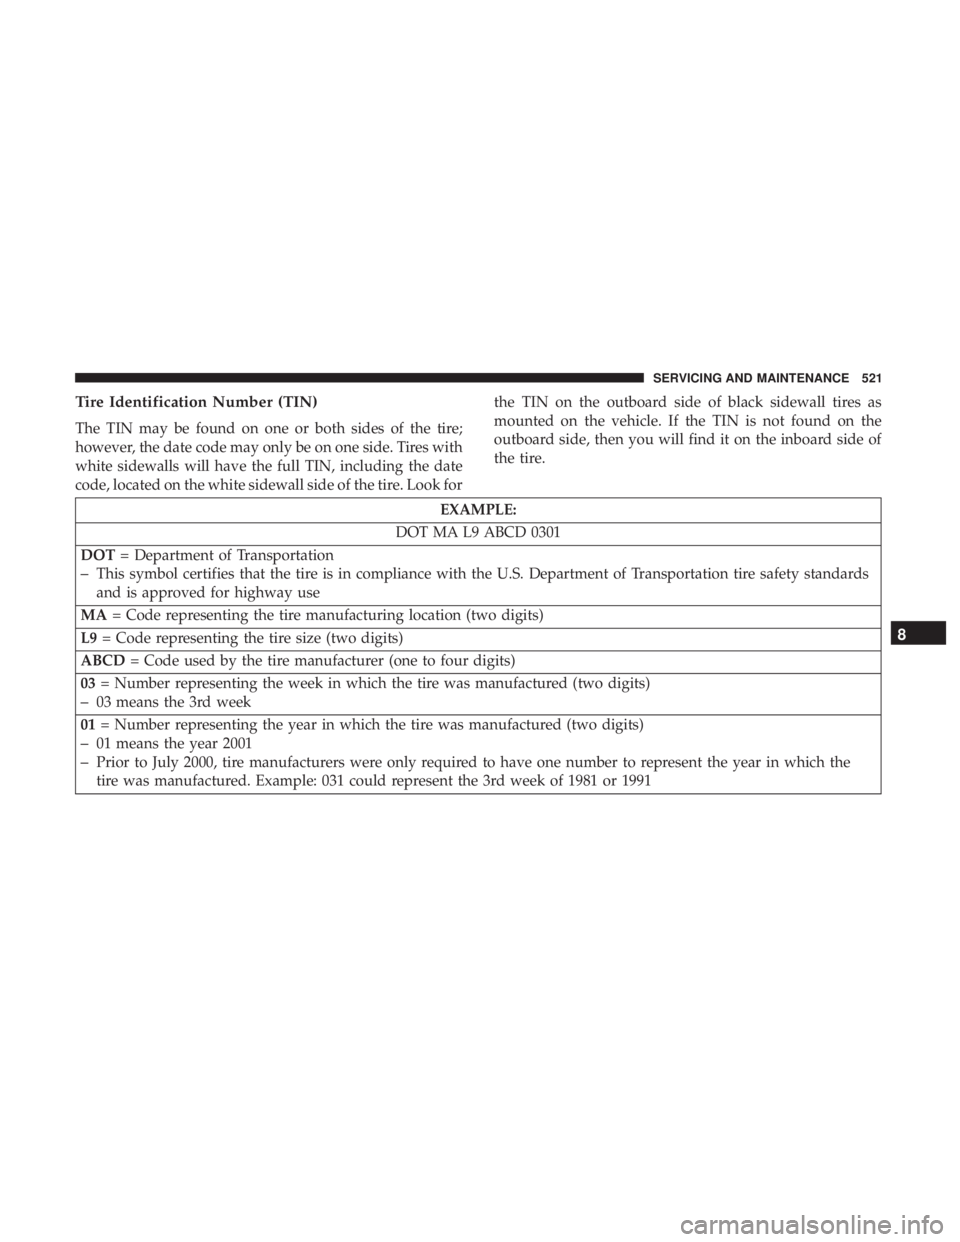
Tire Identification Number (TIN)
The TIN may be found on one or both sides of the tire;
however, the date code may only be on one side. Tires with
white sidewalls will have the full TIN, including the date
code, located on the white sidewall side of the tire. Look forthe TIN on the outboard side of black sidewall tires as
mounted on the vehicle. If the TIN is not found on the
outboard side, then you will find it on the inboard side of
the tire.
EXAMPLE:
DOT MA L9 ABCD 0301
DOT = Department of Transportation
–This symbol certifies that the tire is in compliance with the U.S. Department of Transportation tire safety standards
and is approved for highway use
MA = Code representing the tire manufacturing location (two digits)
L9 = Code representing the tire size (two digits)
ABCD = Code used by the tire manufacturer (one to four digits)
03 = Number representing the week in which the tire was manufactured (two digits)
–03 means the 3rd week
01 = Number representing the year in which the tire was manufactured (two digits)
–01 means the year 2001
–Prior to July 2000, tire manufacturers were only required to have one number to represent the year in which the
tire was manufactured. Example: 031 could represent the 3rd week of 1981 or 1991
8
SERVICING AND MAINTENANCE 521
Page 527 of 696
Steps For Determining Correct Load Limit—
(1) Locate the statement “The combined weight of
occupants and cargo should never exceed XXX kg or
XXX lbs.” on your vehicle’s placard.
(2) Determine the combined weight of the driver and
passengers that will be riding in your vehicle.
(3) Subtract the combined weight of the driver and
passengers from XXX kg or XXX lbs.
(4) The resulting figure equals the available amount of
cargo and luggage load capacity. For example, if “XXX”
amount equals 1400 lbs. and there will be five 150 lb
passengers in your vehicle, the amount of available
cargo and luggage load capacity is 650 lbs. (1400-750
(5x150) = 650 lbs.)
(5) Determine the combined weight of luggage and
cargo being loaded on the vehicle. That weight may not
safely exceed the available cargo and luggage load
capacity calculated in Step 4.
(6) If your vehicle will be towing a trailer, load from
your trailer will be transferred to your vehicle. Consultthis manual to determine how this reduces the available
cargo and luggage load capacity of your vehicle.
Metric Example For Load Limit
For example, if “XXX” amount equals 635 kg and there will
be five 68 kg passengers in your vehicle, the amount of
available cargo and luggage load capacity is 295 kg (635-
340 (5x68) = 295 kg) as shown in step 4.
NOTE:
•
If your vehicle will be towing a trailer, load from your
trailer will be transferred to your vehicle. The following
table shows examples on how to calculate total load,
cargo/luggage, and towing capacities of your vehicle
with varying seating configurations and number and
size of occupants. This table is for illustration purposes
only and may not be accurate for the seating and load
carry capacity of your vehicle.
• For the following example, the combined weight of
occupants and cargo should never exceed 865 lbs
(392 kg).
8
SERVICING AND MAINTENANCE 525
Page 534 of 696
Keep dismounted tires in a cool, dry place with as little
exposure to light as possible. Protect tires from contact with
oil, grease, and gasoline.
Replacement Tires
The tires on your new vehicle provide a balance of many
characteristics. They should be inspected regularly for
wear and correct cold tire inflation pressures. The manu-
facturer strongly recommends that you use tires equivalent
to the originals in size, quality and performance when
replacement is needed. Refer to the paragraph on “Tread
Wear Indicators” in this section. Refer to the Tire and
Loading Information placard or the Vehicle Certification
Label for the size designation of your tire. The Load Index
and Speed Symbol for your tire will be found on the
original equipment tire sidewall.
See the Tire Sizing Chart example found in the “Tire Safety
Information” section of this manual for more information
relating to the Load Index and Speed Symbol of a tire.
It is recommended to replace the two front tires or two rear
tires as a pair. Replacing just one tire can seriously affect
your vehicle’s handling. If you ever replace a wheel, make
sure that the wheel’s specifications match those of the
original wheels.It is recommended you contact an authorized tire dealer or
original equipment dealer with any questions you may
have on tire specifications or capability. Failure to use
equivalent replacement tires may adversely affect the
safety, handling, and ride of your vehicle.
WARNING!
•
Do not use a tire, wheel size, load rating, or speed
rating other than that specified for your vehicle.
Some combinations of unapproved tires and wheels
may change suspension dimensions and perfor-
mance characteristics, resulting in changes to steer-
ing, handling, and braking of your vehicle. This can
cause unpredictable handling and stress to steering
and suspension components. You could lose control
and have a collision resulting in serious injury or
death. Use only the tire and wheel sizes with load
ratings approved for your vehicle.
• Never use a tire with a smaller load index or capacity,
other than what was originally equipped on your
vehicle. Using a tire with a smaller load index could
result in tire overloading and failure. You could lose
control and have a collision.
(Continued)
532 SERVICING AND MAINTENANCE
Page 535 of 696
WARNING!(Continued)
•Failure to equip your vehicle with tires having ad-
equate speed capability can result in sudden tire
failure and loss of vehicle control.
CAUTION!
Replacing original tires with tires of a different size
may result in false speedometer and odometer read-
ings.
Tire Types
All Season Tires — If Equipped
All Season tires provide traction for all seasons (Spring,
Summer, Fall, and Winter). Traction levels may vary be-
tween different all season tires. All season tires can be
identified by the M+S, M&S, M/S or MS designation on the
tire sidewall. Use all season tires only in sets of four; failure
to do so may adversely affect the safety and handling of
your vehicle.
Summer Or Three Season Tires — If Equipped
Summer tires provide traction in both wet and dry condi-
tions, and are not intended to be driven in snow or on ice.
If your vehicle is equipped with Summer tires, be aware
these tires are not designed for Winter or cold driving
conditions. Install Winter tires on your vehicle when am-
bient temperatures are less than 40°F (5°C) or if roads are
covered with ice or snow. For more information, contact an
authorized dealer.
Summer tires do not contain the all season designation or
mountain/snowflake symbol on the tire sidewall. Use
Summer tires only in sets of four; failure to do so may
adversely affect the safety and handling of your vehicle.
WARNING!
Do not use Summer tires in snow/ice conditions. You
could lose vehicle control, resulting in severe injury or
death. Driving too fast for conditions also creates the
possibility of loss of vehicle control.
8
SERVICING AND MAINTENANCE 533
Page 536 of 696
Snow Tires
Some areas of the country require the use of snow tires
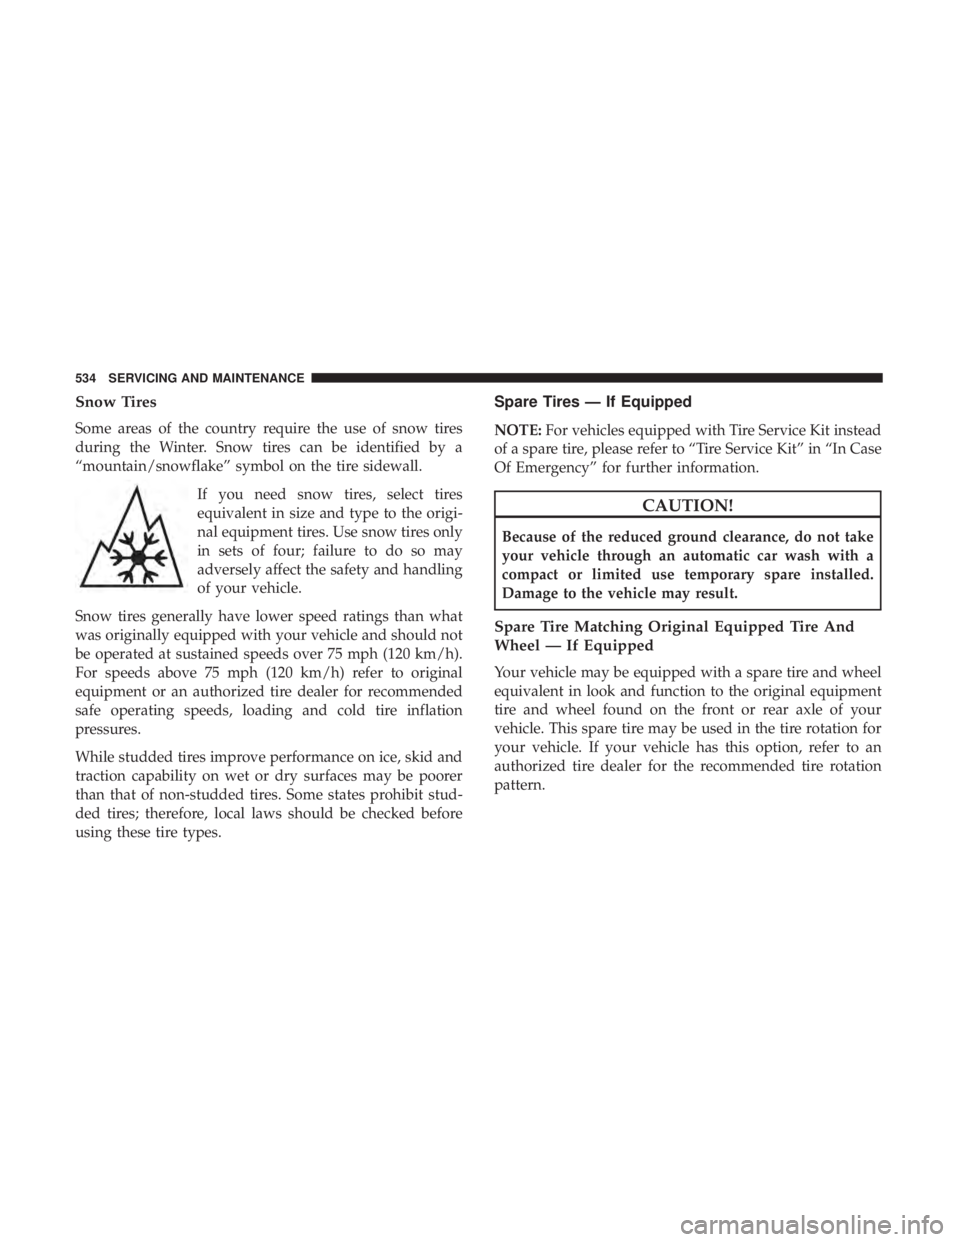
during the Winter. Snow tires can be identified by a
“mountain/snowflake” symbol on the tire sidewall.If you need snow tires, select tires
equivalent in size and type to the origi-
nal equipment tires. Use snow tires only
in sets of four; failure to do so may
adversely affect the safety and handling
of your vehicle.
Snow tires generally have lower speed ratings than what
was originally equipped with your vehicle and should not
be operated at sustained speeds over 75 mph (120 km/h).
For speeds above 75 mph (120 km/h) refer to original
equipment or an authorized tire dealer for recommended
safe operating speeds, loading and cold tire inflation
pressures.
While studded tires improve performance on ice, skid and
traction capability on wet or dry surfaces may be poorer
than that of non-studded tires. Some states prohibit stud-
ded tires; therefore, local laws should be checked before
using these tire types.
Spare Tires — If Equipped
NOTE: For vehicles equipped with Tire Service Kit instead
of a spare tire, please refer to “Tire Service Kit” in “In Case
Of Emergency” for further information.
CAUTION!
Because of the reduced ground clearance, do not take
your vehicle through an automatic car wash with a
compact or limited use temporary spare installed.
Damage to the vehicle may result.
Spare Tire Matching Original Equipped Tire And
Wheel — If Equipped
Your vehicle may be equipped with a spare tire and wheel
equivalent in look and function to the original equipment
tire and wheel found on the front or rear axle of your
vehicle. This spare tire may be used in the tire rotation for
your vehicle. If your vehicle has this option, refer to an
authorized tire dealer for the recommended tire rotation
pattern.
534 SERVICING AND MAINTENANCE
Page 537 of 696
Compact Spare Tire — If Equipped
The compact spare is for temporary emergency use only.
You can identify if your vehicle is equipped with a compact
spare by looking at the spare tire description on the Tire
and Loading Information Placard located on the driver ’s
side door opening or on the sidewall of the tire. Compact
spare tire descriptions begin with the letter “T” or “S”
preceding the size designation. Example: T145/80D18
103M.
T, S = Temporary Spare Tire
Since this tire has limited tread life, the original equipment
tire should be repaired (or replaced) and reinstalled on
your vehicle at the first opportunity.
Do not install a wheel cover or attempt to mount a
conventional tire on the compact spare wheel, since the
wheel is designed specifically for the compact spare tire.
Do not install more than one compact spare tire and wheel
on the vehicle at any given time.
WARNING!
Compact and collapsible spares are for temporary
emergency use only. With these spares, do not drive
more than 50 mph (80 km/h). Temporary use spares
have limited tread life. When the tread is worn to the
tread wear indicators, the temporary use spare tire
needs to be replaced. Be sure to follow the warnings,
which apply to your spare. Failure to do so could result
in spare tire failure and loss of vehicle control.
Collapsible Spare Tire — If Equipped
The collapsible spare is for temporary emergency use only.
You can identify if your vehicle is equipped with a collaps-
ible spare by looking at the spare tire description on the
Tire and Loading Information Placard located on the
driver ’s side door opening or on the sidewall of the tire.
Collapsible spare tire description example: 165/80-17 101P.
Since this tire has limited tread life, the original equipment
tire should be repaired (or replaced) and reinstalled on
your vehicle at the first opportunity.
Inflate collapsible tire only after the wheel is properly
installed to the vehicle. Inflate the collapsible tire using the
electric air pump before lowering the vehicle.8
SERVICING AND MAINTENANCE 535
Page 538 of 696
Do not install a wheel cover or attempt to mount a
conventional tire on the collapsible spare wheel, since the
wheel is designed specifically for the collapsible spare tire.
WARNING!
Compact and Collapsible spares are for temporary
emergency use only. With these spares, do not drive
more than 50 mph (80 km/h). Temporary use spares
have limited tread life. When the tread is worn to the
tread wear indicators, the temporary use spare tire
needs to be replaced. Be sure to follow the warnings,
which apply to your spare. Failure to do so could result
in spare tire failure and loss of vehicle control.
Full Size Spare — If Equipped
The full size spare is for temporary emergency use only.
This tire may look like the originally equipped tire on the
front or rear axle of your vehicle, but it is not. This spare
tire may have limited tread life. When the tread is worn to
the tread wear indicators, the temporary use full size spare
tire needs to be replaced. Since it is not the same as your
original equipment tire, replace (or repair) the original
equipment tire and reinstall on the vehicle at the first
opportunity.
Limited Use Spare — If Equipped
The limited use spare tire is for temporary emergency use
only. This tire is identified by a label located on the limited
use spare wheel. This label contains the driving limitations
for this spare. This tire may look like the original equipped
tire on the front or rear axle of your vehicle, but it is not.
Installation of this limited use spare tire affects vehicle
handling. Since it is not the same as your original equip-
ment tire, replace (or repair) the original equipment tire
and reinstall on the vehicle at the first opportunity.
WARNING!
Limited use spares are for emergency use only. Instal-
lation of this limited use spare tire affects vehicle
handling. With this tire, do not drive more than the
speed listed on the limited use spare wheel. Keep
inflated to the cold tire inflation pressures listed on
your Tire and Loading Information Placard located on
the driver ’s side B-Pillar or the rear edge of the driver ’s
side door. Replace (or repair) the original equipment
tire at the first opportunity and reinstall it on your
vehicle. Failure to do so could result in loss of vehicle
control.
536 SERVICING AND MAINTENANCE
Page 551 of 696
In the event power assist is lost for any reason (i.e.,
repeated brake applications with the engine off) the brakes
will still function. However, the effort required to brake the
vehicle will be much greater than that required with the
power system operating.
WHEEL AND TIRE TORQUE SPECIFICATIONS
Proper lug nut/bolt torque is very important to ensure that
the wheel is properly mounted to the vehicle. Any time a
wheel has been removed and reinstalled on the vehicle, the
lug nuts/bolts should be torqued using a properly cali-
brated torque wrench using a high quality six sided (hex)
deep wall socket.
Torque Specifications
Lug Nut/BoltTorque **Lug Nut/Bolt
Size Lug Nut/Bolt
Socket Size
100 Ft-Lbs (135 N·m) M12 x 1.5
19 mm
**Use only your authorized dealer recommended lug nuts/
bolts and clean or remove any dirt or oil before tightening.
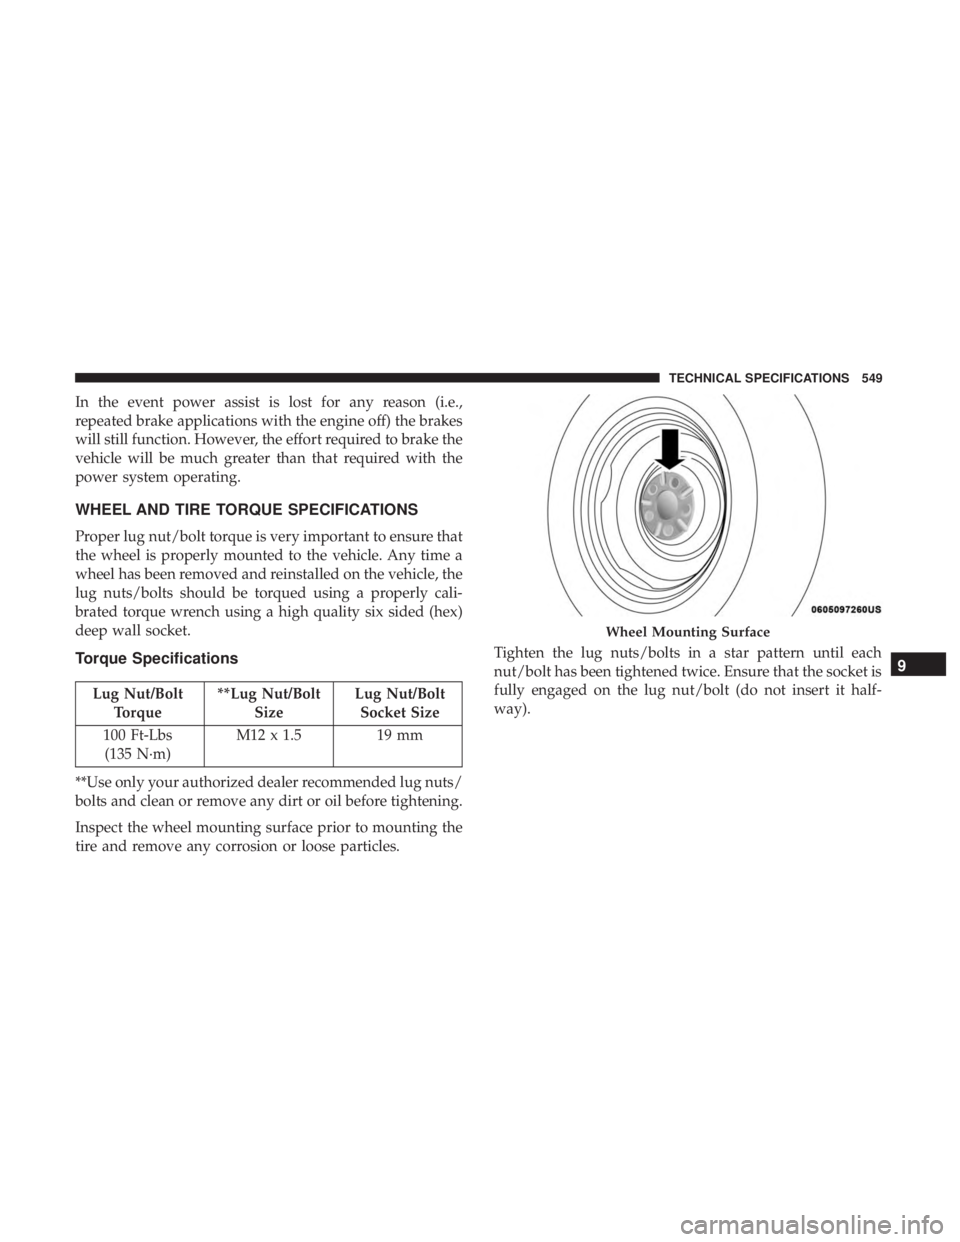
Inspect the wheel mounting surface prior to mounting the
tire and remove any corrosion or loose particles. Tighten the lug nuts/bolts in a star pattern until each
nut/bolt has been tightened twice. Ensure that the socket is
fully engaged on the lug nut/bolt (do not insert it half-
way).
Wheel Mounting Surface
9
TECHNICAL SPECIFICATIONS 549
Page 559 of 696
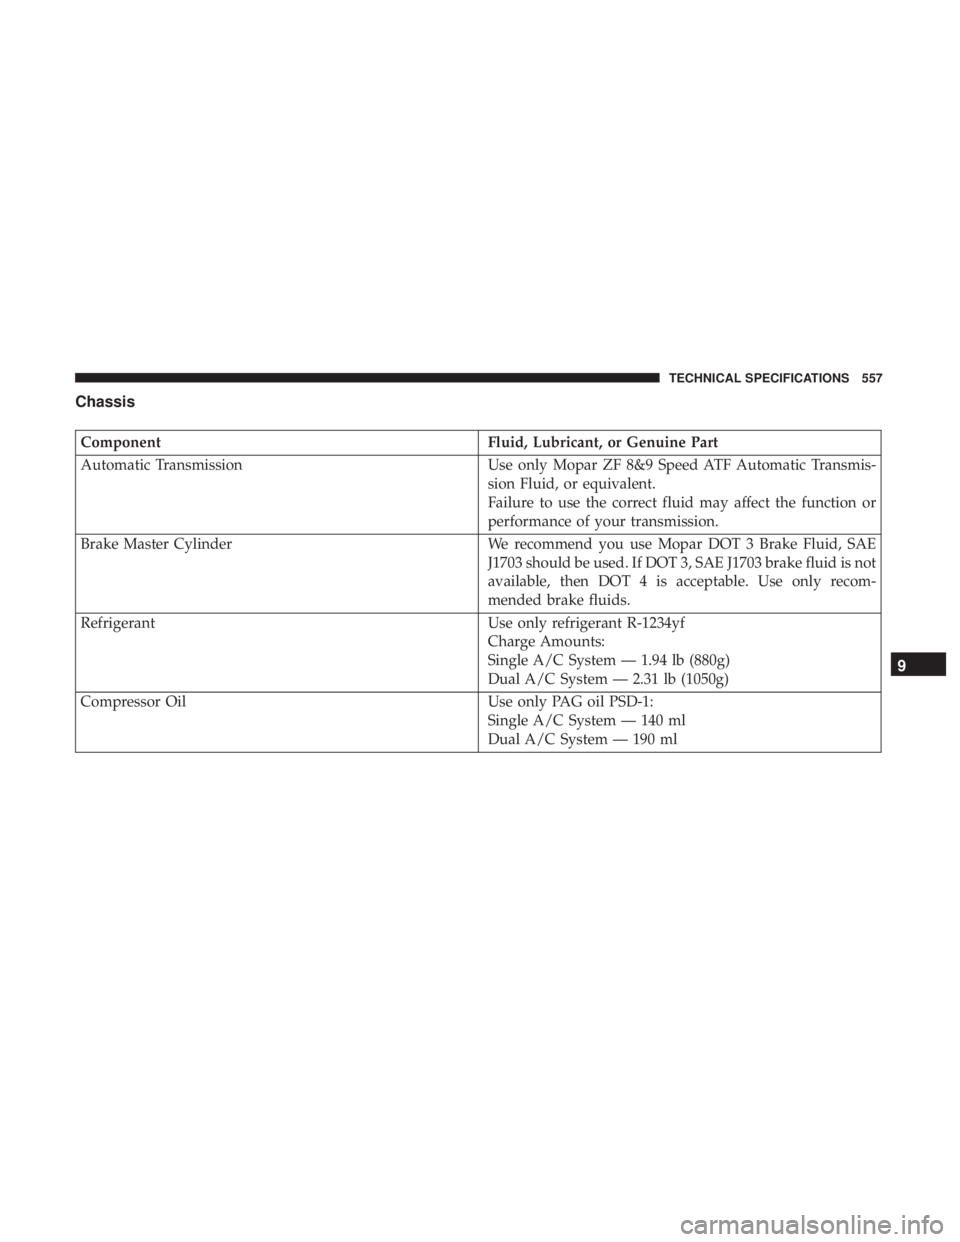
Chassis
ComponentFluid, Lubricant, or Genuine Part
Automatic Transmission Use only Mopar ZF 8&9 Speed ATF Automatic Transmis-
sion Fluid, or equivalent.
Failure to use the correct fluid may affect the function or
performance of your transmission.
Brake Master Cylinder We recommend you use Mopar DOT 3 Brake Fluid, SAE
J1703 should be used. If DOT 3, SAE J1703 brake fluid is not
available, then DOT 4 is acceptable. Use only recom-
mended brake fluids.
Refrigerant Use only refrigerant R-1234yf
Charge Amounts:
Single A/C System — 1.94 lb (880g)
Dual A/C System — 2.31 lb (1050g)
Compressor Oil Use only PAG oil PSD-1:
Single A/C System — 140 ml
Dual A/C System — 190 ml
9
TECHNICAL SPECIFICATIONS 557
Page 577 of 696
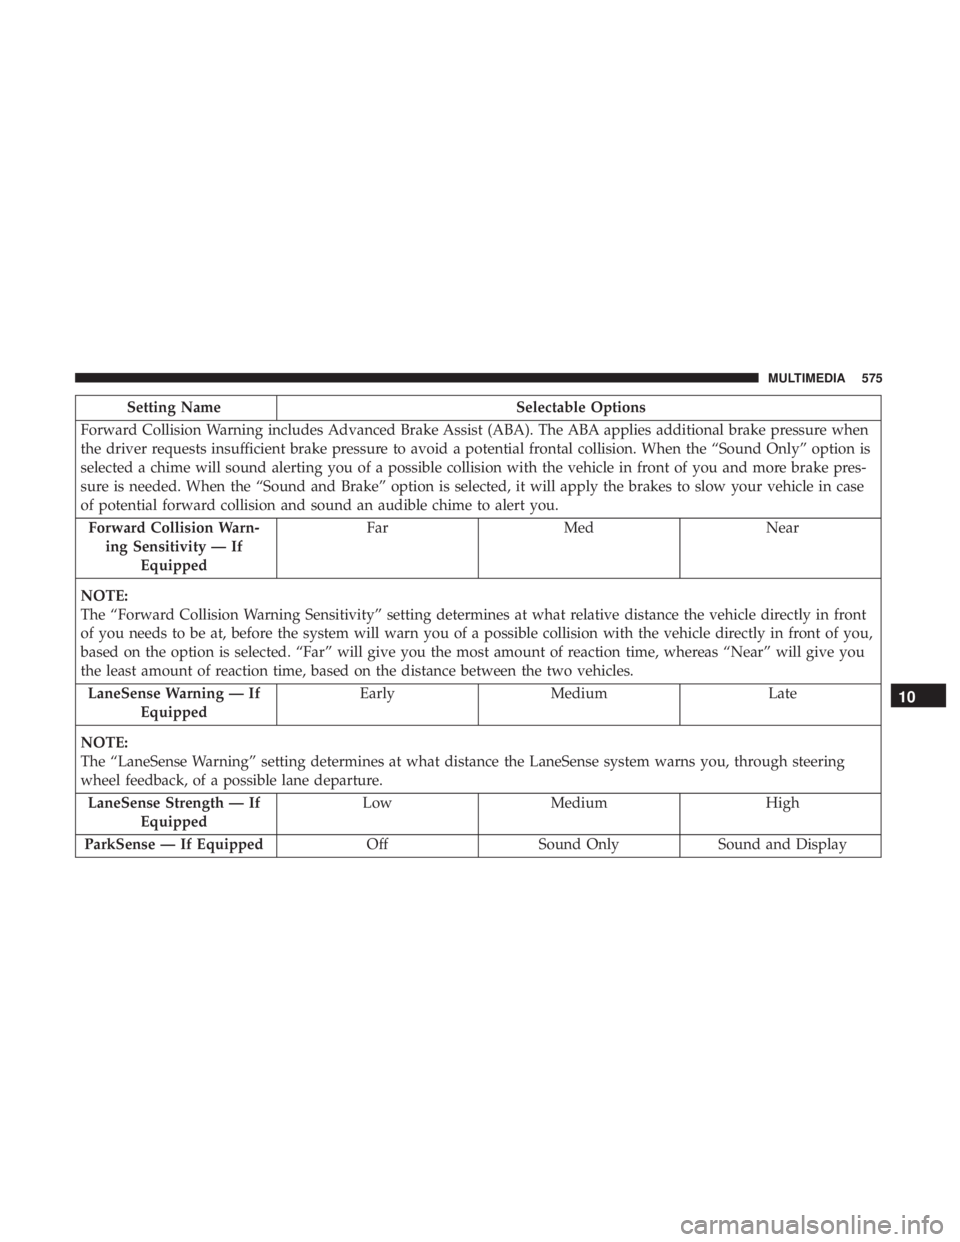
Setting NameSelectable Options
Forward Collision Warning includes Advanced Brake Assist (ABA). The ABA applies additional brake pressure when
the driver requests insufficient brake pressure to avoid a potential frontal collision. When the “Sound Only” option is
selected a chime will sound alerting you of a possible collision with the vehicle in front of you and more brake pres-
sure is needed. When the “Sound and Brake” option is selected, it will apply the brakes to slow your vehicle in case
of potential forward collision and sound an audible chime to alert you. Forward Collision Warn- ing Sensitivity — If Equipped Far
Med Near
NOTE:
The “Forward Collision Warning Sensitivity” setting determines at what relative distance the vehicle directly in front
of you needs to be at, before the system will warn you of a possible collision with the vehicle directly in front of you,
based on the option is selected. “Far” will give you the most amount of reaction time, whereas “Near” will give you
the least amount of reaction time, based on the distance between the two vehicles. LaneSense Warning — If Equipped Early
Medium Late
NOTE:
The “LaneSense Warning” setting determines at what distance the LaneSense system warns you, through steering
wheel feedback, of a possible lane departure. LaneSense Strength — If Equipped Low
Medium High
ParkSense — If Equipped OffSound Only Sound and Display
10
MULTIMEDIA 575