uconnect settings CHRYSLER PACIFICA 2020 Owner's Manual
[x] Cancel search | Manufacturer: CHRYSLER, Model Year: 2020, Model line: PACIFICA, Model: CHRYSLER PACIFICA 2020Pages: 516, PDF Size: 28.69 MB
Page 93 of 516
GETTING TO KNOW YOUR VEHICLE91
NOTE:
It is not necessary to move the temperature
settings for cold or hot vehicles. The system
automatically adjusts the temperature,
mode, and blower speed to provide comfort
as quickly as possible.
The temperature can be displayed in U.S. or
Metric units by selecting the U.S./Metric
customer-programmable feature. Refer to
the “Uconnect Settings” in “Multimedia” for
further information.
To provide you with maximum comfort in the
Automatic mode during cold start-ups, the
blower fan will remain on low until the engine
warms up. The blower will increase in speed
and transition into Auto mode.
Manual Operation Override
This system offers a full complement of manual
override features. The AUTO symbol in the front
Automatic Temperature Control (ATC) display
will be turned off when the system is being used
in the manual mode.
Operating Tips
NOTE:
Refer to the chart at the end of this section for
suggested control settings for various weather
conditions.
Summer Operation
The engine cooling system must be protected
with a high-quality antifreeze coolant to provide
proper corrosion protection and to protect
against engine overheating. OAT coolant
(conforming to MS.90032) is recommended.
Refer to “Fluids And Lubricants” in “Technical
Specifications” for proper coolant selection.
Winter Operation
To ensure the best possible heater and
defroster performance, make sure the engine
cooling system is functioning properly and the
proper amount, type, and concentration of
coolant is used. Refer to “Fluids And
Lubricants” in “Technical Specifications” for
proper coolant selection. Use of the air
Recirculation mode during Winter months is not
recommended, because it may cause window
fogging.
Vacation/Storage
Before you store your vehicle, or keep it out of
service (i.e., vacation) for two weeks or more,
run the air conditioning system at idle for about
five minutes, in fresh air with the blower setting
on high. This will ensure adequate system
lubrication to minimize the possibility of
compressor damage when the system is started
again.
Window Fogging
Vehicle windows tend to fog on the inside in
mild, rainy, and/or humid weather. To clear the
windows, select Defrost or Mix mode and
increase the front blower speed. Do not use the
Recirculation mode without A/C (air
conditioning) for long periods, as fogging may
occur.
2
20_RU_OM_EN_US_t.book Page 91
Page 99 of 516
GETTING TO KNOW YOUR VEHICLE97
NOTE:
If the sunroof is open, the shade will close to the
half-open position. Pushing the shade close
button again will automatically close both the
sunroof and shade completely.
Closing Power Shade — Manual Mode
To close the shade, push and hold the
sunshade close switch. Any release of the
switch will stop the movement and the shade
will remain in a partially closed condition until
the switch is pushed again.
Pinch Protect Feature
This feature will detect an obstruction in the
closing of the sunroof during the Express Close
operation. If an obstruction in the path of the
sunroof is detected, the sunroof will
automatically retract. Remove the obstruction if
this occurs. NOTE:
If three consecutive sunroof close attempts
result in Pinch Protect reversals, Pinch Protect
will disable and the sunroof must be closed in
Manual Mode.
Sunroof Maintenance
Use only a non-abrasive cleaner and a soft cloth
to clean the glass panel. Periodically check for
and clear out any debris that may have
collected in the tracks.
Ignition Off Operation
The power sunroof switch will remain active for
up to approximately 10 minutes after the
ignition switch is placed in the OFF position.
Opening either front door will cancel this
feature.
NOTE:
Ignition off time is programmable through the
Uconnect System. Refer to “Uconnect Settings”
in “Multimedia” for further information.
HOOD
Opening
If applicable, refer to the “Hybrid Supplement”
for additional information.
The hood release lever (to open the primary
latch) and safety latch (to open the secondary
latch) must be released to open the hood.
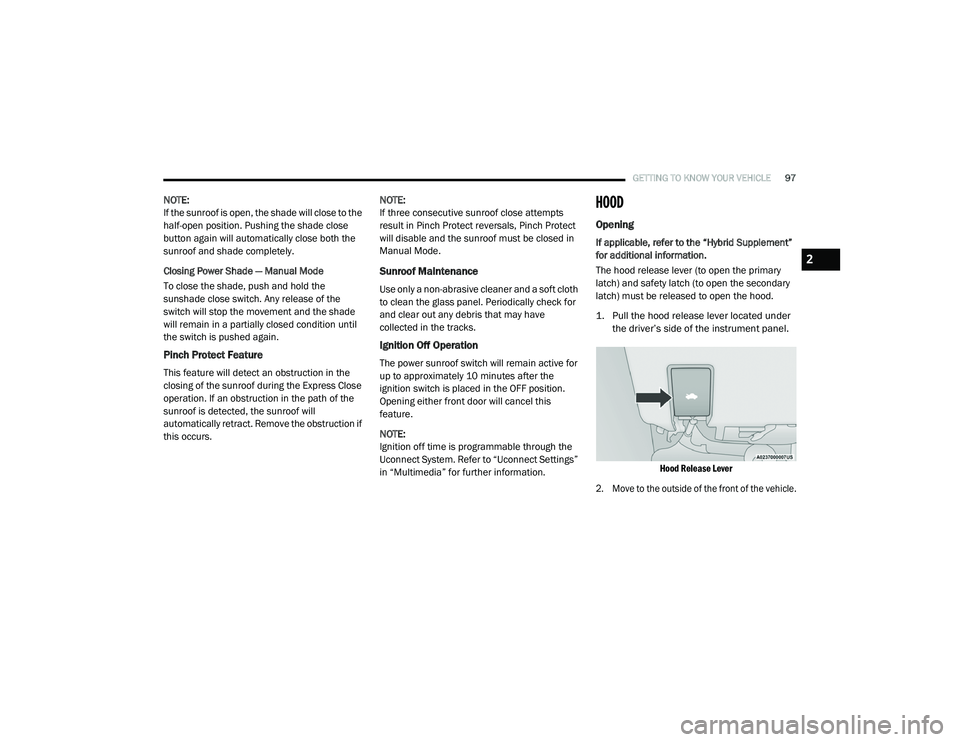
1. Pull the hood release lever located under
the driver’s side of the instrument panel.
Hood Release Lever
2. Move to the outside of the front of the vehicle.
2
20_RU_OM_EN_US_t.book Page 97
Page 101 of 516
GETTING TO KNOW YOUR VEHICLE99
LIFTGATE
Opening
To Unlock/Enter The Liftgate
The liftgate may be released in several ways:
Overhead console liftgate button
Key fob
Outside handle
Push the liftgate button on the key fob twice
within five seconds to release the liftgate.
The key fob and the overhead console button
will release the liftgate when the liftgate is
locked. The outside handle requires the liftgate
to be unlocked. If the vehicle is equipped with
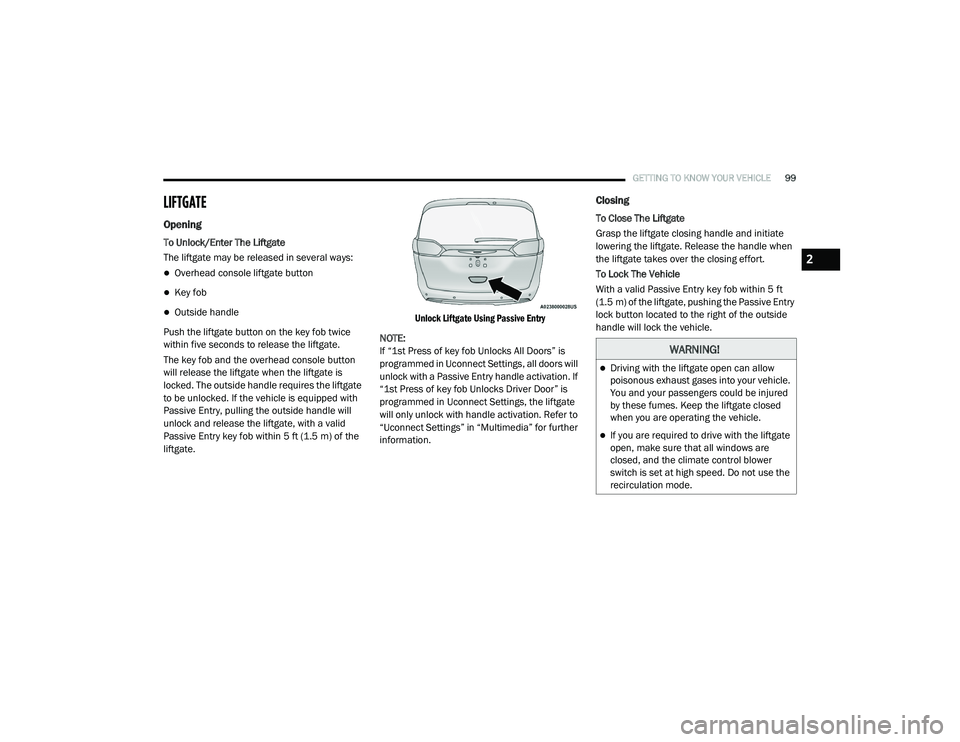
Passive Entry, pulling the outside handle will
unlock and release the liftgate, with a valid
Passive Entry key fob within 5 ft (1.5 m) of the
liftgate.
Unlock Liftgate Using Passive Entry
NOTE:
If “1st Press of key fob Unlocks All Doors” is
programmed in Uconnect Settings, all doors will
unlock with a Passive Entry handle activation. If
“1st Press of key fob Unlocks Driver Door” is
programmed in Uconnect Settings, the liftgate
will only unlock with handle activation. Refer to
“Uconnect Settings” in “Multimedia” for further
information.
Closing
To Close The Liftgate
Grasp the liftgate closing handle and initiate
lowering the liftgate. Release the handle when
the liftgate takes over the closing effort.
To Lock The Vehicle
With a valid Passive Entry key fob within 5 ft
(1.5 m) of the liftgate, pushing the Passive Entry
lock button located to the right of the outside
handle will lock the vehicle.
WARNING!
Driving with the liftgate open can allow
poisonous exhaust gases into your vehicle.
You and your passengers could be injured
by these fumes. Keep the liftgate closed
when you are operating the vehicle.
If you are required to drive with the liftgate
open, make sure that all windows are
closed, and the climate control blower
switch is set at high speed. Do not use the
recirculation mode.
2
20_RU_OM_EN_US_t.book Page 99
Page 102 of 516
100GETTING TO KNOW YOUR VEHICLE
Power Liftgate — If Equipped
The power liftgate may be opened or closed in
several ways:
Overhead console liftgate button
Key fob
Outside handle (opens liftgate only)
Button just inside the liftgate on the upper
left trim (when liftgate is open)
Hands-Free Liftgate (if equipped) — opens lift -
gate only
Using the above ways:
When the liftgate is fully closed, the liftgate
will open
When the liftgate is fully open, the liftgate will
close
When the liftgate is moving, the liftgate will
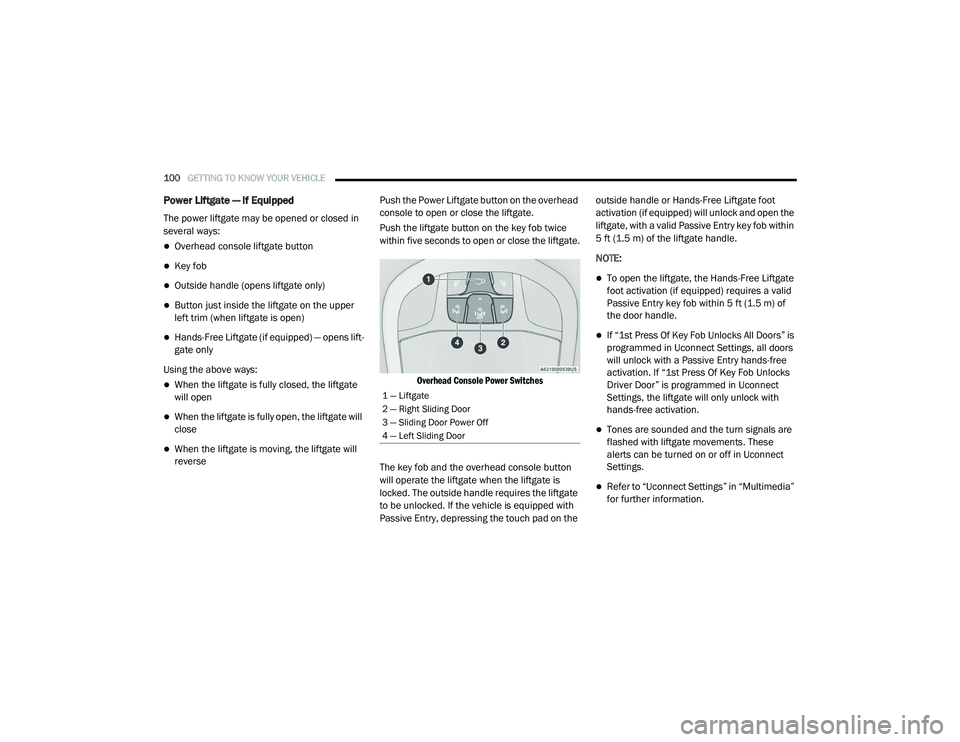
reverse Push the Power Liftgate button on the overhead
console to open or close the liftgate.
Push the liftgate button on the key fob twice
within five seconds to open or close the liftgate.
Overhead Console Power Switches
The key fob and the overhead console button
will operate the liftgate when the liftgate is
locked. The outside handle requires the liftgate
to be unlocked. If the vehicle is equipped with
Passive Entry, depressing the touch pad on the outside handle or Hands-Free Liftgate foot
activation (if equipped) will unlock and open the
liftgate, with a valid Passive Entry key fob within
5 ft (1.5 m) of the liftgate handle.
NOTE:
To open the liftgate, the Hands-Free Liftgate
foot activation (if equipped) requires a valid
Passive Entry key fob within 5 ft (1.5 m) of
the door handle.
If “1st Press Of Key Fob Unlocks All Doors” is
programmed in Uconnect Settings, all doors
will unlock with a Passive Entry hands-free
activation. If “1st Press Of Key Fob Unlocks
Driver Door” is programmed in Uconnect
Settings, the liftgate will only unlock with
hands-free activation.
Tones are sounded and the turn signals are
flashed with liftgate movements. These
alerts can be turned on or off in Uconnect
Settings.
Refer to “Uconnect Settings” in “Multimedia”
for further information.
1 — Liftgate
2 — Right Sliding Door
3 — Sliding Door Power Off
4 — Left Sliding Door
20_RU_OM_EN_US_t.book Page 100
Page 104 of 516
102GETTING TO KNOW YOUR VEHICLE
(Continued)
NOTE:
To open the Hands-Free Liftgate requires a valid
Passive Entry key fob within 5 ft (1.5 m) of the
door handle. If a valid Passive Entry key fob is
not within 5 ft (1.5 m), the liftgate will not
respond to any kicks.
NOTE:
The Hands-Free Liftgate will only operate
when the transmission is in PARK.
If anything obstructs the Hands-Free Liftgate
while it is opening or closing, the liftgate will
automatically reverse to the closed position,
provided it meets sufficient resistance.
There are pinch sensors attached to the side
of the liftgate opening. Light pressure
anywhere along these strips will cause the
liftgate to return to the open position.
If the power liftgate encounters multiple
obstructions within the same cycle, the
system will automatically stop. If this occurs,
the liftgate must be operated manually.
The power liftgate will release, but not power
open, in temperatures below −12°F
(−24°C). Be sure to remove any buildup of
snow or ice from the liftgate before opening
the liftgate.
If the liftgate is left open for an extended
period of time, the liftgate may need to be
closed manually to reset power liftgate func-
tionality. Gas props support the liftgate in the open
position. However, because the gas pressure
drops with temperature, it may be necessary to
assist the props when opening the liftgate in
cold weather.
NOTE:
Allow the power system to open the liftgate.
Manually pushing or pulling the liftgate may
activate the liftgate obstacle detection feature
and stop the power operation or reverse its
direction.
CAUTION!
The Hands-Free Liftgate feature may be
turned on or off in Uconnect Settings. Refer to
“Uconnect Settings” in “Multimedia” for
further information. The Hands-Free Liftgate
feature should be turned off during Jacking,
Tire Changing, and Vehicle Service.
WARNING!
Driving with the liftgate open can allow
poisonous exhaust gases into your vehicle.
You and your passengers could be injured
by these fumes. Keep the liftgate closed
when you are operating the vehicle.
If you are required to drive with the liftgate
open, make sure that all windows are
closed, and the climate control blower
switch is set at high speed. Do not use the
recirculation mode.
WARNING!
During power operation, personal injury or
cargo damage may occur. Ensure the liftgate
travel path is clear. Make sure the liftgate is
closed and latched before driving away.
WARNING!
(Continued)
20_RU_OM_EN_US_t.book Page 102
Page 160 of 516
158SAFETY
Towing With HSA
HSA will also provide assistance to mitigate roll
back while towing a trailer.
Disabling And Enabling HSA
This feature can be turned on or turned off. To
change the current setting, proceed as follows:
If disabling HSA using Uconnect Settings,
refer to “Uconnect Settings” in “Multimedia”
for further information.
Rain Brake Support (RBS)
Rain Brake Support (RBS) may improve braking
performance in wet conditions. It will
periodically apply a small amount of brake
pressure to remove any water buildup on the
front brake rotors. It functions when the
windshield wipers are in LO or HI speed. When
RBS is active, there is no notification to the
driver and no driver interaction is required.
Ready Alert Braking (RAB)
Ready Alert Braking (RAB) may reduce the time
required to reach full braking during emergency
braking situations. It anticipates when an
emergency braking situation may occur by
monitoring how fast the throttle is released by
the driver. The Electronic Brake Control (EBC)
system will prepare the brake system for a
panic stop.
Traction Control System (TCS)
The Traction Control System (TCS) monitors the
amount of wheel spin of each of the driven
wheels. If wheel spin is detected, the TCS may
apply brake pressure to the spinning wheel(s)
and/or reduce vehicle power to provide
enhanced acceleration and stability. A feature
of the TCS, Brake Limited Differential (BLD),
functions similar to a limited slip differential
and controls the wheel spin across a driven
axle. If one wheel on a driven axle is spinning
faster than the other, the system will apply the
brake of the spinning wheel. This will allow more
vehicle torque to be applied to the wheel that is
not spinning. BLD may remain enabled even if
TCS and the Electronic Stability Control (ESC)
are in a reduced mode.
Trailer Sway Control (TSC)
Trailer Sway Control (TSC) uses sensors in the
vehicle to recognize an excessively swaying
trailer and will take the appropriate actions to
attempt to stop the sway. TSC will become
active automatically once an excessively
swaying trailer is recognized. Note that TSC
cannot stop all trailers from swaying. Always
use caution when towing a trailer and follow the
trailer tongue weight recommendations. Refer
WARNING!
If you use a trailer brake controller with your
trailer, the trailer brakes may be activated
and deactivated with the brake switch. If so,
there may not be enough brake pressure to
hold both the vehicle and the trailer on a hill
when the brake pedal is released. In order to
avoid rolling down an incline while resuming
acceleration, manually activate the trailer
brake or apply more vehicle brake pressure
prior to releasing the brake pedal.
HSA is not a parking brake. Always apply
the parking brake fully when exiting your
vehicle. Also, be certain to place the trans -
mission in PARK.
Failure to follow these warnings can result
in a collision or serious personal injury.
20_RU_OM_EN_US_t.book Page 158
Page 165 of 516
SAFETY163
Modes Of Operation
Three selectable modes of operation are
available in the Uconnect System. Refer to
“Uconnect Settings” in “Multimedia” for further
information.
Blind Spot Alert Lights Only — Default Setting
When operating in Blind Spot Alert mode, the
BSM system will provide a visual alert in the
appropriate side view mirror based on a
detected object. However, when the system is
operating in Rear Cross Path (RCP) mode, the
system will respond with both visual and
audible alerts when a detected object is
present. Whenever an audible alert is
requested, the radio is muted.
Blind Spot Alert Lights/Chime
When operating in Blind Spot Alert Lights/
Chime mode, the BSM system will provide a
visual alert in the appropriate side view mirror
based on a detected object. If the turn signal is
then activated, and it corresponds to an alert
present on that side of the vehicle, an audible
chime will also be sounded. Whenever a turn
signal and detected object are present on the
same side at the same time, both the visual and
audible alerts will be issued. In addition to the
audible alert the radio (if on) will also be muted. NOTE:
Whenever an audible alert is requested by the
BSM system, the radio is also muted.
When the system is in RCP, the system shall
respond with both visual and audible alerts
when a detected object is present. Whenever
an audible alert is requested, the radio is also
muted. Turn/hazard signal status is ignored;
the RCP state always requests the chime.
Blind Spot Alert Off
When the BSM system is turned off there will be
no visual or audible alerts from either the BSM
or RCP systems.
NOTE:
The BSM system will store the current oper
-
ating mode when the vehicle is shut off. Each
time the vehicle is started the previously
stored mode will be recalled and used.
The BSM system can work in conjunction with
the Keysense function of the vehicle (if
equipped). Refer to “KeySense Cluster
Messages" in “Getting To Know Your Instru -
ment Panel” for further information.
General Information
The following regulatory statement applies to all
Radio Frequency (RF) devices equipped in this
vehicle:
This device complies with Part 15 of the FCC
Rules and with Innovation, Science and
Economic Development Canada license-exempt
RSS standard(s). Operation is subject to the
following two conditions:
1. This device may not cause harmful
interference, and
2. This device must accept any interference received, including interference that may
cause undesired operation.
Le présent appareil est conforme aux CNR
d`Innovation, Science and Economic
Development applicables aux appareils radio
exempts de licence. L'exploitation est autorisée
aux deux conditions suivantes:
1. l'appareil ne doit pas produire de brouillage, et
2. l'utilisateur de l'appareil doit accepter tout brouillage radioélectrique subi, même si le
brouillage est susceptible d'en compro -
mettre le fonctionnement.
4
20_RU_OM_EN_US_t.book Page 163
Page 167 of 516
SAFETY165
It is unsafe to test the FCW system. To
prevent such misuse of the system, after four
Active Braking events within a key cycle, the
Active Braking portion of FCW will be deacti -
vated until the next key cycle.
The FCW system is intended for on-road use
only. If the vehicle is taken off-road, the FCW
system should be deactivated to prevent
unnecessary warnings to the surroundings.
Turning FCW On Or Off
The Forward Collision menu setting is located in
the Uconnect settings.
NOTE:
The default status of FCW is “on”, this allows
the system to warn you of a possible collision
with the vehicle in front of you.
Changing the FCW status to “off” deactivates
the system, so no warning or active braking will
be available in case of a possible collision.
NOTE:
The FCW system state is kept in memory from
one key cycle to the next. If the system is
turned off, it will remain off when the vehicle
is restarted.
FCW can work in conjunction with the
KeySense function of the vehicle (if
equipped). Refer to “KeySense Cluster
Messages" in “Getting To Know Your Instru -
ment Panel” for further information.
FCW Braking Status And Sensitivity
The FCW Sensitivity and Active Braking status
are programmable through the Uconnect
System. Refer to “Uconnect Settings” in
“Multimedia” for further information.
The default sensitivity of FCW is the “Medium”
setting and the system status is “Warning &
Braking”. This allows the system to warn the
driver of a possible collision with the vehicle in
front using audible/visual warnings and it
applies autonomous braking.
Changing the FCW status to the “Far” setting
allows the system to warn the driver of a possible
collision with the vehicle in front using audible/
visual warning when the latter is at a farther
distance than the “Medium” setting. This
provides the most reaction time to avoid a
possible collision.
Changing the FCW status to the “Near” setting,
allows the system to warn the driver of a possible
collision with the vehicle in front when the
distance between the vehicle in the front is much
closer. This setting provides less reaction time
than the “Far” and “Medium” settings, which
allows for a more dynamic driving experience.
WARNING!
Forward Collision Warning (FCW) is not
intended to avoid a collision on its own, nor
can FCW detect every type of potential
collision. The driver has the responsibility to
avoid a collision by controlling the vehicle via
braking and steering. Failure to follow this
warning could lead to serious injury or death.
4
20_RU_OM_EN_US_t.book Page 165
Page 227 of 516
STARTING AND OPERATING225
While cruising, brief full-throttle acceleration
within the limits of local traffic laws contributes
to a good break-in. Wide-open throttle
acceleration in low gear can be detrimental and
should be avoided.
The engine oil installed in the engine at the
factory is a high-quality energy conserving type
lubricant. Oil changes should be consistent with
anticipated climate conditions under which
vehicle operations will occur. For the
recommended viscosity and quality grades,
refer to “Dealer Service” in “Servicing And
Maintenance”.
NOTE:
A new engine may consume some oil during its
first few thousand miles (kilometers) of opera -
tion. This should be considered a normal part of
the break-in and not interpreted as a problem.PARK BRAKE
Electric Park Brake (EPB)
Your vehicle is equipped with an Electric Park
Brake System (EPB) that offers simple
operation, and some additional features that
make the park brake more convenient and
useful.
The park brake is primarily intended to prevent
the vehicle from rolling while parked. Before
leaving the vehicle, make sure that the park
brake is applied. Also, be certain to leave the
transmission in PARK.
You can engage the park brake in two ways;
Manually, by applying the park brake switch.
Automatically, by enabling the Auto Park
Brake feature in the customer programmable
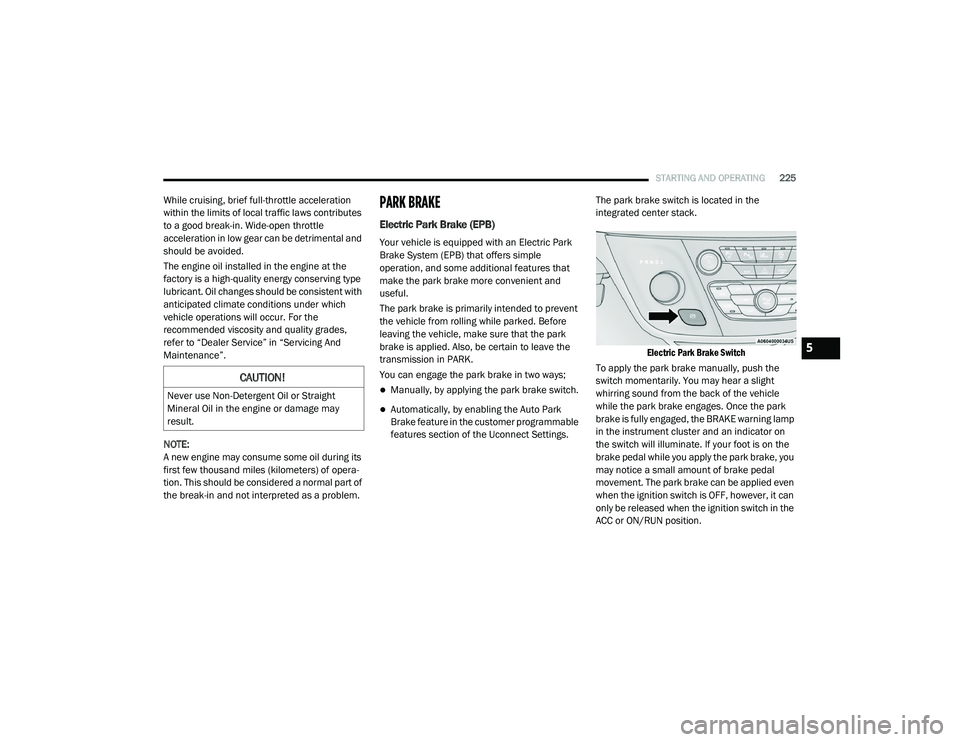
features section of the Uconnect Settings. The park brake switch is located in the
integrated center stack.
Electric Park Brake Switch
To apply the park brake manually, push the
switch momentarily. You may hear a slight
whirring sound from the back of the vehicle
while the park brake engages. Once the park
brake is fully engaged, the BRAKE warning lamp
in the instrument cluster and an indicator on
the switch will illuminate. If your foot is on the
brake pedal while you apply the park brake, you
may notice a small amount of brake pedal
movement. The park brake can be applied even
when the ignition switch is OFF, however, it can
only be released when the ignition switch in the
ACC or ON/RUN position.
CAUTION!
Never use Non-Detergent Oil or Straight
Mineral Oil in the engine or damage may
result.
5
20_RU_OM_EN_US_t.book Page 225
Page 229 of 516
STARTING AND OPERATING227
If exceptional circumstances should make it
necessary to engage the park brake while the
vehicle is in motion, push on the electric park
brake switch for as long as engagement is
desired. The BRAKE warning lamp will
illuminate, and a continuous chime will sound.
The rear stop lamps will also be illuminated
automatically while the vehicle remains in
motion. To disengage the park brake while the vehicle is
in motion, release the switch. If the vehicle is
brought to a complete stop using the park
brake, when the vehicle reaches approximately
3 mph (4.8 km/h), the park brake will remain
engaged.
In the unlikely event of a malfunction of the
Electric Park Brake system, a yellow EPB fault
lamp will illuminate. This may be accompanied
by the BRAKE warning lamp flashing. In this
case, urgent service of the electric park brake
system is required. Do not rely on the park
brake to hold the vehicle stationary.
Auto Park Brake
The Electric Park Brake can be programmed to
be applied automatically whenever the vehicle
is at a standstill and the automatic transmission
is placed in PARK. Auto Park Brake is enabled
and disabled by customer selection through the
“Customer Programmable Features” section of
the “Uconnect Settings”.
SafeHold
SafeHold is a safety feature of the Electric Park
Brake System that will engage the park brake
automatically if the vehicle is left unsecured. If
the automatic transmission is not in PARK, the
seat belt is unbuckled, the driver door is open,
the vehicle is at a standstill, and there is no
attempt to depress the brake pedal or
accelerator pedal, the park brake will
automatically engage to prevent the vehicle
from rolling.
SafeHold can be temporarily bypassed by
pushing the Electric Park Brake Switch while the
driver door is open and brake pedal is pressed.
Once manually bypassed, SafeHold will be
enabled again once the vehicle reaches
12 mph (20 km/h) or the ignition is cycled to
the OFF position and back to ON again.
Brake Service Mode
We recommend having your brakes serviced by
an authorized dealer. You should only make
repairs for which you have the knowledge and
the right equipment. You should only enter
Brake Service Mode during brake service.
When servicing your rear brakes, it may be
necessary for you or your technician to push the
rear piston into the rear caliper bore. With the
Driving the vehicle with the parking brake
engaged, or repeated use of the parking
brake to slow the vehicle may cause
serious damage to the brake system.
CAUTION!
If the Brake System Warning Light remains on
with the parking brake released, a brake
system malfunction is indicated. Have the
brake system serviced by an authorized
dealer immediately.
WARNING!
(Continued)
5
20_RU_OM_EN_US_t.book Page 227