CHRYSLER PACIFICA HYBRID 2018 Owners Manual
Manufacturer: CHRYSLER, Model Year: 2018, Model line: PACIFICA HYBRID, Model: CHRYSLER PACIFICA HYBRID 2018Pages: 614, PDF Size: 7.08 MB
Page 101 of 614
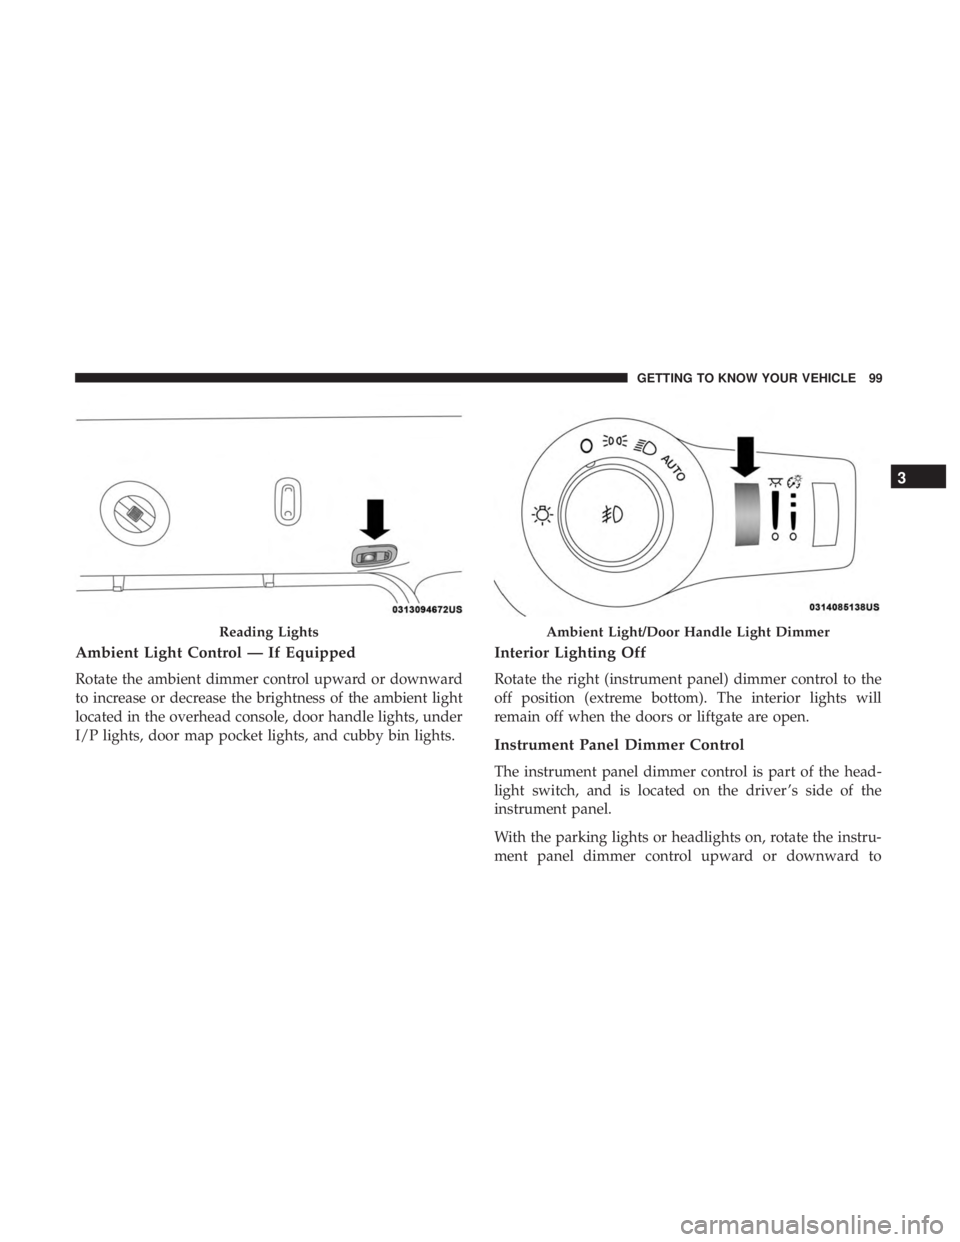
Ambient Light Control — If Equipped
Rotate the ambient dimmer control upward or downward
to increase or decrease the brightness of the ambient light
located in the overhead console, door handle lights, under
I/P lights, door map pocket lights, and cubby bin lights.
Interior Lighting Off
Rotate the right (instrument panel) dimmer control to the
off position (extreme bottom). The interior lights will
remain off when the doors or liftgate are open.
Instrument Panel Dimmer Control
The instrument panel dimmer control is part of the head-
light switch, and is located on the driver ’s side of the
instrument panel.
With the parking lights or headlights on, rotate the instru-
ment panel dimmer control upward or downward to
Reading LightsAmbient Light/Door Handle Light Dimmer
3
GETTING TO KNOW YOUR VEHICLE 99
Page 102 of 614
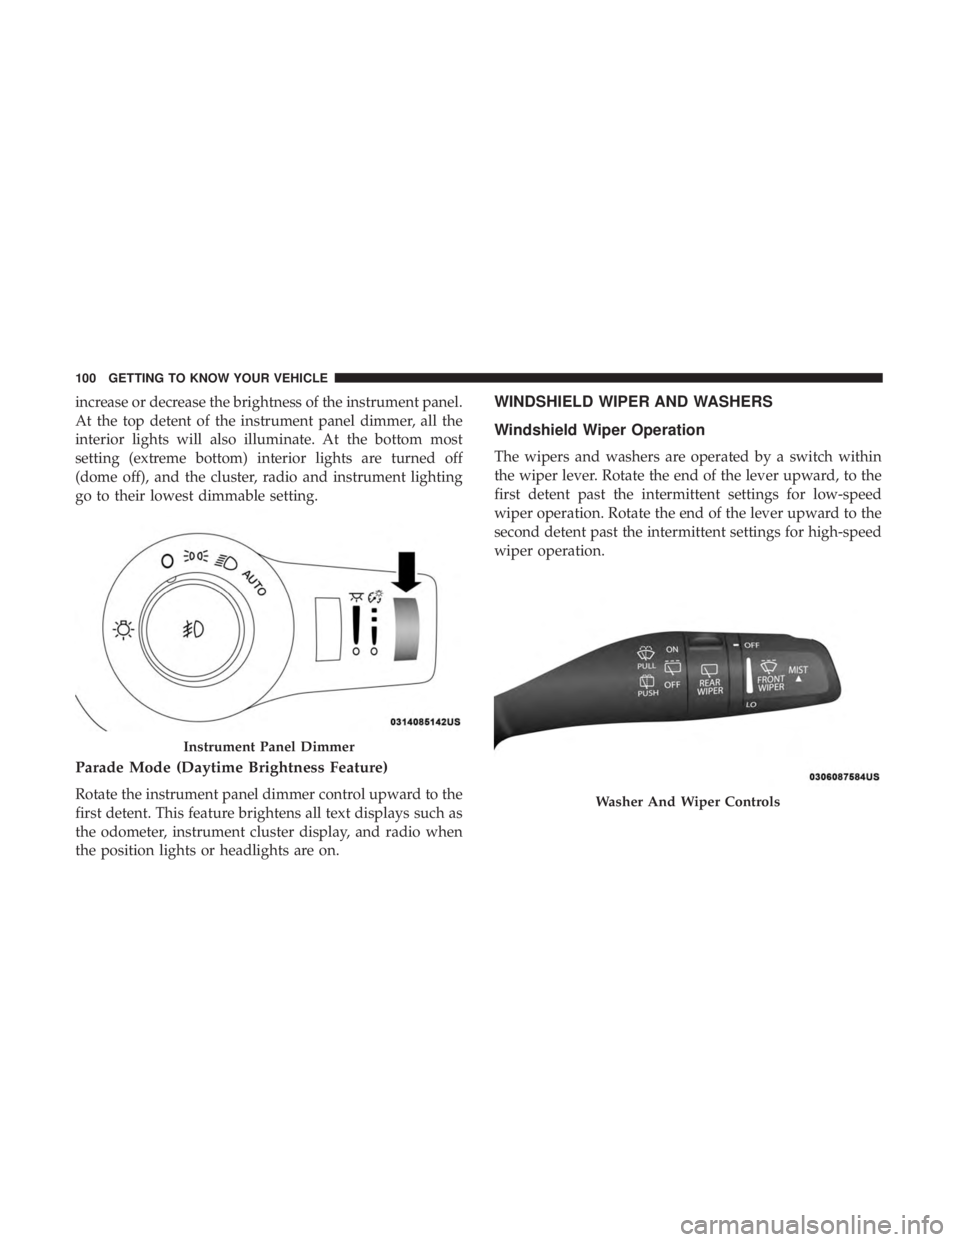
increase or decrease the brightness of the instrument panel.
At the top detent of the instrument panel dimmer, all the
interior lights will also illuminate. At the bottom most
setting (extreme bottom) interior lights are turned off
(dome off), and the cluster, radio and instrument lighting
go to their lowest dimmable setting.
Parade Mode (Daytime Brightness Feature)
Rotate the instrument panel dimmer control upward to the
first detent. This feature brightens all text displays such as
the odometer, instrument cluster display, and radio when
the position lights or headlights are on.
WINDSHIELD WIPER AND WASHERS
Windshield Wiper Operation
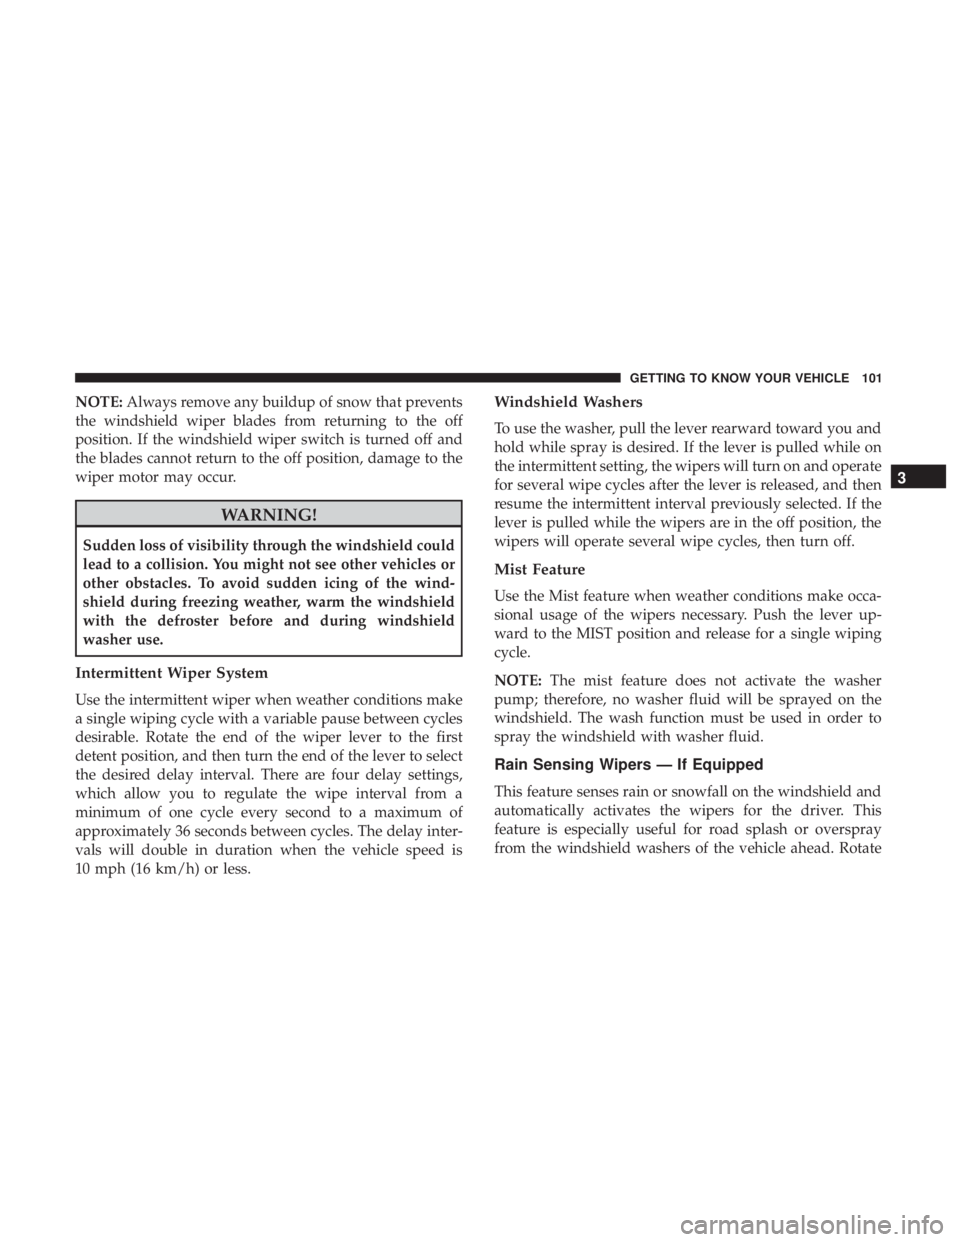
The wipers and washers are operated by a switch within
the wiper lever. Rotate the end of the lever upward, to the
first detent past the intermittent settings for low-speed
wiper operation. Rotate the end of the lever upward to the
second detent past the intermittent settings for high-speed
wiper operation.
Instrument Panel Dimmer
Washer And Wiper Controls
100 GETTING TO KNOW YOUR VEHICLE
Page 103 of 614
NOTE:Always remove any buildup of snow that prevents
the windshield wiper blades from returning to the off
position. If the windshield wiper switch is turned off and
the blades cannot return to the off position, damage to the
wiper motor may occur.
WARNING!
Sudden loss of visibility through the windshield could
lead to a collision. You might not see other vehicles or
other obstacles. To avoid sudden icing of the wind-
shield during freezing weather, warm the windshield
with the defroster before and during windshield
washer use.
Intermittent Wiper System
Use the intermittent wiper when weather conditions make
a single wiping cycle with a variable pause between cycles
desirable. Rotate the end of the wiper lever to the first
detent position, and then turn the end of the lever to select
the desired delay interval. There are four delay settings,
which allow you to regulate the wipe interval from a
minimum of one cycle every second to a maximum of
approximately 36 seconds between cycles. The delay inter-
vals will double in duration when the vehicle speed is
10 mph (16 km/h) or less.
Windshield Washers
To use the washer, pull the lever rearward toward you and
hold while spray is desired. If the lever is pulled while on
the intermittent setting, the wipers will turn on and operate
for several wipe cycles after the lever is released, and then
resume the intermittent interval previously selected. If the
lever is pulled while the wipers are in the off position, the
wipers will operate several wipe cycles, then turn off.
Mist Feature
Use the Mist feature when weather conditions make occa-
sional usage of the wipers necessary. Push the lever up-
ward to the MIST position and release for a single wiping
cycle.
NOTE: The mist feature does not activate the washer
pump; therefore, no washer fluid will be sprayed on the
windshield. The wash function must be used in order to
spray the windshield with washer fluid.
Rain Sensing Wipers — If Equipped
This feature senses rain or snowfall on the windshield and
automatically activates the wipers for the driver. This
feature is especially useful for road splash or overspray
from the windshield washers of the vehicle ahead. Rotate
3
GETTING TO KNOW YOUR VEHICLE 101
Page 104 of 614
the end of the multifunction lever to one of the four
intermittent wiper sensitivity settings to activate this fea-
ture.
The sensitivity of the system is adjustable from the multi-
function lever. Wiper sensitivity position 3 has been cali-
brated for best overall wiping sensitivity. If the operator
desires more wiping sensitivity, they may select sensitivity
position 4. If the operator desires less wiping sensitivity,
they may select sensitivity positions 2 or 1. Place the
multifunction lever in the OFF position when not using the
system.
NOTE:
•The Rain Sensing feature will not operate when the
wiper speed is in the low or high position.
• The Rain Sensing feature may not function properly
when ice or dried saltwater is present on the windshield.
• Use of Rain-X or products containing wax or silicone
may reduce rain sensor performance.
• The Rain Sensing feature can be turned on and off
through the Uconnect System. Refer to “Uconnect Set-
tings” in “Multimedia” for further information. The Rain Sensing system has protective features for the
wiper blades and arms. It will not operate under the
following conditions:
•
Low Temperature Wipe Inhibit — The Rain Sensing
feature will not operate when the ignition is first
switched ON, when the vehicle is stationary and the
outside temperature is below 32°F (0°C), unless the
wiper control on the multifunction lever is moved, the
vehicle speed becomes greater than 3 mph (5 km/h) or
the outside temperature rises above freezing.
• Neutral Wipe Inhibit — The Rain Sensing feature will
not operate when the ignition is ON, when the transmis-
sion gear selector is in the NEUTRAL position and the
vehicle speed is less than 3 mph (5 km/h), unless the
wiper control on the multifunction lever is moved, the
vehicle speed is greater than 3 mph (5 km/h) or the gear
selector is moved out of the NEUTRAL position.
• Remote Start Mode Inhibit —
On vehicles equipped
with Remote Starting system, Rain Sensing wipers are not
operational when the vehicle is in the remote start mode.
Once the operator is in the vehicle and has placed the
ignition switch in the RUN position, rain sensing wiper
operation can resume, if it has been selected, and no other
inhibit conditions (mentioned previously) exist.
102 GETTING TO KNOW YOUR VEHICLE
Page 105 of 614
Rear Wiper And Washer
Rear Windshield Wiper Operation
Rotate the windshield wiper lever center ring upwards to
operate one of two modes for the rear window wiper:
•First detent — intermittent mode.
• Second detent — continuous mode.
Rear Windshield Washer Operation
Pushing the windshield wiper lever forward activates the
rear window washer. If the lever is pushed while on the
intermittent setting, the wipers will turn on and operate for
several wipe cycles after the lever is released, and then
resume the intermittent interval previously selected. If the
lever is pushed while the wipers are in the off position, the
wipers will operate several wipe cycles, then turn off.
CLIMATE CONTROLS
Overview
The Climate Control System allows you to regulate the
temperature, air flow, and direction of air circulating
throughout the vehicle. The front climate controls are
located on the touchscreen and on the faceplate below the
touchscreen. The rear climate controls are located on the
touchscreen and in the rear headliner, on the passenger
side of the vehicle.
3
GETTING TO KNOW YOUR VEHICLE 103
Page 106 of 614
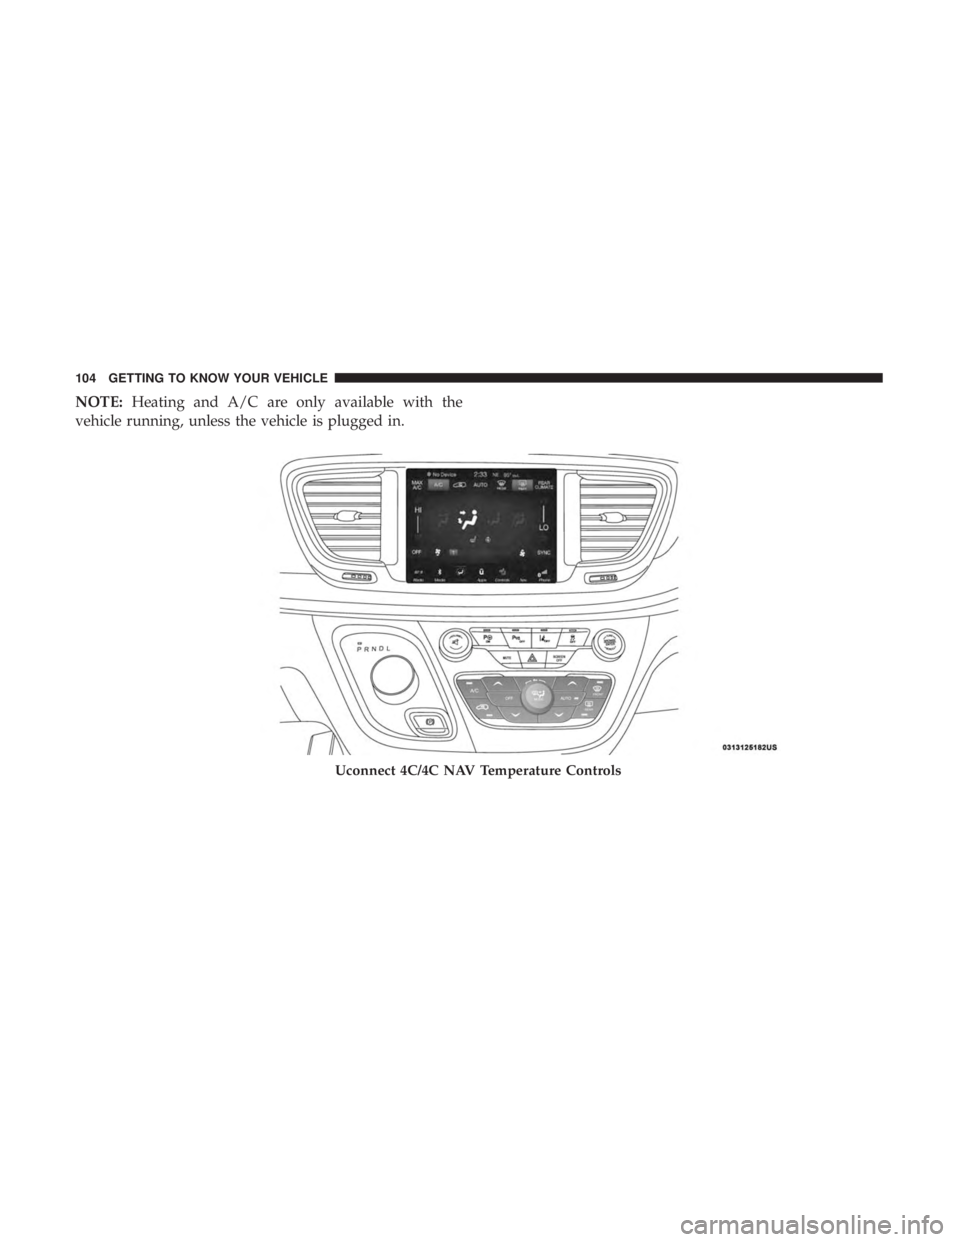
NOTE:Heating and A/C are only available with the
vehicle running, unless the vehicle is plugged in.
Uconnect 4C/4C NAV Temperature Controls
104 GETTING TO KNOW YOUR VEHICLE
Page 107 of 614
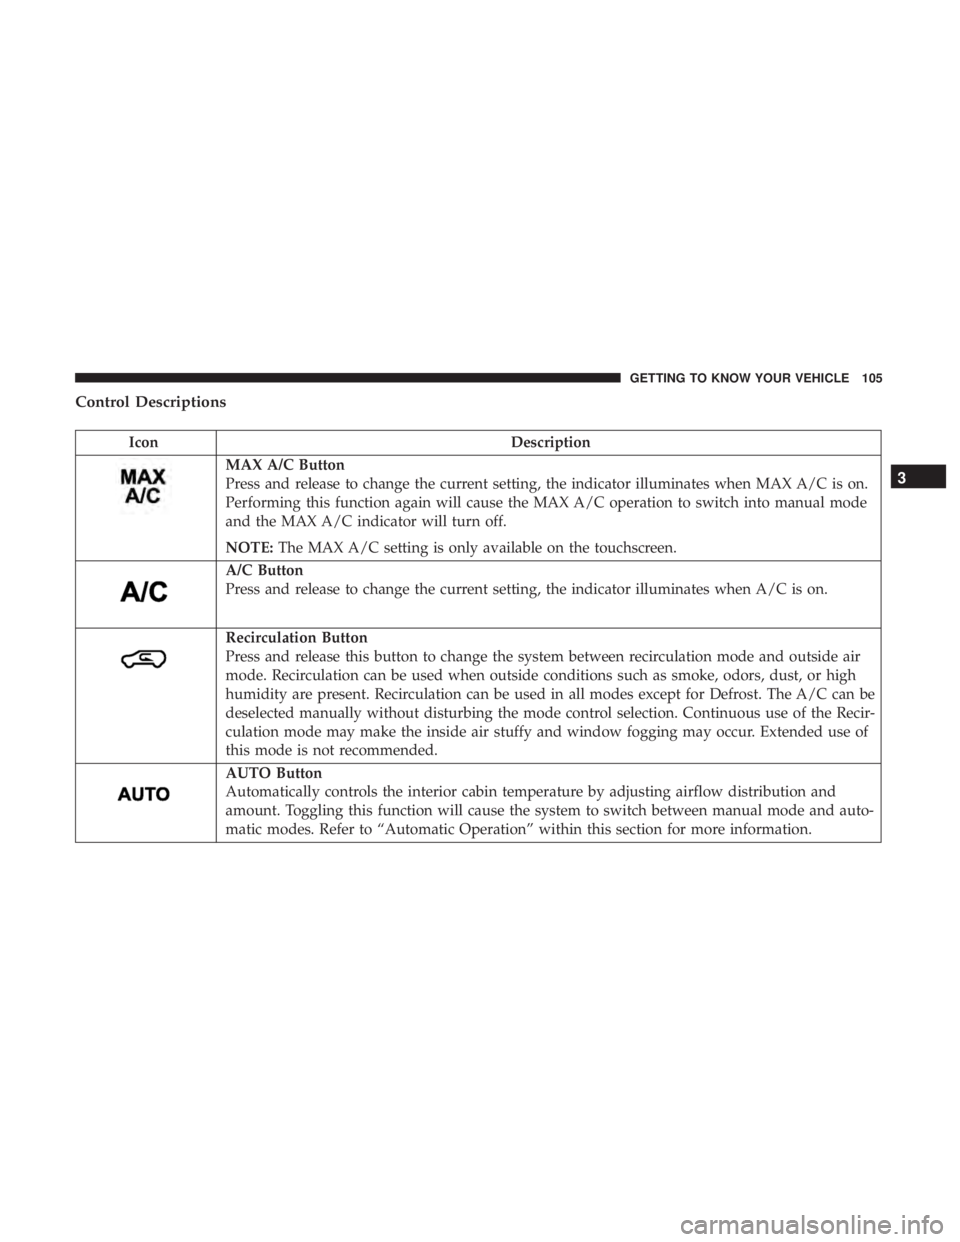
Control Descriptions
IconDescription
MAX A/C Button
Press and release to change the current setting, the indicator illuminates when MAX A/C is on.
Performing this function again will cause the MAX A/C operation to switch into manual mode
and the MAX A/C indicator will turn off.
NOTE:The MAX A/C setting is only available on the touchscreen.
A/C Button
Press and release to change the current setting, the indicator illuminates when A/C is on.
Recirculation Button
Press and release this button to change the system between recirculation mode and outside air
mode. Recirculation can be used when outside conditions such as smoke, odors, dust, or high
humidity are present. Recirculation can be used in all modes except for Defrost. The A/C can be
deselected manually without disturbing the mode control selection. Continuous use of the Recir-
culation mode may make the inside air stuffy and window fogging may occur. Extended use of
this mode is not recommended.
AUTO Button
Automatically controls the interior cabin temperature by adjusting airflow distribution and
amount. Toggling this function will cause the system to switch between manual mode and auto-
matic modes. Refer to “Automatic Operation” within this section for more information.
3
GETTING TO KNOW YOUR VEHICLE 105
Page 108 of 614
IconDescription
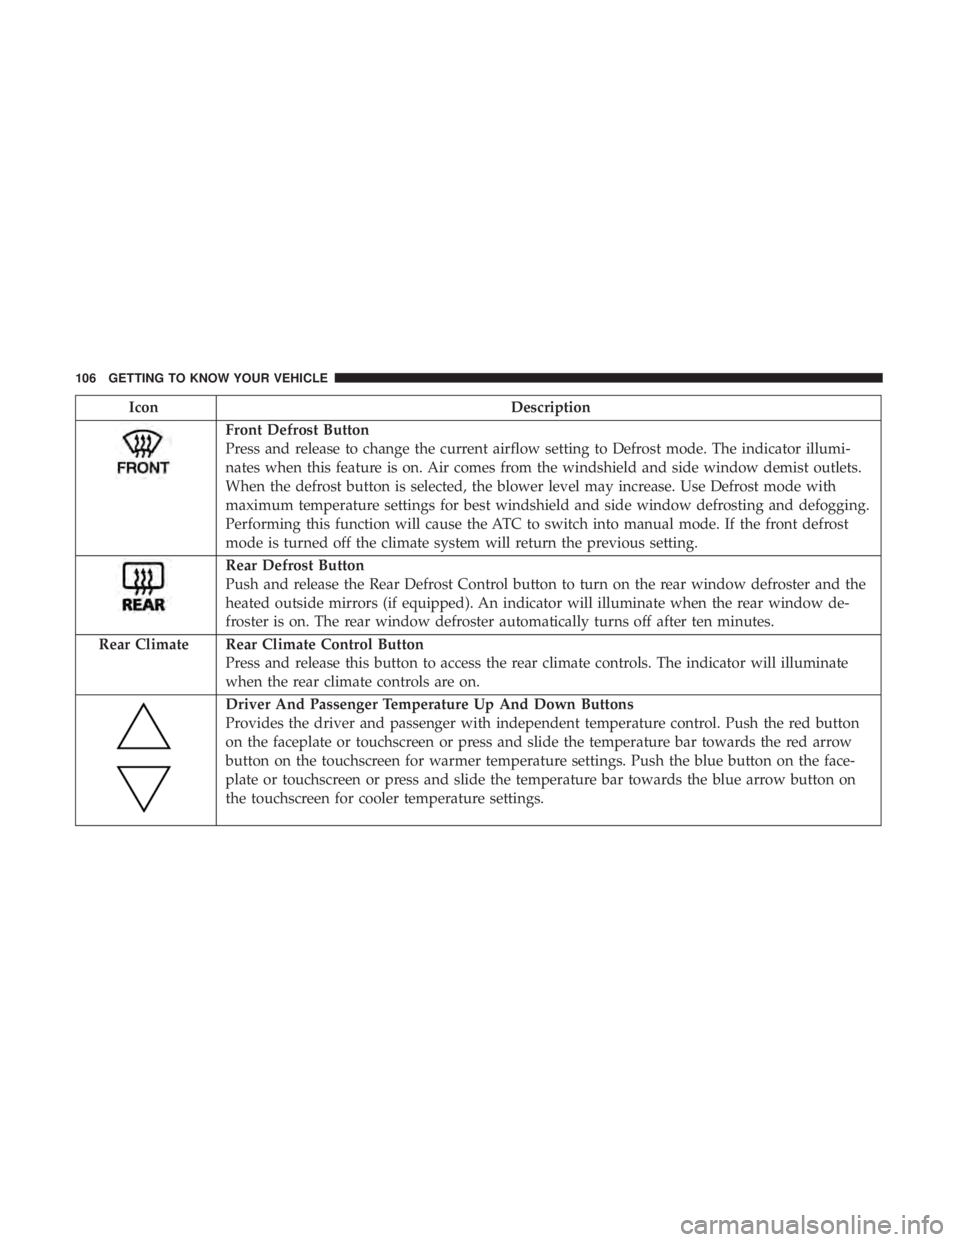
Front Defrost Button
Press and release to change the current airflow setting to Defrost mode. The indicator illumi-
nates when this feature is on. Air comes from the windshield and side window demist outlets.
When the defrost button is selected, the blower level may increase. Use Defrost mode with
maximum temperature settings for best windshield and side window defrosting and defogging.
Performing this function will cause the ATC to switch into manual mode. If the front defrost
mode is turned off the climate system will return the previous setting.
Rear Defrost Button
Push and release the Rear Defrost Control button to turn on the rear window defroster and the
heated outside mirrors (if equipped). An indicator will illuminate when the rear window de-
froster is on. The rear window defroster automatically turns off after ten minutes.
Rear Climate Rear Climate Control Button Press and release this button to access the rear climate controls. The indicator will illuminate
when the rear climate controls are on.
Driver And Passenger Temperature Up And Down Buttons
Provides the driver and passenger with independent temperature control. Push the red button
on the faceplate or touchscreen or press and slide the temperature bar towards the red arrow
button on the touchscreen for warmer temperature settings. Push the blue button on the face-
plate or touchscreen or press and slide the temperature bar towards the blue arrow button on
the touchscreen for cooler temperature settings.
106 GETTING TO KNOW YOUR VEHICLE
Page 109 of 614
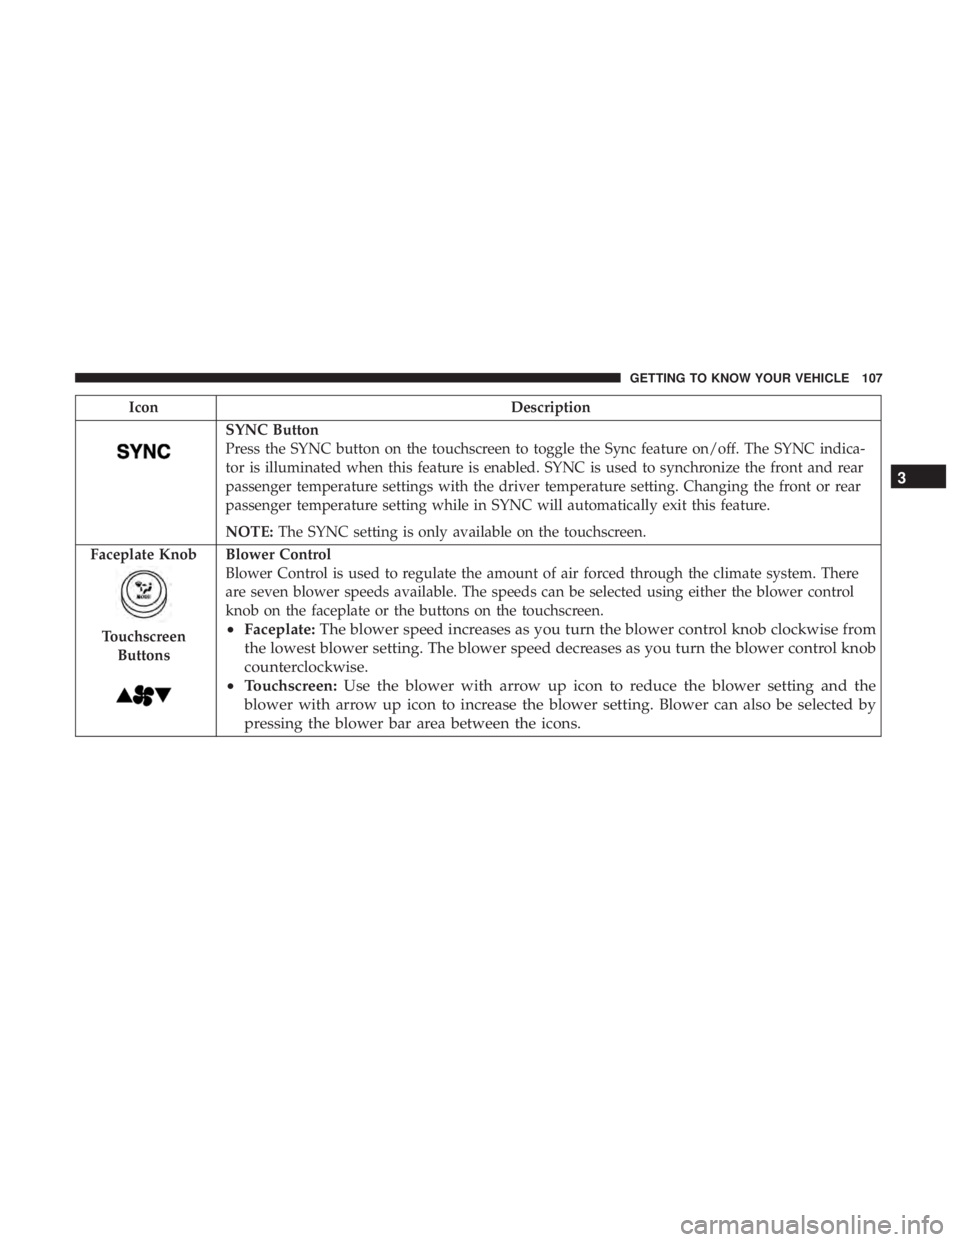
IconDescription
SYNC Button
Press the SYNC button on the touchscreen to toggle the Sync feature on/off. The SYNC indica-
tor is illuminated when this feature is enabled. SYNC is used to synchronize the front and rear
passenger temperature settings with the driver temperature setting. Changing the front or rear
passenger temperature setting while in SYNC will automatically exit this feature.
NOTE:The SYNC setting is only available on the touchscreen.
Faceplate Knob
Touchscreen Buttons
Blower Control
Blower Control is used to regulate the amount of air forced through the climate system. There
are seven blower speeds available. The speeds can be selected using either the blower control
knob on the faceplate or the buttons on the touchscreen.
• Faceplate: The blower speed increases as you turn the blower control knob clockwise from
the lowest blower setting. The blower speed decreases as you turn the blower control knob
counterclockwise.
• Touchscreen: Use the blower with arrow up icon to reduce the blower setting and the
blower with arrow up icon to increase the blower setting. Blower can also be selected by
pressing the blower bar area between the icons. 3
GETTING TO KNOW YOUR VEHICLE 107
Page 110 of 614
IconDescription
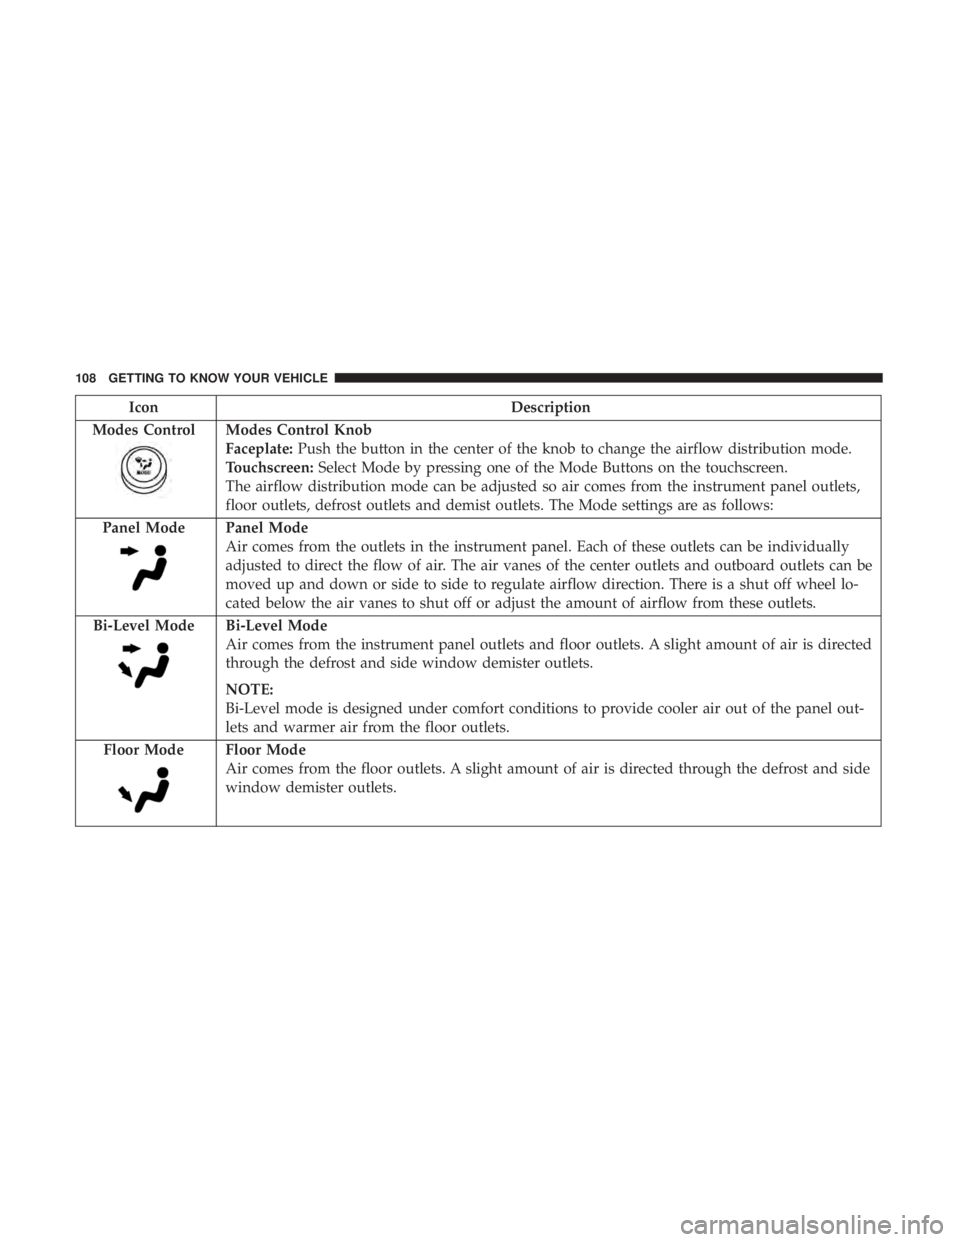
Modes Control
Modes Control Knob
Faceplate: Push the button in the center of the knob to change the airflow distribution mode.
Touchscreen: Select Mode by pressing one of the Mode Buttons on the touchscreen.
The airflow distribution mode can be adjusted so air comes from the instrument panel outlets,
floor outlets, defrost outlets and demist outlets. The Mode settings are as follows:
Panel Mode
Panel Mode
Air comes from the outlets in the instrument panel. Each of these outlets can be individually
adjusted to direct the flow of air. The air vanes of the center outlets and outboard outlets can be
moved up and down or side to side to regulate airflow direction. There is a shut off wheel lo-
cated below the air vanes to shut off or adjust the amount of airflow from these outlets.
Bi-Level Mode
Bi-Level Mode
Air comes from the instrument panel outlets and floor outlets. A slight amount of air is directed
through the defrost and side window demister outlets.
NOTE:
Bi-Level mode is designed under comfort conditions to provide cooler air out of the panel out-
lets and warmer air from the floor outlets.
Floor Mode
Floor Mode
Air comes from the floor outlets. A slight amount of air is directed through the defrost and side
window demister outlets.
108 GETTING TO KNOW YOUR VEHICLE