CHRYSLER PACIFICA HYBRID 2019 Owners Manual
Manufacturer: CHRYSLER, Model Year: 2019, Model line: PACIFICA HYBRID, Model: CHRYSLER PACIFICA HYBRID 2019Pages: 620, PDF Size: 4.92 MB
Page 381 of 620
NOTE:
•Front tires will be in image when the tires are turned.
• Due to wide angle cameras in mirror, the image will
appear distorted.
• Top view will show which sliding doors are open.
• Open front doors will remove outside image.
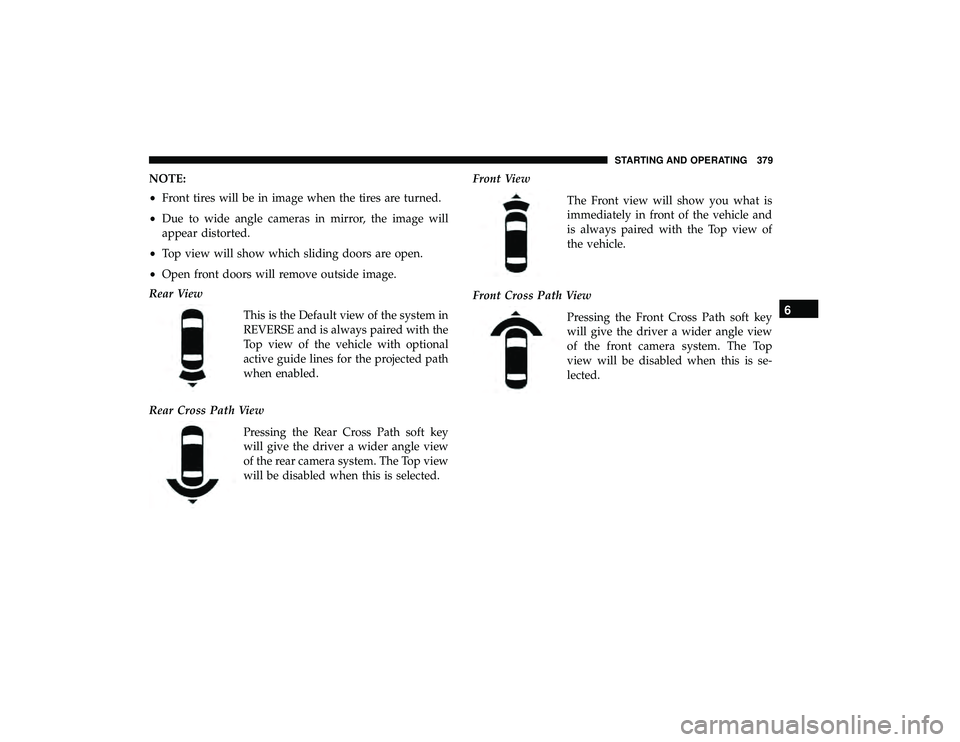
Rear View
This is the Default view of the system in
REVERSE and is always paired with the
Top view of the vehicle with optional
active guide lines for the projected path
when enabled.
Rear Cross Path View Pressing the Rear Cross Path soft key
will give the driver a wider angle view
of the rear camera system. The Top view
will be disabled when this is selected. Front View
The Front view will show you what is
immediately in front of the vehicle and
is always paired with the Top view of
the vehicle.
Front Cross Path View Pressing the Front Cross Path soft key
will give the driver a wider angle view
of the front camera system. The Top
view will be disabled when this is se-
lected.
6
STARTING AND OPERATING 379
Page 382 of 620
Deactivation
The system can be deactivated in the following conditions:
•The speed of the vehicle reaches greater than 8 mph
(13 km/h).
• The vehicle shifted into PARK from a different gear.
• If the vehicle is in any gear other than REVERSE, press
the “X” button.
• The camera delay system is turned off manually through
the Uconnect settings menu. Refer to “Uconnect Set-
tings” in “Multimedia” for further information.
NOTE:
• If snow, ice, mud, or any foreign substance builds up on
the camera lenses, clean the lenses, rinse with water, and
dry with a soft cloth. Do not cover the lenses.
• If a malfunction with the system has occurred, see your
nearest authorized dealer.WARNING!
Drivers must be careful when backing up even when
using the Surround View Camera. Always check care-
fully behind your vehicle, and be sure to check for
pedestrians, animals, other vehicles, obstructions, or
blind spots before backing up. You are responsible for
the safety of your surroundings and must continue to
pay attention while backing up. Failure to do so can
result in serious injury or death.
CAUTION!
• To avoid vehicle damage, Surround View should
only be used as a parking aid. The Surround View
camera is unable to view every obstacle or object in
your drive path.
• To avoid vehicle damage, the vehicle must be driven
slowly when using Surround View to be able to stop
in time when an obstacle is seen. It is recommended
that the driver look frequently over his/her shoulder
when using Surround View.
380 STARTING AND OPERATING
Page 383 of 620
REFUELING THE VEHICLE
1. Put the vehicle in the PARK postion.
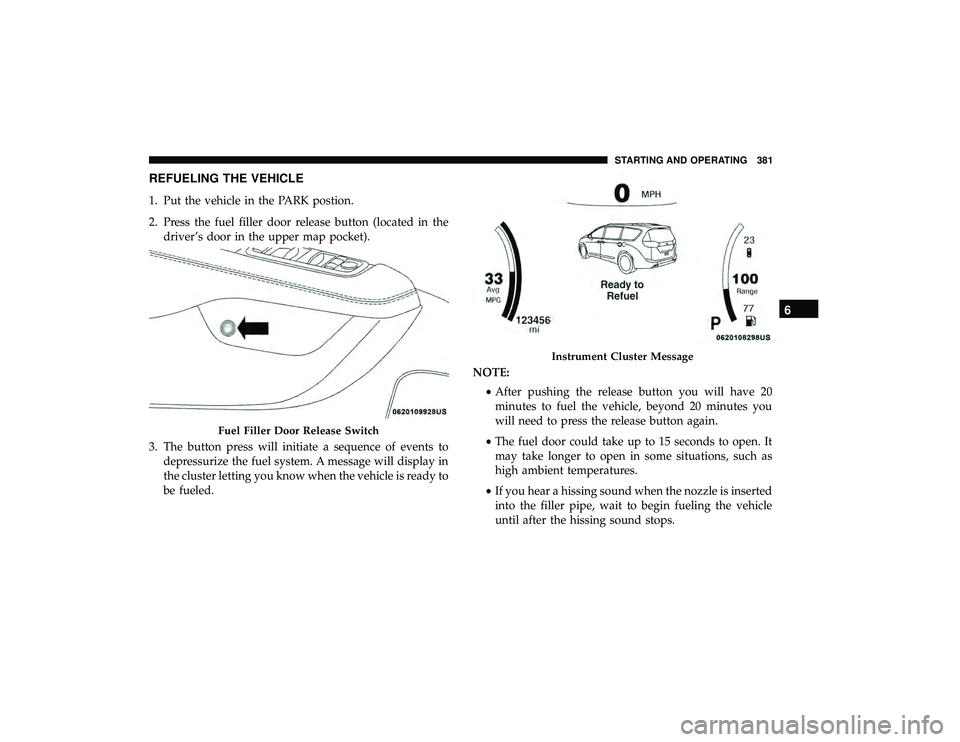
2. Press the fuel filler door release button (located in thedriver’s door in the upper map pocket).
3. The button press will initiate a sequence of events to depressurize the fuel system. A message will display in
the cluster letting you know when the vehicle is ready to
be fueled. NOTE:
•After pushing the release button you will have 20
minutes to fuel the vehicle, beyond 20 minutes you
will need to press the release button again.
• The fuel door could take up to 15 seconds to open. It
may take longer to open in some situations, such as
high ambient temperatures.
• If you hear a hissing sound when the nozzle is inserted
into the filler pipe, wait to begin fueling the vehicle
until after the hissing sound stops.
Fuel Filler Door Release Switch
Instrument Cluster Message
6
STARTING AND OPERATING 381
Page 384 of 620
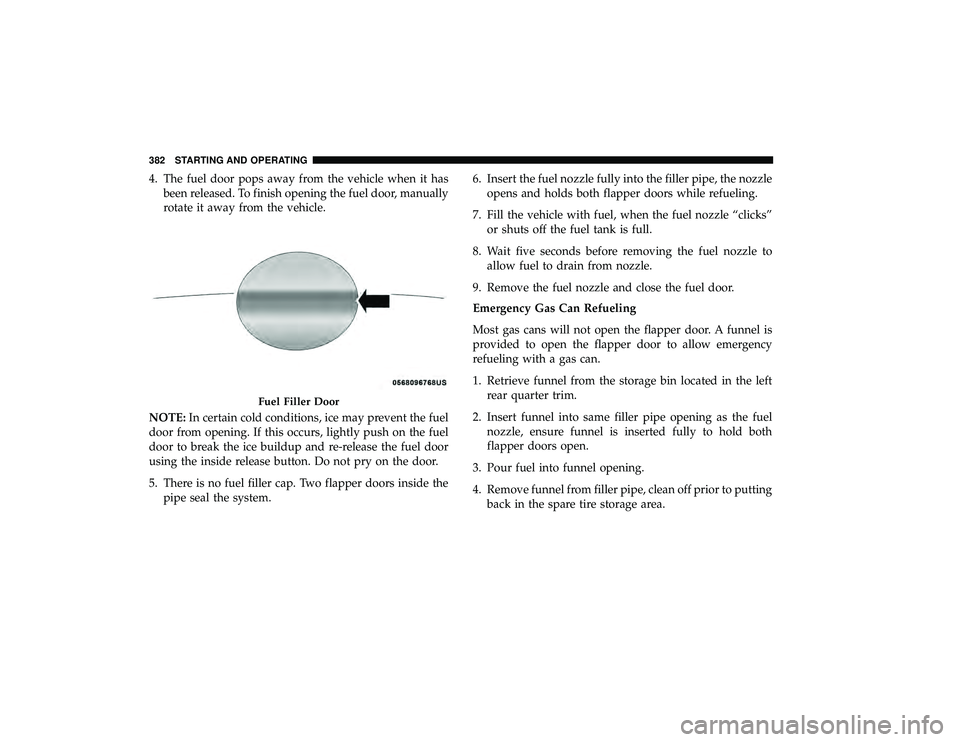
4. The fuel door pops away from the vehicle when it hasbeen released. To finish opening the fuel door, manually
rotate it away from the vehicle.
NOTE: In certain cold conditions, ice may prevent the fuel
door from opening. If this occurs, lightly push on the fuel
door to break the ice buildup and re-release the fuel door
using the inside release button. Do not pry on the door.
5. There is no fuel filler cap. Two flapper doors inside the pipe seal the system. 6. Insert the fuel nozzle fully into the filler pipe, the nozzle
opens and holds both flapper doors while refueling.
7. Fill the vehicle with fuel, when the fuel nozzle “clicks” or shuts off the fuel tank is full.
8. Wait five seconds before removing the fuel nozzle to allow fuel to drain from nozzle.
9. Remove the fuel nozzle and close the fuel door.
Emergency Gas Can Refueling
Most gas cans will not open the flapper door. A funnel is
provided to open the flapper door to allow emergency
refueling with a gas can.
1. Retrieve funnel from the storage bin located in the left rear quarter trim.
2. Insert funnel into same filler pipe opening as the fuel nozzle, ensure funnel is inserted fully to hold both
flapper doors open.
3. Pour fuel into funnel opening.
4. Remove funnel from filler pipe, clean off prior to putting back in the spare tire storage area.
Fuel Filler Door
382 STARTING AND OPERATING
Page 385 of 620
WARNING!
•Never have any smoking materials lit in or near the
vehicle when the fuel door is open or the tank is
being filled.
• Never add fuel when the engine is running. This is
in violation of most state and federal fire regulations
and may cause the “Malfunction Indicator Light” to
turn on.
• A fire may result if fuel is pumped into a portable
container that is inside of a vehicle. You could be
burned. Always place fuel containers on the ground
while filling.
CAUTION!
To avoid fuel spillage and overfilling, do not “top off”
the fuel tank after filling. Emergency Fuel Door Release
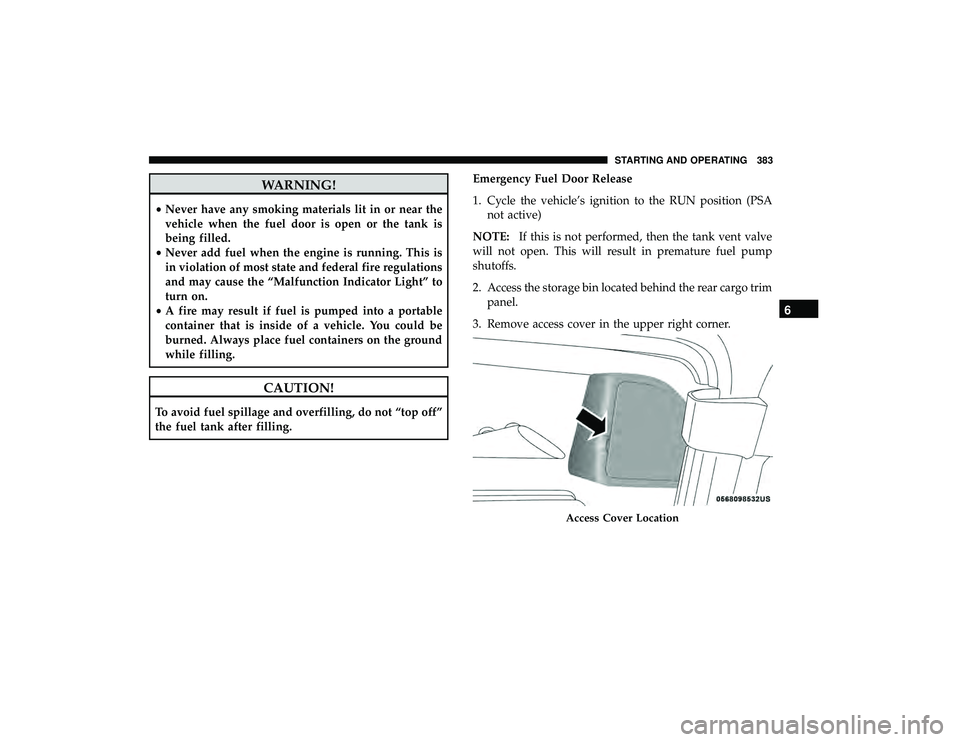
1. Cycle the vehicle’s ignition to the RUN position (PSA
not active)
NOTE: If this is not performed, then the tank vent valve
will not open. This will result in premature fuel pump
shutoffs.
2. Access the storage bin located behind the rear cargo trim panel.
3. Remove access cover in the upper right corner.
Access Cover Location
6
STARTING AND OPERATING 383
Page 386 of 620
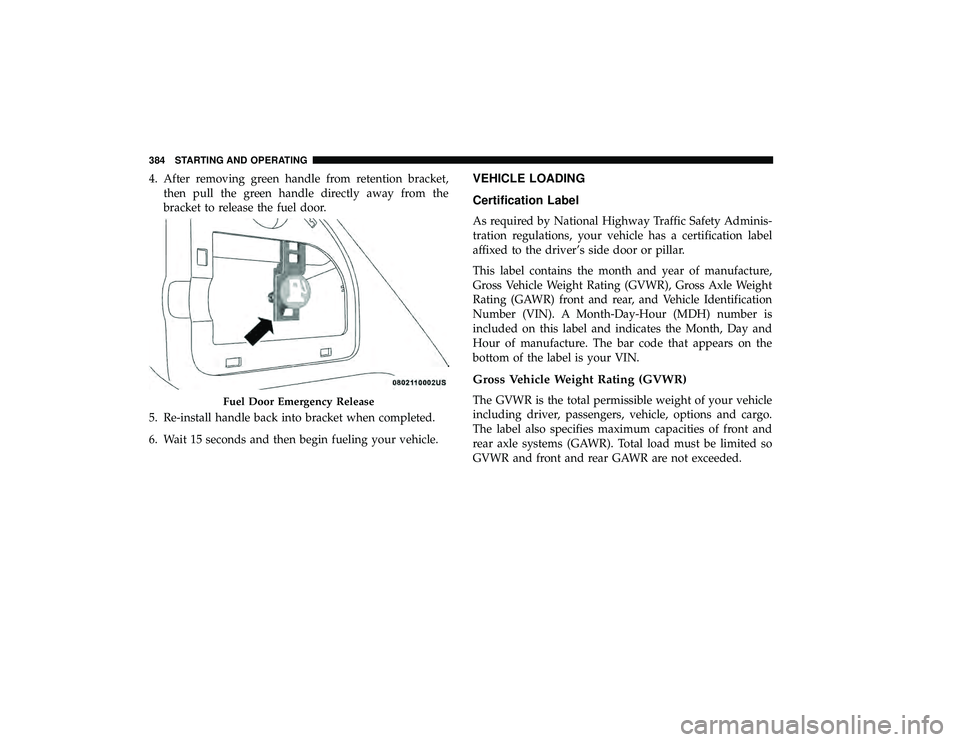
4. After removing green handle from retention bracket,then pull the green handle directly away from the
bracket to release the fuel door.
5. Re-install handle back into bracket when completed.
6. Wait 15 seconds and then begin fueling your vehicle.VEHICLE LOADING
Certification Label
As required by National Highway Traffic Safety Adminis-
tration regulations, your vehicle has a certification label
affixed to the driver’s side door or pillar.
This label contains the month and year of manufacture,
Gross Vehicle Weight Rating (GVWR), Gross Axle Weight
Rating (GAWR) front and rear, and Vehicle Identification
Number (VIN). A Month-Day-Hour (MDH) number is
included on this label and indicates the Month, Day and
Hour of manufacture. The bar code that appears on the
bottom of the label is your VIN.
Gross Vehicle Weight Rating (GVWR)
The GVWR is the total permissible weight of your vehicle
including driver, passengers, vehicle, options and cargo.
The label also specifies maximum capacities of front and
rear axle systems (GAWR). Total load must be limited so
GVWR and front and rear GAWR are not exceeded.Fuel Door Emergency Release
384 STARTING AND OPERATING
Page 387 of 620
Payload
The payload of a vehicle is defined as the allowable load
weight a truck can carry, including the weight of the driver,
all passengers, options and cargo.
Gross Axle Weight Rating (GAWR)
The GAWR is the maximum permissible load on the front
and rear axles. The load must be distributed in the cargo
area so that the GAWR of each axle is not exceeded.
Each axle GAWR is determined by the components in the
system with the lowest load carrying capacity (axle,
springs, tires or wheels). Heavier axles or suspension
components sometimes specified by purchasers for in-
creased durability does not necessarily increase the vehi-
cle’s GVWR.
Tire Size
The tire size on the Vehicle Certification Label represents
the actual tire size on your vehicle. Replacement tires must
be equal to the load capacity of this tire size.
Rim Size
This is the rim size that is appropriate for the tire size
listed.
Inflation Pressure
This is the cold tire inflation pressure for your vehicle for
all loading conditions up to full GAWR.
Curb Weight
The curb weight of a vehicle is defined as the total weight
of the vehicle with all fluids, including vehicle fuel, at full
capacity conditions, and with no occupants or cargo loaded
into the vehicle. The front and rear curb weight values are
determined by weighing your vehicle on a commercial
scale before any occupants or cargo are added.
Loading
The actual total weight and the weight of the front and rear
of your vehicle at the ground can best be determined by
weighing it when it is loaded and ready for operation.
The entire vehicle should first be weighed on a commercial
scale to insure that the GVWR has not been exceeded. The
weight on the front and rear of the vehicle should then be
determined separately to be sure that the load is properly
distributed over the front and rear axle. Weighing the
6
STARTING AND OPERATING 385
Page 388 of 620
vehicle may show that the GAWR of either the front or rear
axles has been exceeded but the total load is within the
specified GVWR. If so, weight must be shifted from front to
rear or rear to front as appropriate until the specified
weight limitations are met. Store the heavier items down
low and be sure that the weight is distributed equally. Stow
all loose items securely before driving.
Improper weight distributions can have an adverse effect
on the way your vehicle steers and handles and the way
the brakes operate.CAUTION!
Do not load your vehicle any heavier than the GVWR
or the maximum front and rear GAWR. If you do, parts
on your vehicle can break, or it can change the way
your vehicle handles. This could cause you to lose
control. Also overloading can shorten the life of your
vehicle.
TRAILER TOWING
Trailer towing is not permitted with this vehicle.
RECREATIONAL TOWING (BEHIND MOTORHOME, ETC.)
Towing This Vehicle Behind Another Vehicle
Towing ConditionWheel OFF The Ground All Models
Flat Tow NONENOT ALLOWED
Dolly Tow FrontOK
Rear NOT ALLOWED
On Trailer ALLOK
386 STARTING AND OPERATING
Page 389 of 620
NOTE:
•To avoid inadvertent Electric Park Brake engagement,
you must ensure that the Auto Park Brake feature is
disabled before towing this vehicle (if rear wheels are on
the ground). The Auto Park Brake feature is enabled or
disabled via the customer programmable features in the
Uconnect Settings.
• When towing your vehicle, always follow applicable
state and provincial laws. Contact state and provincial
Highway Safety offices for additional details.
• If your vehicle is disabled and in need of commercial
towing service, please refer to “Towing A Disabled
Vehicle” in “In Case Of Emergency”.
Recreational Towing — All Models
DO NOT flat tow this vehicle. Damage to the drivetrain
will result.
CAUTION!
• DO NOT flat tow this vehicle. Damage to the drive-
train will result. If this vehicle requires towing,
make sure the drive wheels are OFF the ground.
(Continued)
CAUTION! (Continued)
•Ensure that the Electric Park Brake is released, and
remains released, while being towed.
• Towing this vehicle in violation of the above require-
ments can cause severe transmission damage. Dam-
age from improper towing is not covered under the
New Vehicle Limited Warranty.
Recreational towing is allowed ONLY if the front wheels
are OFF the ground. This may be accomplished using a tow
dolly (front wheels off the ground) or vehicle trailer (all
four wheels off the ground). If using a tow dolly, follow this
procedure:
1. Properly secure the dolly to the tow vehicle, following the dolly manufacturer’s instructions.
2. Drive the front wheels onto the tow dolly.
3. Apply the park brake.
4. Place the transmission in PARK.
5. Turn the ignition OFF.
6. Properly secure the front wheels to the dolly, following the dolly manufacturer’s instructions.
6
STARTING AND OPERATING 387
Page 390 of 620
7. Turn the ignition to the ON/RUN mode, but do not startthe vehicle.
8. Press and hold the brake pedal.
9. Release the park brake.
10. Turn the ignition OFF.
11. Release the brake pedal.
DRIVING TIPS
Driving On Slippery Surfaces
Information in this section will aid in safe controlled
launches in adverse conditions.
Acceleration
Rapid acceleration on snow covered, wet, or other slippery
surfaces may cause the driving wheels to pull erratically to
the right or left. This phenomenon occurs when there is a
difference in the surface traction under the front (driving)
wheels.
WARNING!
Rapid acceleration on slippery surfaces is dangerous.
Unequal traction can cause sudden pulling of the front
wheels. You could lose control of the vehicle and
possibly have a collision. Accelerate slowly and care-
fully whenever there is likely to be poor traction (ice,
snow, wet, mud, loose sand, etc.).
Traction
When driving on wet or slushy roads, it is possible for a
wedge of water to build up between the tire and road
surface. This is hydroplaning and may cause partial or
complete loss of vehicle control and stopping ability. To
reduce this possibility, the following precautions should be
observed:
• Slow down during rainstorms or when the roads are
slushy.
• Slow down if the road has standing water or puddles.
388 STARTING AND OPERATING