CHRYSLER SEBRING SEDAN 2008 3.G Owners Manual
SEBRING SEDAN 2008 3.G
CHRYSLER
CHRYSLER
https://www.carmanualsonline.info/img/25/8551/w960_8551-0.png
CHRYSLER SEBRING SEDAN 2008 3.G Owners Manual
Trending: engine coolant, low oil pressure, fuel pump, stop start, brake pads, lights, climate settings
Page 421 of 494
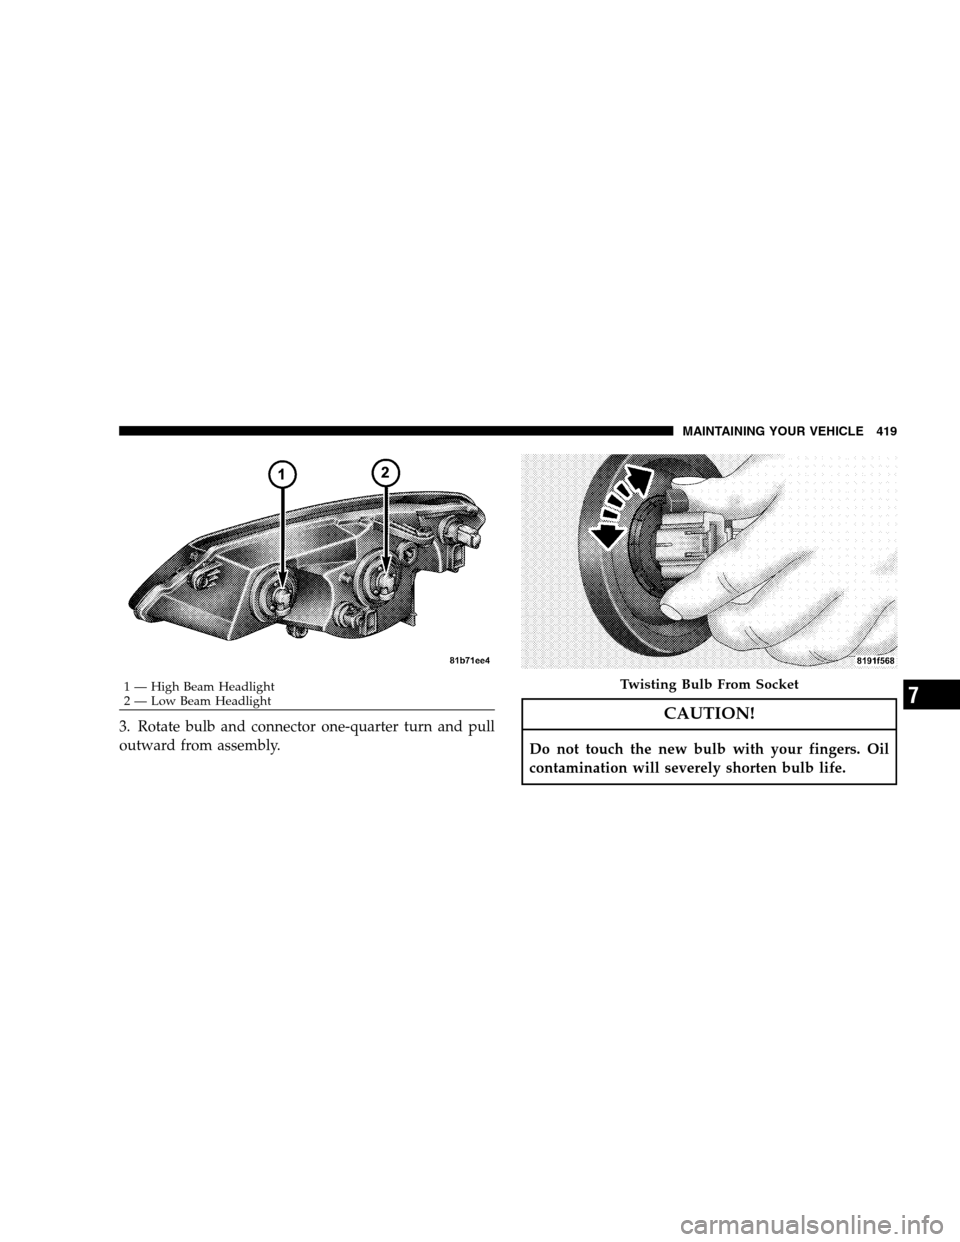
3. Rotate bulb and connector one-quarter turn and pull
outward from assembly.CAUTION!
Do not touch the new bulb with your fingers. Oil
contamination will severely shorten bulb life.
1 — High Beam Headlight
2 — Low Beam HeadlightTwisting Bulb From Socket
MAINTAINING YOUR VEHICLE 419
7
Page 422 of 494
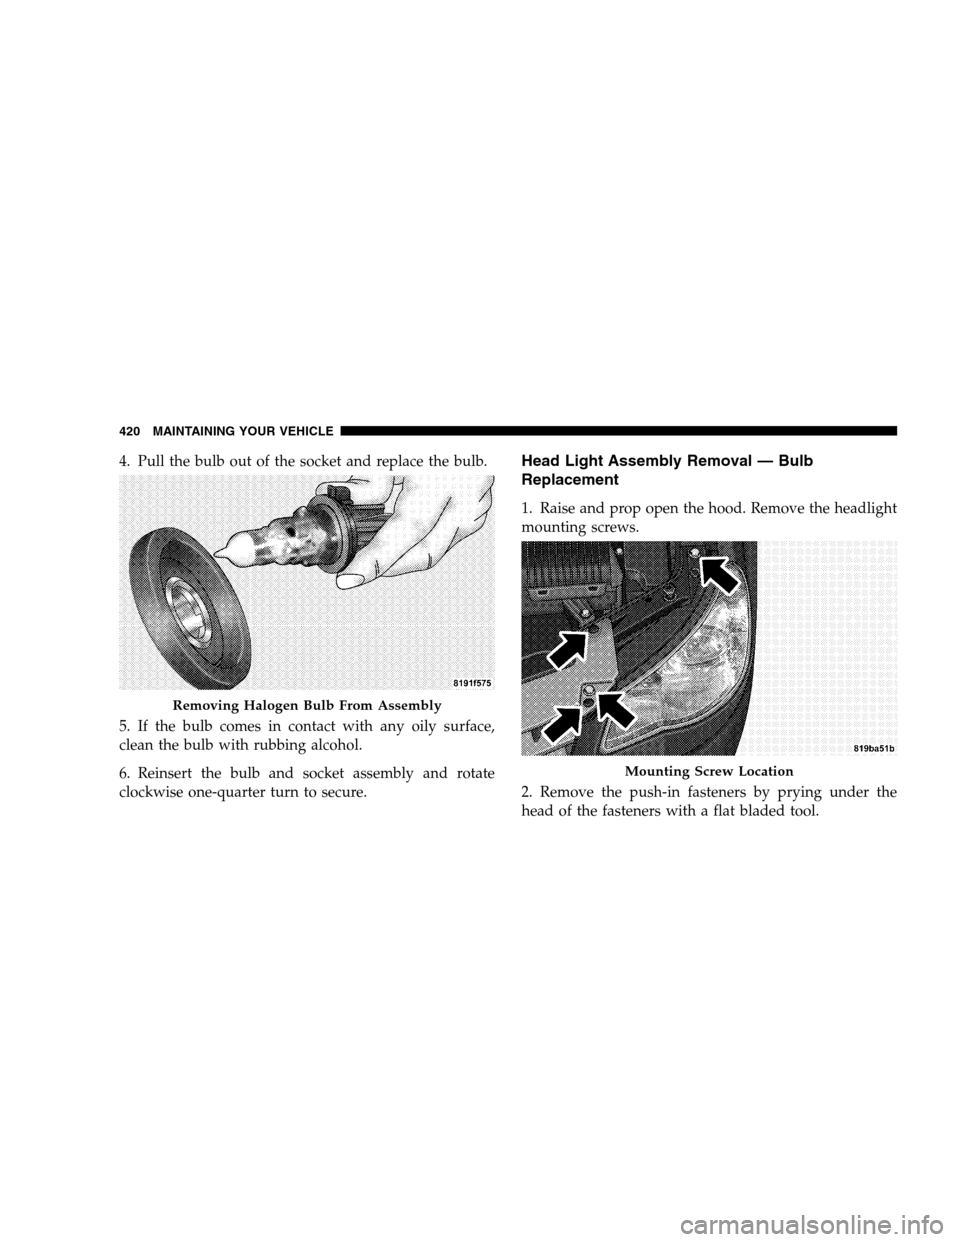
4. Pull the bulb out of the socket and replace the bulb.
5. If the bulb comes in contact with any oily surface,
clean the bulb with rubbing alcohol.
6. Reinsert the bulb and socket assembly and rotate
clockwise one-quarter turn to secure.Head Light Assembly Removal — Bulb
Replacement
1. Raise and prop open the hood. Remove the headlight
mounting screws.
2. Remove the push-in fasteners by prying under the
head of the fasteners with a flat bladed tool.
Removing Halogen Bulb From Assembly
Mounting Screw Location
420 MAINTAINING YOUR VEHICLE
Page 423 of 494
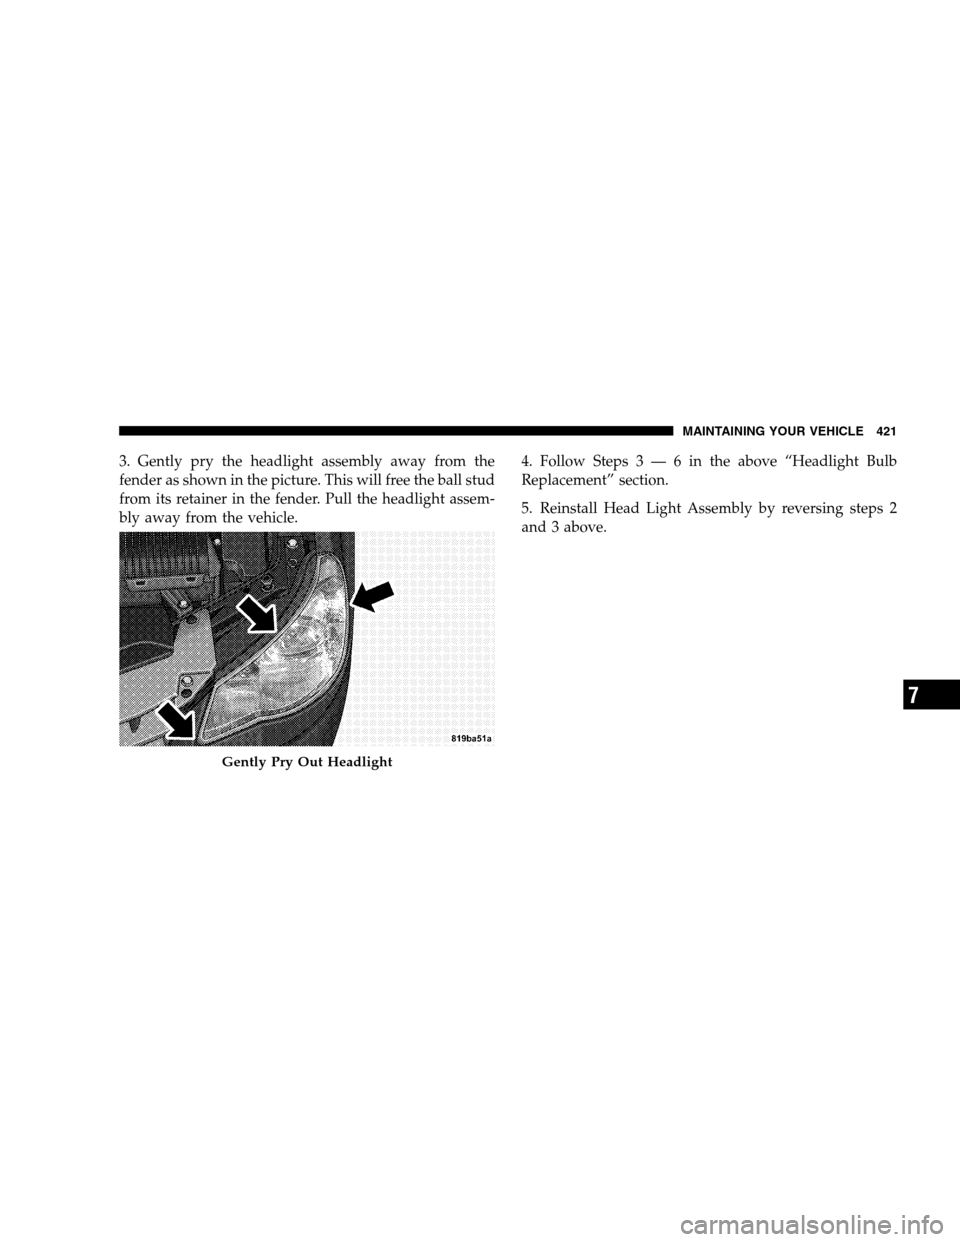
3. Gently pry the headlight assembly away from the
fender as shown in the picture. This will free the ball stud
from its retainer in the fender. Pull the headlight assem-
bly away from the vehicle.4. Follow Steps 3 — 6 in the above “Headlight Bulb
Replacement” section.
5. Reinstall Head Light Assembly by reversing steps 2
and 3 above.
Gently Pry Out Headlight
MAINTAINING YOUR VEHICLE 421
7
Page 424 of 494
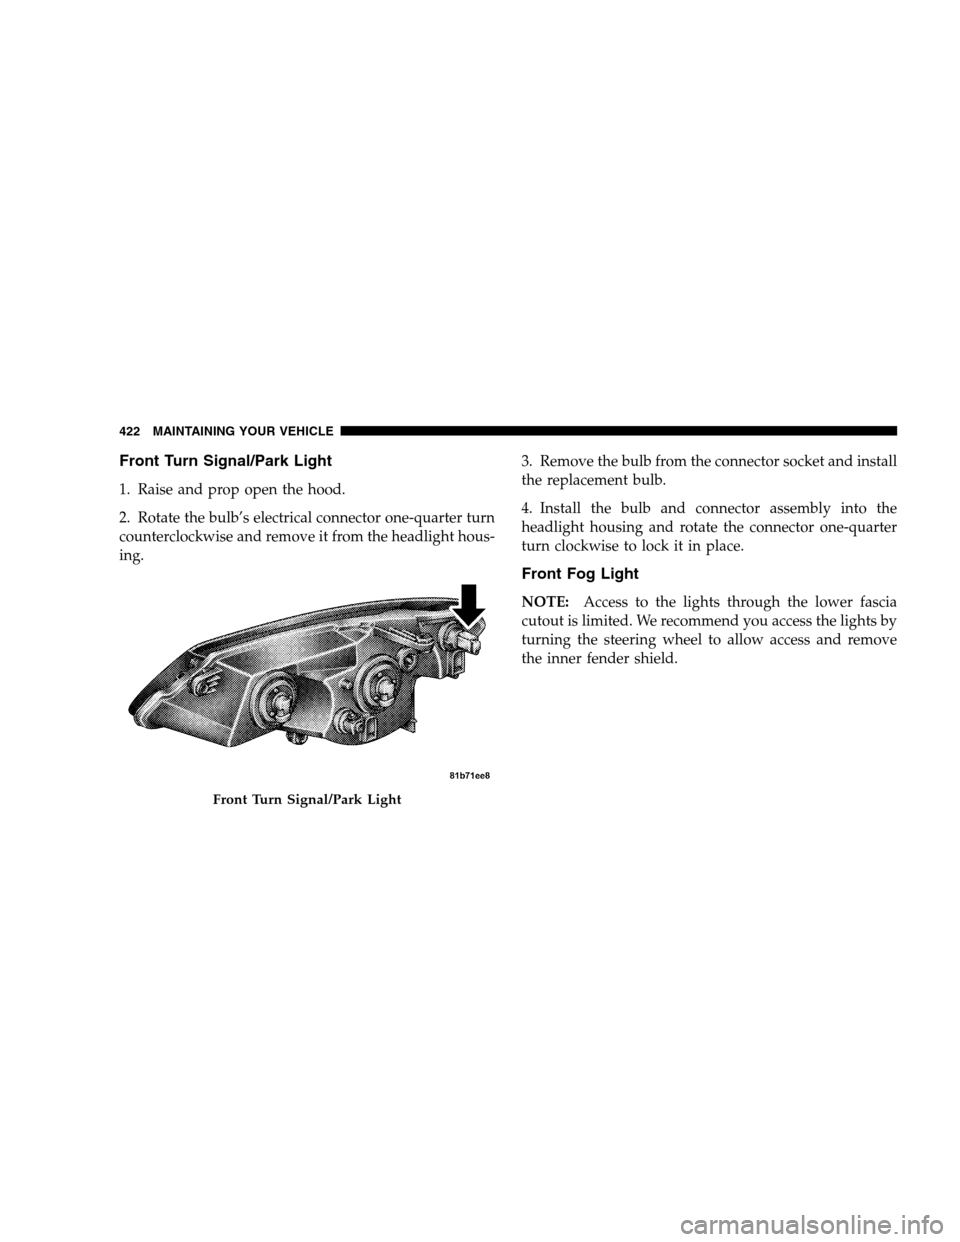
Front Turn Signal/Park Light
1. Raise and prop open the hood.
2. Rotate the bulb’s electrical connector one-quarter turn
counterclockwise and remove it from the headlight hous-
ing.3. Remove the bulb from the connector socket and install
the replacement bulb.
4. Install the bulb and connector assembly into the
headlight housing and rotate the connector one-quarter
turn clockwise to lock it in place.
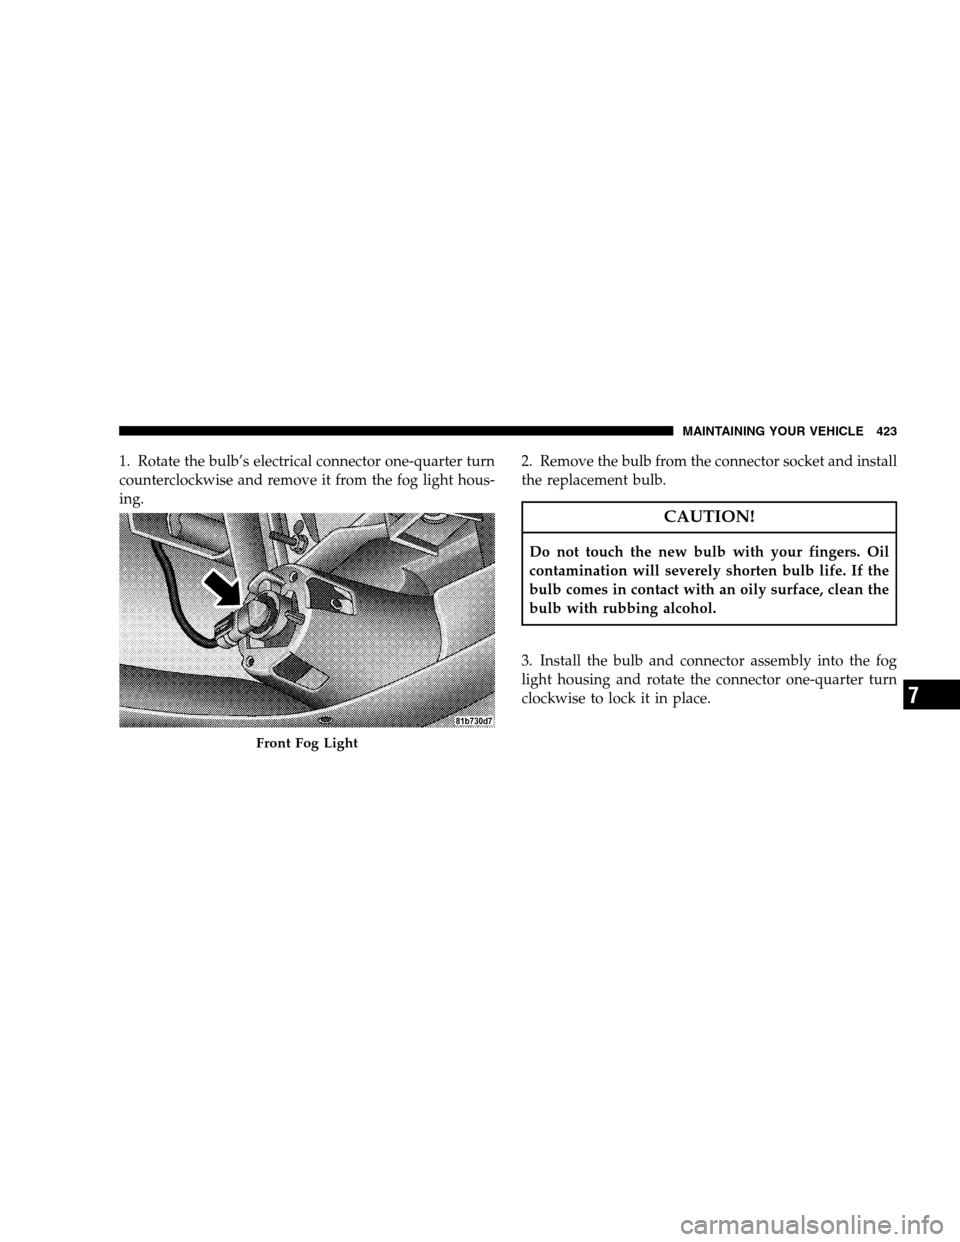
Front Fog Light
NOTE:Access to the lights through the lower fascia
cutout is limited. We recommend you access the lights by
turning the steering wheel to allow access and remove
the inner fender shield.
Front Turn Signal/Park Light
422 MAINTAINING YOUR VEHICLE
Page 425 of 494
1. Rotate the bulb’s electrical connector one-quarter turn
counterclockwise and remove it from the fog light hous-
ing.2. Remove the bulb from the connector socket and install
the replacement bulb.
CAUTION!
Do not touch the new bulb with your fingers. Oil
contamination will severely shorten bulb life. If the
bulb comes in contact with an oily surface, clean the
bulb with rubbing alcohol.
3. Install the bulb and connector assembly into the fog
light housing and rotate the connector one-quarter turn
clockwise to lock it in place.
Front Fog Light
MAINTAINING YOUR VEHICLE 423
7
Page 426 of 494
Tail/Stop Light, Rear Turn Signal Light, Backup
Light
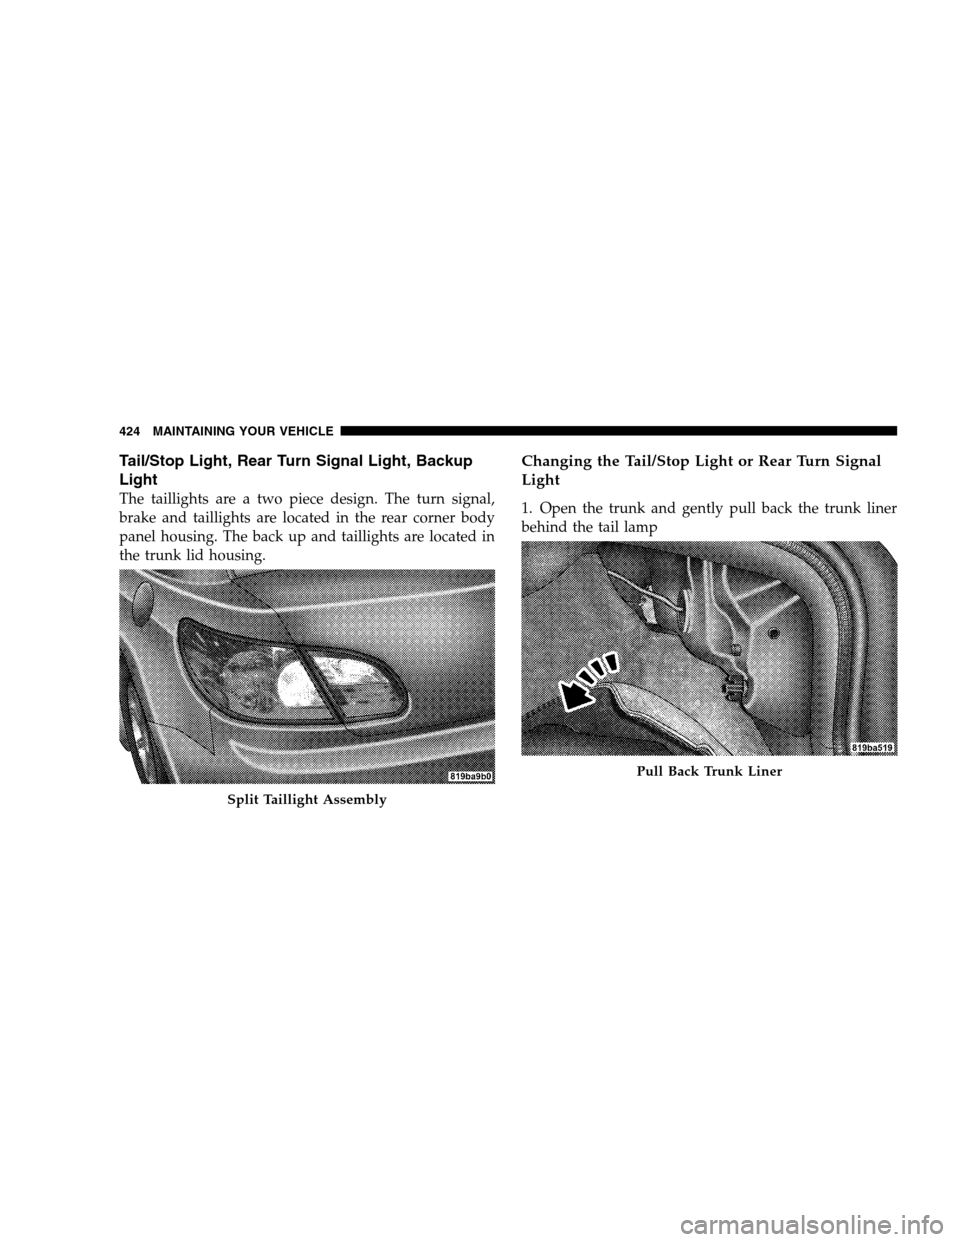
The taillights are a two piece design. The turn signal,
brake and taillights are located in the rear corner body
panel housing. The back up and taillights are located in
the trunk lid housing.
Changing the Tail/Stop Light or Rear Turn Signal
Light
1. Open the trunk and gently pull back the trunk liner
behind the tail lamp
Split Taillight Assembly
Pull Back Trunk Liner
424 MAINTAINING YOUR VEHICLE
Page 427 of 494
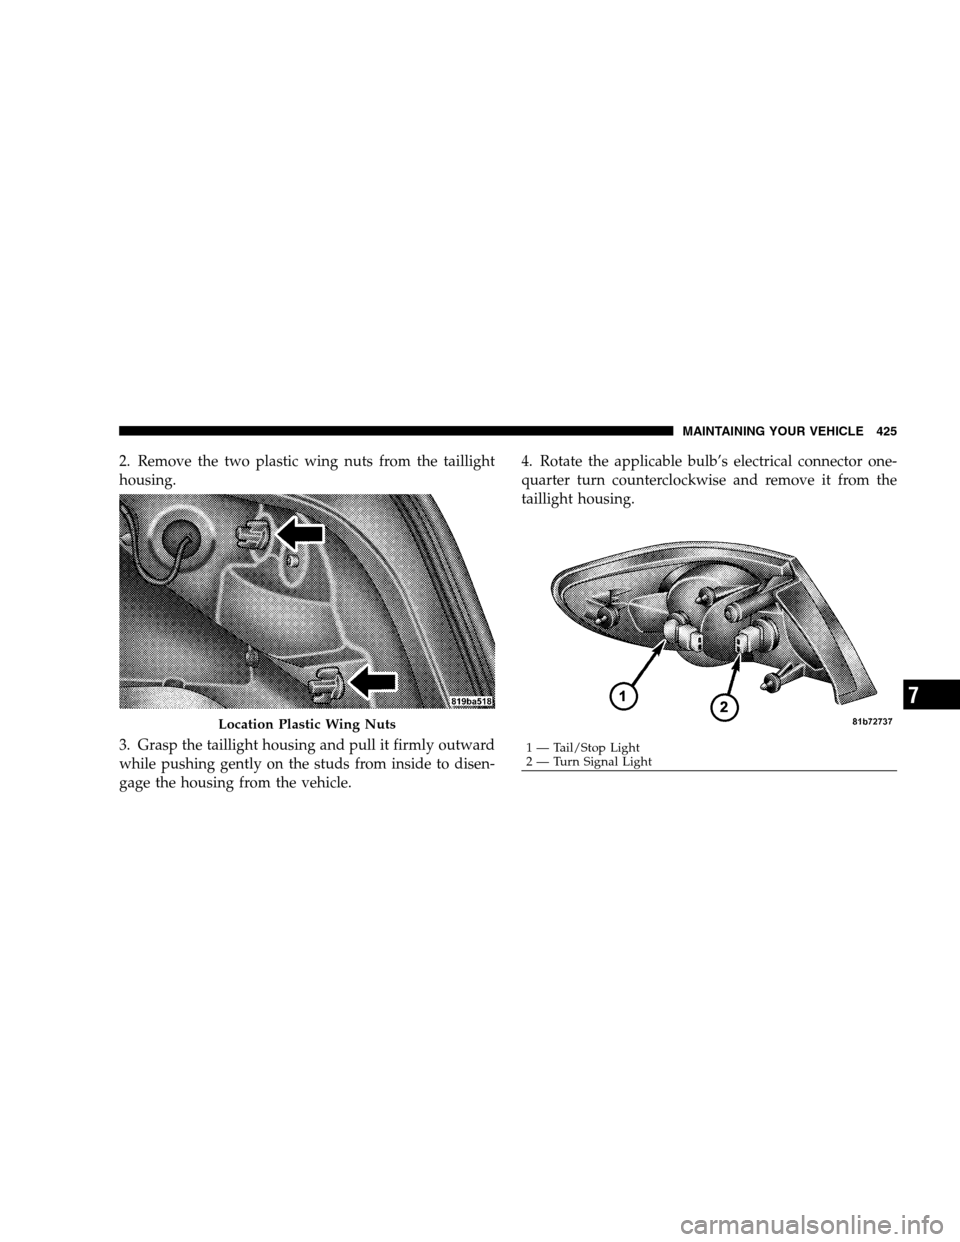
2. Remove the two plastic wing nuts from the taillight
housing.
3. Grasp the taillight housing and pull it firmly outward
while pushing gently on the studs from inside to disen-
gage the housing from the vehicle.4. Rotate the applicable bulb’s electrical connector one-
quarter turn counterclockwise and remove it from the
taillight housing.
Location Plastic Wing Nuts
1 — Tail/Stop Light
2 — Turn Signal LightMAINTAINING YOUR VEHICLE 425
7
Page 428 of 494
5. Remove the bulb from the connector socket and install
the replacement bulb.
6. Install the bulb and connector assembly into the
taillight housing and rotate the connector one-quarter
turn clockwise to lock it in place.
7. Reinstall the taillight housing.
Changing the Backup Light
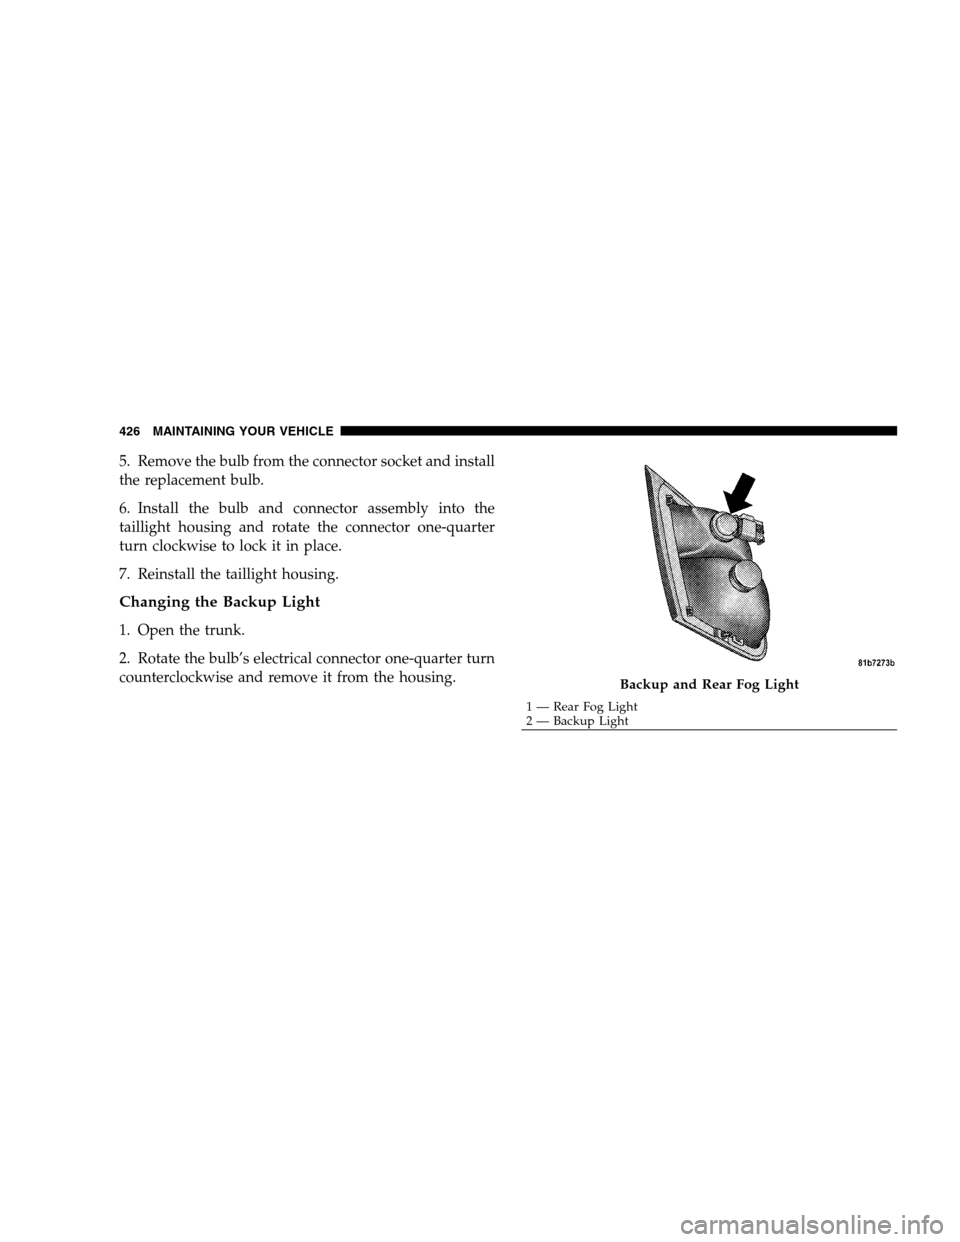
1. Open the trunk.
2. Rotate the bulb’s electrical connector one-quarter turn
counterclockwise and remove it from the housing.
Backup and Rear Fog Light
1 — Rear Fog Light
2 — Backup Light 426 MAINTAINING YOUR VEHICLE
Page 429 of 494
3. Remove the bulb from the connector socket and install
the replacement bulb.
4. Install the bulb and connector assembly into the
housing and rotate the connector one-quarter turn clock-
wise to lock it in place.
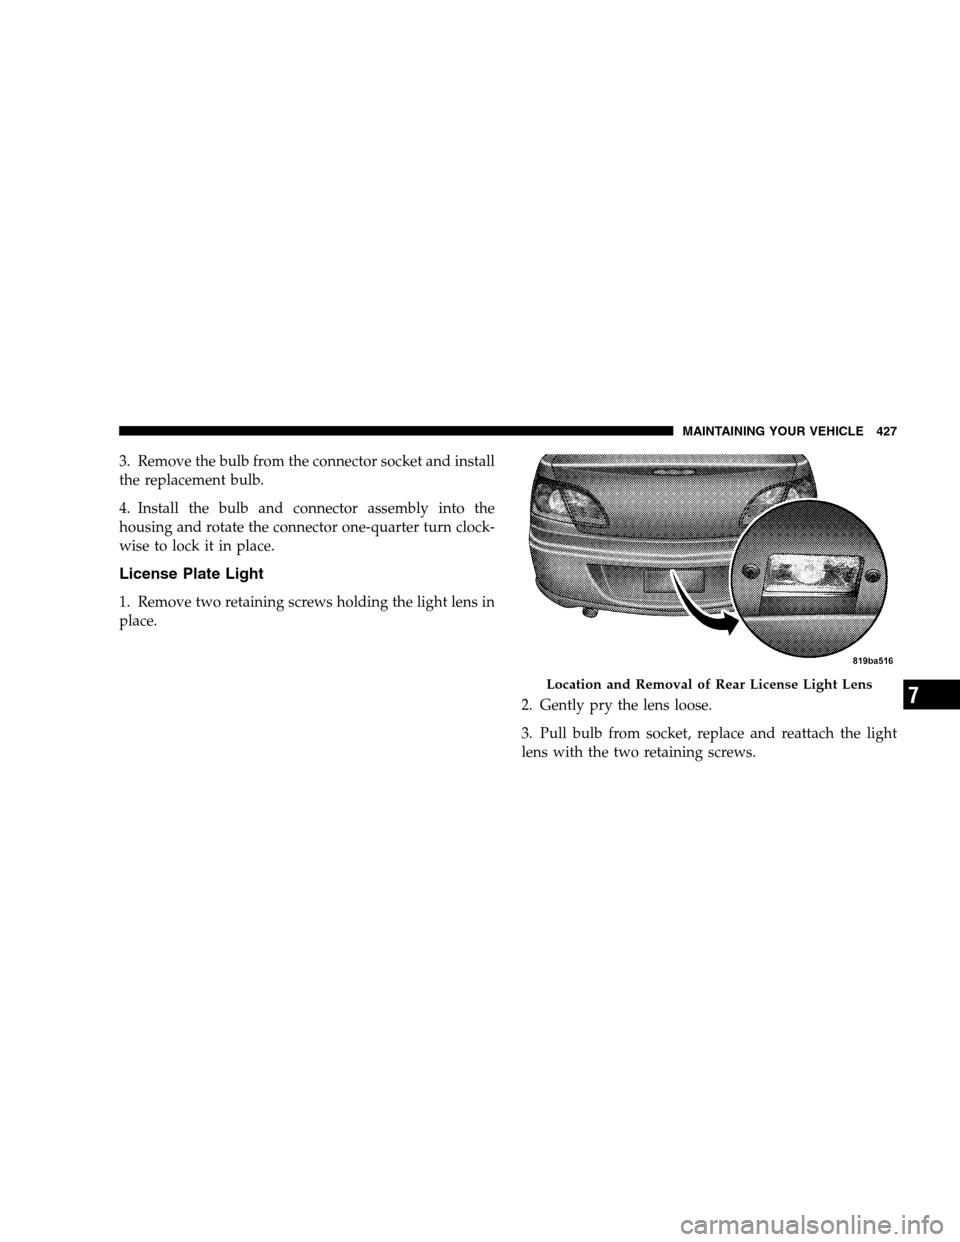
License Plate Light
1. Remove two retaining screws holding the light lens in
place.
2. Gently pry the lens loose.
3. Pull bulb from socket, replace and reattach the light
lens with the two retaining screws.
Location and Removal of Rear License Light Lens
MAINTAINING YOUR VEHICLE 427
7
Page 430 of 494
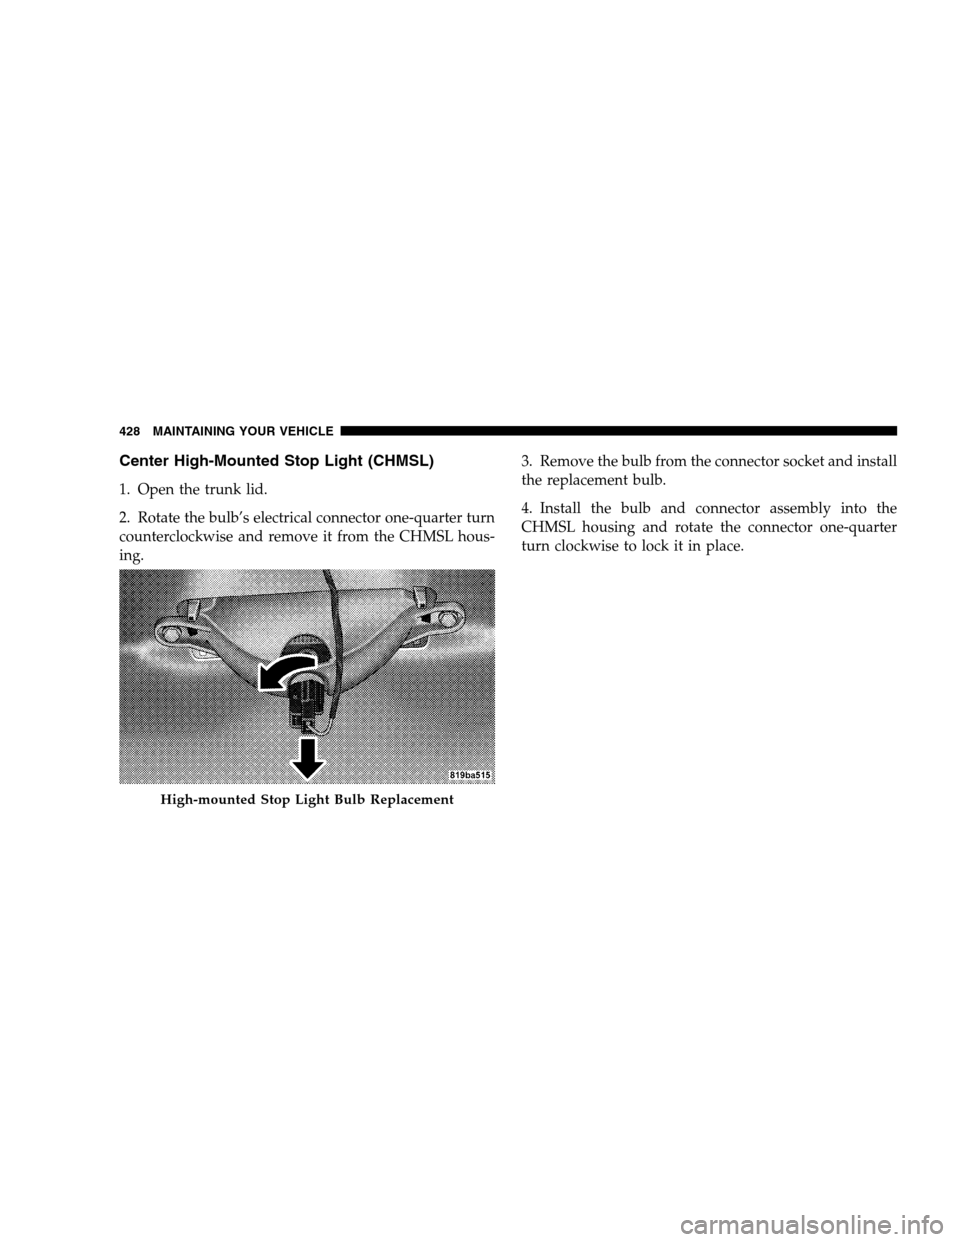
Center High-Mounted Stop Light (CHMSL)
1. Open the trunk lid.
2. Rotate the bulb’s electrical connector one-quarter turn
counterclockwise and remove it from the CHMSL hous-
ing.3. Remove the bulb from the connector socket and install
the replacement bulb.
4. Install the bulb and connector assembly into the
CHMSL housing and rotate the connector one-quarter
turn clockwise to lock it in place.
High-mounted Stop Light Bulb Replacement
428 MAINTAINING YOUR VEHICLE
Trending: reset, odometer, air condition, trailer, oil dipstick, keyless, fuel additives
