hook CHRYSLER TOWN AND COUNTRY 2015 5.G User Guide
[x] Cancel search | Manufacturer: CHRYSLER, Model Year: 2015, Model line: TOWN AND COUNTRY, Model: CHRYSLER TOWN AND COUNTRY 2015 5.GPages: 164, PDF Size: 22.47 MB
Page 24 of 164

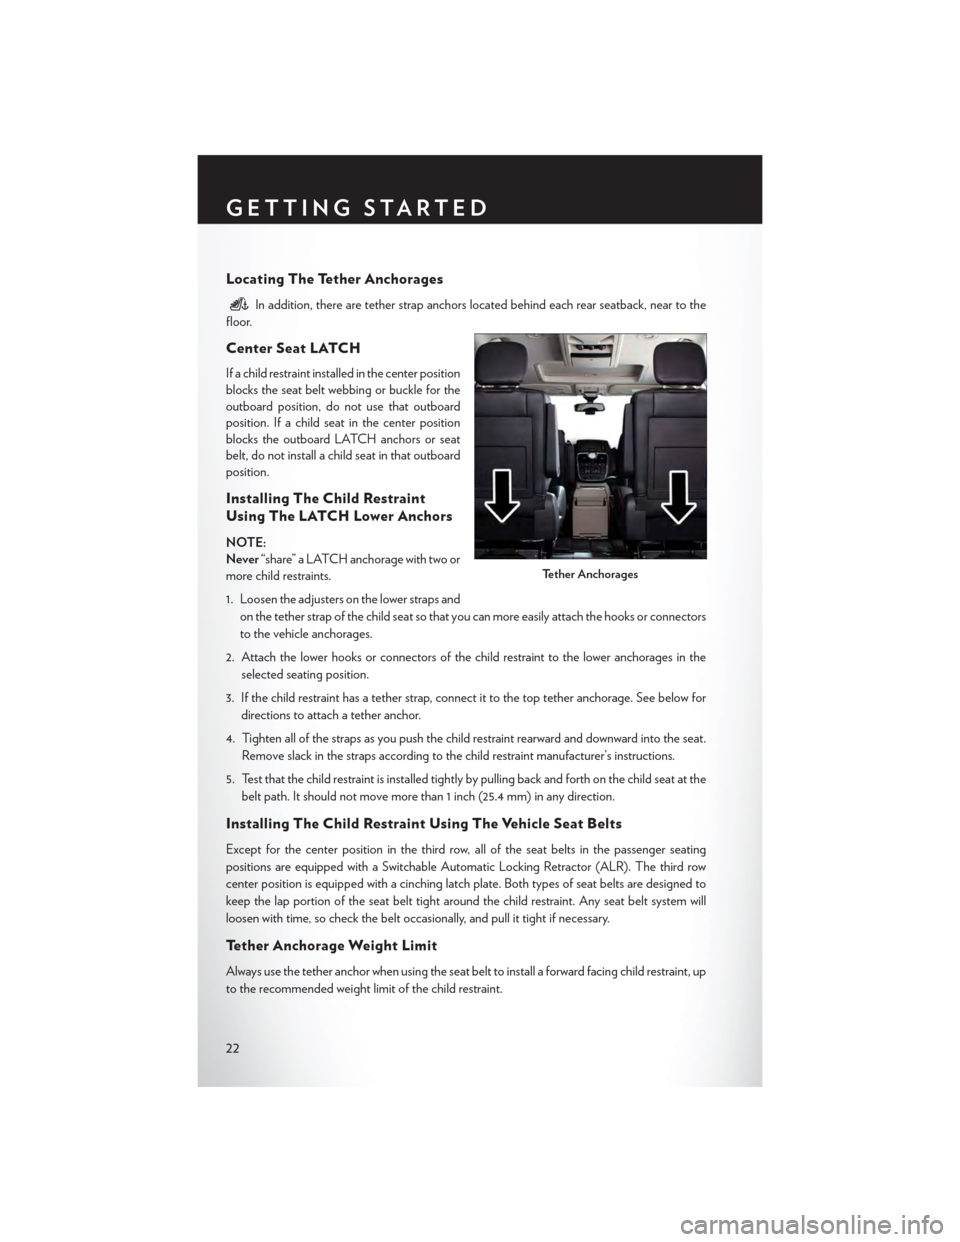
Locating The Tether Anchorages
In addition, there are tether strap anchors located behind each rear seatback, near to the
floor.
Center Seat LATCH
If a child restraint installed in the center position
blocks the seat belt webbing or buckle for the
outboard position, do not use that outboard
position. If a child seat in the center position
blocks the outboard LATCH anchors or seat
belt, do not install a child seat in that outboard
position.
Installing The Child Restraint
Using The LATCH Lower Anchors
NOTE:
Never“share” a LATCH anchorage with two or
more child restraints.
1. Loosen the adjusters on the lower straps and
on the tether strap of the child seat so that you can more easily attach the hooks or connectors
to the vehicle anchorages.
2. Attach the lower hooks or connectors of the child restraint to the lower anchorages in the
selected seating position.
3. If the child restraint has a tether strap, connect it to the top tether anchorage. See below for
directions to attach a tether anchor.
4. Tighten all of the straps as you push the child restraint rearward and downward into the seat.
Remove slack in the straps according to the child restraint manufacturer’s instructions.
5. Test that the child restraint is installed tightly by pulling back and forth on the child seat at the
belt path. It should not move more than 1 inch (25.4 mm) in any direction.
Installing The Child Restraint Using The Vehicle Seat Belts
Except for the center position in the third row, all of the seat belts in the passenger seating
positions are equipped with a Switchable Automatic Locking Retractor (ALR). The third row
center position is equipped with a cinching latch plate. Both types of seat belts are designed to
keep the lap portion of the seat belt tight around the child restraint. Any seat belt system will
loosen with time, so check the belt occasionally, and pull it tight if necessary.
Te t h e r A n c h o r a g e W e i g h t L i m i t
Always use the tether anchor when using the seat belt to install a forward facing child restraint, up
to the recommended weight limit of the child restraint.
Tether Anchorages
GETTING STARTED
22
Page 26 of 164

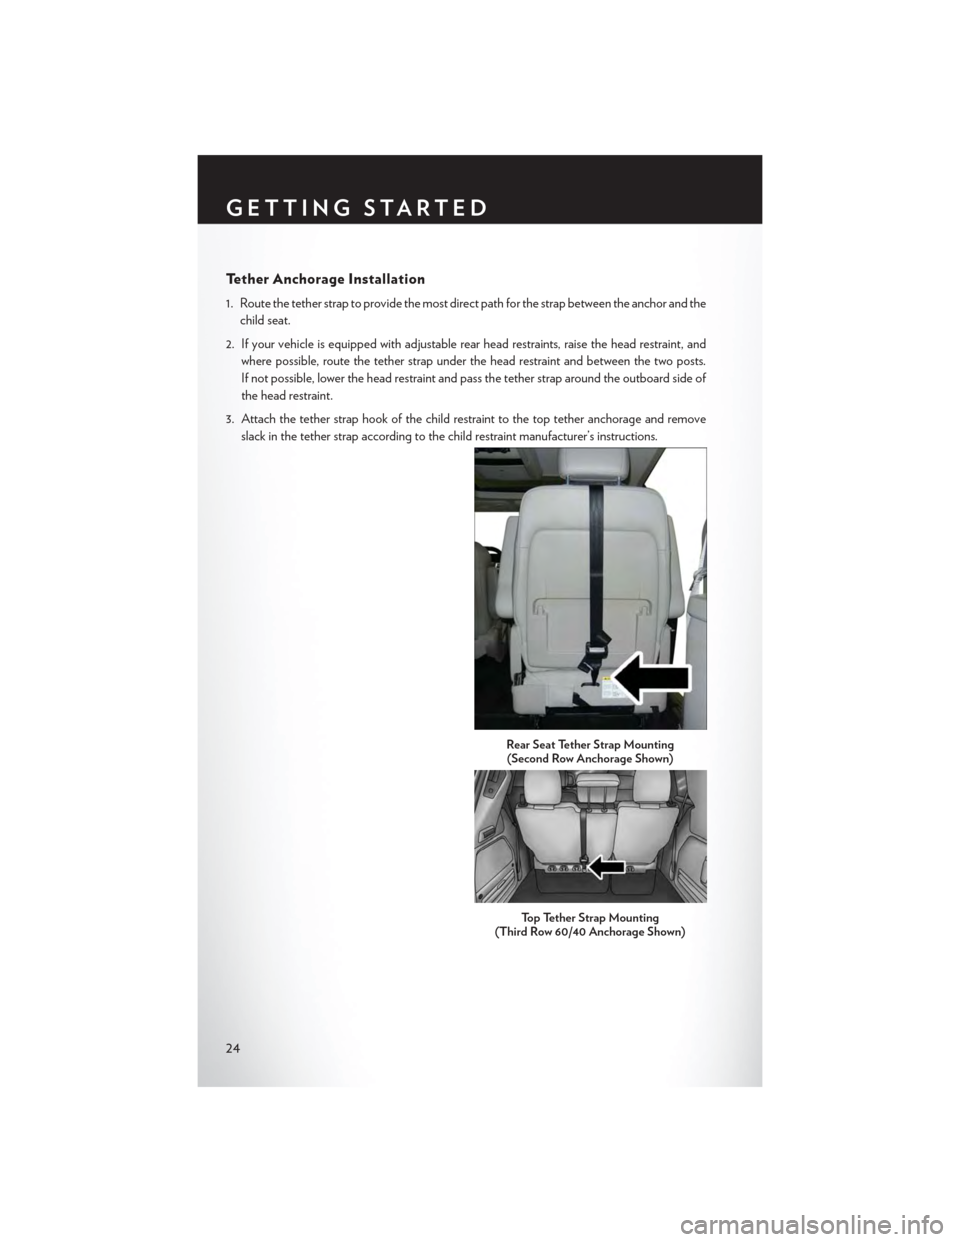
Te t h e r A n c h o r a g e I n s t a l l a t i o n
1. Route the tether strap to provide the most direct path for the strap between the anchor and the
child seat.
2. If your vehicle is equipped with adjustable rear head restraints, raise the head restraint, and
where possible, route the tether strap under the head restraint and between the two posts.
If not possible, lower the head restraint and pass the tether strap around the outboard side of
the head restraint.
3. Attach the tether strap hook of the child restraint to the top tether anchorage and remove
slack in the tether strap according to the child restraint manufacturer’s instructions.
Rear Seat Tether Strap Mounting(Second Row Anchorage Shown)
Top Tether Strap Mounting(Third Row 60/40 Anchorage Shown)
GETTING STARTED
24
Page 115 of 164

Spare Tire Tools
The tool pouch contains three pieces and can be assembled into a spare tire hook; to remove the
compact spare tire/cover assembly from under the vehicle, or a Winch T-handle; to raise/lower
the compact spare tire/cover assembly.
Assembled T-handle
A—SpareTireHook/T-handleB — Extension 1C — Extension 2
Assembling The Spare Tire Hook
A—SpareTireHook/T-handleB — Extension 1C — Extension 2
WHAT TO DO IN EMERGENCIES
113
Page 116 of 164

Spare Tire Removal Instructions
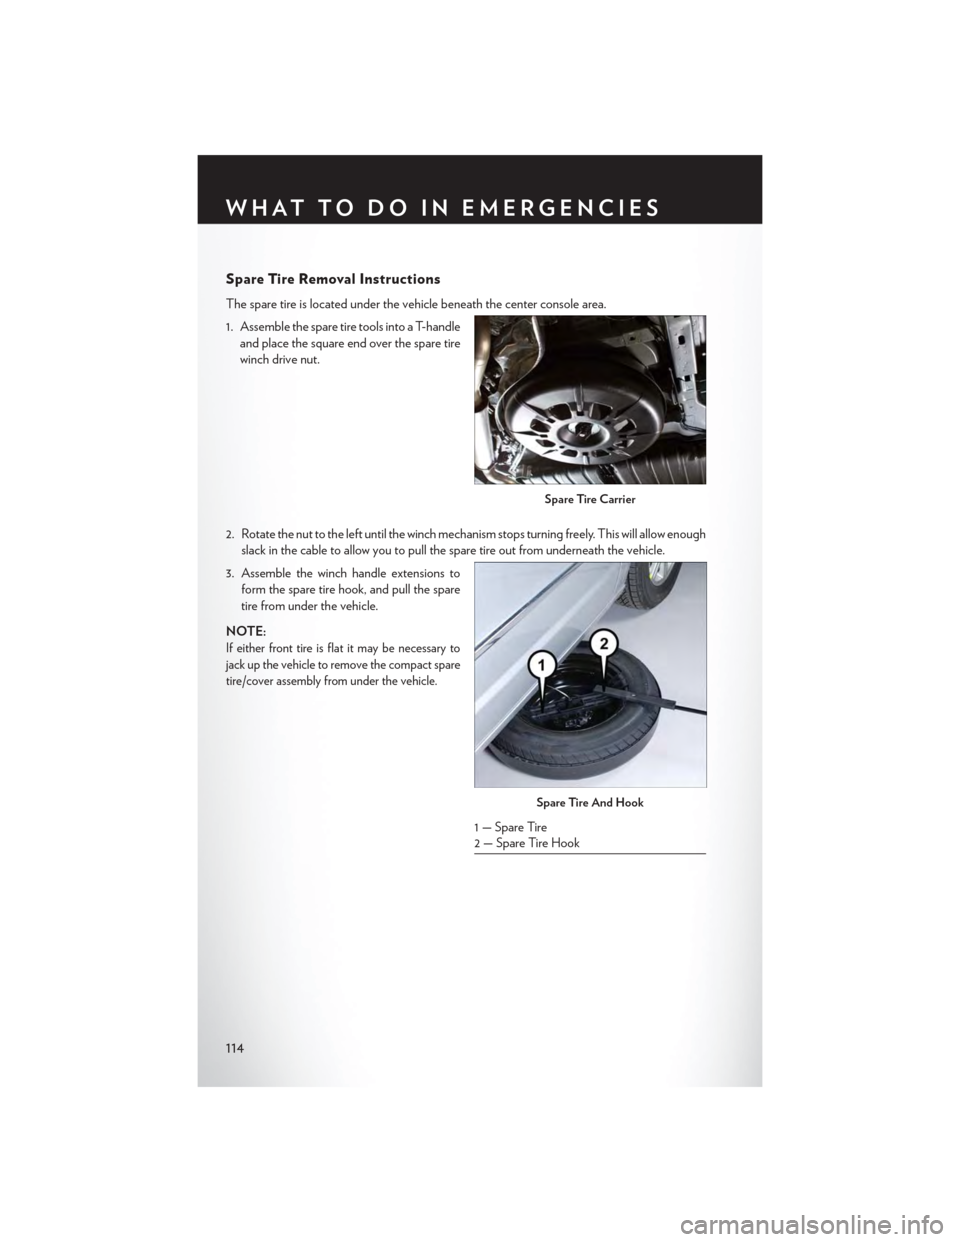
The spare tire is located under the vehicle beneath the center console area.
1. Assemble the spare tire tools into a T-handle
and place the square end over the spare tire
winch drive nut.
2. Rotate the nut to the left until the winch mechanism stops turning freely. This will allow enough
slack in the cable to allow you to pull the spare tire out from underneath the vehicle.
3. Assemble the winch handle extensions to
form the spare tire hook, and pull the spare
tire from under the vehicle.
NOTE:
If either front tire is flat it may be necessary to
jack up the vehicle to remove the compact spare
tire/cover assembly from under the vehicle.
Spare Tire Carrier
Spare Tire And Hook
1 — Spare Tire2—SpareTireHook
WHAT TO DO IN EMERGENCIES
114
Page 120 of 164

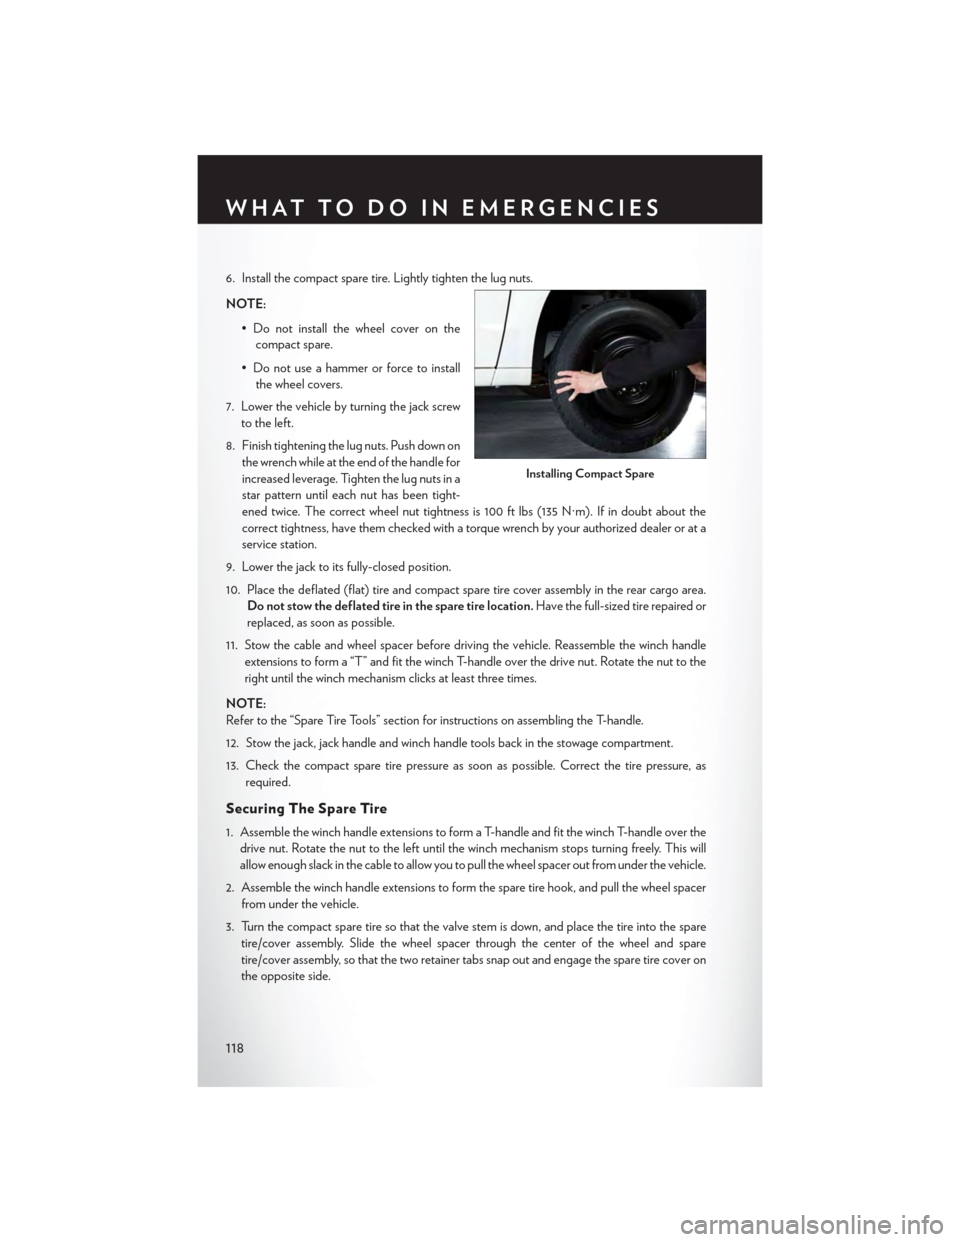
6. Install the compact spare tire. Lightly tighten the lug nuts.
NOTE:
•Donotinstallthewheelcoveronthe
compact spare.
• Do not use a hammer or force to install
the wheel covers.
7. Lower the vehicle by turning the jack screw
to the left.
8. Finish tightening the lug nuts. Push down on
the wrench while at the end of the handle for
increased leverage. Tighten the lug nuts in a
star pattern until each nut has been tight-
ened twice. The correct wheel nut tightness is 100 ft lbs (135 N·m). If in doubt about the
correct tightness, have them checked with a torque wrench by your authorized dealer or at a
service station.
9. Lower the jack to its fully-closed position.
10. Place the deflated (flat) tire and compact spare tire cover assembly in the rear cargo area.
Do not stow the deflated tire in the spare tire location.Have the full-sized tire repaired or
replaced, as soon as possible.
11. Stow the cable and wheel spacer before driving the vehicle. Reassemble the winch handle
extensions to form a “T” and fit the winch T-handle over the drive nut. Rotate the nut to the
right until the winch mechanism clicks at least three times.
NOTE:
Refer to the “Spare Tire Tools” section for instructions on assembling the T-handle.
12. Stow the jack, jack handle and winch handle tools back in the stowage compartment.
13. Check the compact spare tire pressure as soon as possible. Correct the tire pressure, as
required.
Securing The Spare Tire
1. Assemble the winch handle extensions to form a T-handle and fit the winch T-handle over the
drive nut. Rotate the nut to the left until the winch mechanism stops turning freely. This will
allow enough slack in the cable to allow you to pull the wheel spacer out from under the vehicle.
2. Assemble the winch handle extensions to form the spare tire hook, and pull the wheel spacer
from under the vehicle.
3. Turn the compact spare tire so that the valve stem is down, and place the tire into the spare
tire/cover assembly. Slide the wheel spacer through the center of the wheel and spare
tire/cover assembly, so that the two retainer tabs snap out and engage the spare tire cover on
the opposite side.
Installing Compact Spare
WHAT TO DO IN EMERGENCIES
118