MPG CHRYSLER VOYAGER 2021 Owners Manual
[x] Cancel search | Manufacturer: CHRYSLER, Model Year: 2021, Model line: VOYAGER, Model: CHRYSLER VOYAGER 2021Pages: 348, PDF Size: 18.73 MB
Page 94 of 348
92GETTING TO KNOW YOUR INSTRUMENT PANEL
Coolant Temp
Displays the actual coolant temperature.
Transmission Temp
Displays the actual transmission temperature.
Oil Temp
Displays the actual oil temperature.
Oil Pressure
Displays the actual oil pressure.
Oil Life
Displays the remaining engine oil life as a
percentage.
To reset the Oil Life, you must hold the OK button.
The “Hold OK to Reset” instruction will be
displayed at all times, but the following conditions
will need to be met in order to reset Oil Life:
The ignition must be in the ON/RUN position
If the conditions are met, holding the OK button will
reset the gauge and the numeric display will return
to 100%.
If the conditions are not met, a pop-up message
will display for five seconds, describing the
required conditions, and then the Oil Life screen
will reappear.
Battery Voltage
Displays the actual battery voltage. Engine Hours — If Equipped
Displays the number of hours of engine operation.
Fuel Economy
Push and release the
up or down arrow
button until the Fuel Economy Menu item is
highlighted in the instrument cluster display. The
Fuel Economy Menu will display the following:
Two submenu pages that can be toggled
between using the left and right arrow
buttons; one with Current Value displayed and
one without the Current Value displayed:
Average Fuel Economy
(MPG, L/100 km, or km/L)
Range To Empty (miles or km)
Current Fuel Economy
(MPG, L/100 km, or km/L)
The Max and Min values will correspond to
the particular engine requirements
Hold OK to reset average fuel economy informa -
tion.
Trip Info
Push and release the up or down arrow
button until the Trip Menu item is highlighted in the
instrument cluster display. Push the left or
right arrow button to scroll through the Trip A and Trip B submenus. The Trip information will
display the following:
Distance
Average Fuel Economy
Elapsed Time
Hold the OK button to reset feature information.
Stop / Start – If Equipped
Push and release the up or down arrow
button until the Stop/Start menu title is displayed
in the instrument cluster display.
Audio
Push and release the up or down arrow
button until the Audio Menu displays in the
instrument cluster display.
Messages
Push and release the up or down arrow
button until Messages is highlighted in the
instrument cluster display. This feature shows the
number of stored warning messages. Pushing the
right arrow button will allow you to see what the
stored messages are.
NOTE:The pop-up messages indicate the status of the
system and/or the conditions that need to be met.
Messages remain in the stored stack until
condition is cleared.
21_RUV_OM_EN_USC_t.book Page 92
Page 95 of 348
GETTING TO KNOW YOUR INSTRUMENT PANEL93
Screen Setup
Push and release the up or down arrow button until the Screen Setup Menu displays in the instrument cluster display. Push and release the OK button
to enter the submenus. The Screen Setup feature allows you to change what information is displayed in the instrument cluster as well as the location that
information is displayed.
Base Instrument Cluster Display Screen Setup Options:
1 — Upper Left
None
Compass
Outside Temp
Time
Range
Current (MPG, L/100km, or km/L)
Average (MPG, L/100km, or km/L)
2 — Upper Right
None
Compass
Outside Temp
Time
Range
Current (MPG, L/100km, or km/L)
Average (MPG, L/100km, or km/L)
3
21_RUV_OM_EN_USC_t.book Page 93
Page 96 of 348
94GETTING TO KNOW YOUR INSTRUMENT PANEL
3 — Center
None
Compass
Outside Temp
Time
Range
Average (MPG, L/100km, or km/L)
Current (MPG, L/100km, or km/L)
Trip A Distance
Trip B Distance
Audio Menu Title
Menu Title
Digital Speed
4 — Defaults
Restore
Cancel
Base Instrument Cluster Display Screen Setup Options:
21_RUV_OM_EN_USC_t.book Page 94
Page 98 of 348
96GETTING TO KNOW YOUR INSTRUMENT PANEL
Loss of the battery charge may indicate one or
more of the following conditions:
The charging system cannot deliver enough
electrical power to the vehicle system because
the electrical loads are larger than the capability
of charging system. The charging system is still
functioning properly.
Turning on all possible vehicle electrical loads
(e.g. HVAC to max settings, exterior and interior
lights, overloaded power outlets +12 Volts,
150W, USB ports) during certain driving condi -
tions (city driving, towing, frequent stopping).
Installing options like additional lights, upfitter
electrical accessories, audio systems, alarms
and similar devices.
Unusual driving cycles (short trips separated by
long parking periods).
The vehicle was parked for an extended period
of time (weeks, months).
The battery was recently replaced and was not
charged completely.
The battery was discharged by an electrical load
left on when the vehicle was parked.
The battery was used for an extended period
with the engine not running to supply radio,
lights, chargers, +12 Volt portable appliances
like vacuum cleaners, game consoles and
similar devices. What to do when an electrical load reduction
action message is present (“Battery Saver On” or
“Battery Saver Mode”)
During a trip:
Reduce power to unnecessary loads if possible:
Turn off redundant lights
(interior or exterior)
Check what may be plugged in to power
outlets +12 Volts, 150W, USB ports
Check HVAC settings (blower, temperature)
Check the audio settings (volume)
After a trip:
Check if any aftermarket equipment was
installed (additional lights, upfitter electrical
accessories, audio systems, alarms) and review
specifications if any (load and Ignition Off Draw
currents).
Evaluate the latest driving cycles (distance,
driving time and parking time).
The vehicle should have service performed if
the message is still present during consecutive
trips and the evaluation of the vehicle and
driving pattern did not help to identify the cause.
TRIP COMPUTER
The Trip Computer is located in the instrument
cluster display. Push and release the up or
down arrow button until “Trip Info” is
highlighted in the instrument cluster display.
Navigate between Trip A or Trip B by using the
right and left arrow buttons.
For each trip the following information will be
displayed:
Trip A
Shows the total distance traveled for Trip A
since the last reset.
Shows the Average MPG for Trip A since the last
reset.
Shows the elapsed time traveled for Trip A since
the last reset. Elapsed time will increment when
the ignition switch is in the ON or START posi -
tion.
Trip B
Shows the total distance traveled for Trip B
since the last reset.
Shows the Average MPG for Trip B since the last
reset.
Shows the elapsed time traveled for Trip B
since the last reset. Elapsed time will increment
when the ignition switch is in the ON or START
position.
21_RUV_OM_EN_USC_t.book Page 96
Page 148 of 348
146MULTIMEDIA
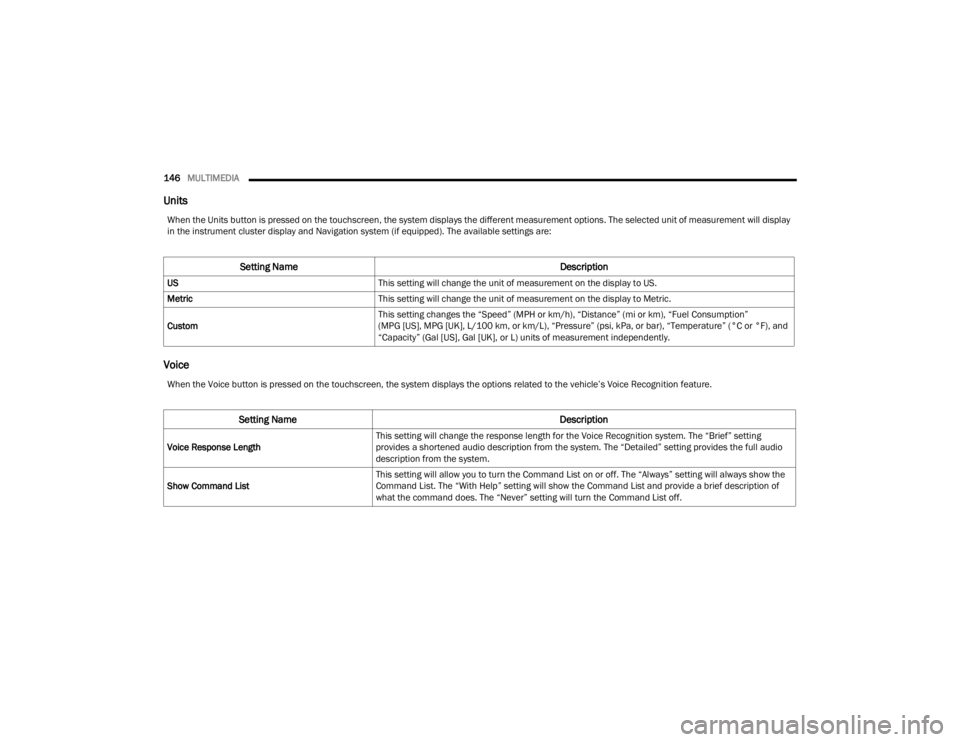
Units
Voice
When the Units button is pressed on the touchscreen, the system displays the different measurement options. The selected unit of measurement will display
in the instrument cluster display and Navigation system (if equipped). The available settings are:
Setting Name Description
USThis setting will change the unit of measurement on the display to US.
Metric This setting will change the unit of measurement on the display to Metric.
Custom This setting changes the “Speed” (MPH or km/h), “Distance” (mi or km), “Fuel Consumption”
(MPG [US], MPG [UK], L/100 km, or km/L), “Pressure” (psi, kPa, or bar), “Temperature” (°C or °F), and
“Capacity” (Gal [US], Gal [UK], or L) units of measurement independently.
When the Voice button is pressed on the touchscreen, the system displays the options related to the vehicle’s Voice Recognition feature.
Setting Name
Description
Voice Response LengthThis setting will change the response length for the Voice Recognition system. The “Brief” setting
provides a shortened audio description from the system. The “Detailed” setting provides the full audio
description from the system.
Show Command List This setting will allow you to turn the Command List on or off. The “Always” setting will always show the
Command List. The “With Help” setting will show the Command List and provide a brief description of
what the command does. The “Never” setting will turn the Command List off.
21_RUV_OM_EN_USC_t.book Page 146