brake light CITROEN 2CV 1975 Owners Manual
[x] Cancel search | Manufacturer: CITROEN, Model Year: 1975, Model line: 2CV, Model: CITROEN 2CV 1975Pages: 86, PDF Size: 2.21 MB
Page 5 of 86
IMPORTANT POINTS
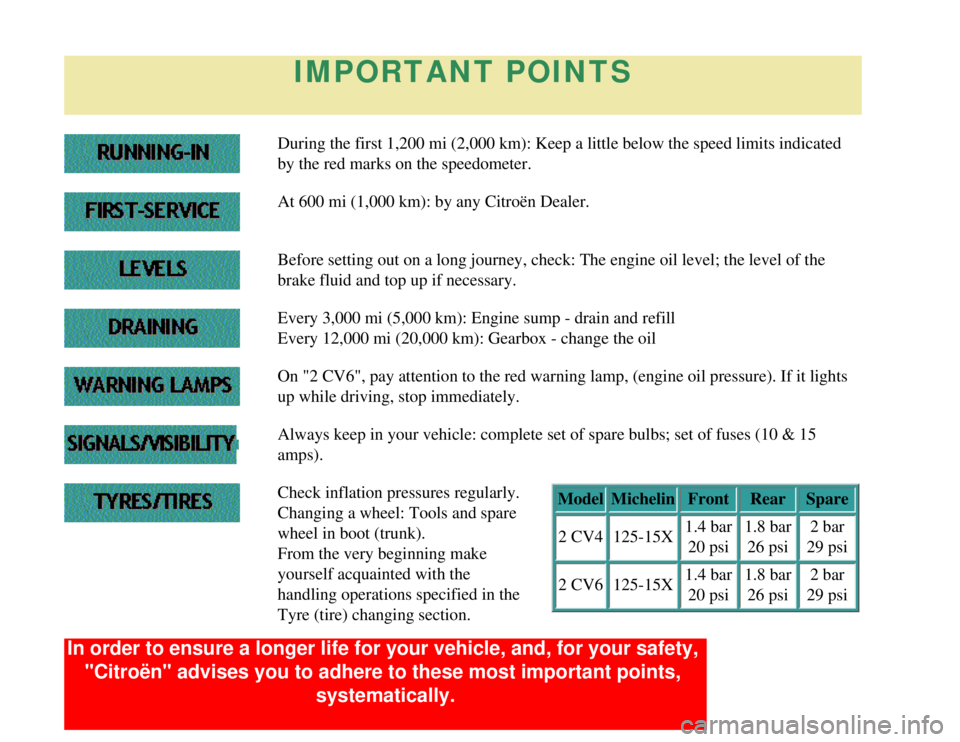
During the first 1,200 mi (2,000 km): Keep a little below the speed li\
mits indicated
by the red marks on the speedometer.
At 600 mi (1,000 km): by any Citroën Dealer.
Before setting out on a long journey, check: The engine oil level; the l\
evel of the
brake fluid and top up if necessary.
Every 3,000 mi (5,000 km): Engine sump - drain and refill
Every 12,000 mi (20,000 km): Gearbox - change the oil
On "2 CV6", pay attention to the red warning lamp, (engine oil pressure\
). If it lights
up while driving, stop immediately.
Always keep in your vehicle: complete set of spare bulbs; set of fuses (\
10 & 15
amps).
Check inflation pressures regularly.
Changing a wheel: Tools and spare
wheel in boot (trunk).
From the very beginning make
yourself acquainted with the
handling operations specified in the
Tyre (tire) changing section.Model
Michelin FrontRearSpare
2 CV4 125-15X 1.4 bar
20 psi 1.8 bar
26 psi 2 bar
29 psi
2 CV6 125-15X 1.4 bar
20 psi 1.8 bar
26 psi 2 bar
29 psi
In order to ensure a longer life for your vehicle, and, for your safety,\
"Citroën" advises you to adhere to these most important points, systematically.
Page 8 of 86
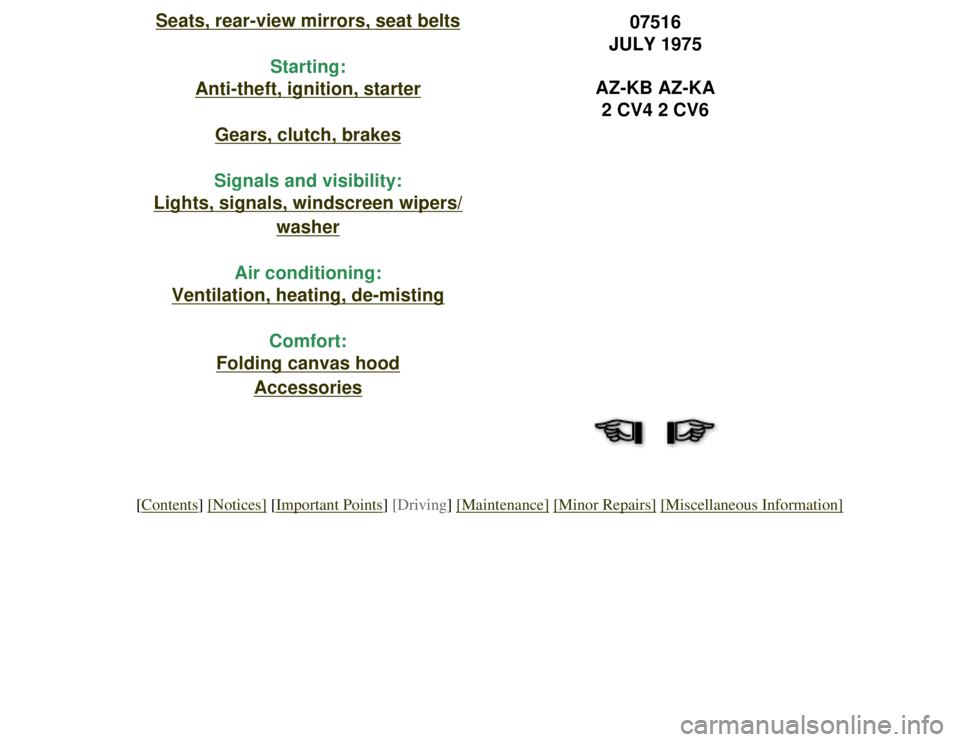
Seats, rear-view mirrors, seat beltsStarting:
Anti-theft, ignition, starter
Gears, clutch, brakes
Signals and visibility:
Lights, signals, windscreen wipers/
washer
Air conditioning:
Ventilation, heating, de-misting Comfort:
Folding canvas hood
Accessories
07516
JULY 1975
AZ-KB AZ-KA 2 CV4 2 CV6
[Contents] [Notices] [Important Points] [Driving] [Maintenance] [Minor Repairs] [Miscellaneous Information]
Page 12 of 86
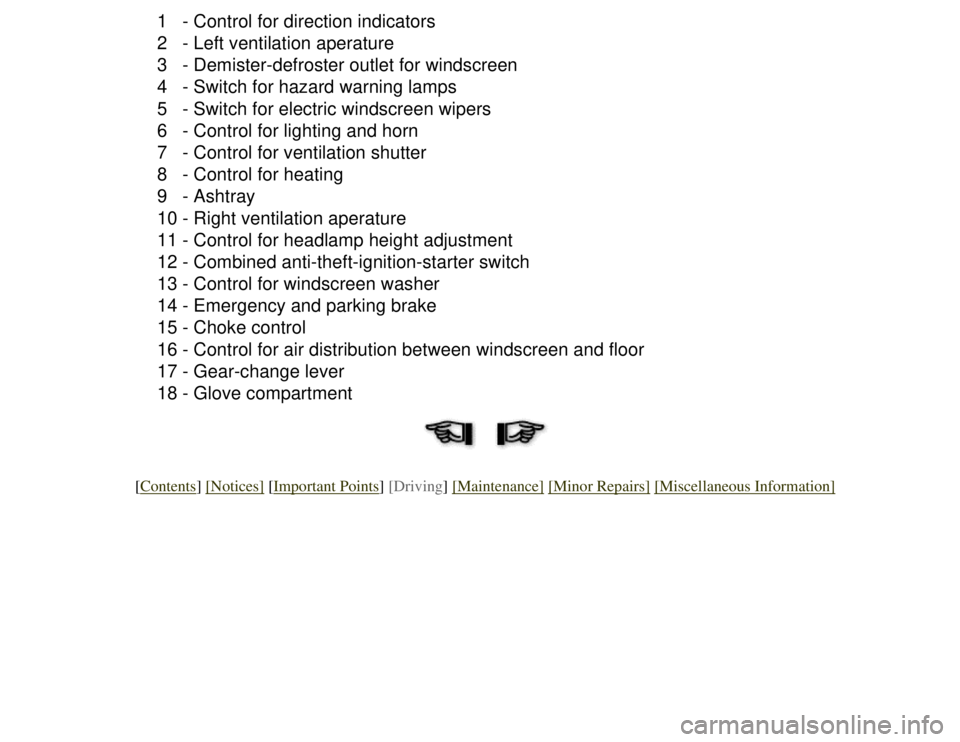
1 - Control for direction indicators
2 - Left ventilation aperature
3 - Demister-defroster outlet for windscreen
4 - Switch for hazard warning lamps
5 - Switch for electric windscreen wipers
6 - Control for lighting and horn
7 - Control for ventilation shutter
8 - Control for heating
9 - Ashtray
10 - Right ventilation aperature
11 - Control for headlamp height adjustment
12 - Combined anti-theft-ignition-starter switch
13 - Control for windscreen washer
14 - Emergency and parking brake
15 - Choke control
16 - Control for air distribution between windscreen and floor
17 - Gear-change lever
18 - Glove compartment
[Contents] [Notices] [Important Points] [Driving] [Maintenance] [Minor Repairs] [Miscellaneous Information]
Page 14 of 86
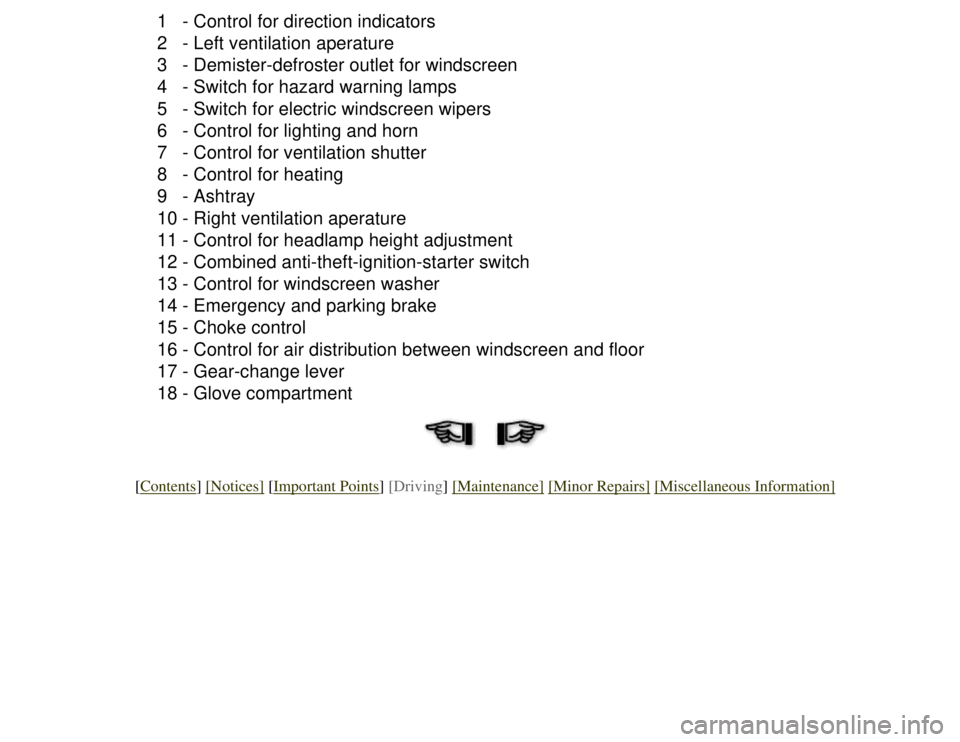
1 - Control for direction indicators
2 - Left ventilation aperature
3 - Demister-defroster outlet for windscreen
4 - Switch for hazard warning lamps
5 - Switch for electric windscreen wipers
6 - Control for lighting and horn
7 - Control for ventilation shutter
8 - Control for heating
9 - Ashtray
10 - Right ventilation aperature
11 - Control for headlamp height adjustment
12 - Combined anti-theft-ignition-starter switch
13 - Control for windscreen washer
14 - Emergency and parking brake
15 - Choke control
16 - Control for air distribution between windscreen and floor
17 - Gear-change lever
18 - Glove compartment
[Contents] [Notices] [Important Points] [Driving] [Maintenance] [Minor Repairs] [Miscellaneous Information]
Page 33 of 86

MINOR REPAIRS
Replacing a Wheel
TOOL KIT
The spare wheel and jack, the starting handle, and the wooden block
are positioned in the boot (trunk).
REMOVAL (Fig. 37 and 38)
Engage fully the handbrake
Position the wooden block under the wheel directly diagonally
opposite the one which is to be changed. If the road is on a slope,
wedge the wheel on the downward side.
Unlock but do not slacken the three wheel nuts with the wheel brace.
Place the base of the jack well under the car and turned slightly
towards the wheel to be changed, so as to avoid contact with the
bodywork in the final stage of jacking.
Engage lifting arm (1) fully into socket (2) (these sockets are
situated under the front and rear doors).
Turn the operating screw (3) clockwiase by hand until the jack is in
firm contact.
Fig. 37 Fig. 38
37 - Replacing a front wheel 1 - Lifting arm2 - Support3 - Screw
38 - Replacing a rear wheel
Page 38 of 86
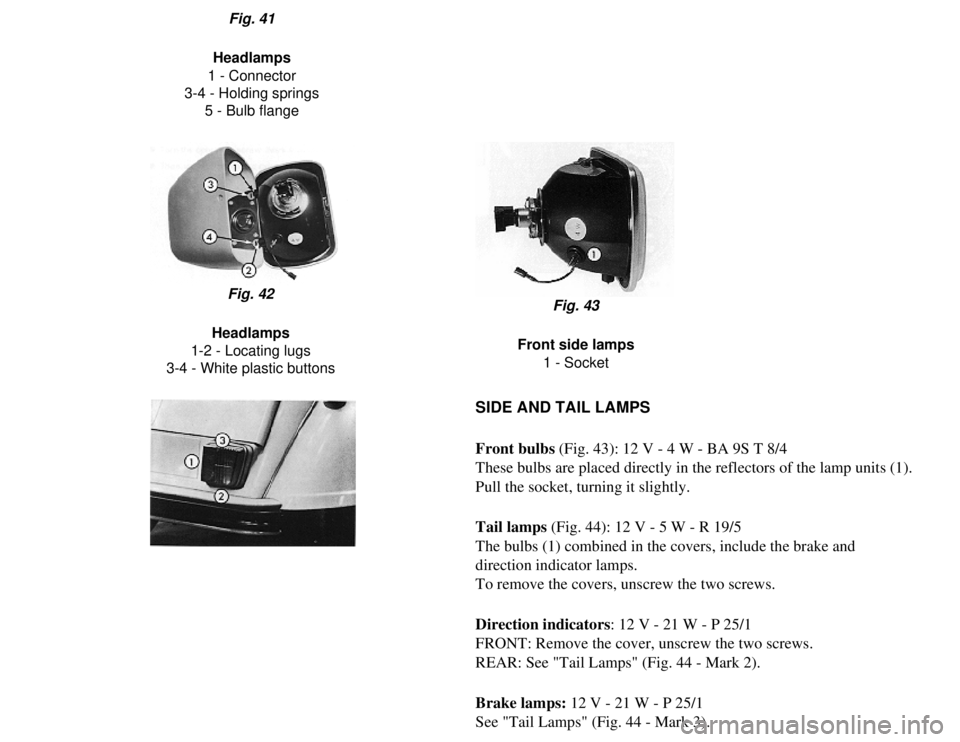
Fig. 41
Headlamps
1 - Connector
3-4 - Holding springs 5 - Bulb flange
Fig. 42
Headlamps
1-2 - Locating lugs
3-4 - White plastic buttons Fig. 43
Front side lamps 1 - Socket
SIDE AND TAIL LAMPS
Front bulbs (Fig. 43): 12 V - 4 W - BA 9S T 8/4
These bulbs are placed directly in the reflectors of the lamp units (1)\
.
Pull the socket, turning it slightly.
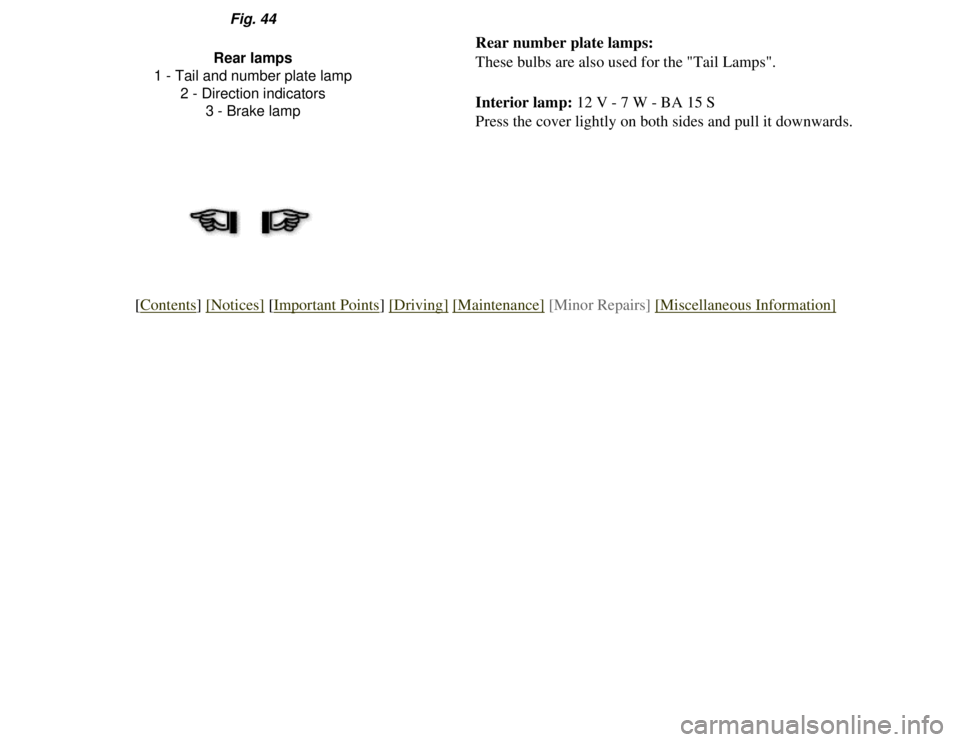
Tail lamps (Fig. 44): 12 V - 5 W - R 19/5
The bulbs (1) combined in the covers, include the brake and
direction indicator lamps.
To remove the covers, unscrew the two screws.
Direction indicators: 12 V - 21 W - P 25/1
FRONT: Remove the cover, unscrew the two screws.
REAR: See "Tail Lamps" (Fig. 44 - Mark 2).
Brake lamps: 12 V - 21 W - P 25/1
See "Tail Lamps" (Fig. 44 - Mark 3).
Page 39 of 86
Rear number plate lamps:
These bulbs are also used for the "Tail Lamps".
Interior lamp: 12 V - 7 W - BA 15 S
Press the cover lightly on both sides and pull it downwards.
Fig. 44
Rear lamps
1 - Tail and number plate lamp 2 - Direction indicators3 - Brake lamp
[Contents] [Notices] [Important Points] [Driving] [Maintenance] [Minor Repairs] [Miscellaneous Information]
Page 56 of 86
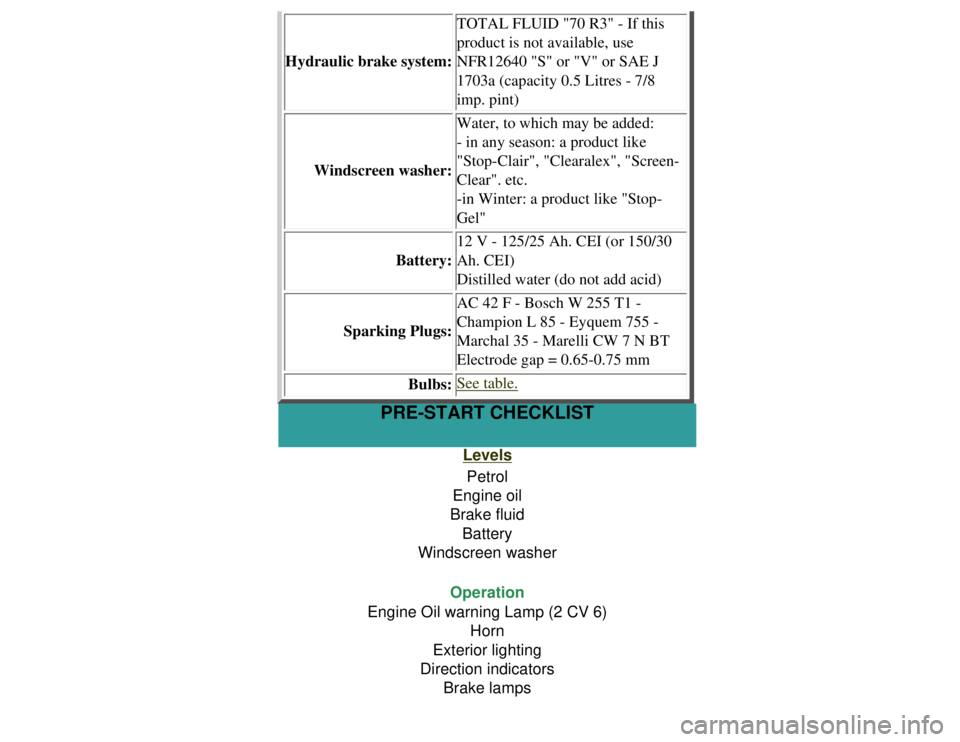
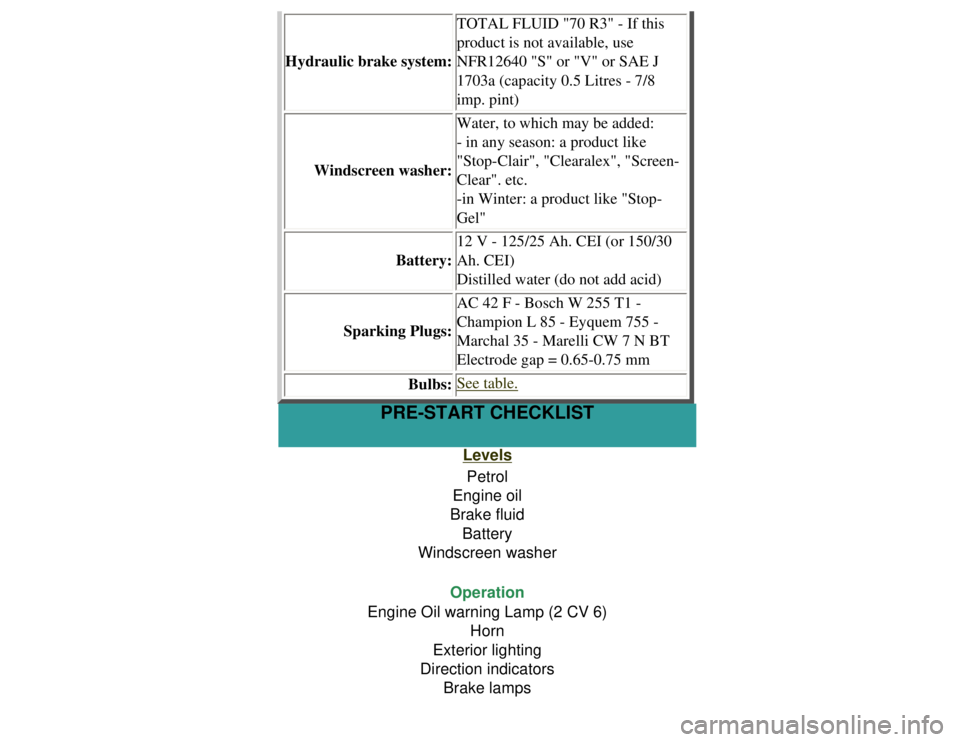
Hydraulic brake system:TOTAL FLUID "70 R3" - If this
product is not available, use
NFR12640 "S" or "V" or SAE J
1703a (capacity 0.5 Litres - 7/8
imp. pint)
Windscreen washer: Water, to which may be added:
- in any season: a product like
"Stop-Clair", "Clearalex", "Screen-
Clear". etc.
-in Winter: a product like "Stop-
Gel"
Battery: 12 V - 125/25 Ah. CEI (or 150/30
Ah. CEI)
Distilled water (do not add acid)
Sparking Plugs: AC 42 F - Bosch W 255 T1 -
Champion L 85 - Eyquem 755 -
Marchal 35 - Marelli CW 7 N BT
Electrode gap = 0.65-0.75 mm
Bulbs:
See table.
PRE-START CHECKLIST
Levels Petrol
Engine oil
Brake fluid Battery
Windscreen washer
Operation
Engine Oil warning Lamp (2 CV 6) Horn
Exterior lighting
Direction indicators Brake lamps
Page 59 of 86
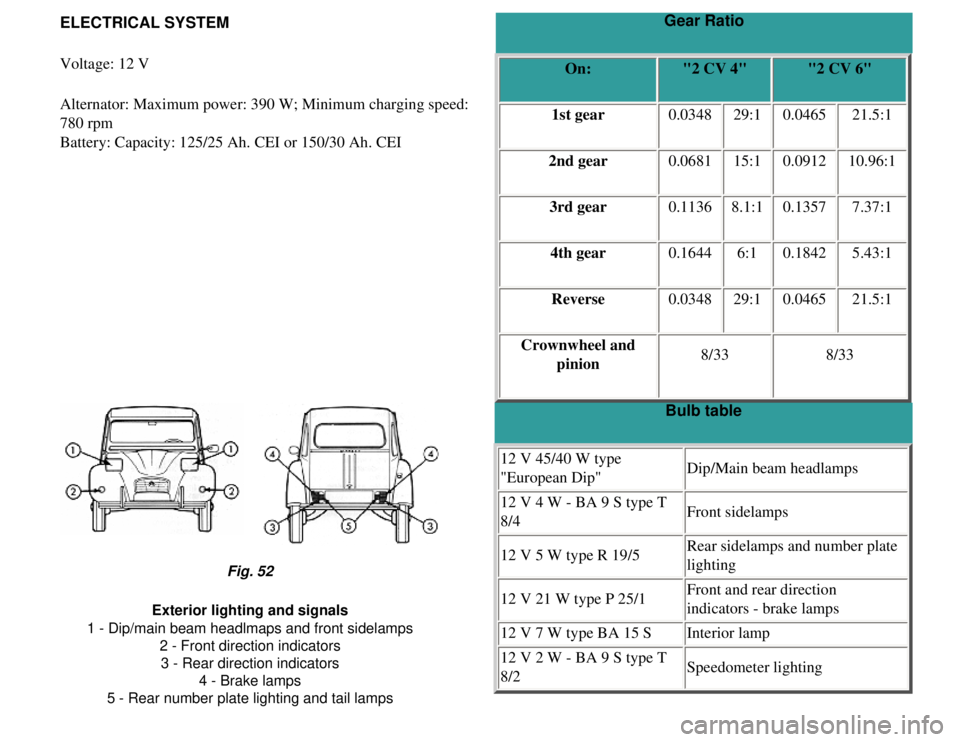
Gear Ratio
ELECTRICAL SYSTEM
Voltage: 12 V
Alternator: Maximum power: 390 W; Minimum charging speed:
780 rpm
Battery: Capacity: 125/25 Ah. CEI or 150/30 Ah. CEI On:
"2 CV 4" "2 CV 6"
1st gear 0.034829:10.0465 21.5:1
2nd gear 0.068115:10.0912 10.96:1
3rd gear 0.11368.1:10.1357 7.37:1
4th gear 0.16446:10.1842 5.43:1
Reverse 0.034829:10.0465 21.5:1
Crownwheel and pinion 8/33
8/33
Bulb table
12 V 45/40 W type
"European Dip" Dip/Main beam headlamps
12 V 4 W - BA 9 S type T
8/4 Front sidelamps
12 V 5 W type R 19/5 Rear sidelamps and number plate
lighting
12 V 21 W type P 25/1 Front and rear direction
indicators - brake lamps
12 V 7 W type BA 15 S Interior lamp
12 V 2 W - BA 9 S type T
8/2 Speedometer lighting
Fig. 52
Exterior lighting and signals
1 - Dip/main beam headlmaps and front sidelamps 2 - Front direction indicators3 - Rear direction indicators 4 - Brake lamps
5 - Rear number plate lighting and tail lamps
Page 65 of 86
Hydraulic brake system:TOTAL FLUID "70 R3" - If this
product is not available, use
NFR12640 "S" or "V" or SAE J
1703a (capacity 0.5 Litres - 7/8
imp. pint)
Windscreen washer: Water, to which may be added:
- in any season: a product like
"Stop-Clair", "Clearalex", "Screen-
Clear". etc.
-in Winter: a product like "Stop-
Gel"
Battery: 12 V - 125/25 Ah. CEI (or 150/30
Ah. CEI)
Distilled water (do not add acid)
Sparking Plugs: AC 42 F - Bosch W 255 T1 -
Champion L 85 - Eyquem 755 -
Marchal 35 - Marelli CW 7 N BT
Electrode gap = 0.65-0.75 mm
Bulbs:
See table.
PRE-START CHECKLIST
Levels Petrol
Engine oil
Brake fluid Battery
Windscreen washer
Operation
Engine Oil warning Lamp (2 CV 6) Horn
Exterior lighting
Direction indicators Brake lamps