OTA CITROEN BERLINGO 2023 Owners Manual
[x] Cancel search | Manufacturer: CITROEN, Model Year: 2023, Model line: BERLINGO, Model: CITROEN BERLINGO 2023Pages: 324, PDF Size: 9.41 MB
Page 13 of 324
11
Instruments
1Displays
With LCD symbols display
With LCD text display
With matrix display
With matrix display (Electric)
When travelling abroad, you may need to
change the distance unit: the speed must
be displayed in the country’s official unit (mph
or km/h). The unit is changed via the screen's
configuration menu, with the vehicle
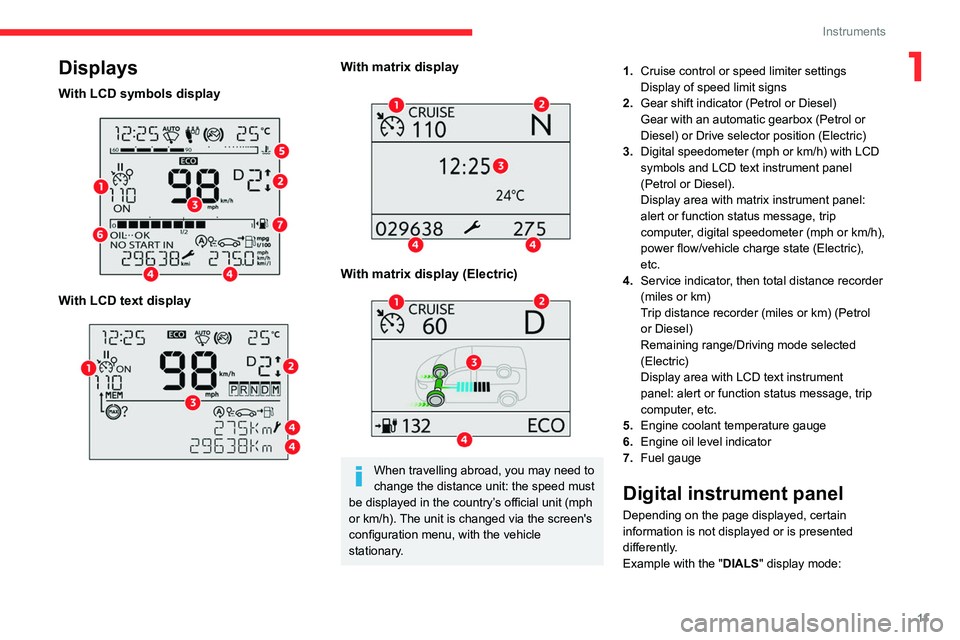
stationary. 1.
Cruise control or speed limiter settings
Display of speed limit signs
2. Gear shift indicator (Petrol or Diesel)
Gear with an automatic gearbox (Petrol or
Diesel) or Drive selector position (Electric)
3. Digital speedometer (mph or km/h) with LCD
symbols and LCD text instrument panel
(Petrol or Diesel).
Display area with matrix instrument panel:
alert or function status message, trip
computer, digital speedometer (mph or km/h),
power flow/vehicle charge state (Electric),
etc.
4. Service indicator, then total distance recorder
(miles or km)
Trip distance recorder (miles or km) (Petrol
or Diesel)
Remaining range/Driving mode selected
(Electric)
Display area with LCD text instrument
panel: alert or function status message, trip
computer, etc.
5. Engine coolant temperature gauge
6. Engine oil level indicator
7. Fuel gauge
Digital instrument panel
Depending on the page displayed, certain
information is not displayed or is presented
differently.
Example with the " DIALS"
display mode:
Page 14 of 324
12
Instruments
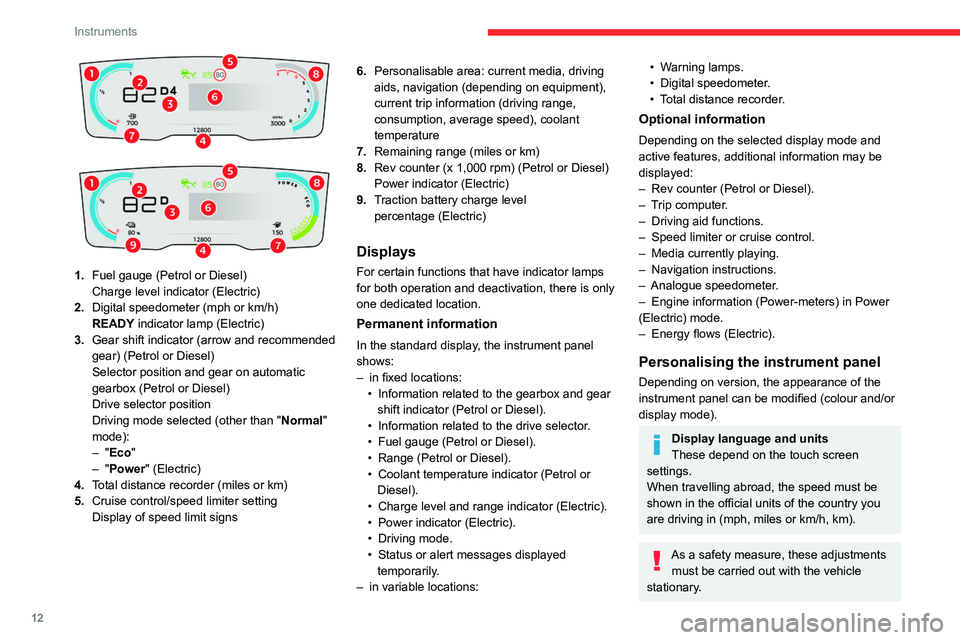
1. Fuel gauge (Petrol or Diesel)
Charge level indicator (Electric)
2. Digital speedometer (mph or km/h)
READY indicator lamp (Electric)
3. Gear shift indicator (arrow and recommended
gear) (Petrol or Diesel)
Selector position and gear on automatic
gearbox (Petrol or Diesel)
Drive selector position
Driving mode selected (other than " Normal"
mode):
–
"Eco"
–
"Power" (Electric)
4. Total distance recorder (miles or km)
5. Cruise control/speed limiter setting
Display of speed limit signs 6.
Personalisable area: current media, driving
aids, navigation (depending on equipment),
current trip information (driving range,
consumption, average speed), coolant
temperature
7. Remaining range (miles or km)
8. Rev counter (x 1,000 rpm) (Petrol or Diesel)
Power indicator (Electric)
9. Traction battery charge level
percentage (Electric)
Displays
For certain functions that have indicator lamps
for both operation and deactivation, there is only
one dedicated location.
Permanent information
In the standard display, the instrument panel
shows:
–
in fixed locations:
•
Information related to the gearbox and gear
shift indicator (Petrol or Diesel).
•
Information related to the drive selector
.
•
Fuel gauge (Petrol or Diesel).
•
Range (Petrol or Diesel).
•
Coolant temperature indicator (Petrol or
Diesel).
•
Charge level and range indicator (Electric).
•
Power indicator (Electric).
•
Driving mode.
•
Status or alert messages displayed
temporarily
.
–
in variable locations:
• Warning lamps.
• Digital speedometer .
•
T
otal distance recorder.
Optional information
Depending on the selected display mode and
active features, additional information may be
displayed:
–
Rev counter (Petrol or Diesel).
–
T
rip computer.
–
Driving aid functions.
–
Speed limiter or cruise control.
–
Media currently playing.
–
Navigation instructions.
–
Analogue speedometer
.
–
Engine information (Power-meters) in Power
(Electric) mode.
–
Energy flows (Electric).
Personalising the instrument panel
Depending on version, the appearance of the
instrument panel can be modified (colour and/or
display mode).
Display language and units
These depend on the touch screen
settings.
When travelling abroad, the speed must be
shown in the official units of the country you
are driving in (mph, miles or km/h, km).
As a safety measure, these adjustments must be carried out with the vehicle
stationary.
Page 15 of 324
13
Instruments
1Choice of display colour (Petrol or Diesel)
Depending on version, the instrument panel
display colour depends on the colour scheme
chosen in the touch screen.
The settings are changed via the Settings touch screen menu.
Choosing the display mode
In each mode, specific types of information are
displayed on the instrument panel.
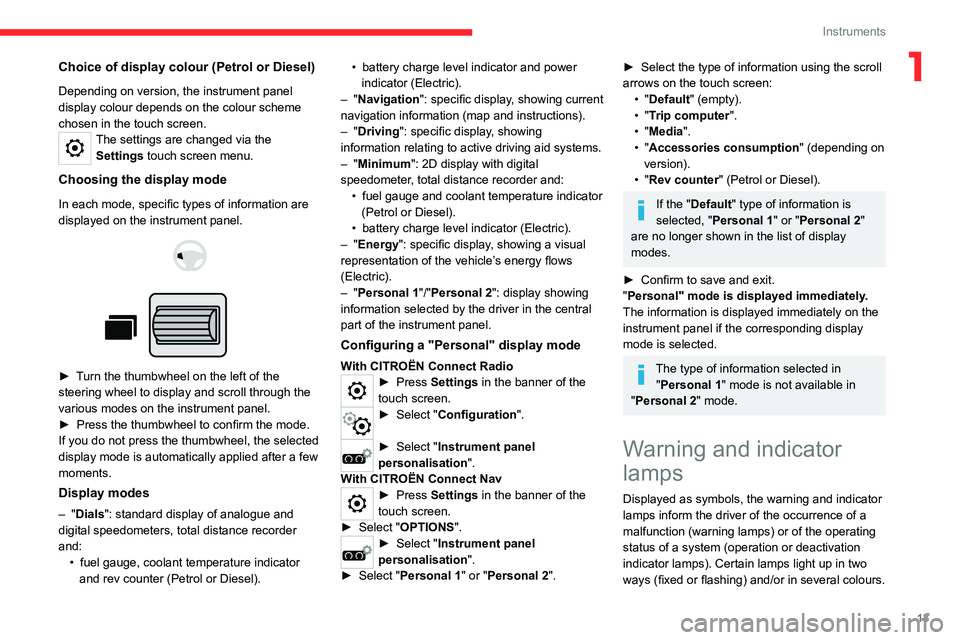
► Turn the thumbwheel on the left of the
steering wheel to display and scroll through the
various modes on the instrument panel.
►
Press the thumbwheel to confirm the mode.
If you do not press the thumbwheel, the selected
display mode is automatically applied after a few
moments.
Display modes
– "Dials": standard display of analogue and
digital speedometers, total distance recorder
and: •
fuel gauge, coolant temperature indicator
and rev counter (Petrol or Diesel). •
battery charge level indicator and power
indicator (Electric).
–
"Navigation": specific display, showing current
navigation information (map and instructions).
– "Driving": specific display, showing
information relating to active driving aid systems.
– "Minimum": 2D display with digital
speedometer, total distance recorder and: •
fuel gauge and coolant temperature indicator
(Petrol or Diesel).
•
battery charge level indicator (Electric).
–
"Energy": specific display, showing a visual
representation of the vehicle’s energy flows
(Electric).
– "Personal 1"/"Personal 2": display showing
information selected by the driver in the central
part of the instrument panel.
Configuring a "Personal" display mode
With CITROËN Connect Radio► Press Settings in the banner of the
touch screen.
► Select " Configuration ".
► Select "Instrument panel
personalisation".
With CITROËN Connect Nav
► Press Settings in the banner of the
touch screen.
►
Select "
OPTIONS".
► Select " Instrument panel
personalisation".
►
Select "
Personal 1" or "Personal 2".
► Select the type of information using the scroll
arrows on the touch screen: •
"Default" (empty).
•
"Trip computer".
•
"Media".
•
"Accessories consumption" (depending on
version).
•
"Rev counter" (Petrol or Diesel).
If the "Default" type of information is
selected, "Personal 1" or "Personal 2"
are no longer shown in the list of display
modes.
►
Confirm to save and exit.
"
Personal" mode is displayed immediately.
The information is displayed immediately on the
instrument panel if the corresponding display
mode is selected.
The type of information selected in "Personal 1" mode is not available in
"Personal 2" mode.
Warning and indicator
lamps
Displayed as symbols, the warning and indicator
lamps inform the driver of the occurrence of a
malfunction (warning lamps) or of the operating
status of a system (operation or deactivation
indicator lamps). Certain lamps light up in two
ways (fixed or flashing) and/or in several colours.
Page 23 of 324
21
Instruments
1Have your vehicle serviced very soon.
Service spanner flashingFlashing then fixed, when the
ignition is switched on.
(With
BlueHDi Diesel engines, associated with
the Service warning lamp.)
The servicing interval has been exceeded.
Have your vehicle serviced as soon as possible.
Resetting the service indicator
The service indicator must be reset after each
service.
►
Switch the ignition off.
W
ith LCD symbols and LCD text or matrix
instrument panel
► Press and hold this button.
► Switch on the ignition; the distance recorder
display begins a countdown.
►
Release the button when =0
is displayed; the
spanner disappears.
With digital instrument panel
The service indicator is reset using the "Check" button in the Driving/Vehicle
touch screen menu.
If you have to disconnect the battery
following this operation, lock the vehicle
and wait at least 5 minutes for the reset to be
registered.
Reminder of the servicing information
You can access the servicing information at any
time.
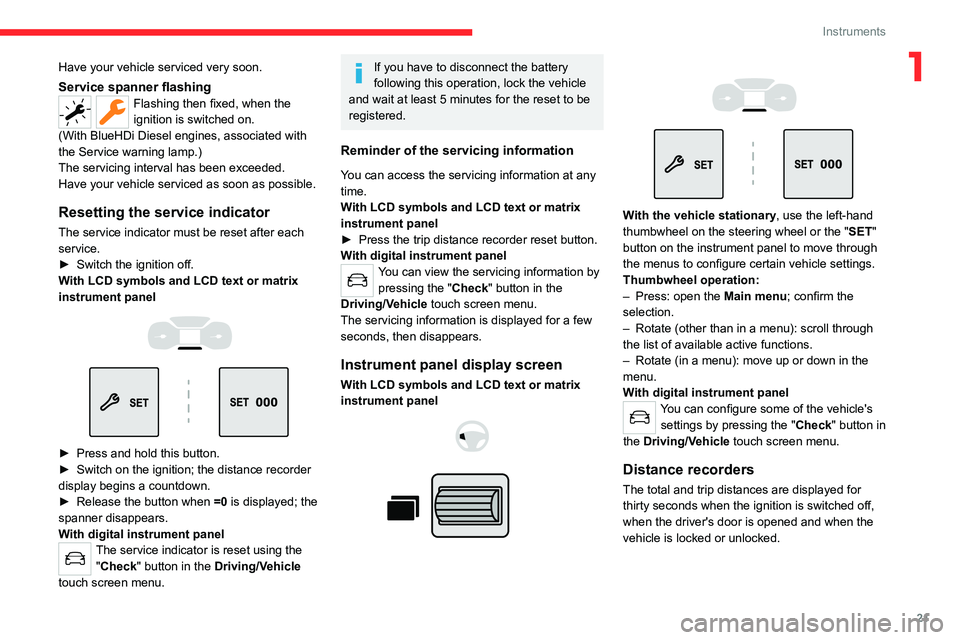
With LCD symbols and LCD text or matrix
instrument panel
►
Press the trip distance recorder reset button.
W
ith digital instrument panel
You can view the servicing information by pressing the " Check" button in the
Driving/Vehicle touch screen menu.
The servicing
information is displayed for a few
seconds, then disappears.
Instrument panel display screen
With LCD symbols and LCD text or matrix
instrument panel
With the vehicle stationary, use the left-hand
thumbwheel on the steering wheel or the " SET"
button on the instrument panel to move through
the menus to configure certain vehicle settings.
Thumbwheel operation:
–
Press: open the
Main menu; confirm the
selection.
–
Rotate (other than in a menu): scroll through
the list of available active functions.
–
Rotate (in a menu): move up or down in the
menu.
W
ith digital instrument panel
You can configure some of the vehicle's settings by pressing the " Check" button in
the Driving/Vehicle touch screen menu.
Distance recorders
The total and trip distances are displayed for
thirty seconds when the ignition is switched off,
when the driver's door is opened and when the
vehicle is locked or unlocked.
Page 24 of 324
22
Instruments
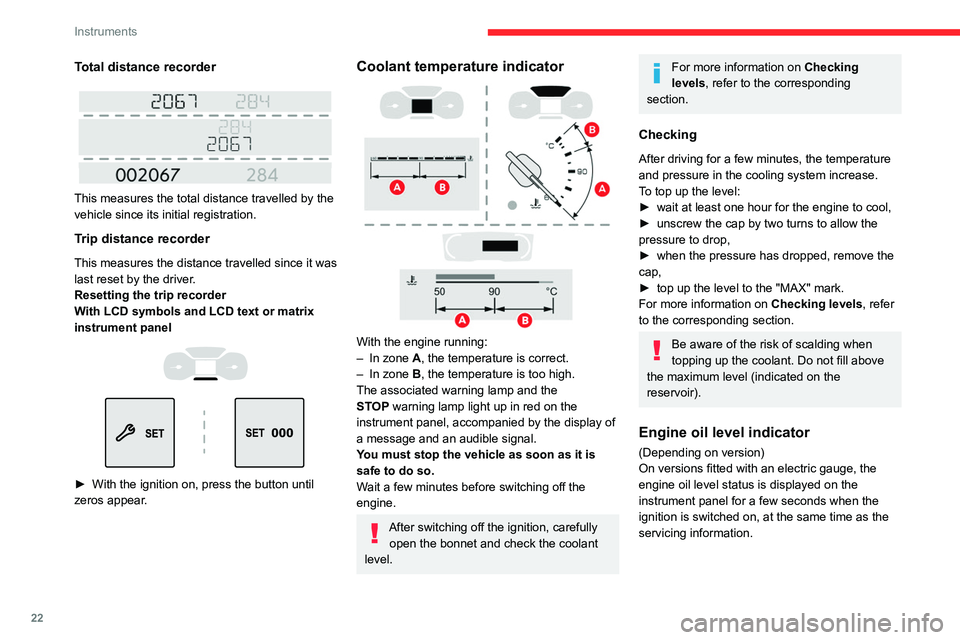
Total distance recorder
This measures the total distance travelled by the
vehicle since its initial registration.
Trip distance recorder
This measures the distance travelled since it was
last reset by the driver.
Resetting the trip recorder
With LCD symbols and LCD text or matrix
instrument panel
► With the ignition on, press the button until
zeros appear .
Coolant temperature indicator
With the engine running:
– In zone A, the temperature is correct.
–
In zone
B, the temperature is too high.
The associated warning lamp and the
STOP
warning lamp light up in red on the
instrument panel, accompanied by the display of
a message and an audible signal.
You must stop the vehicle as soon as it is
safe to do so.
Wait a few minutes before switching off the
engine.
After switching off the ignition, carefully open the bonnet and check the coolant
level.
For more information on Checking
levels, refer to the corresponding
section.
Checking
After driving for a few minutes, the temperature
and pressure in the cooling system increase.
To top up the level:
►
wait at least one hour for the engine to cool,
►
unscrew the cap by two turns to allow the
pressure to drop,
►
when the pressure has dropped, remove the
cap,
►
top up the level to the "MAX" mark.
For more information on Checking levels
, refer
to the corresponding section.
Be aware of the risk of scalding when
topping up the coolant. Do not fill above
the maximum level (indicated on the
reservoir).
Engine oil level indicator
(Depending on version)
On versions fitted with an electric gauge, the
engine oil level status is displayed on the
instrument panel for a few seconds when the
ignition is switched on, at the same time as the
servicing information.
Page 31 of 324
29
Instruments
1– Air conditioning system controls (depending
on version).
For safety reasons, always stop the
vehicle before performing operations
that require sustained attention.
Some functions are not accessible while
driving.
Recommendations
Do not use pointed objects on the touch screen.
Do not touch the touch screen with wet hands.
Use a soft, clean cloth to clean the touch screen.
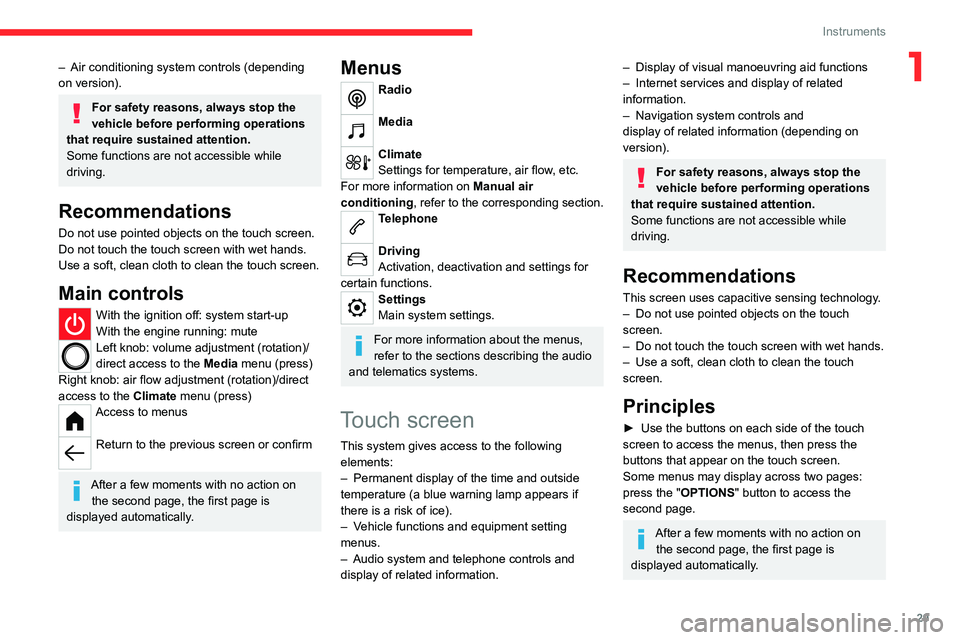
Main controls
With the ignition off: system start-up
With the engine running: mute
Left knob: volume adjustment (rotation)/
direct access to the Media menu (press)
Right knob: air flow adjustment (rotation)/direct
access to the Climate menu (press)
Access to menus
Return to the previous screen or confirm
After a few moments with no action on
the second page, the first page is
displayed automatically.
Menus
Radio
Media
Climate
Settings for temperature, air flow, etc.
For more information on Manual air
conditioning , refer to the corresponding section.
Telephone
Driving
Activation, deactivation and settings for
certain functions.
Settings
Main system settings.
For more information about the menus,
refer to the sections describing the audio
and telematics systems.
Touch screen
This system gives access to the following elements:
–
Permanent display of the time and outside
temperature (a blue warning lamp appears if
there is a risk of ice).
–
V
ehicle functions and equipment setting
menus.
–
Audio system and telephone controls and
display of related information.
– Display of visual manoeuvring aid functions
– Internet services and display of related
information.
–
Navigation system controls and
display
of related information (depending on
version).
For safety reasons, always stop the
vehicle before performing operations
that require sustained attention.
Some functions are not accessible while
driving.
Recommendations
This screen uses capacitive sensing technology.
– Do not use pointed objects on the touch
screen.
–
Do not touch the touch screen with wet hands.
–
Use a soft, clean cloth to clean the touch
screen.
Principles
► Use the buttons on each side of the touch
screen to access the menus, then press the
buttons that appear on the touch screen.
Some menus may display across two pages:
press the "OPTIONS" button to access the
second page.
After a few moments with no action on the second page, the first page is
displayed automatically.
Page 36 of 324
34
Access
Purchasing a second-hand vehicle
Have the key codes memorised by a
CITROËN dealer, to ensure that the keys in
your possession are the only ones able to
start the vehicle.
Accumulations (water, dust, grime, salt, etc.) on the inner surface of the door
handle may affect detection.
If cleaning the inner surface of the door
handle using a cloth does not restore
detection, contact a CITROËN dealer or a
qualified workshop.
A sudden splash of water (stream of water,
high pressure jet washer, etc.) may be
identified by the system as the desire to open
the vehicle.
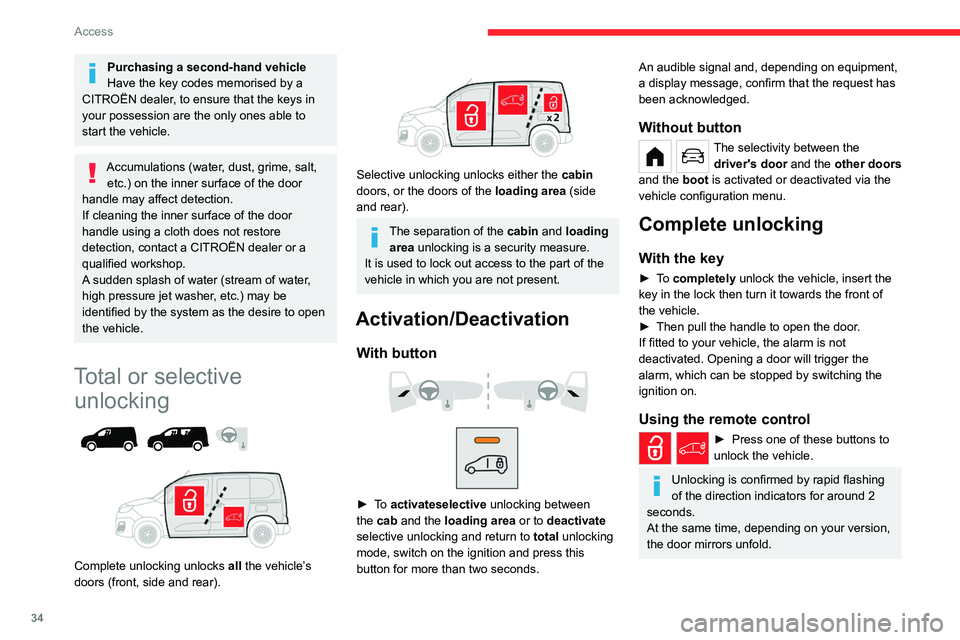
Total or selective unlocking
Complete unlocking unlocks all the vehicle’s
doors (front, side and rear).
Selective unlocking unlocks either the cabin
doors, or the doors of the loading area (side
and rear).
The separation of the cabin and loading area unlocking is a security measure.
It is used to lock out access to the part of the
vehicle in which you are not present.
Activation/Deactivation
With button
► To activateselective unlocking between
the cab and the loading area or to deactivate
selective unlocking and return to total unlocking
mode, switch on the ignition and press this
button for more than two seconds.
An audible signal and, depending on equipment,
a display message, confirm that the request has
been acknowledged.
Without button
The selectivity between the driver's door and the other doors
and the boot is activated or deactivated via the
vehicle configuration menu.
Complete unlocking
With the key
► To completely unlock the vehicle, insert the
key in the lock then turn it towards the front of
the vehicle.
►
Then pull the handle to open the door
.
If fitted to your vehicle, the alarm is not
deactivated. Opening a door will trigger the
alarm, which can be stopped by switching the
ignition on.
Using the remote control
► Press one of these buttons to
unlock the vehicle.
Unlocking is confirmed by rapid flashing
of the direction indicators for around 2
seconds.
At the same time, depending on your version,
the door mirrors unfold.
Page 53 of 324

51
Ease of use and comfort
3AdjustmentsLongitudinal
► Raise the control and slide the seat forwards
or backwards.
Height
(driver only)
► If fitted to the vehicle, pull the control
upwards to raise or push it downwards to lower ,
as many times as necessary to obtain the
position required.
For more information on the Seat belts,
refer to the corresponding section.
Tilting the backrest
► Push the control backwards then use your
weight and your legs to adjust the backrest.
Lumbar
(driver only)
► Turn the knob to obtain the desired level of
lumbar support.
Armrest
► To put the armrest in the vertical position,
raise it until it locks into place.
►
Lower the armrest to return it to the position
for use.
The armrest can be removed from the passenger
seat.
Removing the armrest
►
Raise the armrest into the vertical position.
► Push the armrest shaft towards the backrest.
► While holding it in this position, rotate the
armrest towards the rear
.
►
Pull the armrest to detach it from the
backrest.
Refitting the armrest
Page 54 of 324

52
Ease of use and comfort
► Slot the armrest into the backrest, ensuring
that you align the bayonet lugs with the holes.
►
Push the armrest shaft towards the backrest.
►
While holding it in this position, rotate the
armrest towards the front.
The armrest is once
again secured onto the backrest.
Storage compartment under
the seat
► Lift the passenger ’s seat cushion to access
the storage compartment.
Retractable position
► If the centre console inconveniences you,
remove the passenger's seat armrest.
►
Push the control rearwards fully to tilt and
guide the assembly
.
This position allows you to transport long loads
inside the vehicle with the doors closed.
When retracted, the maximum permitted weight
on the backrest is 50
kg.
►
T
o reposition the seat cushion, raise the
backrest until it locks in the raised position.
Heated seat control
► Approximately 30 seconds after starting the
engine, press the control.
It can be activated when the outside temperature
is below 20°C.
The temperature is controlled automatically
.
Pressing again interrupts operation.
If you press the control while the engine
is not running, the request will be
memorised for approximately 2 minutes.
With the two-seat front bench seat, the driver's
seat control switches the heating on or off for the
bench seat’s outer seat.
Do not use the function when the seat
is not occupied.
Reduce the heating intensity as soon as
possible.
When the seat and passenger compartment
have reached a satisfactory temperature,
Page 85 of 324

83
Lighting and visibility
4Lighting control stalk
Main lighting
Automatic illumination of lamps/daytime running lamps
Sidelamps only
Dipped or main beam headlamps
Operation of the selected lighting is
confirmed by the illumination of the
corresponding indicator lamp.
Headlamp dipping
► Pull the lighting control stalk to switch
between dipped and main beam headlamps.
In "
AUTO" and sidelamps mode, pull the lighting
control stalk to switch the main beam headlamps
on directly ("headlamp flash").
Foglamps selection ring
Rear foglamps
They only work if the sidelamps are on.
► Rotate the ring forwards/backwards to turn
them on/off.
When the lighting is switched off automatically
("AUTO" position) the foglamps and the dipped
beam headlamps remain on.
Front foglamps/Rear foglamps
They operate with the sidelamps, dipped or main beam headlamps on.
► Rotate the ring forwards:
• once to switch on the front foglamps,
•
a second time to switch on the rear
foglamps.
►
T
urn in the opposite direction to switch off.
If the lighting is switched off automatically
("AUTO" position) or the dipped beam
headlamps are switched off manually, the
foglamps and sidelamps remain on.
►
Rotate the ring backwards to switch the
foglamps off; the sidelamps will then switch off.
Switching on the foglamps is prohibited
in clear weather or in rain, both day and
night. In these situations, the power of their
beams may dazzle other drivers. They must
only be used in fog or falling snow (rules may
vary depending on country).
Do not forget to switch off the foglamps when
they are no longer necessary.