display CITROEN C-ELYSÉE 2023 User Guide
[x] Cancel search | Manufacturer: CITROEN, Model Year: 2023, Model line: C-ELYSÉE, Model: CITROEN C-ELYSÉE 2023Pages: 180, PDF Size: 4.77 MB
Page 18 of 180
16
Dashboard instruments
Related to the average fuel consumption over
the last few kilometres travelled.
This value may vary following a change in the driving style or the relief, resulting
in a significant change in the current fuel
consumption.
When the range falls below 20 miles (30 km),
dashes are displayed. After filling with at least
5 litres of fuel, the range is recalculated and is
displayed if it exceeds 60 miles (100 km).
If dashes are displayed continuously
while driving instead of the digits, contact
a CITROËN dealer or a qualified workshop.
Current fuel consumption
(l/100 km or km/l)
Calculated over the last few seconds.
This function is only displayed from 18 mph (30 km/h).
Average fuel consumption
(l/100 km or km/l)
Calculated since the last time the trip was
reset.
Average speed
(km/h)
Calculated since the last time the trip was
reset.
Distance travelled
(km)
Calculated since the last time the trip was
reset.
Stop & Start time counter
(minutes/seconds or hours/minutes)
If your vehicle is fitted with Stop & Start, a time
counter calculates the time spent in STOP mode
during a journey.
It resets to zero every time the ignition is
switched on.
Page 21 of 180
19
Access
2Automatic (anti-intrusion security)
The doors and boot lock automatically while
driving (speed above 6 mph (10
km/h)).
To deactivate/reactivate this function (activated
by default):
►
Press the button until an audible signal is
heard and/or a message appears on the screen.
Back-up procedures
Lost keys, remote control
Go to a CITROËN dealer with the vehicle's
registration certificate, your personal
identification documents and if possible, the label
bearing the key code.
The CITROËN dealer will be able to retrieve the
key code and the transponder code, enabling a
new key to be ordered.
Complete unlocking/locking
of the vehicle with the key
Use this procedure in the following situations:
– Remote control battery discharged.
–
Remote control malfunction.
–
V
ehicle battery discharged.
–
V
ehicle in an area subject to strong
electromagnetic interference.
In the first case, change the remote control
battery.
In the second case, reinitialise the remote
control.
Refer to the corresponding sections.
Driver's door
Insert the key in the door lock to lock or unlock
the door.
Passenger doors
► On the rear doors, check that the child lock
is not on.
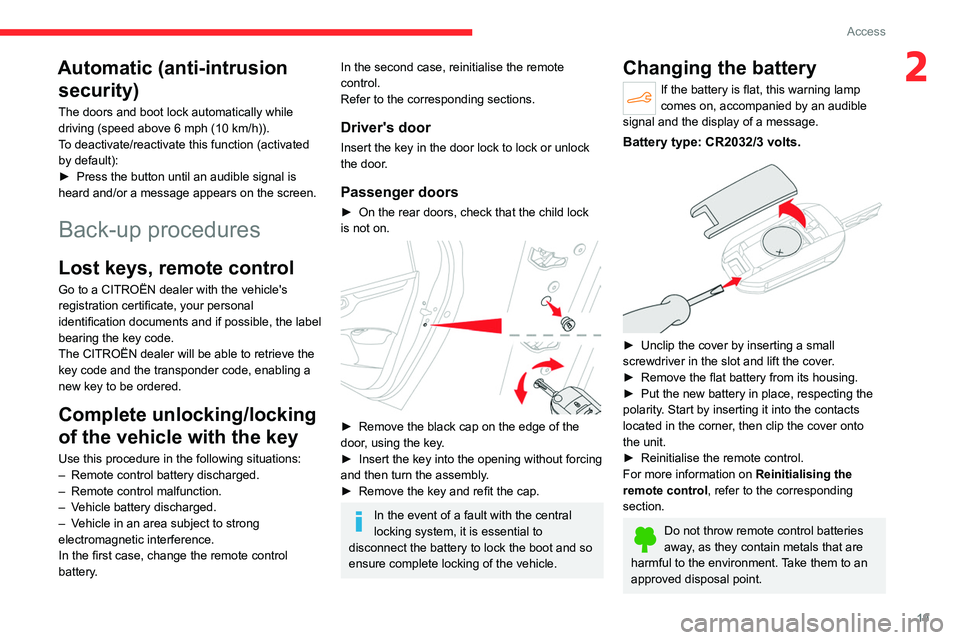
► Remove the black cap on the edge of the
door , using the key.
►
Insert the key into the opening without forcing
and then turn the assembly
.
►
Remove the key and refit the cap.
In the event of a fault with the central
locking system, it is essential to
disconnect the battery to lock the boot and so
ensure complete locking of the vehicle.
Changing the battery
If the battery is flat, this warning lamp
comes on, accompanied by an audible
signal and the display of a message.
Battery type: CR2032/3 volts.
► Unclip the cover by inserting a small
screwdriver in the slot and lift the cover .
►
Remove the flat battery from its housing.
►
Put the new battery in place, respecting the
polarity
. Start by inserting it into the contacts
located in the corner, then clip the cover onto
the unit.
►
Reinitialise the remote control.
For more information on Reinitialising the
remote control
, refer to the corresponding
section.
Do not throw remote control batteries
away, as they contain metals that are
harmful to the environment. Take them to an
approved disposal point.
Page 29 of 180
27
Ease of use and comfort
3water underneath the vehicle. This is perfectly
normal.
Servicing the ventilation and air
conditioning system
►
Ensure that the passenger compartment
filter is in good condition and have the filter
elements replaced regularly
.
We recommend using a composite passenger
compartment filter. Its specific active additive
helps protect against polluting gases and bad
smells.
►
T
o ensure correct operation of the
air conditioning system, have it checked
according to the recommendations in the
Manufacturer’s service schedule.
Stop & Start
The heating and air conditioning systems
only operate when the engine is running.
Temporarily deactivate the Stop & Start
system to maintain a comfortable temperature
in the passenger compartment.
For more information on the Stop &
Start
system, refer to the corresponding
section.
Air conditioning, manual (without display screen)
This system operates only with the engine
running.
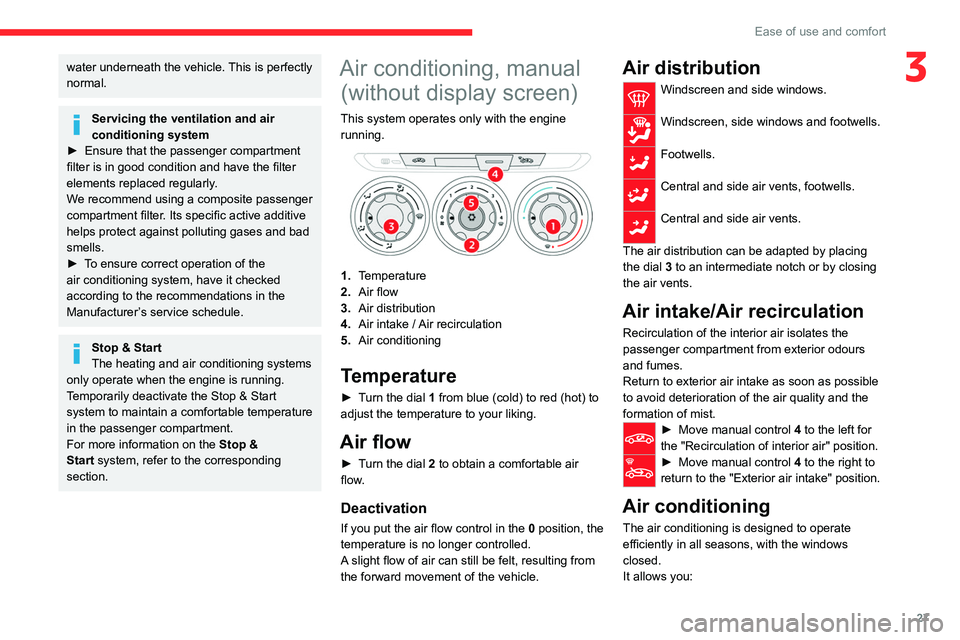
1. Temperature
2. Air flow
3. Air distribution
4. Air intake
/ Air recirculation
5. Air conditioning
Temperature
► Turn the dial 1 from blue (cold) to red (hot) to
adjust the temperature to your liking.
Air flow
► Turn the dial 2 to obtain a comfortable air
flow.
Deactivation
If you put the air flow control in the 0 position, the
temperature is no longer controlled.
A slight flow of air can still be felt, resulting from
the forward movement of the vehicle.
Air distribution
Windscreen and side windows.
Windscreen, side windows and footwells.
Footwells.
Central and side air vents, footwells.
Central and side air vents.
The air distribution can be adapted by placing
the dial 3 to an intermediate notch or by closing
the air vents.
Air intake/Air recirculation
Recirculation of the interior air isolates the
passenger compartment from exterior odours
and fumes.
Return to exterior air intake as soon as possible
to avoid deterioration of the air quality and the
formation of mist.
► Move manual co ntrol 4 to the left for
the "Recirculation of interior air" position.
► Move manual co ntrol 4 to the right to
return to the "Exterior air intake" position.
Air conditioning
The air conditioning is designed to operate
efficiently in all seasons, with the windows
closed.
It allows you:
Page 30 of 180
28
Ease of use and comfort
– in summer, to lower the temperature,
– increase the effectiveness of the demisting in
winter
, above 3°C.
Switching on
► Press button 5 to activate/deactivate the air
conditioning.
The control lights up when the system is
activated.
The air conditioning does not operate when the air flow adjustment dial is in
position " 0".
Faster cool air
When the air conditioning is activated, to obtain
cool air more quickly, you can use recirculation
of the interior air for a few moments.
► Move manual co ntrol 4 to the left for
the "Recirculation of interior air" position.
► Then, move manual control 4 to the
right to return to the "Exterior air intake"
position.
Switching off
► Press button 5 again, the associated indicator
lamp goes off.
Switching the system off could result in
discomfort (humidity, misting).
Electronic air conditioning
(with display screen)
This system only operates with the engine
running.
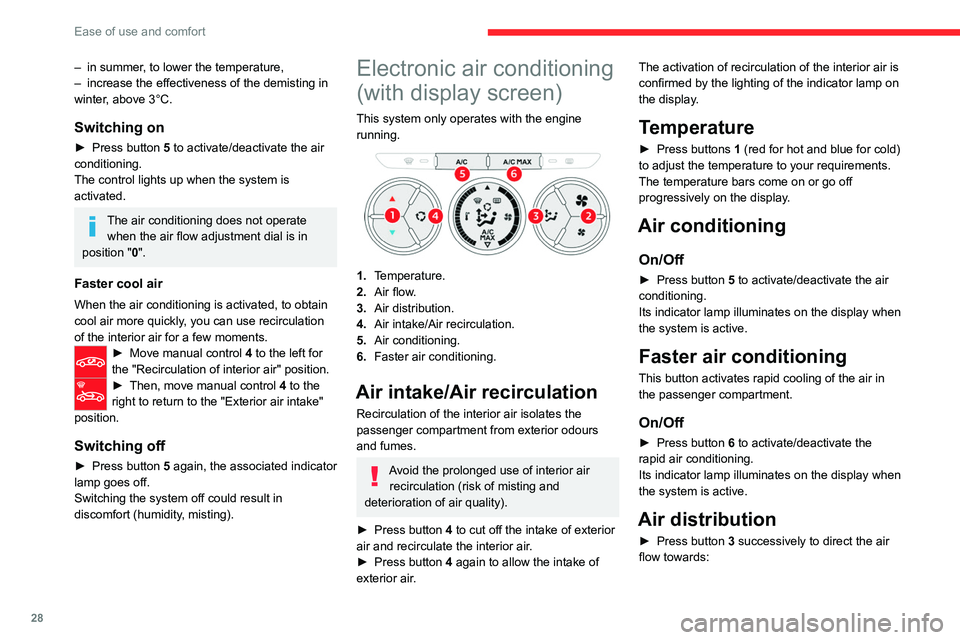
1. Temperature.
2. Air flow.
3. Air distribution.
4. Air intake/Air recirculation.
5. Air conditioning.
6. Faster air conditioning.
Air intake/Air recirculation
Recirculation of the interior air isolates the
passenger compartment from exterior odours
and fumes.
Avoid the prolonged use of interior air
recirculation (risk of misting and
deterioration of air quality).
►
Press button
4 to cut off the intake of exterior
air and recirculate the interior air.
►
Press button
4 again to allow the intake of
exterior air. The activation of recirculation of the interior air is
confirmed by the lighting of the indicator lamp on
the display.
Temperature
► Press buttons
1 (red for hot and blue for cold)
to adjust the temperature to your requirements.
The temperature bars come on or go off
progressively on the display.
Air conditioning
On/Off
► Press button 5 to activate/deactivate the air
conditioning.
Its indicator lamp illuminates on the display when
the system is active.
Faster air conditioning
This button activates rapid cooling of the air in
the passenger compartment.
On/Off
► Press button 6 to activate/deactivate the
rapid air conditioning.
Its indicator lamp illuminates on the display when
the system is active.
Air distribution
► Press button 3 successively to direct the air
flow towards:
Page 31 of 180
29
Ease of use and comfort
3• windscreen and side windows (demisting or
defrosting),
•
the windscreen, side windows and air vents,
•
the windscreen, side windows, air vents and
footwells,
•
the windscreen, side windows and footwells,
•
the footwells,
•
the air vents and footwells,
•
the air vents.
Air flow
► Press one of the buttons 2 to increase/
decrease the air flow.
The air flow bars light up/go off gradually.
Deactivating the system
► Press the "small fan" button 2 until all the
bars in the display are off.
This action deactivates all functions of the air
conditioning system.
Temperature is no longer regulated. A slight flow
of air can still be felt, resulting from the forward
movement of the vehicle.
Pressing the "small fan" button 2 again
reactivates the system.
Avoid driving for long periods with the system deactivated (risk of misting and
deterioration of air quality).
Front demist - defrost
These markings on the control panel indicate the control positions for rapid
demisting or defrosting of the windscreen and
side windows.
With the manual air
conditioning system
(without screen)
► Put the temperature and air flow
controls to the dedicated marked position.
► Put the air intake control to the
"Exterior air intake" position (manual
control moved to the right).
► Put the air distribution control to the
"Windscreen" position.
► Switch on the air conditioning by
pressing the appropriate button; the
lighting of the associated control comes on.
With the electronic air
conditioning system (with
screen)
► Press this button to activate/deactivate
the system.
The lighting of the indicator lamp in the button
indicates that the system is activated.
With Stop & Start, when demisting has
been activated, STOP mode is not
available.
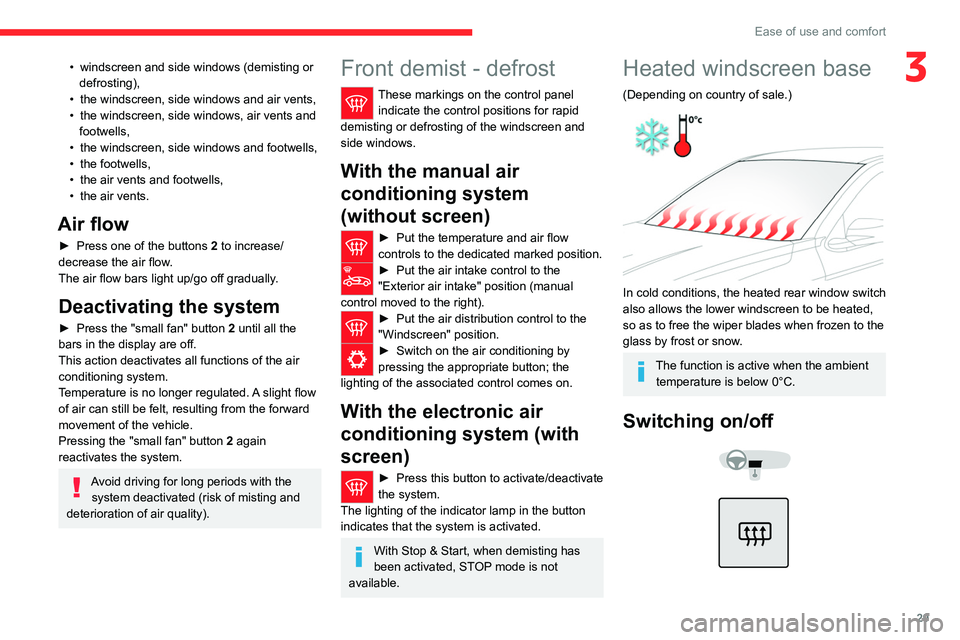
Heated windscreen base
(Depending on country of sale.)
In cold conditions, the heated rear window switch
also allows the lower windscreen to be heated,
so as to free the wiper blades when frozen to the
glass by frost or snow.
The function is active when the ambient temperature is below 0°C.
Switching on/off
Page 33 of 180
31
Ease of use and comfort
3Storage compartments
► For access to the closed storage box, lift the
lever to open the lid.
► To access the open storage under the
armrest, lift the armrest fully backward.
USB socket
A USB port is located on the central console.
It allows the connection of portable devices or
USB memory sticks.
It reads the audio files and sends them to your
audio system to be played through the vehicle's
speakers.
You can manage these files using the audio
system control panel and display them in the
screen.
When the USB port is used, the portable device
charges automatically.
While charging, a message is displayed if the
current drawn by the portable device exceeds
the power rating of the vehicle's port.
Cigarette lighter/12 V
accessory socket(s)
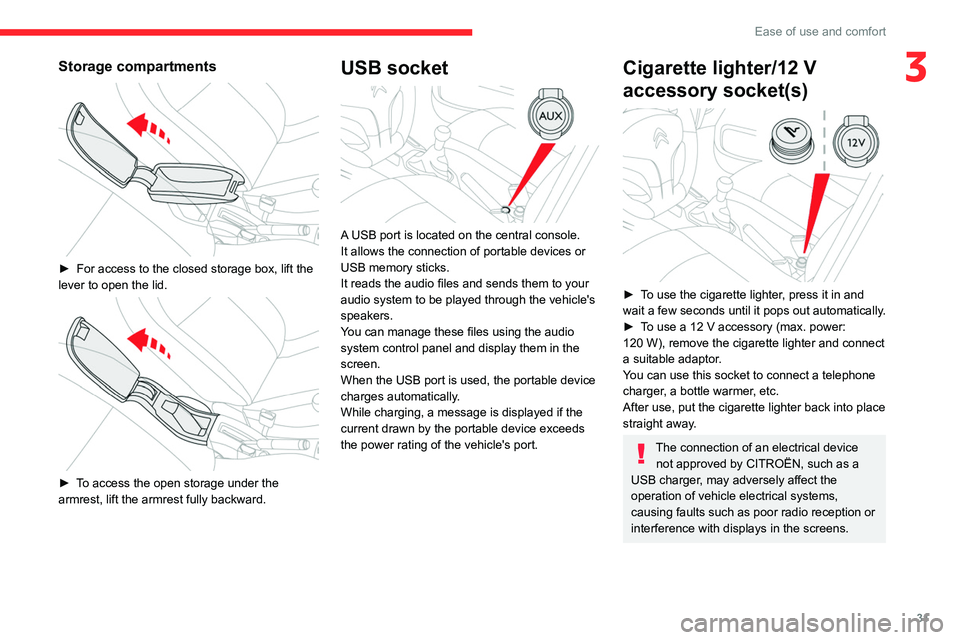
► To use the cigarette lighter, press it in and
wait a few seconds until it pops out automatically.
►
T
o use a 12 V accessory (max. power:
120
W), remove the cigarette lighter and connect
a suitable adaptor.
You can use this socket to connect a telephone
charger, a bottle warmer, etc.
After use, put the cigarette lighter back into place
straight away.
The connection of an electrical device not approved by CITROËN, such as a
USB charger, may adversely affect the
operation of vehicle electrical systems,
causing faults such as poor radio reception or
interference with displays in the screens.
Page 35 of 180

33
Lighting and visibility
4Exterior lighting control
stalk
Main lighting
Lamps off (ignition off)/
Daytime running lamps (engine running)
Sidelamps only
Dipped or main beam headlamps
Headlamp dipping
► Pull the lighting control stalk to switch
between dipped and main beam headlamps.
In lamps off and sidelamps modes, pull the
lighting control stalk to switch the main beam
headlamps on directly ("headlamp flash").
Display
Illumination of the corresponding indicator
lamp on the instrument panel confirms that the
selected lighting is on.
A fault with a lamp is signalled by the permanent illumination of this warning
lamp, accompanied by the display of a message
and an audible signal.
Rear foglamp
They only work if the dipped or main beam headlamps are on.
► Rotate the ring forwards/backwards to turn
it on/off.
Front foglamps/Rear
foglamp
They operate with the dipped or main beam headlamps on.
► Rotate the ring forwards:
• once to switch on the front foglamps,
•
a second time to switch on the rear foglamp.
►
T
urn in the opposite direction to switch off.
►
Rotate the ring backwards to switch the
foglamps off; the sidelamps will then switch off.
Switching on the foglamps is prohibited
in clear weather or in rain, both day and
night. In these situations, the power of their
beams may dazzle other drivers. They must
only be used in fog or falling snow (rules may
vary depending on country).
Do not forget to switch off the foglamps when
they are no longer necessary.
Switching off of the lighting when the
ignition is switched off
When the ignition is switched off, all of the
lamps turn off immediately, except for the
dipped beam headlamps if automatic guide-
me-home lighting is activated.
Switching on the lamps after
switching off the ignition
To reactivate the lighting control, rotate the
ring to the "0" position - lamps off, then to the
desired position.
Page 41 of 180
39
Safety
5(confirmed by this warning lamp flashing on the
instrument panel).
Deactivation / Reactivation
In exceptional conditions (starting a vehicle
which is bogged down, stuck in snow, on soft
ground, etc.), it may be advisable to deactivate
the ASR system, so that the wheels can turn
freely and regain grip.
Reactivate the system as soon as the level of
grip permits.
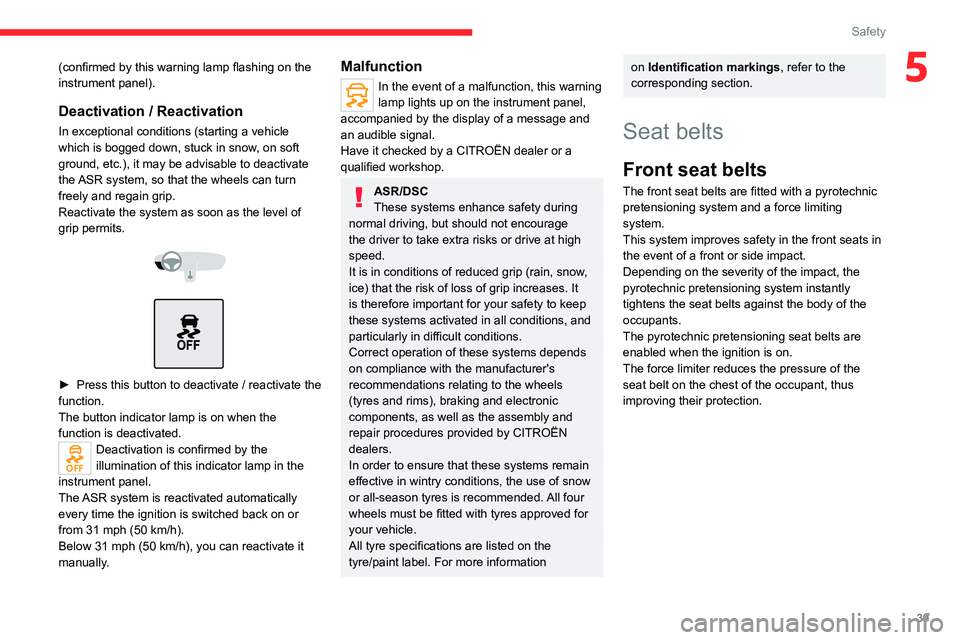
► Press this button to deactivate / reactivate the
function.
The button indicator lamp is on when the
function is deactivated.
Deactivation is confirmed by the
illumination of this indicator lamp in the
instrument panel.
The ASR system is reactivated automatically
every time the ignition is switched back on or
from 31 mph (50
km/h).
Below 31 mph (50
km/h), you can reactivate it
manually.
Malfunction
In the event of a malfunction, this warning
lamp lights up on the instrument panel,
accompanied by the display of a message and
an audible signal.
Have it checked by a CITROËN dealer or a
qualified workshop.
ASR/DSC
These systems enhance safety during
normal driving, but should not encourage
the driver to take extra risks or drive at high
speed.
It is in conditions of reduced grip (rain, snow,
ice) that the risk of loss of grip increases. It
is therefore important for your safety to keep
these systems activated in all conditions, and
particularly in difficult conditions.
Correct operation of these systems depends
on compliance with the manufacturer's
recommendations relating to the wheels
(tyres and rims), braking and electronic
components, as well as the assembly and
repair procedures provided by CITROËN
dealers.
In order to ensure that these systems remain
effective in wintry conditions, the use of snow
or all-season tyres is recommended. All four
wheels must be fitted with tyres approved for
your vehicle.
All tyre specifications are listed on the
tyre/paint label. For more information
on Identification markings , refer to the
corresponding section.
Seat belts
Front seat belts
The front seat belts are fitted with a pyrotechnic
pretensioning system and a force limiting
system.
This system improves safety in the front seats in
the event of a front or side impact.
Depending on the severity of the impact, the
pyrotechnic pretensioning system instantly
tightens the seat belts against the body of the
occupants.
The pyrotechnic pretensioning seat belts are
enabled when the ignition is on.
The force limiter reduces the pressure of the
seat belt on the chest of the occupant, thus
improving their protection.
Page 56 of 180
54
Driving
Switching off the engine
► Immobilise the vehicle.
► With the engine at idle, turn the key to
position 1
.
►
Remove the key from the ignition switch.
►
T
o lock the steering column, turn the steering
wheel until it locks.
To facilitate unlocking of the steering column, it is recommended that the
wheels be returned to the straight ahead
position before switching off the engine.
Never switch off the ignition before the
complete immobilisation of the vehicle.
With the engine off, the braking and steering
assistance systems are also cut off - risk of
loss of control of the vehicle!
Check that the parking brake is correctly
applied, particularly on sloping ground.
When leaving the vehicle, keep the key in
your possession and lock the vehicle.
Energy economy mode
After the engine has stopped (position 1. Stop),
for a maximum combined duration of 30 minutes,
you can still use functions such as the audio and
telematics system, courtesy lamps or dipped
beam headlamps.
For more information on Energy
economy mode, refer to the
corresponding section.
Key left in
When the driver's door is opened, a
message is displayed, accompanied by an
audible signal, if the key has been left in the
ignition switch in position 1.
If the key has been left in the ignition switch
in position 2, the ignition will be switched off
automatically after one hour.
To switch the ignition back on, turn the key to
position 1, then back to position 2.
Parking brake
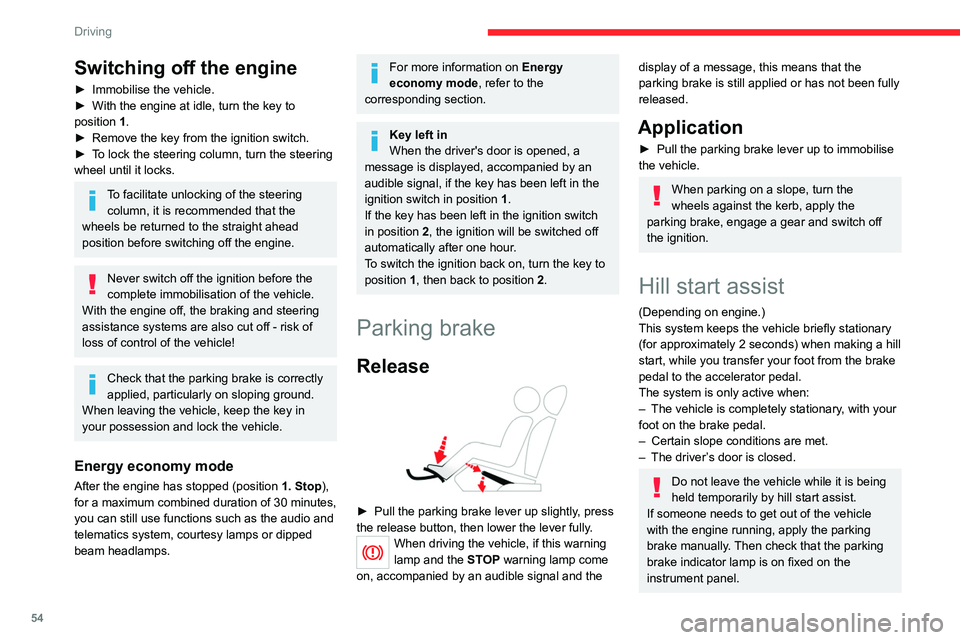
Release
► Pull the parking brake lever up slightly , press
the release button, then lower the lever fully.
When driving the vehicle, if this warning
lamp and the STOP warning lamp come
on, accompanied by an audible signal and the
display of a message, this means that the
parking brake is still applied or has not been fully
released.
Application
► Pull the parking brake lever up to immobilise
the vehicle.
When parking on a slope, turn the
wheels against the kerb, apply the
parking brake, engage a gear and switch off
the ignition.
Hill start assist
(Depending on engine.)
This system keeps the vehicle briefly stationary
(for approximately 2
seconds) when making a hill
start, while you transfer your foot from the brake
pedal to the accelerator pedal.
The system is only active when:
–
The vehicle is completely stationary
, with your
foot on the brake pedal.
–
Certain slope conditions are met.
–
The driver
’s door is closed.
Do not leave the vehicle while it is being
held temporarily by hill start assist.
If someone needs to get out of the vehicle
with the engine running, apply the parking
brake manually. Then check that the parking
brake indicator lamp is on fixed on the
instrument panel.
Page 57 of 180
55
Driving
6The hill start assist function cannot be deactivated. However, using the parking
brake to immobilise the vehicle interrupts its
operation.
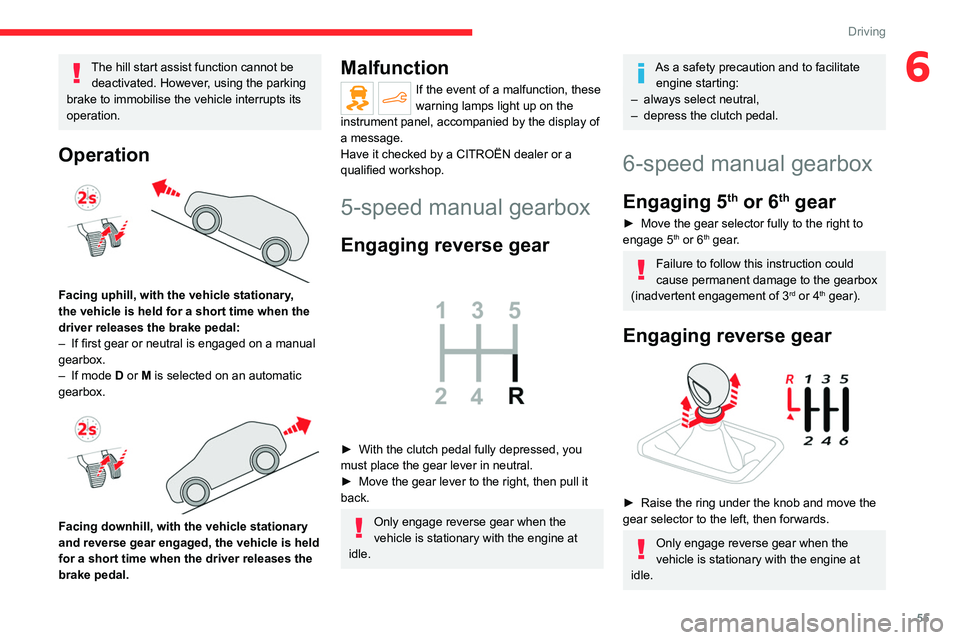
Operation
Facing uphill, with the vehicle stationary,
the vehicle is held for a short time when the
driver releases the brake pedal:
–
If first gear or neutral is engaged on a manual
gearbox.
–
If mode
D or M is selected on an automatic
gearbox.
Facing downhill, with the vehicle stationary
and reverse gear engaged, the vehicle is held
for a short time when the driver releases the
brake pedal.
Malfunction
If the event of a malfunction, these
warning lamps light up on the
instrument panel, accompanied by the display of
a message.
Have it checked by a CITROËN dealer or a
qualified workshop.
5-speed manual gearbox
Engaging reverse gear
► With the clutch pedal fully depressed, you
must place the gear lever in neutral.
►
Move the gear lever to the right, then pull it
back.
Only engage reverse gear when the
vehicle is stationary with the engine at
idle.
As a safety precaution and to facilitate engine starting:
–
always select neutral,
–
depress the clutch pedal.
6-speed manual gearbox
Engaging 5th or 6th gear
► Move the gear selector fully to the right to
engage 5th or 6th gear.
Failure to follow this instruction could
cause permanent damage to the gearbox
(inadvertent engagement of 3
rd or 4th gear).
Engaging reverse gear
► Raise the ring under the knob and move the
gear selector to the left, then forwards.
Only engage reverse gear when the
vehicle is stationary with the engine at
idle.