boot CITROEN C-ZERO 2017 Handbook (in English)
[x] Cancel search | Manufacturer: CITROEN, Model Year: 2017, Model line: C-ZERO, Model: CITROEN C-ZERO 2017Pages: 174, PDF Size: 4.15 MB
Page 4 of 174
.
.
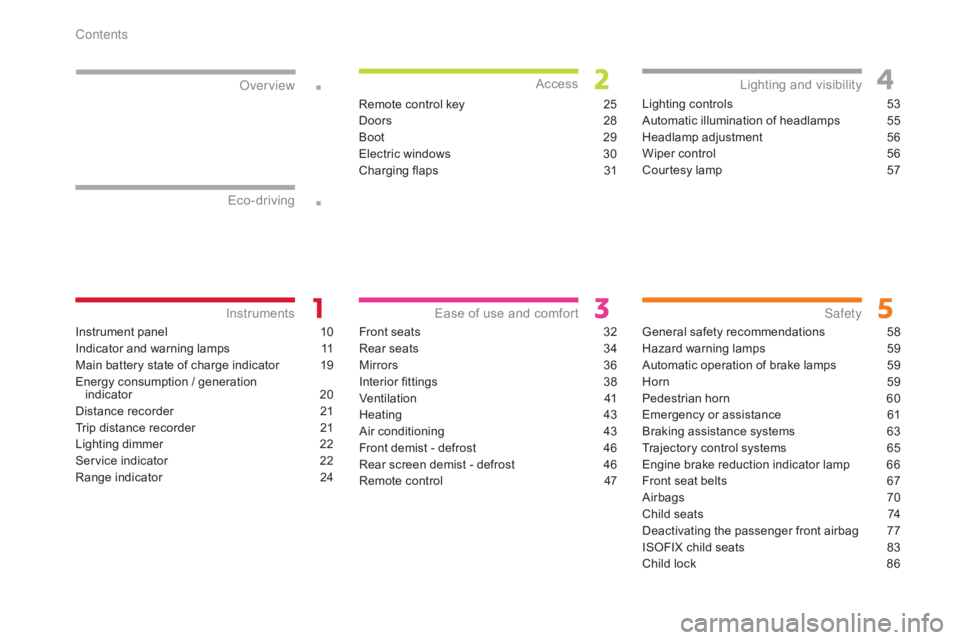
Instrument panel 10
Indicator and warning lamps
1
1
Main battery state of charge indicator
1
9
Energy consumption / generation indicator
2
0
Distance recorder
2
1
Trip distance recorder
2
1
Lighting dimmer
2
2
Service indicator
2
2
Range indicator
2
4Remote control key
2
5
Doors
2
8
Boot
2
9
Electric windows
3
0
Charging flaps
3
1
Front seats 3 2
Rear seats
3
4
Mirrors
36
I
nterior fittings
3
8
Ventilation
4
1
Heating
4
3
Air conditioning
4
3
Front demist - defrost
4
6
Rear screen demist - defrost
4
6
Remote control
4
7Lighting controls
5
3
Automatic illumination of headlamps
5
5
Headlamp adjustment
5
6
Wiper control
5
6
Courtesy lamp
5
7
General safety recommendations 5 8
Hazard warning lamps
5
9
Automatic operation of brake lamps
5
9
Horn
5
9
Pedestrian horn
6
0
Emergency or assistance
6
1
Braking assistance systems
6
3
Trajectory control systems
6
5
Engine brake reduction indicator lamp
6
6
Front seat belts
6
7
Airbags
7
0
Child seats
7
4
Deactivating the passenger front airbag
7
7
ISOFIX child seats
8
3
Child lock
8
6
Over view
Eco-driving
Instruments Access
Ease of use and comfort Lighting and visibility
Safety
Contents
Page 6 of 174
4
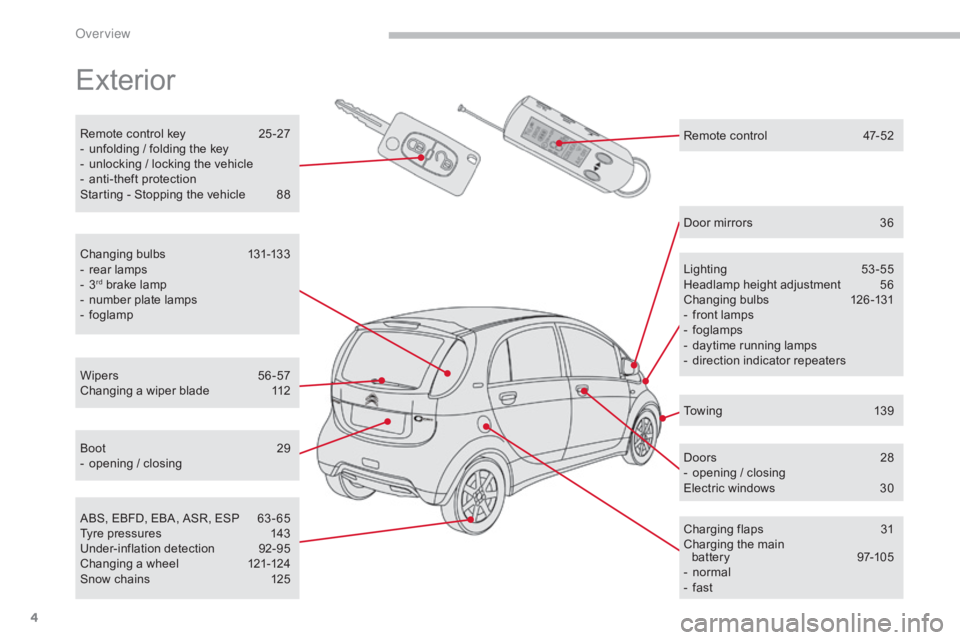
Exterior
Remote control key 25 -27
- u nfolding / folding the key
-
u
nlocking / locking the vehicle
-
a
nti-theft protection
Starting - Stopping the vehicle
8
8
Lighting
5
3-55
Headlamp height adjustment
5
6
Changing bulbs
1
26-131
-
f
ront lamps
-
fo
glamps
-
d
aytime running lamps
-
d
irection indicator repeaters
Wipers
5
6 -57
Changing a wiper blade
1
12 Door mirrors
3
6
Doors
2
8
-
o
pening / closing
Electric windows
3
0
Charging flaps
3
1
Charging the main battery
9
7-105
-
n
ormal
-
f
ast
ABS, EBFD, EBA, ASR, ESP
6
3 - 65
Tyre pressures
1
43
Under-inflation detection
9
2-95
Changing a wheel
1
21-124
Snow chains
1
25
Boot
2
9
-
o
pening / closing
Changing bulbs
1
31-133
-
r
ear lamps
-
3rd brake lamp
-
n
umber plate lamps
-
fo
glamp
To w i n g
1
3 9
Remote control
4
7-52
Over view
Page 18 of 174
16
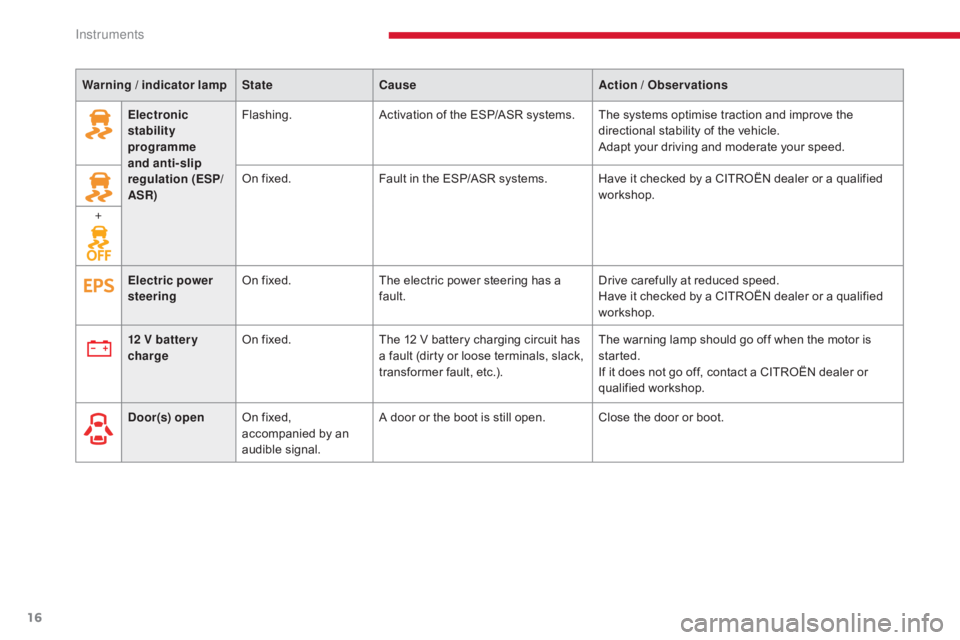
Electronic
stability
programme
and anti-slip
regulation (ESP/
ASR)Flashing.
Activation of the ESP/ASR systems. The systems optimise traction and improve the
directional stability of the vehicle.
Adapt your driving and moderate your speed.
On fixed. Fault in the ESP/ASR systems. Have it checked by a CITROËN dealer or a qualified
workshop.
+
Door(s) open On fixed,
accompanied by an
audible signal. A door or the boot is still open. Close the door or boot.
12 V
battery
charge On fixed.
The 12 V battery charging circuit has
a fault (dirty or loose terminals, slack,
transformer fault, etc.). The warning lamp should go off when the motor is
started.
If it does not go off, contact a CITROËN dealer or
qualified workshop.
Electric power
steering
On fixed.
The electric power steering has a
fault. Drive carefully at reduced speed.
Have it checked by a CITROËN dealer or a qualified
workshop.
Warning
/ indicator lamp
State Cause Action
/ Observations
Instruments
Page 27 of 174

25
System used for centralised locking or unlocking of the vehicle using the door lock barrel or from a distance. It is also used to start the vehicle, as well
as providing protection against theft.
Remote control key
Unfolding / Folding the key
F Press button A to unfold or fold the key.
Unlocking using the remote
control
F Press the open padlock to unlock the vehicle.
Locking the vehicle
Unlocking is confirmed by the interior lighting
which comes on for approximately 15 seconds
and the direction indicators which flash twice .
Depending on version, the door mirrors unfold
at the same time.
Unlocking using the key
F Turn the key to the right in the driver's door lock to unlock the vehicle.
Locking is confirmed by the interior lighting
which comes on for about 15 seconds and the
direction indicators which flash twice .
On the other hand, the door mirrors do not
unfold.
Normal locking using the remote
control
F Press the closed padlock to lock the vehicle.
Locking is confirmed by the direction indicators
which come on once .
Depending on version, the door mirrors fold at
the same time.
Normal locking using the key
F Turn the key to the left in the driver's door
lock to lock the vehicle.
Locking is confirmed by the direction indicators,
which flash once .
On the other hand, the door mirrors do not fold.
The vehicle will lock itself again
automatically after thirty seconds
unless a door or the boot is opened.
This function avoids inadvertent
unlocking.
The passenger's door lock barrel does
not lock or unlock the other doors and/
or the boot.
Unlocking the vehicle
2
Access
Page 30 of 174
28
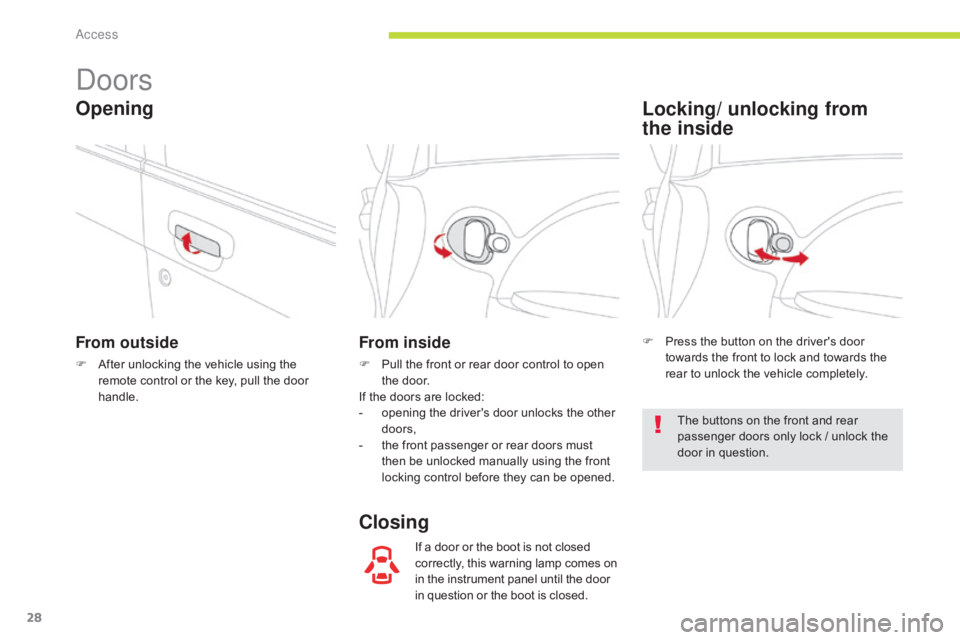
Doors
From outside
F After unlocking the vehicle using the remote control or the key, pull the door
handle.
From inside
F Pull the front or rear door control to open the door.
If the doors are locked:
-
o
pening the driver's door unlocks the other
doors,
-
t
he front passenger or rear doors must
then be unlocked manually using the front
locking control before they can be opened.
If a door or the boot is not closed
correctly, this warning lamp comes on
in the instrument panel until the door
in question or the boot is closed.
Opening
ClosingLocking/ unlocking from
the
inside
F Press the button on the driver's door
towards the front to lock and towards the
rear to unlock the vehicle completely.
The buttons on the front and rear
passenger doors only lock / unlock the
door in question.
Access
Page 31 of 174

29
Boot
Opening
F After unlocking the vehicle using the remote control or the key, press the
handle
A
and open the tailgate. F
P ull the handle B downwards to guide the
tailgate down,
F
r
elease the handle and press the exterior
sur face of the tailgate gently to close it.
Closing
2
Access
Page 44 of 174
42
In order for these systems to be fully effective, follow the operation and maintenance
guidelines below:
F
I
f the interior temperature remains very high after the vehicle has been parked in
the sun for a considerable time, first ventilate the passenger compartment for a few
moments by opening the windows.
P
lace the air flow control at a sufficient level to provide an adequate renewal of air in
the passenger compartment.
F
C
ondensation created by the air conditioning results in a discharge of water under the
vehicle when stationary, which is per fectly normal.
F
T
o obtain an even air distribution, take care not to obstruct the exterior air intake grilles
located at the base of the windscreen, the nozzles, the vents and the air outlets, as well
as the air extractor located in the boot.
F
F
avour the intake of exterior air as prolonged use of the air recirculation may cause
misting of the windscreen and the side windows.
F
O
perate the air conditioning system for 5 to 10 minutes, once or twice a month to keep it
in good working order.
F
E
nsure that the passenger compartment filter is in good condition and have the filter
elements replaced regularly.
F
T
o ensure correct operation of the air conditioning system, you are also advised to have
it checked regularly.
F
I
f the system does not produce cold air, do not use it and contact a CITROËN dealer or
a qualified workshop.
Recommendations for ventilation and air conditioning
The heating and air conditioning use
energy from the main battery. Their use
increases electrical consumption and
reduces the range of the vehicle.
Remember to switch off the heating or
air conditioning as soon as they are no
longer needed.
During normal charging of the
vehicle, the ventilation, heating and
air
conditioning can be activated from
the ACC position of the switch.
During fast charging of the vehicle, the
ventilation, heating and air conditioning
cannot be activated.
Ease of use and comfort
Page 59 of 174

57
Rear wiper
Park.
Intermittent wipe.
The wiper wipes twice then switches to
intermittent mode with an interval of a few
seconds. Wipe with screenwash
Keep the ring in this position to operate the
screenwash with several wipes of the wiper. C.
R
ear wiper selection ring.
Courtesy lamp
Position 1 "ON"
The courtesy lamp is permanently on.
Position 2 "●"
The courtesy lamp comes on when opening
a door or the boot; when the door or boot is
closed again, the lighting gradually dims for a
few seconds before going off.
However, the courtesy lamp is switched off
immediately when the doors and boot are
closed and you lock the vehicle from the inside
or using the remote control.
Position 3 "OFF"
The courtesy lamp is permanently off. Before leaving the vehicle, ensure that
the courtesy lamp is not on.
If left on, it discharges the 12 V battery,
even if the main battery is charged or
on charge.
Starting your vehicle will then no longer
be possible.
4
Lighting and visibility
Page 85 of 174

83
Your vehicle has been approved in accordance
with the latest ISOFIX regulation .
The seats, represented below, are fitted with
regulation ISOFIX mountings:
"ISOFIX" mountings
The TOP TETHER is used to secure the
upper strap of child seats that have one. This
arrangement limits the for ward tipping of the
child seat in the event of a front impact. Follow precisely the fitting instructions
in the installation guide provided with
the child seat.
This ISOFIX mounting system provides fast,
reliable and safe fitting of the child seat in your
vehicle.
The ISOFIX child seats are fitted with two
latches which are secured on the two rings A .
Some seats also have an upper strap which is
secured to the ring B .
-
a r
ing B for securing the upper strap called
the TOP TETHER , located in the boot.
I
t is indicated by a marking.
There are three rings for each seat:
-
t
wo rings A located in the angle between
the vehicle seat's cushion and backrest,
indicated by a marking, To secure the child seat to the TOP TETHER:
-
p
ass the top strap of the child seat centrally
over the top of the vehicle seat backrest,
-
r
aise the TOP TETHER cover,
-
s
ecure the hook on the upper strap to the
ring B ,
-
t
ighten the upper strap.
The incorrect installation of a child seat
in a vehicle compromises the child's
protection in the event of an accident.
For information on the possibilities for installing
ISOFIX child seats in your vehicle, refer to the
summary table.
5
Safety
Page 110 of 174

108
Rear compartmentLocated under the boot floor, this compartment gives access to the cooling system reservoir.
F
O
pen the boot.
F
D
etach the carpet retaining adhesive strip.
F
R
emove the boot carpet. F
R
emove the four "butter fly" screws.
F
R
emove the protective cover.F
C
heck the coolant level and top up if
necessary.
For more information on Checking
levels , refer to the corresponding
section.
When working in this compartment,
you must observe the safety
recommendations on the labels.
Practical information