buttons CITROEN C-ZERO 2017 Handbook (in English)
[x] Cancel search | Manufacturer: CITROEN, Model Year: 2017, Model line: C-ZERO, Model: CITROEN C-ZERO 2017Pages: 174, PDF Size: 4.15 MB
Page 29 of 174
27
Lost keys
Visit a CITROËN dealer with the vehicle's V5 registration document and your personal
identification documents.
The CITROËN dealer will be able to retrieve the key code and the transponder code
required to order a replacement key.
Remote control
The high frequency remote control is a sensitive system; do not operate it while it is in your
pocket as there is a possibility that it may unlock the vehicle, without you being aware of it.
Do not repeatedly press the buttons of your remote control out of range and out of sight of
your vehicle. You run the risk of stopping it from working.
The remote control does not operate when the key is in the ignition, even when the ignition
is switched off.
Locking the vehicle
Driving with the doors locked may make access to the passenger compartment by the
emergency services more difficult in an emergency.
As a safety precaution (with children on board), remove the key from the ignition when you
leave the vehicle, even for a short time.
Anti-theft protection
Do not make any modifications to the electronic immobiliser system; this could cause
malfunctions.
When purchasing a second-hand vehicle
Have the key codes memorised by a CITROËN dealer, to ensure that the keys in your
possession are the only ones which can start the vehicle.
2
Access
Page 30 of 174
28
Doors
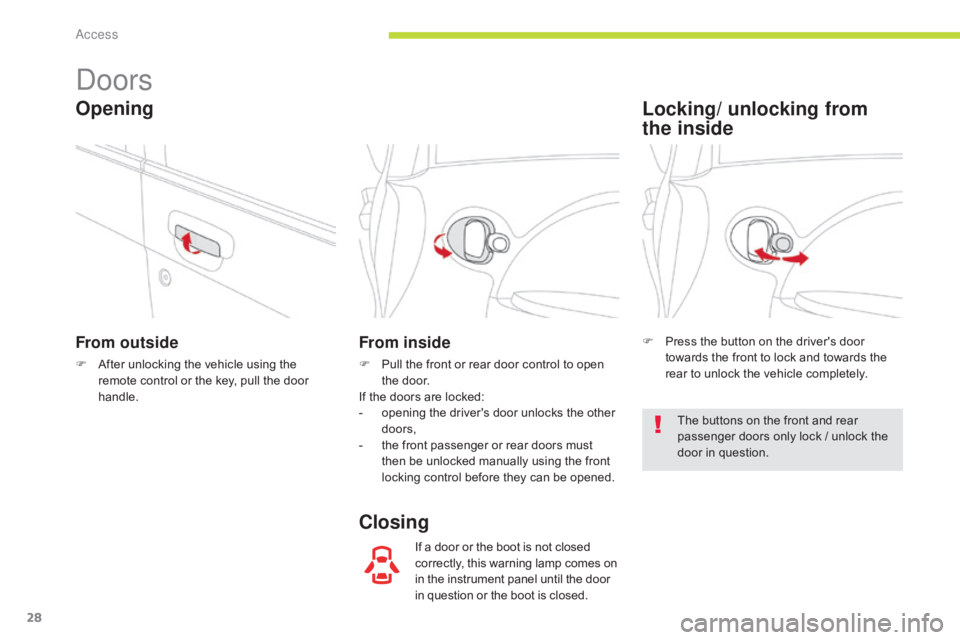
From outside
F After unlocking the vehicle using the remote control or the key, pull the door
handle.
From inside
F Pull the front or rear door control to open the door.
If the doors are locked:
-
o
pening the driver's door unlocks the other
doors,
-
t
he front passenger or rear doors must
then be unlocked manually using the front
locking control before they can be opened.
If a door or the boot is not closed
correctly, this warning lamp comes on
in the instrument panel until the door
in question or the boot is closed.
Opening
ClosingLocking/ unlocking from
the
inside
F Press the button on the driver's door
towards the front to lock and towards the
rear to unlock the vehicle completely.
The buttons on the front and rear
passenger doors only lock / unlock the
door in question.
Access
Page 49 of 174
47
Remote control*
This is used for remote control of the following
functions:
-
C
heck of the vehicle charge status.
-
P
rogramming of charging: start time and
duration of charging.
-
A
ctivation of the climate control functions
(heating, air conditioning, demisting).
In order to programme charging, the
following conditions must be met.
-
P
lace the drive selector in
position
P.
-
P
lace the switch on LOCK .
-
C
onnect the vehicle using the
normal charging cable.Buttons Display
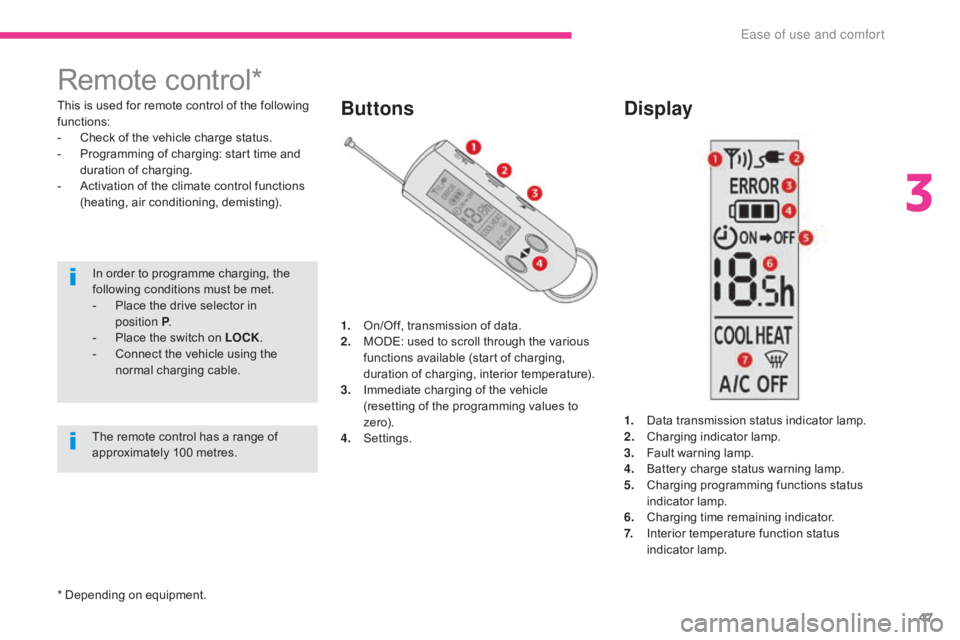
1. On/Off, transmission of data.
2. M
ODE: used to scroll through the various
functions available (start of charging,
duration of charging, interior temperature).
3.
I
mmediate charging of the vehicle
(resetting of the programming values to
ze r o).
4.
S
ettings. 1.
D
ata transmission status indicator lamp.
2.
C
harging indicator lamp.
3.
F
ault warning lamp.
4.
B
attery charge status warning lamp.
5.
C
harging programming functions status
indicator lamp.
6.
C
harging time remaining indicator.
7.
I
nterior temperature function status
indicator lamp.
The remote control has a range of
approximately 100 metres.
* Depending on equipment.
3
Ease of use and comfort
Page 64 of 174
62
Localised Assistance Call
To reactivate geo-location, simultaneously
press the "Localised Emergency Call" and
"Localised Assistance Call" buttons again,
followed by a press on "Localised Assistance
Call" to confirm.
Operation of the systemPress this button for more than
2 seconds to request assistance
if the vehicle breaks down. If you purchased your vehicle outside
the Brand's dealer network, we suggest
that you have a dealer check and, if
desired, modify the configuration of
these services.
In a multi-lingual country, configuration
is possible in the official national
language of your choice.
For technical reasons, in particular
to improve the quality of Telematic
services to customers, the
manufacturer reserves the right to carry
out updates to the vehicle's on-board
telematic system at any time.
The fault with the system does not
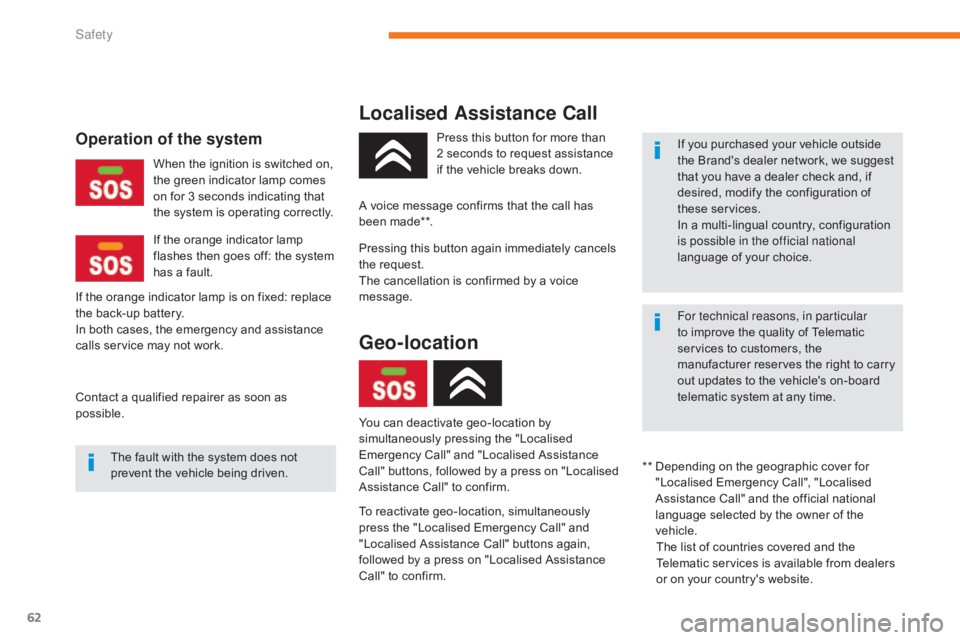
prevent the vehicle being driven. When the ignition is switched on,
the green indicator lamp comes
on for 3 seconds indicating that
the system is operating correctly.
If the orange indicator lamp
flashes then goes off: the system
has a fault.
If the orange indicator lamp is on fixed: replace
the back-up battery.
In both cases, the emergency and assistance
calls service may not work.
Contact a qualified repairer as soon as
possible. A voice message confirms that the call has
been made**.
**
D
epending on the geographic cover for
"Localised Emergency Call", "Localised
Assistance Call" and the official national
language selected by the owner of the
vehicle. The list of countries covered and the
Telematic services is available from dealers
or on your country's website.
Pressing this button again immediately cancels
the request.
The cancellation is confirmed by a voice
message.
Geo-location
You can deactivate geo-location by
simultaneously pressing the "Localised
Emergency Call" and "Localised Assistance
Call" buttons, followed by a press on "Localised
Assistance Call" to confirm.
Safety
Page 149 of 174
147
Radio
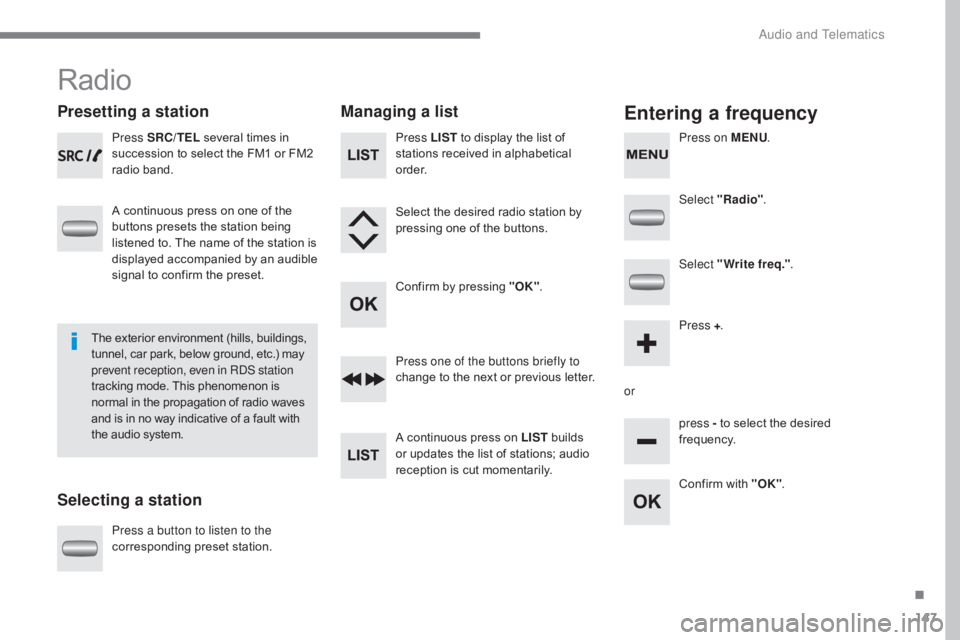
Presetting a station
Selecting a stationManaging a listEntering a frequency
Press SRC/TEL
several times in
succession to select the FM1 or FM2
radio band.
A continuous press on one of the
buttons presets the station being
listened to. The name of the station is
displayed accompanied by an audible
signal to confirm the preset.
Press a button to listen to the
corresponding preset station. Select "Radio"
.
Select "Write freq." .
Press + .
or press - to select the desired
frequency.
Press one of the buttons briefly to
change to the next or previous letter.
A continuous press on LIST
builds
or updates the list of stations; audio
reception is cut momentarily. Press LIST to display the list of
stations received in alphabetical
o r d e r.
Select the desired radio station by
pressing one of the buttons.
Confirm by pressing "OK" .
Confirm with "OK".
The exterior environment (hills, buildings,
tunnel, car park, below ground, etc.) may
prevent reception, even in RDS station
tracking mode. This phenomenon is
normal in the propagation of radio waves
and is in no way indicative of a fault with
the audio system. Press on MENU
.
.
Audio and Telematics
Page 151 of 174
149
Media
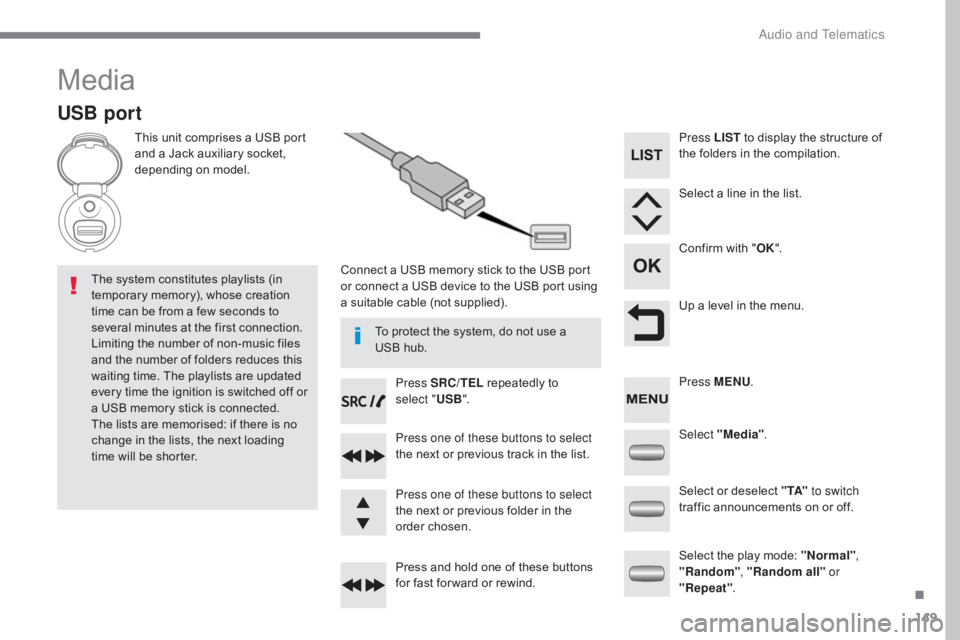
USB port
This unit comprises a USB port
and a Jack auxiliary socket,
depending on model.Connect a USB memory stick to the USB port
or connect a USB device to the USB port using
a suitable cable (not supplied).
The system constitutes playlists (in
temporary memory), whose creation
time can be from a few seconds to
several minutes at the first connection.
Limiting the number of non-music files
and the number of folders reduces this
waiting time. The playlists are updated
every time the ignition is switched off or
a USB memory stick is connected.
The lists are memorised: if there is no
change in the lists, the next loading
time will be shorter. Press SRC/TEL
repeatedly to
select " USB".
Press one of these buttons to select
the next or previous track in the list.
Press and hold one of these buttons
for fast for ward or rewind. Press one of these buttons to select
the next or previous folder in the
order chosen. Press LIST
to display the structure of
the folders in the compilation.
Select a line in the list.
Confirm with " OK".
Up a level in the menu.
Select "Media" .
Select the play mode: "Normal" ,
"Random" , "Random all" or
"Repeat" .
Select or deselect " TA"
to switch
traffic announcements on or off. Press MENU .
To protect the system, do not use a
USB hub.
.
Audio and Telematics
Page 152 of 174
150
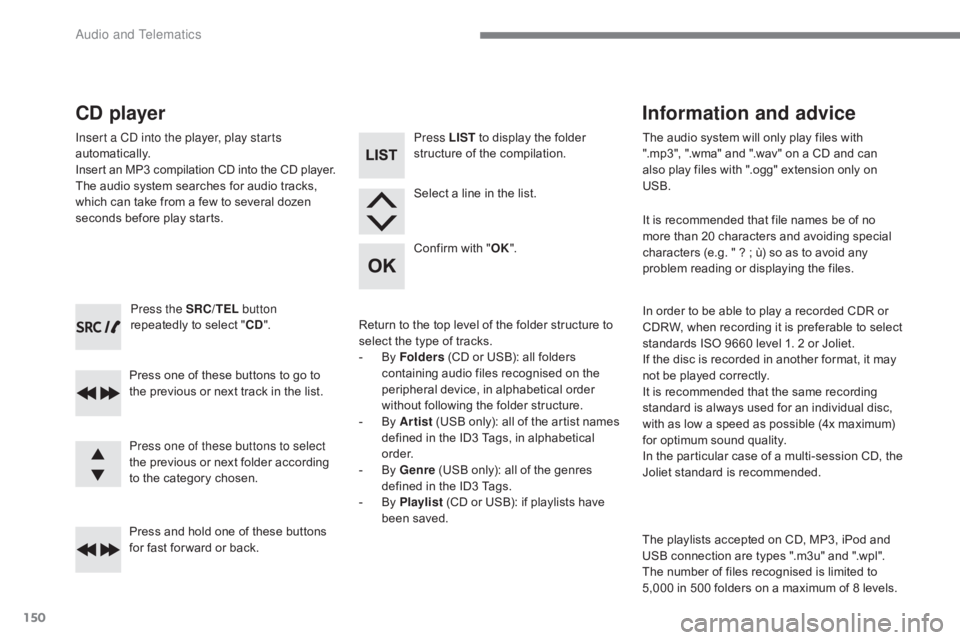
Press the SRC/TEL button
repeatedly to select " CD".
Press one of these buttons to go to
the previous or next track in the list.
Press and hold one of these buttons
for fast for ward or back.
CD player
Insert a CD into the player, play starts
automatically.
Insert an MP3 compilation CD into the C D p layer.The audio system searches for audio tracks,
which can take from a few to several dozen
seconds before play starts.
Press one of these buttons to select
the previous or next folder according
to the category chosen. Press LIST
to display the folder
structure of the compilation.
Select a line in the list.
Confirm with " OK".
Return to the top level of the folder structure to
select the type of tracks.
-
B
y Folders (CD or USB): all folders
containing audio files recognised on the
peripheral device, in alphabetical order
without following the folder structure.
-
B
y Artist (USB only): all of the artist names
defined in the ID3 Tags, in alphabetical
o r d e r.
-
B
y Genre (USB only): all of the genres
defined in the ID3 Tags.
-
B
y Playlist (CD or USB): if playlists have
been saved. The audio system will only play files with
".mp3", ".wma" and ".wav" on a CD and can
also play files with ".ogg" extension only on
USB.
It is recommended that file names be of no
more than 20 characters and avoiding special
characters (e.g. " ?
; ù) so as to avoid any
problem reading or displaying the files.
In order to be able to play a recorded CDR or
CDRW, when recording it is preferable to select
standards ISO 9660 level 1. 2 or Joliet.
If the disc is recorded in another format, it may
not be played correctly.
It is recommended that the same recording
standard is always used for an individual disc,
with as low a speed as possible (4x maximum)
for optimum sound quality.
In the particular case of a multi-session CD, the
Joliet standard is recommended.
Information and advice
The playlists accepted on CD, MP3, iPod and
USB connection are types ".m3u" and ".wpl".
The number of files recognised is limited to
5,000 in 500 folders on a maximum of 8 levels.
Audio and Telematics
Page 153 of 174
151
Use only USB memory sticks formatted to
FAT32 (File Allocation Table).The use of genuine Apple
® USB cables
is recommended to ensure correct
operation.
On a single disc, the CD player can read up
to 255 MP3 files spread over 8 folder levels
with a maximum of 192 folders. However, it is
recommended that this be kept to 2 levels so
as to limit the time taken to access and play
the CD.
During play, the folder structure is not
observed.
Do not connect a hard disk or USB device other
than audio players to the USB port. This may
cause damage to your installation.
To protect the system, do not use a
USB hub.
Bluetooth® audio streaming
Streaming allows music files on a telephone to
be heard via the vehicle's speakers.
Connect the telephone: see the " Telephone"
section.
In the " Bluetooth : Audio" menu, select the
telephone to connect.
The audio system connects automatically to a
newly paired telephone.
The control of common tracks is possible
via the audio system control buttons and
the steering mounted controls**. Contextual
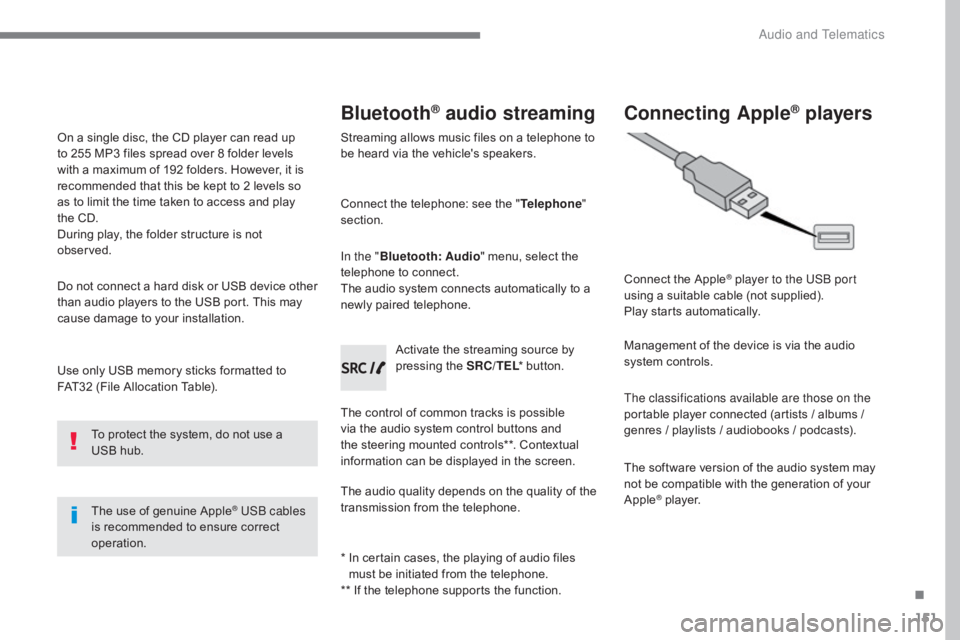
information can be displayed in the screen. Activate the streaming source by
pressing the SRC/TEL
* button.
The audio quality depends on the quality of the
transmission from the telephone.
*
I
n certain cases, the playing of audio files
must be initiated from the telephone.
** If the telephone supports the function.
Connecting Apple® players
Connect the Apple® player to the USB port
using a suitable cable (not supplied).
Play starts automatically.
Management of the device is via the audio
system controls.
The classifications available are those on the
portable player connected (artists / albums /
genres / playlists / audiobooks / podcasts).
The software version of the audio system may
not be compatible with the generation of your
Apple
® player.
.
Audio and Telematics
Page 156 of 174
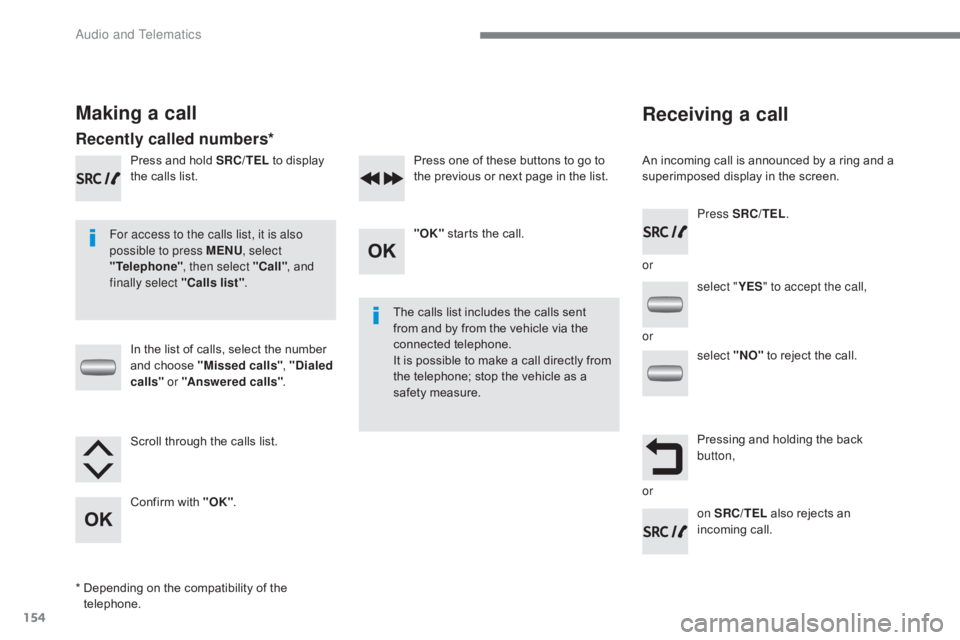
154
Receiving a call
An incoming call is announced by a ring and a
superimposed display in the screen.
For access to the calls list, it is also
possible to press MENU , select
"Telephone" , then select "Call" , and
finally select "Calls list" .
The calls list includes the calls sent
from and by from the vehicle via the
connected telephone.
It is possible to make a call directly from
the telephone; stop the vehicle as a
safety measure.
Making a call
Recently called numbers*
In the list of calls, select the number
and choose "Missed calls" , "Dialed
calls " or "Answered calls" .
Press and hold SRC/TEL
to display
the calls list.
Press SRC/TEL.
on SRC/TEL also rejects an
incoming call.
or
or
or
Scroll through the calls list.
Confirm with "OK"
. "OK"
starts the call.
Press one of these buttons to go to
the previous or next page in the list.
*
D
epending on the compatibility of the
telephone. select "
YES" to accept the call,
select "NO" to reject the call.
Pressing and holding the back
button,
Audio and Telematics