brake Citroen C3 2014 2.G Owner's Guide
[x] Cancel search | Manufacturer: CITROEN, Model Year: 2014, Model line: C3, Model: Citroen C3 2014 2.GPages: 284, PDF Size: 9.01 MB
Page 142 of 284
140
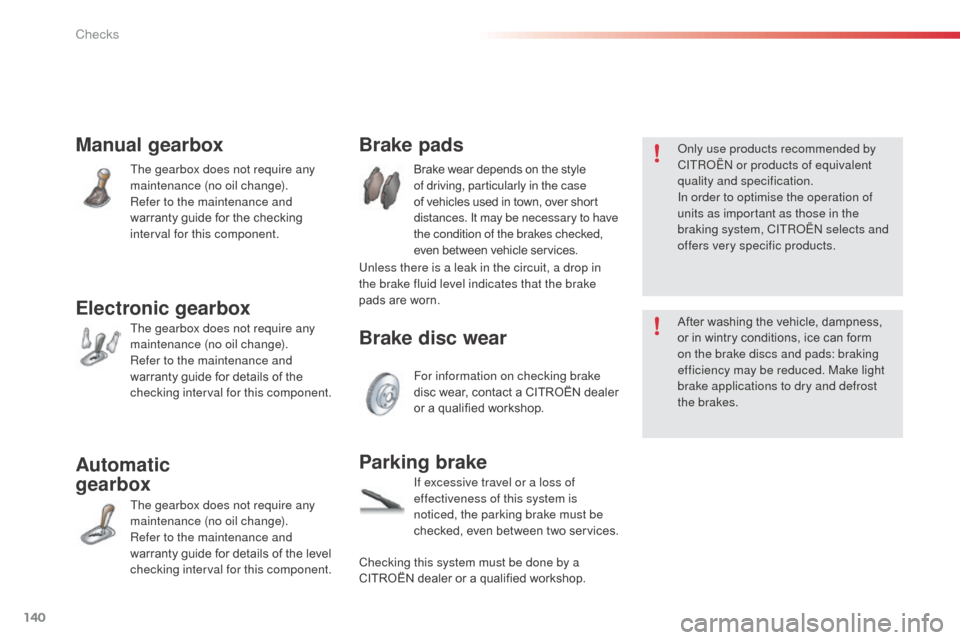
Manual gearbox
The gearbox does not require any
maintenance (no oil change).
Refer to the maintenance and
warranty guide for the checking
interval for this component.
Automatic
gearbox
The gearbox does not require any
maintenance (no oil change).
Refer to the maintenance and
warranty guide for details of the level
checking interval for this component.
Parking brake
If excessive travel or a loss of
effectiveness of this system is
noticed, the parking brake must be
checked, even between two services.
Electronic gearbox
The gearbox does not require any
maintenance (no oil change).
Refer to the maintenance and
warranty guide for details of the
checking interval for this component.
Brake pads
Brake disc wear
Brake wear depends on the style
of driving, particularly in the case
of vehicles used in town, over short
distances. It may be necessary to have
the condition of the brakes checked,
even between vehicle services.
For information on checking brake
disc wear, contact a CITROËN dealer
or a qualified workshop.
on
ly use products recommended by
CITRoËn or products of equivalent
quality and specification.
In order to optimise the operation of
units as important as those in the
braking system, CITR
oËn
selects and
offers very specific products.
Unless there is a leak in the circuit, a drop in
the brake fluid level indicates that the brake
pads are worn.
Checking this system must be done by a
CITROËN dealer or a qualified workshop. After washing the vehicle, dampness,
or in wintry conditions, ice can form
on the brake discs and pads: braking
efficiency may be reduced. Make light
brake applications to dry and defrost
the brakes.
Checks
Page 151 of 284
149
C3_en_Chap11_Info-pratiques_ed01-2014
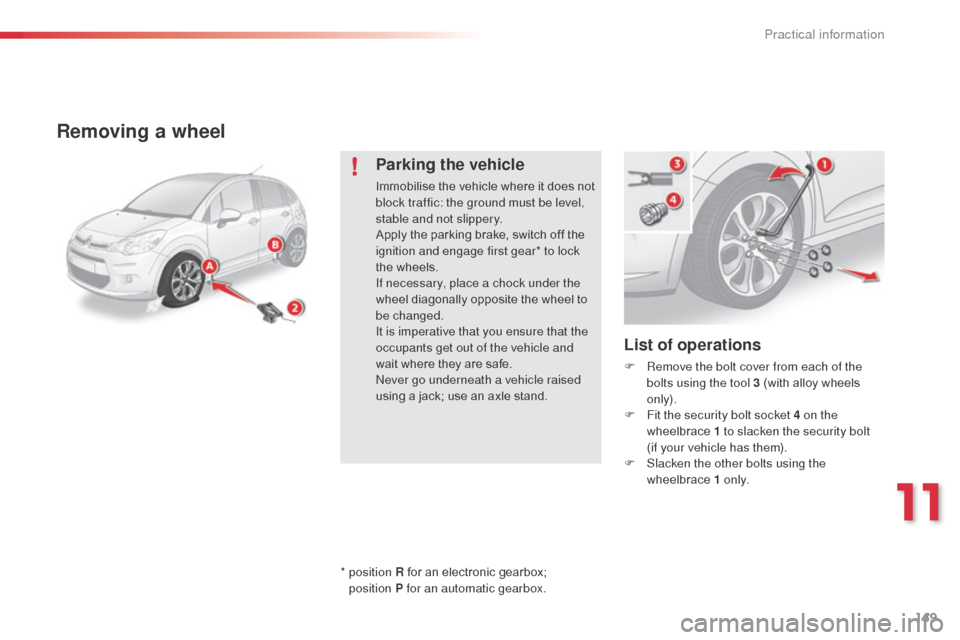
Removing a wheel
List of operations
F Remove the bolt cover from each of the bolts using the tool 3 (with alloy wheels
only).
F
F
it the security bolt socket 4 on the
wheelbrace 1 to slacken the security bolt
(if your vehicle has them).
F
S
lacken the other bolts using the
wheelbrace 1 o n l y.
Parking the vehicle
Immobilise the vehicle where it does not
block traffic: the ground must be level,
stable and not slippery.
Apply the parking brake, switch off the
ignition and engage first gear* to lock
the wheels.
If necessary, place a chock under the
wheel diagonally opposite the wheel to
be changed.
It is imperative that you ensure that the
occupants get out of the vehicle and
wait where they are safe.
ne
ver go underneath a vehicle raised
using a jack; use an axle stand.
*
position R for an electronic gearbox;
position
P for an automatic gearbox.
11
Practical information
Page 155 of 284
153
C3_en_Chap11_Info-pratiques_ed01-2014
Snow chains
In wintry conditions, snow chains improve traction as well as the behaviour of the vehicle when
braking.The snow chains must be fitted only
to the front wheels. They must never
be fitted to "space-saver" type spare
wheels.
Take account of the legislation in force
in your country on the use of snow
chains and the maximum running speed
authorised.Avoid driving with snow chains on roads
that have been cleared of snow, to
avoid damaging your vehicle's tyres and
the road sur face. If your vehicle is fitted
with alloy wheels, check that no part of
the chain or its fixings is in contact with
the wheel rim.
Use only the chains designed to be fitted to the
type of wheel fitted to your vehicle:
or
iginal tyre sizeMaximum link size.
185/65 R15 9 mm
195/55 R16
2 0 5 /4 5 R17 7 mm
For more information on snow chains, contact a
CITROËN dealer or a qualified workshop.
Advice on installation
F If you have to fit the chains during a journey, stop the vehicle on a flat sur face
on the side of the road.
F
a
p
ply the parking brake and position any
wheel chocks to prevent movement of your
vehicle.
F
F
it the chains following the instructions
provided by the manufacturer.
F
M
ove off gently and drive for a few
moments, without exceeding 30 mph
(50
km/h).
F
S
top your vehicle and check that the snow
chains are correctly tightened.
It is strongly recommended that before
you leave, you practise fitting the snow
chains on a level and dry sur face.
11
Practical information
Page 160 of 284
158
C3_en_Chap11_Info-pratiques_ed01-2014
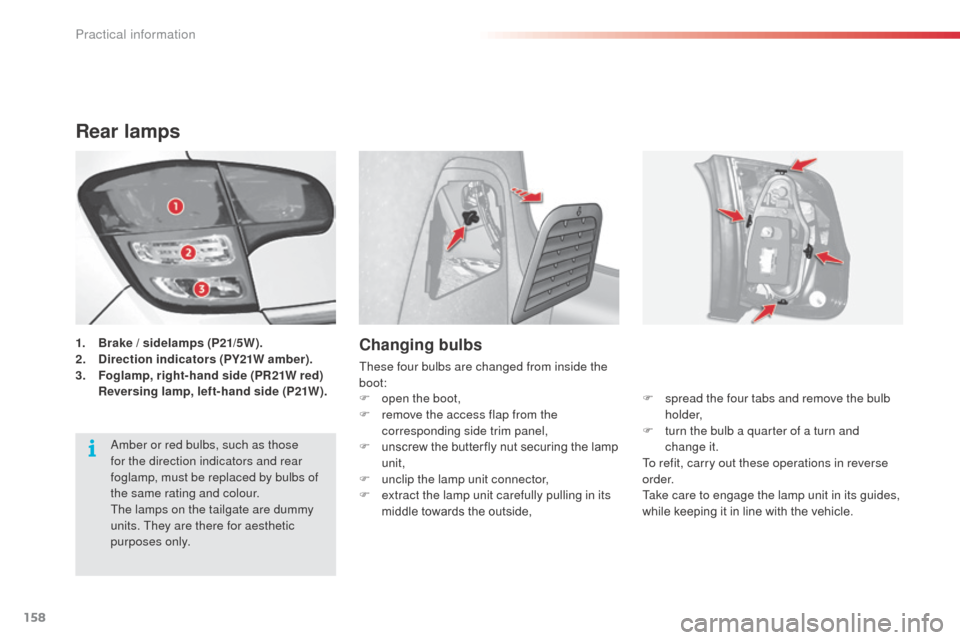
Rear lamps
1. Brake / sidelamps (P21/5W).
2. D irection indicators (PY21W amber).
3.
F
oglamp, right-hand side (PR21W red)
R
eversing lamp, left-hand side (P21W).Changing bulbs
These four bulbs are changed from inside the
boot: F
s
pread the four tabs and remove the bulb
h o l d e r,
F
t
urn the bulb a quarter of a turn and
change it.
To refit, carry out these operations in reverse
o r d e r.
Take care to engage the lamp unit in its guides,
while keeping it in line with the vehicle.
F
o
pen the boot,
F
r
emove the access flap from the
corresponding side trim panel,
F
u
nscrew the butter fly nut securing the lamp
unit,
F
u
nclip the lamp unit connector,
F
e
xtract the lamp unit carefully pulling in its
middle towards the outside,
am
ber or red bulbs, such as those
for the direction indicators and rear
foglamp, must be replaced by bulbs of
the same rating and colour.
The lamps on the tailgate are dummy
units. They are there for aesthetic
purposes only.
Practical information
Page 161 of 284
159
C3_en_Chap11_Info-pratiques_ed01-2014
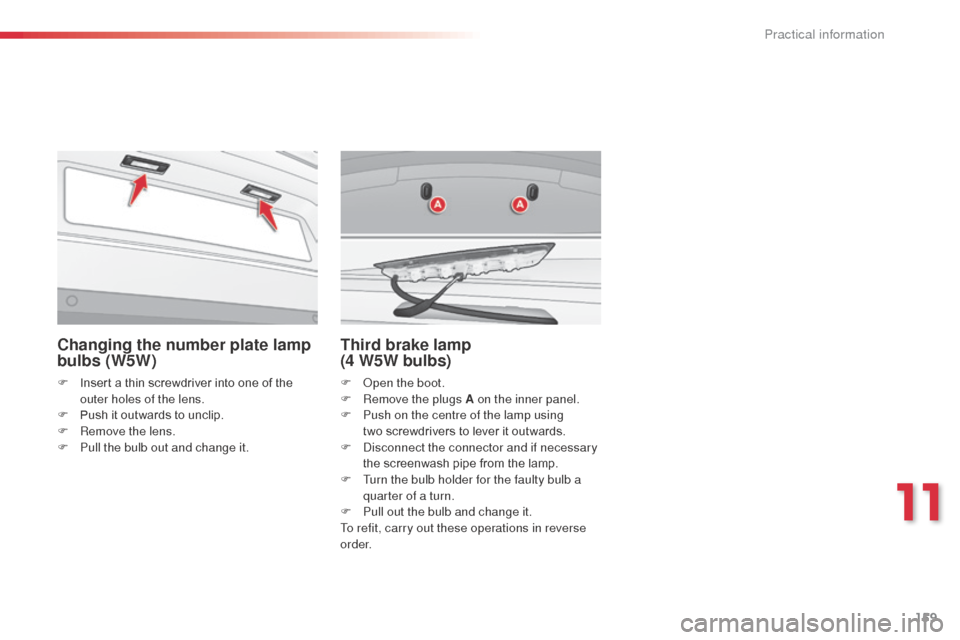
Changing the number plate lamp
bulbs (W5W)
F Insert a thin screwdriver into one of the outer holes of the lens.
F
P
ush it outwards to unclip.
F
R
emove the lens.
F
P
ull the bulb out and change it.
Third brake lamp
(4 W5W bulbs)
F open the boot.
F R emove the plugs A on the inner panel.
F
P
ush on the centre of the lamp using
two
screwdrivers to lever it outwards.
F
d
i
sconnect the connector and if necessary
the screenwash pipe from the lamp.
F
T
urn the bulb holder for the faulty bulb a
quarter of a turn.
F
P
ull out the bulb and change it.
To refit, carry out these operations in reverse
o r d e r.
11
Practical information
Page 167 of 284
165
C3_en_Chap11_Info-pratiques_ed01-2014
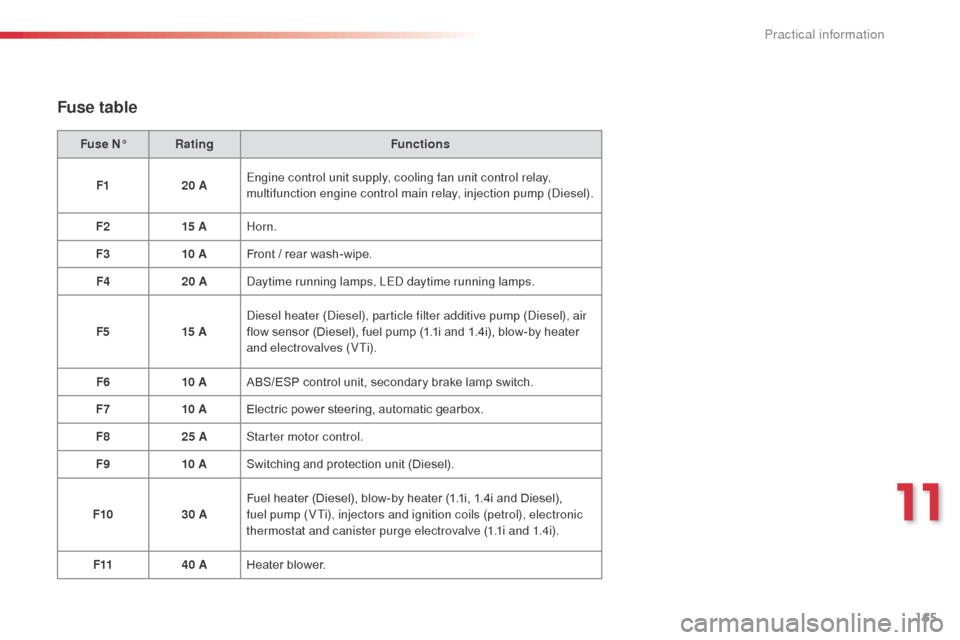
Fuse table
Fuse N°Rating Functions
F1 20 AEngine control unit supply, cooling fan unit control relay,
multifunction engine control main relay, injection pump (
die
sel).
F2 15 AHorn.
F3 10 AFront
/ rear wash-wipe.
F4 20 A
da
ytime running lamps, LE
d d
aytime running lamps.
F5 15 A
di
esel heater (
di
esel), particle filter additive pump (
di
esel), air
flow sensor (Diesel), fuel pump (1.1i and 1.4i), blow-by heater
and electrovalves (VTi).
F6 10 AABS/ESP control unit, secondary brake lamp switch.
F7 10 AElectric power steering, automatic gearbox.
F8 25 AStarter motor control.
F9 10 ASwitching and protection unit (Diesel).
F10 30 AFuel heater (Diesel), blow-by heater (1.1i, 1.4i and Diesel),
fuel pump (VTi), injectors and ignition coils (petrol), electronic
thermostat and canister purge electrovalve (1.1i and 1.4i).
F11 40 AHeater blower.
11
Practical information
Page 175 of 284
173
C3_en_Chap11_Info-pratiques_ed01-2014
Towing the vehicle
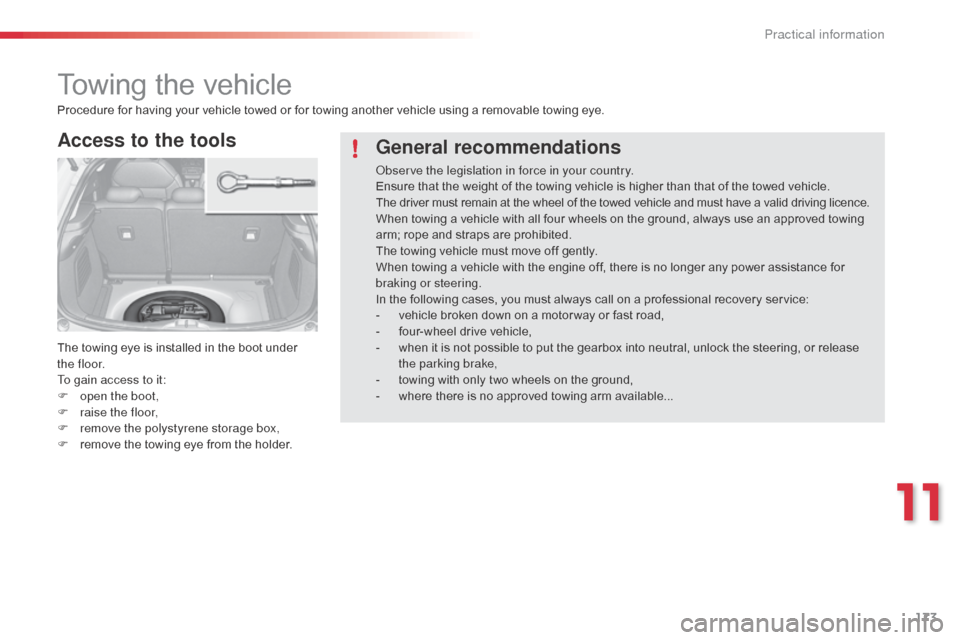
Access to the tools
The towing eye is installed in the boot under
t h e f l o o r.
To gain access to it:
F
o
pen the boot,
F
r
aise the floor,
F
r
emove the polystyrene storage box,
F
r
emove the towing eye from the holder.
Procedure for having your vehicle towed or for towing another vehicle using a removable towing eye.
General recommendations
observe the legislation in force in your country.
Ensure that the weight of the towing vehicle is higher than that of the towed vehicle.
The driver must remain at the wheel of the towed vehicle and must have a valid driving licence.
When towing a vehicle with all four wheels on the ground, always use an approved towing
arm; rope and straps are prohibited.
The towing vehicle must move off gently.
When towing a vehicle with the engine off, there is no longer any power assistance for
braking or steering.
In the following cases, you must always call on a professional recovery service:
-
v
ehicle broken down on a motor way or fast road,
-
f
our-wheel drive vehicle,
-
w
hen it is not possible to put the gearbox into neutral, unlock the steering, or release
the parking brake,
-
t
owing with only two wheels on the ground,
-
w
here there is no approved towing arm available...
11
Practical information
Page 176 of 284
174
C3_en_Chap11_Info-pratiques_ed01-2014
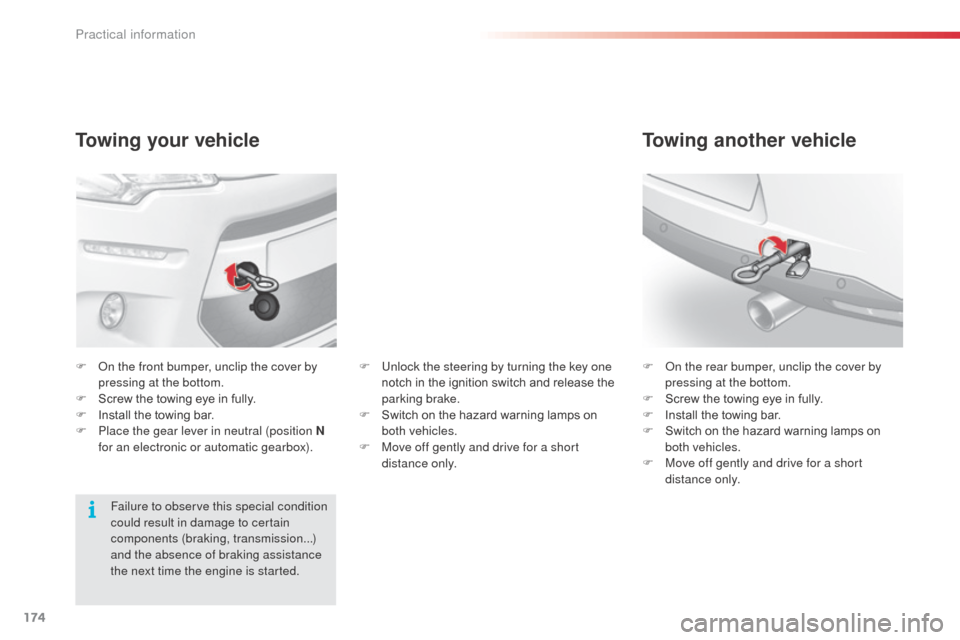
Towing your vehicle
F on the front bumper, unclip the cover by pressing at the bottom.
F
S
crew the towing eye in fully.
F
I
nstall the towing bar.
F
P
lace the gear lever in neutral (position N
for an electronic or automatic gearbox). F
on t he rear bumper, unclip the cover by
pressing at the bottom.
F
S
crew the towing eye in fully.
F
I
nstall the towing bar.
F
S
witch on the hazard warning lamps on
both vehicles.
F
M
ove off gently and drive for a short
distance only.
Towing another vehicle
Failure to observe this special condition
could result in damage to certain
components (braking, transmission...)
and the absence of braking assistance
the next time the engine is started. F
U
nlock the steering by turning the key one
notch in the ignition switch and release the
parking brake.
F
S
witch on the hazard warning lamps on
both vehicles.
F
M
ove off gently and drive for a short
distance only.
Practical information
Page 178 of 284
176
C3_en_Chap11_Info-pratiques_ed01-2014
Braking
Towing a trailer increases the braking distance.
To avoid overheating of the brakes on a long
mountain type of descent, the use of engine
braking is recommended.
Ty r e s
F Check the tyre pressures of the towing vehicle and of the trailer, observing the
recommended pressures.
Lighting
F Check the electrical lighting and signalling on the trailer.
The rear parking sensors will be
deactivated automatically if a genuine
CITROËN towbar is used.
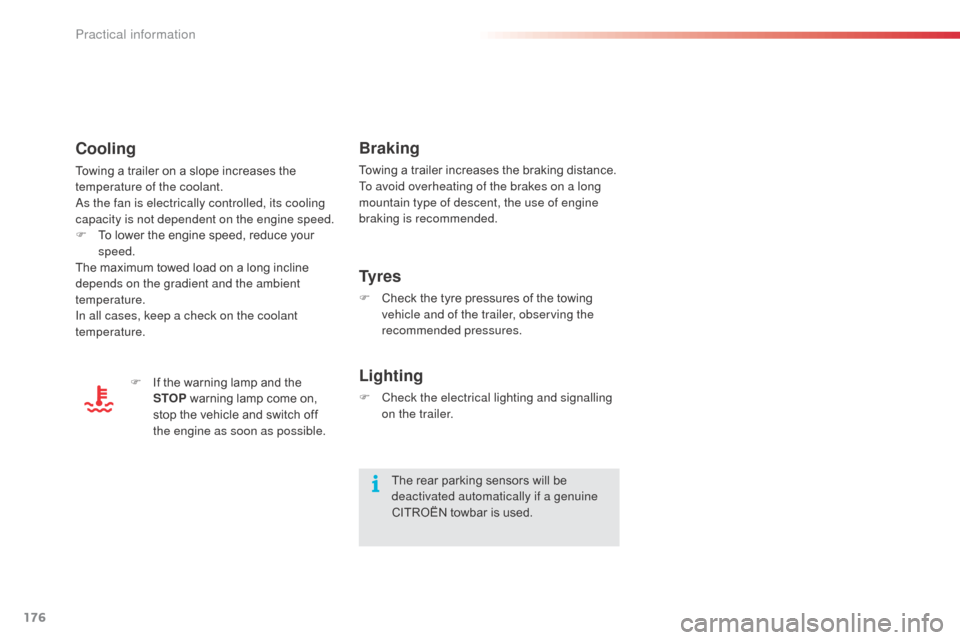
Cooling
Towing a trailer on a slope increases the
temperature of the coolant.
as t
he fan is electrically controlled, its cooling
capacity is not dependent on the engine speed.
F
T
o lower the engine speed, reduce your
speed.
The maximum towed load on a long incline
depends on the gradient and the ambient
temperature.
In all cases, keep a check on the coolant
temperature.
F
I
f the warning lamp and the
STOP warning lamp come on,
stop the vehicle and switch off
the engine as soon as possible.
Practical information
Page 181 of 284
179
C3_en_Chap11_Info-pratiques_ed01-2014
"Comfort"
sun blinds, door deflectors, insulated module,
smoking kit, fragrance cartridges, front centre
armrest, moveable mirror, reading lamp,
front and rear parking sensors, cup holder,
coat hanger for head restraint, solar film for
windows, security film for windows... "Security and safety":
anti-theft alarm, wheel security bolts, stolen
vehicle tracking system, breathalyser, first aid
kit, warning triangle, high visibility vest, dog
guard, snow chains, non-slip covers, foglamps
kit, child seats and booster cushions, pet
transpor t protectors...
Conversion kits
You can obtain an "Enterprise" kit to convert a
trade vehicle to a private car and vice-versa.
"Style":
leather steering wheel, gear lever knobs,
front spoiler, rear diffuser, bumper trims, front
foglamp trims, parking brake lever trims,
aluminium footrest, alloy wheels, wheel trims,
chrome tailgate finisher, chrome tailpipe
finisher, chrome mirror shells, chrome door
handles... "Transport solutions":
boot tray, boot carpet, boot net, boot
containers, transverse roof bars, bicycle
carrier, ski carrier, roof boxes, towbars, towbar
wiring harnesses...
accessoriesA wide range of accessories and genuine parts is available from the CITROËN dealer network.
These accessories and parts are all suitable for your vehicle and benefit from CITROËN's recommendation and warranty.
*
T
o avoid any risk of jamming of the pedals:
-
e
nsure that the mat is positioned and
secured correctly,
-
n
ever fit one mat on top of another.
"Protection":
mats*, mudflaps, seat covers, door sill
protectors, bumper protection strips, vehicle
protective cover, side protectors, boot mat, boot
liner...
If a towbar and wiring are fitted outside
the CITROËN
dealer network, this must
be done making use of the vehicle's
electrical pre-equipment and following
the manufacturer's recommendations.
11
Practical information