warning CITROEN C3 AIRCROSS 2021 Handbook (in English)
[x] Cancel search | Manufacturer: CITROEN, Model Year: 2021, Model line: C3 AIRCROSS, Model: CITROEN C3 AIRCROSS 2021Pages: 244, PDF Size: 6.29 MB
Page 136 of 244
134
Practical information
For more information on the precautions
to take before any work on the 12 V battery, refer to the corresponding section.
Versions equipped with Stop & Start are fitted with a 12 V lead-acid battery of specific technology and specification.
Its replacement should be carried out only by
a CITROËN dealer or a qualified workshop.
Passenger compartment
filter
Depending on the environment and the use of the vehicle (e.g. dusty atmosphere,
city driving), change it twice as often, if
necessary .
A clogged passenger compartment filter
can adversely affect air conditioning
system performance and generate
undesirable odours.
Air filter
Depending on the environment and the use of the vehicle (e.g. dusty atmosphere,
city driving), change it twice as often, if
necessary .
Oil filter
Change the oil filter each time the engine oil is changed.
Particle filter (Diesel)
When the particle filter is approaching saturation, this warning lamp comes on
temporarily, accompanied by a message warning
of the risk of filter clogging.
As soon as the traffic conditions permit,
regenerate the filter by driving at a speed of at
least 37 mph (60 km/h) until the warning lamp goes off.
If the warning lamp stays on, this
indicates a low Diesel additive level.
For more information on Checking levels,
refer to the corresponding section.
Following prolonged operation of the
vehicle at very low speed or at idle, you
may, in exceptional circumstances, notice the
emission of water vapour at the exhaust while
accelerating. This has no impact on the
vehicle’s behaviour or the environment.
New vehicle
During the first few particle filter
regeneration operations, you may notice a
"burning" smell. This is perfectly normal.
Manual gearbox
The gearbox does not require any maintenance (no oil change).
Automatic gearbox
The gearbox does not require any maintenance (no oil change).
Brake pads
Brake wear depends on the style of driving, particularly in the case of vehicles
used in town, over short distances. It may be
necessary to have the condition of the brakes
checked, even between vehicle services.
Unless there is a leak in the circuit, a drop in the
brake fluid level indicates that the brake pads
are worn.
After washing the vehicle, moisture, or in wintry conditions, ice can form on the
brake discs and pads: braking efficiency may
be reduced. Gently dab the brakes to dry and
defrost them.
Brake disc wear
For information on checking brake disc
wear, contact a CITROËN dealer or a
qualified workshop.
Manual parking brake
If you notice excessive brake lever travel or decreased effectiveness, the parking
brake must be adjusted, even between two
services.
This system must be checked by a CITROËN
dealer or a qualified workshop.
Wheels and tyres
The inflation pressure of all tyres, including the spare wheel, must be
checked on "cold” tyres.
The pressures indicated on the tyre pressure
label are valid for "cold" tyres. If you have driven
for more than 10 minutes or more than 6 miles
(10 kilometres) at over 31 mph (50 km/h), add 0.3 bar (30 kPa) to the values indicated on the
label.
Under-inflation increases fuel
consumption. Non-compliant tyre
pressure causes premature wear on tyres and
has an adverse effect on the vehicle's road
holding - risk of an accident!
Driving with worn or damaged tyres reduces the
braking and road holding performance of the
vehicle. It is recommended to regularly check the
condition of the tyres (tread and sidewalls) and
wheel rims as well as the presence of the valves.
When the wear indicators no longer appear set
back from the tread, the depth of the grooves is
less than 1.6 mm; it is imperative to replace the
tyres.
Using different size wheels and tyres from those
specified can affect the lifetime of tyres, wheel
rotation, ground clearance, the speedometer
reading and have an adverse effect on road
holding.
Fitting different tyres on the front and rear axles
can cause the ESC to mistime.
Page 137 of 244
135
Practical information
7Wheels and tyres
The inflation pressure of all tyres, including the spare wheel, must be
checked on "cold” tyres.
The pressures indicated on the tyre pressure
label are valid for "cold" tyres. If you have driven
for more than 10 minutes or more than 6 miles
(10 kilometres) at over 31 mph (50 km/h), add 0.3 bar (30 kPa) to the values indicated on the
label.
Under-inflation increases fuel
consumption. Non-compliant tyre
pressure causes premature wear on tyres and
has an adverse effect on the vehicle's road
holding - risk of an accident!
Driving with worn or damaged tyres reduces the
braking and road holding performance of the
vehicle. It is recommended to regularly check the
condition of the tyres (tread and sidewalls) and
wheel rims as well as the presence of the valves.
When the wear indicators no longer appear set
back from the tread, the depth of the grooves is
less than 1.6 mm; it is imperative to replace the
tyres.
Using different size wheels and tyres from those
specified can affect the lifetime of tyres, wheel
rotation, ground clearance, the speedometer
reading and have an adverse effect on road
holding.
Fitting different tyres on the front and rear axles
can cause the ESC to mistime.
AdBlue® (BlueHDi)
To respect the environment and ensure
compliance with the Euro 6 standard, without
adversely affecting the performance or fuel
consumption of its Diesel engines, CITROËN
has taken the decision to equip its vehicles
with a system that associates SCR (Selective
Catalytic Reduction) with a Diesel Particle Filter
(DPF) for the treatment of exhaust gases.
SCR System
Using a liquid called AdBlue® that contains
urea, a catalytic converter turns up to 85% of
the nitrogen oxides (NOx) into nitrogen and
water, which are harmless to health and the
environment.
The AdBlue® is contained in a special
tank holding about 17 litres.
Its capacity allows a driving range of
approximately 5,600 miles (9,000 km), which
may vary considerably depending on your
driving style.
An alert system is triggered once the reserve
level is reached: it is then possible to drive for a
further 1,500 miles (2,400 km) before the tank is empty and the vehicle blocked.
If the estimated distance travelled by the vehicle
between two services is greater than 12,500
miles (20,000 km), it will be necessary to top up
the AdBlue.
For more information on the Warning
and indicator lamps and the associated
alerts, or the Indicators, please refer to the
corresponding sections.
Once the AdBlue® tank is empty, a
system required by legislation prevents
starting of the engine.
If the SCR system is faulty, the level of
emissions from the vehicle will no longer meet
the Euro 6 standard: the vehicle becomes
polluting.
In the event of a confirmed SCR system
malfunction, it is essential to visit a CITROËN
dealer or a qualified workshop. After 680
miles (1,100 km), a device is automatically
activated to prevent the engine from starting.
In both cases, a range indicator indicates
the distance that can be travelled before the
vehicle is stopped.
Page 142 of 244
140
In the event of a breakdown
Access to the kit
This kit is installed in the storage box, under the
boot floor.
Repair procedure
Do not remove any foreign bodies (e.g.
nail, screw) which have penetrated into
the tyre.
► Park the vehicle without obstructing traffic and apply the parking brake.► Follow the safety instructions (hazard warning lamps, warning triangle, high visibility
vest, etc.) according to the legislation in force in
the country of driving.
► Switch off the ignition.► Uncoil the pipe stowed under the compressor.
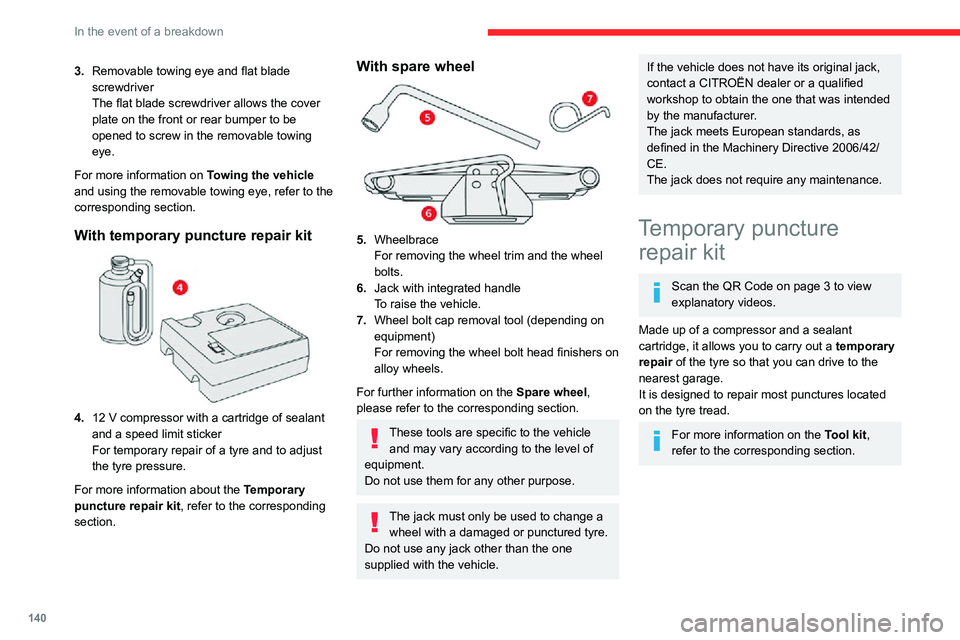
3.Removable towing eye and flat blade
screwdriver
The flat blade screwdriver allows the cover
plate on the front or rear bumper to be
opened to screw in the removable towing
eye.
For more information on Towing the vehicle
and using the removable towing eye, refer to the
corresponding section.
With temporary puncture repair kit
4.12 V compressor with a cartridge of sealant and a speed limit sticker
For temporary repair of a tyre and to adjust
the tyre pressure.
For more information about the Temporary
puncture repair kit, refer to the corresponding
section.
With spare wheel
5. Wheelbrace
For removing the wheel trim and the wheel
bolts.
6. Jack with integrated handle
To raise the vehicle.
7. Wheel bolt cap removal tool (depending on
equipment)
For removing the wheel bolt head finishers on
alloy wheels.
For further information on the Spare wheel,
please refer to the corresponding section.
These tools are specific to the vehicle and may vary according to the level of
equipment.
Do not use them for any other purpose.
The jack must only be used to change a wheel with a damaged or punctured tyre.
Do not use any jack other than the one
supplied with the vehicle.
If the vehicle does not have its original jack,
contact a CITROËN dealer or a qualified
workshop to obtain the one that was intended
by the manufacturer.
The jack meets European standards, as
defined in the Machinery Directive 2006/42/
CE.
The jack does not require any maintenance.
Temporary puncture repair kit
Scan the QR Code on page 3 to view
explanatory videos.
Made up of a compressor and a sealant
cartridge, it allows you to carry out a temporary
repair of the tyre so that you can drive to the
nearest garage.
It is designed to repair most punctures located
on the tyre tread.
For more information on the Tool kit,
refer to the corresponding section.
Page 143 of 244

141
In the event of a breakdown
8Access to the kit
This kit is installed in the storage box, under the
boot floor.
Repair procedure
Do not remove any foreign bodies (e.g.
nail, screw) which have penetrated into
the tyre.
► Park the vehicle without obstructing traffic and apply the parking brake.► Follow the safety instructions (hazard warning lamps, warning triangle, high visibility
vest, etc.) according to the legislation in force in
the country of driving.
► Switch off the ignition.► Uncoil the pipe stowed under the compressor.
► Connect the pipe from the compressor to the bottle of sealant.
► Turn the bottle of sealant over and secure it in the notch provided on the compressor.► Remove the valve cap from the tyre to be repaired, and place it in a clean area.
► Connect the hose from the bottle of sealant to the valve of the tyre to be repaired and tighten
firmly.
► Check that the compressor switch is in position "O".► Fully uncoil the electric cable stowed under the compressor.► Connect the compressor's electric plug to the vehicle's 12 V socket.
Only the 12 V socket located at the front
of the vehicle can be used to power the
compressor .
► Affix the speed limit sticker .
The speed limit sticker must be secured
to the interior of the vehicle in the area
close to the driver, to remind the driver that a
wheel is in temporary use.
Page 159 of 244

157
In the event of a breakdown
8Accessing the tools
The tools are located in the boot. Depending
on version, they are stored under the floor or
behind the removable grille of the right-hand
compartment.
For access:
► Open the boot.► Then, depending on version, lift up the floor using the handle, remove it and remove the mat.► Or open the removable grille on the right by pulling from the top.
For more information on the list of tools, refer to
the Tool kit section.
Towing your vehicle
► On the front bumper , unclip the cover from below using the flat blade screwdriver.► Screw the towing eye in fully .► Install the towbar.► With a manual gearbox, move the gear lever into neutral.► With an automatic gearbox, move the gear selector into position N.
Failure to observe this instruction could
result in damage to certain components
(braking, transmission, etc.) and to the
absence of braking assistance the next time
the engine is started.
► Unlock the steering and release the parking brake.► Switch on the hazard warning lamps on both
vehicles.► Move off gently , drive slowly and only for a short distance.
Towing another vehicle
► On the rear bumper , unclip the cover from below using the flat blade screwdriver.► Screw the towing eye in fully .► Install the towbar.► Switch on the hazard warning lamps on the vehicle being towed.► Move off gently, drive slowly and only for a short distance.
If the vehicle is equipped with a BlueHDi
120 S&S EAT6 engine and a sunroof or
spare wheel, it is forbidden to tow another
vehicle.
Page 167 of 244
165
Bluetooth® audio system
10Radio:Select the previous / next preset radio
station.
Select the previous / next item in a menu or a
list.
Media:
Select the previous / next track.
Select the previous / next item in a menu or a
list.
Radio:Short press: display the list of radio
stations.
Long press: update the list.
Media:
Short press: display the list of folders.
Long press: display the available sorting options.
Other than telephone call:Short press: changing audio source
(radio; USB; AUX (if equipment connected); CD;
streaming), confirmation if the "Telephone"
menu is open.
Long press: open the " Telephone" menu.
In the event of a telephone call:
Short press: accept the call.
Long press: reject the call.
During a telephone call:
Short press: open the contextual telephone
menu.
Long press: end the call.
Confirm a selection.
Increase volume.
Decrease volume.
Mute / Restore sound by simultaneously pressing the increase and decrease
volume buttons.
Steering mounted controls -
Type 2
Access to the main menu.
Increase volume.
Mute / Restore the sound.
Decrease volume.
Other than telephone call:Short press: changing audio source
(radio; USB; AUX (if equipment connected); CD;
streaming), confirmation if the "Telephone"
menu is open.
Long press: open the " Telephone" menu.
In the event of a telephone call:
Short press: accept the call.
Long press: reject the call.
During a telephone call:
Short press: open the contextual telephone
menu. Long press: end the call.
Start voice recognition on your smartphone via the system.Radio:Short press: display the list of radio
stations.
Long press: update the list.
Media:
Short press: display the list of folders.
Long press: display the available sorting options.
Radio:Select the previous / next preset radio
station.
Select the previous / next item in a menu or a
list.
Media:
Select the previous / next track.
Select the previous / next item in a menu or a
list.
Press the thumbwheel: confirm.
Menus
Depending on version."Multimedia": Media settings, Radio
settings.
"Telephone": Call, Directory
management, Telephone management,
Hang up.
"Trip computer".
"Maintenance": Diagnosis, Warning log,
etc.
Page 200 of 244
198
CITROËN Connect Nav
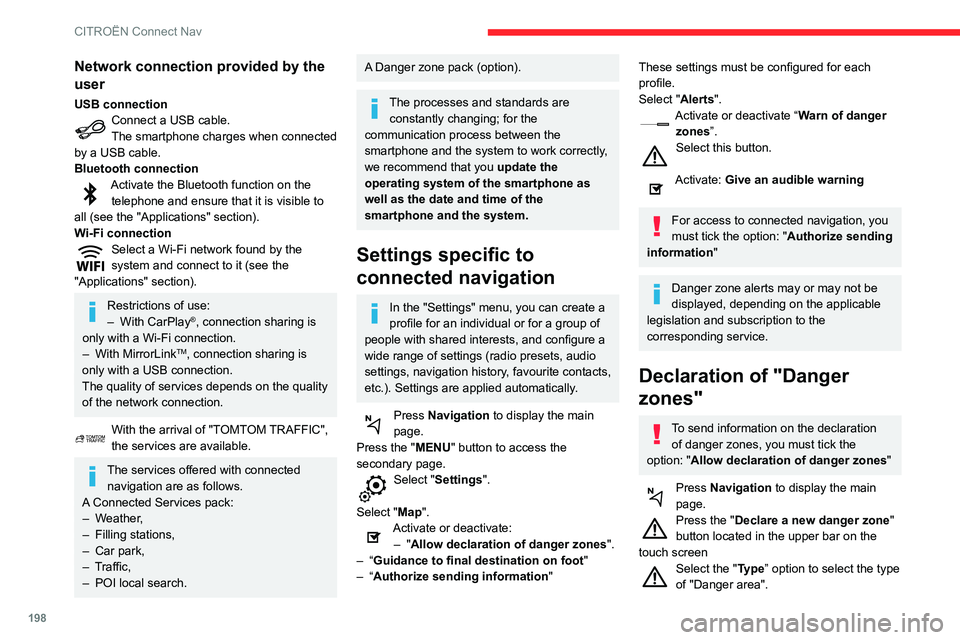
Network connection provided by the
user
USB connectionConnect a USB cable.The smartphone charges when connected
by a USB cable.
Bluetooth connection
Activate the Bluetooth function on the telephone and ensure that it is visible to
all (see the "Applications" section).
Wi-Fi connection
Select a Wi-Fi network found by the system and connect to it (see the
"Applications" section).
Restrictions of use:– With CarPlay®, connection sharing is
only with a Wi-Fi connection.
– With MirrorLinkTM, connection sharing is
only with a USB connection.
The quality of services depends on the quality
of the network connection.
With the arrival of "TOMTOM TRAFFIC", the services are available.
The services offered with connected navigation are as follows.
A Connected Services pack:
– Weather,– Filling stations,– Car park,– Traffic,– POI local search.
A Danger zone pack (option).
The processes and standards are constantly changing; for the
communication process between the
smartphone and the system to work correctly,
we recommend that you update the
operating system of the smartphone as
well as the date and time of the
smartphone and the system.
Settings specific to
connected navigation
In the "Settings" menu, you can create a
profile for an individual or for a group of
people with shared interests, and configure a
wide range of settings (radio presets, audio
settings, navigation history, favourite contacts,
etc.). Settings are applied automatically.
Press Navigation to display the main
page.
Press the "MENU" button to access the
secondary page.
Select "Settings".
Select "Map".
Activate or deactivate:– "Allow declaration of danger zones ".– “Guidance to final destination on foot "– “Authorize sending information"
These settings must be configured for each
profile.
Select "Alerts".
Activate or deactivate “Warn of danger
zones”.
Select this button.
Activate: Give an audible warning
For access to connected navigation, you
must tick the option: "Authorize sending
information "
Danger zone alerts may or may not be
displayed, depending on the applicable
legislation and subscription to the
corresponding service.
Declaration of "Danger
zones"
To send information on the declaration
of danger zones, you must tick the option: "Allow declaration of danger zones "
Press Navigation to display the main
page.
Press the "Declare a new danger zone"
button located in the upper bar on the
touch screen
Select the "Type” option to select the type
of "Danger area".
Select the ""Speed" option and enter it
using the virtual keypad.
Press "OK" to save and send the
information.
"Danger zones" pack
updates
Press Settings to display the primary
page.
Press the "OPTIONS " button to go to the
secondary page.
Select "System administration".
Select the "System info" tab.
Select "View" to display the versions of
the different modules installed in the
system.
Select "Update(s) due".
You can download the system and map updates from the Brand’s website.
The update procedure can also be found on
the website.
Displaying weather
information
Press Navigation to display the main
page.
Press this button to display the list of services.
Page 213 of 244
2 11
CITROËN Connect Nav
12The "Danger zone" audible warning feature is
not working.
The audible warning is not active or the volume
is too low.
► Activate the audible warning in the "Navigation" menu and check the voice volume
in the sound settings.
The system does not suggest a detour
around an incident on the route.
The route settings do not take account of TMC
messages.
► Configure the "Traffic info " function in the route settings list (Without, Manual or
Automatic).
I receive a warning about a "Danger area"
that is not on my route.
As well as providing guided navigation, the
system announces all "Danger areas" positioned
in a cone located in front of the vehicle. It may
provide an alert for "Danger areas" located on
nearby or parallel roads.
► Zoom the map to show the exact location of the "Danger area". You can select "On the
route" to stop receiving warnings or decrease the
warning duration.
Certain traffic jams along the route are not
indicated in real time.
On starting, a few minutes may elapse before
the system begins to receive traffic information.
► Wait until traffic information is being received correctly (traffic information icons shown on the
map). In certain countries, only major routes
(motorways, etc.) are listed for the traffic
information.
This is perfectly normal. The system is
dependent on the traffic information available.
The altitude is not displayed.
On starting, GPS initialisation may take up to
3 minutes to receive more than 4 satellites
correctly.
► Wait until the system has started up completely so that there is GPS coverage by at least 4 satellites.Depending on the geographical environment
(tunnel, etc.) or the weather, the conditions of
reception of the GPS signal may vary.
This behaviour is normal. The system is
dependent on the GPS signal reception
conditions.
My navigation is no longer connected.
During start-up and in certain geographical
areas, the connection may be unavailable.
► Check that the online services are activated (settings, contract).
Radio
The reception quality of the tuned radio
station gradually deteriorates or the station
presets are not working (no sound, 87.5 MHz
is displayed, etc.).
The vehicle is too far from the selected station’s
transmitter, or no transmitter is present in the
geographical area.
► Activate the "RDS" function by means of the short-cut menu to enable the system to check
whether there is a more powerful transmitter in
the geographical area.
The aerial is missing or has been damaged
(for example while entering a car wash or
underground car park).
► Have the aerial checked by a dealer
.The environment (hills, buildings, tunnels,
basement car parks, etc.) is blocking reception,
including in RDS mode.
This is a perfectly normal phenomenon, and is
not indicative of an audio system malfunction.
I cannot find some radio stations in the list of
stations received.
The name of the radio station changes.
The station is no longer received or its name has
changed in the list.
Some radio stations send other information
in place of their name (the title of the song for
example).
The system interprets these details as the station
name.
► Press the "Update list" button in the "Radio stations” secondary menu.
Media
Playback of my USB memory stick starts only
after a very long wait (around 2 to 3 minutes).
Some files supplied with the memory stick may
greatly slow down access to reading the memory
stick (multiplication by 10 of the cataloguing
time).
Page 216 of 244
214
Alphabetical index
180° rear vision 118
A
ABS 67Accessories 64Active Safety Brake 108–109, 111AdBlue® 14, 135
AdBlue® tank 136Additive, Diesel 133–134Adjusting headlamps 59Adjusting head restraints 36Adjusting seat 37Adjusting the air distribution 44Adjusting the air flow 44–45Adjusting the date 17, 22, 187, 210Adjusting the height and reach of the steering wheel 41Adjusting the seat angle 37Adjusting the seat belt height 71Adjusting the temperature 44Adjusting the time 17, 22, 187, 210Advice on care and maintenance 137Advice on driving 6, 86Airbags 73, 75, 77Airbags, curtain 74–75Airbags, front 74–75, 78Airbags, lateral 74–75Air conditioning 43–44Air conditioning, automatic 44Air conditioning, manual 43–44
Air intake 44Air vents 42Alarm 30–32Anti-lock braking system (ABS) 67Antitheft / Immobiliser 26Apple CarPlay connection 183, 199Armrest, front 49Armrest, rear 50Assistance call 65
Assistance, emergency braking 67, 110Audible warning 65Audio streaming (Bluetooth) 170, 182, 204
B
Battery 128, 152–155Battery, 12 V 133–134, 154Battery, charging 154Battery, remote control 26–27Blind 32–33Blind spot sensors 113Blinds, side 50BlueHDi 14, 133, 139Bluetooth (hands-free) 170–171, 184–185, 205–206Bluetooth (telephone) 184–185, 205–207Bodywork 138Bonnet 130Boot 29, 54Brake discs 134Brake lamps 148
Brakes 134Braking assistance system 67Braking, automatic emergency 108–111Brightness 186Bulbs 147Bulbs (changing) 146–148
C
Cable, audio 204Cable, Jack 204Capacity, fuel tank 123–124Cap, fuel filler 123–124Care of the bodywork 138CD 169, 182, 204CD, MP3 169, 182, 204Central locking 25, 30Changing a bulb 146–149Changing a fuse 150–152Changing a wheel 139, 143Changing a wiper blade 61–62Changing the remote control battery 27Charger, induction 48Charger, wireless 48Checking the engine oil level 14Checking the levels 131–133Checking tyre pressures (using the kit) 140, 142Checks 131, 133–134Checks, routine 133–134Child lock 84–85
Page 217 of 244
215
Alphabetical index
Children 72, 79–81, 83Children (safety) 84Child seats 72, 75–79Child seats, conventional 78–79Child seats, i-Size 83Child seats, ISOFIX 80–81, 83Cleaning (advice) 137–138Closing the boot 24, 26, 29Closing the doors 24–26, 29
Coat hanger 50Coat hook 50Collision risk alert 109–110Collision Risk Alert 108–110Configuration, vehicle 17–19Connection, Bluetooth 171, 184–185, 201–202, 205–207Connection, MirrorLink 183–184, 200Connection, Wi-Fi network 202Container, AdBlue® 136Control, electric windows 34Control, emergency boot release 29Control, emergency door 26–27Control, heated seats 38Control stalk, lighting 55–56Control stalk, wipers 60–63Courtesy lamp 149Courtesy lamps 53Cruise control 101, 103–104, 106–108Cruise control by speed limit recognition 103–104Cruise control, dynamic with Stop function 103–104
Cup holder 50
D
DAB (Digital Audio Broadcasting) - Digital radio 167–168, 181, 203–204Date (setting) 17, 22, 187, 210Daytime running lamps 57, 147
Deactivating the passenger airbag 74, 77–78Deadlocking 24, 26Defrosting 46–47Defrosting, front 46Demisting, front 46Demisting, rear 41Demisting, rear screen 41Dials and gauges 7Dimensions 162Dipstick 14, 132Direction indicators 56, 147–148Display, head-up 99–100Doors 29Driver’s attention warning 111 – 11 2Driving 86Driving aids camera (warnings) 99Driving aids (recommendations) 98Driving economically 6Dynamic stability control (DSC) 67–68
E
EBFD 67Eco-driving (advice) 6Economy mode 128Electric windows 34Electronic brake force distribution (EBFD) 67Emergency braking assistance (EBA) 67Emergency call 65
Emergency switching off 90Emergency warning lamps 64Emissions control system, SCR 15, 135Energy economy mode 128Engine compartment 131Engine, Diesel 123, 131, 139, 161Engine, petrol 131, 159Engines 158–159, 161Environment 6, 26ESC (electronic stability control) 67
F
Fatigue detection 111 – 11 2Filling the AdBlue® tank 133, 136Filling the fuel tank 123–124Filter, air 134Filter, oil 134Filter, particle 133–134Filter, passenger compartment 43, 134Fitting a wheel 143, 145Fitting roof bars 129