display CITROEN C3 AIRCROSS 2023 Manual PDF
[x] Cancel search | Manufacturer: CITROEN, Model Year: 2023, Model line: C3 AIRCROSS, Model: CITROEN C3 AIRCROSS 2023Pages: 244, PDF Size: 7.09 MB
Page 123 of 244
121
Practical information
7Compatibility of fuels
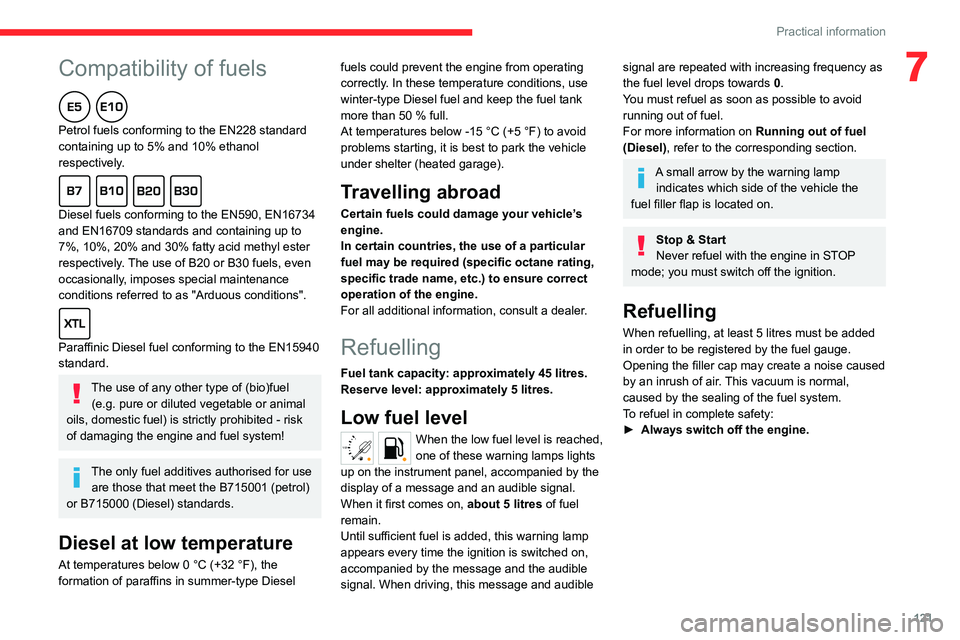
Petrol fuels conforming to the EN228 standard
containing up to 5% and 10% ethanol
respectively.
Diesel fuels conforming to the EN590, EN16734
and EN16709 standards and containing up to
7%, 10%, 20% and 30% fatty acid methyl ester
respectively. The use of B20 or B30 fuels, even
occasionally, imposes special maintenance
conditions referred to as "Arduous conditions".
Paraffinic Diesel fuel conforming to the EN15940
standard.
The use of any other type of (bio)fuel (e.g. pure or diluted vegetable or animal
oils, domestic fuel) is strictly prohibited - risk
of damaging the engine and fuel system!
The only fuel additives authorised for use are those that meet the B715001 (petrol)
or B715000 (Diesel) standards.
Diesel at low temperature
At temperatures below 0 °C (+32 °F), the
formation of paraffins in summer-type Diesel fuels could prevent the engine from operating
correctly
. In these temperature conditions, use
winter-type Diesel fuel and keep the fuel tank
more than 50 % full.
At temperatures below -15 °C (+5 °F) to avoid
problems starting, it is best to park the vehicle
under shelter (heated garage).
Travelling abroad
Certain fuels could damage your vehicle’s
engine.
In certain countries, the use of a particular
fuel may be required (specific octane rating,
specific trade name, etc.) to ensure correct
operation of the engine.
For all additional information, consult a dealer.
Refuelling
Fuel tank capacity: approximately 45 litres.
Reserve level: approximately 5 litres.
Low fuel level
/2
1 1When the low fuel level is reached,
one of these warning lamps lights
up on the instrument panel, accompanied by the
display of a message and an audible signal.
When it first comes on, about 5 litres of fuel
remain.
Until sufficient fuel is added, this warning lamp
appears every time the ignition is switched on,
accompanied by the message and the audible
signal. When driving, this message and audible
signal are repeated with increasing frequency as
the fuel level drops towards 0.
You must refuel as soon as possible to avoid
running out of fuel.
For more information on Running out of fuel
(Diesel), refer to the corresponding section.
A small arrow by the warning lamp indicates which side of the vehicle the
fuel filler flap is located on.
Stop & Start
Never refuel with the engine in STOP
mode; you must switch off the ignition.
Refuelling
When refuelling, at least 5 litres must be added
in order to be registered by the fuel gauge.
Opening the filler cap may create a noise caused
by an inrush of air. This vacuum is normal,
caused by the sealing of the fuel system.
To refuel in complete safety:
►
Always switch off the engine.
Page 129 of 244

127
Practical information
7– Do not transport more than 4 conventional
bicycles or 2 electric bicycles.
When loading bicycles onto a bicycle carrier
on a towball, be sure to place the heaviest
bicycles as close as possible to the vehicle.
Observe the legislation in force in the
country where you are driving.
Load reduction mode
This system manages the use of certain
functions according to the level of charge
remaining in the battery.
When the vehicle is being driven, the load
reduction function temporarily deactivates certain
functions, such as the air conditioning and the
heated rear screen.
The deactivated functions are reactivated
automatically as soon as conditions permit.
Energy economy mode
This system manages the duration of use of
certain functions, in order to conserve a sufficient
level of charge in the battery with the ignition off.
After switching off the engine and for a maximum
cumulative period of around 30 minutes, you can
continue to use functions such as the audio and
telematics system, dipped beam headlamps or
courtesy lamps.
Selecting the mode
A confirmation message is displayed when
energy economy mode is entered, and the active
functions are placed on standby.
If a telephone call is in progress at the
time, it will be maintained for around 10
minutes via the audio system’s hands-free
system.
Exiting the mode
These functions are automatically reactivated the
next time the vehicle is used.
To restore the use of these functions
immediately, start the engine and let it run:
–
For less than 10 minutes, to use the
equipment for approximately 5 minutes.
–
For more than 10 minutes, to use the
equipment for approximately 30 minutes.
Let the engine run for the specified duration to
ensure that the battery charge is sufficient.
T
o recharge the battery, avoid repeatedly or
continuously restarting the engine.
A flat battery prevents the engine from starting.
For more information on the 12
V battery,
refer to the corresponding section.
Roof bars
As a safety measure and to avoid damaging the roof, it is essential to use
transverse roof bars approved for your
vehicle.
Observe the instructions on fitting and use
contained in the guide supplied with the roof
bars.
Fitting directly to the roof
You must only attach the transverse bars to
the four fixing points located on the roof frame.
These points are concealed by the vehicle doors
when the doors are closed.
The roof bar fixings have a stud which must be
inserted into the opening of each fixing point.
Page 132 of 244
130
Practical information
10.Priming pump*
Diesel fuel system
This system is under very high pressure.
All work must be carried out only by a
CITROËN dealer or a qualified workshop
Checking levels
Check all of the following levels regularly in
accordance with the manufacturer's service
schedule. Top them up if required, unless
otherwise indicated.
If a level drops significantly, have the
corresponding system checked by a CITROËN
dealer or a qualified workshop.
The fluids must comply with the manufacturer's requirements and with
the vehicle's engine.
Take care when working under the bonnet, as certain areas of the engine
may be extremely hot (risk of burns) and the
cooling fan could start at any time (even with
the ignition off).
* Depending on engine.
Used products
Avoid prolonged contact of used oil or fluids with the skin.
Most of these fluids are harmful to health and
very corrosive.
Do not discard used oil or fluids into
sewers or onto the ground.
Empty used oil into the containers reserved
for this purpose at a CITROËN dealer or a
qualified workshop.
Engine oil
The level is checked, with the engine having been switched off for at least 30
minutes and on level ground, either using the oil
level indicator in the instrument panel when the
ignition is switched on (for vehicles equipped
with an electric gauge), or using the dipstick.
It is normal to top up the oil level between two
services (or oil changes). It is recommended
that you check the level, and top up if necessary,
every 3,000 miles (5,000 km).
In order to maintain the reliability of the
engine and emissions control system,
never use additives in the engine oil.
Checking using the dipstick
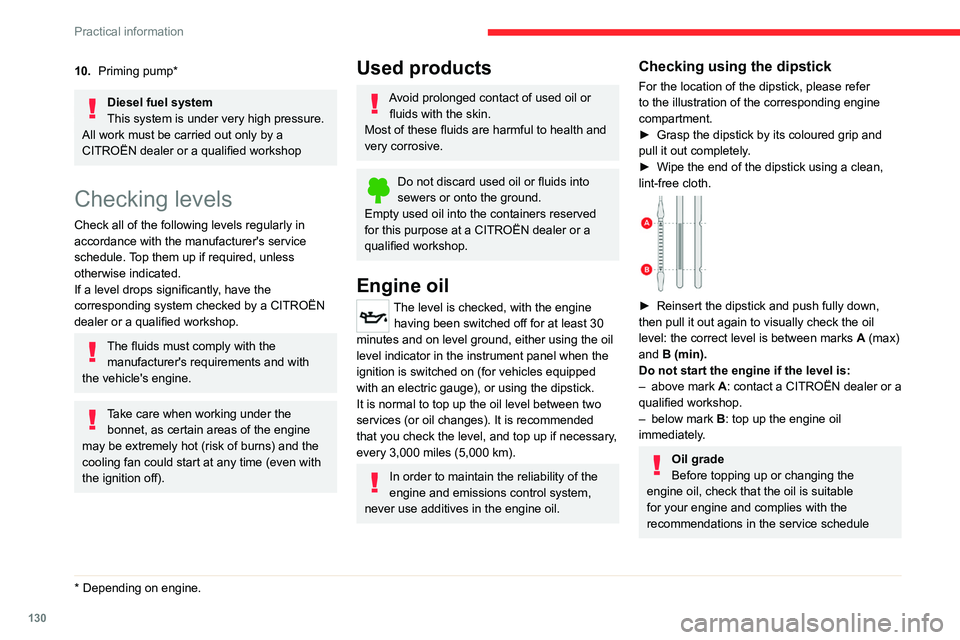
For the location of the dipstick, please refer
to the illustration of the corresponding engine
compartment.
►
Grasp the dipstick by its coloured grip and
pull it out completely
.
►
Wipe the end of the dipstick using a clean,
lint-free cloth.
► Reinsert the dipstick and push fully down,
then pull it out again to visually check the oil
level: the correct level is between marks A
(max)
and B (min).
Do not start the engine if the level is:
–
above mark
A: contact a CITROËN dealer or a
qualified workshop.
–
below mark B
: top up the engine oil
immediately.
Oil grade
Before topping up or changing the
engine oil, check that the oil is suitable
for your engine and complies with the
recommendations in the service schedule
supplied with the vehicle (or available from
your CITROËN dealer or qualified workshop).
Use of non-recommended oil may invalidate
your warranty in the event of engine failure.
Topping up the engine oil level
For the location of the engine oil filler cap, please
refer to the corresponding engine compartment
illustration.
► Add oil in small quantities, avoiding any spills
on engine components (risk of fire).
► Wait a few minutes before checking the level
again using the dipstick.
► Top up the level if necessary.
► After checking the level, carefully screw the
oil filler cap back on and replace the dipstick in
its tube.
The oil level indication displayed on the instrument panel when the ignition is
switched on is not valid for 30 minutes
following an addition of oil.
Brake fluid
The level of this fluid should be close to the "MAX" mark. If not, check the brake
pads for wear.
To know how often the brake fluid should be
replaced, refer to the manufacturer's servicing
schedule.
Page 133 of 244
131
Practical information
7supplied with the vehicle (or available from
your CITROËN dealer or qualified workshop).
Use of non-recommended oil may invalidate
your warranty in the event of engine failure.
Topping up the engine oil level
For the location of the engine oil filler cap, please
refer to the corresponding engine compartment
illustration.
►
Add oil in small quantities, avoiding any spills
on engine components (risk of fire).
►
W
ait a few minutes before checking the level
again using the dipstick.
►
T
op up the level if necessary.
►
After checking the level, carefully screw the
oil filler cap back on
and replace the dipstick in
its tube.
The oil level indication displayed on the instrument panel when the ignition is
switched on is not valid for 30 minutes
following an addition of oil.
Brake fluid
The level of this fluid should be close to the "MAX" mark. If not, check the brake
pads for wear.
To know how often the brake fluid should be
replaced, refer to the manufacturer's servicing
schedule.
Clean the cap before removing it to refill.
Use only DOT4 brake fluid from a sealed
container.
Engine coolant
It is normal to top up this fluid between
two services.
The check and top-up must only be done with
the engine cold.
A level of coolant that is too low risks causing
major damage to the engine; the coolant level
must be close to the "MAX" mark without ever
going above it.
If the level is close to or below the " MIN" mark, it
is essential to top it up.
When the engine is hot, the temperature of the
coolant is regulated by the fan.
As the cooling system is pressurised, wait at
least one hour after switching off the engine
before carrying out any work.
In order to avoid the risk of scalding if you need
to top up in an emergency, wrap a cloth around
the cap and unscrew the cap by two turns to
allow the pressure to drop.
Once the pressure has dropped, remove the cap
and top up to the required level.
Cooling of the engine when stopped
The engine cooling fan may start after
the engine has been switched off.
Take care with objects or clothing that
could be caught in the blades of the fan!
Screenwash fluid
Top up to the required level when necessary.
Fluid specification
The fluid must be topped up with a pre-mixed
product.
In winter (temperatures below zero), a fluid
containing an anti-freeze agent which is
appropriate for the temperature conditions
must be used in order to protect the system's
components (pump, tank, ducts, jets).
Filling with pure water is prohibited in all
circumstances (risk of freezing,
limescale, etc.).
Diesel fuel additive (Diesel
with particle filter)
On reaching the minimum level in the
particle filter additive tank, this warning
lamp comes on fixed, accompanied by an
audible signal and a warning message.
Topping up
The topping up of this additive must be carried
out quickly.
Visit a CITROËN dealer or a qualified workshop.
AdBlue® (BlueHDi)
An alert is triggered when the reserve level is
reached.
Page 138 of 244
136
Practical information
move the electronic key away and deactivate
the "hands-free" function (Hands-Free
Tailgate Access).
When using a pressure washer, keep the jet
nozzle at a minimum distance of 30 cm from
the vehicle (particularly when cleaning areas
containing chipped paint, sensors or seals).
Promptly clean up any stains containing
chemicals liable to damage the vehicle's
paintwork (including tree resin, bird
droppings, insect secretions, pollen and tar).
Depending on the environment, clean the
vehicle frequently to remove salty deposits
(in coastal areas), soot (in industrial areas)
and mud/salts (in wet or cold areas). These
substances can be highly corrosive.
Contact a CITROËN dealer or a qualified
workshop for advice on removing stubborn
stains requiring special products (such as tar
or insect removers).
Preferably, have paint touch-ups performed
by a CITROËN dealer or a qualified
workshop.
Interior
When washing the vehicle, never use a
water hose or high-pressure jet to clean
the interior.
Liquids carried in cups or other open
containers can spill, presenting a risk of
damage to the instruments and controls and
the controls located on the centre console. Be
vigilant!
To clean instrument panels, touch screens
or other displays, wipe gently with a soft,
dry cloth. Do not use products (e.g. alcohol,
disinfectant) or soapy water directly on these
surfaces - risk of damage!
Bodywork
High-gloss paint
Do not use abrasive products, solvents,
petrol or oil to clean the bodywork.
Never use an abrasive sponge to clean
stubborn stains - risk of scratching the
paintwork!
Do not apply polish in strong sunshine, or to
plastic or rubber parts.
Use a soft cloth and soapy water or a pH
neutral product.
Gently wipe the bodywork with a clean
microfibre cloth.
Apply polish with the vehicle clean and dry.
Comply with the instructions for use stated on
the product.
Decals
(Depending on version)
Do not use a high-pressure washer to
clean the vehicle - risk of damaging or
detaching the decals!
Use a high-flow hose (temperature
between 25°C and 40°C).
Place the jet of water perpendicular to the
surface to be cleaned.
Rinse the vehicle with demineralised water.
Page 152 of 244
150
In the event of a breakdown
When the vehicle is towed with its engine off, there is no longer braking and steering assistance.
A professional recovery service must be called in the following cases:
– broken down on a motorway or main road;
– not possible to put the gearbox into neutral, unlock the steering, or release the parking brake;
– not possible to tow a vehicle with an automatic gearbox, with the engine running;
– towing with only two wheels on the ground;
– four-wheel drive vehicle;
– no approved towbar available.
Towing constraints
Type of vehicle
(engine/gearbox) Front wheels on the
ground Rear wheels on the
ground Flatbed
4 wheels on the ground
with towbar
Internal combustion/Manual
Internal combustion/Automatic
In case of battery or electric parking brake failure, it is essential to call a p
rofessional using flatbed recovery vehicles (excluding manual gearbox).
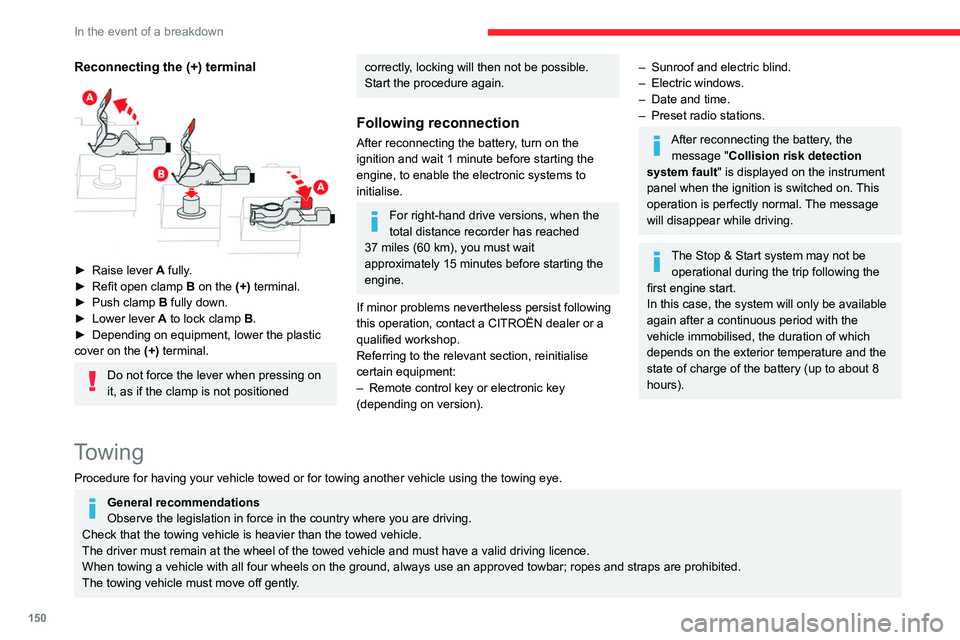
Reconnecting the (+) terminal
► Raise lever A fully.
► Refit open clamp B on the (+) terminal.
►
Push clamp
B fully down.
►
Lower lever
A
to lock clamp B.
►
Depending on equipment, lower the plastic
cover on the
(+) terminal.
Do not force the lever when pressing on
it, as if the clamp is not positioned
correctly, locking will then not be possible.
Start the procedure again.
Following reconnection
After reconnecting the battery, turn on the
ignition and wait 1 minute before starting the
engine, to enable the electronic systems to
initialise.
For right-hand drive versions, when the
total distance recorder has reached
37
miles (60 km), you must wait
approximately 15
minutes before starting the
engine.
If minor problems nevertheless persist following
this operation, contact a CITROËN dealer or a
qualified workshop.
Referring to the relevant section, reinitialise
certain equipment:
–
Remote control key or electronic key
(depending on version).
– Sunroof and electric blind.
– Electric windows.
–
Date and time.
–
Preset radio stations.
After reconnecting the battery, the message "Collision risk detection
system fault" is displayed on the instrument
panel when the ignition is switched on. This
operation is perfectly normal. The message
will disappear while driving.
The Stop & Start system may not be operational during the trip following the
first engine start.
In this case, the system will only be available
again after a continuous period with the
vehicle immobilised, the duration of which
depends on the exterior temperature and the
state of charge of the battery (up to about 8
hours).
Towing
Procedure for having your vehicle towed or for towing another vehicle using the towing eye.
General recommendations
Observe the legislation in force in the country where you are driving.
Check that the towing vehicle is heavier than the towed vehicle.
The driver must remain at the wheel of the towed vehicle and must have a valid driving licence.
When towing a vehicle with all four wheels on the ground, always use an approved towbar; ropes and straps are prohibited.
The towing vehicle must move off gently.
Page 161 of 244
159
Bluetooth® audio system
10Bluetooth® audio system
The different functions and settings described vary according to the version
and configuration of your vehicle.
As a safety measure and because it requires sustained attention by the driver,
the pairing of a Bluetooth mobile telephone
with the Bluetooth hands-free system of your
audio system must be done with the vehicle
stationary and the ignition on.
Your audio system is coded in such a way that it will only operate in your
vehicle.
All work on the system must be carried out
exclusively by a dealer or qualified workshop,
to avoid any risk of electrocution, fire or
mechanical faults.
To avoid discharging the battery, the audio system may switch off after a few
minutes if the engine is not running.
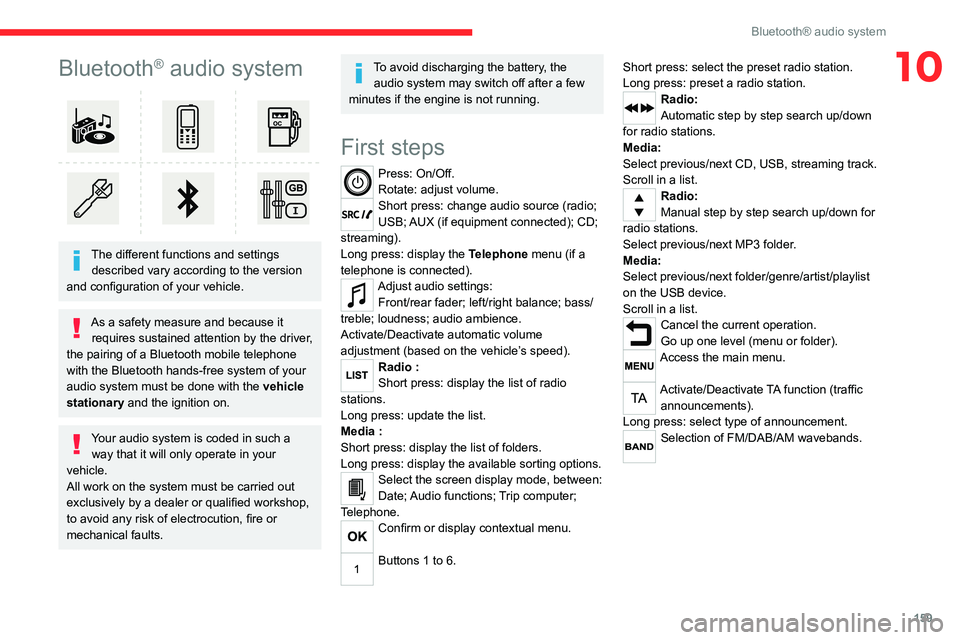
First steps
Press: On/Off.
Rotate: adjust volume.
Short press: change audio source (radio;
USB; AUX (if equipment connected); CD;
streaming).
Long press: display the Telephone menu (if a
telephone is connected).
Adjust audio settings: Front/rear fader; left/right balance; bass/
treble; loudness; audio ambience.
Activate/Deactivate automatic volume
adjustment (based on the vehicle’s speed).
Radio :
Short press: display the list of radio
stations.
Long press: update the list.
Media
:
Short press: display the list of folders.
Long press: display the available sorting options.
Select the screen display mode, between:
Date; Audio functions; Trip computer;
Telephone.
Confirm or display contextual menu.
Buttons 1 to 6. Short press: select the preset radio station.
Long press: preset a radio station.
Radio:
Automatic step by step search up/down
for radio stations.
Media:
Select previous/next CD, USB, streaming track.
Scroll in a list.
Radio:
Manual step by step search up/down for
radio stations.
Select previous/next MP3 folder.
Media:
Select previous/next folder/genre/artist/playlist
on the USB device.
Scroll in a list.
Cancel the current operation.
Go up one level (menu or folder).
Access the main menu.
Activate/Deactivate TA function (traffic announcements).
Long press: select type of announcement.
Selection of FM/DAB/AM wavebands.
Page 162 of 244
160
Bluetooth® audio system
"Telephone": Call, Directory
management, Telephone management,
Hang up.
"Trip computer".
"Maintenance": Diagnosis, Warning log,
etc.
"Connections": Manage connections,
search for devices.
"Personalisation-configuration ": Define
the vehicle parameters, Choice of
language, Display configuration, Choice of units,
Date and time adjustment.
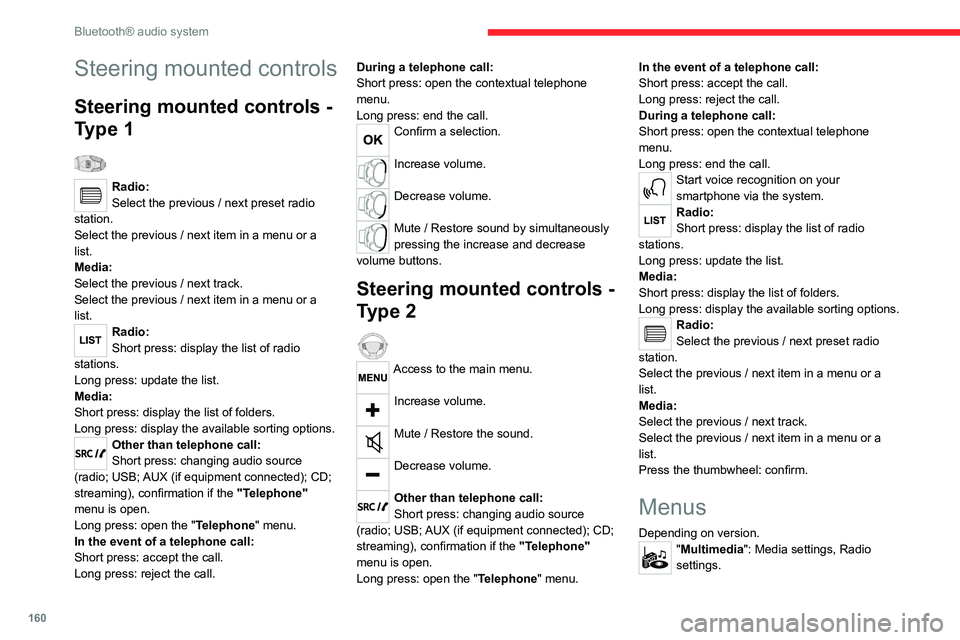
Press the "MENU" button.
Move from one menu to another.
Enter a menu.
Radio
Selecting a station
Press the SOURCE button repeatedly
and select the radio.
Press this button to select a waveband
(FM / AM / DAB).
Press one of the buttons for an automatic
search for radio stations.
Press one of the buttons to carry out a
manual search up / down for radio
frequencies.
Steering mounted controls
Steering mounted controls -
Type 1
Radio:
Select the previous / next preset radio
station.
Select the previous / next item in a menu or a
list.
Media:
Select the previous / next track.
Select the previous / next item in a menu or a
list.
Radio:
Short press: display the list of radio
stations.
Long press: update the list.
Media:
Short press: display the list of folders.
Long press: display the available sorting options.
Other than telephone call:
Short press: changing audio source
(radio; USB; AUX (if equipment connected); CD;
streaming), confirmation if the "Telephone"
menu is open.
Long press: open the " Telephone" menu.
In the event of a telephone call:
Short press: accept the call.
Long press: reject the call. During a telephone call:
Short press: open the contextual telephone
menu.
Long press: end the call.
Confirm a selection.
Increase volume.
Decrease volume.
Mute / Restore sound by simultaneously
pressing the increase and decrease
volume buttons.
Steering mounted controls -
Type 2
Access to the main menu.
Increase volume.
Mute / Restore the sound.
Decrease volume.
Other than telephone call:
Short press: changing audio source
(radio; USB; AUX (if equipment connected); CD;
streaming), confirmation if the "Telephone"
menu is open.
Long press: open the " Telephone" menu. In the event of a telephone call:
Short press: accept the call.
Long press: reject the call.
During a telephone call:
Short press: open the contextual telephone
menu.
Long press: end the call.
Start voice recognition on your
smartphone via the system.
Radio:
Short press: display the list of radio
stations.
Long press: update the list.
Media:
Short press: display the list of folders.
Long press: display the available sorting options.
Radio:
Select the previous / next preset radio
station.
Select the previous / next item in a menu or a
list.
Media:
Select the previous / next track.
Select the previous / next item in a menu or a
list.
Press the thumbwheel: confirm.
Menus
Depending on version."Multimedia": Media settings, Radio
settings.
Page 163 of 244
161
Bluetooth® audio system
10"Telephone": Call, Directory
management, Telephone management,
Hang up.
"Trip computer".
"Maintenance": Diagnosis, Warning log,
etc.
"Connections": Manage connections,
search for devices.
"Personalisation-configuration ": Define
the vehicle parameters, Choice of
language, Display configuration, Choice of units,
Date and time adjustment.
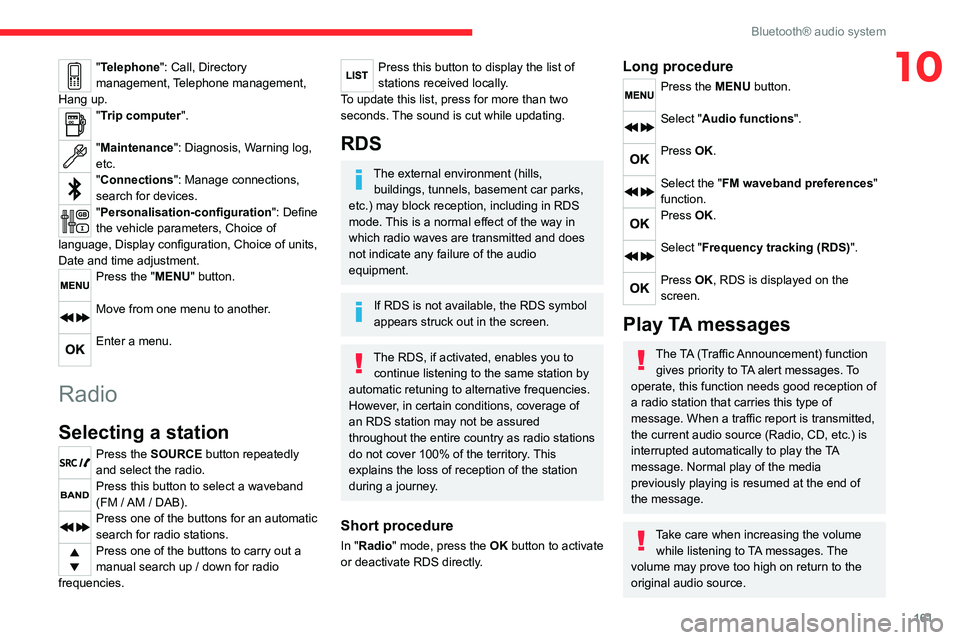
Press the "MENU" button.
Move from one menu to another.
Enter a menu.
Radio
Selecting a station
Press the SOURCE button repeatedly
and select the radio.
Press this button to select a waveband
(FM / AM / DAB).
Press one of the buttons for an automatic
search for radio stations.
Press one of the buttons to carry out a
manual search up / down for radio
frequencies.
Press this button to display the list of
stations received locally.
To update this list, press for more than two
seconds. The sound is cut while updating.
RDS
The external environment (hills, buildings, tunnels, basement car parks,
etc.) may block reception, including in RDS
mode. This is a normal effect of the way in
which radio waves are transmitted and does
not indicate any failure of the audio
equipment.
If RDS is not available, the RDS symbol
appears struck out in the screen.
The RDS, if activated, enables you to continue listening to the same station by
automatic retuning to alternative frequencies.
However, in certain conditions, coverage of
an RDS station may not be assured
throughout the entire country as radio stations
do not cover 100% of the territory. This
explains the loss of reception of the station
during a journey.
Short procedure
In "Radio" mode, press the OK button to activate
or deactivate RDS directly.
Long procedure
Press the MENU button.
Select "Audio functions ".
Press OK.
Select the "FM waveband preferences"
function.
Press OK.
Select "Frequency tracking (RDS)".
Press OK, RDS is displayed on the
screen.
Play TA messages
The TA (Traffic Announcement) function
gives priority to TA alert messages. To
operate, this function needs good reception of
a radio station that carries this type of
message. When a traffic report is transmitted,
the current audio source (Radio, CD, etc.) is
interrupted automatically to play the TA
message. Normal play of the media
previously playing is resumed at the end of
the message.
Take care when increasing the volume while listening to TA messages. The
volume may prove too high on return to the
original audio source.
Page 164 of 244
162
Bluetooth® audio system
When the radio station is displayed in the
screen , press "OK" to display the
contextual menu.
(Frequency search (RDS), DAB / FM auto
tracking, RadioText (TXT) display, Information
on the station, etc.)
DAB / FM station tracking
"DAB" does not have 100% coverage of
the country.
When the digital signal is weak, "DAB / FM
auto tracking" allows you to continue
listening to the same station, by automatically
switching to the corresponding analogue FM
station (if it exists).
When the "DAB / FM auto tracking" is active,
the DAB station will be selected automatically.
Press the MENU button.
Select "Multimedia" and confirm.
Select "DAB / FM auto tracking" and
confirm.
If "DAB / FM auto tracking" tracking is
enabled, there is a lag of a few seconds
when the system switches to the analogue
FM station sometimes with a change in
volume.
Press the TA button to activate or
deactivate traffic messages.
Receiving INFO messages
The INFO function gives priority to TA alert messages. To be active, this
function needs good reception of a radio
station that transmits this type of message.
When a message is transmitted, the current
audio source (Radio, CD, USB, etc.) is
interrupted automatically to receive the INFO
message. Normal play of the media
previously playing is resumed at the end of
the message.
Make a long press on this button to
display the list of categories.
Select or deselect categories.
Activate or deactivate the reception of the corresponding messages.
Display TEXT INFOS
Radio text is information transmitted by
the radio station related to the station's
current programme or song.
When the radio station is displayed in the
screen, press OK to display the
contextual menu.
Select "RadioText (TXT) display" and
confirm OK to save.
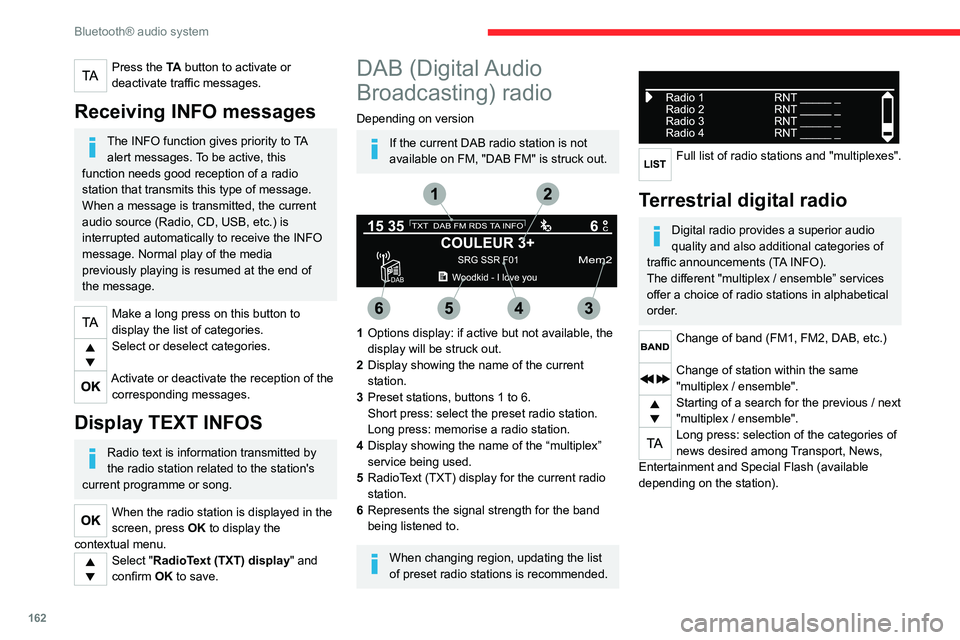
DAB (Digital Audio
Broadcasting) radio
Depending on version
If the current DAB radio station is not
available on FM, "DAB FM" is struck out.
1 Options display: if active but not available, the
display will be struck out.
2 Display showing the name of the current
station.
3 Preset stations, buttons 1 to 6.
Short press: select the preset radio station.
Long press: memorise a radio station.
4 Display showing the name of the “multiplex”
service being used.
5 RadioText (TXT) display for the current radio
station.
6 Represents the signal strength for the band
being listened to.
When changing region, updating the list
of preset radio stations is recommended.
Full list of radio stations and "multiplexes".
Terrestrial digital radio
Digital radio provides a superior audio
quality and also additional categories of
traffic announcements (TA INFO).
The different "multiplex / ensemble” services
offer a choice of radio stations in alphabetical
order.
Change of band (FM1, FM2, DAB, etc.)
Change of station within the same
"multiplex / ensemble".
Starting of a search for the previous / next
"multiplex / ensemble".
Long press: selection of the categories of
news desired among Transport, News,
Entertainment and Special Flash (available
depending on the station).