navigation system Citroen C4 2015 2.G Owner's Manual
[x] Cancel search | Manufacturer: CITROEN, Model Year: 2015, Model line: C4, Model: Citroen C4 2015 2.GPages: 494, PDF Size: 20.49 MB
Page 46 of 494
44
C4-2_en_Chap02_ecran-multifonction_ed01-2015
C4-2_en_Chap02_ecran-multifonction_ed01-2015
Touch screen tablet
General operation
Principles
Press the virtual buttons in the touch screen
tablet.
Each menu is displayed over one or two pages
(
primary page and secondary page).
For reasons of safety, the driver
should only carr y out operations
that require close attention, with the
vehicle stationary.
Some
functions
are
not
accessible
w
hen
d
riving.
This
system
gives
access
to:
-
m
enus
for
adjusting
settings
for
vehicle
f
unctions
and
systems,
-
a
udio
and
display
settings
menus,
-
a
udio
system
and
telephone
controls
and
t
he
display
of
associated
information.
-
t
he
display
of
alert
messages,
-
t
he
display
of
the
ambient
temperature
(a
blue
snowflake
appears
if
there
is
a
risk
o
f
ice),
-
t
he
display
of
the
trip
computer.
And,
depending
on
equipment,
it
also
allows:
-
t
he
display
of
visual
parking
sensors
i
nformation,
-
a
ccess
to
the
controls
for
the
navigation
s
ystem
and
Internet
services,
and
the
d
isplay
of
associated
information.
Recommendations
It is necessary to press firmly, particularly for " flick" gestures (scrolling through lists, moving
t
he
m
ap...).
A
light wipe is not enough.
The
screen does not recognise pressing with
m
ore than one finger.
This
technology allows use at all temperatures
a
nd when wearing gloves.
Do
not use pointed objects on the touch screen
t
ablet.
do n
ot touch the touch screen tablet with wet
hands.
Uses
a soft clean cloth to clean the touch
s
creen
t
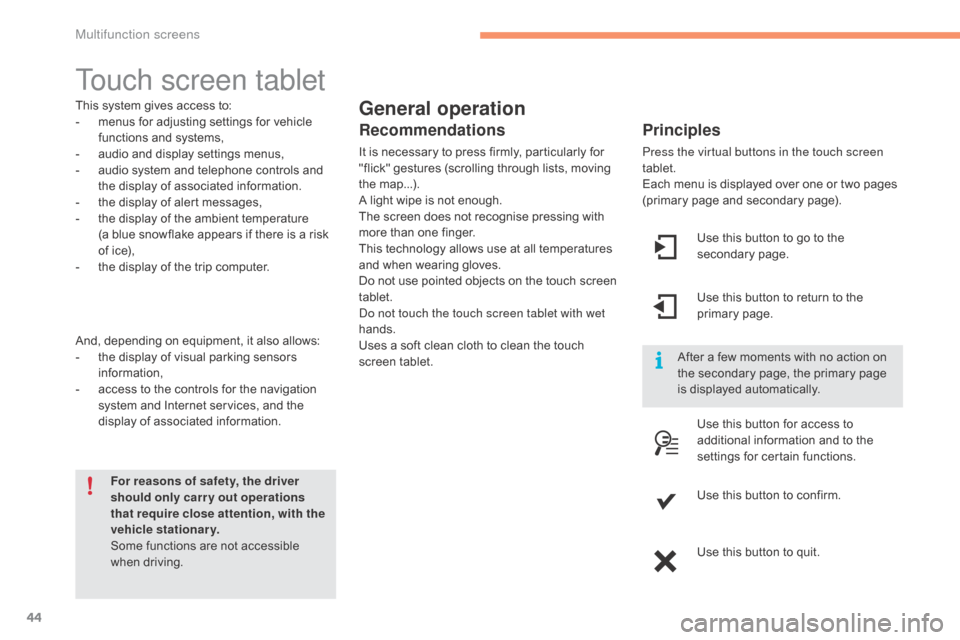
ablet. Use
this button to go to the
s
econdary
pag
e.
After
a few moments with no action on
t
he secondary page, the primary page
i
s displayed automatically.
Use
this button to return to the
p
rimary
pag
e.
Use
this button for access to
a
dditional information and to the
s
ettings for certain functions.
Use
this button to confirm.
Use
this button to quit.
Multifunction screens
Page 47 of 494
45
C4-2_en_Chap02_ecran-multifonction_ed01-2015
C4-2_en_Chap02_ecran-multifonction_ed01-2015
Menus
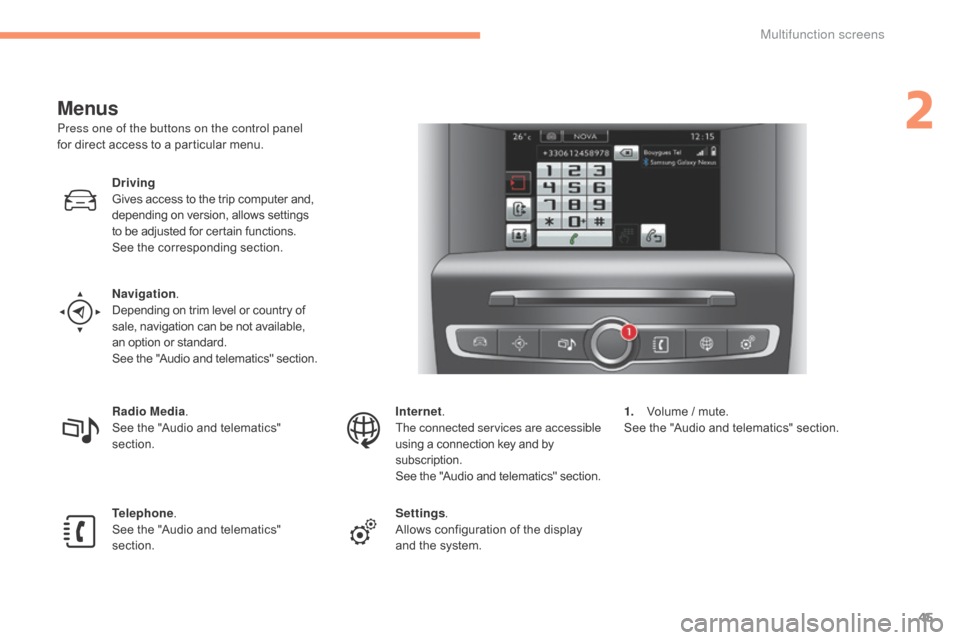
Press one of the buttons on the control panel
for direct access to a particular menu.
Driving
Gives
access to the trip computer and,
d
epending on version, allows settings
t
o be adjusted for certain functions.
See
the corresponding section.
Navigation .
Depending
on trim level or country of
s
ale, navigation can be not available,
a
n option or standard.
See
t
he
"
Audio
a
nd
t
elematics"
se
ction.
Radio Media .
See
the "Audio and telematics"
s
ection.
Telephone .
See
the "Audio and telematics"
s
ection. Internet.
The connected services are accessible
using
a connection key and by
s
ubscription.
See
t
he
"
Audio
a
nd
t
elematics"
se
ction.
Settings .
Allows
configuration of the display
a
nd the system.1.
V
olume / mute.
See
the "Audio and telematics" section.
2
Multifunction screens
Page 261 of 494
259
C4-2_en_Chap11_info-pratique_ed01-2015
C4-2_en_Chap11_info-pratique_ed01-2015
Charging the battery using
a battery charger
F Disconnect the battery from the vehicle.
F F ollow the instructions for use provided by
the
manufacturer of the charger.
F
C
onnect the battery starting with the
n
egative terminal (-).
F
C
heck that the terminals and connectors
a
re clean. If they are covered
w
ith
s
ulphate
(
whitish or greenish deposit), remove them
a
nd clean them.
Reinitialisation after
reconnection
after any reconnection of the battery, switch on
the ignition and wait at least one minute before
s
tarting, to allow time for the initialisation of the
e
lectronic systems.
By
referring to the corresponding sections, you
s
hould set or initialise the following systems
y
ourself:
-
o
ne-touch electric windows,
-
t
ime and date,
-
a
udio and navigation system settings.
Check
that no alert message or warning lamp
c
omes on after switching on the ignition.
However,
if minor problems persist after
c
arrying out these operations, contact a
C
ITROËN dealer or a qualified workshop.
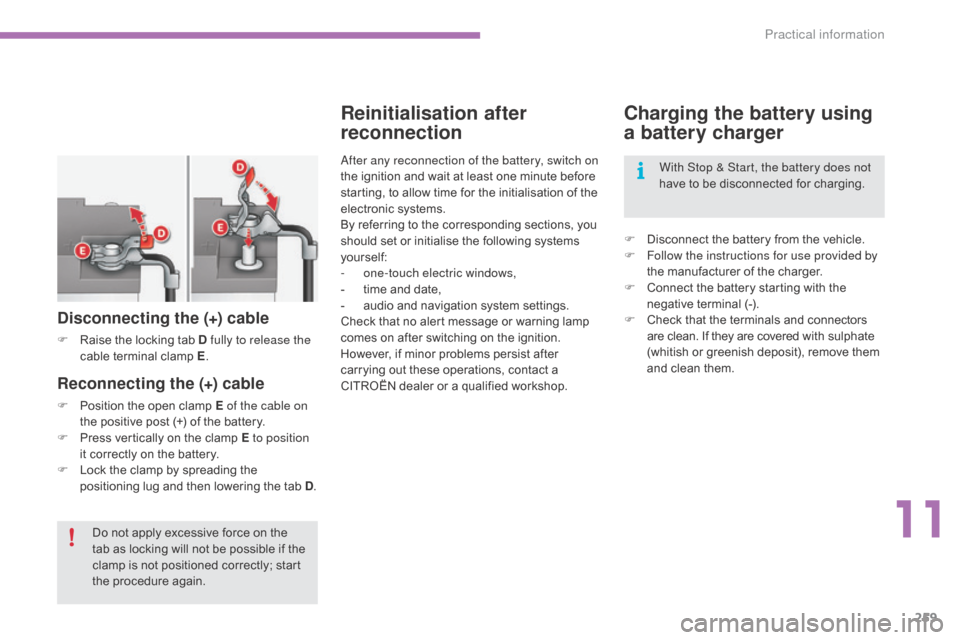
Reconnecting the (+) cable
F Position the open clamp E of the cable on
the positive post (+) of the battery.
F
P
ress vertically on the clamp E to position
it
correctly on the battery.
F
L
ock the clamp by spreading the
p
ositioning lug and then lowering the tab D.
Disconnecting the (+) cable
F Raise the locking tab D fully to release the
cable t erminal c lamp E.
D
o not apply excessive force on the
t
ab as locking will not be possible if the
c
lamp is not positioned correctly; start
t
he procedure again. With Stop & Start, the battery does not
have
to be disconnected for charging.
11
Practical information
Page 262 of 494
260
C4-2_en_Chap11_info-pratique_ed01-2015
C4-2_en_Chap11_info-pratique_ed01-2015
Load reduction modeE nergy ec onomy m ode
Switching to economy mode
Once this period has elapsed, a message a
ppears in the screen indicating that the
v
ehicle has switched to economy mode and the
a
ctive functions are put on standby.
Exiting economy mode
These functions are reactivated automatically the next time the vehicle is driven.
F
I
n order to resume the use of these functions
i
mmediately, start the engine and let it run for a
f
ew
m
inutes.
The
time available to you will then be double
t
he period for which the engine is left running.
H
owever, this period will always be between
five
and thirty minutes.
System
which
manages
the
use
of
certain
f
unctions
according
to
the
level
of
charge
r
emaining
in
the
battery.
When
the
vehicle
is
being
driven,
the
load
r
eduction
function
temporarily
deactivates
c
ertain
functions,
such
as
the
air
conditioning,
t
he
heated
rear
screen...
The deactivated functions are reactivated
automatically
as
soon
as
conditions
permit. System
which
manages
the
period
of
use
of
certain
functions to conserve a sufficient level of
c
harge
in
the
battery.
After
the
engine
has
stopped,
you
can
still
use
functions such as the audio equipment, windscreen
w
ipers,
dipped
beam
headlamps,
courtesy
lamps,
etc. for
a m
aximum
c
ombined
p
eriod
o
f
t
hirty
m
inutes.
A flat battery prevents the engine from
s
tarting (refer to the corresponding
par
agraph).
This
period
may
be
greatly
reduced
if
t
he
battery
is
not
fully
charged.
If
the
telephone
is
being
used
at
the
s
ame
time
on
the
navigation
system,
i
t
w
ill
be
interrupted
after
1
0
m
inutes.
Practical information
Page 276 of 494
274
C4-2_en_Chap11_info-pratique_ed01-2015
C4-2_en_Chap11_info-pratique_ed01-2015
"Multimedia":
audio systems, steering mounted audio controls, speakers, Hi-Fi module, Bluetooth
h
ands-free system, portable satellite navigation
s
ystem, semi-integral support bracket for
p
ortable navigation system, mapping update
C
D, driving assistant, portable video screen,
p
ortable video support bracket, 230 V/50 Hz
s
ocket, 230 V/50 Hz adaptor, iPhone
®
compatible
mobile
phone
charger,
mobile
p
hone/smartphone
bracket,
Wi-Fi
on
board...
By
going to a CITROËN dealer, you can also
o
btain cleaning and maintenance products
(
interior and exterior) - including ecological
p
roducts in the "TECHNATURE" range -,
p
roducts for topping up (screenwash...), touch-
up
pens and paint aerosols for the exact colour
o
f your vehicle, recharges (cartridge for the
t
emporary puncture repair kit...), ...
Installation of radio
communication
transmitters
Before installing any after-market radio communication transmitter, you can
c
ontact a CITR
oËn
dealer for the
specification
of transmitters which can
b
e fitted (frequency, maximum power,
a
erial position, specific installation
requirements),
in line with the Vehicle
E
lectromagnetic
C
ompatibility
D
irective (2004/104/EC). The
fitting of electrical equipment or
a
ccessories which are not recommended
b
y CITROËN may result in a failure of
y
our vehicle's electronic system and
e
xcessive electrical consumption.
Contact a CITR
oËn
dealer
for
information on the range of
r
ecommended equipment and
a
ccessories.
Depending
on the legislation in force in
t
he country, certain safety equipment
m
ay be compulsory: high visibility s
afety vests, warning triangles, b
reathalyzers, spare bulbs, spare fuses,
fire
extinguisher, first aid kit, mud flaps
a
t the rear of the vehicle.
Practical information
Page 291 of 494
289
C4-2_en_Chap13b_SMEGplus_ed01-2015
C4-2_en_Chap13b_SMEGplus_ed01-2015
The system is protected in such a way that it will only operate in your vehicle.
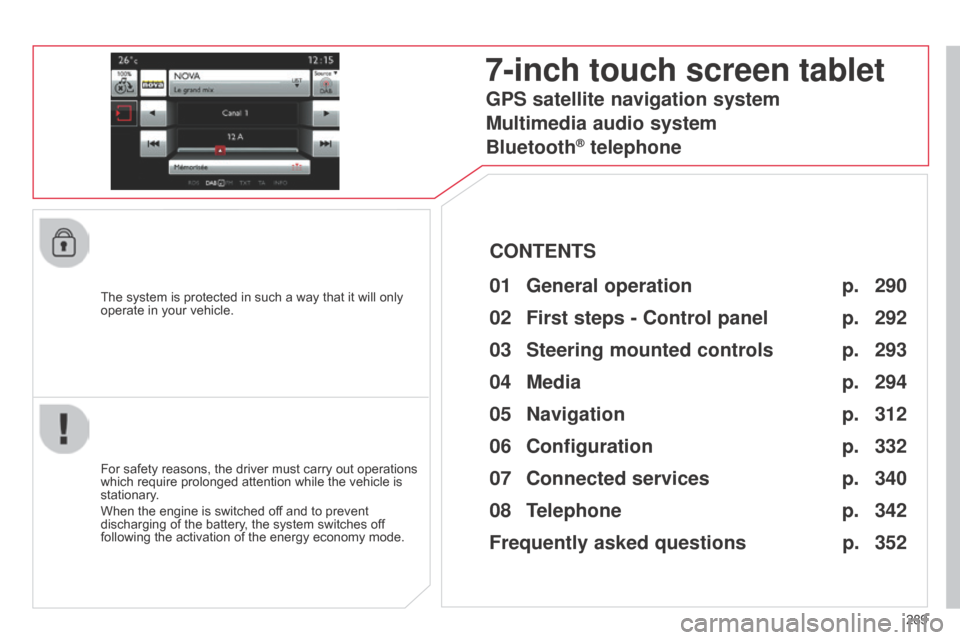
7-inch touch screen tablet
01 General operation
For safety reasons, the driver must carry out operations which
require prolonged attention while the vehicle is
stationary
.
When
the engine is switched off and to prevent
discharging
of the battery, the system switches off
following
the activation of the energy economy mode.
CONTENTS
02
First steps - Control
panel
04
Media
05
Navigation
06
Configuration
07
Connected service
s
08
Telephone p.
p.
p.
p.
p.
p.
p.
Frequently asked questions p.
GPS satellite navigation system
Multimedia audio system
Bluetooth
® telephone
290
292
312 294
332
340
342
352
03
Steering mounted
controls p. 293
Page 294 of 494
02
292
C4-2_en_Chap13b_SMEGplus_ed01-2015
C4-2_en_Chap13b_SMEGplus_ed01-2015
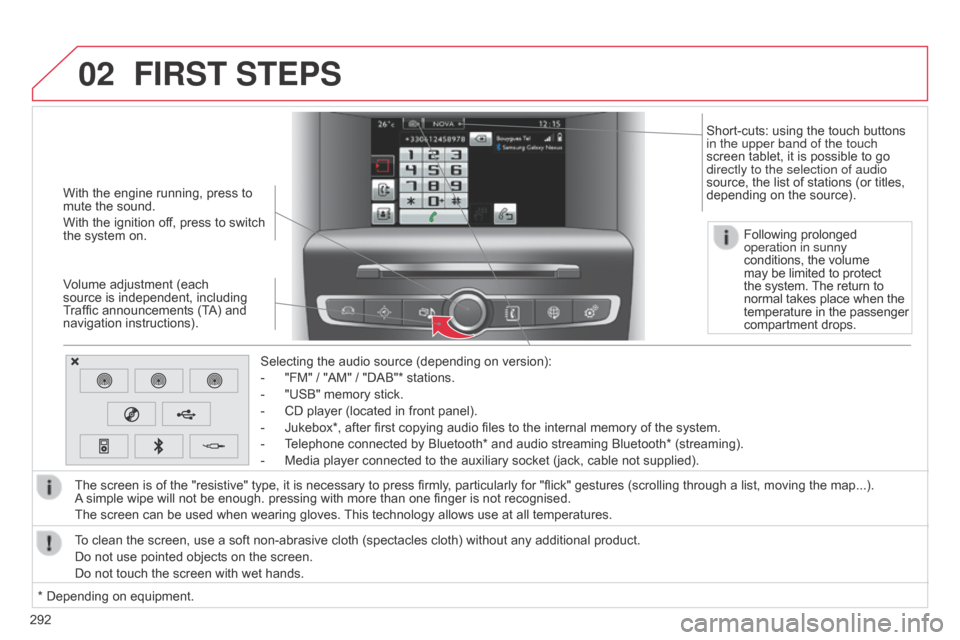
With the engine running, press to mute the sound.
With
the ignition off, press to switch
the
system on.
Volume
adjustment (each
source
is independent, including
T
raffic announcements (TA) and
navigation
instructions). Selecting
the audio source (depending on version):
-
"FM"
/ "AM" / "DAB"* stations.
-
"USB"
memory stick.
-
CD
player (located in front panel).
-
Jukebox*,
after first copying audio files to the internal memory of the system.
-
T
elephone connected by Bluetooth* and audio streaming Bluetooth* (streaming).
-
Media
player connected to the auxiliary socket (jack, cable not supplied).
The
screen is of the "resistive" type, it is necessary to press firmly, particularly for "flick" gestures (scrolling through a list, moving the map...).
A
simple wipe will not be enough. pressing with more than one finger is not recognised.
The
screen can be used when wearing gloves.
This
technology allows use at all temperatures.
FIRST STEPS
* Depending on equipment.
T o clean the screen, use a soft non-abrasive cloth (spectacles cloth) without any additional product.
Do not use pointed objects on the screen.
Do not touch the screen with wet hands. Following prolonged
operation in sunny
conditions, the volume
may
be limited to protect
the
system.
The
return to
normal
takes place when the
temperature
in the passenger
compartment
drops.
Short-cuts: using the touch buttons
in the upper band of the touch
screen
tablet, it is possible to go
directly to the selection of audio
source,
the list of stations (or titles,
depending
on the source).
Page 320 of 494
05
318
C4-2_en_Chap13b_SMEGplus_ed01-2015
C4-2_en_Chap13b_SMEGplus_ed01-2015
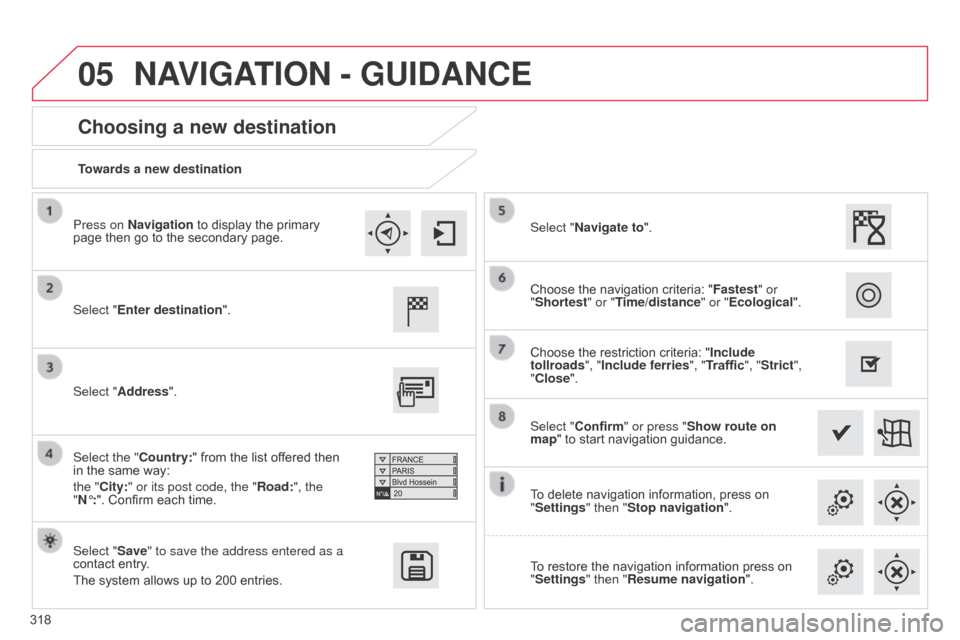
Towards a new destination
Choosing a new destination
Select "Enter destination".
Select "Save" to save the address entered as a
contact entry.
The
system allows up to 200 entries. Select "Confirm" or press "Show route on
map"
to start navigation guidance.
Select "Address".
Select the "Country:"
from the list offered then
in
the same way:
the "
City:" or its post code, the "Road:", the
"N°:".
Confirm each time. Select "Navigate to".
Choose
the restriction criteria: "Include
tollroads", "Include ferries", "Traffic", "Strict",
"Close". Choose the navigation criteria: "
Fastest" or
"Shortest" or "Time/distance" or "Ecological ".
To delete navigation information, press on
"
Settings" then "Stop navigation".
To
restore the navigation information press on
"
Settings" then "Resume navigation".
Press on Navigation
to display the primary
page
then go to the secondary page.
NAVIGATION - GUIDANCE
Page 321 of 494
05
319
C4-2_en_Chap13b_SMEGplus_ed01-2015
C4-2_en_Chap13b_SMEGplus_ed01-2015
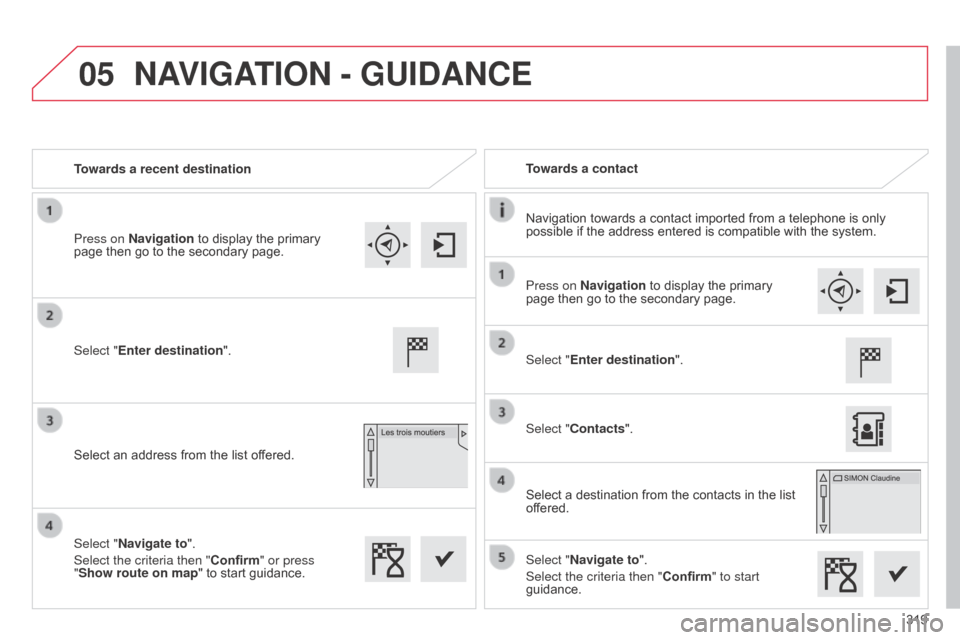
Towards a recent destinationTowards a contact
Navigation
towards a contact imported from a telephone is only
possible
if the address entered is compatible with the system.
Select "Enter destination".
Select
an address from the list offered. Select "Enter destination".
Select "Contacts".
Select
a destination from the contacts in the list
of
fered.
Select "Navigate to".
Select the criteria then "Confirm" to start
guidance.
Select "Navigate to".
Select the criteria then "Confirm" or press
"Show route on map
"
to start guidance.
Press on Navigation
to display the primary
page
then go to the secondary page. Press on Navigation
to display the primary
page
then go to the secondary page.
NAVIGATION - GUIDANCE
Page 325 of 494
05
323
C4-2_en_Chap13b_SMEGplus_ed01-2015
C4-2_en_Chap13b_SMEGplus_ed01-2015
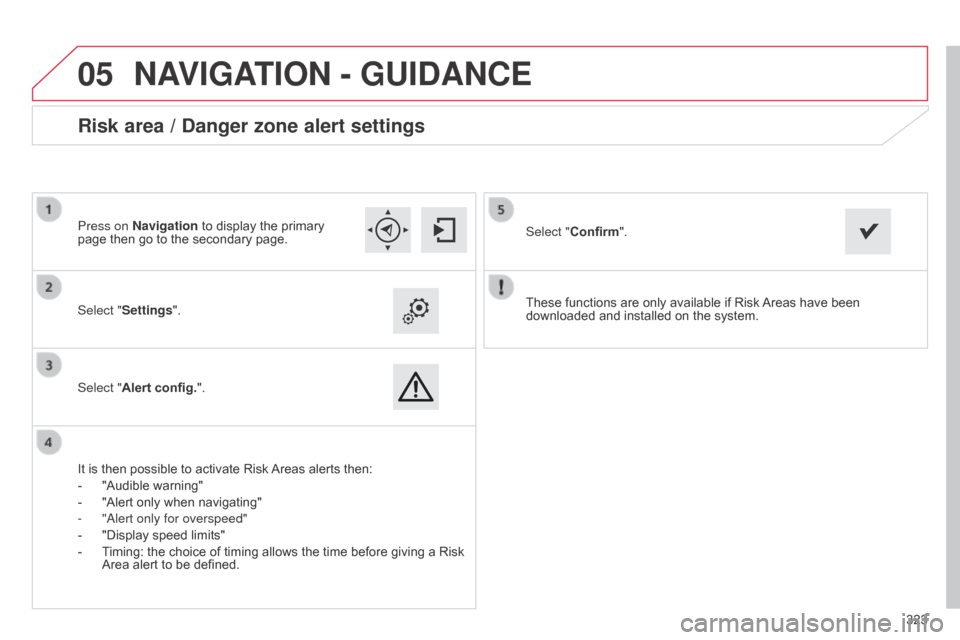
These functions are only available if Risk Areas have been downloaded
and installed on the system.
Select "Settings".
Select "Alert config.".
Risk area / Danger zone alert settings
It is then possible to activate Risk Areas
alerts then:
-
"Audible
warning"
-
"Alert
only when navigating"
-
"
a lert only for overspeed"
-
"Display
speed limits"
-
T
iming: the choice of timing allows the time before giving a Risk
Area
alert to be defined. Select "Confirm".
Press on Navigation to display the primary
page
then go to the secondary page.
NAVIGATION - GUIDANCE