headlamp Citroen C4 2016 2.G User Guide
[x] Cancel search | Manufacturer: CITROEN, Model Year: 2016, Model line: C4, Model: Citroen C4 2016 2.GPages: 396, PDF Size: 10.22 MB
Page 126 of 396
124
C4-2_en_Chap04_eclairage-et-visibilite_ed02-2015
Lighting controls
Main lighting
The various front and rear lamps of the vehicle are designed to adapt the driver's visibility
p
rogressively according to the climatic
c
onditions:
-
s
idelamps, to be seen,
-
d
ipped beam headlamps to see without
d
azzling
o
ther
d
rivers,
-
m
ain beam headlamps to see clearly when
t
he road is clear.
Additional lighting
Other lamps are provided to meet the requirements of particular driving conditions:
-
r
ear
fo
glamps,
-
f
ront foglamps with cornering lighting,
-
d
irectional headlamps for improved
v
isibility
w
hen
c
ornering,
-
d
aytime running lamps to be more visible
d
uring the day,
-
g
uide-me-home and welcome lighting to
f
acilitate access to the vehicle,
-
p
arking lamps as vehicle position markers.
Settings
The setting of some functions can be adjusted:
- a utomatic illumination of headlamps,
-
g
uide-me-home lighting,
-
w
elcome lighting,
-
d
irectional
l
ighting.
In
some
weather
conditions
(e.g.
low
t
emperature
or
humidity),
the
presence
o
f
misting
on
the
internal
sur face
of
the
g
lass
of
the
headlamps
and
rear
lamps
i
s
normal;
it
disappears
after
the
lamps
h
ave
been
on
for
a
few
minutes.
System
for
selection
and
control
of
the
various
front
and
rear
lamps
providing
the
vehicle's
lighting.
Travelling abroad
Halogen and xenon headlamps
If
planning to use your vehicle in a
c
ountry that drives on the other side of
the
road, the headlamp dipped beams
m
ust be adjusted to avoid dazzling on-
coming
d
rivers.
Contact a CITROËN dealer or
a qualified
workshop.
Lighting and visibility
Page 127 of 396
125
C4-2_en_Chap04_eclairage-et-visibilite_ed02-2015
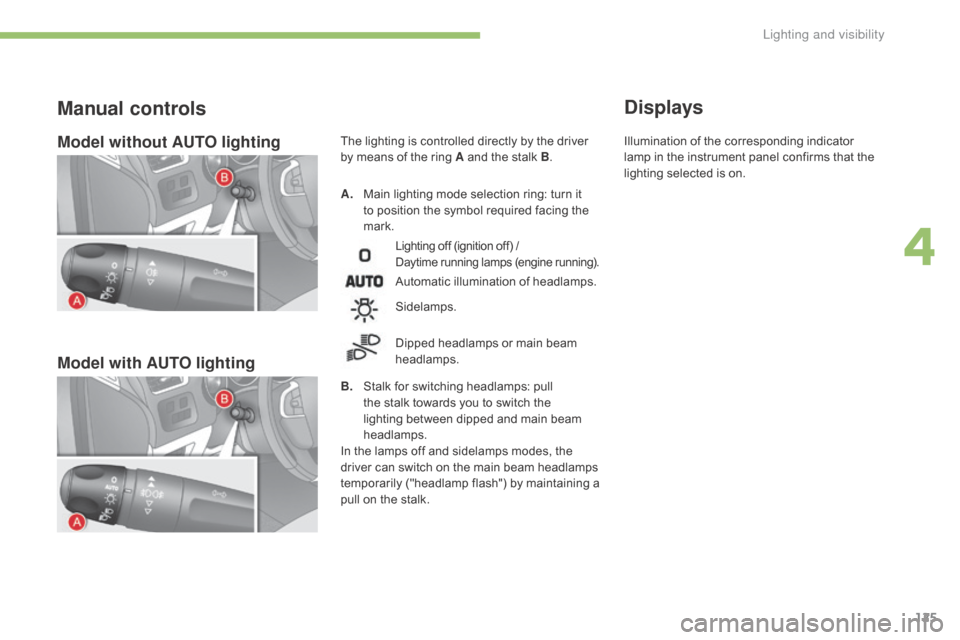
Model without AUTO lighting
Model with AUTO lighting
A. Main lighting mode selection ring: turn it t
o position the symbol required facing the
ma
rk.
Manual controls
Lighting off (ignition off) /
D aytime running lamps (engine running).
Automatic illumination of headlamps.
B.
S
talk
for switching headlamps: pull
t
he
stalk towards you to switch the
l
ighting between dipped and main beam
h
eadlamps.
In
the
lamps off and sidelamps modes, the
d
river
can
switch on the main beam headlamps
t
emporarily ("headlamp flash") by maintaining a
p
ull
on
the stalk.
Sidelamps.
Dipped
headlamps or main beam
h
eadlamps.
Displays
The lighting is controlled directly by the driver by means of the ring A and the stalk B. Illumination
of the corresponding indicator l
amp in the instrument panel confirms that the
l
ighting selected is on.
4
Lighting and visibility
Page 128 of 396

126
C4-2_en_Chap04_eclairage-et-visibilite_ed02-2015
C. Foglamp selection ring.
The foglamps operate with the dipped and main
b
eam
h
eadlamps.
They
operates with the dipped beam
h
eadlamps and main beam headlamps.
F
T
o switch on the rear foglamps, turn the
r
ing C
fo
rwards.
F
T
o switch off the rear foglamps, turn the
r
ing C
r
earwards.Model with rear foglamps only
rear foglamps Rotate and release the ring C:
F
f
or wards a first time to switch on the front
fo
glamps,
F
f
or wards a second time to switch on the
r
ear
fo
glamps,
F
r
ear wards a first time to switch off the rear
fo
glamps,
F
r
ear wards a second time to switch of the
f
ront fog lamps.
Model with front and rear
foglamps
front and rear foglamps
W
hen
the
headlamps switch off with automatic
i
llumination of headlamps (AUTO model)
o
r
when
the dipped beam headlamps are
s
witched
off manually, the foglamps and
si
delamps
re
main
o
n.
F
T
urn
the ring rear wards to switch off
t
he
foglamps, the sidelamps will then
s
witch off.
When
automatic
illumination
of
headlamps
i
s
on
(with
AUTO
model),
the
dipped
beam
h
eadlamps
and
sidelamps
remain
on
while
the
r
ear
foglamps
are
on.
Lighting and visibility
Page 129 of 396

127
C4-2_en_Chap04_eclairage-et-visibilite_ed02-2015
In good or rainy weather, by both day and night, the front foglamps and the
r
ear foglamps are prohibited. In these
s
ituations, the power of their beams
m
ay dazzle other drivers. They should
o
nly be used in fog or falling snow.
In these weather conditions, you should
switch
on the foglamps and dipped
b
eam headlamps manually, as the
s
unshine sensor may detect sufficient
l
ight.
Do
not forget to switch off the front and
r
ear foglamps when they are no longer
n
ecessary.Switching off the lighting when
switching off the ignition
When the ignition is switched off, all of the lamps switch off immediately, except for t
he dipped beam headlamps if automatic
g
uide-me-home lighting is activated.
Switching on the lighting
when switching on the
ignition
To reactivate the lighting control stalk, turn the ring A to position "0" - lighting
o
ff, then to the position of your choice.
When
the driver's door is opened, a
t
emporary audible signal warns you that
t
he vehicle's lighting is on.
They
switch off automatically after a
p
eriod which depends on the state of
charge
of the battery (entry to energy
ec
onomy
mo
de).
4
Lighting and visibility
Page 130 of 396
128
C4-2_en_Chap04_eclairage-et-visibilite_ed02-2015
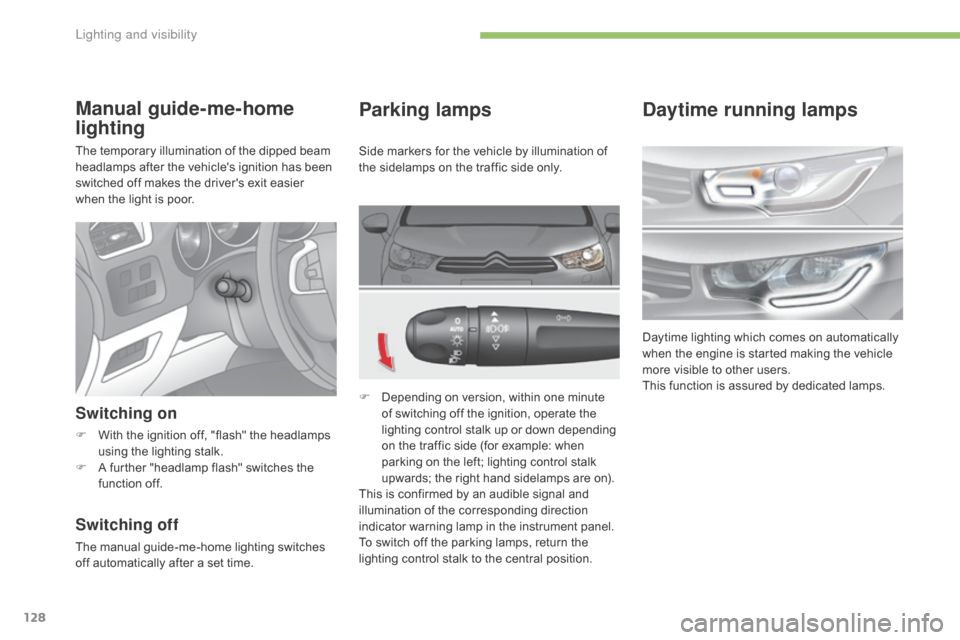
Parking lamps
F Depending on version, within one minute o
f switching off the ignition, operate the
l
ighting control stalk up or down depending
o
n the traffic side (for example: when
p
arking on the left; lighting control stalk
u
pwards; the right hand sidelamps are on).
This
is confirmed by an audible signal and
i
llumination of the corresponding direction
i
ndicator warning lamp in the instrument panel.
To
switch off the parking lamps, return the
l
ighting control stalk to the central position.
Manual guide-me-home
lighting
The temporary illumination of the dipped beam headlamps after the vehicle's ignition has been
s
witched off makes the driver's exit easier
w
hen the light is poor.
Switching on
F With the ignition off, "flash" the headlamps u
sing the lighting stalk.
F
A
further "headlamp flash" switches the
f
unction off.
Switching off
The manual guide-me-home lighting switches off automatically after a set time.Side
markers for the vehicle by illumination of
t
he sidelamps on the traffic side only.
Daytime running lamps
Daytime lighting which comes on automatically w
hen the engine is started making the vehicle
m
ore visible to other users.
This
function is assured by dedicated lamps.
Lighting and visibility
Page 131 of 396
129
C4-2_en_Chap04_eclairage-et-visibilite_ed02-2015
Automatic illumination of
headlamps
The sidelamps and dipped beam headlamps are switched on automatically, without any
a
ction on the part of the driver, when a low level
of
external light is detected or in certain cases
o
f activation of the windscreen wipers.
As
soon as the brightness returns to an
a
dequate level or after the windscreen wipers
a
re switched off, these lamps are switched off
a
utomatically and the daytime running lamps
c
ome on.
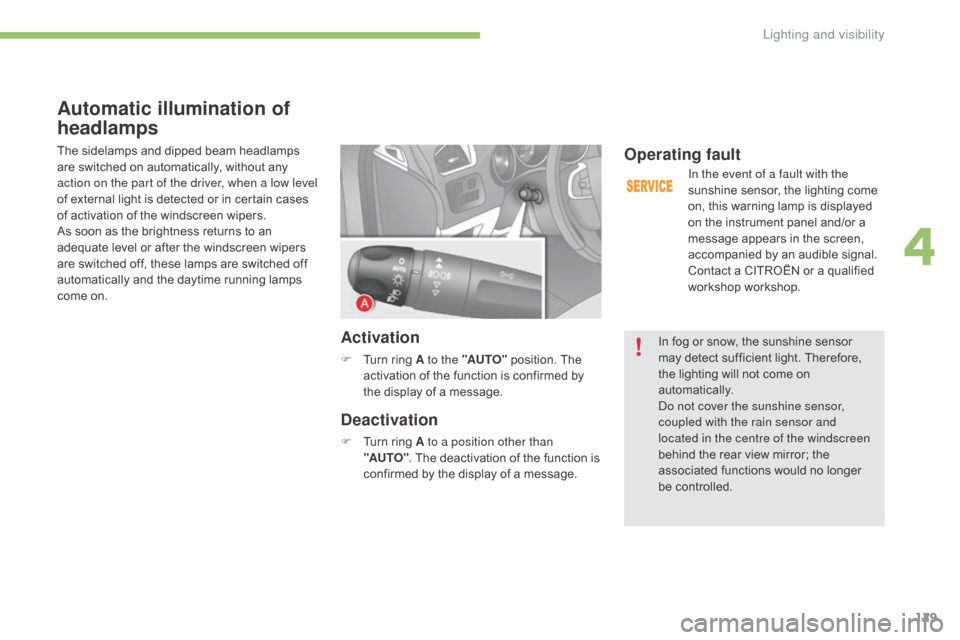
Activation
F Turn ring A to the "AUTO" position. The a
ctivation of the function is confirmed by
t
he display of a message.
Deactivation
F Turn ring A to a position other than
"AUTO" .
The deactivation of the function is
c
onfirmed by the display of a message.
Operating fault
In the event of a fault with the
sunshine sensor, the lighting come
o
n, this warning lamp is displayed
o
n the instrument panel and/or a
m
essage appears in the screen,
a
ccompanied by an audible signal.
Contact
a CITROËN or a qualified
w
orkshop workshop.
In
fog or snow, the sunshine sensor
m
ay
detect sufficient light. Therefore,
t
he
lighting will not come on
au
tomatically.
Do not cover the sunshine sensor,
coupled with the rain sensor and
located in the centre of the windscreen
behind
the rear view mirror; the
a
ssociated functions would no longer
be c
ontrolled.
4
Lighting and visibility
Page 132 of 396
130
C4-2_en_Chap04_eclairage-et-visibilite_ed02-2015
Switching off
The welcome lighting switches off automatically after a programmed time, when the ignition is
s
witched on or on locking the vehicle.
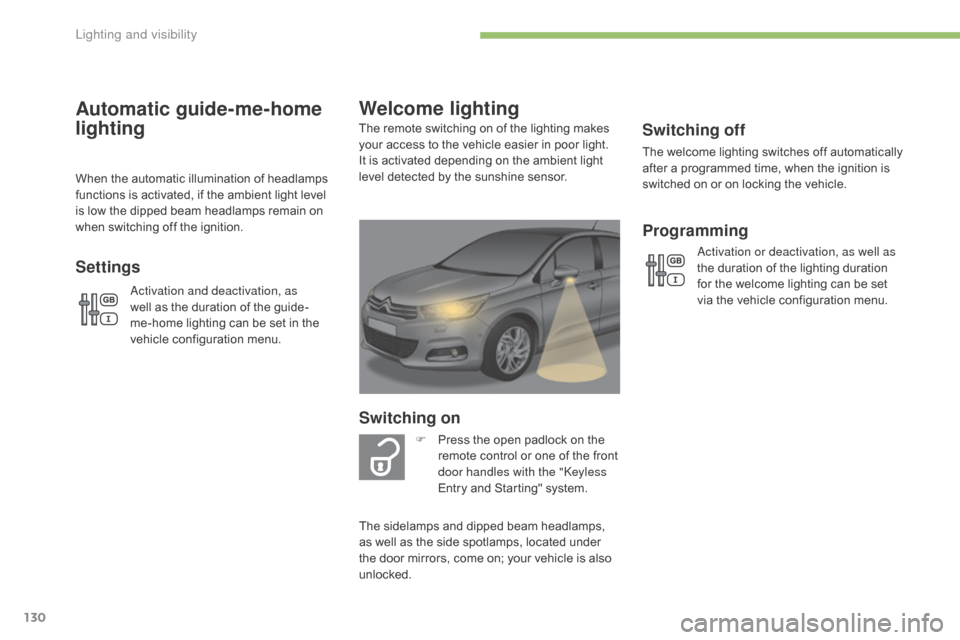
Welcome lighting
Switching on
F Press the open padlock on the r
emote control or one of the front
d
oor handles with the "Keyless
Entry
and Starting" system.
The
remote switching on of the lighting makes
y
our
access to the vehicle easier in poor light.
I
t
is
activated depending on the ambient light
l
evel
detected by the sunshine sensor.
The
sidelamps and dipped beam headlamps,
a
s
well
as
the side spotlamps, located under
t
he
door
mirrors, come on; your vehicle is also
u
nlocked.
Programming
Activation or deactivation, as well as
the duration of the lighting duration
f
or the welcome lighting can be set
v
ia the vehicle configuration menu.
Automatic guide-me-home
lighting
When the automatic illumination of headlamps functions is activated, if the ambient light level
i
s low the dipped beam headlamps remain on
w
hen switching off the ignition.
Settings
Activation and deactivation, as
well as the duration of the guide-
me-home
lighting can be set in the
v
ehicle configuration menu.
Lighting and visibility
Page 134 of 396
132
C4-2_en_Chap04_eclairage-et-visibilite_ed02-2015
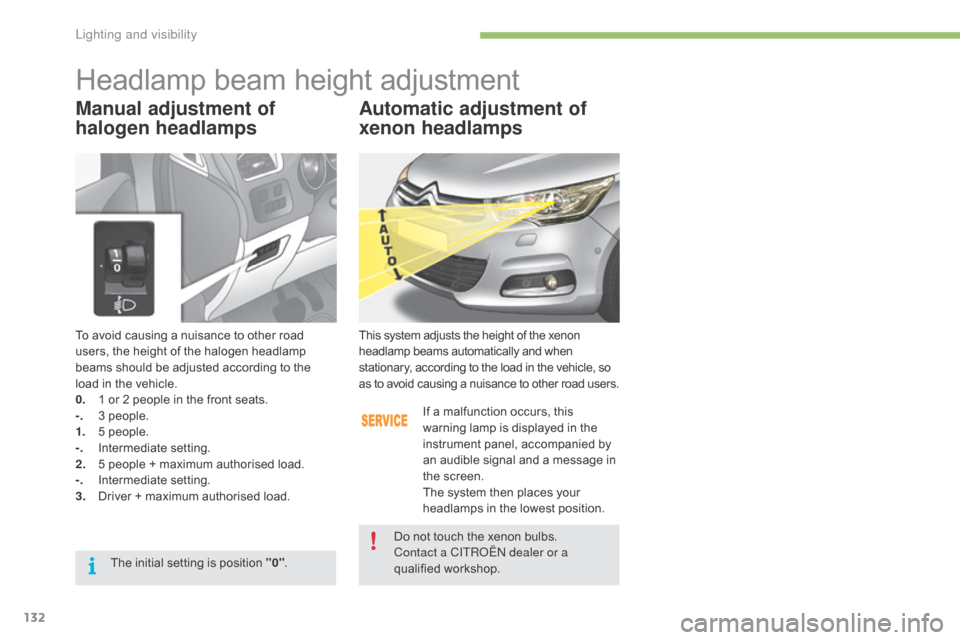
To avoid causing a nuisance to other road users, the height of the halogen headlamp
b
eams should be adjusted according to the
l
oad in the vehicle.
0.
1
or 2 people in the front seats.
-.
3
people.
1.
5
people.
-.
I
ntermediate
s
etting.
2.
5
people + maximum authorised load.
-.
I
ntermediate
s
etting.
3.
D
river + maximum authorised load.
Headlamp beam height adjustment
Automatic adjustment of
xenon headlamps
This system adjusts the height of the xenon headlamp beams automatically and when s
tationary, according to the load in the vehicle, so
a
s to avoid causing a nuisance to other road users.
If
a malfunction occurs, this
w
arning lamp is displayed in the
i
nstrument panel, accompanied by
a
n audible signal and a message in
t
he screen.
The
system then places your
h
eadlamps in the lowest position.
Do
not touch the xenon bulbs.
Contact a CITROËN dealer or a
qualified
w
orkshop.
The
initial
setting
is
position
"0" .
Manual adjustment of
halogen headlamps
Lighting and visibility
Page 135 of 396
133
C4-2_en_Chap04_eclairage-et-visibilite_ed02-2015
Directional lighting
Programming
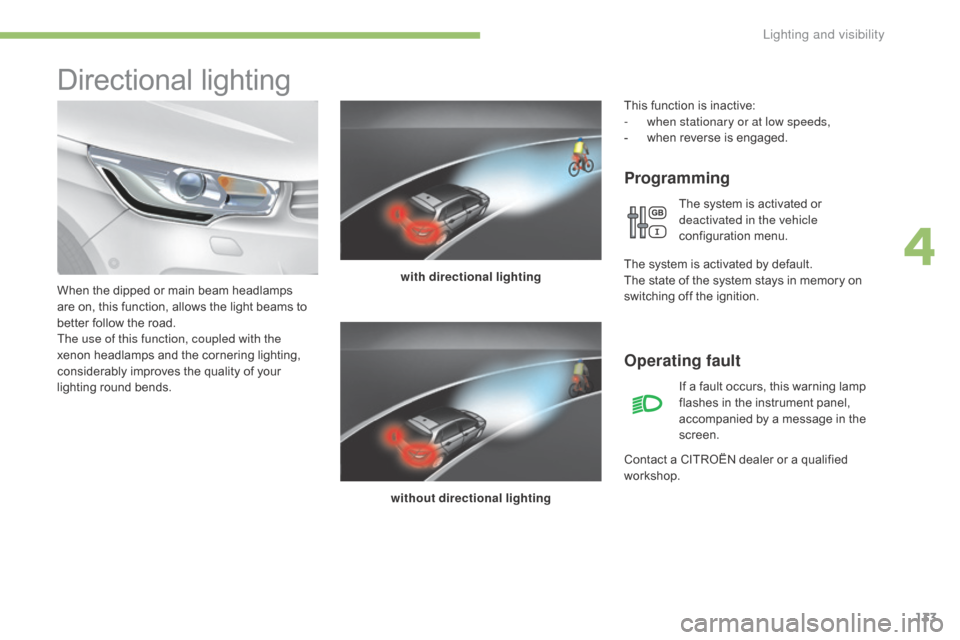
with directional lighting
without directional lighting
When
the
dipped
or
main
beam
headlamps
a
re
on,
this
function,
allows
the
light
beams
to
b
etter
follow
the
road.
The use of this function, coupled with the
xenon
headlamps
and
the
cornering
lighting,
c
onsiderably
improves
the
quality
of
your
l
ighting
r
ound
b
ends.
Operating fault
If a fault occurs, this warning lamp f lashes in the instrument panel,
a
ccompanied by a message in the
sc
reen.
Contact
a
CITROËN dealer or a qualified
w
orkshop.
This
function is inactive:
-
w
hen stationary or at low speeds,
-
w
hen
r
everse
i
s
enga
ged.
The system is activated or
d
eactivated in the vehicle
configuration
m
enu.
T
he
system is activated by default.
The
state
of the system stays in memory on
s
witching
off the ignition.
4
Lighting and visibility
Page 139 of 396
137
C4-2_en_Chap04_eclairage-et-visibilite_ed02-2015
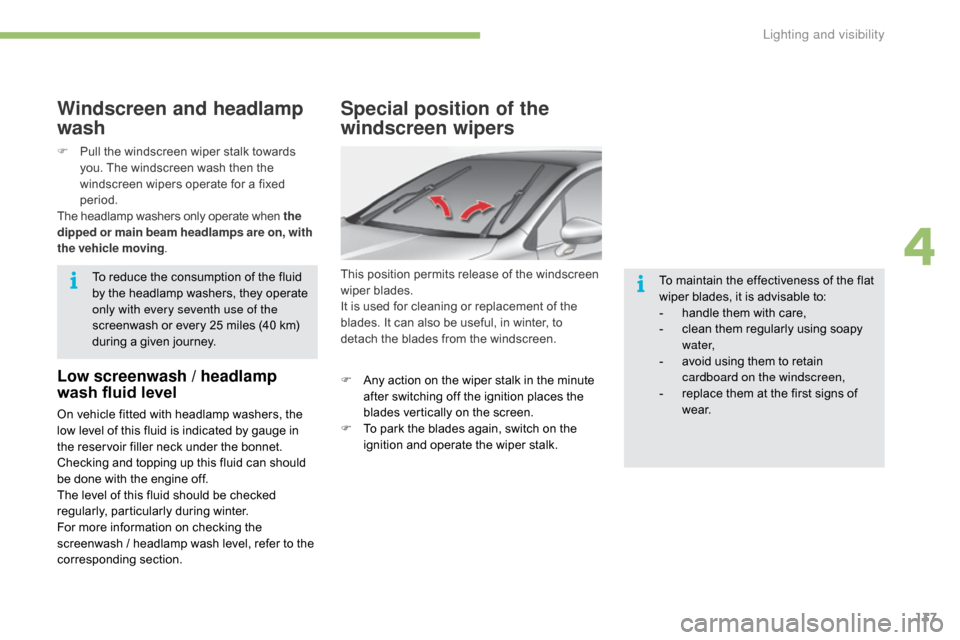
Special position of the
windscreen wipers
This position permits release of the windscreen wiper blades.
It
is used for cleaning or replacement of the
b
lades. It can also be useful, in winter, to
d
etach the blades from the windscreen.
F
A
ny action on the wiper stalk in the minute
a
fter switching off the ignition places the
b
lades vertically on the screen.
F
T
o park the blades again, switch on the
i
gnition and operate the wiper stalk.To
maintain the effectiveness of the flat
w
iper blades, it is advisable to:
-
h
andle them with care,
-
c
lean them regularly using soapy
w
ater,
-
a
void using them to retain
c
ardboard on the windscreen,
-
r
eplace them at the first signs of
w
e a r.
Windscreen and headlamp
wash
Low screenwash / headlamp
wash fluid level
On vehicle fitted with headlamp washers, the low level of this fluid is indicated by gauge in
t
he reservoir filler neck under the bonnet.
Checking
and topping up this fluid can should
b
e done with the engine off.
The
level of this fluid should be checked
r
egularly,
par
ticularly
d
uring
w
inter.
For
more information on checking the
s
creenwash / headlamp wash level, refer to the
c
orresponding
s
ection.
F
P
ull the windscreen wiper stalk towards
y
ou. The windscreen wash then the
w
indscreen wipers operate for a fixed
p
eriod.
The headlamp washers only operate when the
dipped or main beam headlamps are on , with
the vehicle moving .
To reduce the consumption of the fluid
b
y the headlamp washers, they operate
o
nly with every seventh use of the
screenwash or every 25 miles (40 km)
d
uring a given journey.
4
Lighting and visibility