key Citroen C4 CACTUS RHD 2015 1.G Owner's Guide
[x] Cancel search | Manufacturer: CITROEN, Model Year: 2015, Model line: C4 CACTUS RHD, Model: Citroen C4 CACTUS RHD 2015 1.GPages: 326, PDF Size: 8.56 MB
Page 156 of 326
154
Child seats
Recommendations
Installing a booster
cushion
The chest part of the seat belt must be positioned on the child's shoulder without
t
ouching the neck.
Ensure
that the lap part of the seat belt
p
asses correctly over the child's thighs.
CITROËN
recommends the use of a booster
s
eat which has a back, fitted with a seat belt
g
uide at shoulder level.
As
a safety precaution, do not leave:
-
o
ne or more children alone and
u
nsupervised in a vehicle,
-
a
child or an animal in a vehicle which
i
s exposed to the sun, with the windows
c
losed,
-
t
he keys within reach of children inside
t
he vehicle.
To
prevent accidental opening of the doors,
u
se the child lock.
Take
care not to open the rear windows by
m
ore than one third.
To
protect young children from the rays of
t
he sun, fit side blinds on the rear windows.
Children at the front
For optimum installation o f t he fo rward f acing c
hild seat, ensure that the back of the child
s
eat is as close as possible to the backrest
o
f the vehicle's seat, or in contact if possible.
The
head restraint must be removed before
i
nstalling a child seat with a backrest on the
p
assenger
sea
t.
Ensure
that the head restraint is stowed or
a
ttached securely so that it is not thrown
a
round the vehicle in the event of sharp
b
raking.
Refit
the head restraint as soon as the child
s
eat is removed.
The
legislation on carrying a child on the
f
ront passenger seat is specific to each
c
ountry. Refer to the legislation in force in
t
he country in which you are driving.
Deactivate
the passenger's front airbag
w
hen a rear ward facing child seat is installed
o
n the front passenger seat. Other wise, the
c
hild would risk being seriously injured or
k
illed if the airbag were deployed.
The
incorrect
installation
of
a
child
seat
in
a
v
ehicle
compromises
the
child's
protection
in
t
he
event
of
an
accident.
Check
that
there
is
no
seat
belt
or
seat
belt
b
uckle
under
the
child
seat
as
this
could
de
stabilise
i
t.
Remember
to
fasten
the
seat
belts
or
the
c
hild
seat
harnesses
keeping the slack in
relation
to
the
child's
body
to a minimum ,
even
for
short
journeys.
For
the
installation
of
a
child
seat
using
a
s
eat
belt,
ensure
that
this
is
well
tensioned
o
n
the
child
seat
and
that
it
is
holding
the
c
hild
seat
firmly
against
the
seat
of
your
v
ehicle.
If
your
front
passenger
seat
is
a
djustable,
move
it
for ward
if
necessary.
at t
he rear seats, always leave sufficient
space
between
the
front
seat
and:
-
a
rear ward
facing
child
seat,
-
t
he
feet
of
a
child
seated
in
a
for ward
f
acing
child
seat.
For
this,
move
the
front
seat
for ward
and
if
n
ecessary
straighten
its
backrest.
Child safety
Page 157 of 326
155
Electric child lock
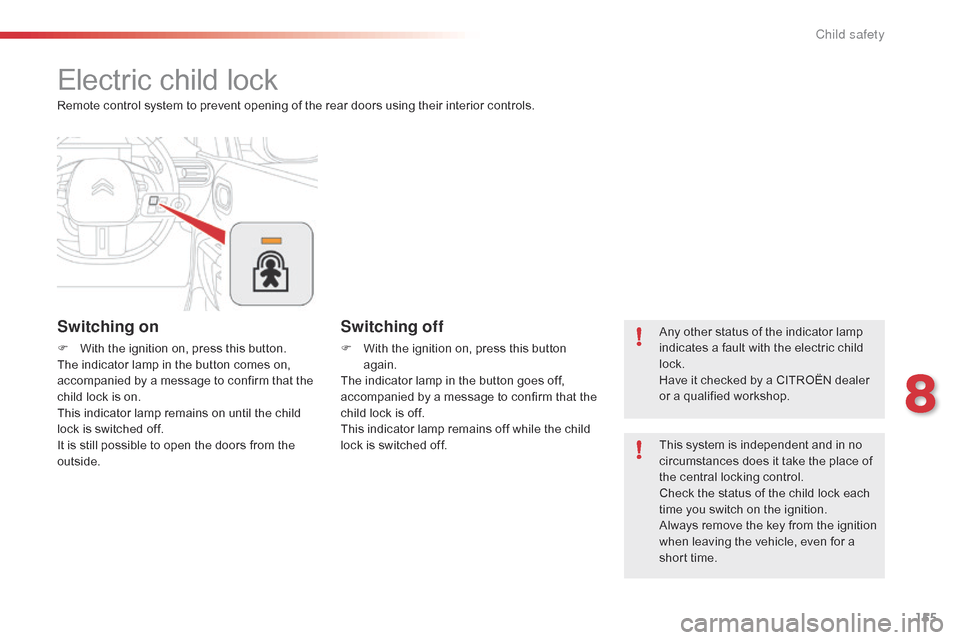
Switching on
F With the ignition on, press this button.
The indicator lamp in the button comes on,
a
ccompanied by a message to confirm that the
c
hild lock is on.
This
indicator lamp remains on until the child
l
ock is switched off.
It
is still possible to open the doors from the
o
utside.
Switching off
F With the ignition on, press this button ag
ain.
The
indicator lamp in the button goes off,
a
ccompanied by a message to confirm that the
c
hild lock is off.
This
indicator lamp remains off while the child
l
ock is switched off.
Remote
control
system
to
prevent
opening
of
the
rear doors using their interior controls.
Any other status of the indicator lamp i
ndicates a fault with the electric child l
ock.
Have
it checked by a CITROËN dealer
o
r a qualified workshop.
This
system is independent and in no
c
ircumstances does it take the place of
t
he central locking control.
Check
the status of the child lock each
t
ime you switch on the ignition.
Always
remove the key from the ignition
w
hen leaving the vehicle, even for a
s
hort time.
8
Child safety
Page 158 of 326

156
Fuel tank
Capacity of the tank:
- Pe trol: approximately 50 litres.
-
D
iesel: approximately 45 or 50 litres (depending on version).
Low fuel levelRefuelling
When the low fuel level is reached, t
his warning lamp in the instrument
p
anel comes on, accompanied by
a
n audible warning, a message and
t
he last bar of the fuel gauge flashes
i
n red.
To
refuel in complete safety:
F
Y
ou must switch off the engine.
F
O
pen the filler flap.
A
label on the inside of the fuel filler flap r
eminds you of the type of fuel to use,
d
epending on your engine type.
Additions
of fuel must be of at least 5 litres to
b
e registered by the fuel gauge.
When
it
first comes on, about 5 litres of fuel
remain
in
the tank.
Until
sufficient fuel has been added, this
w
arning
lamp appears every time the ignition
i
s
switched on, accompanied by an audible
w
arning
and a message. This audible warning
a
nd
message are repeated with increasing
f
requency
as the fuel level drops towards "0 ".
Refuel
as
soon as possible to avoid
r
unning out. Opening
the filler cap may result in an inrush of
a
ir. This is entirely normal and results from the
s
ealing of the fuel system.
With Stop & Start, never refuel with the
system
in STOP mode; you must switch
o
ff the ignition with the key.
If
you run out of fuel (Diesel), refer
a
lso to the section "Running out of fuel
(D
iesel)". F
T
ake care to select the pump that delivers
t
he correct type of fuel for your vehicle.
F
I
ntroduce the key into the cap and turn it to
t
he left.
Practical information
Page 159 of 326
157
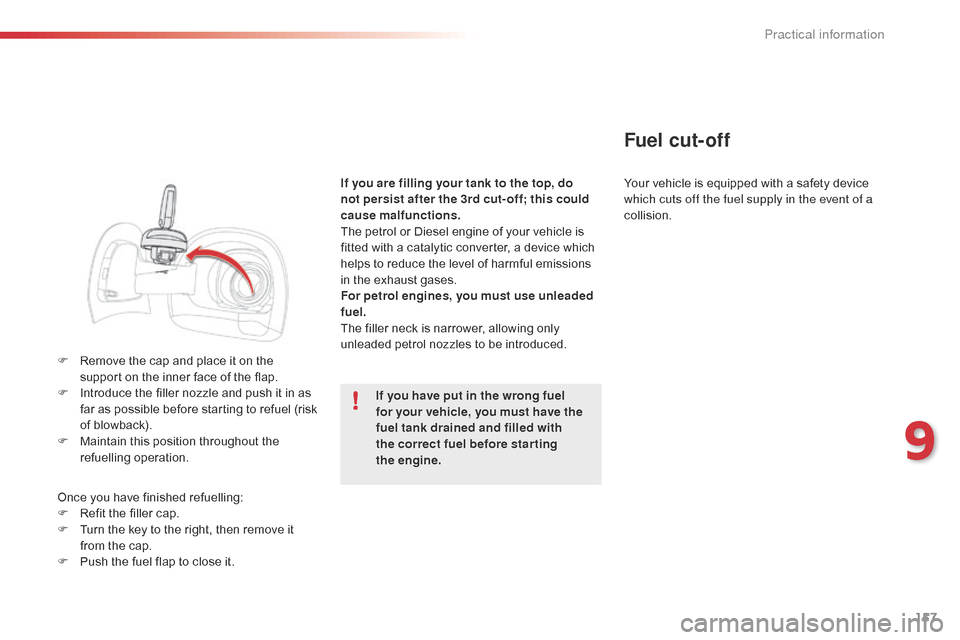
F Remove the cap and place it on the s
upport on the inner face of the flap.
F
I
ntroduce the filler nozzle and push it in as
f
ar as possible before starting to refuel (risk
o
f blowback).
F
M
aintain this position throughout the
r
efuelling
ope
ration.
Once
you have finished refuelling:
F
R
efit the filler cap.
F
T
urn the key to the right, then remove it
f
rom the cap.
F
P
ush the fuel flap to close it.If you are filling your tank to the top, do
not persist after the 3rd cut- off; this could
cause malfunctions.
The
petrol or Diesel engine of your vehicle is
f
itted with a catalytic converter, a device which
h
elps to reduce the level of harmful emissions
i
n the exhaust gases.
For petrol engines, you must use unleaded
fuel.
The filler neck is narrower, allowing only
u
nleaded petrol nozzles to be introduced.Your vehicle is equipped with a safety device
w
hich cuts off the fuel supply in the event of a
collision.
Fuel cut- of f
If you have put in the wrong fuel
for your vehicle, you must have the
fuel tank drained and filled with
the correct fuel before star ting
the
engine.
9
Practical information
Page 169 of 326
167
Recommendations on storage
Never store bottles of AdBlue® in your
vehicle.
Procedure
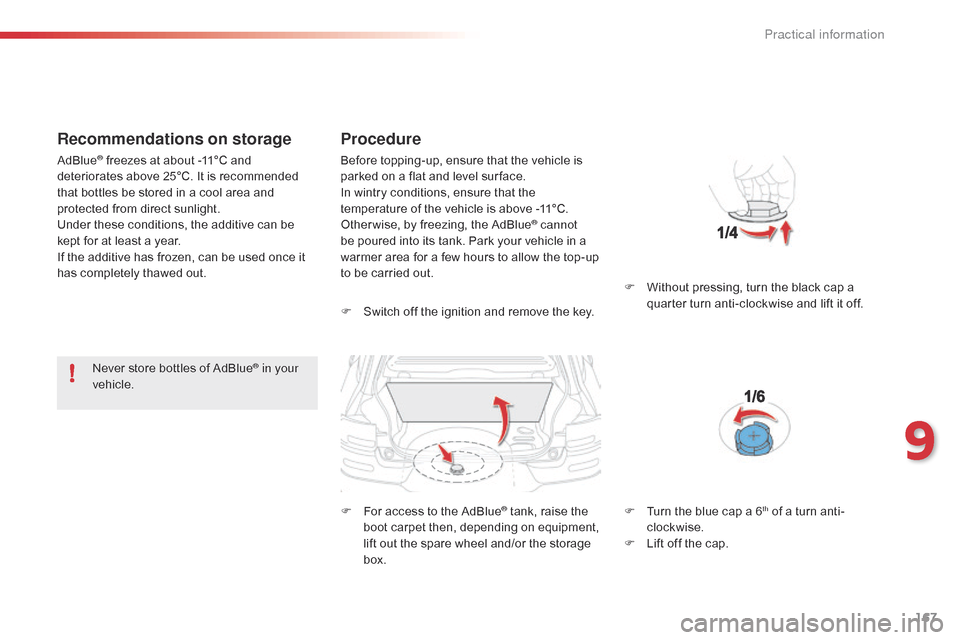
F Switch off the ignition and remove the key.
F
F
or access to the AdBlue
® tank, raise the b
oot
carpet
then,
depending on equipment,
l
ift
out
the
spare
wheel
and/or the storage
b
ox. F
W
ithout pressing, turn the black cap a
q
uarter turn anti-clockwise and lift it off.
AdBlue
® freezes at about -11°C and d
eteriorates above 25°C. It is recommended
t
hat
bottles be stored in a cool area and
p
rotected from direct sunlight.
Under
these conditions, the additive can be
k
ept
for
at least a year.
If
the
additive has frozen, can be used once it
h
as
completely thawed out. Before
topping-up, ensure that the vehicle is p
arked on a flat and level sur face.
In
wintry conditions, ensure that the
t
emperature of the vehicle is above -11°C.
O
ther wise, by freezing, the AdBlue
® cannot
be
poured
into
its
tank.
Park
your
vehicle in a
w
armer
area
for
a
few
hours
to
allow the top-up
t
o
be
carried
out.
F
T
urn the blue cap a 6
th of a turn anti-
c
lockwise.
F
L
ift
off
the
cap.
9
Practical information
Page 170 of 326
168
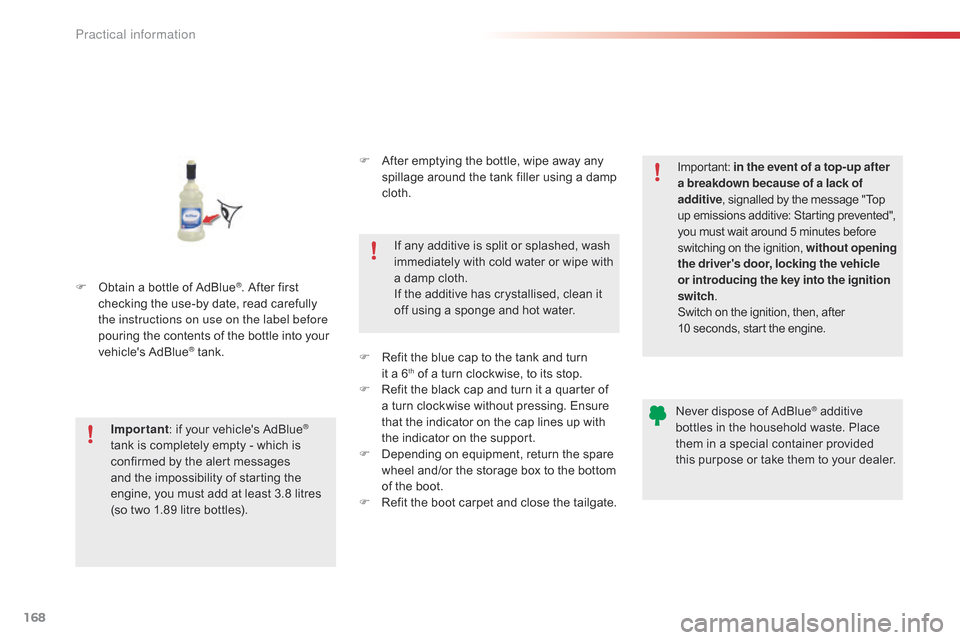
F Obtain a bottle of AdBlue®. After first c
hecking
the
use-by
date,
read carefully
t
he instructions on use on the label before
pouring
the
contents
of
the bottle into your
v
ehicle's
Ad
Blue
® tank.
I
mportant :
if
your vehicle's AdBlue
®
tank
is
completely
empty
-
which
is
c
onfirmed
by
the
alert
messages
a
nd
the
impossibility
of
starting
the
e
ngine,
you
must
add
at
least
3.8
litres
(
so two 1.89
litre
bottles). If
any additive is split or splashed, wash
i
mmediately
w
ith
c
old
w
ater
o
r
w
ipe
w
ith
a
damp cloth.
If the additive has crystallised, clean it
o
ff using a sponge and hot water.Important:
i
n the event of a top-up after
a breakdown because of a lack of
additive , signalled by the message "Top
u
p emissions additive: Starting prevented",
y
ou must wait around 5 minutes before
s
witching
o
n
t
he
i
gnition,
w
ithout opening
the driver's door, locking the vehicle
or introducing the key into the ignition
switch .
Switch on the ignition, then, after
1
0 seconds, start the engine.
Never dispose of AdBlue
® additive b
ottles
in
the
household
waste. Place
t
hem
in
a
special
container provided
t
his
p
urpose
o
r
t
ake
t
hem
t
o
y
our
d
ealer.
F
A
fter
emptying
the
bottle,
wipe
away
any
s
pillage
around
the
tank
filler
using
a
damp
c
loth.
F
R
efit
the
blue
cap
to
the
tank
and
turn
it
a
6
th of a turn clockwise, to its stop.
F
R
efit
the black cap and turn it a quarter of
a
turn
clockwise without pressing. Ensure
t
hat
the indicator on the cap lines up with
t
he
indicator on the support.
F
D
epending on equipment, return the spare
w
heel
and/or the storage box to the bottom
o
f
the
boot.
F
R
efit
the boot carpet and close the tailgate.
Practical information
Page 202 of 326
200
When your vehicle's battery is discharged, the engine can be started using a slave battery
(
external or on another vehicle) and jump lead
c
ables.
Starting using another
battery
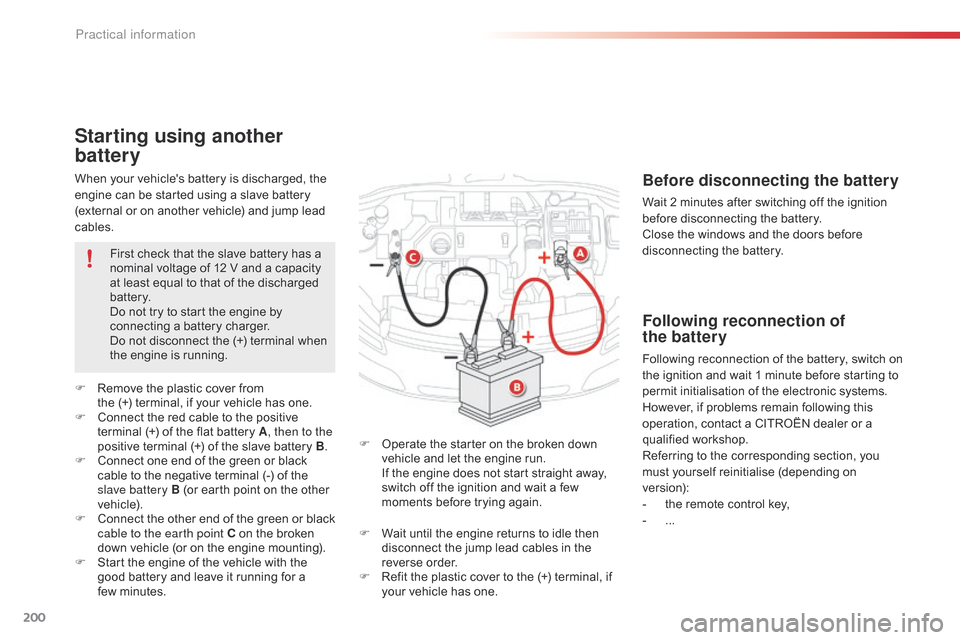
F Operate the starter on the broken down v
ehicle and let the engine run.
I
f the engine does not start straight away,
s
witch off the ignition and wait a few
m
oments before trying again.
F
R
emove
the
plastic
cover
from
the
(+)
terminal,
if
your
vehicle
has
one.
F
C
onnect
the
red
cable
to
the
positive
t
erminal
(+)
of
the
flat
battery
A
, then to the
positive
terminal
(+)
of
the
slave
battery
B.
F
C
onnect
one
end
of
the
green
or
black
c
able
to
the
negative
terminal
(-)
of
the
s
lave battery B
(or
earth
point
on
the
other
v
ehicle).
F
C
onnect
t
he
o
ther
e
nd
o
f
t
he
g
reen
o
r
b
lack
c
able to the earth point C
on
the
broken
d
own
vehicle
(or
on
the
engine
mounting).
F
S
tart
the
engine
of
the
vehicle
with
the
g
ood
battery
and
leave
it
running
for
a
f
ew minutes. First
check
that
the
slave
battery
has
a
n
ominal
voltage
of
12
V
and
a
capacity
a
t
least
equal
to
that
of
the
discharged
b
attery.
Do
not
try
to
start
the
engine
by
c
onnecting
a
battery
charger.
Do
not
disconnect
the
(+)
terminal
when
t
he
engine
is
running.
Before disconnecting the battery
Wait 2 minutes after switching off the ignition b
efore disconnecting the battery.
Close
the windows and the doors before
d
isconnecting the battery.
Following reconnection of
the battery
Following reconnection of the battery, switch on t
he ignition and wait 1 minute before starting to
p
ermit initialisation of the electronic systems.
H
owever, if problems remain following this
o
peration, contact a CITROËN dealer or a
q
ualified
w
orkshop.
Referring
to the corresponding section, you
m
ust
y
ourself
r
einitialise
(
depending
o
n
ve
rsion):
-
t
he remote control key,
-
...
F
W
ait
until
the
engine
returns
to
idle
then
d
isconnect
the
jump
lead
cables
in
the
r
everse
o
rder.
F
R
efit
the
plastic
cover
to
the
(+)
terminal,
if
y
our
vehicle
has
one.
Practical information
Page 236 of 326
01
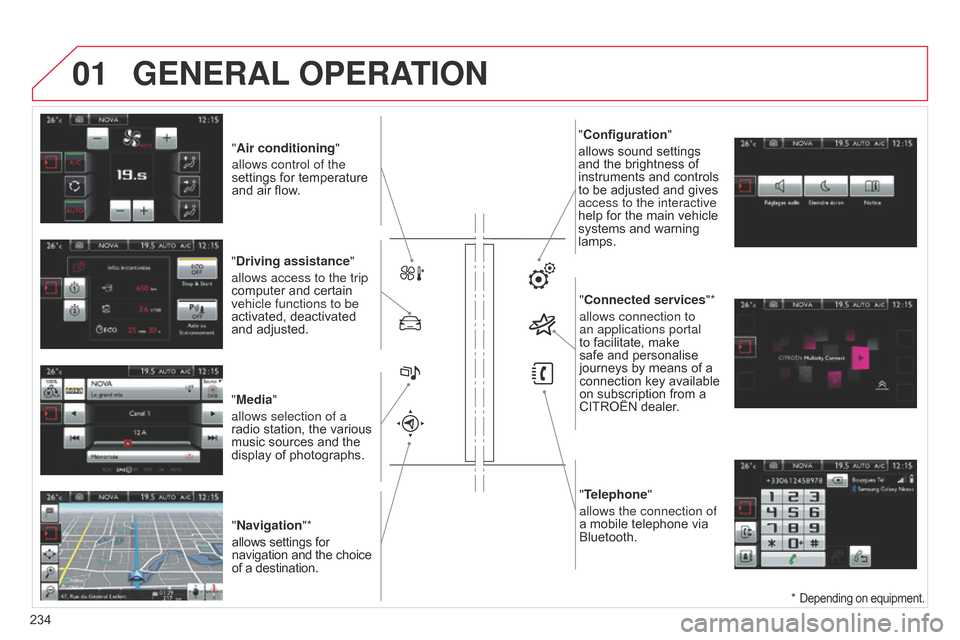
"Air conditioning"
allows control of the
settings
for temperature
and
air flow.
"Driving assistance"
allows access to the trip
computer
and certain
vehicle functions to be
activated,
deactivated
and
adjusted.
"Media"
allows selection of a
radio
station, the various
music
sources and the
display
of photographs.
"Navigation"*
allows
settings for
navigation
and the choice
of
a destination. "Configuration
"
allows sound settings and
the brightness of
instruments
and controls
to
be adjusted and gives
access to the interactive
help
for the main vehicle
systems
and warning
lamps."
Connected services"*
allows connection to
an applications portal
to
facilitate, make
safe
and personalise
journeys
by means of a
connection
key available
on
subscription from a
CITROËN
dealer.
"Telephone"
allows the connection of
a
mobile telephone via
Bluetooth.
GENERAL OPERATION
234 *
Depending on equipment.
Page 247 of 326
04
245
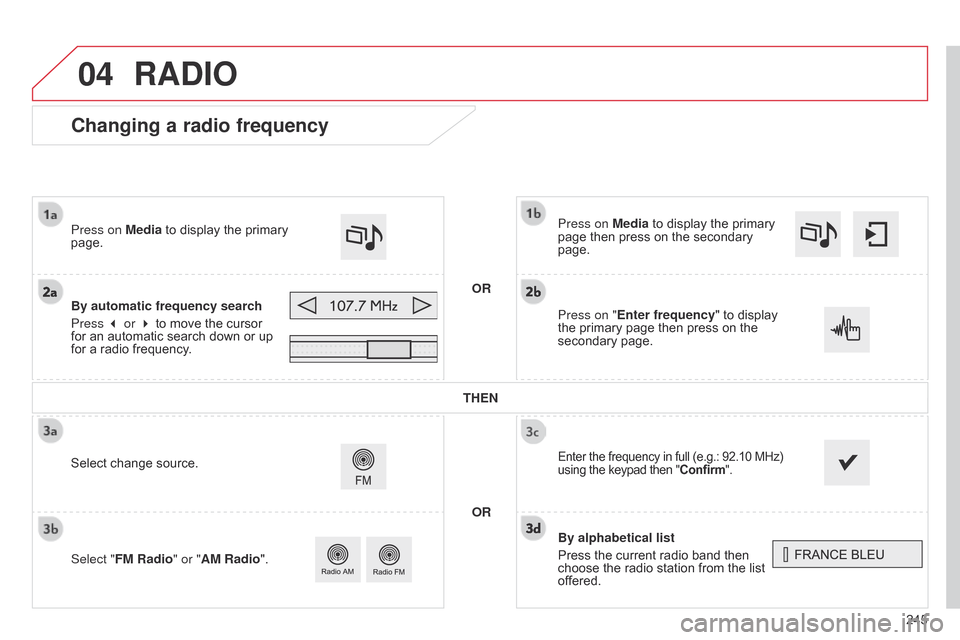
Changing a radio frequency
By alphabetical list
Press the current radio band then
choose
the radio station from the list
of
fered.
Press on Media
to display the primary
page
then press on the secondary
page.
Enter the frequency in full (e.g.: 92.10 MHz) using
the keypad then "Confirm".
By automatic frequency search
Press 3 or 4
to move the cursor
for
an automatic search down or up
for
a radio frequency.
Press on Media
to display the primary
page.
Press on "
Enter frequency" to display
the
primary page then press on the
secondary
page.
OR
RADIO
Select change source.
Select " FM Radio" or "AM Radio". THEN
OR
Page 289 of 326
07
287
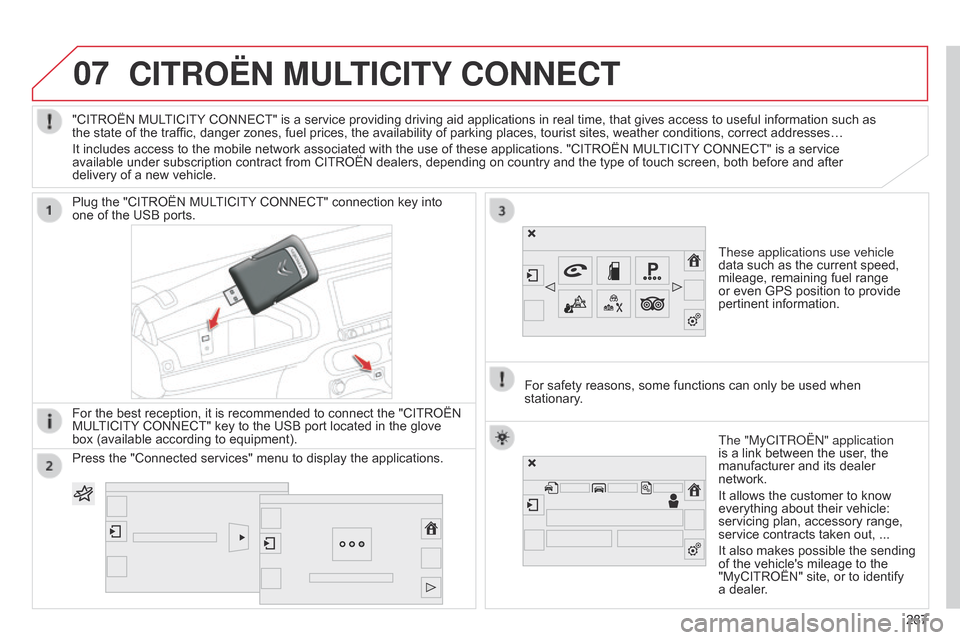
CITROËN MULTICITY CONNECT
These applications use vehicle
data such as the current speed,
mileage,
remaining fuel range
or
even GPS position to provide
pertinent
information.
Plug
the
"CITROËN
MULTICITY
CONNECT"
connection
key
into
one
of
the
USB
ports.
For
the
best
reception,
it
is
recommended
to
connect
the
"CITROËN
MUL
TICITY
CONNECT"
key
to
the
USB
port
located
in
the
glove
box
(available
according
to
equipment). The "MyCITR
o Ë n " application
is
a link between the user, the
manufacturer
and its dealer
network.
It
allows the customer to know
everything
about their vehicle:
servicing
plan, accessory range,
service
contracts taken out, ...
It
also makes possible the sending
of
the vehicle's mileage to the
"MyCITROËN"
site, or to identify
a
dealer.
"CITROËN
MULTICITY
CONNECT"
is
a
service
providing
driving
aid
applications
in
real
time,
that
gives
access
to useful information such as
the
state
of
the
traffic,
danger
zones,
fuel
prices,
the
availability
of
parking
places,
tourist
sites,
weather
conditions, correct addresses…
It
includes
access
to
the
mobile
network
associated
with
the
use
of
these
applications.
"CITROËN
MULTICITY
CONNECT" is a service
available
under
subscription
contract
from
CITROËN
dealers,
depending
on
country
and
the
type
of
touch
screen, both before and after
delivery
of
a
new
vehicle.
For
safety
reasons,
some
functions can only be used when
stationary
.
Press
the
"Connected
services"
menu
to
display
the
applications. 287