boot Citroen C4 DAG 2014.5 2.G User Guide
[x] Cancel search | Manufacturer: CITROEN, Model Year: 2014.5, Model line: C4 DAG, Model: Citroen C4 DAG 2014.5 2.GPages: 340, PDF Size: 12.89 MB
Page 69 of 340
67
C4-2_en_Chap04_ouvertures_ed01-2014
Unlocking the vehicle using the
3-button remote control
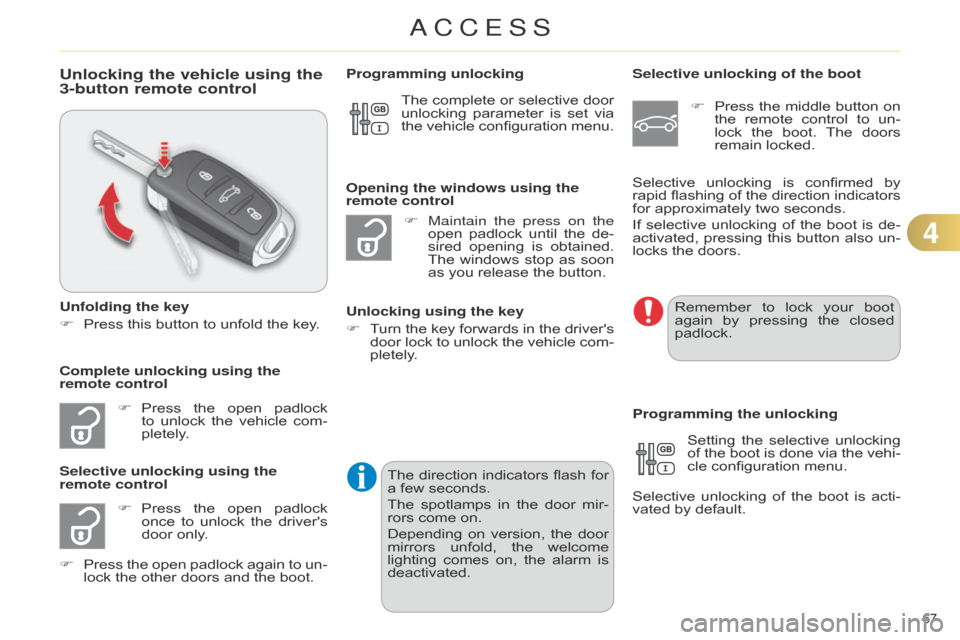
Unfolding the key
F
Press
this button to unfold the key.
F
Press
the
open
padlock
to
unlock
the
vehicle
com
-
pletely.
F
Press
the
open
padlock
once
to
unlock
the
driver's
door
only.
Selective unlocking using the
remote control F
Maintain the press on the
open
padlock
until
the
de
-
sired
opening
is
obtained.
The
windows
stop
as
soon
as
you release the button.
Opening the windows using the
remote control
Unlocking using the key
F
T
urn
the
key
forwards
in
the
driver's
door
lock
to
unlock
the
vehicle
com
-
pletely.
Programming unlocking
Selective unlocking of the boot
F
Press
the
middle
button
on
the
remote
control
to
un
-
lock
the
boot.
The
doors
remain
locked.
Setting
the
selective
unlocking
of
the
boot
is
done
via
the
vehi
-
cle
configuration menu.
Selective
unlocking
of
the
boot
is
acti
-
vated
by default.
Programming the unlocking
Complete unlocking using the
remote control Selective
unlocking
is
confirmed
by
rapid
flashing
of
the
direction
indicators
for
approximately two seconds.
If
selective
unlocking
of
the
boot
is
de
-
activated,
pressing
this
button
also
un
-
locks the doors.
The
complete
or
selective
door
unlocking
parameter
is
set
via
the
vehicle
configuration
menu.
Remember
to lock your boot again
by pressing the closed
padlock.
F
Press
the
open
padlock
again
to
un
-
lock
the other doors and the boot.The
direction
indicators
flash
for
a
few seconds.
The
spotlamps
in
the
door
mir
-
rors
come on.
Depending
on
version,
the
door
mirrors
unfold,
the
welcome
lighting
comes
on,
the
alarm
is
deactivated.
4
ACCESS
Page 70 of 340
68
C4-2_en_Chap04_ouvertures_ed01-2014
Locking the vehicle
F Press the closed padlock to lock
the vehicle.
Normal locking using the remote
control
Normal locking using the key
F
T
urn
the
key
towards
the
rear
in
the
driver's
door
lock
to
lock
the
vehicle.
Locating your vehicle
This function allows you to identify your vehicle
from a distance, particularly in
poor
light.
Y
our
vehicle
must
be
locked.
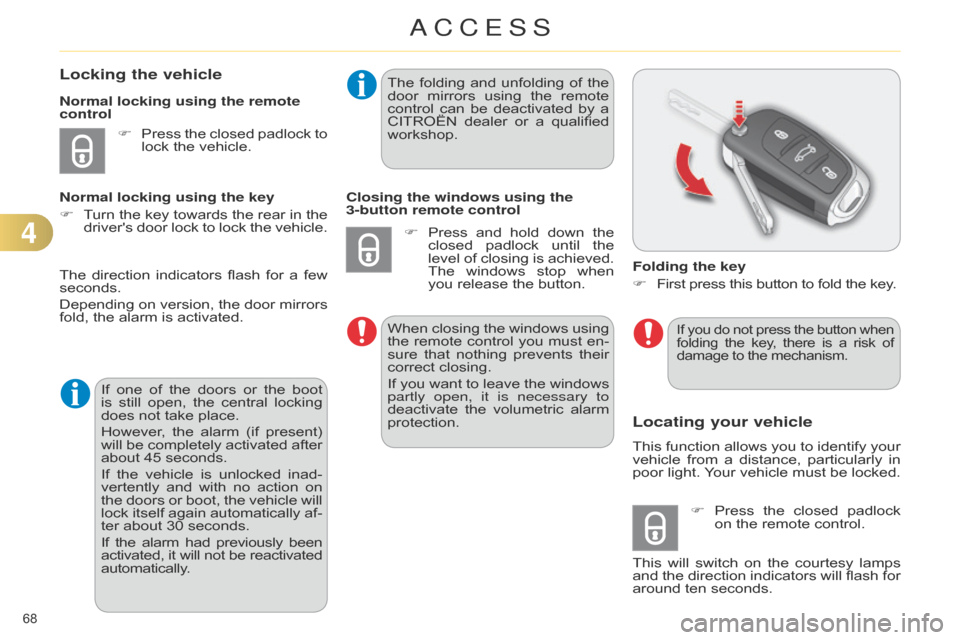
Folding the key
F
First
press this button to fold the key.
F
Press
the
closed
padlock
on
the remote control.
This
will
switch
on
the
courtesy
lamps
and
the
direction
indicators
will
flash
for
around
ten seconds.
The
direction
indicators
flash
for
a
few
seconds.
Depending
on
version,
the
door
mirrors
fold,
the
alarm
is
activated.
If
one
of
the
doors
or
the
boot
is
still
open,
the
central
locking
does
not
take
place.
However,
the
alarm
(if
present)
will
be
completely
activated
after
about
45
seconds.
If
the
vehicle
is
unlocked
inad
-
vertently
and
with
no
action
on
the
doors
or
boot,
the
vehicle
will
lock
itself
again
automatically
af
-
ter
about
30
seconds.
If
the
alarm
had
previously
been activated,
it
will
not
be
reactivated automatically
. The
folding
and
unfolding
of
the
door
mirrors
using
the
remote
control
can
be
deactivated
by
a
CITROËN
dealer
or
a
qualified
workshop.
Closing the windows using the
3-button remote control
F
Press
and
hold
down
the
closed
padlock
until
the
level
of
closing
is
achieved.
The
windows
stop
when
you
release
the
button.
When
closing
the
windows
using
the
remote
control
you
must
en
-
sure
that
nothing
prevents
their
correct
closing.
If
you
want
to
leave
the
windows
partly open, it is necessary to
deactivate
the
volumetric
alarm
protection.
If you
do not press the button when folding
the key , there is a risk of damage
to the mechanism.
4
ACCESS
Page 74 of 340
72
C4-2_en_Chap04_ouvertures_ed01-2014
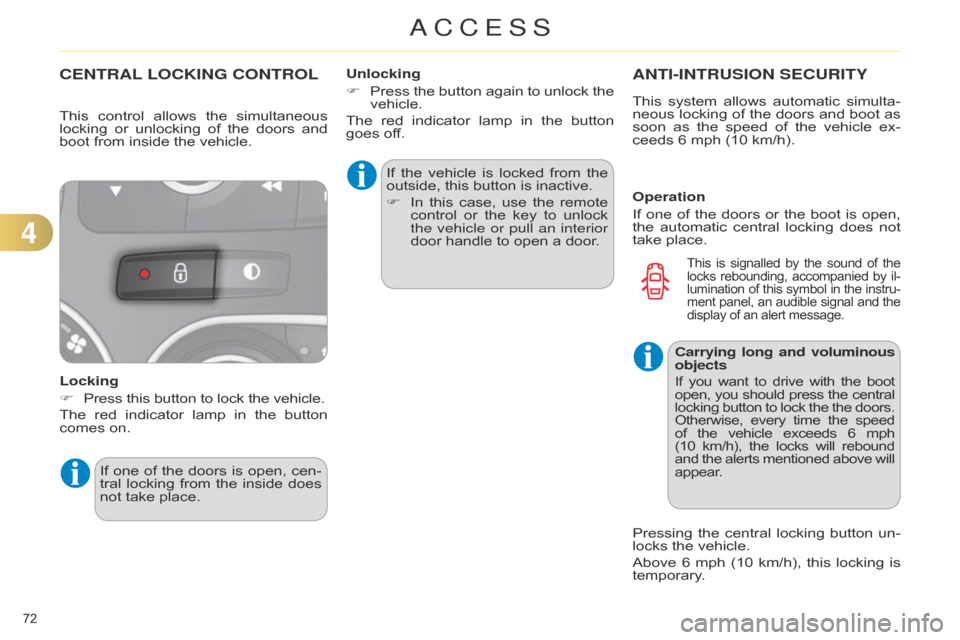
CENTRAL LOCKING CONTROL
Locking
F
Press
this button to lock the vehicle.
The
red
indicator
lamp
in
the
button
comes
on. If
the
vehicle
is
locked
from
the
outside,
this button is inactive.
F
In
this
case,
use
the
remote
control
or
the
key
to
unlock
the vehicle or pull an interior
door
handle to open a door.
If
one
of
the
doors
is
open,
cen
-
tral
locking
from
the
inside
does
not
take place. Unlocking
F
Press
the
button
again
to
unlock
the
vehicle.
The
red
indicator
lamp
in
the
button
goes
off.
ANTI-INTRUSION SECURITY
Operation
If
one
of
the
doors
or
the
boot
is
open,
the
automatic
central
locking
does
not
take
place.
This
control
allows
the
simultaneous
locking
or
unlocking
of
the
doors
and
boot
from
inside
the
vehicle.
This
system
allows
automatic
simulta
-
neous
locking
of
the
doors
and
boot
as
soon
as
the
speed
of
the
vehicle
ex
-
ceeds 6 mph (10 km/h).
Carrying long and voluminous
objects
If you want to drive with the boot open,
you should press the central locking
button
to
lock
the
the
doors. Otherwise,
every
time
the
speed of
the
vehicle
exceeds
6
mph
(10
km/h),
the
locks
will
rebound and
the
alerts
mentioned
above
will appear
.
Pressing the central locking button un -
locks the vehicle.
Above
6
mph
(10
km/h),
this
locking
is
temporary
.
This is signalled by the sound of the locks
rebounding, accompanied by il -
lumination
of
this
symbol
in
the
instru
-
ment
panel,
an
audible
signal
and
the display
of an alert message.
4
ACCESS
Page 76 of 340
74
C4-2_en_Chap04_ouvertures_ed01-2014
* According to country.
ALARM*
System which protects and provides a deterrent
against theft and break-ins. It provides
the
following
types
of
monitoring.
-
exterior perimeter
The
system
checks
for
opening
of
the
vehicle.
The
alarm
is
triggered
if
anyone
tries
to
open
a door, the boot, the bonnet...
-
interior volumetric
The
system
checks
for
any
variation
in
the volume
in the passenger compartment.
The
alarm
is
triggered
if
anyone
breaks
a window
,
enters
the
passenger
compart
-
ment
or moves inside the vehicle.
-
tilt
The
system
checks
for
any
change
in
the
attitude of the vehicle.
The
alarm
is
triggered
if
the
vehicle
is
lifted,
moved or knocked.
Self-protection function
The
system
checks
for
the
putting
out
of
service of its components.
The
alarm
is
triggered
if
the
battery
,
the
central
control
or
the
siren
wiring
are
put
out of service or damaged.
For
all
work
on
the
alarm
sys
-
tem,
contact
a
CITROËN
dealer
or
a qualified workshop.
Locking the vehicle with full
alarm system
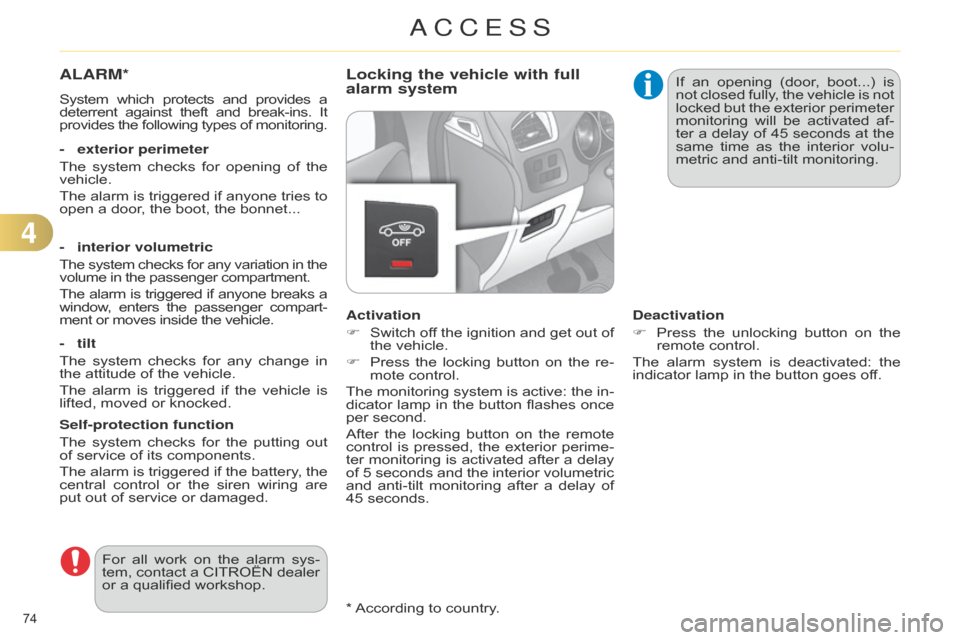
Activation
F
Switch
of
f
the
ignition
and
get
out
of
the
vehicle.
F
Press
the
locking
button
on
the
re
-
mote
control.
The
monitoring
system
is
active:
the
in
-
dicator
lamp
in
the
button
flashes
once
per
second.
After
the
locking
button
on
the
remote
control
is
pressed,
the
exterior
perime
-
ter
monitoring
is
activated
after
a
delay
of
5
seconds
and
the
interior
volumetric
and
anti-tilt
monitoring
after
a
delay
of
45
seconds. If
an
opening
(door
,
boot...)
is
not
closed
fully
,
the
vehicle
is
not
locked
but
the
exterior
perimeter
monitoring
will
be
activated
af
-
ter
a
delay
of
45
seconds
at
the
same
time
as
the
interior
volu
-
metric and anti-tilt monitoring.
Deactivation
F
Press
the
unlocking
button
on
the
remote
control.
The
alarm
system
is
deactivated:
the
indicator
lamp in the button goes off.
4
ACCESS
Page 79 of 340
77
C4-2_en_Chap04_ouvertures_ed01-2014
BOOT
Opening
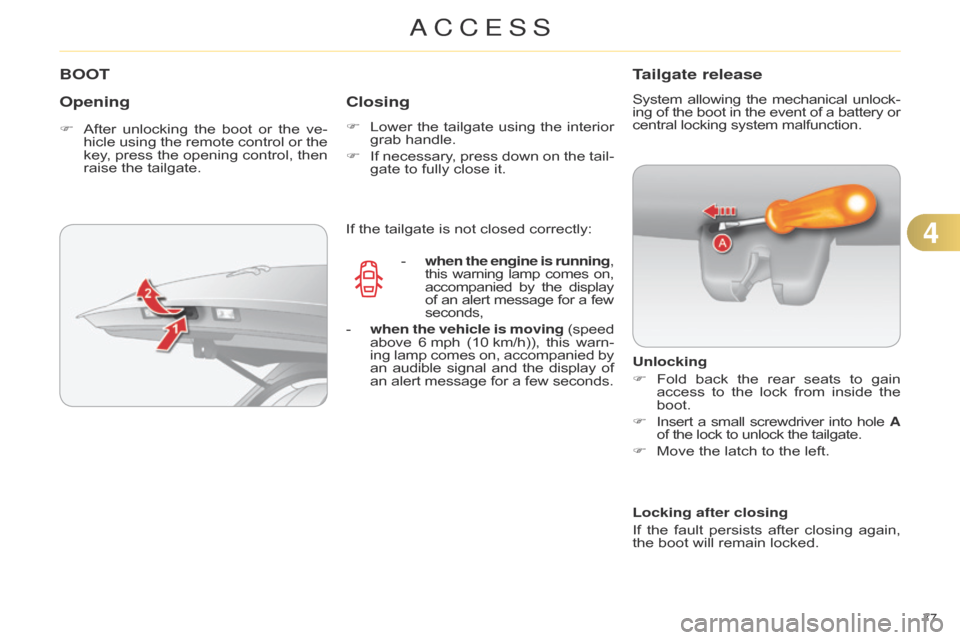
F After unlocking the boot or the ve -
hicle using the remote control or the
key
,
press
the
opening
control,
then
raise
the tailgate.
Closing
F Lower the tailgate using the interior grab
handle.
F
If
necessary
,
press
down
on
the
tail
-
gate
to fully close it.
Tailgate release
System allowing the mechanical unlock -
ing of the boot in the event of a battery or central
locking system malfunction.
Unlocking
F
Fold
back
the
rear
seats
to
gain
access
to
the
lock
from
inside
the
boot.
F
Insert
a
small
screwdriver
into
hole
A
of
the lock to unlock the tailgate.
F
Move
the latch to the left.
If
the
tailgate
is
not
closed
correctly:
-
when
the engine is running,
this
warning
lamp
comes
on, accompanied
by
the
display of
an
alert
message
for
a
few seconds,
-
when the vehicle is moving
(speed above
6
mph
(10
km/h)),
this
warn
-
ing
lamp
comes
on,
accompanied
by an
audible
signal
and
the
display
of an
alert
message
for
a
few
seconds. Locking after closing
If
the
fault
persists
after
closing
again,
the
boot will remain locked.
4
ACCESS
Page 96 of 340
55
94
C4-2_en_Chap05_visibilite_ed01-2014
INTERIOR MOOD LIGHTING
The dimmed passenger compartment lighting
improves visibility in the vehicle
when
the light is poor.
Switching on
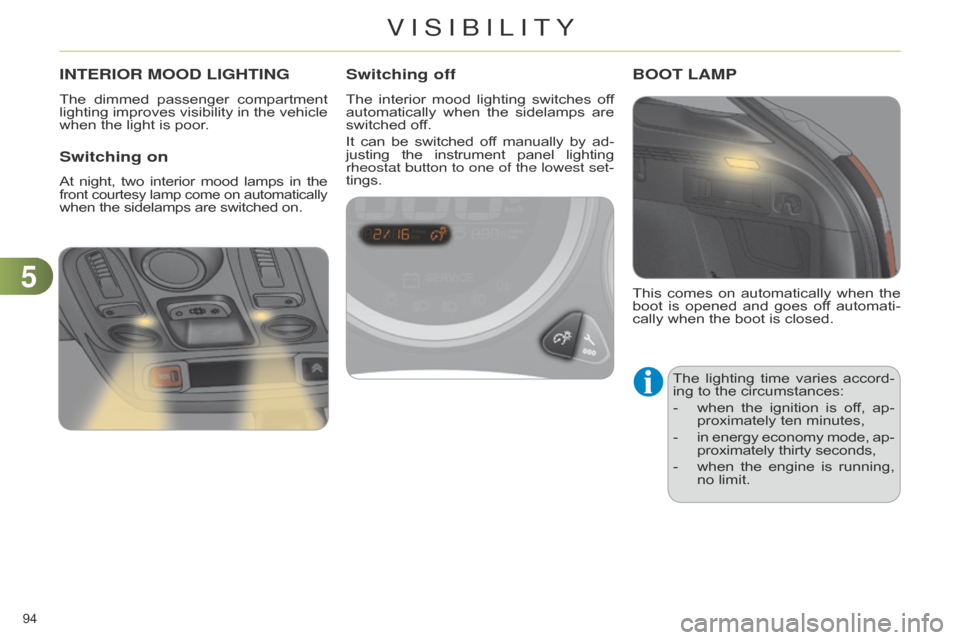
At night, two interior mood lamps in the front courtesy lamp come on automatically
when
the
sidelamps
are
switched
on.
Switching off
The interior mood lighting switches of f automatically
when the sidelamps are
switched
off.
It
can
be
switched
of
f
manually
by
ad
-
justing
the
instrument
panel
lighting rheostat button to one of the lowest set
-
tings.
This
comes
on
automatically
when
the
boot
is
opened
and
goes
of
f
automati
-
cally
when the boot is closed.
BOOT LAMP
The lighting time varies accord -
ing to the circumstances:
-
when
the
ignition
is
of
f,
ap
-
proximately
ten minutes,
-
in
energy
economy
mode,
ap
-
proximately
thirty seconds,
-
when
the
engine
is
running,
no
limit.
VISIBILITY
Page 105 of 340
103
C4-2_en_Chap06_amenagement_ed01-2014
REAR ARMREST
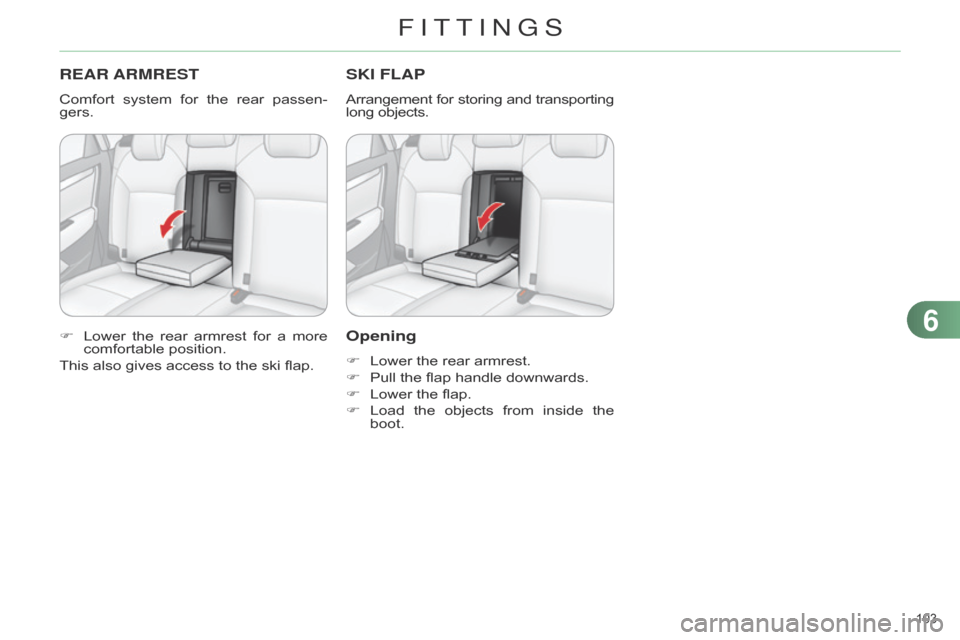
Comfort system for the rear passen -
gers.
F
Lower
the
rear
armrest
for
a
more
comfortable
position.
This
also gives access to the ski flap.
SKI FLAP
Arrangement for storing and transporting long
objects.
Opening
F Lower the rear armrest.
F
Pull
the flap handle downwards.
F
Lower
the flap.
F
Load
the
objects
from
inside
the
boot.
6
FITTINGS
Page 106 of 340
104
C4-2_en_Chap06_amenagement_ed01-2014
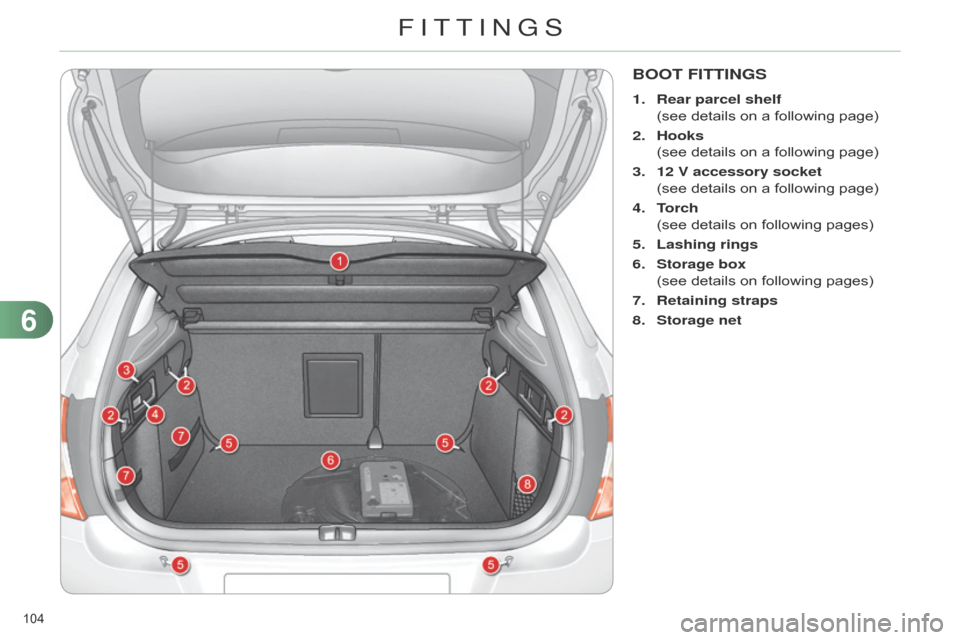
BOOT FITTINGS
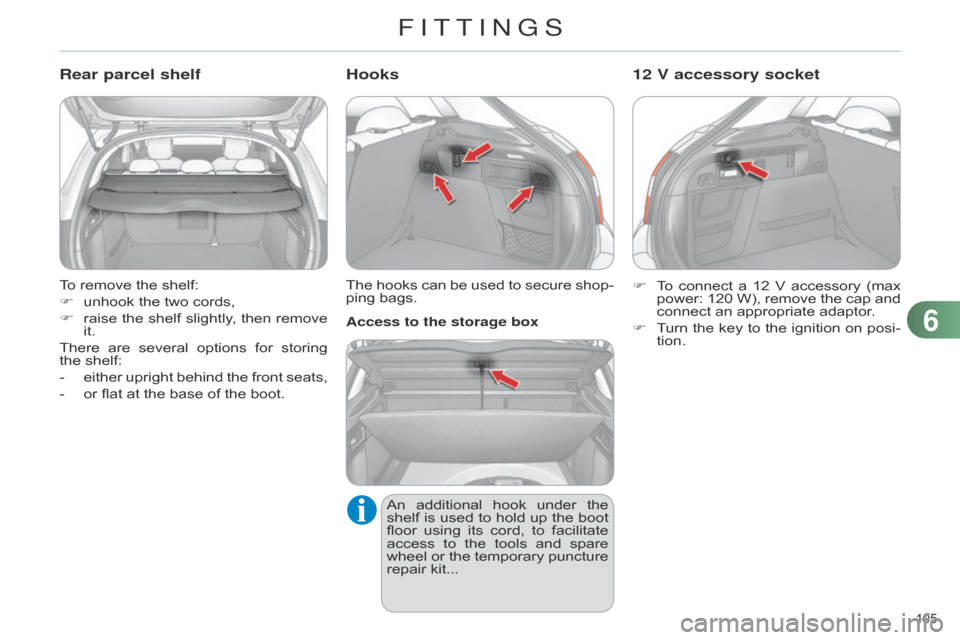
1. Rear parcel shelf
(see
details on a following page)
2.
Hooks
(see
details on a following page)
3.
12 V accessory socket
(see
details on a following page)
4.
T
orch
(see
details on following pages)
5.
Lashing rings
6.
Storage box
(see
details on following pages)
7.
Retaining straps
8.
Storage net
6
FITTINGS
Page 107 of 340
105
C4-2_en_Chap06_amenagement_ed01-2014
To remove the shelf:
F
unhook
the two cords,
F
raise
the
shelf
slightly
,
then
remove
it.
There
are
several
options
for
storing
the
shelf:
-
either
upright
behind
the
front
seats,
-
or
flat at the base of the boot.
Rear parcel shelf
The hooks can be used to secure shop -
ping bags.
Hooks
An additional hook under the shelf
is used to hold up the boot
floor
using
its
cord,
to
facilitate
access
to
the
tools
and
spare
wheel
or
the
temporary
puncture
repair
kit...
Access to the storage box
F
T
o
connect
a
12
V
accessory
(max
power:
120
W),
remove
the
cap
and
connect
an appropriate adaptor.
F
T
urn
the
key
to
the
ignition
on
posi
-
tion.
12 V accessory socket
6
FITTINGS
Page 108 of 340
106
C4-2_en_Chap06_amenagement_ed01-2014
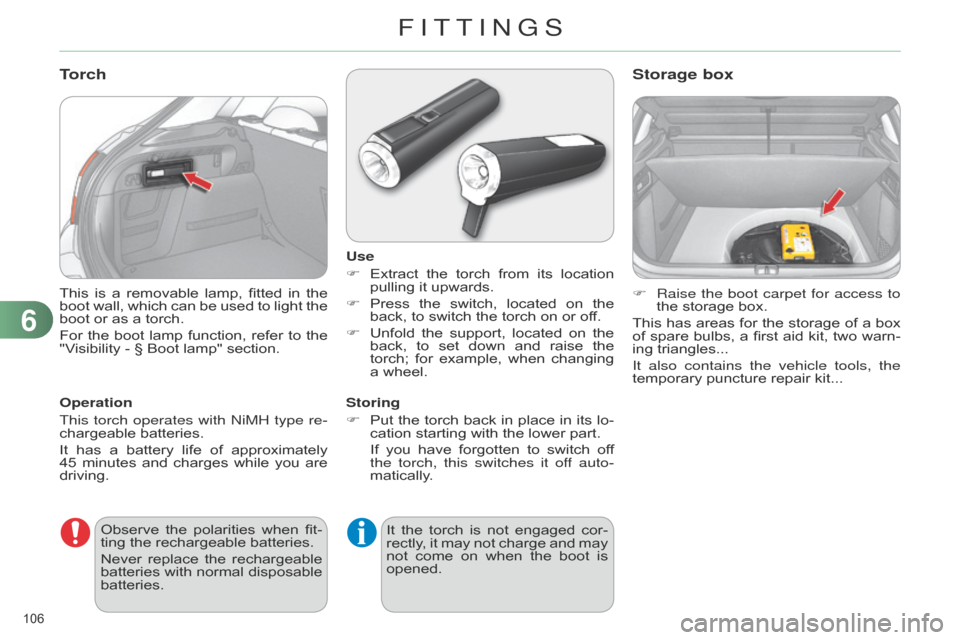
This is a removable lamp, fitted in the boot
wall, which can be used to light the
boot
or as a torch.
For
the
boot
lamp
function,
refer
to
the
"V
isibility - § Boot lamp" section.
Torch
Operation
This torch operates with
n
iMH type re-
chargeable
batteries.
It
has
a
battery
life
of
approximately
45
minutes
and
charges
while
you
are
driving. Use
F
Extract
the
torch
from
its
location
pullin
g it upwards.
F
Press
the
switch,
located
on
the
back,
to switch the torch on or off.
F
Unfold
the
support,
located
on
the
back,
to
set
down
and
raise
the
torch;
for
example,
when
changing
a
wheel.
Storing
F
Put
the
torch
back
in
place
in
its
lo
-
cation
starting with the lower part.
If
you
have
forgotten
to
switch
of
f
the torch, this switches it of
f auto-
matically. F
Raise the boot carpet for access to
the
storage box.
This
has
areas
for
the
storage
of
a
box
of
spare
bulbs,
a
first
aid
kit,
two
warn
-
ing triangles...
It also contains the vehicle tools, the
temporary puncture repair kit...
Storage box
Observe the
polarities when fit -
ting the rechargeable batteries.
Never
replace
the
rechargeable
batteries
with
normal
disposable
batteries. It
the torch is not engaged cor -
rectly,
it may not charge and may
not
come
on
when
the
boot
is
opened.
6
FITTINGS