warning Citroen C4 DAG 2014.5 2.G Owner's Guide
[x] Cancel search | Manufacturer: CITROEN, Model Year: 2014.5, Model line: C4 DAG, Model: Citroen C4 DAG 2014.5 2.GPages: 340, PDF Size: 12.89 MB
Page 33 of 340
31ô
C4-2_en_Chap01_controle-de-marche_ed01-2014
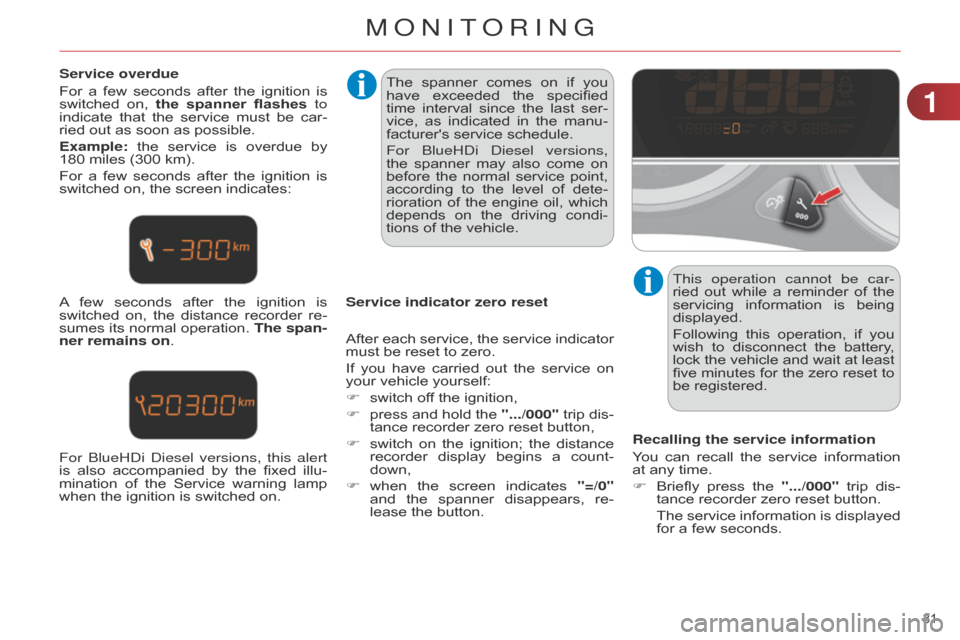
Service overdue
Forô
a
ô
few
ô
seconds
ô
after
ô
the
ô
ignition
ô
is
ô
switched
ô
on,
ô
the
spanner flashes to
indicate
ô
that
ô
the
ô
service
ô
must
ô
be
ô
car
-
ried
ô out ô as ô soon ô as ô possible.
Example:
ô
the
ô
service
ô
is
ô
overdue
ô
by
ô
180
ô miles ô (300 ô km).
For
ô
a
ô
few
ô
seconds
ô
after
ô
the
ô
ignition
ô
is
ô
switched
ô on, ô the ô screen ô indicates:
A
ô few
ô
seconds
ô
after
ô
the
ô
ignition
ô
is
ô
switched
ô
on,
ô
the
ô
distance
ô
recorder
ô
re
-
sumes
ô
its
ô
normal
ô
operation.
ô
The span
-
ner remains on. The
ô spanner ô comes ô on ô if ô you ô
have
ô
exceeded
ô
the
ô
specified
ô
time
ô
interval
ô
since
ô
the
ô
last
ô
ser
-
vice,
ô
as
ô
indicated
ô
in
ô
the
ô
manu
-
facturer's
ô service ô schedule.
For
b lueH d i d iesel versions,
the
ô
spanner
ô
may
ô
also
ô
come
ô
on
ô
before
ô
the
ô
normal
ô
service
ô
point,
ô
according
ô
to
ô
the
ô
level
ô
of
ô
dete
-
rioration
ô
of
ô
the
ô
engine
ô
oil,
ô
which
ô
depends
ô
on
ô
the
ô
driving
ô
condi
-
tions
ô of ô the ô vehicle.
Service indicator zero reset This operation cannot be car-
ried
ô
out
ô
while
ô
a
ô
reminder
ô
of
ô
the
ô
servicing
ô
information
ô
is
ô
being
ô
displayed.
Following
ô
this
ô
operation,
ô
if
ô
you
ô
wish
ô
to
ô
disconnect
ô
the
ô
battery
, ô
lock
ô
the
ô
vehicle
ô
and
ô
wait
ô
at
ô
least
ô
five
ô
minutes
ô
for
ô
the
ô
zero
ô
reset
ô
to
ô
be
ô registered.
Recalling the service information
You
ô
can
ô
recall
ô
the
ô
service
ô
information
ô
at
ô any ô time.
F
ô
Briefly
ô
press
ô
the
ô
".../000"
ô
trip
ô
dis
-
tance
ô recorder ô zero ô reset ô button.
ô The
ô
service
ô
information
ô
is
ô
displayed
ô
for
ô a ô few ô seconds.
After
ô
each
ô
service,
ô
the
ô
service
ô
indicator
ô
must
ô be ô reset ô to ô zero.
If
ô
you
ô
have
ô
carried
ô
out
ô
the
ô
service
ô
on
ô
your
ô vehicle ô yourself:
F
ô
switch
ô off ô the ô ignition,
F
ô
press
ô
and
ô
hold
ô
the
ô
".../000"
ô
trip
ô
dis
-
tance
ô recorder ô zero ô reset ô button,
F
ô
switch
ô
on
ô
the
ô
ignition;
ô
the
ô
distance
ô
recorder
ô
display
ô
begins
ô
a
ô
count
-
down,
F
ô
when
ô
the
ô
screen
ô
indicates
ô
"=/0"
and
ô
the
ô
spanner
ô
disappears,
ô
re
-
lease
ô the ô button.
For
b lueH d i d iesel versions, this alert
is
ô
also
ô
accompanied
ô
by
ô
the
ô
fixed
ô
illu-
mination
ô
of
ô
the
ô
Service
ô
warning
ô
lamp
ô
when
ô the ô ignition ô is ô switched ô on.
1
MONITORING
Page 40 of 340
22
38ô
C4-2_en_Chap02_ecran-multifonction_ed01-2014
Define the vehicle parameters
Thisô
menu
ô
allows
ô
you
ô
to
ô
activate
ô
or
ô
de
-
activate
ô
the
ô
following
ô
equipment,
ô
clas
-
sified
ô in ô different ô categories:
-
ô
"Access
ô
to
ô
the
ô
vehicle"
ô
(see
ô
the
ô
"Access"
ô section):
ã
ô
"Plip
ô
action"
ô
(Selective
ô
unlocking
ô
of
ô the ô driver's ô door),
ã
ô
"Unlocking
ô
boot
ô
only"
ô
(Selective
ô
unlocking
ô of ô the ô boot).
"Telephone" menu
Withô theô audio ô system ô switched ô on, ô this ô menu
ô allows ô you ô to ô make ô a ô call ô or ô view ô
the
ô various ô telephone ô directories.
For
ô
more
ô
information
ô
on
ô
the
ô
"T
elephone" ô
application,
ô
refer
ô
to
ô
the
ô
"Audio
ô
and
ô
T
elematics" ô section. This
ô
menu
ô
allows
ô
you
ô
to
ô
view
ô
informa
-
tion ô on ô the ô status ô of ô the ô vehicle.
Warning log
This ô
summarises
ô
the
ô
status
ô
and
ô
warn
-
ing ô
messages
ô
for
ô
systems
ô
(active,
ô
not
ô
active
ô
or
ô
faulty),
ô
displaying
ô
them
ô
in
ô
suc
-
cession ô in ô the ô multifunction ô screen.
F
Press the
"MENU" button for ac-
cess ô to ô the ô main ô menu.
F
Press the arrows, then the
"OK"
button to select the "Trip computer"
menu.
F In the " Trip computer" ô menu, ô se -
lect ô the ô "W arning ô log" ô line ô and ô con -
firm.
"Bluetooth connection"
menu "Trip computer" menu
Witô the ô audio ô system ô on, ô this ô menu ô al -
lows ô a ô Bluetooth ô device ô (telephone, ô
media
ô
player)
ô
to
ô
be
ô
connected
ô
or
ô
dis
-
connected
ô
and
ô
the
ô
connection
ô
mode
ô
to
ô
be
ô
defined
ô
(hands-free,
ô
playing
ô
audio
ô
files).
For
ô
more
ô
information
ô
on
ô
the
ô
"Bluetooth
ô
connection" application, refer to the
"Audio
ô and ô
T
elematics" ô section.
"Personalisation-
configuration" menu
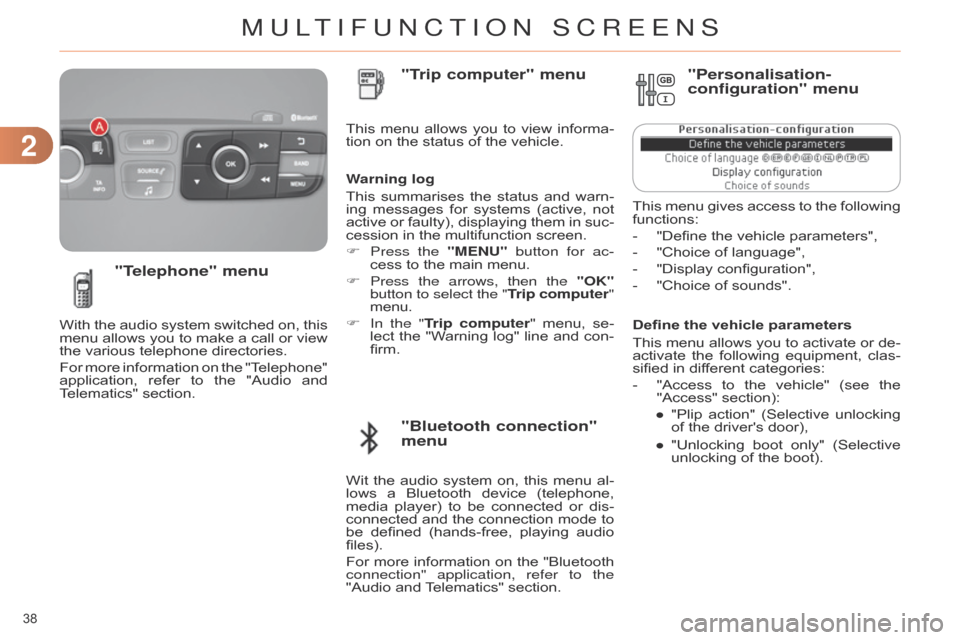
Thisô menuô gives ô access ô to ô the ô following ô functions:
-
ô
"Define
ô the ô vehicle ô parameters",
-
ô
"Choice
ô of ô language",
-
ô
"Display
ô configuration",
-
ô
"Choice
ô of ô sounds".
MULTIFUNCTION SCREENS
Page 58 of 340
33
56ô
C4-2_en_Chap03_confort_ed01-2014
FRONT DEMIST - DEFROST
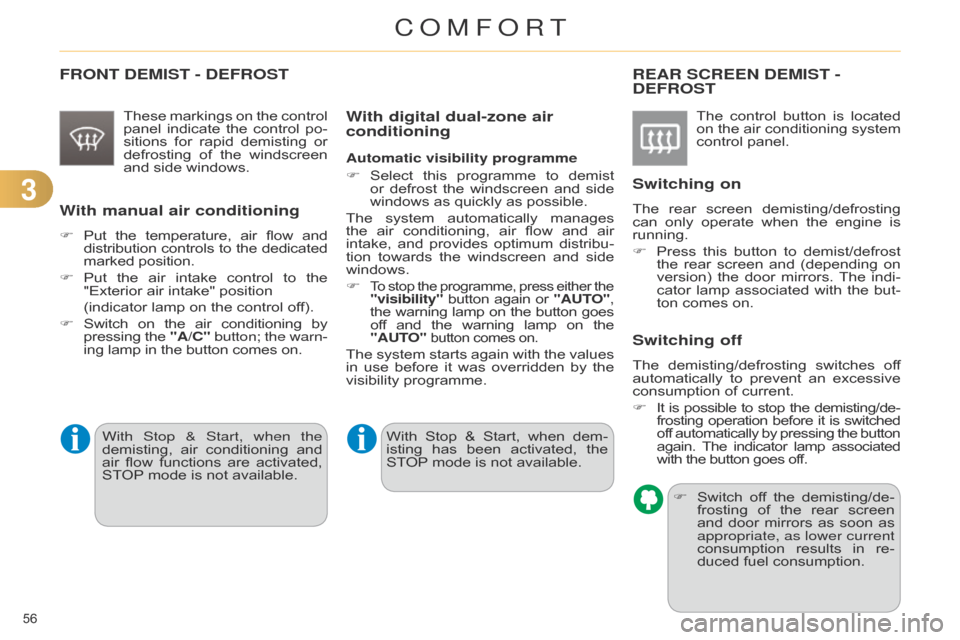
Theseô markingsô on ô the ô control ô panel
ô indicate ô the ô control ô po -
sitions
ô
for
ô
rapid
ô
demisting
ô
or
ô
defrosting
ô
of
ô
the
ô
windscreen
ô
and
ô side ô windows.
With manual air conditioning
Fô Putô the ô temperature, ô air ô flow ô andô distribution
ô controls ô to ô the ô dedicatedô marked
ô position.
F
ô
Put
ô
the
ô
air
ô
intake
ô
control
ô
to
ô
the
ô
"Exterior
ô air ô intake" ô position ô
ô
(indicator
ô lamp ô on ô the ô control ô off).
F
ô
Switch
ô
on
ô
the
ô
air
ô
conditioning
ô
byô pressing
ô
the
ô
"A/C"
button; the warn-
ing
ô lamp ô in ô the ô button ô comes ô on.
REAR SCREEN DEMIST - DEFROST
Theô controlô button ô is ô located ô on
ô the ô air ô conditioning ô system ô
control
ô panel.
Switching on
Theô rear ô screen ô demisting/defrosting ô can
ô only ô operate ô when ô the ô engine ô is ô
running.
F
ô
Press
ô
this
ô
button
ô
to
ô
demist/defrost
ô
the
ô
rear
ô
screen
ô
and
ô
(depending
ô
on
ô
version)
ô
the
ô
door
ô
mirrors.
ô
The
ô
indi
-
cator
ô
lamp
ô
associated
ô
with
ô
the
ô
but
-
ton
ô comes ô on.
Switching off
Theô demisting/defrosting ô switches ô of f ô automatically
ô to ô prevent ô an ô excessive ô
consumption
ô of ô current.
F
ô
It
ô
is
ô
possible
ô
to
ô
stop
ô
the
ô
demisting/de
-
frosting
ô
operation
ô
before
ô
it
ô
is
ô
switchedô of
f ô
automatically
ô
by
ô
pressing
ô
the
ô
buttonô again.
ô
The
ô
indicator
ô
lamp
ô
associatedô with
ô the ô button ô goes ô off.
F
ô
Switch
ô
of
f ô
the
ô
demisting/de
-
frosting
ô
of
ô
the
ô
rear
ô
screen
ô
and
ô
door
ô
mirrors
ô
as
ô
soon
ô
as
ô
appropriate, as lower current
consumption
ô
results
ô
in
ô
re
-
duced
ô fuel ô consumption.
With digital dual-zone air
conditioning
Automatic visibility programme
Fô
Select
ô
this
ô
programme
ô
to
ô
demist
ô
or
ô
defrost
ô
the
ô
windscreen
ô
and
ô
side
ô
windows
ô as ô quickly ô as ô possible.
The
ô
system
ô
automatically
ô
manages
ô
the
ô
air
ô
conditioning,
ô
air
ô
flow
ô
and
ô
air
ô
intake,
ô
and
ô
provides
ô
optimum
ô
distribu
-
tion
ô
towards
ô
the
ô
windscreen
ô
and
ô
side
ô
windows.
F
Toô stop ô the ô programme, ô press ô either ô theô "visibility"ô buttonô again ô or ô "AUT O",
the ô warning ô lamp ô on ô the ô button ô goesô of
f ô
and
ô
the
ô
warning
ô
lamp
ô
on
ô
theô "AUT
O"
buttonô comesô on.
Theô system ô starts ô again ô with ô the ô values ô in
ô use ô before ô it ô was ô overridden ô by ô the ô
visibility
ô programme.
With
ô
Stop
ô
&
ô
Start,
ô
when
ô
dem
-
isting
ô
has
ô
been
ô
activated,
ô
the
ô
ST
OP
ô
mode ô is ô not ô available.
With Stop & Start, when the
demisting,
ô
air
ô
conditioning
ô
and
ô
air
ô
flow
ô
functions
ô
are
ô
activated,
ô
ST
OP
ô
mode
ô
is
ô
not
ô
available.
COMFORT
Page 62 of 340
33
60ô
C4-2_en_Chap03_confort_ed01-2014
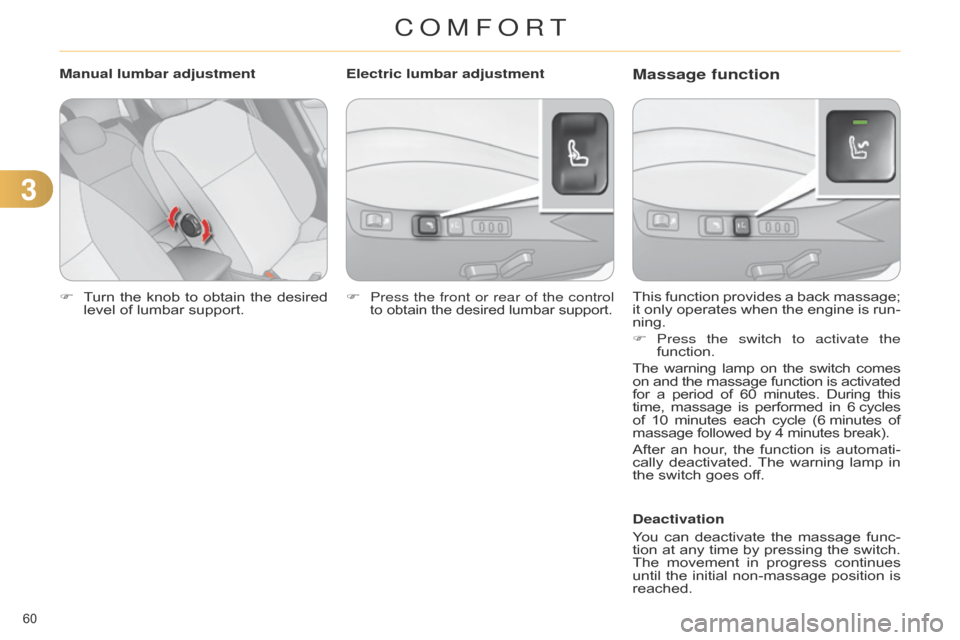
Fô Turnô the ô knob ô to ô obtain ô the ô desired ô level
ô of ô lumbar ô support. This
ô function ô provides ô a ô back ô massage; ô it
ô only ô operates ô when ô the ô engine ô is ô run -
ning.
F
Press the switch to activate the
function.
The
ô
warning
ô
lamp
ô
on
ô
the
ô
switch
ô
comesô on
ô
and
ô
the
ô
massage
ô
function
ô
is
ô
activatedô for
ô
a
ô
period
ô
of
ô
60
ô
minutes.
ô
During
ô
thisô time,
ô
massage
ô
is
ô
performed
ô
in
ô
6
ô cycles
ô of
ô
10
ô
minutes
ô
each
ô
cycle
ô
(6
ô minutes ô
ofô massage
ô followed ô by ô 4 ô minutes ô break).
After
ô
an
ô
hour
, ô
the
ô
function
ô
is
ô
automati
-
cally
ô
deactivated.
ô
The
ô
warning
ô
lamp
ô
in
ô
the
ô switch ô goes ô off.
Deactivation
You
ô
can
ô
deactivate
ô
the
ô
massage
ô
func
-
tion
ô
at
ô
any
ô
time
ô
by
ô
pressing
ô
the
ô
switch.
ô
The
ô
movement
ô
in
ô
progress
ô
continues
ô
until
ô
the
ô
initial
ô
non-massage
ô
position
ô
is
ô
reached.
Manual lumbar adjustment
Massage functionElectric lumbar adjustment
F
Press the front or rear of the control
toô obtain ô the ô desired ô lumbar ô support.
COMFORT
Page 71 of 340
69ô
C4-2_en_Chap04_ouvertures_ed01-2014
Operating fault with the
2-button remote control
Followingô disconnectionô of ô the ô vehicle ô battery
, ô replacement ô of ô the ô remote ô con -
trol
ô
battery
ô
or
ô
in
ô
the
ô
event
ô
of
ô
malfunction
ô
of
ô
the
ô
remote
ô
control,
ô
you
ô
can
ô
no
ô
longer
ô
unlock,
ô lock ô or ô locate ô your ô vehicle.
F
ô
First
ô
of
ô
all,
ô
use
ô
the
ô
key
ô
in
ô
the
ô
lock
ô
to
ô
unlock
ô or ô lock ô your ô vehicle.
F
ô
Then,
ô reinitialise ô the ô remote ô control.
Reinitialisation
F
ô
Switch
ô off ô the ô ignition.
F
Turnô the ô key ô to ô position ô 2 (Ignition on) .
Fô Pressô the ô closed ô padlock ô immedi -
ately ô for ô a ô few ô seconds.
F
ô
Switch
ô
of
f ô
the
ô
ignition
ô
and
ô
remove
ô
the
ô key ô from ô the ô ignition ô switch.
The
ô
remote
ô
control
ô
is
ô
fully
ô
operational
ô
again. Battery
ô ref.: ô CR1620/3 ô volts.
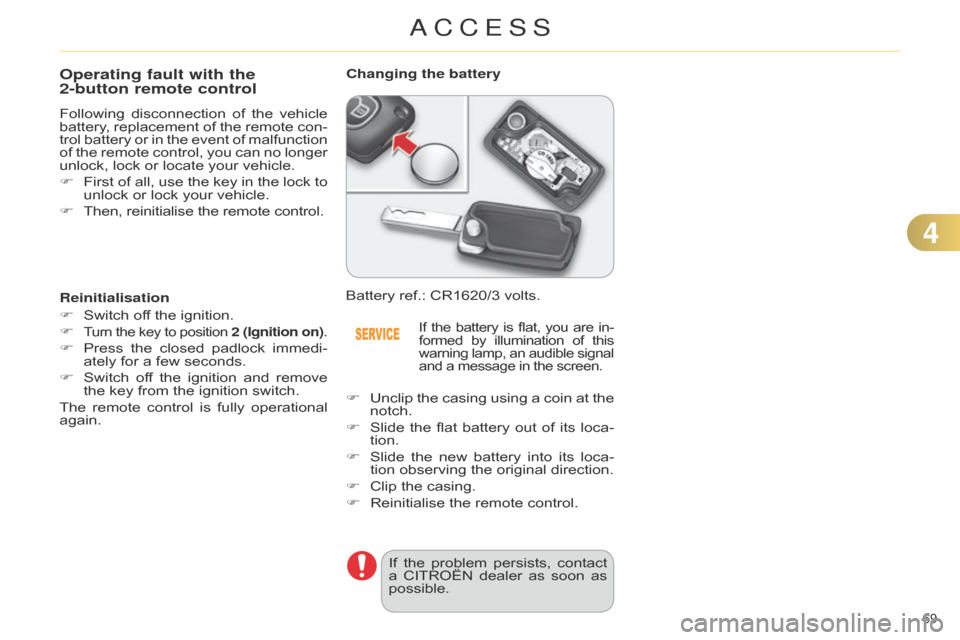
Changing the battery
Ifô the
ô battery ô is ô flat, ô you ô are ô in -
formed ô by ô illumination ô of ô thisô warning
ô
lamp,
ô
an
ô
audible
ô
signalô and
ô a ô message ô in ô the ô screen.
Fô Unclipô the ô casing ô using ô a ô coin ô at ô the ô notch.
F
ô
Slide
ô
the
ô
flat
ô
battery
ô
out
ô
of
ô
its
ô
loca
-
tion.
F
ô
Slide
ô
the
ô
new
ô
battery
ô
into
ô
its
ô
loca
-
tion
ô observing ô the ô original ô direction.
F
ô
Clip
ô the ô casing.
F
ô
Reinitialise
ô the ô remote ô control.
If
ô
the
ô
problem
ô
persists,
ô
contact
ô
a
ô
CITROûN
ô
dealer
ô
as
ô
soon
ô
as
ô
possible.
4
ACCESS
Page 72 of 340
70ô
C4-2_en_Chap04_ouvertures_ed01-2014
Operating fault with the
3-button remote control
Inô theô event ô of ô a ô malfunction ô with ô the ô remote
ô control, ô you ô can ô no ô longer ô un -
lock,
ô lock ô or ô locate ô your ô vehicle.
F
ô
First
ô
of
ô
all,
ô
use
ô
the
ô
key
ô
in
ô
the
ô
lock
ô
to
ô
unlock
ô or ô lock ô your ô vehicle.
F
ô
Then,
ô reinitialise ô the ô remote ô control.
Reinitialisation
F
ô
Switch
ô
of
f ô
the
ô
ignition
ô
and
ô
remove
ô
the
ô ignition ô key.
F
ô
Press
ô
the
ô
closed
ô
padlock
ô
immedi
-
ately
ô for ô a ô few ô seconds.
F
ô
T
urn ô
the
ô
key
ô
to
ô
position
ô
2 (Ignition
on)
.
F
ô
Switch
ô
of
f ô
the
ô
ignition
ô
and
ô
remove
ô
the
ô key ô from ô the ô ignition ô switch.
The
ô
remote
ô
control
ô
is
ô
fully
ô
operational
ô
again. Battery
ô ref.: ô CR2032/3 ô volts.
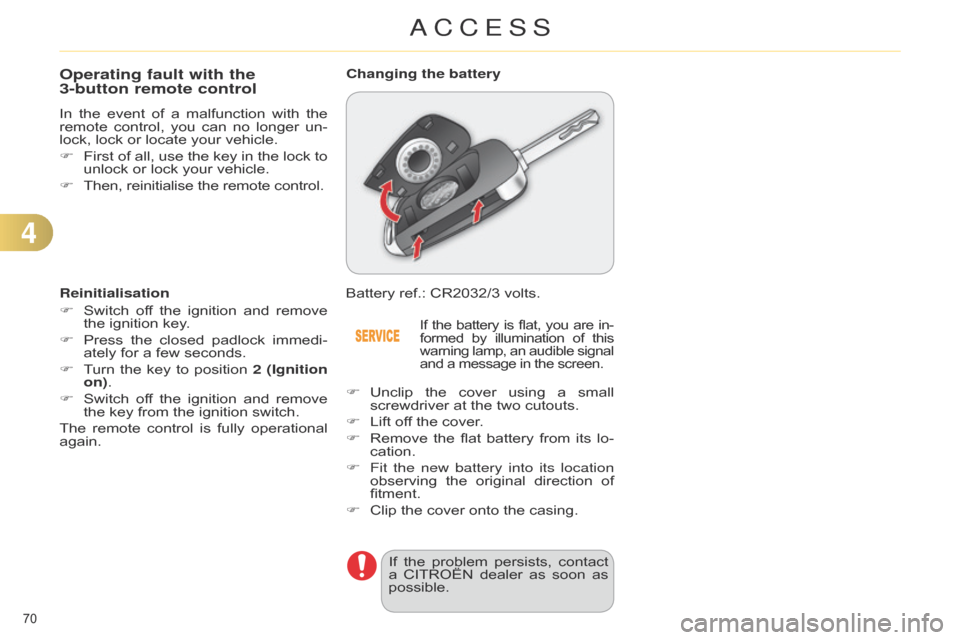
Changing the battery
Ifô the
ô battery ô is ô flat, ô you ô are ô in -
formed ô by ô illumination ô of ô thisô warning
ô
lamp,
ô
an
ô
audible
ô
signalô and
ô a ô message ô in ô the ô screen.
Fô Unclipô the ô cover ô using ô a ô small ô screwdriver
ô at ô the ô two ô cutouts.
F
ô
Lift
ô off ô the ô cover.
F
ô
Remove
ô
the
ô
flat
ô
battery
ô
from
ô
its
ô
lo
-
cation.
F
Fit the new battery into its location
observing
ô
the
ô
original
ô
direction
ô
of
ô
fitment.
F
ô
Clip
ô the ô cover ô onto ô the ô casing.
If
ô
the
ô
problem
ô
persists,
ô
contact
ô
a
ô
CITROûN
ô
dealer
ô
as
ô
soon
ô
as
ô
possible.
4
ACCESS
Page 78 of 340
76ô
C4-2_en_Chap04_ouvertures_ed01-2014
DOORS
Opening
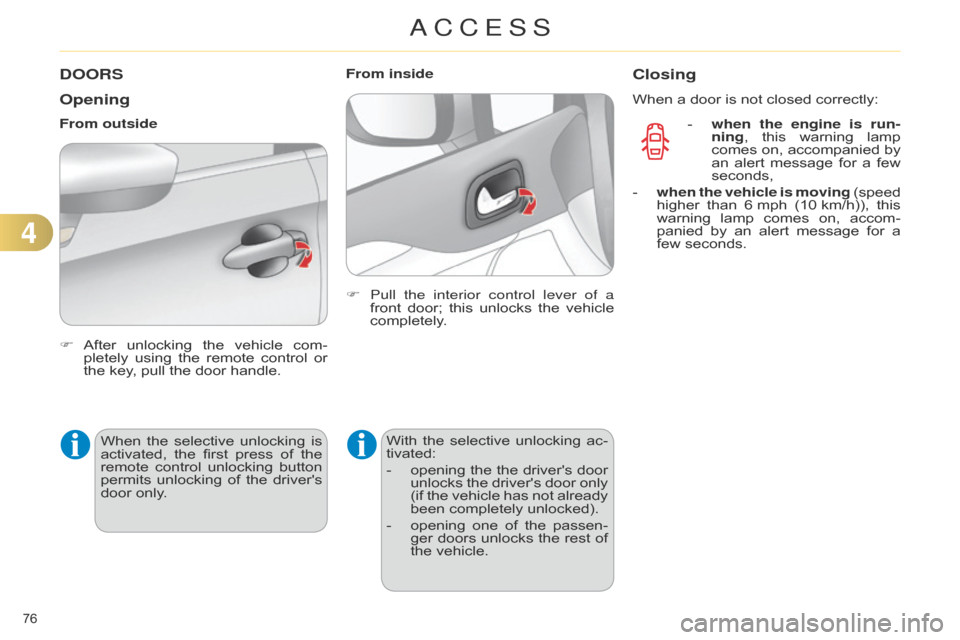
Fô Afterô unlocking ô the ô vehicle ô com -
pletely ô using ô the ô remote ô control ô or ô
the
ô key, ô pull ô the ô door ô handle.
From outside
When ô
the
ô
selective
ô
unlocking
ô
is
ô
activated,
ô
the
ô
first
ô
press
ô
of
ô
the
ô
remote
ô
control
ô
unlocking
ô
button
ô
permits
ô
unlocking
ô
of
ô
the
ô
driver's
ô
door
ô only. F
Pull the
interior control lever of a
front ô
door;
ô
this
ô
unlocks
ô
the
ô
vehicle
ô
completely
.
From inside
With ô
the
ô
selective
ô
unlocking
ô
ac
-
tivated:
-
ô
opening
ô
the
ô
the
ô
driver's
ô
door
ô
unlocks
ô
the
ô
driver's
ô
door
ô
only
ô
(if
ô
the
ô
vehicle
ô
has
ô
not
ô
already
ô
been
ô completely ô unlocked).
-
ô
opening
ô
one
ô
of
ô
the
ô
passen
-
ger
ô
doors
ô
unlocks
ô
the
ô
rest
ô
of
ô
the
ô vehicle.
Closing
Whenô aô doorô isô notô closedô correctly:
- ô
when the engine is run
-
ning,
ô
this
ô
warning
ô
lamp
ô
comes
ô
on,
ô
accompanied
ô
by
ô
an
ô
alert
ô
message
ô
for
ô
a
ô
few
ô
seconds,
-
ô
when the vehicle is moving
ô
(speed
ô
higher
ô
than
ô
6
ô mph ô
(10
ô km/h)), ô
this
ô
warning
ô
lamp
ô
comes
ô
on,
ô
accom
-
panied
ô
by
ô
an
ô
alert
ô
message
ô
for
ô
a
ô
few
ô seconds.
4
ACCESS
Page 79 of 340
77ô
C4-2_en_Chap04_ouvertures_ed01-2014
BOOT
Opening
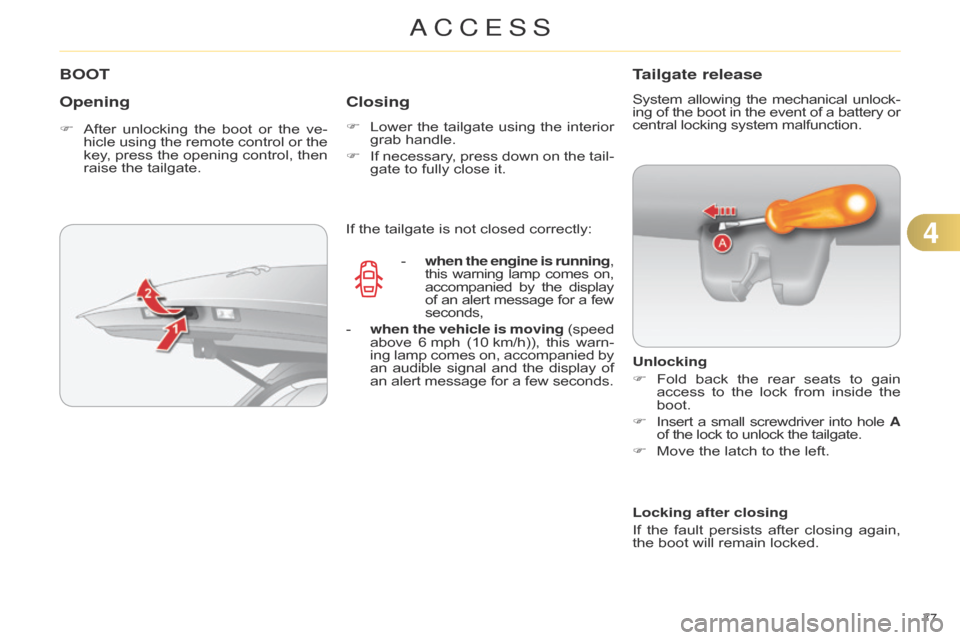
Fô Afterô unlocking ô the ô boot ô or ô the ô ve -
hicle ô using ô the ô remote ô control ô or ô the ô
key
, ô
press
ô
the
ô
opening
ô
control,
ô
then
ô
raise
ô the ô tailgate.
Closing
Fô Lowerô the ô tailgate ô using ô the ô interior ô grab
ô handle.
F
ô
If
ô
necessary
, ô
press
ô
down
ô
on
ô
the
ô
tail
-
gate
ô to ô fully ô close ô it.
Tailgate release
Systemô allowingô the ô mechanical ô unlock -
ing ô of ô the ô boot ô in ô the ô event ô of ô a ô battery ô orô central
ô locking ô system ô malfunction.
Unlocking
F
ô
Fold
ô
back
ô
the
ô
rear
ô
seats
ô
to
ô
gain
ô
access
ô
to
ô
the
ô
lock
ô
from
ô
inside
ô
the
ô
boot.
F
ô
Insert
ô
a
ô
small
ô
screwdriver
ô
into
ô
hole
ô
A
of
ô the ô lock ô to ô unlock ô the ô tailgate.
F
ô
Move
ô the ô latch ô to ô the ô left.
If
ô
the
ô
tailgate
ô
is
ô
not
ô
closed
ô
correctly:
-
ô
when
the engine is running,
this
ô
warning
ô
lamp
ô
comes
ô
on,ô accompanied
ô
by
ô
the
ô
displayô of
ô
an
ô
alert
ô
message
ô
for
ô
a
ô
fewô seconds,
-
ô
when the vehicle is moving
ô
(speedô above
ô
6
ô
mph
ô
(10
ô
km/h)),
ô
this
ô
warn
-
ing
ô
lamp
ô
comes
ô
on,
ô
accompanied
ô
byô an
ô
audible
ô
signal
ô
and
ô
the
ô
display
ô
ofô an
ô
alert
ô
message
ô
for
ô
a
ô
few
ô
seconds. Locking after closing
If
ô
the
ô
fault
ô
persists
ô
after
ô
closing
ô
again,
ô
the
ô boot ô will ô remain ô locked.
4
ACCESS
Page 86 of 340
55
84ô
C4-2_en_Chap05_visibilite_ed01-2014
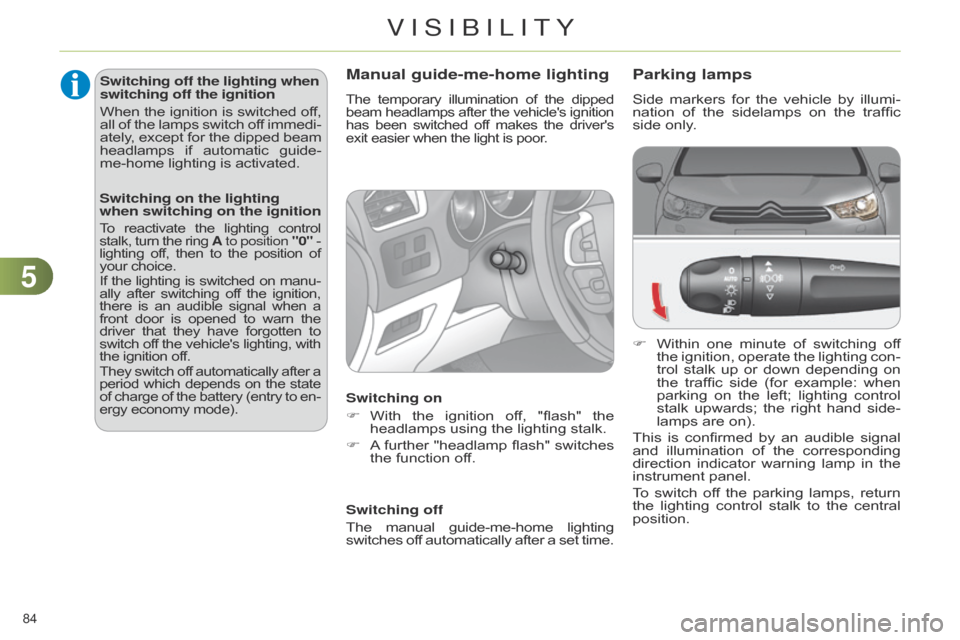
Parking lamps
Sideô markersô for ô the ô vehicle ô by ô illu mi-
nation ô of ô the ô sidelamps ô on ô the ô traffic ô
side
ô only.
F
ô
Within
ô
one
ô
minute
ô
of
ô
switching
ô
of
f ô
the
ô
ignition,
ô
operate
ô
the
ô
lighting
ô
con
-
trol
ô
stalk
ô
up
ô
or
ô
down
ô
depending
ô
on
ô
the
ô
traffic
ô
side
ô
(for
ô
example:
ô
when
ô
parking
ô
on
ô
the
ô
left;
ô
lighting
ô
control
ô
stalk
ô
upwards;
ô
the
ô
right
ô
hand
ô
side
-
lamps
ô are ô on).
This
ô
is
ô
confirmed
ô
by
ô
an
ô
audible
ô
signal
ô
and
ô
illu
mination ô
of
ô
the
ô
corresponding
ô
direction
ô
indicator
ô
warning
ô
lamp
ô
in
ô
the
ô
instrument
ô panel.
To
ô
switch
ô
of
f ô
the
ô
parking
ô
lamps,
ô
return
ô
the
ô
lighting
ô
control
ô
stalk
ô
to
ô
the
ô
central
ô
position.
Switching off the lighting when
switching off the ignition
When
ô the
ô ignition
ô is
ô switched
ô of
f,ô all
ô
of
ô
the
ô
lamps
ô
switch
ô
of
f
ô
immedi
-
ately,
ô
except
ô
for
ô
the
ô
dipped
ô
beamô headlamps
ô
if
ô
automatic
ô
guide-
me-home
ô
lighting
ô
is
ô
activated.
Manual guide-me-home lighting
Theô temporary ô illumination ô of ô the ô dippedô beam
ô headlamps ô after ô the ô vehicle's ô ignitionô has
ô
been
ô
switched
ô
of
f ô
makes
ô
the
ô
driver'sô exit
ô easier ô when ô the ô light ô is ô poor.
Switching on
Fô
With
ô
the
ô
ignition
ô
of
f, ô
"flash"
ô
the
ô
headlamps
ô using ô the ô lighting ô stalk.
F
ô
Aô further
ô
"headlamp
ô
flash"
ô
switches
ô
the
ô function ô off.
Switching off
The
ô
manual
ô
guide-me-home
ô
lightingô switches
ô
of
f ô
automatically
ô
after
ô
a
ô
set
ô
time.
Switching on the lighting
when switching on the ignition
Toô reactivate ô the ô lighting ô controlô stalk,ô turnô the ô ring ô A to position "0" ô -ô lightingô off,ô then ô to ô the ô position ô ofô your
ô choice.
If
ô
the
ô
lighting
ô
is
ô
switched
ô
on
ô
manu
-
ally
ô
after
ô
switching
ô
of
f ô
the
ô
ignition,ô there
ô
is
ô
an
ô
audible
ô
signal
ô
when
ô
aô front
ô
door
ô
is
ô
opened
ô
to
ô
warn
ô
theô driver
ô
that
ô
they
ô
have
ô
forgotten
ô
toô switch
ô
of
f ô
the
ô
vehicle's
ô
lighting,
ô
withô the
ô ignition ô off.
They
ô
switch
ô
of
f ô
automatically
ô
after
ô
aô period
ô
which
ô
depends
ô
on
ô
the
ô
stateô of
ô
charge
ô
of
ô
the
ô
battery
ô
(entry
ô
to
ô
en
-
ergy
ô economy ô mode).
VISIBILITY
Page 87 of 340

55
85ô
C4-2_en_Chap05_visibilite_ed01-2014
Automatic illumination of
headlamps
Theô sidelampsô and ô dipped ô beam ô head -
lamps ô are ô switched ô on ô automatically , ô
without any action on the part of the
driver
, ô
when
ô
a
ô
low
ô
level
ô
of
ô
external
ô
light
ô
is
ô
detected
ô
or
ô
in
ô
certain
ô
cases
ô
of
ô
activa
-
tion
ô of ô the ô windscreen ô wipers.
As
ô
soon
ô
as
ô
the
ô
brightness
ô
returns
ô
to
ô
a
ô
sufficient
ô
level
ô
or
ô
after
ô
the
ô
windscreen
ô
wipers
ô
are
ô
switched
ô
of
f, ô
the
ô
lamps
ô
are
ô
switched
ô off ô automatically.
Activation
F
ô
T
urn ô
ring
ô
A to the
"AUTO" ô
position.ô The
ô
automatic
ô
illumination
ô
of
ô
head
-
lamps
ô is ô accompanied ô by ô
a
ô
messageô in
ô the ô screen.
Deactivation
F
ô
T
urn ô
ring
ô
A
to a position other
than
"AUT
O". ô
Deactivation
ô
is
ô
ac
-
companied
ô
by
ô
a
ô
message
ô
in
ô
the
ô
screen.Coupling with the automatic "Guide-
me-home" lighting
Association
ô with ô the ô automatic ô illu mi-
nation ô of ô headlamps ô provides ô "guide-
me-home"
ô
lighting
ô
with
ô
the
ô
following
ô
additional
ô options:
-
ô
selection
ô
of
ô
the
ô
lighting
ô
duration
ô
to
ô
15,
ô
30
ô
or
ô
60
ô
seconds
ô
in
ô
the
ô
settings
ô
in
ô
the
ô
vehicle
ô
configuration
ô
menu
ô
(except
ô
in
ô
the
ô
case
ô
of
ô
the
ô
mono
-
chrome
ô
screen
ô
A,
ô
for
ô
which
ô
the
ô
duration
ô is ô set: ô 60 ô seconds),
-
ô automatic
ô
activation
ô
of
ô
"guide-me-
home"
ô
lighting
ô
when
ô
automatic
ô
illumi
-
nation
ô of ô headlamps ô is ô in ô operation.
In the event of a fault with the
sunshineô sensor , ô the ô lightingô come
ô
on,
ô
this
ô
warning
ô
lamp
ô
isô displayed
ô
on
ô
the
ô
instrument
ô
panel
ô
and/or
ô
aô message
ô
appears
ô
in
ô
the
ô
screen,
ô
accompa
-
nied
ô
by
ô
an
ô
audible ô signal.
Contact
ô
a
ô
CITROûN
ô
or
ô
a
ô
qualified
ô
work
-
shop
ô
workshop.
Operating fault
In ô
fog
ô
or
ô
snow
, ô
the
ô
sunshine
ô
sensor
ô
may
ô
detect
ô
sufficient
ô
light.
ô
Therefore,
ô
the
ô
lighting
ô
will
ô
not
ô come ô on ô automatically.
d
o not cover the sunshine sen-
sor,
ô
coupled
ô
with
ô
the
ô
rain
ô
sensor
ô
and
ô
located
ô
in
ô
the
ô
centre
ô
of
ô
the
ô
windscreen
ô
behind
ô
the
ô
rear
ô
view
ô
mirror;
ô
the
ô
associated
ô
functions
ô
would
ô no ô longer ô be ô controlled.
VISIBILITY